Condensed milk ice cream. How to easily and quickly prepare condensed milk ice cream? Standard recipe for making ice cream
The lack of an ice cream maker has ceased to be an obstacle to making creamy homemade ice cream with the advent of this recipe. There are only two ingredients at the heart: heavy cream and condensed milk, which can then be supplemented with a variety of additives like chocolate, coffee, vanilla, nuts, and more. Read about how to make ice cream from cream and condensed milk in the recipes below.
Ice cream from cream and condensed milk with tea - recipe
Ingredients:
- for whipping (from 33%) - 480 ml;
- black tea - 2 tsp;
- - 390 ml;
- honey - 30 ml.
Preparation
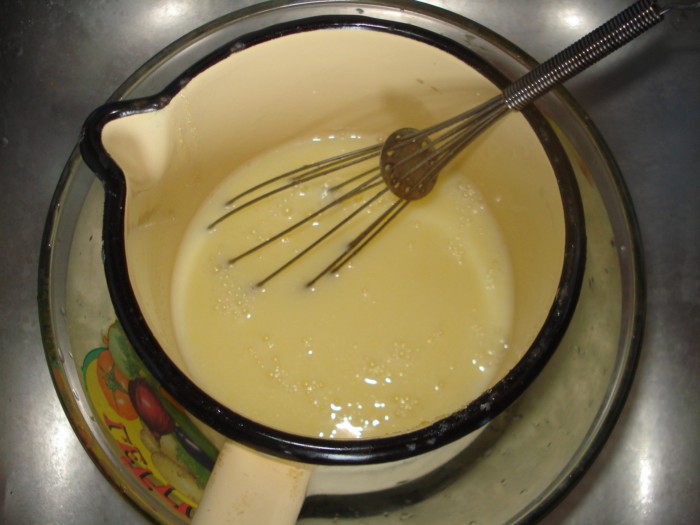
Pour the cream into a saucepan and wait for it to boil without bringing it to a boil. Throw the tea leaves into the hot cream and let it brew for half an hour. After that, strain the cream through a sieve and cool. Pour condensed milk into cold cream and add honey, beat the base for our ice cream with a mixer for about 3-5 minutes or until the consistency of the mixture resembles melted ice cream. Put the ice cream made from cream and condensed milk to solidify in freezer for 5-6 hours.
Homemade coffee ice cream made from cream and condensed milk
Ingredients:
- condensed milk - 395 ml;
- heavy cream - 490 ml;
- vanilla pod;
- instant coffee- 1 tsp;
- chocolate - 85 g.
Preparation
Chill the cream, pour condensed milk into it and add the seeds from the vanilla pod. Using a mixer, beat the mixture until soft peaks and take a couple of tablespoons into a separate container. Dissolve coffee in 15 ml of water and add to the reserved part of the mixture. Pour the ice cream base into a mold, add the crumbled chocolate and coffee ice cream, stir gently to leave coffee streaks on the surface. Place the treat in the freezer for 5 hours.
Homemade ice cream made from cream and condensed milk- one of the most tasty options homemade ice cream. You can prepare it using different recipes... Creamy ice cream, based on cream and condensed milk, can be prepared using a custard (hot method) or cold method, that is, without boiling. Taste , step by step recipe from the photo of which is posted below, it tastes like shop ice cream.
Now let's move on to the recipe and see how to cook ice cream from cream and condensed milk - a step by step recipe with a photo.
Ingredients:
- Cream 33% fat - 500 ml.,
- Vanillin - 1 pack,
- Condensed milk - 1 jar
Homemade cream and condensed milk ice cream - recipe
Pour the cream into a bowl. Beat them with a mixer until thick sour cream... Whisk chilled to make them whisk well.
To make the ice cream even more flavorful, add vanillin or vanilla sugar to the cream.

Pour in the condensed milk. Since condensed milk is very sweet, we will not use sugar in the recipe.

Beat all the ingredients of the future ice cream with a mixer until air bubbles are formed on the surface of the mass. Saturated with oxygen, the ice cream will turn out lush. If desired, chopped nuts, pieces of chocolate can be added to the resulting mass.

Pour the resulting mixture into a plastic tray or any other container.

Place homemade cream and condensed milk ice cream in the freezer. If ice cream is left to freeze on its own, many large ice crystals will form in it.
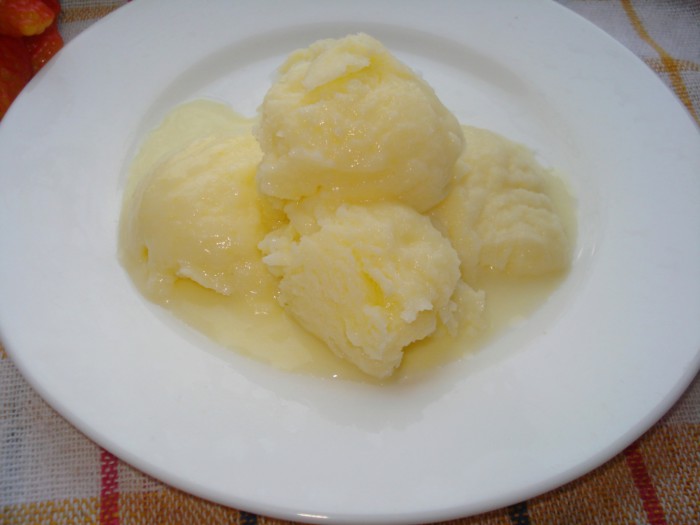
To get ice cream of a homogeneous structure, it, like other types of homemade ice cream, must be mixed periodically. Stir the ice cream every hour. After about five hours, the creamy homemade cream and condensed milk will be ready. This photo clearly shows the consistency of the finished ice cream.

An ice cream spoon warmed up in hot water, type ice cream. Put the ice cream balls in bowls or bowls. In addition, the ice cream balls will just look perfect in wafer rolls... Today, many housewives in the kitchen have electric waffle irons, so many can cook waffles at home.
What to serve with ice cream made from cream and condensed milk at home? Ready ice cream can be sprinkled with topping, jam, fruit or berry syrup, sprinkled with chocolate chips, pieces of fruit, berries or chopped nuts. And according to this recipe, you can make ice cream from cream and boiled condensed milk. Enjoy your meal. I would be glad if you like this recipe for homemade cream and condensed milk ice cream. It turns out no less tasty and
Without a delicious dessert, no friendly or family gatherings will bring real pleasure and will not be able to win over to heartfelt conversation.
Without further ado, you can quickly prepare and serve the guests in an original way, everyone's favorite, homemade ice cream made from cream and condensed milk, we will consider the recipe today. This delicacy is unmatched in popularity, people of all ages and generations adore it and will not deny themselves such a delicious treat on a plate.
Dessert is made very easily and disperses on plates in the blink of an eye. But in order for the delicacy to turn out truly tender and airy, we suggest using only the fattest cream (unless, of course, you decide to make condensed milk ice cream at home on their basis).
Yes, it will turn out high in calories, but in order to pamper your taste buds depth impeccable taste, sometimes, it is worth forgetting about diets for a moment.
If this is an unforgivable luxury for you, then we offer Alternative option in the form of your favorite condensed milk delicacy and low-fat milk... So the dessert will turn out to be not very high in calories, which means that the figure will not suffer, but the tenderness in the taste of ice cream will remain the same as in the case of heavy cream.
Ice cream made from cream and condensed milk: the best recipe
Ingredients
- Cream 33% 500 ml
- Vanilla-flavored sugar 20 g
- Condensed milk (white) 1 small jar
How to make the most delicious cream and condensed milk ice cream
In any kitchen, you can find three simple product, which are needed in order to make your favorite cold treat at home.
The main thing in the recipe is to stock up on high-quality high-fat cream. Before making your favorite condensed milk ice cream from them according to the proposed recipe, you need to keep them in the cold for about three hours.
- Cold milk product flavored with vanilla sugar.
- Armed with a mixer with several speeds of rotation of the beaters, we lower them into the mass and turn on the "maximum" speed.
- Beat until the mixture turns into a fluffy creamy substance.
- It remains only gradually, spoon by spoon, to introduce condensed milk into it. At the same time, we do not stop shaking the products with a mixer at the lowest speed.
- When the basis for homemade goodies, for which cream and condensed milk are needed, will be done; all that remains is to put it in a plastic container, close it and send it to the freezer.
So that, freezing, it does not turn into pieces of ice, it is necessary, about every half hour, to take out the container and interfere with its solidifying fragrant contents.
Knowing how easy it is to make a delicate and beloved by many delicacy with liquid not boiled condensed milk simple recipe you don't have to worry about delicious dessert that everyone would like.
Believe me, everyone will appreciate it: both old and young, especially if you show your imagination and beautifully decorate the ice cream when serving, using fresh berries, candied fruits and syrup for this.
Ice cream with cream without condensed milk: an original recipe
Based on bright yolks chicken eggs you can cook homemade ice cream without condensed milk. The recipe for each of the types of delicacies is so simple that it can be used in a cooking lesson at school or to master the basics of confectionery with its help.
Ingredients
- Chicken yolks - 3 pcs.;
- Sugar - 1.5 tbsp.;
- Cow cream (fatty) - 1 tbsp.;
- Fresh milk - 2 tbsp.;
- Vanilla-flavored sugar - 1 tsp
How to make delicious ice cream without condensed milk
- We take the eggs and remove the protein part from them. Grind fresh yolks with granulated sugar to maximum homogeneity. The mass should be quite thick. We dilute it with milk (it is not necessary to warm it at all) and flavored with sugar with the aroma of vanillin.
- We mix all this, then we send the container with the base for the cold delicacy to the fire. As soon as the mass begins to thicken (it will take about a quarter of an hour), remove it from the burner, gradually cool it and put it in the freezer when it is already cool.
To prevent homemade ice cream made according to this simple recipe from turning into ice, you need to take it out every 30 minutes during solidification and stir it with a silicone spatula.
- We still have cream - we foam exactly half and add to the frozen egg mass.
- After half an hour, we take up the second half and also swell it to a creamy state, add it to the common "cauldron", stir.
- We send the finished mixture back, that is, to the freezer, and forget about it for 4 hours.
Into the ice cream we make on this original recipe, you can add condensed milk if you don't taste good without it, but only 1 jar. In this case, you need to pour less sugar so that the dessert does not turn out to be overly sweet.
It's even better if you garnish it with lime or lemon slices to accentuate the delicate flavor.
Ice cream Sundae from milk and condensed milk with vanilla
We offer another, very simple, way of ice cream, but this time dietary. In the previous recipe, we added cream to the dessert, but did not use condensed milk, in this one the opposite is true.
The delicacy tastes no worse than the one prepared according to the recipe with cream, but, in comparison with it, it is less high-calorie.
Ingredients
- Milk (cow or goat) - 3 tbsp.;
- Condensed milk - 1/2 can;
- Ground vanilla pods - ¼ tsp;
- Chicken yolk - 4 pcs.;
- Sugar - 100 g.
How to quickly cook condensed milk sundae
- First, slightly heat the usual fresh milk and, adding vanilla powder to it for flavoring, let it boil.
- From sugar and yolks of chicken eggs we make "mogul-mogul", whipping the products until they are foamy.
- Pour the sweet mixture into the milk. This should be done gradually, in a thin trickle, not forgetting to constantly interfere. It should be kept on fire until its consistency resembles thick sour cream.
- The cooled base for your favorite “delicacy low temperatures»Flavored with condensed milk at the end.
- We mix everything, put it in a container for freezing and send it to the refrigerator for 3 hours.
It is imperative, periodically, to stir a cold treat from condensed milk. So we will save it from freezing, and ourselves from a tasteless dessert.
How to make boiled condensed milk ice cream at home
It is very difficult for foreigners to explain why to cook in boiling water for several hours in a row tin can... They don't know how delicious its contents are! And we not only cook condensed milk, but also know how to make ice cream with it at home, having ordinary and boiled milk in the refrigerator.
Ingredients
- Condensed boiled milk - almost 2 tbsp.;
- Fresh cow's milk - 3 tbsp.;
- Dried vanilla (crushed) - 1/8 tsp;
- A pinch of salt.
Making ice cream from boiled condensed milk without cream
- Take a bowl with high edges and fill it with milk. Dissolve condensed milk in it.
- As soon as this happens, remove the container from the burner and let it cool to room temperature.
- Flavor the mass with vanilla extract, salt, cool a little more in natural conditions and only then we put it in the coldest place in the home refrigerator.
Full hardening time is about 3 hours. We take out the mixture, stir it with a spatula and send it to the freezer for another hour.
The taste of homemade boiled condensed milk ice cream is so delicate and pleasant that, having tried it once, you will no longer want to buy any other!
A handmade dessert in itself is expensive gift... Using any of the recipes offered in the selection, you can treat all your numerous guests with the most delicate delicacy at no special cost.
So get ready to listen to flattering reviews of your phenomenal culinary skills and tackle the next batch of treats.
On a hot summer day, you always want something cold. And these days, sales of ice cream are especially increasing in stores. We also often buy it, children, grandchildren love it, and we ourselves are not averse to feasting on it. But if you buy it good quality, then it is quite expensive. And the bad, with all sorts of additives and oils vegetable origin- and I don't feel like eating.
But why buy, if you can cook it yourself, and most the highest quality, and with a wide variety of flavors.
There are many ways to do this. And they are all relatively simple and lightweight. Depending on the chosen cooking option, you can spend from 5 minutes to half an hour, and get the product without any unnecessary additives, only from natural milk, cream, sugar and sometimes eggs.
And for this you do not need an ice cream maker, because in some recipes you just need to knock the ingredients down with a mixer, and then mix them several times either with a spoon or with the same mixer. And that's all, after a few hours of cooling, the delicious chilled product is ready to eat. Moreover, his taste is such that he wants to eat and eat.
Our today's article will be just about this wonderful cold dessert, and about him different types... This is a real ice cream, and creme brulee, and strawberry, and your favorite chocolate. And if you like other tastes, then they are easy to create on the basis of any of the methods proposed today.
This is my favorite recipe, and therefore I decided to start with this story today. I have had it for a very long time, and in my recipe book it is listed as a "real ice cream".
Later I met similar recipes, where this delicacy is called "ice cream of the Soviet era", or "ice cream according to GOST".

One thing I can say for sure, this is a real delicious cold dessert, very tender, airy, melting in your mouth. Whoever prepares it according to this option at least once, he will forever enter it in his piggy bank of recipes.
We need:
- milk 3.4 - 4.5% - 200 ml
- cream 33% - 500 ml
- icing sugar - 150 - 200 gr
- egg yolks - 4 pcs
- vanillin - 0.5 tsp
For those with a sweet tooth, the second value for the amount of sugar is used, and for those who are calm about sweets, but love ice cream, you can use its first value. You can take the average amount. In general, try to cook it once, then you will be able to more accurately regulate this sweetness.
Preparation:
When buying ingredients, be sure to look at the percentage of dairy product, this is important to get a quality and tasty treat.
The whole process of preparation consists of three stages: preparation of the cream; whipping cream; cooling the resulting mixture.
1. The first step is to prepare the cream. To do this, separate the yolks from the proteins.

Then place them in a bowl.

2. Pour into them icing sugar, vanillin and pour in milk.

Armed with a whisk, stir the mixture until smooth. At this stage, we don't need a mixer yet; the mixture does not need whipping.

3. Pour it into a saucepan and put on fire. With constant stirring, bring it to a boil, small bubbles will begin to appear, but it should not boil.

Fire for this should be minimal.
4. The next step we need to lightly boil the cream.
When you cook ice cream with condensed milk, you don't need to cook anything. There you just whip the cream and combine it with condensed milk. It is a binding element and a thickener, in fact, due to which a viscous cold dessert is obtained.
Here we cook custard on milk and yolks. In this case, their task will be to connect all the components.
5. It should be boiled for about 20 - 25 minutes until it becomes viscous and slightly thickened from a liquid. At the same time, it will need to be stirred almost constantly so that it does not burn and does not go "grains".

Readiness can be checked in this way - dip a wooden spatula into the mixture, get it out and let the bulk drain. Then draw a longitudinal line with your finger on the remaining cream, and if it does not connect when tilted, then the mixture is ready.
Try not to form grains in the cream. If the fire is too big, then they can appear. In this case, take a whisk and work with it. In general, it is better to mix the mass with a silicone or wooden spatula.
6. When the cream is ready, place it in a bowl with cold water, leaving it in the stewpan of course. Stir with a spatula, the water will quickly become warm and warm. Then you can drain it and pour a new one.
It happens that ice is also used for cooling. That is, they put it in a bowl of water and the cooling goes faster. I choose the first option, especially since while I knock down the cream, the cream will cool down completely. By the way, you can change the water to a colder one.
7. Let's proceed to the second stage. In order for the cream to be knocked down faster and easier, they should first be kept in the refrigerator for at least an hour. In the same place, cool the bowl, where we will knock them down and the whisk of the mixer. For dishes and utensils, the residence time in the refrigerator will be sufficient from 30 to 40 minutes.

When everything has cooled, pour the cream into a bowl and begin to beat. At first, do this at a not very high speed, foam bubbles will appear.

8. Then the speed can be gradually increased. After about 5 minutes of churning, the cream will begin to thicken. After which it will take another three to five minutes to give them the desired state. It is also called "before the peaks". This is when non-falling peaks appear on the surface.

Well, this is for my mixer, its power is not so strong. You can knock down the cream in 3 minutes, if the power of the technique allows it.
You can still check readiness by sliding your finger over the surface, a groove should remain. At the same time, try not to "kill" the dairy product, otherwise the ice cream will lose its lightness and airiness.
9. When will you achieve the desired consistency slowly pour in the cooled cream in two or three batches and continue to shoot down at low speed.
Someone at this stage simply mixes the mixture with blades, I knock it down, it seems to me that it is additionally saturated with oxygen, and at the same time, if there are small lumps in the cream, they will completely break.

10. Put the resulting mass into a container, or two containers.
To make it freeze faster, I divide it into two parts and place it in two bowls. Now each of them should be closed with a lid and placed in the freezer.

11. After 40 minutes, remove the bowls, and mix the mass with a wooden spatula. Then cover again and put in the freezer. Do this three times, and all in 40 minutes.

Nothing bad will happen if you stir again after 45 or 60 minutes. But don't forget to do this. This is an important step. Thanks to him, we saturate the mass with oxygen, the ice cream will turn out to be very tender and airy.
Also, this procedure will prevent small ice crystals from forming in the mixture.
12. After the third time, put the containers with the contents back in the cold. This time it is already 5-6 hours, or for the whole night.
13. Finally, it's time to try our delicacy. You can put it in small vases, or bowls.

Decorate to your liking - grated chocolate, nuts, jam, fresh pieces, canned berries or fruit.

Everyone who tastes such ice cream for the first time simply becomes speechless. And they refuse to believe that this ice cream is made at home. Painfully, it is tasty, delicate and fragrant.
Be sure to prepare it, I am sure that such a dessert will not leave you indifferent.
Sundae from cream and condensed milk according to the simplest recipe
According to this recipe, you can prepare a cold dessert in literally 5 minutes, not counting the time for freezing, of course. And you only need two components for this.

The delicacy turns out to be simply magical - delicate, airy and incredibly tasty.
We need:
- cream 33% - 500 ml
- condensed milk - 250 ml
Preparation:
1. Place the cream in a blender bowl or beating bowl. As you can see from the recipe, they need to have a certain percentage of fat. This is also necessary to obtain a high-quality ice-crystal free ice cream, as well as for its taste.
If you use homemade cream with a fat content of 40% or more, then you do not need to churn them, otherwise we will not get an ice cream, but butter.
2. Knock down the cream until stable peaks are formed. However, everything needs a "golden mean", you don't need to interrupt them either, otherwise the final product will lose all its tenderness and velvety taste.

3. Introduce condensed milk. Try to get them of good quality from a trusted manufacturer. Continue knocking down until an elastic, smooth, pleasant mass is obtained.
Try the mixture, if you want the dessert to be sweeter, you can add an additional portion of condensed milk.
4. This is basically the whole cooking process. Now the mass remains only to be transferred to a container, or another suitable dishes and close it with a lid.

Put in the freezer for at least 2 - 3 hours, it should freeze completely.
5. Then take it out and spread it out with a special spoon in bowls or vases.

You can decorate with berries, pieces of fruit, chopped nuts, chocolate chips or jam. Enjoy the delicate velvety taste in hot weather.

For the ice cream ball to form better, it is better to moisten the spoon in hot water.
Video on how to make homemade ice cream without cream in 5 minutes
This recipe can actually make a delicious cold treat. And all for this we need 5 - 6 minutes. The timing will depend on how well prepared you are physically.
I'm kidding, of course, although there is some truth in every joke. And in order not to waste your time, we immediately proceed to view.
Cool?! Like this!!! And you don't always need to wait 5-6 hours until it hardens.
And for lovers of a slightly melted dessert, this is just a true find. I know many who do not eat it cold. He waits for him to melt, and then he takes a small spoon and enjoys the delicious milk "coldness".
Strawberry Ice Cream with Whipped Cream and Condensed Milk
I really love fruit and berry ice cream, and strawberry ice cream is my favorite. And here is one of great recipes, which will not leave anyone indifferent.

You can prepare it in reserve. It keeps well in the refrigerator. And whenever you want to cool down a little, you can get it out and enjoy it.
We need:
- fat cream 35% - 250 gr
- condensed milk - 1 can
- strawberries - 300 gr
- lemon juice - 1 tsp
- icing sugar - 2 tbsp. spoons
Preparation:
1. Sort out the strawberries, wash and dry. Put them in a blender bowl and beat in mashed potatoes.

Today we are preparing exactly strawberry treat, but in general, according to this recipe, you can cook from other berries and fruits.
2. Transfer the puree to a bowl where it will be convenient to mix the two mixtures. And pour in a can of condensed milk. Prepare a silicone or wooden spatula and use it to mix both mixtures into one.

Send the bowl with the contents to the freezer for 30 minutes.
3. While it is cooling there, prepare another bowl and pour the chilled cream into it. Take a product of at least 30% fat, otherwise they may not go astray. If the box says that this product is specifically for churning, then it will be just fine.
Also add powdered sugar and lemon juice into the same bowl.

Sometimes people ask why you can't add sugar to the cream? It's very simple - powdered sugar dissolves faster in the liquid component than crystals. And therefore it will be easier to shoot them down.
Arm yourself with a mixer and knock everything into a single mixture until stable beautiful peaks are formed.

4. Now you can put in the mixture strawberry puree... Stir with a spatula, moving the mixture from the edges to the center. After mixing, the mixture must be knocked down with a mixer until smooth.

Then put it in the freezer for 50 minutes.

5. After the allotted time, take out the mixture and beat it again with a mixer. Then put the lidded bowl back into the cold chamber. This time it will take 5 to 6 hours for the ice cream to be fully cooked.

In principle, this is the whole cooking process.

V the right time, but not earlier than after 5 hours, the sweetness can be taken out and laid out in vases. Decorate fresh berries and eat with pleasure.
This is a delicious homemade ice cream! You just lick your fingers.
Condensed milk chocolate ice cream without cream
A delicious cold dessert can be prepared not only with cream and milk. Sour cream is also great for this purpose. The treat is thick and tasty, with light chocolate aftertaste.

Cooking it is not difficult, and having cooked it once, soon you will certainly want to repeat the result.
We need:
- sour cream 20% - 400 gr
- condensed milk - 1 can
- cocoa powder - 2 tbsp. spoons
Preparation:
1. Put sour cream in a bowl. Try to get it in the desired percentage, and also make sure that it is quite thick.

2. Pour the can of condensed milk and cocoa powder there. If you do not like chocolate desserts, then you can not add cocoa.
Conversely, you can add a little more powder, then the taste of the chocolate will be more pronounced, and the color of the product will be more intense.

3. Mix everything together using a kitchen assistant - a mixer. You should get an even, homogeneous mass without lumps.
4. Transfer the mixture to a clean, dry bowl and place it in the freezer for 1 hour.
Then remove and mix with a whisk. This procedure will allow the mixture to be saturated with oxygen, which will leave the final product tender and airy. It also prevents ice crystals from forming.

5. Then put the mixture back into the cold chamber, and keep it there for not an hour, but two. Then take it out again and mix with a whisk. Alternatively, you can use the mixer at low speed.
6. After a couple of hours, you can repeat the procedure again, or you can leave the ice cream to cool for 5-6 hours, or even overnight.
During this time, it should completely solidify to a state so that you can pick it up with a special spoon.

You can serve it with chocolate chips, or with chocolate chunks, or whatever you like best.
Ice-cream creme brulee without eggs with boiled condensed milk
What ingredients are used to make ice cream at home. And here is one of those options where it is used boiled condensed milk... Would you say that they don't cook like that? How they cook! And how delicious it turns out.

And the second feature of the recipe is that here we will not use eggs, nor whites, nor yolks. Although today we have already considered other recipes without their participation.
We need:
- cream 33% - 500 ml
- milk - 100 ml
- boiled condensed milk - 300 gr
Preparation:
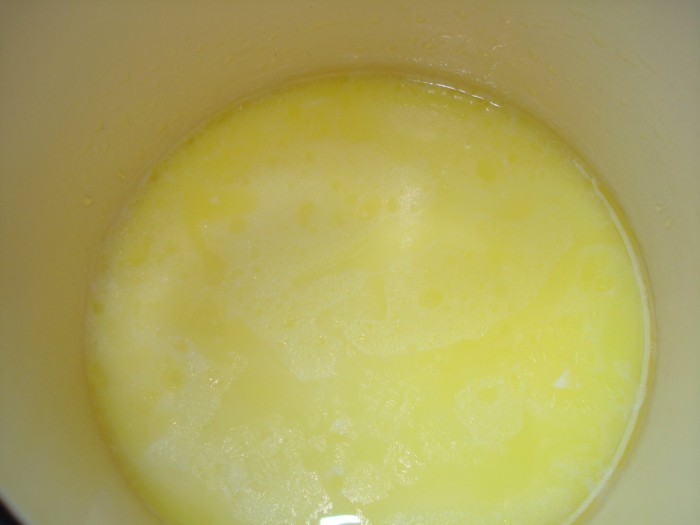
1. Put boiled condensed milk into a bowl, pour milk to it and mix with a spoon or spatula until both components are combined into one whole. You will get a rather liquid, slightly stretching mass.

Put it aside for now, let it wait for its moment.
2. In a separate bowl, beat down the chilled cream. As soon as they become thick, stop churning, you do not need to be very zealous at this stage, so as not to lose the airiness of the finished product.

3. Pour in all the brownish milk mixture at once and stir with a spatula, moving the mixture from the edges to the center. The result is a milky-creamy substance with a light beige tint.

4. It can be transferred to a common container and placed in the freezer to freeze.
Or you can put the mixture in silicone muffin molds. Or maybe you have special containers for ice cream. It will be just wonderful!

The freezing time will also depend on the volume of the container. It will vary approximately between 3 and 6 hours.
Then remove them from the molds and enjoy the taste.
Dear friends, I have specially collected such interesting and delicious homemade recipes for you in one article. As you can see, translating them into reality is not such a difficult task.
All you need is a little free time, and a set necessary products... And then, you can enjoy your favorite dessert at least every day. At the same time, every time to come up with different tastes and filling.
I wish you all a warm summer and bon appetit!
The most delicious homemade ice cream is in our selection! Prepare what you like - ice cream, creamy, chocolate!
- cream from 33% - 200 ml;
- milk - 100 ml;
- egg yolks - 2 pcs.;
- sugar - 60 g;
- vanilla pod - 1 pc.

Mix the milk with sugar in a small saucepan with a thick bottom. Vanilla pod cut with a knife blade along the entire length, remove the seeds and also add to the milk mass. Thanks to vanilla, ice cream will be saturated with a delicious natural aroma, but in the absence of this ingredient, you can get by with a bag vanilla sugar or a pinch of vanilla. We warm the mixture to a hot state, but do not bring it to a boil.

In another container, gently rub the egg yolks with a whisk. In this case, we only need to achieve homogeneity - the mass should not be whipped, otherwise foam may form on the surface, which will complicate the process of preparing the ice cream.

Pour hot milk into the crushed yolks in a thin stream, continuously stirring the mixture.

Pour the resulting composition into a saucepan, put on a small fire and cook until lightly thickened. It is important not to overheat the milk, otherwise the yolks may curdle! To avoid this nuisance, choose a heavy-bottomed saucepan for boiling the cream and cook over low heat. Also, do not forget to stir the cream continuously, especially at the bottom (it is most convenient to use a silicone cooking spatula for this).

We check the readiness as follows: we run our finger along the silicone spatula. If the trace remains clear, and does not float with cream, immediately remove the pan from the heat.
Tip: if the yolks are curled up, you can grind the mass through a fine sieve or puree with a hand blender. However, unfortunately, it will no longer be possible to avoid the egg taste of the ice cream. In this case, it is better to remove the pan from the heat sooner rather than later.

Cool the freshly made cream to room temperature. In parallel, beat the cold cream until firm.

Put the cooled cream to the whipped cream mass and mix. Cool the mixture in the freezer for 3 hours. During this time, it is necessary to take out the container 5-6 times and mix the mass thoroughly in order to avoid the formation of ice crystals and obtain a smooth and homogeneous texture.

When the workpiece looks like soft ice cream in consistency and is difficult to mix, transfer the mass to a silicone mold, cover it with a lid and put it in the freezer for another 3-4 hours (you can leave it overnight).

Before serving, let the frozen ice cream stand for a while at room temperature. Then we collect the slightly melted mass with an ice cream spoon and form balls. Optionally, we complement the dessert with chocolate chips, mint leaves or berries.

Recipe 2: homemade ice cream - creamy sundae
- 500-600 gr whipping cream (fat content from 30%)
- 100 grams of powdered sugar (or fine sugar)
- a pinch of vanillin

Put chilled cream, icing sugar and a little vanillin in a deep bowl. Beat until fluffy, stable foam for 4-5 minutes.

Place the whipped mixture in a plastic container.

We put it in the freezer for the night.
We take out the ready-made ice cream, let it thaw a little and can be laid out in the bowls.

Such an ice cream can be made in different ways - with the addition of cocoa (carob), frozen berries - it is especially tasty with honeysuckle (only the berries must first be mashed with a blender, and then added to the whipped mixture and beat again).

Recipe 3: how to make homemade ice cream sundae?
The recipe for homemade ice cream sundae can be reproduced at home, it will turn out very tasty, natural and taste like a Soviet ice cream.
- egg yolks (4 pcs.);
- milk (300 ml);
- cream (33%, 300 ml);
- icing sugar (180 g);
- vanillin (½ tsp).

So, first of all, bring the milk to a boil and then cool it down to about 30 degrees.
Add powdered sugar and vanilla sugar to the yolks.

Whisk.

Pour in milk. Beat again.

We put on a quiet fire and, stirring, keep until the mixture thickens. As everyone around advises, you can check the density by sliding your finger over the spatula - if there is a clear mark, the mixture is ready.

Leave to cool to room temperature and then chill in the refrigerator.
Meanwhile, whip the cream.

Mix with chilled cream.

We transfer the entire mixture to a container in which it will be convenient for us to mix future ice cream with a blender.

Then we take out and quickly (so that the ice cream does not have time to melt) mix with a blender.

Put it back in the freezer for 2 hours. We repeat the procedure 2-3 more times with an interval of 30-60 minutes. Thanks to the blender, the ice cream will have the desired structure... The blender allows you to grind ice crystals and form an air mass.
When the ice cream is completely frozen, take it out and use a special spoon to make balls. Previously, you can put ice cream in the refrigerator for 15 minutes so that it melts a little - it will be much more convenient to make balls.

We spread the ice cream in bowls and sprinkle or water with what we love. I AM - grated chocolate... Homemade ice cream is not inferior to store-bought ice cream, and the content is guaranteed not to contain "unnecessary" additives. The recipe has been verified.

Recipe 4: homemade ice cream sundae made from milk
- milk - 1 glass;
- butter - 25 grams;
- egg yolk - 1 piece;
- sugar - ½ cup;
- vanilla sugar - 5 grams;
- starch - ½ teaspoon.
Combine sugar, starch and vanilla sugar in a convenient deep container.

Add one egg yolk.

Grind the mass until smooth. Pour in some milk.

Send the remaining milk to the fire. Add 25 grams butter... The butter must be real, consisting of 100 percent cream from cow's milk... Bring the mixture to a boil.
Pour in egg mixture into boiled milk. While stirring, bring to a boil. Remove from fire and send to cold water... Cool, stirring occasionally.
Pour the cold mixture into molds. It could be large form or small portions. I have a big Silicone molds and molds for small cars.

Send the molds to the freezer for a couple of hours.

Small ice cream tins will be ready in 30-50 minutes. Take it out of silicone molds very simple.
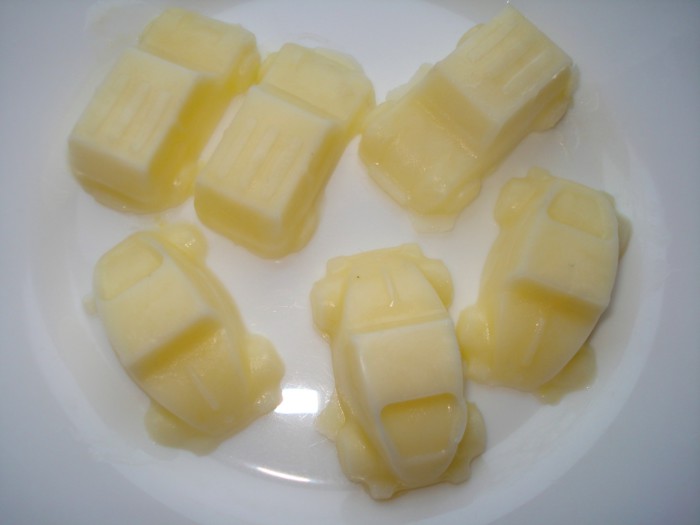
From a large form, spread the ice cream with a spoon on portioned plates. It is incredibly tasty, tender and aromatic.
Recipe 5: how to make an ice cream at home
- 0.5 liters of cream (the higher the fat content, the tastier the ice cream will be)
- ¾ glasses of sugar
- 4 chicken eggs
- Chocolate chip cookies (or other flavors)

Break eggs into a bowl and add sugar.
Whisk well with a fork and grind the sugar. Pour in the cream and mix well again.
Pour the resulting mass into a small saucepan and put on a very slow fire... Stir constantly, you cannot bring to a boil, otherwise the eggs will curl. Remove from heat when the mass begins to thicken, the consistency should resemble liquid sour cream.
In total, the pan will hold on fire for 15 - 20 minutes. Well, you can also find out the readiness of the desired consistency by sliding your finger over the spoon. If the spoon is all in cream and a fingerprint remains, the homemade ice cream mixture is ready.
After removing from the stove, pour the mass into any dish convenient for freezing. In general, any food grade plastic container can be used.
Add any filling (in this case, crumbled cookies, or you can use berries, chocolate chips or pieces of fruit).
Let stand for about an hour to let the mixture cool slightly (the mixture will cool faster if you put the container in the sink with cold water). Then transfer the container with the mixture to the freezer. Homemade ice cream will harden and gradually thicken. The thickening time can be from 5 to 6 hours, so it is better to do it at night or in the morning, so that you can enjoy it by the evening.
Before serving, remove the container with homemade ice cream with cream from the freezer and place in the refrigerator for 20 minutes. Roll small balls from the prepared ice cream with a tablespoon (if there is no special spoon for ice cream) and place in tall glasses, bowls or plates. Ice cream can be garnished with grated chocolate or berries. Serve immediately. Bon Appetit!
Recipe 6: how to make an ice cream from milk? (step by step photos)
- milk - 2.5 cups
- sugar - 1 glass
- vanillin - to taste

Pour milk into home saucepan, bring the milk to a boil, then remove the pan from the stove and let the milk cool to a temperature of 36 degrees.

Add to egg yolks sugar and vanillin (if you want to make vanilla ice cream, not regular ice cream). Mix well and grind the mass. To do this, you can use a blender.

Stir the resulting mass constantly, pouring milk into it in a thin stream.
We heat the final mixture over low heat, while we do not stop stirring. The mixture should thicken.

Cool the resulting mixture, our cream first, then put it in the refrigerator.
Pour the cream into a separate bowl. Whip the cream until it thickens.
Add whipped cream to the cooled cream and mix the mixture.

We transfer the mixture to a plastic container, cover it with a lid, and place it in the freezer for one hour. Then we take out the slightly frozen mixture, beat with a mixer and put it back in the freezer. We repeat the procedure again.

Then we leave the mass of future ice cream for 3 hours in the freezer. So our ice cream is ready. To soften the ice cream slightly, place it in the refrigerator for 20 minutes before serving.
Read also ...
- Chicken liver pate
- Delicious zucchini with cheese in sour cream in the oven - a step by step recipe with video Zucchini recipes in the oven with sour cream
- Banana rice and corn flour pancakes (gluten free) with homemade banana sauce Banana pancakes with semolina
- Cabbage casserole with chicken Chicken fillet casserole with cabbage


