Salted dough box. DIY salt dough box
Salted dough box. Master class with step by step photos
Author: Nazarova Tatyana Nikolaevna, Teacher of additional education, MOU DOD House of Childhood and Youth, MillerovoMaster class "Box for mother's beads" in the technique of molding from salt dough.
Any mother will be delighted to receive a gift from her child. Yes, if this gift is also made by the child himself, with desire and love.
Purpose: such boxes can be given on March 8, Mother's Day, or just a gift for no reason.
Dear colleagues! I offer this master class for teachers of technology, primary school teachers, teachers of additional education, as well as for teachers of preparatory groups for school. Maybe the master class will seem simple to you? This is not true. In our work we use subtle elements and sometimes it is not easy for children to cope with such a task.
Target: make a bead box using the salt dough sculpting technique.
Tasks:
- to encourage the desire to make gifts made with your own hands for loved ones;
- to develop students' creativity, imagination;
- to instill a love for modeling from salt dough.
Stages of work:

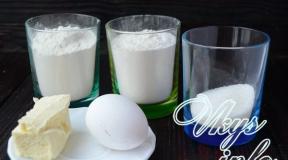
To make the box, we need: an empty jar of face cream, PVA glue, clove seasoning - seeds, stack, rolling pin, thin glue brush, cutting for marzipan “flower”, “leaf”, salt dough.
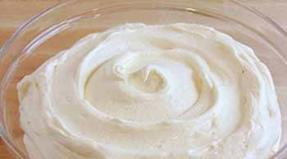
Salty dough recipe:
Flour - 1 tbsp. salt "Extra" - 0.5 tbsp. water 0.5 tbsp. Put salt in a bowl and cover with cold water. The salt will dissolve a little, and immediately add a little flour. Add flour as needed. Knead to a tight, elastic dough. During work, store the dough in a cellophane bag so that it does not dry out.

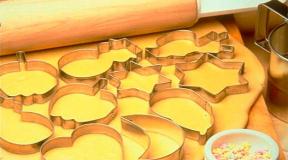
Take a small piece of dough and roll it out 2-3 mm thick. Cut out 13 leaves by cutting the "leaf".

Dust the table with flour and place the squeezed leaves. The leaves will not stick to the table. Stack on the leaves and make notches as if you were drawing a Christmas tree.

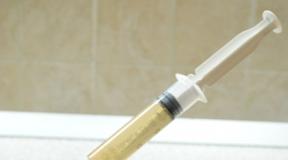
Now we need to glue these leaves to the jar. It is desirable that you have a thicker PVA glue. Lightly dip the brush into the glue, and grease the jar in the place where you stick the leaf. Try not to smear the jar with glue, the leaves can "float" down. Thus, glue all the leaves. Excess glue can be wiped off with a dry brush.

Take a small pea-sized lump of dough and glue it to the leaves. In this case, you do not need glue, it is already enough at the edges of the leaves. Now take the seeds of the "carnation", cut off the ponytails with scissors so that the carnation is shorter. Press the clove lightly into the center of the small lump. Thus, the berry will stick to the leaves, and the leaves will hold onto the jar more firmly. So exactly glue the berry to all the leaves.

Let's start decorating the cap. We cut out 9 leaves in a familiar way, make notches on them. Let me remind you again, when you glue the leaves, do not grease the lid with glue too much. The leaves will hold firmly after drying. The leaves are glued.

Take a small lump of dough, roll it out with a rolling pin 2-3 mm thick. Cut out a few flowers by cutting the "flower".

Put a flower on each leaf, and press down with the opposite end of the brush in the center of the flower. You will get the middle of the flower. We do not use glue. The flower will hold on so well. While pressing the flower, hold the brush gently so that it does not slide on the lid, not with a gentle movement can ruin the whole composition. Remove excess glue with a dry brush or cotton swab. Even if the glue is visible anywhere, don't worry, it won't be visible once it dries.

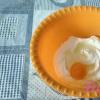
This is how you should get a box. Now our task is to carefully transfer it to the place where you will dry it. We will dry on a sunny windowsill. It will take about 6-7 days to dry. Better not to rush, but dry the box well.

The box is dry. Paint it with paints, and after the paint dries, cover it with clear acrylic varnish. The varnish will keep your work for a long time. Here is our box and ready.
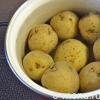
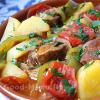
By the same principle, my children and I decorated food jars in which you can store raisins, or any seasoning. The mothers were happy. Here's what we got.


I wish you and the kids creative success!
Greetings to all!
Friends, many made some kind of crafts from salt dough, this is a very affordable material and it is easy to make it at home.
In this article, we will not bypass it and make interesting bowls of salt dough and Tetra Pak boxes.
What we need for this:
- Milk cartons or similar;
- Salted dough, rolling pin;
- PVA glue;
- Acrylic paints;
- Sponge for washing dishes.
Craft option number 1.
Step 1.
We make a steep salty dough and roll out a pancake from it, the size of which is larger than the box.

Step 2.
Cut off the upper part from the box so that the edge is even, measure a strip on a dough pancake so that it can wrap the whole box in a circle. Cut out a strip of dough, apply PVA glue to the surface of the box and glue it to the box, covering the entire side surface.


Step 3.
Using a flat object (here we used a flat, wooden stick) we make horizontal marks on the entire surface of the dough, and then, vertical marks between horizontal marks, imitating brickwork. We are waiting for the dough to harden.


Step 4.
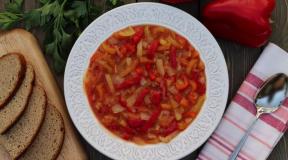
The dough has frozen, and now you need to paint over the applied risks with acrylic paint, and then, with a damp sponge for washing dishes, rub the paint a little over the surface, slightly toning our "brickwork".


We are waiting for the paint to dry and that's it, the vase is ready!
Craft option number 2.
Step 1.
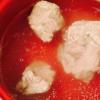
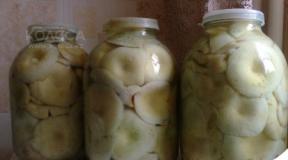
Cut off the upper part from the box, apply PVA glue to the surface and glue round pieces, ovals, etc. to it. from salted dough. We are waiting for the dough to harden.


Step 2.
We paint over the gaps between the glued parts made of salt dough with acrylic paint and, as in the first version, rub it a little with a damp sponge. We are waiting for the paint to dry.


These are the two options for the craft I showed you. They can be used as decorative vases, or as organizers, all at your discretion. By the way, you can do this work with your children, I'm sure this activity will be very exciting for them))).
Friends, do not forget to share our articles on social networks! Good luck and good luck to everyone!
As a gift to your mother or grandmother, teacher or girlfriend, you can make an original box for little things with your own hands: threads and needles, jewelry or pencils. This little thing looks very beautiful, and you don't need to buy practically anything to make it.
- Required materials for crafts
You can make a box from any used container. If the house has a microwave oven, then even plastic boxes, trays and buckets will be used: from under mayonnaise, fish or ice cream.
For this craft, you also need salt dough, any paints and, if desired, varnish. By the way, even hairspray will do.
Master class with photos
- Making salted dough
The most important component - salted dough - must be made from flour, salt and water. To make a box with a volume of 30cm X 20cm X 7 cm, you will need 200 g of ordinary flour (not pancake or pancake flour), 200 g of salt and 125 g of water. Considering that the density of salt is twice the density of flour, then in terms of volume it will look like this: 200 ml: 100 ml: 125 ml.
The salt is mixed with flour and water is carefully added little by little, stirring the mass thoroughly. You can use a mixer for this.

Then the dough must be kneaded with your hands, like a dumpling dough. And in terms of consistency, the salty modeling dough should resemble soft dough for dumplings.

- Execution of a bas-relief
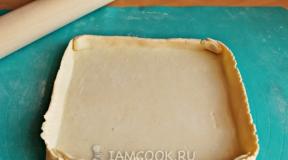
You should start working on the box by rolling out a piece of dough in a thin layer. It must be carefully laid out on the outside of the container. The excess is easily cut off with a sharp knife. The dough is pressed tightly against the container so that there are no voids between the dough and the walls.

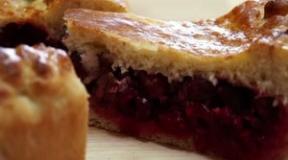
When the whole box is covered with this mass, you can start making the bas-relief. For strawberries, you need to roll out a tiny piece of dough, cut out the shape of the berry with a sharp knife. Before applying, moisten the side of the part with which it is to be attached. The bas-relief is pressed easily, then with damp fingers you need to carefully smooth the junction so that there are not even small cracks.

The berries come in a variety of sizes. They are also arranged in no particular order. Then, sepals are cut out of the rolled layer with a sharp knife, which are placed on top of the strawberries. The algorithm for attaching all parts is the same. You can also stick strawberry leaves and flowers.

If desired, small legs can be attached to the bottom of the box.

- Drying salted dough products
When the bas-relief on the box is made, the product should be dried in the oven or microwave. It goes without saying that when using plastic, plastic or glass containers, you should not put the product to dry in the oven. In this case, it is best to use a microwave oven.
The first time it is enough to turn off the oven for 2 minutes, putting it on the defrosting mode. After turning off the oven, the box must be taken out and carefully examined if there are any cracks or irregularities on the surface. If found, it is recommended to cover them with dough, abundantly moistened with water.
Then the box should be put back inside the microwave oven for 2 minutes in the same mode. If everything is stuck together normally, you can thoroughly dry the thing already in the warm-up mode by setting the drying time to 5 - 8 minutes.
- Coloring the box
You need to paint the box after final drying. It is best to do this with a very thin brush, carefully drawing all the small details and trying not to leave stained areas.
While working, remember that the dough is quite hygroscopic. Therefore, in order for the color of the finished product to be bright and saturated, the coloring process will need to be repeated several times at intervals.
- Varnishing of dough products
After the paint has dried, the finished box is covered with colorless varnish. If the master decides to make a thing of the same color, without painting, then you can use dark varnish on wood - this will create an imitation of a product made of wood.
It is very convenient to use hairspray for the last coating: when sprayed, it lays down in an even layer and gets into the smallest bends. However, the disadvantage of such a coating is that hairdressing varnish does not give as strong a shine as other varnishes.

- Useful Tips
So an original gift for a woman is ready! The recipient will surely like the box made of salted dough! Our master class is over, but in the end I would like to give a couple of useful tips.
By the way, knowing how to decorate the surfaces of containers with a bas-relief, you can make an original sugar bowl, a dish, a plate for fruit, a glass for napkins, a salt shaker, a stand for spices and other cute kitchen utensils.
You just need to always remember that salty dough, even well dried and varnished, is afraid of liquids. Therefore, washing such things with water is not worth it. Also, do not forget that salted dough products are very fragile and fragile.
Every woman has small things: beads, accessories, cosmetics, etc. There comes a moment when they cease to fit into the existing boxes. Or they get mixed up, which makes it harder to find the right thing. Well, there is a way out! You can make a wonderful box out of salted dough.
The popularity of this material for needlework is incredibly high. His motto can be the phrase "Cheap and .. (no, not angry) beautiful." Every home contains a pinch of salt, water and flour. Moreover, the dough is a very plastic material. It can be used to sculpt whatever the soul desires - toys, various figurines, decorations and even containers for them.
The advantages are inexpensive and relatively fast. Most importantly, there is no limit to your imagination. The dough is so pliable material that it allows you to embody any daring ideas. Beginners can follow the instructions exactly. More experienced ones can take an idea, and the technology for making products is not much different - we make dough and cut off all unnecessary things.
Such dough box can be done not only for yourself. It can be a wonderful gift for a woman who will appreciate a handmade present. After all, such things carry a piece of the soul of the needlewoman herself.