How to make a jelly cake. Jelly cake - mosaic
What could be better than freshly baked homemade cake with bright delicious fruits? Only a jelly cake with fruits, with a multi-colored shining jelly filling and a biscuit melting on the tongue!
If you decide to make a fruit cake, you should make sure that the fruits and berries on it look more juicy and appetizing. To do this, you can cover the cake with jelly filling. Jelly will add shine to the fruits laid on the surface of the cake and protect them from winding and darkening. Jelly for fruit cake can be prepared on the basis of juice, which will give the cake not only a beautiful appearance but also extra flavor.
To prepare a jelly filling for a cake, you can use ordinary dry gelatin, or you can purchase ready mixes for jelly in the store. Now they are released in in large numbers and in a wide variety of flavors.
7 secrets of a successful fruit jelly cake
1 . To prevent jelly from soaking into the surface of the cake, the finished biscuit should be smeared with a thin layer of jam or marmalade. Then spread dried berries or pieces of fruit on the surface and pour a thin layer of jelly.
2 . To prevent jelly from flowing down the sides of the cake, the cake must be placed in detachable form, the sides of which are higher than the level of the cake.
3 . Instead of a split form, you can use baking paper - tightly wrap the sides of the cake with parchment paper.
4 . To make the jelly harden faster on the surface of the fruit cake, keep the cake in the refrigerator before pouring.
5 . Fill the cake with gelatin from the middle to the edges.
6 . Gelatin for filling should be cooled, slightly viscous. Then it will harden faster and will not be absorbed into the surface of the cake.
7 . If the fruit cake is decorated with a thin layer of jelly, the color of the jelly filling should match the color of the fruit and berries. Red jelly for red berries and fruits (raspberries, red currants, strawberries), and yellow jelly for yellow ones (apricots, peaches, oranges). If you are using multi-colored fruits, then cook clear jelly without juice.


Recipe: Fruit Cake Jelly
To prepare jelly for filling a fruit cake, you will need: dry gelatin, water, berry or fruit syrup, sugar.
- Gelatin - 20 g (1 tablespoon with a slide)
- Water - 1 glass
- Berry or fruit juice- 1 glass
- Sugar
Soak dry gelatin in 1 cup cold boiled water, stir well and leave to swell for 30 minutes.
- Pour berry or fruit juice into a saucepan, add sugar to taste.
- Bring the juice to a boil and, stirring gradually, pour in the swollen gelatin.
- Continue stirring until all the gelatin is dissolved.
- Cool the jelly mass to a slightly viscous state.
Recipe: Jelly Cake with Fruit and Sour Cream
simple recipe sponge cake And sour cream jelly for filling. In the recipe, the biscuit is not the basis of the cake, but its filling. The finished biscuit is cut into small cubes, mixed with sour cream jelly and poured into a mold.
- Biscuit:
- eggs - 3 pcs.
- sugar - 1 cup
- flour - 1 cup
- Sour cream jelly:
- gelatin - 3 tbsp. l.
- water (cold boiled) - 200 ml
- sour cream - 800 g
- sugar - 1 cup
- vanillin optional
- fruits or berries - 500-700 g
Biscuit:
- beat eggs with sugar until foamy for 7-10 minutes,
- then add flour, mix with a spoon, pour into a greased form,
- bake until done.
- Remove the finished biscuit from the bowl, cool completely, cut into cubes.
Sour cream jelly:
- soak gelatin in a glass of cold boiled water for 40-60 minutes,
- Beat sour cream with sugar until sugar dissolves.
- bring the soaked gelatin to a boil, but do not boil,
- mix with sour cream and sugar.
Fruit:
- Wash and cut into cubes.
- For this recipe, it is better to choose very soft fruits or berries such as peaches, kiwis, bananas, strawberries, raspberries.
- At the bottom of a large container (about 3 liters), we put pieces of fruit, in the finished cake they will be at the top.
- Then put half of the chopped fruit and half of the biscuit cubes on top.
- Gently pour half of the sour cream-jelly mixture so that the pattern on the bottom does not go astray.
- We put in the refrigerator until it hardens (half an hour to an hour).
- Then lay out the remaining biscuit and fruit, and pour the remaining sour cream.
- We put the form with jelly-sour cream cake in the refrigerator for several hours (overnight).
- To make it easier to take out finished cake- sour cream with fruit from the mold, lower it for a few seconds in hot water. You can also line the form with cling film in advance and then pour the jelly-sour cream mixture with fruit and biscuit.
Homemade cakes are an invariable attribute of any family holiday. True, in recent years, the domestic confectionery industry has spoiled us so much that many housewives do not bother making homemade cakes, but prefer to buy ready-made ones. And the reason for this is not only the availability of these delicacies, but also the chic look of store-bought cakes.
Meanwhile, if you are not friends with confectionery decorations, but you want to serve homemade gourmet cake, then a cake with jelly is your option. The recipe for such a cake is not available in a single copy. Similar desserts are prepared with butter and curd cream, with a biscuit or sand base, jelly and soufflé are combined. And there is a recipe (and more than one) for such a cake without baking! But most importantly - this cake will look incomparable without additional decorations. And, of course, it will definitely turn out delicious. And you just have to choose a recipe and cook such a cake for the occasion or just like that, for a good mood.
German jellied cake
This is perhaps the classic of jelly cakes. Its recipe became known in the Soviet Union thanks to the stupid culinary creativity of housewives whose husbands served in the GDR. So, the recipe for a German jellied cake has successfully migrated to the notebooks of Soviet citizens and has become one of the most “imported” options among all homemade cake recipes.
Ingredients:
- 2 cups flour (approx)
- Half a glass of sugar
- A pack of butter or margarine for baking
- 2 teaspoons baking powder for dough
- handful of almonds
For cream:
- Half a kilo of cottage cheese
- 2 tablespoons of fat sour cream
- 3 eggs
- Half glass of sugar
- Tea spoon vanilla sugar
- 2 sachets of gelatin.
For jelly:
- 2 packages fruit jelly powder
- 1 sachet of gelatin
- Fresh or canned fruit
Cooking:
For this cake, we need a detachable form. In it we will bake sand base, in it we will also collect the cake. Let the butter melt a little, and then put it in a bowl and lightly beat with a mixer. Then add sugar to the butter and now beat everything together until it becomes a cream. By the way, if you do not have a mixer, then you can thoroughly grind the butter with sugar with an ordinary tablespoon.
Now put the nuts chopped with a knife into the oil and mix well again. Next, sift the flour and mix it with the baking powder. We introduce the flour into the butter gradually, first stirring it with a spoon, and then kneading the dough with our hands. We cover the form with baking paper and put the dough into it. Having leveled the cake, we send the form to the preheated oven for about half an hour. The baked cake is carefully removed from the mold and left to cool.
While the cake is cooling, let's make the curd cream. Beat the eggs with sugar, and then introduce them into the cottage cheese. Add sour cream there and grind everything properly or beat with a mixer. Dilute gelatin with water (as indicated on the package) and heat in a water bath. Let the gelatin cool down and add it to the cream.
Now we take the form again (previously washed and dried) and place the cake in it, on which we put the curd cream. Level the cream layer and send everything to the freezer. While the layer is drying curd cream, prepare fruit and jelly. Dilute the jelly with water according to the instructions and mix with gelatin, prepared as for curd cream. We take out the form from the freezer, spread the fruits on top of the curd layer and carefully fill them with liquid jelly. Again we remove the cake in the freezer for fifteen minutes, and then move it refrigerator compartment. The cake is ready when upper layer the jelly is completely frozen. To transfer the cake to a dish (cake maker), with a sharp and thin knife, we draw several times along the edge of the mold between the sides and the cake. We remove the sides, and gently move the cake to the dish. Gorgeous handsome man! Striped flaky edge and fruity frenzy under clear jelly.
Note:
Ideally, the fruit should match the jelly with which the cake is made. And pay attention: green fruits under red or pink jelly look unappetizing. But orange jelly is perfect for fruits and berries of any color. And further. The chic look of the cake depends a lot on how you arrange the fruit.

Cake "Swan Lake"
The cake recipe under this name exists in many interpretations. The whole point of this cake is in the swans. They are molded from mastic, cut from apples or prepared from choux pastry. The water surface is imitated with the help of tinted cream or colored coconut flakes. But the recipe for a real Swan Lake cake is a recipe for a cake with jelly and eclair swans. Here we are with you and try to cook it.
Ingredients:
- 6 eggs
- A glass of flour
- glass of sugar
For cream:
- Bank of condensed milk
- Tablespoon of flour
- Glass of water
- Tablespoon of butter
For jelly:
- 4 sachets of gelatin
- 2 cups tarragon lemonade
- 2 tablespoons of sugar
- 2 bags of dry blue or green jelly
- 1 sachet of gelatin
For swans:
- Half a stick of butter
- 150 g flour
- Glass of water
- 5 eggs
- A pinch of salt
Cooking:
Let's bake a biscuit first. Let's carefully separate egg whites from the yolks, put the proteins in the refrigerator, and beat the yolks with sugar. The more thoroughly the yolks are beaten, the more magnificent the biscuit will turn out. Add the sifted flour to the yolk-sugar mixture and mix well. Then whisk in strong foam proteins. It should turn out thick and fluffy, and when turning the dishes upside down, the foam should not slide along the walls and fall out of the dishes. Whipped egg whites carefully, one tablespoon at a time, enter into the dough, mixing it very gently. We bake a biscuit in a form with split edges, which we cover with baking paper or grease with oil and sprinkle with flour.
While the biscuit is preparing, make choux pastry for swans. Pour water into a saucepan, add oil and salt and let the water boil. Then pour the flour into the water, mix thoroughly and continue to cook (stirring!), Until the dough begins to gather into a lump and, leaving no traces, easily separates from the walls and bottom of the pan. Remove from fire and cool slightly. One by one, beat the eggs into the dough. Important! In no case should you put all the eggs in the dough at once.
Transfer the dough to pastry bag or into an ordinary cornet and onto a baking sheet covered with baking paper, we squeeze out oblong strips that will become the body of the swans. On the other baking sheet we draw thin “twos” in the form of swan necks. During this time, the biscuit is already baked. We take out the form from the oven and send the baking sheets with choux pastry to the oven. It will take us a little more than half an hour to bake blanks for swans.
While the swans are preparing, let's get busy custard. Pour condensed milk, water and flour diluted to a liquid slurry into a saucepan. We put it all on slow fire and cook, stirring, until the first bubbles appear on the surface of the cream. Cool the cream and beat it with butter, just put the butter in the cream and use a mixer. We divide the biscuit into two cakes and coat with custard.
Cooking jelly. We soak the gelatin, let it swell, and then heat it in a water bath. Pour gelatin into lemonade or into a pre-prepared solution of powdered jelly. We put the cake in the mold, snap the sides and carefully pour the jelly. We put the form in the freezer.
We fill the baked blanks for swans with the remaining custard, insert the “neck” into the “torso” and sprinkle the swans powdered sugar. When the jelly on the cake hardens, we put our birds on it, if desired, we decorate the “lake” with mint leaves or buttercream flowers.

grape cake
One more recipe gorgeous cake with jelly and fresh fruit. Best of all, this recipe does not require baking! BUT the result will surpass your wildest expectations. Are we trying?
Ingredients:
- Sweet crackers - 300 g
- Sour cream with a fat content of at least 20% - 700 g
- Sugar - glass
- Seedless raisins - 100 g
- Grapes fresh white or green - 1 large brush
- Chocolate - 2 bars
- Vanilla sugar - 1 sachet
- Fruit jelly (powder) green - 1 package
- Gelatin - 3 sachets (30 g)
Cooking:
First, soak the gelatin and leave it to swell, and then heat it in a water bath and leave to cool. Pour raisins with boiling water, soak in it for about ten minutes, and then rinse and dry, throwing it on a sieve. Jelly from a bag is also diluted with water, focusing on the instructions on the package. Grind the crackers, breaking them into small pieces with your hands. Put sour cream in a saucepan, add sugar and vanilla to it and beat with a mixer until fluffy. Then add gelatin to sour cream and whisk again.
Chop the chocolate into crumbs and put in a saucepan with sour cream. We also add raisins and crackers. Pour the mixture into a mold with removable sides and send it to the freezer. After half an hour, we take out the form and spread the top of the sour cream jelly with grapes. Pour the prepared jelly and put it in the refrigerator again. When the top layer of jelly hardens, the cake can be removed from the mold and served.
Corn flakes jelly cake
This recipe is also attractive in the "cold" way of making the cake. As a matter of fact, this is one of the variants of the German jellied cake without baking. And how much this recipe will suit your taste, judge for yourself.
Ingredients:
- Corn flakes - 200 g
- Butter - 1 pack (200 g)
- Fruit yogurt - 500 g
- Sugar - 100 g
- Citric acid - a third of a teaspoon
- Instant gelatin - 3 sachets (30 g)
- Fruit jelly (in powder) - 2 packs
- Fresh fruits - any
Cooking:
First, prepare the basis for the cake - a cake of corn flakes. To do this, put softened butter in a bowl and add flakes to it. Mix everything thoroughly and leave for half an hour or an hour. After that, we cover the mold with removable sides with cling film and put the corn-butter mixture into it. We level the “dough” and put the form in the refrigerator so that the cake freezes. Soak gelatin, heat it in a water bath and leave to cool.
Meanwhile we are preparing yogurt cream. Beat the yogurt with a mixer, gradually adding sugar and lemon to it. Lastly, pour in the cooled gelatin and put this mixture on the cornflake cake. We put the form in the refrigerator again and wait until the yogurt layer “grabs”. At this time, we breed jelly powder and prepare fruits for the cake. When the top layer of the cake hardens enough, put the fruit on it and fill it with liquid jelly. The cake is ready when the top layer of jelly is completely dry.
Cake "Sandwich with red caviar"
Yes, imagine, such a cake can also be prepared. The whole feature of this cake is in red caviar, which we will make from gelatin. But you can bake biscuit or sand cakes for this cake - that's how you like it. The main thing is that they are soft. By the way, for cakes you can use chocolate dough. Then you get a black bread sandwich. Cream for such a cake - any oil. Well, for this we need the following ingredients:
- 6 eggs
- glass of sugar
- A glass of flour
- Butter pack
- Can of condensed milk
- Orange jelly powder
Cooking:
First, we prepare a classic biscuit. Sob'em egg yolks with sugar and mix with sifted flour. We also beat the proteins with a mixer until a lush and stable foam. Then, one tablespoon at a time, introduce the proteins into the dough, put the dough into a mold and send it to the oven. Thirty minutes later we take out the biscuit and leave to cool.
Meanwhile, prepare the cream. Place softened butter in a bowl and beat lightly. Continuing to beat, in small portions add condensed milk to it. The cream is considered ready when it begins to easily and without traces lag behind the walls of the bowl. But in our case, this is not necessary - we will not make cream decorations, so he does not need to keep the shape. Dividing the biscuit into two cakes, we give it the shape of a sandwich, cutting off the excess parts along the edges. We send the cut biscuit to the oven to dry and make crumbs out of it for sprinkling the sides of the cake. We coat the middle, sides and top of the cake with cream. Sprinkle the sides with biscuit crumbs.
And now the most important thing - caviar! We dilute jelly with half the norm of water indicated on the package. Heated jelly in accordance with the instructions, we begin to drip it into ice water using a pipette, syringe or medical syringe without a needle. We throw the "eggs" on a sieve, and then lay them on top of the cake. That's all.
Choose a recipe, cook jelly and make wonderful cakes with them - tasty and beautiful. If you wish, you will certainly succeed. Don't be afraid to experiment and learn something new. Cook with pleasure, and enjoy your meal!
Step 1: Prepare the oven and baking dish.
First of all, turn on the oven to warm up to 200 degrees Celsius. Then, using kitchen scissors, we cut out a circle from baking paper to the diameter of a well-squeezed non-stick form with removable sides and put it on the bottom of this dish, and grease the inside of the inventory with a thin layer of butter. At the same time, heat some purified water in a kettle.Step 2: prepare wheat flour and baking powder.

Then, using a sieve with a fine mesh, sift into a deep bowl right amount wheat flour. This process is needed in order for this ingredient to dry slightly, become looser and get rid of any kind of litter. Then add the baking powder to the flour, mix them with a whisk until a homogeneous consistency and move on.
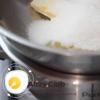
Step 3: Prepare the eggs and beat the egg whites.

With the back of a kitchen knife, in turn, we stuff chicken eggs and distribute the yolks with proteins in separate clean bowls. We put the dishes with the latter under the blades of a mixer or blender with a special nozzle and beat into a thick, stable foam at the highest speed. This will take about 5-7 minutes, although everything is relatively and completely dependent on the quality of your kitchen appliance.
Step 4: prepare the yolks.

Then we wash the mixer or blender and begin to deal with the yolks. Add to them a couple of tablespoons of hot water from the kettle and immediately shake everything until smooth airiness. When the structure of the mixture acquires a magnificent cap, and this will happen literally in a minute, immediately pour two types of sugar into it: vanilla and ordinary sand. We continue to beat the products at high speed until the mass brightens. Then pour into it a little concentrated fresh lemon juice and shake everything again, but now to an increase of 2, and preferably 2.5 times.
Step 5: prepare the biscuit dough.

Now we combine the whipped proteins and yolks, very carefully loosening them with a silicone or wooden kitchen spatula. Then we introduce into the resulting mass a mixture of flour and baking powder. We act gradually, adding it spoon by spoon, at the same time kneading the biscuit semi-thick dough. As soon as it takes on a homogeneous structure, we also carefully transfer the semi-finished flour product to the prepared form, level it and proceed to the next step.
Step 6: Bake the biscuit.

We still put raw base under the cake warmed up desired temperature oven and bake 13–16 minutes, after which we check the readiness flour product wooden skewer or match. Just insert the end of the stick into the pulp of the biscuit and take it out. If there are wet lumps of dough on the tree, keep baking in the oven for another 5–6 minutes.

Is the base ready? Then everything is simple, we pull kitchen gloves on our hands, move the form to cutting board, previously placed on the countertop, and Let the contents cool down completely room temperature without revealing!
Step 7: prepare the gelatin for the curd layer.

We don’t waste a minute while the base for the dessert cools down, pour cold whole pasteurized milk into a small metal or heat-resistant bowl, add powdered gelatin there, mix them with a tablespoon until a homogeneous consistency and leave to swell for 25-30, and preferably 50 minutes. After that we send to medium fire a small saucepan filled with half-purified water, and when the liquid begins to boil, we place a bowl of swollen gelatin on the surface of the hot dish.

We do not boil the mixture, just warm it up, not forgetting to stir constantly so that all the sticky granules dissolve! As soon as the mass acquires a homogeneous liquid consistency, remove it from the stove and cool to room temperature.
Step 8: Prepare the Kiwi.

Then, using a kitchen knife, peel the kiwi, put it on a cutting board, cut into rings, slices, half rings, straws or cubes, although the style of cutting is not critical, but it is desirable that the thickness of the pieces does not exceed 5–7 millimeters. We move the chopped fruits into a clean bowl and begin to deal with the curd mixture.
Step 9: prepare the mixture for the curd layer.

Rub into a deep dry bowl through a sieve with a fine mesh non-greasy, tender cottage cheese, add sugar and sour cream to it and beat these products until the crystals are completely dissolved at high speed with the same, but clean mixer or blender with a whisk attachment. Then, without stopping the operation of the kitchen appliance, gradually pour the dissolved gelatin into the resulting mass that has cooled down and shake everything until a homogeneous soft state.
Step 10: we form a jelly cake with fruits - stage one.

Now lay out the tender curd mass on a chilled biscuit and carefully level it. We try to make it so that it fits snugly against the walls of the mold, then the next layer of jelly will not seep onto the biscuit and the cake will look very nice. If the deed is done, then we tighten the dishes with a semi-finished dessert with plastic cling film and send it to the refrigerator for 5 minutes.

We don’t keep him there for a long time, later right time we spread the sliced \u200b\u200bkiwi on a slightly seized snow-white mass, slightly melting them inward, now the fruits will not float during pouring. Covering up again fragrant yummy plastic wrap and refrigerate until needed.
Step 11: Prepare Kiwi Jelly.

Then we heat the purified water in the kettle again, but now we need about 300 milliliters. As soon as the liquid boils, pour it into a deep bowl, pour kiwi flavored jelly there, mix everything thoroughly until completely dissolved and cool to room temperature.
Step 12: we form a jelly cake with fruits - stage two.

Here we come to practically final stage cooking the cake, move the form with three layers of dessert to the countertop, pour the kiwi with barely warm jelly, cover everything again and put it in the refrigerator for another couple of hours or until the delicacy completely hardens.

When this happens, we draw the edge of the knife between the sides of the mold and the side of the treat, thus disconnecting it from cold dishes. Then carefully remove the side, using a kitchen spatula, transfer the cake to a large flat dish or a tray and offer to try the resulting product to your favorite gourmets!
Step 13: serve fruit jelly cake.

Fruit jelly cake is served chilled on a tray, a large flat dish or in portions on plates as a dessert for a sweet table. In any additions, this cooking masterpiece does not need it, its taste turns out to be moderately sweet, with a delicate sourness, and only one thing can be said about the aroma - divine!

It is pleasant to savor such a delicacy in good company along with a cup of hot, freshly brewed tea or coffee. Cook with love and give your loved ones amazing dishes prepared by your golden hands!
Bon Appetit!
Kiwi is not the main ingredient that can be used, you can also take any other canned or fresh fruits either berries to your liking, in accordance with the choice of jelly, you can also change, for example, make apple, orange, cherry, or the one you like best;
Very often, a little soaked and grated on a very fine grater citrus peel, fresh fruits or berries chopped into small pieces, for example, an apple, banana, strawberries, raspberries, tangerine slices and even the same kiwi;
Alternative to vanilla sugar - liquid extract from this spice baking paper- parchment, butter- any butter or vegetable fat.
Recipes for making cakes at home with photos
fruit jelly cake
1 hour 20 minutes
175 kcal
5 /5 (1 )
Today jelly can be found different forms, colors and flavors. This special kind sweets pleases both children and adults. Not so long ago, it has become popular to make cakes with both jelly layers filled on top and decorated with jelly, and with jelly cakes. Thanks to this confectionery invention, a lot of options for decorating and decorating cakes appeared, especially jelly cake with fruit looks appetizing.
Biscuit-jelly cake with fruits
If you want to surprise the most whimsical guests with something really original, then you should cook this particular cake. It turns out surprisingly tasty, tender, and outwardly looks great.
For cooking, we need kitchen appliances:
- 2 small deep bowls;
- 1 large deep bowl;
- mixer;
- sieve;
- two pans (one with a thick bottom).
Ingredients
For the biscuit:
For jelly:
For impregnation:
For cream:
Fruit:
Preparation of biscuits
- In this recipe, the amount of ingredients is indicated for two biscuit cakes, so we divide everything in half. Take two eggs and separate the whites from the yolks.
Did you know? It is necessary to separate the protein carefully so that the yolk does not get into it. The container in which we place the proteins should be perfectly dry, without a single drop of water, the same applies to the whisks of the mixer. Eggs must be chilled.
- Beat egg whites with sugar.

Add a pinch of salt before starting beating the protein, then it will be lush. You need to beat with a mixer until a fluffy foam is formed, then gradually, without turning off the mixer, add 30 g of sugar. You can check the readiness by stopping the mixer and looking at the consistency of the protein: it should not fall out of the bowl. Also, the main thing is not to kill the protein, so you need to periodically turn off the mixer and look at the consistency.
- Yolks in separate dishes beat with sugar until it is completely dissolved, the consistency should have a foamy structure.

- Pour the beaten yolks into a bowl, then the whites. Sift through a sieve 25 g of flour and add 1 tsp. starch.

- Gently mix all the contents with a spoon from the bottom up, without making too sudden movements.

- Place the prepared dough in a greased vegetable oil form and put in an oven already preheated to 180 °.

Important! While baking a biscuit, it is advisable not to look into the oven, otherwise the dough may not rise.
- Biscuit preparation time - 15-20 minutes. You can check the readiness of the cake with a wooden stick or match. If the tip of the match is dry, then the biscuit is ready.
- While the first cake is baking, make the second batch in the same way. Leave the second cake in the form in which it was baked.

Did you know? You can transfer the cake to a flat dish and make a high cardboard cylinder according to the diameter of the biscuit and wrap it inside with cling film. Then the cylinder can simply be removed or cut, and the finished cake will remain on the dish.
cooking jelly

Assembling the cake
- We impregnate cakes cognac impregnation. We also soak the biscuit that has remained in the form, and fill it with half of the creamy jelly (if the jelly has already frozen a little by that time, you need to preheat it in a water bath). We put to freeze in the refrigerator.

- We prepare the jelly bought in the store according to the recipe indicated on the package, and when it cools down to 35-37 °, we take out our biscuit from the refrigerator, fill it with the already frozen creamy cake and place it in the refrigerator again.
- When fruit jelly hardens, we place a second biscuit cake on it, soaked cognac syrup, and grease with the remaining creamy jelly.

- We lay out thinly sliced \u200b\u200bfruits on the frozen second cake (turn on the fantasy and decorate the cake at our discretion) and fill it with the second prepared and cooled jelly (it is better if it is as transparent as possible, for example lemon).

- The frozen cake is carefully removed from the mold (preferably a detachable one) and put our masterpiece on a flat dish or remove the previously prepared cardboard cylinder.

- Beat the butter with condensed milk and with confectionery syringe decorate the top and walls of the cake or sprinkle them with colored coconut flakes or biscuit crumbs.

Biscuit-jelly cake with fruit is not greasy or too sweet, so your guests will be happy to eat it even after a plentiful feast. We also suggest trying to cook, which can surprise your loved ones with external originality and exquisite taste.
Jelly cake with fruit and sour cream without baking
To prepare this cake, you will have to make a minimum of effort, as it is prepared without the use of an oven. It is original, looks appetizing and will be able to show you how good confectioner even if you do not have special skills in making desserts.
- Cooking time- 35 minutes.
- Designed for eight servings.
- Kitchenware: saucepan with a thick bottom,deep bowl with round bottom mixer.
For a jelly-sour cream cake with fruits, we need:
- ready-made biscuit (can be purchased at the store);
- sour cream - 500 ml;
- gelatin - 25 g;
- water (cold) - 1 tbsp.;
- fruits (pineapple, banana, kiwi, orange).
Cooking method
- Cut the biscuit into cubes.

- Pour gelatin cold water to swell for 20 minutes.

- We clean the fruits and cut them into rings, if we use pineapples, dry them from the syrup.
- We heat the gelatin in a water bath, stirring constantly, until completely dissolved.

- Beat sour cream with sugar and pour gelatin in a thin stream.

- We prepare a deep bowl with a round bottom, cover it with cling film and put fruit on the bottom - this will be the top of our cake.

- The next layer is some cream jelly to cover the fruit.

- We lay out the pieces of biscuit with fruit and pour again with creamy jelly. You can repeat several layers like this, the main thing is that the top layer is covered with creamy jelly.

- Cover the bowl with a lid and place in the refrigerator overnight until completely solidified.

- The next day, place the bottom of the bowl in hot water for a couple of seconds (to make our cake come off easier), turn it over onto a flat dish and remove the bowl. Peel off the top of the cake cling film and our delicacy is ready.

Did you know? If you replace the biscuit with cookies in the recipe, you get a jelly cake with fruits and cookies, in which the cooking time and process is no different from a biscuit cake.
And for true lovers chocolate desserts we recommend to try.
Cottage cheese jelly cake with fruits
This recipe is not only delicious and very healthy, but also easy to prepare, as it eliminates the baking process. Be sure to prepare an airy and hearty dessert.
- Cooking time- 30 minutes.
- Designed for 12 servings.
- From kitchen appliances have to take: mixer, a saucepan with a thick bottomdeep bowl or plastic packaging from under purchased cake.
I make cottage cheese jelly cake with sour cream and fruits according to this recipe:
- cottage cheese - 500 g;
- fat sour cream - 500 g;
- lemon - 1 pc.;
- gelatin - 40 g;
- fruits (pineapple, orange, kiwi, banana);
- jelly in a bag;
- sugar - 6 tbsp. l.;
- vanilla sugar - 10 g.
Cooking curd-jelly cake with fruit without baking
- We clean all fruits and cut into rings.

- We take a bowl or a box from a purchased cake, put orange rings (half rings) on the bottom. Pour the prepared store-bought jelly (preferably with orange flavor) and place in the refrigerator.

- In the meantime, pour gelatin with cold water for 20 minutes to swell.

- Beat cottage cheese, sour cream and sugar with a blender in a separate bowl.
- Add another 70 ml of water to the swollen gelatin and, stirring, dissolve in a water bath. We introduce gelatin into the curd mixture and beat again with a blender.

- We put all the fruits in the same container, you can also add cookies, squeeze the lemon juice and evenly mix all the ingredients on top of the curd mass.

- Taking out from the refrigerator orange jelly, pour an even layer of curd-fruit mass and put in the refrigerator overnight.

- Jelly cake with cottage cheese and fruit is ready to eat. Bon Appetit!

fruit jelly cake recipe video
Also watch the video, which demonstrates a simple recipe for a delicious jelly cake with fruit based biscuit. such a guide will save you from doubts about creating a delicious dessert.
Fruit jelly cake. Fruit jelly cake recipe.
A delicious cake with biscuit, sour cream jelly and fruits will decorate your table 🙂 Jelly cake is often made in summer. Fruits (berries) can be taken any, at your discretion. If you want to diet option, then sour cream can be replaced with any yogurt. I hope you enjoy the cake 🙂 Thank you for your views, likes and comments! Bon Appetit!
Recipe:
Sour cream 20% - 500 gr
Sugar - 1 tbsp
Vanilla sugar - 1 sachet
Gelatin - 3 tbsp (dissolve in 0.5 tbsp of boiled water)
Biscuit:
Eggs - 4 pcs
Sugar - 1 tbsp
Flour - 1 tbsp
Potato starch - 1 tbsp
Baking powder - 1 tsp
Fruits, berries (I have 2 bananas, 2 oranges and 120 gr blueberries)
https://i.ytimg.com/vi/nwdp0TQCAZs/sddefault.jpg
https://youtu.be/nwdp0TQCAZs
2014-06-11T05:00:00.000Z
Jelly cakes are just a godsend for both a beginner in the preparation of desserts and a first-class chef. You surely have own recipe this light dessert- share it with us so that others can use it interesting ideas to create such a delicate cake.
Jelly cake with biscuit will win the hearts of all the sweet tooth. air biscuit, impregnated gentle cream, in combination with a light jelly layer allows you to get moderately sweet and delicate dessert.
Jelly cake with biscuit - the basic principles of cooking
The basis for the cake are biscuit cakes. Probably every housewife knows how to cook a biscuit. For young housewives who have never encountered the preparation of cakes, we will remind you how to bake cakes correctly. classic biscuit made from eggs, sugar and flour. To do this, chilled eggs are broken and the whites are separated from the yolks. Proteins are whipped into a dense foam. Then, without stopping beating, gradually pour in the sugar and add the yolks one at a time. It is very important that you only move the mixer in one direction when whipping. Otherwise, the dough will settle, and the biscuit will not turn out. At the end, sift the flour and beat, reducing the speed.
The jelly layer is prepared on the basis of fruit juices, sour cream or cream. You can make fruit jelly in different colors in a separate bowl, then cut it up and add it to cream or sour cream jelly. Get not just a delicious jelly layer, but also beautiful. In addition, pieces of fruit or berries are added to the jelly.
So that the biscuit does not turn out dry, it is impregnated with syrup or cream.
Decorate cakes chocolate icing, fruits or nuts.
Recipe 1. Jelly cake with biscuit, fruits and berries
Ingredients
strawberries - five pieces;
three eggs;
ten pcs. raspberries;
one and a half glasses of sugar;
incomplete glass of flour;
Orange;
400 g sour cream;
two bags of jelly;
30 g of instant gelatin.
Cooking method
1. Beat the chilled eggs with a mixer with sugar, gradually increasing the speed. As soon as the mass becomes lush, pour in the flour and mix with a spoon in the same direction as you beat.
2. Line the detachable form with parchment and pour the dough into it. We send the form to the oven and bake for 15 minutes at 200 C. Then we reduce the temperature to 170 C and cook for the same amount of time. We take out and cool the biscuit right in the form.
3. Soak instant gelatin in 100 ml of hot water and mix until the gelatin grains are completely dissolved. We cool.
4. Combine sour cream with sugar and beat until the latter is completely dissolved. Continuing to beat, we introduce a thin stream of the cooled gelatin mixture.
5. We soak the biscuit with syrup, and apply sour cream jelly on it. Smooth with a spatula and put in the fridge.
6. We clean the berries, fruits and cut them into arbitrary slices.
7. We prepare jelly from bags according to the instructions on the package. However, we take half as much water as indicated on the package. We cool.
8. On hardened jelly from sour cream, lay out slices of fruit and berries. Pour half of the chilled jelly over them and send them back to the refrigerator. As soon as the jelly grabs, pour over the rest. Keep in the refrigerator until completely solidified. Then we draw a sharp thin knife between the cake and the side of the mold. Open the mold and cut the cake.
Recipe 2. Jelly cake with biscuit and cream
Ingredients
two bags of strawberry jelly;
120 ml unsweetened yogurt;
5 g baking powder;
200 g of sugar;
200 ml heavy cream;
four eggs;
40 g cocoa powder;
20 g of gelatin;
150 g wheat flour.
Cooking method
1. Fill the gelatin with half a glass cold water and leave to swell for an hour.
2. Beat eggs with sugar until fluffy airy foam is obtained. Add vanillin. We introduce a little double-sifted flour and baking powder. Mix carefully. We shift the dough into a parchment-lined form and bake for forty minutes at 180 degrees.
3. We heat the swollen gelatin in a water bath, stirring until all the lumps melt. Do not bring to a boil! Whip the cream until firm foam, add half a glass of sugar and yogurt. Beat for a couple more minutes. Pour the melted gelatin in a thin stream, stirring. Then add cocoa powder and stir.
4. Remove the biscuit from the oven and cool directly in the form. Pour the creamy chocolate jelly over the biscuit and put in the refrigerator.
5. Cooking from bags strawberry jelly according to the recipe on the package. When it cools, carefully pour it over the creamy layer and put it back in the refrigerator overnight.
Recipe 3. Three-layer jelly cake with biscuit
Ingredients
a sachet of vanillin;
two eggs;
100 g flour;
two thirds of a glass of sugar.
a bag of vanilla sugar;
400 g of cottage cheese;
15 g of gelatin;
150 ml sour cream;
three quarters of a glass of sugar.
20 g of gelatin;
200 ml of jam;
200 ml of purified water.
Cooking method
1. Separate the yolks from the proteins. Lastly, add a pinch of salt and beat until light foam. Pour half the sugar in small portions, without ceasing to beat, until a dense thick foam is obtained.
2. Combine the yolks with the remaining sugar and beat separately until the mass triples.
3. Combine the whipped whites with the yolks, gently mixing in one direction so that the bubbles do not burst. At the end, add vanilla sugar and flour. Continue to mix gently until you get a smooth, lump-free dough.
4. Grease the mold with oil and sprinkle with flour. Pour the dough into it and bake for half an hour at 180 degrees. Remove the finished biscuit from the mold and cool on a wire rack.
5. Add white and vanilla sugar, sour cream to the cottage cheese. Beat with a blender until a homogeneous air mass is obtained.
6. Pour gelatin with water and leave to swell for 20 minutes. Then heat in a water bath until dissolved. Pour the resulting mixture into the curd mass and beat well with a mixer.
7. Wash and dry the mold in which the biscuit was baked. Line it with parchment. Cut off the top crust from the biscuit. Place in mold and soak in syrup. Put the curd mass on it and put it in the refrigerator for an hour.
8. Dilute the jam with water and strain. Soak gelatin in the resulting mixture and leave for half an hour. Then heat in a water bath or low heat, without bringing to a boil. Cool and pour over the curd layer. Place back in the refrigerator for four hours. Before serving, you can decorate with sprigs of mint or lemon balm.
Recipe 4. Jelly cake with biscuit "Summer extravaganza"
Ingredients
100 g flour;
three bags of jelly in different colors;
400 g of sugar;
25 g gelatin;
four eggs;
600 g of fat sour cream.
Cooking method
1. Beat the eggs with 100 g of sugar in a dense thick foam. Add flour and stir gently. Transfer the dough to a parchment-lined form and bake at 180 degrees for half an hour. Remove from oven, cool slightly and remove cake from pan.
2. Prepare three bags of jelly, each in a separate bowl. At the same time, take less water than indicated on the package. Place the cooled jelly in the refrigerator, and leave it there until completely solidified.
3. Add the remaining granulated sugar to the sour cream and beat until the latter is dissolved. Dissolve gelatin in 300 ml of boiling water. Mix thoroughly and pour in a thin stream into whipped sour cream with sugar.
4. Cut the jelly from the refrigerator into small pieces. Place them in a bowl and stir. Cut the biscuit into small plates.
5. Lay the cake in layers in silicone mold, alternating colorful pieces jelly, sour cream jelly and biscuit. Pour all the remaining sour cream jelly.
6. Place the cake overnight or several hours in the refrigerator. Before serving, dip the form for a few seconds in hot water and invert onto a dish.
Recipe 5. Jelly cake with Kiwi biscuit
Ingredients
160 g flour;
six fresh eggs;
200 g sugar.
two kiwis;
sour cream - 300 ml;
gelatin - a pack;
sugar - 300 g;
one and a half packs of kiwi jelly.
Cooking method
1. Divide the eggs into yolks and proteins. In the latter, add a pinch of salt and beat them into a strong foam. Continuing to beat, pour sugar in a thin stream. When it is completely dissolved, enter one egg at a time. Reduce the mixer speed and add the sifted flour with baking powder. Place the dough in a mold and bake at 180 degrees for half an hour.
2. Cut the cooled biscuit in half lengthwise. Beat sour cream with sugar until it is completely dissolved. Dissolve gelatin in a water bath, and inject it in a thin stream into a mixture of sour cream and sugar.
3. Place the lower part of the cake in a detachable form and lay sour cream jelly on it in an even layer and refrigerate for several hours.
4. Peel the kiwi and cut into rings. Lay them on top of the frozen sour cream jelly. Dilute a bag of kiwi flavored jelly according to the instructions on the package. Pour half of the jelly over the fruit. Put in the refrigerator for an hour. Then pour the remaining jelly and leave the cake overnight in the refrigerator.
Recipe 6. Jelly cake with biscuit, strawberries and banana
Ingredients
20 ml lemon juice;
three eggs;
half a glass of flour;
half a glass of purified water;
Cup granulated sugar;
half a glass of sugar for syrup;
a bag of vanilla sugar;
400 g 20% sour cream;
350 g strawberries;
25 g of instant gelatin;
Cooking method
1. Drive eggs into a dry bowl, add a pinch of salt to them and beat with a mixer, gradually increasing the speed. Gradually add half a glass of sugar, continuing to beat until the mass increases in volume and turns white. Sprinkle flour on a spoon and mix in one direction.
2. Lubricate the detachable form with oil and sprinkle with flour. We spread the dough into it, level it and put it in an oven preheated to 180 degrees for half an hour. We take out the finished biscuit, cool and cut in half.
3. Place the lower part of the biscuit in a detachable form, after lining it with foil.
4. Bring half a glass of water to a boil, add the same amount of sugar and cook, stirring continuously until it dissolves completely. Add lemon juice to chilled syrup. Soak the biscuit with syrup.
5. Pour instant gelatin with five tablespoons of water and leave to swell. Peel banana and strawberries and cut into pieces.
6. Beat sour cream with white and vanilla sugar. Dissolve gelatin over low heat and mix it with fruits and berries. We combine the resulting mass with whipped sour cream. Mix and spread on top of the biscuit. We send the cake for several hours in the refrigerator. Decorate with strawberries before serving.
We stir the flour into the beaten proteins in the same direction as we beat them so that the bubbles do not burst.
Do not open the oven door while the cake is baking, otherwise the cake will settle.
Soak the biscuit in syrup to keep it from drying out.
Chill the eggs well before beating them.
To make egg whites whip faster, add a pinch of salt to them.