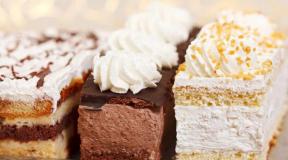
Sponge cake with cocoa recipe. Classic chocolate sponge cake at home
Alexandra 01/04/13
Luxurious cake, very elegantly decorated
Alyona
Alexandra, thanks for your feedback. Generally, the most beautiful and wholesome cake decorations are fresh fruit decorations.
Luda 06/08/13
I baked a chocolate sponge cake, we are already finishing it. The biscuit turned out to be tender, fragrant, rose well and evenly. I recommend it for cooking. I usually bake this biscuit without any problems for separately beating whites and yolks. Beat eggs and sugar at a good speed with a mixer for about 15 minutes until the mass increases several times. It turns out, too, an airy, tender biscuit for the cake.
Alyona
Luda, thank you very much for your comment.
lily 07/08/13
the recipe is really good, but why bother so much? if it is possible for a 26 cm mold. 3 eggs 200 gr. butter 200 sugar 1 bar of melted chocolate! vanilla. and baking powder. You can add liqueur. Beat butter or margarine with sugar. then beat in eggs one at a time at intervals of 3 minutes. when all is well beat, add chocolate. 150g sour cream. then flour 100 gr. vanilla baking powder. all this at the low speed of the mixer. that's all.
Alyona
lily, thanks for your chocolate sponge cake recipe. I'll have to try)))
Alexandra 08/10/13
the recipe is a little wrong, my biscuit rose by half and after 30 minutes, looked into the oven and it settled. Maybe you shouldn't beat whites with sugar? It turns out not a stable foam, but a frosting for cake
Alyona
Alexandra, if everything was done according to the recipe, then I see only one reason for the failure. Apparently, you greatly lowered the heating temperature of the oven, the chocolate sponge cake was slowly cooking, but after half an hour it was still too moist. Opening the oven dropped the temperature dramatically and the biscuit sat down. It is important to maintain the temperature and not open the oven at all for the first 20 minutes. And yet, the whites are whipped into the icing for the cake, if you put a lot of sugar ...
P.S. Especially today I baked biscuit cakes to make a recipe step by step, tomorrow I will post pictures.
Marina 02.11.13
I have long wanted to try baking a chocolate cake, namely a biscuit one, as I love the feeling of satiety from this kind of desserts. I liked the recipe, it looks like nothing too complicated, but it looks very appetizing. The only thing is that it does not fall off even after 30 minutes and is somehow scared to cut, will it work smoothly, will it not fall apart?
Alyona
Marina, after thirty minutes, be sure to try the biscuit for readiness (the usual way with a wooden toothpick). If the biscuit is baked, then it will no longer settle. Cut the biscuit after cooling completely, otherwise it will crumple when cutting. Usually baked in the evening, and cut the very next day.
Maria 02.11.13
Please tell me, what form should you put the paper in? in which the biscuit will be baked or in which the dough is being prepared?
Alyona
Good afternoon, Maria! The paper is usually placed in the bottom of a large rectangular baking sheet or dish in which the biscuit is going to be baked. Due to the presence of paper, it is easier to remove the cake from the mold. If the form is detachable, then this can be omitted. I have a detachable one with a special coating, I just pour the dough and put it in a hot oven.
Yana 12/16/13
I love to cook chocolate biscuits, but I have not tried it with such a filling yet, it is interesting to cook with prunes and whipped cream.
Elvira 12/18/13
Finally, I have found the optimal recipe for making a biscuit. And now it is clear why my biscuits do not turn out to be airy - I always looked into the oven! I will not do this anymore, although I always worry that the biscuit may not bake.
Inna 12/18/13
My biscuit has always turned out to be excellent, since I have been baking cakes all my life, so I think that chocolate biscuit will not disappoint). The sponge cake really needs to be baked only in a hot oven and it is advisable to close the door carefully during baking, such a dough requires caution). Chocolate cake will be in place, both on holidays and on weekdays, it will please no less).
Zukhra 01/12/14
I'm going to bake my mom's chocolate sponge cake for her anniversary, this is her favorite of all the cakes. But I would like to decorate it in some special way ... Maybe I should use coconut instead of chocolate to decorate the cake ...?
Alyona
Zuhra, the cake can be decorated with coconut, or you can come up with something more original. I always like decorations made from fresh fruit or candied fruits.
Valya 02/11/14
We have a tradition at work - to bring homemade cake for birthday. I’ll surprise my girls. True, I never tried to bake a chocolate sponge cake, but everything in the recipe is described in such detail that it will be difficult to make a mistake.
Nastya 02/12/14
I just adore chocolate, and if it's also a chocolate sponge cake, then you can't pull me off by the ears from such deliciousness)). I prepared it according to your recipe, it turned out the first time)), only instead of vanilla I added half a packet of vanilla sugar.
Alyona
Nastya, thanks for the tip)))
Ksenia 05/07/14
Thank you, the chocolate biscuit turned out to be just a supper!
Lilya 05/10/14
Hello! I was looking for a recipe for a chocolate biscuit for a long time, I liked only yours. I did everything strictly according to the recipe - it worked! Tall, handsome! I have already cooked twice !!! I know that the cocoa in the biscuit shrinks, but since the dough is kneaded slowly and for a short time, everything worked out! Thank you!!!
Alyona
And to you, Lilya, thank you for your kind words!
Tatiana 12/13/14
A very good recipe! The cake came out like a photo. First time biscuit turned out so good! The combination with prunes and cream is excellent. The whole family is delighted. Thanks!!!
Alyona
Tatiana, to your health!
Anya 01/11/15
I noticed that cocoa makes the dough a little heavier, and it does not rise as much as in a regular sponge cake. Therefore, I also add a teaspoon of baking powder or slaked soda to it at the tip of a knife.
Vika 01/18/15
Yesterday I baked such a biscuit cake, I'm bragging)). It seems to have turned out, at least left in one day, it's good that I managed to take a photo at first. I didn't have coconut flakes, I decorated it with walnuts. Not as beautiful as on the site, but for the first time, too, I think it's not bad)).
Alyona
Vika, your cake turned out to be gorgeous !!! Thanks for the review and for the photo)))
Inna 03/12/15
An excellent recipe, yesterday we tried to bake it, but instead of prunes, I added frozen cherries to the filling. It turned out - you just lick your fingers. I didn't know that you shouldn't open the oven when the biscuit is baking. Now it's clear why everything worked out so well yesterday.
Daria 11/30/18
Good afternoon, Alena! I have always loved and bought a biscuit in the store, and never thought that it is so hard to prepare and so fastidious in preparation! It turned out with grief in half, of course I have it! :) For some reason, when mixing dry mass with whipped yolks, lumps formed! But all the same, in the end it turned out very tasty! I am grateful to you and your site! thanks
Alyona
Daria, it's difficult to cook for the first time, but in fact, the biscuit just takes a little practice)))))))
I found this sponge cake with cocoa on a Polish site, it is also called an abandoned sponge cake. This name was given to him, because after baking it needs to be thrown down, but first things first. So, everyone has a biscuit! Therefore, conversations about what did not work out for me are not accepted. Please follow the recipe and you will succeed! And not any baking powder and starches. Thanks for the recipe Natalia M.
So, let's prepare the ingredients according to the list. All ingredients must be weighed on a scale, not by sight.
Separate the whites and yolks. Whisk the whites.

Whisk the whites for about 5 minutes. Add sugar in a spoon. The whites should be whipped up to these peaks.

Now, without ceasing to beat, add the eggs one at a time. Beat a little more and add flour. To do this, mix it with cocoa and sift everything into our mixture. Sprinkle everything in parts. I did it in 4 approaches.

At the same time, we mix everything with a spatula from top to bottom, folding as if the dough.

Let's prepare the form, I have it with a diameter of 24 cm. Cover the bottom of the form with baking paper. Do not lubricate the form with anything. Pour the mass. The oven must be turned on in advance. We set to bake at 170 degrees, for 40 minutes.

We check the biscuit with a toothpick, if it is dry then it is ready.

Now comes the fun part. Take the cake mold out of the oven and turn it over like this. Lift it 50 cm above the table and drop it down on the table. Yes, yes, let's just give up and no need to be afraid. I do it the 2nd time everything works out.

Then we also put it on the wire rack at once and let it cool in this form for 4-5 hours.

After 5 hours, I removed the form with a knife. This is how it turned out. Bon Appetit!

Another photo of a sponge cake with cocoa.
Today I have selected 4 best recipes for making fluffy, tall, soft and fragrant homemade biscuits at once - classic (vanilla), poppy, chocolate and very beautiful biscuit - "red velvet" (in the photo below - just a cake with such a biscuit).
Tell me, dear reader, how do you feel about biscuits? Good? How do they feel about you? If you have mutual love and agreement with this fastidious type of pastry baking in your kitchen, I can only be glad for you!
I didn't have a good relationship with him from the very beginning ... Sometimes there were successful attempts, but they were so rare that they are not worth mentioning ... Most often, instead of a tall, lush classic biscuit, I ended up with something obscure and unconvincing ... Of course, any failure can be abundantly saturated with delicious cream, decorated better, and the cake will be happily destroyed by hungry guests and households, simply because a homemade cake is ALWAYS tastier than a store one. Maybe no one will even notice your jambs, but the sediment will remain ...
But biscuit is the basis for delicious cakes and pastries, how can you cook them poorly?
Popular mistakes beginners make when making a homemade classic biscuit.
Having shoveled over a dozen recipes and videos from experienced housewives, whose lush biscuits are obtained "at the expense of times", I made several important conclusions - how to still cook a biscuit without mistakes. I will gladly share with you!
So the errors are:
- We cook from products of different temperatures - it turns out that it is important to "balance in temperature" all the products that will be used
- We do not follow the recipe - we take fewer eggs or put more flour, we take products "by eye", and do not weigh ...
- My typical mistake, as it turned out, is that I never sift flour! It turns out that this is very important for obtaining a fluffy biscuit - it is better to sift the flour not even once, but several times, so we saturate it with oxygen.
- Beating eggs together is a mistake, although I have seen such recipes. Still, according to the classics, you need to separate the whites from the yolks and beat them separately, with a clean whisk, without mixing
- Baking dish not prepared. I always cook the pan as it should be - grease the bottom and sides with oil, sprinkle it with a little flour, or line it with parchment for baking, so this mistake is not about me ...
- Oven temperature: error if you put a biscuit in an unheated oven. And a mistake if you open the oven door earlier than 20 minutes from the start of baking - the dough may settle and no longer rise!
With this in mind, we will proceed to our wonderful biscuits.
Classic biscuit with vanilla

Let's start, of course, with the classics. Anyone who wants to can make a lush, soft and fragrant classic biscuit of 4 eggs - it is important to do everything according to the recipe, following the sequence of steps in steps and measuring the components for the biscuit dough strictly according to the recipe.
- Flour 120 gr.
- Sugar 175 gr.
- Egg 4 pcs.
- Vanillin 1 sachet

- First of all, let's separate the yolks from the whites, I hope you know how to carry out this simple procedure. Break the egg with one blow so that the shell cracks almost to the middle. Over the bowl, carefully break the two halves and drain the protein, throwing the yolk from one half of the shell to the other. You can simply pour the entire egg (whole, make sure that the yolk does not spread!) Into a bowl and gently pick it up with a large spoon and put it in another dish.
- It is believed that the yolk should never get into a protein bowl, even in small quantities, otherwise, they say, the proteins will not beat into a strong foam ... I don't know for sure if this is true, but I always try to break eggs over a separate bowl, but not over the total, so that if something happens, not to spoil all the proteins at once ...

- As already mentioned, the flour must be sieved without fail, and even - several times. This will add extra pomp to our biscuit.

- Begin to beat the whites in a bowl at medium speed, gradually adding sugar in small portions. The whites are also whipped by hand, it just takes longer. And yet - it is advisable to take fresh eggs, and not old ones - they whip better.

- We stop whipping when a thick foam appears, so thick that if we turn the bowl upside down, our protein mass will not fall out anywhere, but it will remain in the bowl! They also say "beat until stable peaks." This, it must be understood, is such frozen cones that are formed on the beater, if you take it out of the bowl - our protein foam will still stand like a stake on this very beater. You can even bake meringues from such good foam!

- Now put the oven on preheat - about 180-190 degrees.
- In the whites with sugar, already whipped to the desired consistency, add 4 yolks - one at a time, continuing to beat.

- Now we will remove the whisk (or mixer) and arm ourselves with a spatula - with it we will gently and gently mix our mass, slowly adding flour and vanillin to it. Even in the photo you can see how airy we got the dough! This means that the biscuit will be lush and high, the main thing is not to "screw up" when baking.

- Lubricate the form and dust with flour, if required for this form. Her sides should be high - the sponge cake will greatly increase in height! If not high, cook in 2 parts on two different tins, but at the same time. Since this type of dough must be baked immediately after preparation, so that it does not settle.

- We put in the oven for 25-30 minutes at 185 degrees.

- Leave the hot sponge cake in the form until it cools completely. If necessary, cut a little on the sides with a sharp knife so that the biscuit is better separated from the walls.
- We did not use any leavening agents for the dough, and the dough rose by almost 5 cm - an excellent result! With such a height, the cake can be cut even into 3 parts, and not into two, as usual.
- But first, he needs to be allowed to settle. We wrap it in plastic and put it in the refrigerator for at least 12 hours.

Such, properly infused, biscuit will be easy to cut, almost meringue of crumbs. This is how it looks on a cut. Great result, right? 
Very effective and beautiful biscuit - "Red Velvet"

For this unusual cake, we will have to use food coloring. I don't really like this kind of additives, but I really liked the look of this biscuit - I've never seen anything like it! In my environment, too, no one ate such a cake, so those who like to surprise and like to treat with something original - it is quite possible to use this recipe. Moreover, I will show everything step by step, with a photo, as it should be 🙂

What products are needed:
- 110 g butter
- 110 g corn oil (you can do something else, the main thing is odorless)
- 340 g flour
- 10 gr. cocoa
- 350 gr. Sahara
- 2 eggs (100 gr.)
- 230 gr. milk or kefir
- 7 gr. baking powder
- Red food coloring - we select the amount by color, if the dye is in the form of a gel, then no more than 10 grams.
This type of biscuit has not only a bright unusual bright color (and looks very impressive in any cakes), but also a bright pleasant taste.
Step-by-step work plan:
- Cut the butter at room temperature into pieces and start mixing with the powdered sugar. To this we add another type of oil - refined vegetable (so that there is no smell), you can corn.

- 2. Beat until lightness. Due to the addition of vegetable oil, the mass turns out to be a little liquidish, but still butter will give the necessary splendor. We begin to add the eggs (beat them with a fork first) - pour in a thin stream into the bowl, continuing to beat.

- 3. Now mix all the dry ingredients and sift them through a sieve. Flour, baking powder and alkalized cocoa powder. This type of cocoa powder has a rich chocolate flavor. But if you have a different type of cocoa powder, just increase its volume by 10-15 grams, and, on the contrary, decrease the flour by the same amount.

- 4. Now is the time to put the oven on preheat - 150 degrees.

- 5. Now, continuing to beat the bulk, add milk and dry mixture with flour alternately. At the same stage, add the dye - if it is dry, you can dilute it in milk, or you can add it to the dry mixture.

- 6. In the photo - added a dye in the form of a gel. It also needs to be added "by eye", adding in parts and tracking the color of the dough, but not more than 10 grams of gel.

- 7. The color should be about the same saturation. The only thing, keep in mind that when baked in the oven, the color will become less saturated than in raw dough.

- 8. It is better not to bake this amount of dough in one form - it may bake poorly due to the peculiarities of the dough. It is best to distribute the entire volume into 3 molds (diameter 21 cm). But keep in mind that you will have to bake them at the same time so that the dough does not fall off. If this does not work out, for example, you only have one form, then it is better to knead each portion of the dough again before baking.
- 9. We put to bake for about 30-35 minutes at a temperature of 150 degrees. It is easy to check the readiness of the biscuit with a dry wooden stick (or a match) - if we pierce

10. We have 3 fluffy cakes - cut each in half and get 6 cakes. We will use one of them for sprinkling, so we will break it into pieces and send it to dry additionally in the oven at 110 degrees for an hour.

11. Any buttercream goes well with this biscuit. Such a beauty can be made -

Lush and fragrant sponge cake with poppy seeds

Poppy seed cake has many cooking options. Sometimes it can turn out to be a little "heavy" ... But this recipe for biscuit with poppy seeds is selected so that its structure is very tender and soft, at the same time - it is quite saturated with poppy seeds, which always gives the dough a unique taste and aroma. For this, in fact, he is so loved by many.
I also adore poppy seeds, since childhood, when my mother was preparing a chic poppy roll for the holidays. And poppy, by the way, we then grew ourselves in the garden, and it was very large, incredibly tasty in any pastry!
But I digress, let's continue. For this recipe for biscuit with poppy seeds, we need the following
products:
- 90 gr. flour
- 50 gr. dry poppy
- 120 g Sahara
- 4 eggs (200 gr.)
- 20 gr. milk
- 2 gr. baking powder
- 20 gr. corn oil
- 30 gr. corn starch

- First, grind the poppy seeds in a blender so that it fully reveals its aroma and taste in baked goods. Many people advise to rinse the poppy well in cold water and dry it completely before adding it to the biscuit dough (if the poppy is wet, the biscuit may not rise). But I usually remember these recommendations when I am "in the process" and therefore almost always just grab a poppy from the package.

- Sift the flour several times through a sieve and mix with crushed poppy seeds.

- Do not forget to turn on the oven in advance for heating to 160 degrees

- Eggs should be at room temperature - this makes them easier to beat. Begin to beat at medium speed and add another pinch of salt.

- Continuing to beat, add sugar in small portions. When half of the sugar has already been added, increase the whipping speed and add the remaining sugar in one portion. Beat until our egg mass becomes airy and almost triples in volume.

- Add a mixture of flour and poppy to the densely beaten egg mass in two or three doses. But we are already stirring everything very carefully, with a spatula, in manual mode, so as not to disturb the splendor and airiness of the mass and, ultimately, to get an airy dough and a fluffy biscuit.

- Mix the milk with vegetable oil and add to the dough. Also, gently mix with a spatula from the bottom up.

- We shift the dough into a tall form, level the surface. You can additionally twist the mold slightly to fill it tighter and more evenly.

We bake for 35-40 minutes at a temperature of 160 degrees. Check the readiness with a wooden skewer - if dry, the biscuit is ready. Turn the form over and leave to cool in this form. Look at how beautiful, tall and soft the biscuit is. The height of this cake is 6.5 cm. If you don't coat it right away, then you need to wrap the biscuit in a film and put it in the refrigerator. 
Chocolate sponge cake with natural chocolate
The biscuit according to this recipe turns out to be "very chocolate", fantastically tasty! To be honest, it was a surprise for me that you can add not ordinary cocoa powder to the dough for the chocolate crust, but real chocolate from the melted chocolate bar. Apparently, this explains such a distinct taste of chocolate. Probably, for everyone's beloved legendary cake "Prague" just such a biscuit will give the best result.
For a chocolate biscuit, take:
- 100 g flour
- 100 g butter
- 100 g Sahara
- 4 eggs
- 100 g chocolate (better bitter, high in cocoa)
- 20 gr. vanilla sugar
- 10 gr. baking powder

Step-by-step recipe for chocolate biscuit
- First things first, put the oven on preheat - 180 degrees.
 2. Sift flour together with baking powder.

3. Mix butter at room temperature with vanilla sugar until smooth. 
4. Separate the yolks from the proteins. 
5. Break a bar of chocolate into pieces and place in a container over boiling water - in a water bath. Then we cool the chocolate to about 28 degrees (when the mass is still liquid) and add to the butter. We knead. 
6. Add the yolks one by one to the chocolate mass, constantly mixing thoroughly. 
7. Whisk the whites until persistent "peaks", into a thick, dense foam. 
8. Combine flour and chocolate mass in several stages, stirring thoroughly each time. 
9. Add protein mass - in parts, constantly stirring the dough. The dough is airy. 
10. Immediately lay out in the prepared form, align. For some reason I often come across questions (more precisely, requests) “how to make a high chocolate biscuit with a diameter of 28 cm so that it is not flat”. 28 cm is a very large diameter of the mold, for such a dough you need to take a lot of eggs and other ingredients and there is a high probability that the dough will not rise ... There are two options here. The first one is to make 2 or 4 short cakes, each time making a new kneading dough just before baking (i.e., a biscuit dough containing a lot of liquid can give a sediment to the bottom layer and therefore will not bake well in a large volume). The second option is to bake single-layer rectangular biscuit cakes on a sheet (4 pieces), and then cut them with a cutter knife into a shape with a diameter of 28 cm. You can already assemble a tall chocolate cake of large diameter from them. 
11. We send to the oven for 30 minutes at 180 degrees. 
12. Here we have such a chocolate "handsome biscuit"! 
And how fragrant it is, it smells magically of chocolate, probably this is the smell that reigns at Willy Wonka's chocolate factory 🙂

Recipes for making cakes at home with a photo
chocolate sponge cake
50 minutes
280 kcal
5 /5 (2 )
Chocolate sponge cake with a delicate layer of airy butter cream is always a welcome delicacy for those who are gathered at the festive table. I remember that as a child I just dreamed of a piece of this, but my grandmother baked it only for the New Year, since the ingredients used were considered in short supply then. Today, in every refrigerator you can find everything you need.
Despite this, few people who are new to cooking take up making such a cake, because it is believed that it is quite complicated. But in vain! Today I will present you with a simple family recipe for a chocolate sponge cake: you will learn in detail how to make the perfect dough for a delicious crust, as well as a delicious cream that keeps its shape perfectly.
Kitchen tools
In order to speed up the preparation of the cake and get an excellent result, it is very important to prepare ahead of time the kitchen utensils and utensils that you will need in the process:
- a round cake mold (preferably with a non-stick coating) with a diameter of 23 cm;
- three to four roomy bowls with a volume of 300 ml;
- a small saucepan;
- medium sieve;
- several teaspoons and tablespoons;
- cotton towels;
- metal whisk;
- long knife;
- cutting board.
In addition, you will definitely need a mixer or food processor with a special attachment to quickly mix the dough and cream ingredients.
Ingredients
Biscuit
Cream
Impregnation

How to choose the right ingredients
Newbies may find the following information helpful in choosing the right products for their chocolate sponge cake.
- Be sure to buy cream with a fat content of at least 35%, otherwise the cream may not thicken and leak during the proofing of the cake.
- It is allowed to use boiled condensed milk, but it is better to cook it yourself by boiling a jar in boiling water for about an hour.
- Chocolate can be either bitter or milky - it all depends on your personal preference. At the same time, do not take chocolate with extraneous fillers: nuts, raisins or dried apricots.
- Instead of rum, you can choose another alcohol: liqueur or cognac. However, in no case use vodka or beer: these products will give the cakes an unpleasant taste.
Cooking sequence
Biscuit

Impregnation

Cream

Assembling the cake

How to decorate a biscuit cake
This treat is great, first of all, because you can decorate it after proofing, before serving. For those who do not want to "bother" too much with decorations, I offer my own recipe for an excellent glaze.
Ingredients
- 250 g of chocolate;
- 250 ml cream.
Preparation

Chocolate sponge cake: recipe video
The video below shows the complete process of making a delicious and beautiful buttercream cake.
Simple Chocolate Sponge Cake - Granny Emma's Recipe
Buy books by Grandma Emma → https://www.videoculinary.ru/shop/
Subscribe to Granny Emma's Recipes channel → https://www.youtube.com/user/videoculinary?sub_confirmation=1
How to Make Simple Chocolate Sponge Cake - recipe and tips from Granny Emma. Sponge cakes are very delicate and delicious. Sponge cake is always a welcome dessert. Here's a recipe for a Simple Sponge Chocolate Cake. Granny Emma shares her Simple Chocolate Sponge Cake Video Recipe - see a detailed step-by-step recipe and ask questions → https://www.videoculinary.ru/recipe/retsept-prostoj-biskvitnyj-tort/
—————————————————————————————
Ingredients:
Biscuit:
Flour - 180 grams
Cocoa powder - 40 grams
Butter - 70 grams
Eggs - 4 pieces
Yolks - 4 pieces
Sugar - 220 grams
Salt - a pinch
Vanilla sugar - 2 teaspoons
Chocolate cream:
Cream, at least 35% fat - 500 milliliters
Condensed milk - 200 grams
Cocoa powder - 30 grams
Chocolate glaze:
Chocolate - 250 grams
Cream - 250 milliliters
Blotting syrup:
Sugar - 100 grams
Water - 100 milliliters
Rum - 20 milliliters
—————————————————————————————
website → https://www.videoculinary.ru
—————————————————————————————
In many of our video recipes, we use music by composer Daniil Burstein
————————————————————————————
Video cooking in the social. networks:
instagram → https://www.instagram.com/videoculinary.ru
facebook → https://www.facebook.com/videoculinary.ru
vk → https://vk.com/clubvideoculinary
ok → https://ok.ru/videoculinary
pinterest → https://ru.pinterest.com/videoculinaryru/
twitter → https://twitter.com/videoculinaryru
youtube → https://www.youtube.com/user/videoculinary
—————————————————————————————
Our recipes in English:
website → http://videoculinary.com/
youtube → https://www.youtube.com/user/videoculinarycom
https://i.ytimg.com/vi/O7sIKoG5u0Q/sddefault.jpg
2015-08-03T09: 52: 15.000Z
How you can diversify the standard recipe
If you wish, you can add some additional components to the dough and cream that improve the taste and aroma of the finished cake.
- Lemon essence or juice can be added to the biscuit - this will appeal to those who do not tolerate vanillin and its aftertaste.
- The dough can be varied with ground nuts, such as walnuts or almonds. However, try to fire them in a skillet before chopping.
- It is not at all necessary to dwell on this type of filler, you can always use any other.
- What else can you soak a biscuit cake with to make it juicy? In addition to sugar impregnation, you can use sweet syrups (cherry, raspberry), as well as regular coffee without sugar.
- Mix the flour into the dough gently using a spatula. Under no circumstances use a mixer for this purpose: the dough will settle strongly and the cake will turn out to be less fluffy.
- For those who cannot devote enough time to making a treat, a quick and easy recipe is offered.
- The cream must be very cold and only remove from the refrigerator when you are going to use it.
- Many people ask themselves the question: how to bake cakes for a biscuit cake so that they do not burn in a particular oven? The readiness of the crust can be easily checked with a wooden skewer or a toothpick: pierce the baking dough with it and immediately pull it out. If the stick remains dry, then the dough is baked and the biscuit can be removed from the oven.
- Experiment more often in the kitchen - this is the only way you can gain the culinary experience necessary for making complex cakes. For example, grab an inimitably delicious recipe that will suit even beginners. Also, bake the most beautiful one that is perfect for a children's party.
Chocolate sponge cake is a superb treat loved by both adults and children. Maybe one of the readers knows how to improve the proposed recipe for the treat, or is constantly using other components to prepare it? Share your findings in the comments, let's discuss a sponge cake inside and out! Bon appetit and always successful culinary experiments!
Wet chocolate sponge cake - deliciously delicious. Confectionery cakes do not need additional impregnation. Syrup impregnation is needed only if the culinary author himself wishes it. What is required for baking, and what nuances should you remember?
Classic chocolate biscuit
The classic chocolate sponge cake is characterized by a delicate, moist and not at all greasy structure. The cakes can be coated with chocolate cream, covered with icing, and then a "full-fledged" and incredibly tasty cake will come out of this pastry.
Prepare the following ingredients for baking:
- 150 g wheat flour;
- a glass of sugar;
- vanilla and salt to taste;
- a teaspoon of baking powder;
- 3 tablespoons of cocoa;
- egg;
- 200 ml of milk;
- a couple of tablespoons of melted butter;
- dark chocolate bar;
- 150 ml heavy cream;
- fruit and icing sugar to taste.
The dough prepares very quickly. Turn on the oven to warm it up before cooking. Sift flour and cocoa through a fine sieve. We mix the ingredients together, adding a teaspoon of baking powder, as well as salt and vanilla to taste. Add milk, butter, sugar and eggs to the dry ingredients. Beat the mass well with a blender.
We coat the mold with butter, and pour out the chocolate dough. We bake for 25 minutes at 180 degrees Celsius. While the cakes are preparing, we start cooking.
Break a bar of dark chocolate into small pieces and put in a water bath. When the chocolate melts and the mass becomes homogeneous, pour out the cream. We remove the ganache from the heat. We take the cake out of the oven and let it cool. Cover the cake with ganache and decorate the sponge cake with fresh fruit. We put the confection in the refrigerator for a couple of hours, and then we enjoy the exquisite taste. Bon Appetit!
Simple and delicious cocoa recipe
As a result of cooking, you will get a moist biscuit, which will have a good height. Often, these biscuits are used to create a multi-layered cake. To make a wet biscuit, prepare the following ingredients:
- 50 gr. milk fat;
- 50 gr. fat milk;
- 50 grams of cocoa;
- 3 pieces of chicken eggs;
- 100 g Sahara;
- 100 g flour;
- vanilla extract to taste.
Melt the butter on. Beat eggs with sugar until a stable foam forms. We also introduce flour here, and continue to beat at high speed. Into the white mass, add cocoa powder sifted through a sieve and vanilla extract. Remove the melted butter from the water bath. Pour the milk into a saucepan and bring to a boil. Hot milk, along with butter, are added to the chocolate dough. We mix. We bake the biscuit for 25 minutes at a temperature of 180 degrees Celsius.
Wet sponge cake in a multicooker with chocolate
Baking wet sponge cake with chocolate chips is a piece of cake. And if a multicooker comes to the rescue of the hostess, then this action will turn into real magic. Baking in a multicooker comes out incredibly lush and juicy. And for the preparation of a confectionery, the following ingredients should be prepared:
- 6 chicken eggs;
- a glass of sugar;
- a glass of flour;
- 40 grams of cocoa;
- 3 tablespoons of vegetable fat
- vanilla to taste;
- chocolate chips - 100 grams.
Beat chicken eggs with sugar. Sift dry ingredients through a fine sieve and add to the mass. Beat with a mixer. Continuing to beat, add vegetable fat and vanilla. Turn off the mixer. We introduce chocolate chips. Mix the mass. Grease the multicooker form with vegetable oil, pour out the dough and bake in the "Baking" mode for about 1 hour.
Wet cake layers
Planning to make a cake? Then keep the perfect wet cake recipe. To prepare the pastry, prepare the following ingredients:
- 350 grams of wheat flour;
- 4 tablespoons of cocoa;
- a tablespoon of lemon juice;
- a glass of sugar;
- a teaspoon of baking soda;
- 5 tablespoons of vegetable fat
- 200 grams of water;
- salt and vanilla to taste;
- a teaspoon of instant coffee.
Flour, salt, baking soda, vanilla, cocoa powder - mix in a dry bowl. Pour vegetable fat with sugar into another bowl, add instant coffee, lemon juice and water. Beat "wet" products with a mixer until a homogeneous consistency is formed.
Continuing to beat the mass, add dry ingredients into it. Pour the resulting dough into a mold greased with butter, put in the oven and bake at 180 degrees for about 30 minutes. Bon Appetit.
Wet sponge cake on boiling water
Wet chocolate sponge cake has a porous structure. However, this is not the main thing, its dignity. For baking, you will need the following ingredients:
- a couple of eggs;
- 2 cups sugar;
- 2 cups of flour;
- 1 glass of milk;
- 120 grams of vegetable or butter;
- 6 tablespoons of cocoa;
- a glass of boiling water;
- 1.5 teaspoons of baking soda and the same amount of baking powder.
Mix flour, sugar, soda, baking powder and cocoa. Drive the eggs into a dry bowl and beat a little with a broom. We introduce milk and the required amount of vegetable oil. We turn on the mixer and begin to beat the mass, gradually introducing the dry ingredients prepared earlier into it. When the mass becomes homogeneous, add a glass of boiling water. Pour the dough into a dry form, and set to bake at 180 degrees Celsius for 40 minutes.
How to make a wet kefir sponge cake?
The amount of ingredients below will make 8 pieces of pie. To saturate the taste of the confection, you can cover with ganache (see recipe above).
Ingredients:
- a glass of kefir;
- 150 grams of flour;
- a teaspoon of baking powder;
- 50 grams of vegetable oil;
- 50 grams of cocoa;
- 150 grams of sugar;
- vanilla to taste.
Pour kefir, sugar and vegetable oil into a bowl. Beat until sugar is completely dissolved. Flour, baking powder and cocoa - pass through a sieve. We introduce into the kefir mass, beat with a mixer, and add the required amount of vanilla extract. We bake for 25 minutes at 180 degrees Celsius.
Secrets of making chiffon biscuit
Very delicate and very porous - this is how a chiffon biscuit can be characterized. To prepare a confectionery product, you should prepare:
- a glass of flour;
- a couple of teaspoons of baking powder;
- a teaspoon of baking soda;
- a glass of sugar;
- 60 grams of cocoa;
- 5 yolks;
- a teaspoon of coffee;
- 170 ml of water;
- 170 grams of vegetable oil;
- 8 proteins + 50 grams of sugar for whipping.
Pour coffee with a glass of water, and let the drink cool down. Mix dry ingredients in one bowl. Beat the yolks with a mixer, along with butter and a mixture of cocoa and coffee. Beat the mass well. Here we also introduce the mixture prepared earlier with dry ingredients. Beat with a mixer.
Beat the whites with sugar or powdered sugar until a stable foam is formed. We introduce the protein mass into the chocolate dough, gently stirring it with a spoon. Pour the biscuit mass into a mold, and bake at a temperature of 160 degrees Celsius for about 50 minutes.
Wet biscuit is quite easy to prepare. And in order not to overdry the cakes, we advise you to get acquainted with some recommendations from the pastry chefs.
- Add a teaspoon of starch to the dough to prevent the baked goods from deflating after baking.
- Cover the baking dish with foil. Thus, the necessary moisture will remain in the cake.
- You can check the readiness of the cake with a toothpick.
- To easily remove the cake from the mold, place it on a damp towel.
Wet biscuit - ideal with hot chocolate, tea, coffee and soft drinks. This is the perfect treat for the guests of the house!
Read also ...
- Chicken liver pate
- Delicious zucchini with cheese in sour cream in the oven - a step by step recipe with video Zucchini recipes in the oven with sour cream
- Banana rice and corn flour pancakes (gluten free) with homemade banana sauce Banana pancakes with semolina
- Cabbage casserole with chicken Chicken fillet casserole with cabbage

