Drying dill in the oven. How to dry greens in the microwave
There are several ways to dry dill. It can be pre-chopped or left in whole branches. If all the recommendations of the selected option were followed, the spice will retain its healing properties and pleasant aroma... Dry herbs can be used to season various dishes. Others important point is compliance with the rules for storing dried spices.
Dill is considered the most popular spicy crop used by housewives in the cooking process. varied dishes... It contains many nutrients.
The disadvantages include the duration of the drying procedure and careful preparatory stage... Each method requires compliance with certain conditions.

How to prepare dill for drying
Preparatory work for the preparation of greens for storage includes compliance with some rules:
- If you intend to use the crop from your garden, then young bushes that have not yet formed umbrellas with inflorescences are best suited for drying. The collection of greens falls on the end of June.
- It is recommended to collect greens in an early, dry morning, before dew falls, or in the evening. During these periods of time, the air humidity is lowest and there is no active sun rays.
- Bushes are pulled out of the ground along with the roots, immediately removing the roots and damaged leaves.
- For drying, it is better to select elastic, undamaged branches, with evenly in green and a characteristic dill smell, as well as without spots and signs of decay.
The collected or purchased bunch of greens must be rinsed under the running cold water... To disinfect, the twigs can be dipped in a solution with soda for several hours. Then the spicy leaves are spread on clean paper to dry completely. It is advisable to dry large branches and inflorescences separately, as they have the greatest aroma.
In what form to dry dill
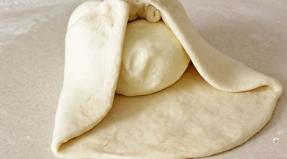
It is best to initially dry the greens with whole branches, and then chop them. With this method, the spice will preserve essential oils for a long time, so the aroma will be strong.
If it was decided to pre-grind the greens, then do not cut them too finely. You can grind dried herbs before adding to the dish, rubbing between your fingers.
Drying chopped dill
Before proceeding with the drying procedure, you need to select right placeprotected from sunlight. The room should be well ventilated. Lined with paper on a flat surface. The entire harvested crop is finely chopped and distributed in the prepared area.

Drying dill with twigs
The method of drying with whole branches takes less time and effort. The harvested crop is distributed on a flat surface. If the weather is dry, you can leave the grass to dry in the sun.
As soon as the plucked greens have dried well, the branches are cut off and placed in containers prepared for storage. With this method of drying, the essential components are preserved longer.
How much to dry dill
If you do not dry or overexpose the dill leaves, then they can lose all their beneficial properties and quickly rot. In clear, dry weather, it is sufficient to dry for 2 hours. If the weather is cloudy, then the time increases to 3.5 hours.

The duration of the procedure is also influenced by the amount of harvest prepared for storage. The thicker the layer on the surface, the longer the grass will dry.
If you intend to dry greens at home, then the time of the procedure depends on the chosen method. For example, drying in the microwave will take a maximum of 5-6 minutes, and in the oven for about three hours.
The main ways to dry dill at home
You can dry prepared and processed greens different ways... Previously, it is crushed or left in whole branches. If all the rules are followed, then the spice will retain its taste and healing qualities for a long time.
Drying in the fresh air
Dill twigs are tied together, creating small bunches. After that, they are suspended with the roots upwards, protecting them from exposure to sunlight. In this case, fresh air must freely flow to the spice.

Finely chopped dill can also be dried on open air... To do this, spread the greens in one layer on a flat surface and cover with gauze to prevent contamination.
How to dry dill in the oven
You can also dry spicy herbs in the oven, only the air temperature should not exceed 42 degrees, otherwise all essential oils will evaporate:
- Too hot air destroys the useful properties of the product and changes the appearance of the workpiece.
- Put paper on the bottom of the baking sheet and distribute the dill sprigs in one layer, you can decompose the chopped greens.
- Do not close the oven door tightly, you need to ensure the flow of air.
The drying procedure takes about 3.5 hours. During this time, every 25 minutes you need to pull out the baking sheet and transfer the greens.

Dry greens in an electric dryer
Easy and quick to prepare herbs for long storage you can use an electric dryer. The trays of the device are filled with spicy grass and a mode is set where the temperature does not exceed 38 degrees. The procedure lasts an average of 40 minutes.
Drying dill in the refrigerator
The collected greens are laid out on a flat surface, covered with a napkin and placed in the refrigerator for 16 days, where it is warmest. During this period of time, all moisture from the greenery will evaporate. Ready dried spice transferred to containers and removed to a dark place.
How to dry greens in the microwave
Lay out a napkin on a plate with a flat bottom, distribute the herb and cover with another layer of napkin. Then the product is placed in the microwave. After 2.5 minutes, check the greens for readiness. If necessary, you can return the herb to the microwave for a couple more minutes.
How to dry dill for the winter so that it does not turn yellow
If the drying procedure spicy herbs was carried out incorrectly, then the appearance of the greenery changes, and it becomes covered with yellow spots. Common cause of change appearance becomes too heat during drying.

To prevent the dill leaves from drying out in any chosen method, they should be covered with a light cloth or paper.
Dill is a popular spice widely used in European and scandinavian cuisine... This plant has a pleasant aroma and spicy taste... Many housewives prefer to always have such a delicious and medicinal herb... Drying is one of the popular ways to prepare greens for the winter. Although drying dill does not require any special skills, there are some nuances that need to be considered. How to dry dill at home?

Training
Drying success depends entirely on correct preparation raw materials. If you are cutting greens in your garden, water them 24 hours before harvesting. The next day required amount Pull the herbs by the roots and sort out. Remove any yellowed, withered or damaged twigs, excess debris and foreign plants. Cut the roots off and discard. Rinse the remaining stems thoroughly in cold water... Shake off excess water, spread on paper towels and dry for 3-5 minutes.
Now you need to decide in what form you will dry the dill: in bunches or finely chopped. Based on this, prepare the greens and start drying.
Naturally
Air drying is the most gentle and effective methodsince it retains most of essential oils, macro- and microelements contained in fragrant grass... To dry the bunches of dill properly, group them into 5-10 branches and tie the bottom with thread or elastic. Hang the bundles with the leaves facing down in a dry, well-ventilated place and leave for 2 weeks. Large bundles of dill, consisting of stalks, can be hung from a rope. After the greens are dry, transfer them to an airtight container and store them.
Air drying is the most gentle and effective way, as it retains most of the essential oils, macro- and microelements contained in the fragrant herb
Drying the chopped dill begins with site preparation. Line a flat surface in a shady, ventilated area with wrapping paper, parchment, or cloth. If you do not want to harm your health, do not use newspapers as a substrate. Dried twigs can become saturated with toxic ink.
Arrange the herbs in the prepared area. Make sure that the layer thickness does not exceed 3-4 cm. Do not place the dill in the sun under any circumstances. Otherwise, the dried spice will lose its essential oils and beneficial properties. Under favorable conditions, the drying time for shredded plants ranges from 3 to 5 days. Transfer the dried seasoning to an opaque zip-lock bag and store in a cupboard.
In the oven
Another way to prepare dill at home is to dry it in an oven or electric dryer. However, keep in mind: any greenery does not tolerate heat well. Therefore, do not heat the oven above + 45 ° C.
Line a tray or baking sheet with parchment paper, spread the spice evenly over it and send to dry. To prevent excess moisture from interfering with drying, leave the oven door ajar. Stir the workpieces periodically to dry evenly. After 2-3 hours, turn off the stove, remove the dried grass and let it cool down at room temperature.
In the microwave
Small amounts of greens can be conveniently dried in the microwave. Line the bottom of the plate with paper towels. Spread the prepared dill evenly over the dish. Cover with another towel and place in the oven. Turn on maximum power and dry the grass for about 3-4 minutes. After the indicated time, remove the plate and check the readiness of the herbs. If necessary, let it come within 2 minutes.
It is worth noting that even well-dried dill will be less aromatic than fresh dill. Therefore, if you want to preserve all the beneficial properties of the plant, its smell and taste, use another method of storage at home - freezing. However, you should not completely abandon drying greens for the winter. Indeed, for some dishes and decoctions, it is dry herbs that are needed.
- one of the most popular herbs in cooking, characterized by a rich aroma and a high content of vitamins, minerals and essential oils. The fragrant spice is used in many recipes - add it to meat dishes, fish, soups, salads. The golden time of greenery is summer. But if you take care in advance, you can use your favorite seasoning all year round.
Drying dill: pros and cons
There are two ways to harvest dill for the winter: dry or freeze. Freezing greens has its advantages in keeping them attractive and spicy taste... Frozen plants can be added to salads and first courses.
Dried dill saves much more useful vitamins, micro and macro elements, as well as essential oils, compared to frozen and even fresh.
Dill contains useful substances:
- potassium;
- calcium;
- iron;
- manganese;
- copper;
- phosphorus;
- magnesium;
- sodium;
- beta carotene;
- vitamin E;
- vitamin C.
To preserve the maximum aroma and increase the beneficial properties of dill, it is preferable to dry it. Properly dried dill, in contrast to frozen, is stored for several years, without losing its tart smell. For freezing, herbs are better suited where taste is valuable than aroma: parsley, fennel, celery, spinach.
Preparing dill for drying
 It is best to dry a young plant harvested before the umbrellas appear. At this time, the dill has not yet coarsened and has not lost its juiciness. However, umbrellas can be dried for use in marinades and pickles.
Dried and seeds, the use of which is widespread in folk medicine... The content of vitamins and microelements in them is not less than in the plant itself.
It is recommended to pick herbs in the morning, in good weather. The twigs for drying should not be too wet, otherwise they will quickly begin to rot and deteriorate before the end of the drying process itself. If the dill was not grown independently, but was bought on the market, then you should pay attention to the fact that all the branches are bright green.
Besides, herbs should not wither. When choosing a bundle, pay special attention to the place where it is tied. Usually there, due to damage to the integrity of the stem, premature rotting begins.
So, a few main rules when choosing dill for drying:
- twigs - fresh and firm;
- the plant has a uniform green color and a specific dill smell;
- dill intended for drying should not undergo a decay process.
When the beam is selected, proceed directly to the preparation:
- First of all, the greens must be washed. This must be done in a container, not under running water.
- If the dill is purchased and there are doubts about its environmental friendliness, then the twigs can be briefly placed in salted water.
- Then, wet greens must be thoroughly dried with a paper or waffle towel. Moisture should be removed carefully, otherwise it will not be possible to achieve the required dryness of the final product.
Each branch must be carefully examined and sorted out, yellowish and fading leaves must be removed.
Algorithm of preparation for high-quality drying of greens:
- rinse the bundle;
- dry the herbs thoroughly;
- sort out the branches, remove damaged leaves.
How to dry the dill?
You can dry it whole or shredded. If chopped dill is dried, then the stems must be separated from the leaves, they dry longer.
There are several ways to dry dill:
- vertical and horizontal natural;
- in the oven;
- in the microwave;
- in an electric dryer;
- in the fridge.
How to grow more crops?
Any gardener and summer resident is pleased to receive a large harvest with large fruits. Unfortunately, it is not always possible to get the desired result.
Plants often lack nutrition and minerals
It has the following properties:
- Allows increase yield by 50% in just a few weeks of use.
- You can get a good harvest even on low fertile soils and in adverse climatic conditions
- Absolutely safe
How to dry dill at home?
Dill is dried vertically and horizontally. Grass is dried vertically in bunches. To dry the greens in bunches, you need to collect the prepared dill in 5-7 branches and tie it carefully so as not to damage the stems. The finished bundles should be hung in a well-ventilated area at a distance of 7-10 centimeters from each other.
Vertical drying usually occurs naturally. An attic or attic is perfect for her. You can also hang bunches of herbs on a ventilated veranda. But we must carefully monitor that they bright sun rays did not fallas this negatively affects the retention of essential oils in the herbs.
Dry naturally
Dill can be naturally dried horizontally. To do this, the twigs are laid out in a thin layer on paper away from sunlight. Horizontal drying is also suitable for chopped greens. When drying horizontally, the main thing is to carefully monitor the herbs so that they do not start to rot or rot.
Greens must be turned over if whole branches are dried, or mixed if dill is dried in an already chopped form.
Natural drying takes about 2-3 days. It is important to keep track of this process, otherwise overdried dill will lose its beneficial properties. How much greens will dry is influenced by the humidity of the air and the illumination of the place.
Drying dill with household appliances
You can speed up the process with household appliances.
|
In the oven
|
The most popular way. To dry the dill in the oven, spread it out in a thin layer on a baking sheet and place in a heated up to 30 ° Coven. When the herbs are slightly dry, the temperature can be raised up to 50 ° C... The main thing is that the branches do not come into contact with the metal, otherwise the greens will darken and lose a large number of microelements. During drying, the door oven should be slightly open to create air circulation inside. Oven drying process takes about 3 hours. At this time, it is important to periodically stir or turn the greens so that the process runs evenly. |
|
In an electric dryer |
An excellent solution for harvesting dried herbs can be electric dryer (dehydrator). Put the prepared herbs in a thin layer on the wire rack for drying and select the temperature 40 ° C... If there is a "Herbs" mode, then the process becomes easier. Such drying will take about 3 hours. |
|
In the microwave
|
The prepared twigs are laid out in a thin layer on a paper or regular plate and covered with a napkin. After that, the herbs are placed in the microwave and dried. 3 minutes at maximum power. After that, the twigs or chopped dill are carefully inspected and mixed, then sent to dry for 3-5 minutes. |
|
In the fridge
|
Refrigerator drying is one of the easiest, but long ways dry the dill. Shredded greens or dill sprigs are laid out in a loose layer on a plate or pallet, covered paper napkin.
Then placed on the top shelf of the refrigerator for 2-3 weeks... Remember to occasionally inspect and turn the greens, and change your napkin. |


How to dry dill so that it does not turn yellow?
When drying, such a problem may arise: the leaves will turn yellow and lose their attractive appearance. In addition, yellowed greens no longer possess such big amount vitamins and oils.
This problem can occur for several reasons:
- When natural drying its cause is most often overdrying of greens. To avoid yellowness, you just need to control the drying process and remove the dill for storage in time.
- When drying in the oven or microwave yellowness is the effect of too high temperatures. In this case, it is important not to overheat the oven, and also stir the herbs thoroughly during the drying process.
- To prevent the twigs from turning yellow in the microwavedo not forget to cover them with a napkin during the entire process.
How to store dried dill properly?
Many housewives face the question: how to determine the readiness of dried dill?
Focus on these characteristics:
- High-quality dried dill is easily rubbed between the fingers, but it does not turn into dust at all. It just leaves small particles.
- If the dill crumbles into dust, then it is dry. But the twigs, which have already become quite fragile, but do not crumble, need to be dried.
After drying, they are stored in a cool, dark place. It is important to protect spices from heat, moisture and bright light... And the sealed lids will retain a pleasant scent.
Suitable for storing dried dill:
- sealed glass or porcelain jars;
- tin boxes;
- linen bags;
- paper bags.
It is better to put greens in transparent containers in a kitchen cabinet. The opaque container is left on open shelves, just do not place dried herbs over the hob. It will dry out from the heat.
Summarizing
So, we looked at the basic methods on how to dry dill. This can be done naturally or using household appliances: in the oven, electric dryer, microwave and refrigerator. Total, it turned out 5 effective waysthat will keep the spicy greens for the winter.
Dill is one of the most popular spicy plants, is widely used in the preparation of various dishes. Many chefs prepare spices grown in summer for the winter, but not everyone knows how to dry dill correctly, how to preserve the color, smell and beneficial properties of the healing and tasty herb. This article will show you how to dry this spice at home.
Preparing dill for drying
In order to dry the dill, you need to prepare it. For this:
- We collect young plants that have not yet had umbrellas with seeds, usually at the beginning of summer.
- The dill must be dry, so we harvest it in the morning, but after the dew has dried. It is better to wash purchased plants with running water and dry thoroughly with waffle or paper towel, or put in a draft to evaporate moisture.
- We sort out the collected spice, remove the grass and yellowed twigs or stalks of dill, cut off the roots at the very stem if the plant pulled out with them.
If the dill is watered abundantly a day before harvesting, then it will be easier to pull it out by the root and it will better retain its properties.
In what form are greens dried
Housewives usually try to dry chopped dill. But to preserve the essential oils of the plant, it is better to do it with twigs, which are separated from the stems and threshed in an already dried form. The preserved oils will make the spice even more aromatic. You can grind dried herbs before cooking by simply rubbing them with your fingers.

Basic drying methods
Outdoors
You can dry dill at home in a place that is well ventilated, but where the direct rays of the sun do not fall, the greens turn yellow from them. In addition, when dried in the sun, the content of vitamin A rises in the stems and leaves, but all the rest disappear. Plants are tied in bunches, in which there are about 6 branches. Greenery brooms are placed down with leaves, tied to any canopy bar.

- Dried twigs can be chopped by rubbing through a sieve.
- Chopped greens are dried in the shade, spread out on a tray in a thin layer. To prevent the workpiece from becoming covered with dust, it is covered with one layer of gauze.
- You can spread the spice on parchment, covering it on top with another piece of paper.
- Dill is dried for several days. To keep it green, it must be regularly mixed and controlled so that it does not get wet. When the sun hits the greens, drying will go faster, but the quality of the seasoning will be worse.
In the oven
The plant is dried in the oven by spreading it on baking sheets on top of waxed paper. In this case, the drying temperature should not exceed 40 ° C. A higher temperature will change the color of the workpiece and reduce its nutrient content. The drying process in the oven takes about 2 to 4 hours, while you need to regularly remove the baking sheets and mix their contents, while the oven door should be slightly open.
In an electric dryer
Drying dill in a special unit is very convenient. The dryer has a "Herbs" mode, setting on which you can safely wait ready-made seasoning after about 4 hours.
In the fridge
Dried sprigs can be obtained by placing them on the bottom shelf of the plus compartment of the refrigerator for several weeks. Over time, the moisture from the dill will evaporate, and it can be removed for storage.
In the microwave
Using a microwave oven, greens are dried in a few minutes. The maximum power is set in the microwave, and after 3 minutes the workpiece is taken out for mixing. If necessary, the process continues for another 3 minutes.
Checking the readiness of dried herbs
The way to check the readiness of greens is simple, you need to rub the dried twig with your fingers. If it crumbles and makes a crunchy sound, then drying has been carried out correctly. In the case when the branches are crumpled, the process must be continued.
Storage
Dried greens are stored in glass jars with a tight-fitting lid, which are placed in a dark and dry place. If the storage conditions of the dried product are respected, then the dill will delight the cook with its smell and taste for more than six months.

The process of drying herbs does not take much time and effort, but the resulting seasoning will help to prepare delicious food in any season.
Hardly anyone today imagines cooking without the use of herbs. Besides being delicious and aromatic seasoning to various dishes, it is also a storehouse of useful substances. So, for example, it contains four times more ascorbic acid than. And 100 g contains 25% of the daily requirement for humans. In better ways preservation of valuable substances for a long time in plants used in cooking are. We will talk about how to dry properly in this article.
What can be dried
It's pretty simple, easy and cheap way preparations for the winter. In addition, dried products do not take up much space and do not require any special storage conditions.  However, first, let's figure out what kind of greens can be dried so that they do not lose their properties.
Such plants include:

Did you know? 454 g of greens contain as much vegetable protein as you need the human body in a day.
Before drying the greens for the winter, they must be carefully sorted out, washed and dried well from moisture. The roots must first be cut off. Remove yellow, dry, damaged leaves. It is also necessary to get rid of thick leaves and rough stems, old plants.
When purchasing herbs at the market, it makes sense to soak them for 15 minutes in salted water (one tablespoon per 1 liter of water). If they contain harmful additives most of them should go. After the procedure, the herbs should be washed, shaken well and dried on a towel (paper or linen).  If you prefer to dry cut plants, then they must be chopped with a knife into pieces of 4-5 cm. When harvesting by hanging, you need to collect the greens in bunches and tie them.
Drying methods
There are two main drying methods:
- on fresh air;
- in special conditions - with the help of an oven, microwave.
Outdoors
To dry your greenery outdoors, you will need twine or parchment paper, whichever method works best for you - vertical (hanging) or horizontal (unfolded).
Outdoor drying should be done in warm weather.  Vertical drying technology is as follows:
- We tie the culled, washed and dried grass with rubber bands or threads in bundles of five to six branches.
- We hang the bunches under a canopy with the leaves down, so that the air access to them is good, but at the same time they are not strongly blown by the wind, and the sun's rays do not fall on them. When exposed to the sun, the grass will lose most of its nutrients; when exposed to the wind, the smell will evaporate.
- The distance between the beams should be about 7-10 cm.
- We periodically check the readiness of the blanks. Drying takes from six hours to several days. If the greens are dried correctly, they will be the same color as fresh ones. It should not crumble into dust.
For hanging beams, in addition to a canopy, an attic, a balcony, a loggia, a veranda or other well-ventilated room are also suitable.
Dry well in bunches.  For the horizontal drying method, the herbs are laid out on sieves, trays, baking sheets or other surface. Flat plates will do. Under the bottom is parchment or newspaper, canvas. The grass is laid out in a thin layer so that one plant does not find another. You can cover it with gauze from above. During drying, the grass will need to be turned over periodically to prevent rotting. Plants need to be protected from the sun.
On the windowsill
It can be dried horizontally on the windowsill.
- On parchment paper or we lay out the grass. It is best if the layer is single, no higher than 1-1.5 cm. Otherwise, the drying process will be long and of poor quality.
- Mix the grass once or twice a day.
In the same way, you can dry plants on a loggia, balcony. 
In an electric dryer
If you often carry out harvesting greens for the winter, then there is a reason to purchase for these purposes. This is not a very expensive device that will help to greatly simplify the process and dry the plants with high quality.
The drying process in an electric dryer is as follows:
- Place the washed, dried and chopped grass to 1.5-2 cm in a thin layer in trays.
- If the dryer has the "Herbs" function, then select it. If there is no such function, then set the temperature to 40-45 degrees.
- To achieve uniform drying of the entire batch, the trays will need to be interchanged periodically.
- Typically, the drying process in a dryer takes two to six hours. This time will be different for devices of different brands. It should be specified in the attached instructions.
Can I dry in the oven
It is possible to dry herbs in the oven. At the same time, it is important to observe the required temperature, since too high a temperature leads to overdrying of plants, loss of color and valuable substances.
We invite you to familiarize yourself with the technology of drying herbs in the oven:
- Place the washed and dried herbs on a baking sheet with baking paper. It is also desirable to cover the top with paper. The layer should be no higher than one to two centimeters.
- Preheat the oven to the minimum temperature. It is best to dry at temperatures below 40 degrees. To achieve a low temperature, you can place a wine stopper or other object between the door and the oven that will prevent the door from closing completely. This way the temperature can be reduced.
- When the grass becomes lethargic, the temperature should be raised to 50 degrees.
- We keep the plants in the oven for two to four hours, periodically checking their readiness.
Important! Do not dry several types of herbs at the same time. This will mix their smells.
- You can dry greens in the microwave. It is placed on a paper plate, after covering it with a paper napkin. The top of the grass is also covered with a napkin. Plants are dried at maximum power for three minutes. After turning off the oven, the greens are examined. If there are underdried specimens, they are brought to readiness for another two to three minutes.
- Dried herbs are an excellent substitute for salt and reduce salt intake. You just need to add a pinch of dry herb to the salt shaker, which is usually on your kitchen table. He copes with this task perfectly.
- When drying, pay attention that the plants do not come into contact with the metal. Otherwise, they will lose their color and change it to dark. So, if you put plants on metal baking sheets, then spread baking paper on them.
- Young plants lend themselves better to drying.
- Different types of herbs must be dried separately (except in a dryer). If you plan to create a mixture of seasonings, then you need to mix them after they have dried.
- For drying, it is better to choose