What is the name of the dried pumpkin? Dried pumpkin in the oven
Vegetables
Description
dried pumpkin – oriental sweetness, which eventually became quite popular all over the world. In fact, there is nothing to be surprised here, because the pumpkin delicacy is not just sweet, it tastes simply divine. The recipe for making a dried product at home is very simple, as you can see thanks to the simple one provided below. step by step instructions with photo.
In addition to the fact that pumpkin preparation for the winter is an excellent independent dessert for tea, it can be used to make many sweet dishes as additional ingredient. Taking pumpkin delicacy as a basis, it is possible to prepare an excellent filling for confectionery. Moreover, from dried pumpkin you can make a wonderful birthday cake from which you and your loved ones will be delighted.
The benefits of a dried product are manifested not only in the culinary field, but also in terms of traditional medicine there is a lot to be said about her. Pumpkin in fresh It has many useful microcomponents that are very important for maintaining good health. It has been repeatedly proven that during the drying process the product retains almost all of its original useful properties. This suggests that the pumpkin, even in this form, is considered very valuable. medicinal product, which is recommended to be included in the regular diet.
Let's start cooking pumpkin treats for the winter!
Ingredients
Steps
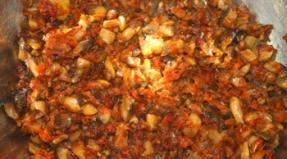
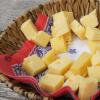
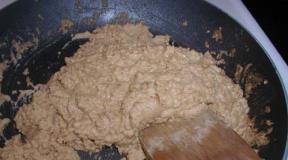
To make delicious and sweet at home pumpkin preparation for the winter, you need to choose for this the most ripe and juicy product.We wash the selected pumpkin well, after which we cut off the entire peel from it and remove all the insides from the fruit. We cut the cleaned product from unnecessary parts not much big pieces, which are subsequently sent to a suitable saucepan.

We fill the container filled with pumpkin slices with sugar so that the surface of the fruit is completely covered with it.

Now take a lemon and separate the juice from it. Place the squeezed lemon halves in a pot with pumpkin, then cover the pot with a lid and leave it for six hours. During this time, the pumpkin pulp will let own juice so you don't have to add water to it.

After the pan has formed enough juice, move it to the stove. If you want the pumpkin delicacy to have a share of citrus flavor, then you can leave the lemon out of the pan. If not, then the citrus should be removed before the container is put on fire. Boil pumpkin sweetness over medium heat for two hours.

Half an hour before the completion of the cooking process of pumpkin sweets, you need to remove the lid from the pan and in this state cook the contents. After that, we remove the container with pieces of pumpkin from the stove and cover it with a lid so that a small gap remains, we wait for complete cooling. After the contents of the saucepan have completely cooled down, put the pumpkin slices in a suitable container, and then move it to a cold place for further storage.

Dried pumpkin at home for the winter is ready! For a beautiful and appetizing serving, put the delicacy on a saucer and sprinkle it with walnuts, and add cream next to the pumpkin slice.

Bon Appetit!
The following types of pumpkins are used as decor:
- Lagenaria. It has a "bottle" shape and can be used to make a bottle, ladle, vase and more. She has green color, but becomes yellow-brown during drying.
- Cucurbita. Not a large pumpkin of bright colors (red, orange, golden). After a couple of months of drying, the colors fade. Lanterns and flower pots are made from these fruits.
There is also a variety of decorative pumpkin varieties, some of the most popular are:
- Mandarin. Small pumpkins with smooth skins and not too prominent ribs.
- Chalmoid. The fruit looks like it is made up of several parts. Pumpkin of this variety is large and has a bizarre appearance, the upper part often looks like a mushroom cap.
- Sweet Dumpling. large vegetable with ribs. The color alternates with white, yellow, green stripes and white spots.
- orange. Spherical or flattened small fruits of a bright color.
- Little Boo. Small white pumpkins that look like huge garlic.
Vegetable preparation
Before drying a vegetable, it must be carefully prepared for the process. The algorithm of actions should be like this:
- The peel of the pumpkin is cleaned of pollution and washed soapy water and warm water;
- Dry well;
- Wipe the surface of the fetus with alcohol;
How to dry a pumpkin for decoration?
What tools and devices are used? Sometimes for drying pumpkins in the form of decor are used kitchen appliances. But in this case, it is likely that the vegetable will simply bake, and not dry out and then deteriorate very quickly.
You can use the following devices and temperature conditions for drying:
- Dry in the oven at 80 degrees. The vegetable is placed in the center of the oven and periodically turned clockwise.
- In an air grill, the drying temperature is approximately 70 degrees.
- Pumpkin is dried in an electric dryer at 80 degrees.
- In the microwave drying is carried out in the mode of 600 watts.
In the process of drying in any of the devices, you need to turn the fruit from side to side so that it does not burn.
How to dry whole? A whole pumpkin can be dried whole in two ways:
- using the devices listed above.
- Very effective, but very long will be natural drying in a well-ventilated area or in the garden.
How to dry cut? Pieces can also be dried in these two ways. To do this, you need to prepare, cut the pumpkin into the necessary pieces and remove the fibers with seeds.
Principles of natural vegetable drying
How to dry a pumpkin for crafts quickly? If decorative item pumpkin is not planned to be stored long time, then you can use the express drying method. It includes the following actions:
- Preparing the pumpkin in the usual way;
- Top cutting. Make the cut even and for this use a large sharp knife;
- Remove the pulp by scraping with a spoon so that nothing remains on the walls, otherwise the pumpkin will become moldy in a few days.
- Wiping the inner surface of the vegetable with a cloth soaked in alcohol liquid;
- Stuffing a vegetable with paper (preferably newspapers);
- Next, you should put the pumpkin in a ventilated dark place and constantly change the stuffing inside it as the paper gets wet.
How to dry a decorative pumpkin correctly and for a long time, but with high quality? by the most the best way remains natural drying. For this method, not large fruits are chosen, whole, without dents, rotting and mold.
IMPORTANT: When cutting a pumpkin from a plant, be sure to leave a small tail. It will help the vegetable release moisture into the environment.
Fetal preparation is the most common: wash in warm water, dry and treat with alcohol.
Process natural drying can last 6-18 months. It depends on the thickness of the skin, the amount of pulp, the size of the fruit and the environmental conditions.
Rules for this type of pumpkin drying:
- For drying, you need to take the number of pumpkins with a margin. There is a chance that not all will dry. Some spoil at the initial stages of the process;
- The fruits must not touch;
- The drying room must be well ventilated;
- It is important that there is no direct sunlight on the fruits;
- You can put the pumpkin on an oilcloth so that moisture flows onto it, and even better - on wooden pallets with a large gap between the lamellas so that the pumpkin has a good air supply;
- Every day at the beginning of drying, you need to inspect the fruits for rot. Then the inspection can be done once a week. All soft perishable pumpkins must be removed immediately, otherwise they will infect healthy ones.
- If small areas of mold appear on the peel from the released moisture, you can remove it and wipe the area with alcohol.
How to make a pumpkin for Halloween and how to store it?
You can start preparing pumpkins for this holiday a few months before it. Choose varieties with a not very hard skin so that you can easily cut scary faces on a vegetable. You can cook by natural drying method. Also, if you don't have time, you can use fast way drying stuffed with newspapers.
In order to extend the shelf life of Halloween pumpkins abroad, products are treated with special antiseptic solutions. In our regions, you can try spraying the pumpkin inside with a solution of whiteness to prevent the growth of microorganisms.
How to dry bottle gourd?
Bottle gourd is quite light, and when dried it becomes almost weightless. This species does not pass moisture through itself well. Fruit preparation and drying process are common. Some nuances of drying this type of pumpkin:
- A natural drying method is used for this species and it is recommended to do it outside.
- The oven and other appliances are not used so that the fruit retains its shape and dries evenly.
- Such a pumpkin is dried in a suspended state or on a grate.
- The first few weeks they keep the pumpkin in a bright place, but without direct sunlight, when the pumpkin hardens, it is moved to a dark room and dried until it is ready.
How to determine readiness?
The readiness of the pumpkin is determined by the following indicators:
- By color. The dried vegetable should fade, Lagenaria usually turns yellowish brown.
- The vegetable is losing its weight.
- If the gourd is shaken, it makes a dull sound of jumping seeds inside it.
Conditions and shelf life of dried pumpkin for decoration
Finished dried fruit can be stored for a very long time. To do this, you must comply with the following conditions:
- The temperature in the room should be 12-28 degrees without sudden changes.
- Exclude dampness and contact with moisture.
- Direct sunlight should not fall on the decorative product.
- Immediately after processing the pumpkin (for example, carving), it is recommended to varnish its surface to extend the shelf life.
To do dried billet for the winter from a pumpkin or to dry a pumpkin for decoration, you need to follow special rules. At the same time, drying methods differ from each other, as they pursue different goals, and pumpkin varieties differ in their properties depending on the purpose.
From our article, you will learn about several ways to dry a pumpkin in the oven, while maintaining its benefits and enriching the taste. With this cooking option, fragrant, tender, melt-in-your-mouth slices are obtained much faster than if we decided to dry them in the open air.
We will not dwell on why it is necessary to harvest pumpkin for the winter - its effect on the body is so complex and positive that it can only be compared with the regular intake of multivitamins.
And skillfully prepared candied fruits can replace useless chewing marmalade and junk candy.
Let's make a delicious vitamin with our own hands for children and adults!
Preparing pumpkin for drying in the oven
Variety selection
In order to dry melon for the winter, medium and late-ripening varieties are suitable. Hard-skinned pumpkins have the most delicious pulp, which is not as prone to rotting and will be stored much longer than fodder varieties.
Muscat and table are also suitable - they are easier to clean and cut. It will be easier to cut them into slices, and they are not inferior in taste to their winter "colleagues".
slicing
Wash the pumpkin well, if it is very dirty, use a brush or sponge. Then, with a large sharp knife, divide it into halves, remove the stalk and scrape out the seeds. They can also be dried - they are tasty and healthy even without the addition of salt, spices or sugar.
Cut into smaller pieces and peel, leaving the pulp.
For drying in the oven, it is better to cut slices of about 6 by 2 cm, since the pumpkin contains a lot of moisture, and significantly decreases in size during drying.

How to dry pumpkin slices in the oven step by step
So, in front of us in a deep plate lies a whole mountain of sunny orange slices that need to be kept as bright as after drying. This can be done through blanching. Also, this process allows you to further increase the shelf life of the slices and prevent mold.
Step 1: Blanching
- While the oven is preheating to 70 ° C, pour boiling water into a deep saucepan so that part of the prepared pulp fits there.
- We put on fire and, as soon as the water boils again, put the chopped pumpkin into it.
- We pinpoint exactly two minutes, after the time has elapsed, we catch the slices with a slotted spoon and immediately transfer them to another pan with ice water. This procedure will help to quickly cool the pieces and prevent them from being cooked.
When the whole pumpkin is blanched, move on to the next step.
Step 2. Drying in the oven the first stage
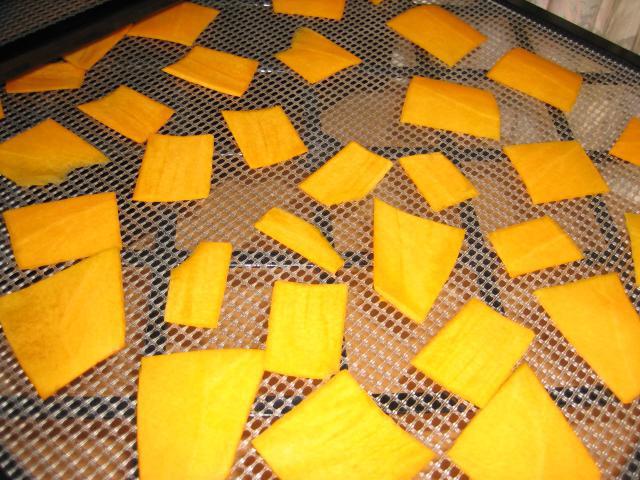
On a large baking sheet or two - it all depends on the amount of pulp, spread baking paper and lay out the slices in one layer. We try to leave a distance between them, otherwise the edges will stick together during drying.
We put full baking sheets on the middle and / or lower level and leave for two to two and a half hours. If the process goes to electric oven with airflow and ventilation, it is not necessary to open the door slightly, but if it is an ordinary oven in a gas stove, leave a crack to allow moisture to evaporate, this will speed up drying.
Step 3. Drying in the oven second stage
After two hours, we stir the slices and set the temperature already at 90 ° C. Now we look every 30 minutes. It will take about a couple more hours.
Check readiness; the slices stick, so we hold for another 40 minutes, they are plastic, but not hard - cheers! - can be delivered.
Let the dried pumpkin cool down fresh air To do this, just leave it at room temperature.
We store the slices in polyethylene or paper bags, containers with loose lids. Do not tightly clog them, as this will interfere with ventilation and can cause a musty smell first, and then mold.
This is how an ordinary pumpkin is prepared, but candied fruits are made in a slightly different way.
How to dry candied pumpkin in the oven
slicing
My pumpkin, cut and take out the seeds, as in the previous method, but we cut it in a different way. We need, if possible, the same size cubes 3 by 3 cm.
We will not blanch them, so immediately pour them into a deep pan.
Candied
- Add to slices granulated sugar at the rate of 200g/kg of pumpkin.
- Stir, press with oppression - another pan filled with water will do - put it on a plate. And we leave the structure for 15 hours. For example, we will do it in the late afternoon of one day and in the morning of the next we can take on another stage.
- We pour the resulting juice into a separate container and save it, pour another portion of sugar, stir and leave again under the same oppression for a slightly shorter time - 12 hours. Made in the evening - ready in the morning!
- We drain the liquid a second time and, while the pumpkin is resting, and the oven is already warming up to 70 ° C, we cook syrup from both portions of the juice in a saucepan, after pouring another 100 g of sugar.
- Slices portionwise immersed in syrup, kept at high temperature, but without bringing to a boil for 10-15 minutes (each serving) and recline in a colander.
Now that the candied pumpkins are ready, dry them in the same way as described above. Spread out in an even layer on lined baking sheets at 70°C for 2 hours, and then at 90°C for the same time or a little longer.
But what if we need a pumpkin not for food, but for needlework? Then it needs to be handled differently!

How to dry a pumpkin for crafts in the oven
Depending on the form in which the melon is needed - pieces or whole, we will cut it or not, but for now let's get down to preparation.
Choosing pumpkins for crafts
In this case, we will focus not on the taste of the pulp, but on the exterior and size. Since we don’t have to make a carriage out of it - at least life-size, we select the smallest pumpkins. They will dry out faster than their larger counterparts, and the likelihood of mold and mildew in them will be minimized.
In addition, there must be a stalk - this will prevent cracking during the drying process.
But from pumpkins big size you can cut slices of the peel - they are also used for crafts.
Pre-washing and drying pumpkin
When we have decided on a suitable melon, carefully wash the fruit, and then wipe it. We leave it to dry for half an hour to forty minutes at natural temperature, and then wipe it again with a dry cloth to make sure that there is no moisture left at all.
Drying in the oven
We put the pumpkin in a cold (!) oven, laying the grate baking paper and set the temperature to 80°C. Every half an hour, after the stove has warmed up, we begin to turn the fruit from one side to the other for a more even distribution of heat.

We keep the pumpkin, depending on its size and density of the peel, from 3 to 6 hours. Ready let cool completely normal conditions. When tapping, the sound should be sonorous - the resulting emptiness should be felt inside.
But if we need to dry the pumpkin slices, we do it as follows.
How to dry pumpkin slices in the oven
My melon, wipe, and then cut into pieces. We cut off the seeds, and the pulp - if it is thin, leave it on the peel. If the layer is very thick, cut it off 3 cm thick.
Rinse, pat dry with paper towels and place on a baking sheet lined with baking paper. We put in cold oven, including heating up to 75°С. We check readiness every hour. We keep the pumpkin for at least 4-5 hours so that the peels dry completely.
We cool the finished slices and use them to make all kinds of crafts and decor elements.
Now you know how to dry a pumpkin in the oven for a variety of purposes. Try to make her delicious candied fruits, wither without sugar or dry for crafts - the result will please you in any case.
Everyone knows the famous Italian delicacy - Sun-dried tomatoes. But, after all, you can cook the queen of the autumn-winter period in the same way - orange pumpkin. In this preparation, bright pumpkin cubes are wonderfully combined with thyme, rosemary and ground black pepper. Olive oil is the link, and garlic fits perfectly into the overall composition, giving the pumpkin its wonderful aroma.
|
Preparation time |
Cooking time |
|
|
20 minutes |
3 hours |
Ingredients
Pumpkin - 1 kg
Olive oil - 200 ml
Dried thyme - 1 tbsp. l.
Rosemary needles - 1 tbsp. l.
Garlic - 3 cloves
Ground black pepper - to taste
Salt - to taste
Cooking method
1. Peel the pumpkin from thick rough peel and seeds. Wash and dry paper towels. Cut the pulp into cubes with a side of approximately 2-2.5 cm.
2. Cover the baking sheet with a sheet of parchment (baking paper). Oil it up olive oil. The easiest way to do this is with a pastry brush.
3. Arrange the pumpkin cubes on the parchment.
4. Pepper, salt, sprinkle with dried thyme and drizzle with olive oil on each piece of pumpkin.
5. Send the baking sheet to the oven on the upper level. Dry the pumpkin for 2-3 hours (cooking time depends on the variety and degree of ripeness of the berry) at a temperature of 100 ° C. During the last hour, periodically look at the pumpkin cubes - they should never burn. In the meantime, thoroughly wash the jar and lid with baking soda. Remove the baking sheet from the oven and let the pumpkin cool completely.
6. Peel and rinse the garlic cloves. Cut each lengthwise into 2-3 pieces.
7. Pour rosemary on the bottom of the jar and put the garlic.
8. Fill the container with pumpkin and pour olive oil.
9. Using a spoon, lightly press the pumpkin and add enough oil that it completely covers the berry. Close the jar with the prepared lid. Pumpkin, dried in the oven, is completely ready to eat! Store it in the refrigerator or basement.
How and with what to serve
Dried pumpkin is good both on its own and as an addition to salads, meat dishes, mashed potatoes.
Bon Appetit!
Pumpkin, for the storage of which they were created optimal conditions, may not deteriorate for a long time. However, if the vegetable is cut, then its shelf life is significantly reduced. What to do with the unused part? It can be frozen or dried. ABOUT various ways we will talk about drying pumpkins in this article.
The whole pumpkin is dried to create various crafts. In the course are mainly decorative varieties. It is better to remove such fruits from the root just before the frost, so it will be stored longer. Before drying the vegetable, it is washed and dried with towels. Then each fruit is placed in nets and hung in a dark, dry and well-ventilated area.
Drying pumpkins continues for 6 - 8 months. Readiness is determined by the sound of the seeds inside. Dried seeds should make a characteristic sound, hitting the dry walls of the fruit.

Preparing Pumpkins for Drying for Culinary Purposes
Table varieties of pumpkin are pre-washed and then wiped with towels. Then the stalk is cut out from the vegetable and, cut in half, the seeds are taken out. Next, the pumpkin is peeled from the hard peel with a sharp knife.

Large pieces of pumpkin need to be crushed. For drying, mainly cutting is done in the form of thin plates or small cubes.

How to dry a pumpkin for the winter
Drying naturally
Pieces of pumpkin are laid out in a single layer on pallets or grates, which is more preferable. The containers are exposed to the sun. It can be a balcony or a veranda of the house. Direct sunlight can cope with the drying of a pumpkin in 6 to 10 days, provided the weather is dry and warm. To protect the cut from dust and insects, it is advisable to cover it with a piece of gauze.
Another way is to dry gas stove. Pumpkin cutting is planted with a needle on a strong nylon thread or fishing line. "Garland" is hung over a gas stove and waiting for the complete evaporation of the liquid from the product.
Watch a video from Vadim Kryuchkov on how to dry a pumpkin in a natural way
Drying in the oven
The pumpkin is cut into plates or slices no more than 1 cm thick and blanched in the manner described above. On a baking sheet, spread the slices in one layer, leaving a small distance between the pieces.
The oven is heated and the cut is placed there. The door is kept slightly ajar during the entire dehydration process. Drying takes place in two stages:
- The first 5 hours the pumpkin must be dried at a temperature of 55 - 60 degrees. After that, the slices are turned over and allowed to cool completely.
- On the final stage the temperature is increased to 75 - 80 degrees and drying is continued until fully cooked.

In an electric dryer
This unit is able to greatly facilitate the process of pumpkin drying, since human intervention in this process will be minimal. The processed slices are laid out on grates, leaving a small gap between them.
The exposure temperature during the entire drying process will be the same - 55 - 60 degrees. To prevent the product from sticking to the grates, after the first 1.5 hours, the slices can be turned over, but this step is not at all necessary.
The total drying time depends on the thickness of the pieces and the humidity of the surrounding air. On average, it is 12 - 20 hours.

Watch the video from the channel "Ezidri Master" - dried pumpkin for the winter. pumpkin powder
How to make pumpkin chips
Previously, the pumpkin is baked in the oven for 30 - 40 minutes. Then the pulp is pierced with a blender, and the resulting mass is spread in a thin layer on a baking sheet or container for making marshmallows. In this form, the product is dried in an oven or electric dryer until brittle.
pumpkin powder
From pumpkin chips, as well as from a vegetable dried in the form of pieces, you can make pumpkin powder. To do this, the product is ground with a coffee grinder to a homogeneous consistency. The powder is convenient to use for making pumpkin puree soup.
How to make candied pumpkin
To prepare candied fruits, pumpkin pieces are boiled several times in sweet syrup, and then dried in any of the ways listed above. Lemon, orange, cinnamon or ginger can be added to the syrup.

Oksana Valerievna in her video will talk in detail about how to make candied fruits from pumpkin.
How to store dried pumpkin
The finished product should be stored in glass jars, with tightly closed lids, in a dry, dark place. Candied fruits are stored in the refrigerator, and if sweets are made a large number of, then part can be removed in the freezer.