How to paint Easter eggs. How to color eggs with blueberries? Nettle and spinach will give a light green color
Easter has its own customs and traditions, one of which is the painting of eggs. The article will be useful for both adults and children. Easter eggs are a symbol of a great holiday. Housewives are in awe of painting eggs, and many tend to come up with new patterns.
The tradition of painting eggs for Easter
There are several versions of the origin of this tradition.
Version 1.
When Jesus was resurrected, Mary Magdalene came to the emperor with the news. Since a gift was needed for such a trip, she took a white egg with her. She said to the emperor "Christ is Risen." The emperor did not believe this news and said that it was as implausible as the fact that the egg turned red. And miraculously, the egg immediately turned red.
Version 2.
Chickens during Lent laid eggs without stopping. The owners were afraid that they would deteriorate. So we decided to paint fresh eggs red.
Version 3.
When Jesus was a baby, painted eggs were an entertaining attribute for him.
What eggs to paint for Easter?
It is customary to paint for Easter chicken eggs: neither color nor size matters.
IMPORTANT: For even color, wash eggs thoroughly with vinegar and soap. Otherwise, the paint will pick up unevenly.
What colors are eggs painted for Easter?
Previously, eggs were only painted red.
Now on Easter, you can find a wide variety of options for painting eggs:
- painting in one color: yellow, green, blue, orange. In fact, the color can be anything that is closer to your soul.
- painting with several colors: many patterns, drawings

How to paint eggs red?
Paint eggs in traditional red color will help:
- Food colorings
- Onion peel
- Beet. Boil an egg along with whole beets. Cook until you get the desired color. You can simply grate a boiled egg with beet broth or grated beets

How to color eggs with onion skins?
- Take a saucepan filled to the top with onion peels
- Fill with water not to the very edge
- Leave to cook for 45 minutes. Cooking time depends on the desired paint color
- Let the infusion cool
- Put the eggs in the husks and cook for 10-15 minutes after boiling
- Cook until you see the color you want
IMPORTANT: Eggs must be completely submerged in water. Flip them over for even coloring.

Food colors for Easter eggs
Eggs can be colored with natural and non-natural food coloring.
FROM unnatural dyes everything is clear: go to the store, buy food coloring of the desired color, dilute the coloring agent in water, put the egg in water with the coloring agent until the desired color is obtained.
IMPORTANT: Staining with these dyes usually gives a more uniform color. But there is a sense of unnaturalness from this.

FROM natural the dye question is more complicated. Many natural colors can be used depending on the desired color of the final egg.
Yellow.
The turmeric egg will help color the egg yellow. Painting technique:
- Add 2 tablespoons to 0.5 liters of water. turmeric, 1 tablespoon table vinegar
- Put your eggs in the water
- Cook until tender

Pink color.
The pink color of the eggs will be given by cranberry juice, in which the boiled eggs will lie down until the desired color is obtained.

Dark brown color.
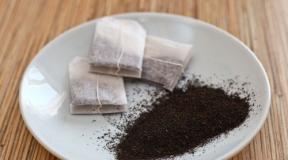
Boil eggs in a strong black tea brew.

Blue color.
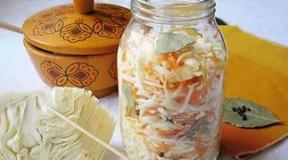
The blue color will help to get red cabbage:
- Chop 2 heads of cabbage finely
- Pour 0.5L of water into a saucepan
- Add 6 tablespoons to the water. table vinegar
- Fill up the cabbage
- Leave to infuse overnight, after mixing
- In the morning in the infusion, put boiled eggs until the desired color is obtained.

Easter eggs painting
Painted eggs will look equally good on pre-colored eggs as well as natural colored eggs.
Painting with a permanent marker.
An easy way to paint Easter eggs for those who can paint.

Painting with paints.
For painting you only need paint and brush thin. You can use the simplest acrylic paints.
IMPORTANT: With this method, you can decorate the egg with your child and complete the painting that you like.

Powdered sugar painting.
- Prepare the icing sugar
- Add as much water to it as needed until a thick, homogeneous mass is obtained.
- Apply the pattern with a confectionery syringe and sugar mixture
- Let the egg dry
Wax painting.
- For wax painting you will need wax crayons or wax paints
- Choose the tool you will use to paint: knitting needle, needle, awl, copper wire
IMPORTANT: The copper wire will keep the wax hot for a long time, which will allow you to draw more lines at a time.
- Heat the wax to 65 C
- Soak the tool in wax and paint

If you do not have the makings of an artist or can not come up with the desired pattern, use stencils.
- Print stencil
- Pick up paints and apply them to a sponge or brush
- Apply the stencil to the egg
- Blot with a sponge or brush over the stencil
- Remove the stencil and dry the egg

How else can you paint eggs for Easter?
Colored floss threads.
Wrap the egg completely with different colored floss threads and boil the egg hard.

Beautiful napkins.
- Buy beautiful napkins with a pattern suitable for the holiday
- Cut out the elements you want to transfer to the egg
- Prepare gelatin according to package directions
- Dissolve the gelatin granules by heating it
- Apply the cut pattern to the boiled egg
- Brush on top with cooked gelatin
- Align the pattern from the center to the edges

Paper.
- Cut out figures, stripes, patterns from paper
- Attach the paper of your choice to the egg.
- Wrap the egg tightly with nylon or gauze
- Dip into the desired dye. If necessary, cook in dye.
- We are waiting for the egg to dry completely
- Removing the paper


Silk.
- Cut a piece of silk to the desired color
- Wrap an egg in it
- Wrap on top with gauze or nylon and secure
- Pour water and 3 tbsp into a saucepan. vinegar
- Boil wrapped eggs in water and vinegar 20 minutes after boiling

- Dip a wet egg in rice
- Wrap with gauze
- Dip in dye
- After staining, open the cheesecloth and let dry

Marble effect.
First way.
- Choose two dyes that match in color (preferably light and dark)
- In one of them, paint the egg
- Pour the second into a bowl and pour in a few tablespoons. vegetable oil (depends on the volume of water)
- Stir oil and water
- Dip the egg completely once into the water so as to catch as many fat bubbles on the water as possible
- Blot with a napkin
- Let dry


Hello dear readers. The Resurrection of Christ is one of the most significant celebrations in the Christian world, celebrated annually. It is also called Easter. On this day, the Resurrection of the Lord Jesus is honored, which is considered a solemn and extremely significant victory for life, which was able to overcome death. Easter is one of the oldest and most important holidays of the liturgical year. And soon it will come. In 2017, this bright holiday will be celebrated on April 16. One of the traditional attributes and, at the same time, the dishes on the Easter table are boiled eggs, which are customary to paint (Easter eggs, painted Easter eggs). Many rituals are associated with them, in which both adults and children take part with pleasure.
But, no less entertaining activity is the painting of eggs itself. In order to complete it, you need incredible perseverance, concentration and, of course, a certain talent. Not everyone can boast of this.
Yes, not everyone needs the classic ones on the table or in an Easter basket. Most people just need beautifully colored (or simply dyed) eggs.
They really create a special atmosphere, mood and perfectly replace Easter eggs. However, there is a potential danger in these Easter decorations / treats that many are unaware of.
And we are not talking about the dangers of eggs as a product, not about their freshness and the like. Talk about synthetic, very common today, dyes, which have an extremely negative effect on the health of those in whose body they enter.
And now - attention: there is a more affordable, safer and smarter alternative to the method of coloring eggs using commercial products of the chemical "food" industry! These are natural colors for Easter eggs.
How and how to paint eggs for Easter?
On the eve of Easter, many housewives are wondering: how and what is the best way to paint the eggs. The answer is obvious: what is practically at your fingertips, but what you do not pay attention to because of your ignorance in these matters.
But, today we will correct the situation by telling you: what natural (natural) dyes can be used to quickly and easily paint Easter eggs, getting a delicious, healthy, safe for health and very aesthetic product.
Most of these dyes are either already at your disposal or available for purchase at your nearest grocery store, almost any grocery store.
So, for coloring purposes, the following can be used with brilliant success:
✔ Onion peel.
✔ Turmeric (powder).
✔ Nettle or spinach.
✔ Red cabbage.
✔ Cranberries or beets.
✔ Grape juice.
✔ Strongly brewed black or green tea.
✔ Coffee.
✔ Blueberries.
And other products that are quite familiar to us, but have never been used for such purposes. Well, if you are worried and care about your health, as well as about the health of your loved ones, then the time has come!
TOP 10 natural dyes for eggs: what to choose, how to use
1. Yellow, brown colors
Onion peel. She, by full right, can head this list, since she is almost the most common and affordable ingredient for the preparation of excellent natural paint.
Eggs from it are obtained in a color spectrum from light yellow to dark brown. The shade depends on how concentrated the broth will turn out, and also how long you keep the eggs in it.
Yes, it is the broth of onion peel that is needed for coloring.
All this is done as follows: dry onion husk (its arbitrary amount) is taken, poured with clean drinking water, placed on a stove (electric or gas), brought to a boil, simmered for about 10-13 minutes, after that the stove is turned off, and the broth is infused for about 15-18 minutes.
The eggs themselves, both with onion broth and other natural dyes, are best treated with hot dye liquid.
That is, eggs (which were previously cooked) should be placed in an onion broth for 2-4 minutes. That is how long it will take for them to get their color.
In chemical dyes, this is done much faster. But who needs blue, red, green fingers and tongues like that?
It is better to spend a little more time and get a better result by several levels.
Please note: eggs that are amenable to the dyeing process should also be warm (but not hot), however, this is not fundamentally important: they can also be dyed cold. We recommend that you collect the husks for the paint preparation in advance, as this is not a very quick process.
How much husk is needed: you will understand this already on an intuitive level when you color eggs next year - for the second time. For the first time, take 1-2 handfuls of dry husk for 1 liter of water. It is not necessary to knead it.
2. Bright yellow, golden tints
Turmeric (powder). A rich, excellent golden yellow color can be obtained from its concentrated broth.
If you want to get a light yellow color - take one teaspoon of turmeric, if more saturated, dark, concentrated - plus two or three tablespoons.
This dose is based on 1 liter of drinking water.
How to prepare paint: boil a liter of water in an enamel bowl, stir turmeric in water, let it stand for 4-5 minutes, dip eggs in the solution for the same time.

Eggs can also be boiled in turmeric, but be prepared for the fact that the egg white itself, in some places, can also be colored yellow, since the eggshell, during the cooking process, can leak paint.
3. Green
Nettles will allow you to get it. It can also be achieved through the use of spinach. But since nettle is one of the most common plants, especially on the eve of Easter, it was she who was mentioned first.
So how do you make the eggs green? A decoction should be prepared. It is prepared in an enamel bowl.
In general, all the paints we are talking about today should be cooked in such a dish. For 1 liter of water, you need to take an arbitrary amount of dye (in this case, nettle or spinach), pour them with water, boil, leave for about 10 minutes.
Everything, you can paint eggs in a known way. Or you can boil some eggs along with nettles or spinach. This will make the color darker.
4. Blue, light blue colors
Cabbage gives them. But, not more familiar to us - white, but red. Ready-made - boiled, eggs acquire this color when they are soaked in the infusion of this cabbage.
The more concentrated the infusion, as usual, the richer the color.
You can also adjust the color by the time the eggs are soaked.
The principle works here: the longer, the darker. So, you need to take a mature poured head of red cabbage, chop it finely, sprinkle with four to five tablespoons of ordinary kitchen 9% vinegar, pour water so that the cabbage is completely covered with it, and another 3-4 centimeters on top.
5. Red color
It can be obtained from: beets, onion skins (red onions!), Cranberries, raspberries, cherry bark. As you already know, the concentration of the color itself will directly depend on the concentration of the paint and the time of dyeing.
So - in all cases, when using any of the above paints. Beet dye: using a juicer, you can get natural juice (only red beet is needed!). Juice, in the right proportions, is diluted with boiled heated water.
The paint is ready. The recipe for red onion husk paint is the same as for white onion husk. Only the result will be different visually.
The berries can be used identically to red beets, or simply crushed and mixed with water. But cherry bark needs cooking.
You need to take an approximate amount of fresh cherry bark, put it in a bowl, add water to 5-6 centimeters, cook, bringing to a boil, for about 40 minutes.
To paint eggs - only in hot broth. Therefore, if necessary, it will need to be reheated.
6. Lavender shade
It is achieved through the use of juice from red grapes.
At the same time, you can use not only fresh grape juice, but also canned one. In order for the eggs to be colored the way they should, soak them completely in juice for 5 minutes.
The juice should be warm, for this it is heated. To get a barely noticeable delicate shade, the juice can be diluted with boiled water, taking a small amount of it.
7. Brown color with a characteristic sheen
Strongly brewed black tea has this effect. For lovers of this drink, most likely, everything is already clear.

For those who are only remotely familiar with it, the following information will be useful. We make a concentrated (strong) tea leaves.
To do this, take 100 grams of black loose tea for 1 liter of water. We boil water, pour tea leaves with it, using a special teapot for this (or glass, enameled dishes, if a teapot of the required volume is not available).
We insist 15 minutes. Everything, the paint is ready for use as intended. Dip eggs in it for 5 minutes.
8. Turquoise shade
Gives color to eggs in a slightly concentrated infusion of green loose tea.
The method of preparing natural paint for Easter eggs, as well as the principle of coloring them, are identical to the previous one - using black tea.
But already with the receipt of a different color - turquoise. Please note: for these purposes, green loose tea should be chosen, and not its varieties - yellow or white.
9. Chocolate shade
It is given by coffee, any: both natural, in beans, and instant, for example, freeze-dried.
How to paint: a strong brewing is made, of course - sugar is not needed, already cooked eggs are lowered into this (hot) brew for 2-3 minutes. Everything, the result will delight you.
10. Orange
Differs in special originality and brightness. A brighter orange color gives carrot juice, a slightly dimmer shade, but also very good looking, will help to get sea buckthorn juice (its fresh berries).
Carrot juice, like sea buckthorn juice, does not need to be diluted with water. They should be used immediately after wringing out. You can use a juicer for carrots.
For sea buckthorn - the same device (pay attention to the presence of seeds in the berries), or a manual method. Eggs should be dyed for about 2-4 minutes.
Easter Egg Stickers
Sometimes the method of "pasting" eggs is used, rather than coloring them. You can also get a good result with it. How aesthetically it looks - each individual person can judge subjectively. FROM
in general, as well as the appearance of eggs colored with natural dyes, which we are talking about today.
Special stickers for Easter eggs can be purchased at the store, supermarket, market, and so on.
The advantage of this "decoration" method is the quick finishing of the eggs. Minus - stickers, very often, do not lag well behind the shell when you need to clean the eggs.
In addition, it is not always known what their composition is and whether it is safe, in terms of use, applicable to food.
Exclusive Recipe - Original Gray
This recipe is not known to many. You just need to try it, since the color turns out to be unusual, unusual and even unique, like for Easter eggs.
The result is a gray with a bluish tint.
To achieve this effect, fresh blueberries are used, from which the juice is extracted. Sometimes blueberry jam is used, but, let's face it, the effect, although it is, is not so bright.
You just need to dilute the jam with boiling water (one tablespoon per glass of water). If you paint eggs in fresh juice, then you need to squeeze it in any convenient way and soak boiled eggs in them for 1-1.5 minutes, or use a brush to paint.
Useful tips for coloring eggs with natural dyes
They will help to achieve the best effect, putting a minimum of effort into this process. So attention.

✔ In order for the natural paint to lay on the egg as evenly as possible and to "stick" to the shell better, wipe them with a cotton swab with kitchen vinegar (9%), or water in which a small amount of soda is dissolved.
✔ To prevent eggs from cracking in water during cooking, do not put them in boiling water. Put them immediately in a bowl, fill with cold water and only then put on fire.
✔ Eggs will cook faster if, before boiling them, 1 hour before, you keep them at room temperature.
✔ Eggs will be much better cleaned if, after boiling them, you pour off the boiling water and fill them with cold water, holding them in it for 10 minutes.
✔ Eggs burst in boiling water? This will not happen if the water is salted. And even if a small crack forms, the contents will not leak out.
✔ A gorgeous shine to already colored eggs is ensured if, after the paint has completely dried, they are lightly rubbed with olive or sunflower oil.
On Easter, we often wonder how to dye eggs for a holiday at home, what safe dyes to use so as not to dye eggs in different colors, and are safe for both children and adults. I hope you got the answer to this question.
These are such simple, but very simple and effective recipes and tips. Use and celebrate Bright Easter with joy, pleasure and peace. All the best to you!
By Easter, eggs are being painted in almost every home. If you paint them in one color, for example, with the help of onion skins, you get "dyes". If an egg is painted with multi-colored dots, with the help of drops of wax, it is "speck". Eggs of the same color, but with a pattern scratched on them - "drapani". The most beautiful, "Easter eggs", have a complex pattern made with a special tool - a scribbler.
Method one. Decoupage
To decorate an Easter egg with a picture, you do not have to go to the store for stickers. You can decorate the egg using decoupage technique.
WHAT DO YOU NEED?
Materials
egg
gelatin
napkin
Tools
scissors
tassel
heat-resistant container
Preparation:
1 Prepare glue from gelatin. To do this, soak the gelatin according to the instructions on the package. Strain the gelatin through a strainer or gently drain off excess water. Heat the swollen gelatin in a container until the granules are completely dissolved. If the gelatin hardens while decorating the eggs, reheat it. 
2 Divide the multi-layer cloth into separate layers. Cut pictures from one color layer. 
3 Place the cutout picture on the shell. Apply gelatin glue directly to the picture. 
4 Your decoupage Easter egg is ready. 
By the way
Spread the gelatin glue evenly over the picture, from the center to the edges.
Method two. Marble
Today we will share the secret of creating a marble shell.
WHAT DO YOU NEED?
Materials
eggs
sunflower oil
Tools
paint dilution tanks
fork
Preparation:
1 Color the required number of eggs light colors. Let them dry completely. 
2 Add a spoonful of sunflower oil to a container with a darker color. Stir gently with a stick (without shaking!) To break a single oil stain into small, pea-sized stains. Dip the egg in the dye and butter and remove immediately. 
3 For a beautiful marble effect, the egg only needs to be dipped once. 
Method three. We paint with a cloth
To dye eggs, you can use old silk ties, pieces of silk chiffon or satin, and, if not a pity, a Pavlovo Posad woolen scarf.
WHAT DO YOU NEED?
Materials
finely patterned fabric with unstable dye, such as silk jersey
white cotton coarse calico - flaps 15x15 cm
vinegar
eggs
Preparation:
1 Wrap a raw egg with a cloth so that the front (brightly patterned) is snug against the shell. 
2 Sew the fabric by hand over the office of the egg. Try to avoid creases and strong creases. 
3 Wrap the lined egg in the cotton patch. Secure the eggs from the blunt end by wrapping them tightly with threads. 
4 Pour 3 tablespoons of vinegar into the water. Place the eggs, wrapped in a cloth, and put on fire. After the water boils, cook the eggs for 10-12 minutes. Then remove the pan from the heat and cover with cold water. 
5 When the eggs have cooled, remove all layers of fabric. A beautiful, delicate pattern will be imprinted on the shell. 
6 Only a professional artist can paint an egg this way.
Method four. We paint with tape
Using a ruler or centimeter to draw stripes or cells on the egg is inconvenient. We suggest using masking tape
WHAT DO YOU NEED?
Materials
eggs
colorful dyes for eggs
masking tape
Tools
breadboard knife
Preparation:
1 Color the boiled egg light. Glue 2-3 strips of masking tape on it at a distance of 3 mm from each other. Since there is no thin masking tape on sale, make the strips of the required width yourself. Line a wide masking tape directly on the spool into strips 5-10 mm wide. Slide along the entire length of the line with a dummy paper knife. The thin strips of tape can now be used.
2 Dip the whole egg in green or blue paint. When the egg is dry, remove the tape strips. 
The fifth method. Eggs with lace pattern
Lace can be replaced with parsley or dill leaves. Then proceed in the same way.
WHAT DO YOU NEED?
Materials
boiled eggs
lace
nylon shreds
threads
colorful food colors
Tools
scissors
glasses for diluting paints
Preparation:
1 Cut the lace motif you like out of the napkin. Soak a piece of lace in water and place on the boiled egg. 
2 Pull the laced egg tightly into the nylon tights flap. Tie from the side of the blunt end with threads. 
3 Dip the egg into the tissue in food coloring. 
4 After a few seconds, remove the egg and gently remove the cloth. 
5 Leave the eggs to dry. 
Sixth method. With wax crayons
Color the boiled eggs with children's drawing wax crayons. After the egg is painted, dip it in food coloring. The entire shell will be colored, and the drawings will show through and become brighter against the background of a contrasting color.
Method seven. Decorating with ribbons or braid
Eggs decorated with ribbons, lace or braid look very festive. Boil the eggs first, you can paint them with special dyes or leave their natural color. Tie a ribbon around each testicle. To prevent it from slipping off, glue it to the shell with hot gun glue. It is not necessary to buy a thermal gun for these purposes - the glue stick can be heated over the candle.
Method eight. Egg craft
A craft egg is a decoration option that will spark a surge of children's enthusiasm. Color the boiled eggs with yellow dye. To make a cock and a hen, it is enough to cut a comb and a beak out of paper. The eyes can be drawn with a pencil. Glue the elements with a thick gelatin solution or PVA glue.
Method nine. Eggs marble
WHAT DO YOU NEED?
Materials
4 eggs
2 tablespoons of tea
1 tablespoon soy sauce
0.25 teaspoon ground nutmeg
1 clove bud
Preparation:
1 Hard-boiled eggs - for 15 minutes, rinse with cold water. Put on a table surface and, gently tapping, crush the shell over the entire surface of the egg. 
2 In a saucepan, boil water, add the tea leaves, add soy sauce and spices. Place eggs directly in crushed shells and simmer over low heat for 40 minutes. Allow to cool without removing from the broth. 
By the way
This recipe can use not only nutmeg and cloves, but also any other spices - ginger, cinnamon, star anise. If you plan on serving marbled eggs for breakfast, boil them the day before and leave them in the broth overnight for an even more intense color and flavor.
Method ten. Decals
All mothers know that children love to paint whatever comes their way. Therefore, there is nothing better than entrusting them to paint chicken eggs for Easter.
WHAT DO YOU NEED?
Materials
chicken eggs
food colors in tubes
felt-tip pens with food colors
egg stickers
Tools
scissors
glass of water
Preparation:
1 First, boil the eggs and cool. You can paint them in light colors or traditionally with onion peels. 
Hello dear readers!
Ahead is a bright holiday - Easter. And according to tradition, cakes are prepared in advance and eggs are painted. The two most basic attributes of this holiday. There is an article on my blog in which I describe the process. You can check it out.
But today we'll talk about how you can paint eggs with your own hands at home.
Why do they paint eggs for Easter?
Easter eggs and Easter cakes are the main symbols of the holiday. The tradition of dyeing eggs originated from Mary Magdalene. In the Orthodox Church, she is revered as a saint and a myrrh-bearer who preached about the risen Christ in Rome. Once she came to the Roman emperor Tiberius with a sermon.
And in ancient Rome it was customary to come to the emperor with a petition only by bringing something to him as a gift. Wealthier people brought gold. And who could not afford it, they brought something from the household.
And so, when Mary came, she brought an egg. It was white as usual. And she said to the emperor - "Christ is Risen". The Emperor, in turn, found it funny. And he said that he would only believe it when the egg turned red. This is how it sounded like: just as an egg is white, not red, so the dead do not rise. And the egg immediately turned red.
The emperor was dumbfounded and replied: - "Indeed he has risen!". So another tradition appeared, comes to the house with these words.
How to paint eggs for Easter with your own hands?
There are a wide variety of painting methods. In the beginning, I will analyze the classic and the most common. We will paint with onion husks and beets. But we will improve it a little. We get them not only in red, but also with a pattern. This method is also good because we will use natural ingredients. In which chemistry will not be used.
To do this, we need onion husks, beets grated through a coarse grater, a couple of parsley leaves and boiled eggs.
Take white eggs. The paint shows better on them!
Painting process:
1. Let's start with beets. Take a small bowl and put the grated beets there. Pour boiling water over it. Just a little bit.

2. Then we put eggs. They should sit for about 20 minutes. It all depends on the degree of color. If you want to be brighter, then hold a little more. We leave aside.

3. Now I'll show you how to make patterns. Take a leaf like parsley. We put it on the egg. To make the sheet fit well, moisten it. Thus, we stick around the egg from all sides.

3. Now we need an old sock or stocking. Better stocking. Naturally, it must be clean. In our case, I use a nylon stocking. Now you need to carefully put it on the egg with leaves. So that the parsley leaves do not peel off. And we tie or tie with a thread. Put in a saucepan with onion skins.

4. Now fill with boiling water. We put on fire. You can also put just an egg, without a picture.
The more you cook, the brighter the color will turn out.

5. Check the eggs that are in the beets. They turned out to be light red. We spread them and wipe them with a paper towel. And the adhering pieces of beets give a certain pattern.
To make the eggs shine, you need to rub them with vegetable oil. To do this, moisten a paper towel with oil and rub it in a thin layer.

6. When finished cooking in the husk, take out the eggs. Cool it down. They can also be rubbed with vegetable oil for shine. That's how they turned out.

Painted eggs: a simple and original way
Easter is always associated with spring, flowers, sun and good mood. And it is not surprising, because there is something magical about this holiday. And you can decorate it with original colored eggs. We will analyze the entire staining procedure step by step.
First option
1. Prepare the paint in advance. We will use liquid dyes in three colors: red, yellow and blue. We breed as described in the instructions.

2. In order for the paint to dry efficiently and without divorce, you need to make a special stand. We make it simple. We need a sponge and needles. We stick the needles into the sponge around the circumference, as shown in the figure. The circle should be large enough to prevent the egg from falling through.

3. Having boiled the egg, dry it with a paper towel.
An important condition for high-quality coloring is the maximum possible egg temperature. Those. to keep it hot. This will better fix the color.

4. And blot the bottom tip with a paper napkin to remove the resulting drop. And then we put it on a stand so that the paint dries. It dries very quickly, because the egg is still warm.

5. The next step is to repeat the absolutely tighter procedure, but only with yellow paint. We lower the egg in the same way by 1/3, but on the other side.
At the intersection of red and yellow paint, an orange color is formed. We also put the egg on the stand,

6. And finally the third stage. In the same way, but with the second unpainted side, we lower it into blue exactly in the middle. And we stand for 1-2 minutes. As a result, blue combined with red gives purple. And in combination with yellow it gives green. Thus, we get a rainbow egg, which consists of six colors with clear transitions.

Second option
Another easy way is to make original lines on the egg. To do this, you will not need ordinary electrical tape. We cut it into thin strips and gradually glue these strips tightly around them.
As it was glued, you need to check again so that air does not get under the electrical tape. Otherwise, water will get in there and color the egg under it.


Third option
I want to show one more original and at the same time simple way. One of my favorite. It is called marble chips. For this we need onion peel, bandage and brilliant green.
1. First of all, with the help of scissors, cut the husk finely and variously. Or if it is dry, chop it with your hands straight into different shapes.
The smaller the pieces, the smaller the drawing.

2. Cut the bandage into two wide strips. We spread it so that the two strips are perpendicular to each other. How would you get a cross. In the center, put the strips, put the egg, boneless in the husk. For the husk to fix better, you need to moisten the egg. And we fold carefully.

3. Once folded, twist it tightly. We twist at the base with ordinary threads. We do all this in such a way that the bandage fits the egg as tightly as possible. To press the husk tighter.


5. Then add a full tube of brilliant green to boiling water. The more you pour the greenery, the richer the color will be.
And you mean, a very important point! The pan must be made of stainless steel so that it can be easily washed later.

6. At the end of this procedure, we take out the eggs. Carefully cut the bandage itself at the base. We rinse. And the result is a very beautifully colored egg.

We make original Easter eggs with our own hands
Probably many will agree with me that painting eggs in solid colors is kind of boring. Therefore, we will analyze in several ways how to decorate and color in an unusual way. If you like to creatively decorate something for the holiday, then you should like it.
For all methods, we need dyes for eggs, which must be diluted according to the instructions.
Peas

To paint with polka dots, we need regular candle wax. All we need to do is draw circles on the egg with wax using a cotton swab.

Then let the wax cool. By the way, you can draw any pattern you like. Next, we lower the egg into a can of paint. But be careful, it shouldn't be hot. Once the paint is dry, you can remove the wax from the egg.
You can use the paint drying stand that we discussed above: a sponge with needles.
We do with an elastic band

For the next method, we need rubber bands. Wrap the egg as you like. Then just dip it in the paint for a while. After the paint has dried, gently remove the rubber bands.


Stripe patterns
For the next option, you will need thin tape. Stick it to the surface of the egg. You can use both dyed and unpainted. Let's dip it in the paint for about half a minute. Remove the scotch tape from the dried egg.

Unusual pattern
In order to make such a drawing, you just need to add vegetable oil to the paint. And we lower the egg for a few seconds. Then we get it. As you can see, we got such divorces. Let dry completely.

Tricolor Rainbow
First, paint the whole egg. Then we dip it on both sides. We have already discussed a similar method above.

Grain drawing
For the next method we need rice. We put it in a separate glass. Add a couple of drops of dye to it. And mix. It is necessary for the rice to be colored, but not wet. It is better to do this procedure in a plastic container. Since you will need to add the egg, close the lid and shake everything together.

But I suggest you apply one more color. Add a different color to the same rice. In this way, different colors can be combined. Throw the egg into the container again, close and shake. That's what we got in the end.

Bright multi-colored drawing "Wave"
Now I will show you the coolest and most favorite way. To color an egg this way, simply wrap it in a paper towel.

Apply a small amount of paint on top. We combine colors according to your taste. We leave the egg in napkins for half a minute so that it is saturated with paint.

And then we unfold the napkin. And we get a wonderful drawing as a result. This way you will definitely surprise your family and friends.


How to paint with natural dyes?
Jelly easter eggs
Well, here we have analyzed more than 10 painting methods together. And I hope I answered the question - How to paint Easter eggs with your own hands? But the main idea of \u200b\u200bthis article is that you can give free rein to your imagination. All methods do not limit, but only give a chance to create and create masterpieces.
It seems like a simple staining procedure, but how much unusual and beautiful you can make. Illustrative illustrations will help you with this.
Thank you for reading the article, for your attention. Give likes and classes to the article. Share information with friends. And I look forward to your comments below. Happy Holidays, Happy Easter. Good luck and happiness to you!

Would you like to learn how to dye eggs with beets so that they acquire a soft pink hue? Read this recipe. Everything is not easy. And no synthetic paints are needed.

If you have saffron, you can use it to color the eggs orange. Here's how to dye eggs with saffron.

If you want to put blue colored eggs on the Easter table, then read this recipe - I will tell you how to paint eggs with blue cabbage. Why use artificial colors when there is a natural product?

Learn how to dye your eggs with turmeric so you don't have to worry about yellow Easter eggs. Why use synthetic dyes when you can dye your eggs naturally?

Tired of monotonous brown eggs for Easter? Then I bring to your attention the amazing painted hibiscus eggs. Why amazing? You have no idea what color they will turn out.

Perhaps the most popular way to color Easter eggs. I am telling you how to paint eggs with onion skins correctly so that they acquire a beautiful shade and do not burst.

Among the many artificial colors, I really want to find something natural that could be used for a holiday. I suggest you one of these options - colored eggs with spinach.

For those who are looking for ideas for Easter, but prefer only natural ingredients, I suggest a fairly simple option - colored coffee eggs.

If you prefer to use only natural dyes for Easter, then I suggest you a great option - eggs painted with blueberries.

Surprisingly, sometimes absolutely unusual things can come in handy in the kitchen. I bring to your attention one of these options - eggs painted with brilliant green.

Today you can find tons of ready-made Easter egg decorations, but let's not forget Grandma's recipes. I show you how to dye eggs with onion skins - according to a traditional Russian recipe!

You probably have scraps of unwanted fabric at home. If so, then I suggest you a festive idea - painted eggs in shreds.

I bring to your attention a very interesting and original version for a festive table for Easter - eggs painted with stains.

Do you want to make something bright and unusual for the festive table? Then I bring to your attention one of these options - striped colored eggs.

If you do not have creativity, but have a great desire to do something original for Easter, then spray painted eggs are exactly what you need.

If you are fond of creativity, then you should definitely try to make eggs painted using decoupage technique for Easter.


