Cake decorating options. You have no idea what ordinary parchment paper is capable of.
"Chocolate board of truffles"
A dessert chessboard is made up of black and white truffles.
You will need:
- a sheet of aluminum foil (parchment paper, polyethylene film)
- culinary bag or syringe
- nozzle for a bag or syringe
Products for 64 truffles:
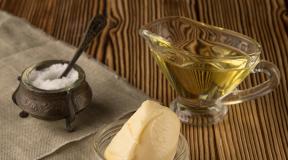
- 500 gr. chocolate
- 100 gr. butter
- 200 ml heavy cream (sour cream)
- 70 gr. powdered sugar
- dark chocolate in the form of powder and powdered sugar
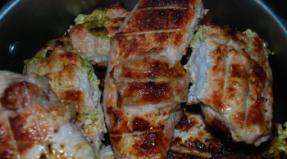
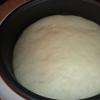
Melt the chocolate along with the cream and powdered sugar in a water bath. While stirring, add butter. Refrigerate, stirring from time to time.
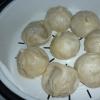
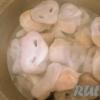
- On aluminum foil (plastic film, parchment paper), use a culinary bag or syringe to deposit small balls from the resulting mass.
- Put the balls in the refrigerator.
Roll half of them in crushed dark chocolate, and the rest in powdered sugar. Put the balls in a cool place.
- On a plate or cake, assemble a “chessboard” by alternating black and white truffle balls.
"Openwork decorations"
Openwork chocolate figures decorate cakes, ice cream and other dessert dishes. Such decorations are made from black, white or colored chocolate, as well as butter. The thinner the lines of chocolate, the more fragile the figures are (to make the lines thicker, cut off the cone of the culinary bag more).

You will need:
- aluminum foil (parchment paper, polyethylene film, plastic sheet)
- culinary bag
- scapula
Products:
- black or white chocolate
Melt the chocolate in a water bath and fill it with a culinary bag made of parchment paper.
- Draw tracery figures with chocolate on aluminum foil, parchment paper, plastic wrap or a clean sheet of plastic.
- Refrigerate for at least 1 hour.
- Carefully separate the figures with a spatula and decorate the dessert with them just before serving.
"Lattice"
The lattice is a very fragile decoration. It can also be made from white chocolate, but it does not look as impressive and requires more careful handling.

1. Break the chocolate bar into pieces and melt in a water bath.

2. Using a culinary bag, draw figures on a sheet of parchment.

3. When the chocolate hardens, carefully remove the figures from the sheet with a spatula.
"Flower"
Make the layer of chocolate at the base of the flower thicker so that everything is more stable.
"Leaf"
Try to draw the contours of the leaf well, make the central veins thicker and, most importantly, flat.
"Palm"

Make this decoration using a paper bag with a hole that is not too small, otherwise the palm will break when removed from the leaf.
"Butterfly"

This fragile decoration can be used to decorate mousses, ice cream ... The butterfly's body should be slightly thicker than the wings.
"Decoration for glasses»

The pattern of melted chocolate is applied directly to the inside of the glass. Until the glasses are filled with dessert, they are stored in the refrigerator.
Helpful advice
How to repair broken jewelry
Take one of the two parts of the broken decoration, dip it in melted chocolate and attach it to the other half. Place in refrigerator to harden.
If you can bake delicious cakes, then you should know how to properly decorate a homemade cake so that it can sparkle with bright colors. Cakes are not only served on birthdays today! It turns out that such sweet products can become the main dish of any feast. Therefore, in this article we decorate the cake with our own hands. In doing so, we will use the most original ideas.
What to use for cake decoration
Before offering you interesting ideas, it is worth saying that today it is customary to decorate cakes with a variety of decorations. However, making such jewelry may require patience and skill from you. And you may also need some improvised means. It could be:
- confectionery syringe with various nozzles,
- parchment paper,
- various blades,
- thin and sharp knife
- masking device.
But if you work hard, you will get a result of excellent quality. As a result, you can get a delicious and very beautifully decorated dish that will allow your guests to admire and enjoy its wonderful taste. In this article, we will tell you how to make various ingredients for decorating a cake.
How to make mastic?
Mastic is used quite often to decorate cakes. You can prepare mastic using any of the modern methods. But we will describe the simplest method of making mastic. So, you should prepare milk mastic. It will require:
- dry milk or cream,
- condensed milk,
- powder,
- dyes as desired.
From marshmallows you should prepare:
- marshmallow,
- food coloring,
- water and citric acid (lemon juice),
- butter,
- starch and powdered sugar.
How to cook?
Milk mastic should be prepared as follows:
Marshmallow mastic should be done as follows:
On a note! Use the mastic is as follows. Mastic should be thinly rolled into a circle. She covers the top of the sweet product. It can also be used to cut various products. Such as flowers, leaves and openwork patterns. Remember mastic tends to dry out instantly. It is very fast to work with her. To create a decoration, pinch off a piece from the total mass, and wrap the main part in cellophane.


Also Read: Birthday Gifts for Mom
How to decorate a marzipan cake?
Marzipan is a delicious nut paste that has long been used to decorate sweet cakes. This paste will consist of almond flour and sugar paste. As a result, the mass will turn out elastic and will keep its shape perfectly. This paste makes beautiful figurines and a perfect cake topper.
In order to prepare the pasta, you should take the following ingredients:
- 200 grams of sugar
- 1/4 cup water
- 1 cup toasted almonds.
How to cook?
On a note! Marzipan can be runny. Therefore, in this case, powdered sugar can be added to it in order to give it the desired consistency. Too thick paste is sprinkled with boiled water and rolled out. The cake that you designed in this way is put in the refrigerator for 8-10 hours.


How to decorate a cake with icing?
Aising is an ice pattern. This pattern looks great in the design of the cake. This decoration looks like an ice pattern on glass. And the taste of this decoration is like crispy ice cubes. The icing is mainly used to decorate cakes for weddings.
To make such an ornament, you must prepare:
- teaspoon of glycerin.
- Egg white - 3 pieces.
- Powdered sugar about 600 grams, maybe less. It all depends on the size of the eggs.
- Lemon juice in the amount of 15 grams.
How to cook?
Aising, as a rule, is prepared from chilled ingredients.
On a note! When working with icing, a confectionery syringe is used. In this case, it is worth using the narrowest nozzle. After the product is decorated, it is put in the cold to solidify.

Decorate the cake with waffles.
In this article, we list the best ideas to help you decorate your own birthday cake.
Waffles are also a great option for decorating a sweet cake. Moreover, they are very convenient to use at work. They don't crack or break. Quite often, wafers are made from: figures of berries, flowers and three-dimensional letters and numbers. Also in demand are photos and pictures of waffles that are edible.
How to decorate a cake with waffle pictures?
- It is worth saying that the process of decorating a cake with waffle pictures has its own characteristics, which should be discussed in more detail.
- The waffle blank is laid only on a flat surface of the cake.
- As a basis, you can use mastic. Also suitable: thick butter cream, chocolate icing.
- A waffle picture should be laid on a non-frozen surface. However, it is worth doing this if chocolate icing is used.
It should be formatted like this:


Decorate the cake with chocolate.
If you do not know how to decorate a cake with your own hands without mastic, then you need to pay attention to chocolate. Decorating the cake with chocolate is a great option. And all because this ingredient is combined with any dough and creams.
How to make chocolate?
Making chocolate chips is not difficult. For example, on a grater, you can grate the tile and sprinkle the sides and surface of the cake with this chip. You can also use a vegetable peeler. Such a knife will allow you to cut long and thin strips.
In order to decorate the cake with chocolate curls, you need to preheat the tile slightly. After that, you can cut the strips with a sharp knife or vegetable cutter.
You will need skill in order to make openwork patterns. In this case, different patterns are drawn on the parchment. After that, melted chocolate needs to draw patterns. The work must be done quickly, but at the same time carefully. Patterns should freeze on paper in the cold.
To make chocolate leaves, you need to take any leaves from plants and dry them. Of course, before sending the leaves for drying, they must be thoroughly washed, after which chocolate, which has been melted, can be applied to their inner side. Leaves should be put in a cold place. After they harden, you need to carefully remove the dried leaves from the chocolate leaves. Then glaze is applied with a silicone brush.


Decorate the cake with icing.
Glaze can also be very beautiful to decorate the cake for any holiday. Currently, there are many types of glaze. For example, there is a type of glaze that requires freezing in the cold. Another type of glaze can be consumed immediately. Now we will tell you what you need to make chocolate glaze:
- Milk - 1.5 tablespoons.
- Cocoa - 2 teaspoons.
- Sugar - 1.5 tablespoons.
- Butter - 40 grams.
How to cook?

Other cake decorating options at home
In addition to all the methods described above, there are other methods that are used in decorating cakes. And if you are wondering how to decorate a birthday cake with your own hands? Then look at some more interesting ideas.
So, you can use cream to decorate the cake. It is very easy to cook it. And it should be applied to the cake with a confectioner's syringe.

Cream is also a good option for decorating a cake. Meringue is also often used to decorate cakes.
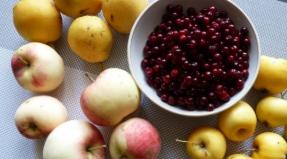
How to decorate a cake with fruits?
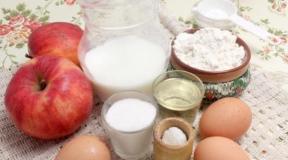
Ordinary or exotic fruits and berries are quite often used in decorating cakes. Their popularity is obvious. They have unique flavors and vibrant colors. To make fruit jelly you will need:
- apple juice - 600 milliliters,
- gelatin powder packaging,
- powdered sugar - 1 cup,
- fresh berries and fruits.
How to cook?

Everyone can prepare a delicious cake for the holiday. An interesting recipe is also not a problem to find in our time. It remains only to do everything according to the instructions and a chic confectionery product is already ready to be served on the festive table. Although ... a birthday cake without decoration is like a beautiful lady at a party in a dressing gown. Therefore, no matter how wonderful a homemade cake is, it must be properly decorated.
Decorating a cake at home requires certain skills. Therefore, before preparing and decorating a culinary masterpiece for a big celebration, it makes sense to practice a little on simple confectionery. After all, no one bothers to decorate homemade cookies prepared on a regular day off.
It is equally important to think over the composition in advance, otherwise unforeseen difficulties may arise during the design process.
It's a good idea to stock up on some pastry tools for decorating. Of course, the inquisitive collective mind of the almighty Internet will find a way to do without them, having adopted an ordinary spoon or fork, you will also find master classes on this dyeing option below. But if you plan to decorate cakes with a certain frequency, then it is better to simplify your task. Well, now it's time to talk directly about the means and methods of decorating homemade cakes.
Decorating a homemade cake with cream
Cream is one of the most famous and popular ways to decorate a cake. No wonder most store confectionery products are decorated with numerous roses, cream borders and other oily trinkets.
buttercream recipe
Making a real pastry cream based on butter is a rather tricky process. If you wish, of course, you can tinker, but such physical and financial costs are completely inappropriate for decorating a homemade cake. It is fashionable to prepare a high-quality and simple oil cream with just two ingredients:
- butter- 100 g;
- condensed milk- 5 tablespoons.
A detailed step-by-step recipe for making a simple butter cream for decorating a homemade cake with a photo. To prepare the cream, the butter must be taken out of the refrigerator in advance. When it becomes soft, it must be beaten properly with a mixer. When the oil becomes fluffy, you need to pour condensed milk into it and continue to beat until a homogeneous and airy mass is obtained. The simplest cream for decorating a homemade masterpiece is ready. By the way, for its preparation, you can use not only ordinary condensed milk, but also its cooked version. In this case, the cream will acquire a pleasant beige hue, and it will taste like a classic crème brulee.

Natural homemade food coloring
Of course, decorating a cake exclusively with white cream is boring. And for coloring creamy treats, you can use any food coloring. They can be purchased at the store in the form of powders, or you can cook it yourself, for example:
- a little saffron diluted in a small amount of water will make the mastic yellow;
- juices of beets or cherries - red;
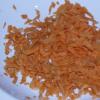
- carrot juice - orange;
- decoction of spinach - green;
- cocoa brown.
The cream is easy to work with. It is better, of course, to use a special syringe with different nozzles for decoration. With this tool, you can draw real masterpieces on a confectionery product. However, you can get by with an ordinary packing bag or a bag folded out of paper with a neatly cut corner. When you press the bag, the cream is evenly squeezed onto the surface of the cake. Having practiced even with the help of such a primitive tool, you can decorate any cake with borders, and inscriptions, and roses with petals.
After the decoration of the surface of the cake is over, the dessert must be put in the refrigerator so that the cream freezes a little. And the leftover cake is also best stored in the refrigerator. In this case, the cream will be edible for at least three days.

homemade icing recipes
Another wonderful and most importantly simple way to decorate a homemade cake is icing. You can make frosting with just three ingredients:
- powdered sugar- 3 tablespoons;
- milk- 1 tablespoon;
- butter- 50 g.
Melt the butter over low heat in a crust and let cool slightly. Then add the sugar ingredient to the butter and mix well. Then add milk and mix again. The finished mass is also white milk icing for decorating a homemade cake. It can be smeared on the surface of the biscuit and allowed to harden.
You can also make chocolate icing. Only the proportions of the products should be slightly different:
- powdered sugar- 3 tablespoons;
- milk- 2 tablespoons;
- butter- 30 g;
- cocoa- 1 tablespoon.
Mix cocoa powder with powdered sugar. Pour milk into the resulting mixture, mix well again and put on fire. When the mass boils, remove the crust from the heat and stir in the butter. The chocolate icing is ready to be applied to the cake.
You can also make real confectionery glaze - ganache. This is a denser variety of this "finishing" material. And to prepare it you need to take:
- chocolate- tiles (180-200 g);
- butter- 50-70 g.
To get a ganache, just melt the chocolate and mix it with melted butter.

Decorating a cake with fondant at home
This is not to say that this is a very simple way to decorate cakes. However, with a certain skill and a sufficient amount of practice, you can make real works of art with the help of mastic from your confectionery.
Mastic is a sweet, plastic mass, somewhat reminiscent of plasticine in its characteristics. You can cut out various figures from it, or you can simply “wrap” the entire cake with it, decorating it on top in some original way. Volumetric mastic compositions can also be made as a decoration for a homemade cake, but when dried, they can begin to crumble, so it is better to use other “materials” for this.

confectionery mastic recipe
Many recipes for making mastic have been invented. However, at home, it is easiest to make milk mastic. For this you will need:
- condensed milk- 200 g;
- powdered milk- 150 g;
- powdered sugar- 150 g;
- lemon juice- for improvement.
Mix powdered sugar and milk powder thoroughly. Then gradually pour the condensed milk into the mixture, kneading the dough. The result should be a homogeneous, elastic mass. We must immediately make a reservation that the amount of dry products is indicated approximately. If the resulting mass sticks to the hands, then a little more powder should be added to it. It happens the other way around: the dough does not want to stick and crumbles in your hands, then you will need to pour 1-2 teaspoons of lemon juice into it. And a few more words about the ingredients. For mastic, you should take powdered sugar of the finest grinding. Moreover, this product must be sifted through a sieve. This guarantees a quality end result.
The resulting mastic is almost white in color. To sculpt colored figures from it to decorate a homemade cake, food coloring must be added to the mass. They have already been mentioned in the description of the preparation of mastic. Working with mastic is quite simple. A ball of “dough” is rolled out on a surface covered with starch or powdered sugar, after which the canvas can be applied to the cake for its “covering” or decorative elements can be cut out of it. Some confectioners advise rolling the mastic between two regular packing bags. In principle, this is also possible. You can connect several elements of mastic by slightly wetting the gluing places with plain water.
It is worth warning that mastic should not be covered with biscuit cakes soaked in syrup or sour cream. Such impregnation will easily dissolve all decorations. There are no other serious restrictions on the use of this material. The mastic left after decorating the cake should not be thrown away. It is perfectly stored in the refrigerator, provided that the material is tightly wrapped in two or three ordinary plastic bags.

Marzipan for cake decoration
Marzipan can be a great option for decorating a homemade cake. This material can cover the surface and make a wide variety of decorative elements out of it.
What is marzipan? This name hides a delicate and elastic nut mass, perfect for decorating a homemade cake. In confectionery stores, you can probably buy it ready-made. However, marzipan can be made independently. To do this, you only need to purchase:
- almond- cup;
- granulated sugar- cup;
- water- a quarter of a glass.
Peel the nuts and roast on a dry baking sheet in the oven until golden brown. Grind the finished nucleoli with a blender or grate on a fine grater. Boil a thick syrup from sugar and water and pour ground nuts into it. Stir the mixture properly and cook for 3 minutes. Pour the mass into a bowl, generously greased with butter, and let cool. Remove the finished marzipan from the bowl, pass through a meat grinder and you can start decorating the cake.
Working with marzipan is as easy as working with mastic. A “lump” of material is rolled out, after which they cover the cakes on top or cut out figures and other elements from it. If marzipan spreads during rolling, then powdered sugar should be added to it and kneaded well. If the product, on the contrary, is too dense, then it should be sprinkled with warm water. After such a procedure, it will roll out much easier.
One thing to keep in mind is that marzipan needs some time to harden properly. So confectionery creativity should be done in advance - at least 8 hours before the culinary masterpiece is taken out to the guests.

Icing
Icing or ice pattern is another great way to decorate a homemade cake. Usually this technique is used in the confectionery business when decorating wedding cakes. However, no one bothers to decorate a cake with icing, for example: for New Year's Eve.
Icing is considered to be a universal decor method, since such patterns do not spread and adhere well to any confectionery surface. A similar decoration looks like an ice pattern on glass. To make such an ornament you will need to take:
- powdered sugar- 500 g (usually takes a little more);
- egg whites- 3 pcs.;
- lemon juice- 3 teaspoons;
- glycerol- 1 teaspoon.
First, chill all ingredients. Then carefully crack the eggs, separate the whites from the yolks and transfer to a clean fat-free bowl. The last procedure can be carried out by simply wiping the inside of the dish with a slice of lemon.
Beat the whites with a mixer at the lowest speed. You don’t need to beat for a long time - two minutes is enough. Now you can add the rest of the ingredients to the proteins and continue to beat the mixture until it turns white. Cover the bowl with the finished “ice” mass with a film and put it in the refrigerator for an hour. During this time, all the formed bubbles should burst. Ready! However, working with this material without special equipment will not work. You will have to purchase a confectionery syringe with special nozzles.
Aising needs to be transferred to a syringe. In this case, the nozzle on the tool must be put on the narrowest. With this material, you can draw lace, make various inscriptions, decorate borders, etc. The only restriction is that the surface of the confectionery product should not be sticky or have a tendency to run off. But icing fits perfectly on mastic or hard glaze.

Wafer homemade cake decoration
Waffles are a good material for decorating a homemade cake. The scope for imagination here is not limited to anything. With the proper skill on a waffle plate, you can make a portrait or draw a magnificent still life. Of course, this should be done exclusively with food paints. From a waffle plate, you can also make any volumetric elements for decoration.
One is bad. Ordinary wafer cakes are not very suitable for such purposes. They get wet or break. So you have to buy special wafer paper. It is produced in two types. More dense - it is good just for applying images (often sold with an image already applied) and very thin - it can be cut into parts. However, not in every locality such confectionery delights can be purchased. Therefore, it’s easier to still get by with the usual waffle cake.
It’s worth starting with the fact that such a workpiece should be cut to give the desired shape only with a very sharp knife. It is also advisable to moisten it in warm water. Otherwise, the waffles will just crumble.
After applying the pattern, the cake should be carefully laid on the surface of the cake. Just to begin with, this very surface needs to be made perfectly smooth. Materials such as mastic or thick glaze are perfect for leveling. So that the waffle layer does not move out, the back side of the cake must be smeared with something sticky. For this purpose, thick sugar syrup, jam or honey is perfect.
In order to apply the "glue" the cake must be placed on a smooth surface. The adhesive layer must be evenly applied to the surface with a special brush. If there is no such tool in the house, then you can even out the adhesive mass with a spoon.
The prepared waffle cake should be laid on the cake, covered with a napkin and gently leveled, squeezing out the air inside. The edges of this pattern can be decorated with cream or whipped cream.
With figures cut out of waffles, they do about the same. They are lubricated on one side with an adhesive and placed in the right place. Volumetric figures can also be assembled from waffle parts. For example, the body and antennae of a butterfly can be made from cream, and wings made from wafers can be stuck next to it.

Chocolate at home, for decorating the cake
Chocolate is the most affordable material for decorating a homemade cake. You can buy it at any store, and working with sweet tiles does not require any complicated tools.
The easiest way to decorate a cake with chocolate is to sprinkle with shavings. To do this, you can simply grate the chocolate and sprinkle the entire surface of the cake smeared with cream. Having worked longer, you can make a pattern or an inscription from chocolate chips. To do this, you first need to cut out a stencil of the desired pattern from paper, put it on the surface of the confectionery masterpiece, and then evenly sprinkle with chocolate chips. When the stencil is removed, only the desired image will remain on the creamy surface. Of course, the choice of chocolate in this case depends on the color of the background. On a light cream, a regular chocolate pattern looks good, and on a brown cream, a pattern of white chocolate chips will look contrasting.
The topping can also be made more interesting if the chocolate is not grated, but cut into thin chips using a conventional vegetable cutter. The resulting curls look very impressive, being in themselves a wonderful decoration.

Chocolate is also good because it can be melted. Many culinary publications write that chocolate bars should be turned into a liquid mass in a steam bath. In fact, this is not entirely correct. It is better to melt the chocolate over low heat in a ladle, stirring it constantly. Alternatively, you can also use the microwave. But in the pore bath, chocolate will absorb part of the condensate and it will no longer be possible to make a normal pattern out of it. But it's time to get back to embellishment.
The resulting chocolate mass can be drawn into a culinary syringe and with its help draw a wide variety of patterns. In order for the pattern to turn out to be an openwork nozzle for the tool, you need to choose the thinnest one. If there is no syringe at hand, it does not matter. You can put the chocolate mass into a regular packing bag, make a small hole in it with a darning game and start decorating the cake.
However, you should not draw directly on the surface of the confectionery. It is better to pre-apply the desired pattern on parchment paper or foil, and then circle the contours of the pattern with a liquid chocolate mass. The sheet with the applied pattern must be carefully transferred to the refrigerator for solidification. After some time, the base must be carefully separated from the chocolate patterns, and the resulting parts should be laid out on the prepared surface of the cake.
To create such decorations, you can use not only paper or foil. A wonderful decoration for a cake can be made by pouring melted chocolate over a clean tree leaf. Then the blanks must also be sent to the refrigerator, and then the natural leaf should be separated from the chocolate one. By the way, it is better to apply chocolate on the back of the leaf, then the real “veins” will be visible at the decorative leaf.
With the help of special stencil molds from chocolate, you can cut out a wide variety of figures. To do this, the melted chocolate mass must be poured onto a cold, buttered baking sheet and leveled with a knife. When the mass is almost solidified, you can start cutting out the figures with molds.
And you can do without molds by simply cutting the chocolate layer into various geometric shapes: squares, triangles, rhombuses and other “wedges”.

Whipped cream
This is also a good way to decorate a homemade cake. In principle, you can buy a can of ready-made whipped cream, but this is too banal. It is better to make whipped cream yourself, especially since it is not difficult at all. For this you need to take:
- cream (fat content not less than 30%)- 0.5 l.
The trick to whipping cream is its temperature. To make everything turn out, the dairy product must be cooled for 4-5 hours in the refrigerator. The container in which the cream will be whipped and the whisk with which this process will be carried out should also be cold. Speaking of capacity. It is better to take a larger bowl for whipping, since the cream will increase significantly in volume in the process of working on it.
Now about the process itself. The first minute the product must be whipped at the lowest speed, and then it can be increased. The whole action should take 7-8 minutes. It is not necessary to beat longer, the cream from this can lose all airiness.
The classic version of whipped cream can be modified. For example, sugar or powdered sugar can be dissolved in a dairy product before whipping (the latter is preferable). Vanillin or vanilla sugar will add a pleasant aroma to whipped cream. Can be added to cream and any food coloring. Then the finished cream will become colored.
Some sources suggest adding gelatin there as well. However, this should not be done. Whipped cream keeps its shape just fine, but you need to put it on a slightly sticky surface. Otherwise, the decoration may "slide".
And working with whipped cream is as easy as working with cream. Especially if the kitchen has a pastry syringe. Only unlike desserts with cream, it is advisable to eat a cake with whipped cream immediately. They still don't hold their shape very well.

Decoration of homemade meringue cakes
Meringue towers look very impressive on any cake. Of course, you can’t decorate a cake with crispy hemispheres alone. Putting such a decoration should be on a surface smeared with cream, icing or at least jam. You can cook meringue at home if you have:
- egg whites- 5 pieces.;
- sugar- 250 g.
Crack the eggs carefully and separate the whites from the yolks. Pour the whites into a large container and beat with a mixer until a strong foam. After that, you need to start pouring sugar into the mass. This should be done gradually - 1-2 tablespoons, while continuing to beat the mixture. The mixer speed should not be too high, but it should not be too small either. In total, the whole process takes 12-15 minutes.
Put the finished protein mass on a baking sheet covered with greased baking paper. You can spread it using an ordinary tablespoon or the same confectionery syringe. Baking time at 100°C is approximately 1.5-2 hours, depending on the size of the meringue.

Fruit for decoration
What could be easier than decorating a homemade cake with fresh fruit or delicious fruit slices? Perhaps this is a rhetorical question. This design option could indeed be considered the simplest, if not for one "but". Fruits do not really tend to fit on the cakes baked for the cake. So you can’t do without cream, icing or jelly.
The choice of "substrate" largely depends on the fruit. For strawberries, plain buttercream is the best option. Not so now exotic bananas go well with chocolate icing. But the win-win option, of course, is jelly. How to make it? This will be discussed below. In the meantime, a couple of words about fruits.
To decorate the cake, any options for natural goodies are suitable. You can take both fresh fruits, and canned or frozen. In principle, even jam is suitable. After all, this is also a fruit, only in a processed form.
Fresh strawberries can be beautifully cut into halves and covered with them on the surface of the confectionery. Small berries - raspberries and blackberries, can be laid whole, dividing the cake into several contrasting triangular sectors. From exotic fruits, you can make whole compositions. In short, the fantasy here is practically not limited to anything.

How to decorate a jelly cake
So it's time to talk about how to decorate a homemade cake with jelly. Theoretically, you can buy a concentrate of this product in the store, dilute according to the instructions and decorate the cake with it. This is even a very good option, allowing you to get a wonderful decor element without much effort. Although in fact, jelly is not so difficult to make on your own. To do this, you need to have at hand:
- fruit juice- 0.6 l;
- powdered sugar- 200-250 g;
- instant gelatin- 1 sachet.
Allow gelatin to swell in one glass of juice, then melt in a water bath. After that, pour the remaining juice into the mixture, pour in the powder, mix everything well and refrigerate. You don't need to let the jelly dry completely. It just needs to be a little tight.
Place the finished cake in a detachable form so that the sides rise above the cake layers by about 30 mm. Remove the prepared jelly mass from the refrigerator and put it into a mold. You can immediately put fresh fruits on the surface of the jelly and send the cake to the refrigerator for 12 hours.
What to do with the rest of the jelly? It can be put into molds and stored in the refrigerator. When they have cooled a little, put them on a jelly surface that has not yet hardened.
By the way, it is not necessary to make jelly from one juice. You can take several varieties of multi-colored fruit drinks, divide the surface of the cake into sectors and make a colorful fill. And you can make the surface plain, and put colored figures on it.

Finished confectionery (sweets and marmalade)
Without particularly straining, you can decorate a homemade cake with ready-made sweets or marmalade. Of course, caramel or lollipops are not suitable for decoration. But chocolates, chocolates, wafer rolls and even M&Ms are excellent material for decorating homemade confectionery.
Lay sweets on a surface covered with cream or icing. Moreover, the cream is preferable, because it is less sweet. Finished confectionery products can decorate not only the surface of the cake, but also its end part. For this, for example, waffle tubes placed vertically are perfect.
It is interesting to decorate the cake with the help of ready-made multi-colored marmalade. The easiest option is to lay out a surface for them in the form of a pattern or inscription. You can do it smarter too. Marmalade melts perfectly in the microwave in just seconds. You can work with the prepared mass in the same way as with jelly. Only the marmalade hardens faster - only 3-4 hours.
You can draw whole pictures with liquid marmalade. True, in this case, it is better to cover the surface of the cake with mastic. Then, using a confectionery syringe with the thinnest nozzle and melted chocolate, you need to apply the contours of the drawing to the surface of the future masterpiece. When the chocolate has cooled, you can fill the corresponding places in the pattern with liquid marmalade of the desired color.

Sprinkle for decorating homemade cake
Well, if all the above methods seem complicated, then you can do it quite simply - sprinkle the surface of the cake with some kind of bulk material, for example: powdered sugar, cocoa or purchased multi-colored sprinkles.
It is worth remembering that the topping will not stick to a dry surface. Therefore, before proceeding with the design of a homemade cake, its top and sides should be smeared with something sticky: cream, icing or jam. It is necessary to apply the dressing immediately after smearing, until the “sticky” base has hardened.
As a rule, no housewife has any difficulties with sprinkling the top surface of the cake. But to decorate the ends of a confectionery product with such material is quite problematic. But this is only if you do not know one secret. In order to sprinkle on the sides, you need to put the cake on a piece of fabric, pour the desired material around it directly onto the fabric, and then gently press the fabric to the side of the cake. Most of the topping will stick to the sides.

Just a cake sprinkled with something will turn out delicious, but the decoration will look too boring. A stencil will help correct the situation. From ordinary paper, you can cut out any pattern or inscription, put it on the surface of the confectionery and start sprinkling. When the stencil is removed, the desired pattern will appear on the cake.
Sprinkling can be done not only with one material. Thanks to stencils, you can also make drawings from different contrasting materials, for example: all from the same cocoa and powdered sugar. What else can be sprinkled on the cake? Yes, basically anything. As a “finishing material”, you can use crushed nuts, cookie or waffle crumbs, instant coffee, grated chocolate, etc.
That, in fact, is all. Creative success and bon appetit!
Video "Cake Decoration"
How to quickly decorate a cake: 6 easy options
The more beautiful the cake, the more it causes appetite and admiration of others. Therefore, today we offer you quick, simple and effective ways to decorate a cake at home.
Option 1, how to quickly decorate a cake: stencil
One of the easiest ways to decorate a cake or pie is to sprinkle it with powdered sugar or cocoa through a stencil.

Anything can serve as a stencil, from a special ready-made stencil, napkins with carved holes to a wide variety of items!
The decorating process is very simple: put the stencil on the surface of the cake, sprinkle with powder or cocoa using a sieve and carefully remove the stencil.

All this looks especially impressive if you use a contrasting background before using the stencil. For example, make the background white with powdered sugar, and sprinkle cocoa on top through the stencil, or vice versa.

Option 2: make frosting
You can easily quickly and beautifully decorate the cake by filling it with icing on top. You can also sprinkle multi-colored sprinkles on top.
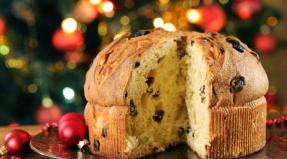
2.1. Milk glaze for quick and easy decoration of a cake, Easter cake
- Butter 50 gr.
- Powdered sugar 3 tbsp
- Milk 1 tbsp
 Ingredients.
 Melt the butter over low heat, then cool slightly.
 While stirring, add powdered sugar, then milk.
 The result should be such a homogeneous white thick mass.
 We coat the top of Easter cakes or buns with the finished glaze. Let the glaze dry.
2.2. Chocolate icing for cake decoration
- Cocoa powder 1 tbsp
- Powdered sugar 3 tbsp
- Butter 30 gr
- Milk 2 tbsp
We keep proportions. The main thing is to stir constantly so that the chocolate icing does not become covered with a crust.


Mix milk with sugar and cocoa, bring to a boil, remove from heat. Cool slightly and add oil, mix well. The butter makes the frosting shiny. Chocolate frosting is ready!
Option 3: butter cream will help you quickly and easily decorate the cake!
Beat 100 gr. softened butter with a mixer until fluffy. Then gently enter 5 tbsp. l. condensed milk (can be boiled), without stopping whisking. The cream should be smooth and fluffy.
To color the resulting cream, special dyes, cherry juice, beetroot, carrot, spinach, cocoa or coffee (instant) are used.

You can “draw” original borders, ruffles, flower arrangements, etc. on the surface of the cake using a pastry bag or a syringe with various nozzles. Alternatively, a cornet is quite suitable for this purpose (a sheet of thick paper folded into a cone with a cut off lower end). Having filled a home-made confectionery envelope with cream and holding it with your hand, you need to lightly squeeze it, squeezing out the right amount of confectionery mass.
You can also make something like a pastry bag out of an ordinary thick plastic bag or "file" by simply cutting off a small corner and tying the free end of the bag.
Option 4: whipped cream
Not all housewives can boast of the ability to whip cream for a cake correctly, but following simple rules, you can learn this. First, you need to choose cream of the desired fat content, at least 30%. Before whipping, the cream is pre-cooled in the refrigerator for two to three hours. If you do not cool the cream before whipping, then in its process they can delaminate and become unsuitable for decorating pastries. The container in which the beating is planned and the whisk should also be pre-cooled, for this purpose they can also be placed in the refrigerator shortly before beating. When choosing a container, you need to take into account that in the process of whipping the volume of cream will increase, it is not recommended to transfer it to another bowl after the mixer has started, it is better to choose a large bowl in advance. You can whip cream to decorate the cake with a good hand whisk, but this will require a lot of effort from the hostess. You need to start whipping at a low speed, gradually increasing it, the whipping process must be stopped in time, otherwise the cream may lose airiness. The average whipping time is 6 - 8 minutes.
If desired, you can add sugar or powdered sugar to them, which will dissolve faster in the total mass. Additionally, you can use vanilla sugar to add flavor. If you can't whip the cream into foam, you can try adding lemon juice.

To decorate cakes with cream, you will need a pastry bag (syringe) with different types of nozzles, with which you can spread the cream on the surface of the cake with openwork patterns, create inscriptions with thin lines, draw flowers, stars and other small shapes.
Option 5: chocolate will help to decorate the cake simply and quickly!
The easiest and fastest way to decorate the cake with chocolate chips. To do this, you just need to grate the chocolate bar on a coarse or fine grater.
But there is also a more interesting and unusual way to get shavings: put the chocolate for a while in a warm place, and then cut thin shavings from the bar with a knife. They will immediately start rolling. Arrange these curls on a plate and send them to the refrigerator. Sprinkle them randomly on the cake when they are completely set. 
Option 6: fruits, berries!
How to quickly decorate a cake at home? Try the fruity version!
Canned, fresh fruits and berries are a great idea for a quick decoration at home. In any season of the year, you can find a suitable option: in winter - kiwi, citrus fruits, apples, bananas, in summer - strawberries, cherries, raspberries, apricots. At any time of the year, you can use exotic fruits - mango, pineapple.

You can easily decorate the cake with berries and cream - an option for beginner housewives!
- Cover the finished round cake with cream: on top - in an even layer, use a pastry bag with a toothed nozzle on the sides, forming corrugated vertical stripes on the sides.
- Divide the surface of the cake into 8 parts and mark them with the tip of a knife, drawing stripes on the cream.
- Take about 150 grams of raspberries or blackberries (or others that will contrast in color).
- Lay the berries neatly in one layer on each “slice” of the cake and separate the parts from each other with a thin strip of cream.

Fruits gelled on the surface of the cake are a very spectacular and bright decoration. It will take a little more time, but only for the jelly to harden.
In order for the layer to be dense and not spread, it is advisable to decorate the cake for several hours, and keep it in the cold until serving.
- Cut the fruit into thin slices, put them on the surface of the cake smeared with thick cream.
- Arrange the slices in even rows, and put the carving fruit flowers in the center.
- Prepare the jelly. To do this, you can use store-bought (dilute it with water, as indicated on the package) or make jelly from ordinary gelatin based on water or juice. Match the shade of the fill to match the colors of the fruit, or use a colorless one.
- Place in refrigerator for at least 1 hour.
No matter what festive dishes the table is filled with, all guests are looking forward to the final chord - dessert. Beautiful cakes are a delicious end to any holiday. Those with a sweet tooth know that a homemade cake made at home is always better and healthier than a store-bought one. Every housewife wants to impress those present with her masterpiece, to put on the table not only a delicious, but also a beautiful cake. Decorating cakes with cream is a fun activity. There are many ways to decorate a cake at home. For example, decorate it with cream, chocolate, mastic, fondant, whipped cream, jelly, beautifully place berries and fruits on it, use meringue to decorate the cake. A master class on decorating cakes offers how to diversify decorating cakes at home.
It is important to consider that the taste of the decor ingredients is in harmony with the taste of baking:
- puff pastry and honey cake are good with boiled or raw condensed milk and nuts;
- sand cake harmonizes well with butter, protein cream, jam;
- butter creams, butter creams, chocolate icing are suitable for biscuits;
- for cottage cheese baking, take berries and fruits, whipped cream.
A little bit of desire and diligence, and you will be able to prepare beautiful cakes, you will be able to simply and quickly create a confectionery masterpiece.
Using, for example, buttercream to decorate a cake is a classic. Since childhood, we remember oil roses, lilac branches, green leaves on pastries from the store. Inscriptions, flowers with leaves, openwork patterns - cream decor will never get old. The cream mass should be thick enough. The best option is butter plus condensed milk. This cake decorating cream holds its shape well. You can add syrup, instant coffee (for coloring and enhancing the aroma), cocoa (provides the taste and color of chocolate), sour cream and whipped cream to get a more delicate texture, all kinds of additives to improve the flavor (vanilla, cinnamon, zest). Protein cream is also perfect for decorating a cake.

To decorate the delicacy with your own hands, you will need pastry bags made of thick film and nozzles made of food grade metal or plastic, or a pastry syringe with curly tips. Instead of a bag, you can simply take a tight plastic bag. If you plan to make the dessert bright, divide the cream into parts and color with food coloring, cool. Place it in a pastry bag or syringe, choose a nozzle. From the cream for decorating the cake, you will make a delicate border, graceful roses, all kinds of small figures or patterns. Often used protein-custard to decorate the cake. The cream recipe involves whipping hot syrup and whipped cream, the cream is strong and does not settle.
Decorate with fruits and berries
Juicy berries, fragrant fruits - it's so appetizing. Decorating a cake with fruit is a great way to decorate baked goods. Pieces of fruit can be placed between the cakes, added to the cream, placed on the surface of the dessert and poured with a layer of jelly. In the same way, the cake is decorated with berries. If you are faced with the question of how to decorate a cake with fruits, keep in mind that not all of them are suitable for decoration, too juicy ones will ruin the look. Most often, mangoes, citrus fruits, apples and pears, apricots and peaches, kiwi and pineapples are used to decorate pastries. And, of course, colorful strawberry cake decoration is used most often.

You will get a successful fruit dessert at home if you fill the surface with jelly. The pieces of fruit will stick better, and cooking will take quite a bit of time. Place the product in a detachable form, lay out thinly sliced \u200b\u200bberries and fruits, pour jelly. You can not think about how to make jelly, just buy ready-made in the store, cook according to the instructions, slightly reducing the amount of water. Place the dessert in the refrigerator for several hours until it cools down well.

Mastic
Many hostesses are sure that decorating a cake with mastic is a very laborious task. Not to say that it's easy, but when you understand how to decorate a cake with fondant at home, decorating cakes will not be a problem for you. There are different types of mastic, it can be painted in different colors, it is soft and plastic and you can create a real masterpiece from it. To make the fondant, you will need gelatin, water, powdered sugar, lemon juice, and food coloring. Mix powdered sugar with dissolved gelatin, add a little lemon juice and knead. Separate the mastic and paint in the desired colors. First you need to cover the finished cake with a layer of mastic. Roll out into a thin layer, place on the surface, gently press down and cut off the excess edges.

Cut out small details (flowers, leaves, patterns) and attach them. You can make three-dimensional figures, mold them from mastic, like from plasticine. If you need to glue individual parts, use protein. This preparation should be done in a couple of days so that it has time to dry. Mastic makes everything extremely bright and elegant.
Chocolate decorations
Everyone loves chocolate and chocolate candies, so decorating a cake with chocolate is always relevant. You can get very beautiful cakes, filling with icing, but you can create a real masterpiece. Use bitter, milk and white chocolate. Before making chocolate decorations for the cake, it must be heated. The most convenient way to do this is in a microwave oven, in a water bath or in an oven at a temperature of 50-100 degrees. The mass must be stirred frequently and the ingress of steam and water must be avoided.

If the question arose of how to decorate pastries, and time is running out - fill it with chocolate icing. You can make it from cocoa powder, butter, sugar, milk or sour cream. Decorating with this glaze is cheaper than using chocolate, the main thing is that the cocoa is of high quality.
But the ideal option is to use real chocolate (70% or more cocoa beans), heavy cream and powdered sugar. The icing will have a great taste, provide a shiny, uniform surface.
You can sprinkle the dessert with chocolate chips. Pre-chocolate must be held at a temperature of about 30 degrees, this will make it more plastic. On the wide side of the tile, you need to cut it with a vegetable cutter with a sharp knife into wide chips. The shavings are rolled up, they can decorate the top layer, lightly sprinkle with powdered sugar on top and decorate cakes at home.
Berries on the cake, framed with chocolate leaves, always attract attention.
Before decorating the cake, try making the leaves yourself:
- Collect live leaves, strong, not too small, with many veins.
- Cover the reverse side of the sheet with melted chocolate with a brush, the veins on it stand out better.
- Bring to the cold, laying the chocolate on top. After hardening, carefully separate the chocolate plate.
With the help of a cornet (pastry bag) you can make chocolate patterns for decorating cakes. It must be melted in a water bath, poured into a cornet and write congratulations on the surface, draw patterns.

To decorate the cake with cream, you can pick up decor-bows. Chocolate bows look beautiful. Pour long strips onto a parchment sheet from the cornet, while the chocolate is still soft, fold in half and pinch the edges with a clothespin. Remove the parchment from the hardened chocolate and lay the bow details in layers, each time reducing the number of folds. Lay out the bow and fasten it with hot chocolate.
You can cast chocolate figures, such as butterflies. To do this, you need a pastry syringe and parchment. Lay the parchment on the stencil and fold it in the center to give the figure volume. Apply chocolate along the contour, wait until the chocolate hardens, and remove the parchment. Butterfly is ready. The figurine is very fragile, handle it with care. In the same way, you can make an openwork border for the side of the cake. On parchment, mark a strip of the required size, draw patterns on it. After hardening, carefully remove the parchment and glue the border to the side surface. These blanks are suitable for children's cakes.
Thematic
It is impossible to imagine a birthday without sweets. For a children's birthday, mom will bake a delicious dessert and provide decoration of a children's cake at the highest level. For children's products, effectiveness and brightness are very important. Prepare a biscuit decorated with M&M´s and Kit-kat - a cake with your own hands. Bake a biscuit according to your proven recipe, coat it with your favorite cream. Glue tick-tock sticks on the side surface, you can tie them with a bright elegant ribbon. Pour a large pack of M&M´s on top and send everything to the cold. For girls, decorations from bows, beads, flowers from mastic will be appropriate. Boys prefer decorations on sports or car themes, with characters from computer games.

Of course, you need to think about how to decorate a birthday cake for an adult. Here it is worth considering the birthday man's hobby, his profession. For an anniversary, you can bake a confectionery product in the form of a number - the age of the birthday person, or write a congratulation with cream directly on the surface. An avid football fan can bake birthday cakes in the form of a soccer ball on the field with gates, flags of your favorite teams. With the help of mastic, you can beat any hobby of the birthday man, professional features. There is full scope for your imagination.

One of the most important events in life is a wedding. Beautiful wedding cakes are not just a treat, they are a symbol of love and fidelity of young spouses. Most often it is made gentle, in soft pastel colors, decorated with flowers. Now baking from a wide variety of geometric shapes, most often multi-tiered, is in fashion. A dessert in the form of one or two hearts interconnected with cream is popular.

Among wedding pastries, multi-tiered products are in the lead; they look very solemn. You can use the following cake decoration:
- The mask is very popular. It can be painted in any color, fashion figurines of the bride and groom, bows, flowers, rings.
- Icing is widely used. From snow-white sugar icing, you can create the most delicate lace, congratulatory inscriptions.
- It is hard to imagine a cake without flowers, leaves and patterns. The most delicate roses are created from the snow-white butter cream.
- On the baking surface covered with cream, spreads thinly sliced \u200b\u200bberries and fruits, it is advisable to fill them with a layer of jelly.
- You can crush the delicacy with candied rose petals.
Creating a beautiful culinary masterpiece is not only for professionals. The homemade cake, in which the hostess put her soul, decorated it with love, will certainly be remembered by all guests. At the same time, the simplest available products are suitable for decoration - ready-made chocolate, simple butter or protein cream, seasonal fruits, frozen berries, and even homemade preparations.