Yeast braid. Plait with raisins from yeast dough Braiding from dough
Step 1: prepare the water.
Pour water into a small saucepan and place the container over medium heat. The water must be heated to a temperature no more than 45°C. Attention: if you have a kitchen thermometer on hand, be sure to use it, as in very hot water the yeast can lose its properties and baking simply won’t work. After that, turn off the burner, and pour the water into a measuring cup.
 Step 2: prepare the yeast.
 To prepare this dish, you can use ordinary dry yeast. And for this, pour yeast and sugar into a measuring glass with warm water.
  Using a mixer or a hand whisk, mix all the ingredients and leave aside to brew for 10 minutes.
 During this period of time, the yeast ingredient should swell.
 Step 3: prepare the dough.
 Pour the yeast mixture into a deep bowl and add vegetable oil, salt and 240 grams of flour.
 Using a mixer or a hand whisk, mix the ingredients well until smooth.
  After that, pour the remaining flour into the container and again mix everything well with the tools at hand.
  After that, we continue to knead the dough with already clean, dry hands or in the same bowl, or whoever is comfortable - on the prepared kitchen table, powdered with a small amount of flour, for another 8 minutes.
 The dough, thanks to our laborious process, should become smooth, elastic and not stick to your hands. At the end, we give the dough a rounded shape.
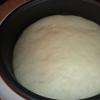
  Next, grease the deep bowl with a small amount of vegetable oil, not forgetting about the walls of the container, and transfer the test ball back to the container. Cover the bowl with a damp cloth towel and leave the dough in a warm place to infuse for 1 hour until it grows in size. 2 times.
 At the end of the allotted time, we crush the dough again with our hands so that carbon dioxide, which is formed due to the fermentation of yeast, comes out of it.
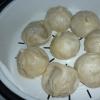
  And now, we shift the test ball onto a floured table. We divide it into two equal parts. And now, forming smaller balls from the test pieces, cover with a cloth towel and again leave the dough in a warm place for 40 minutes insist and increase in size.
 Step 4: prepare the chicken fillet.
 I boiled the meat in advance, so after it has become room temperature, it must be laid out on a cutting board and cut into small pieces with a knife. After - we shift the ingredient to a free plate.
 Step 5: prepare the cheese.
 Using a medium grater, grate mozzarella and cheddar cheese directly into a free plate. And so that the milk components do not become weathered, we wrap the container with cling film.
 Step 6: prepare the bow.
 First, peel the onion from the husk with a knife. After - rinse the component under running water and immediately after that - lay it out on a cutting board. We cut the vegetable with the same sharp inventory into two equal halves and then cut each of them into half rings. Transfer the onion strips to a clean plate.
 Step 7: prepare the stuffing.
 In a medium bowl, lay out such components of the filling as chicken pieces, onion half rings and pour everything with barbecue sauce. Salt the stuffing to taste. And now, using a tablespoon, mix the ingredients well until the sauce is absorbed into them.
 Step 8: Making braids is easy.
 So, the test balls have already increased in size, so we lay them out in turn on a flat surface, powdered with flour, and once again lightly knead them with our hands. Then, using a rolling pin, roll out an oblong-shaped cake from the dough, thick not less than 1 centimeter, as well as such a size that it fits in a baking sheet, and it was convenient to bake the braids in the oven. Next, we shift the dough onto baking paper so that after it it is convenient to transfer the braid to a baking sheet.
  Then we take a ruler and measure from the longer edge to the middle of the cake about 3 centimeters. After - we make the first cut of the dough, which corresponds to the length of this line. Pressing on the dough with the edge of the ruler, we make a perpendicular cut line, and along the entire length of the dough, in order to mark the boundaries of future cuts along the edge of the dough cake.
  And now, already continuing to use only the knife, we make cuts along the entire length of the side edge of the cake at a distance of about 1-1.5 centimeters. After - we do the same procedure with the other longer edge of the cake. We get it in appearance, like a fringe on both sides of the test layer.
  After that, with the help of a confectionery brush, we lubricate the center of the cake, without affecting the cuts.
  Then, with a tablespoon, evenly spread the filling over the entire surface of the center of the cake. And at the end, sprinkle the filling with a mixture of grated cheeses.
  And now the most interesting process of making braids begins. With clean, dry hands, we begin to bend the test strips in turn from two opposite sides obliquely. At the same time, do not forget to press each strip with your fingers to the dough on the opposite side of our test product so that the braid does not open during the baking process. Thus, we get the most real, only edible hairstyle - a braid or spikelet.
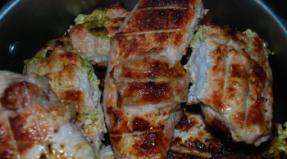
  We leave future baking in a warm place for another for 15 minutes infuse and slightly increase in size. After this time, we shift the parchment with the dish to a baking sheet and set to bake in a preheated oven to a temperature 200°С during 15-20 minutes until the braid is covered in a delicious golden brown color. After that, we take out the pastries from the oven and put the second braid to bake for exactly the same amount of time.
 Step 9: Serve braids as easy as shelling pears.
 After preparing the dish, we are not in a hurry to serve the braids to the table, but leave them aside to brew and cool a little more for 5 minutes.
 And just before serving, the pastries can be cut into small pieces and pleasantly surprise guests with a delicate airy dough, unforgettable aroma and excellent taste of the filling, along with hot tea or coffee. Enjoy your meal!
 - - If you do not want to use the second ball of dough immediately, then simply wrap it with cling film and store it in the refrigerator for 2 days or in the freezer for up to 2 months.
- - In addition to the salty meat filling, you can add any other fillings to your taste in the dish. In any case, the braids will turn out very tasty and fragrant. For example, you can put jam or cottage cheese in baking, or add nothing at all, and at the end make icing and pour it over the surface of the pigtail, and also sprinkle with chopped nuts.
- - Use only high-quality flour of the highest grade, fine grinding and a proven brand in the dough, as low-quality flour can ruin pastries. Also, in the process of kneading the dough, do not overdo it with flour, because if the dough also contains much more flour than indicated in the ingredients, the baking may simply not rise.
Dissolve yeast in 100 ml warm water. Add 1 tablespoon of sugar. Leave the dough in a warm place until a “fluffy hat” forms, about 15 minutes. Prepare products for the preparation of yeast dough, slightly warm the yogurt.
Combine the dough, yogurt, eggs, sugar, salt, 3 tablespoons of vegetable oil. Mix everything well.


Knead soft dough. At the end of the batch, add 1 tablespoon of vegetable oil. Put in a warm place to rise.


As soon as our dough rises a second time, put it on a floured surface. Wrinkle a little.

Divide the yeast dough into two parts (we will get two braids). Roll out the dough into a layer, grease with melted butter and sprinkle with sesame seeds.


Put the workpiece on a baking sheet greased with vegetable oil. Form a braid: turn the pieces of dough in different directions. Leave the braided yeast dough for 15 minutes to proof, then brush with egg yolk and sprinkle with sesame seeds. Put in a preheated oven and bake at 180 degrees until done.
Probably everyone has made a yeast braid at least once in their life. We usually put raisins in the filling - this is the most popular filling option.
But today I want to show you how to make a beautiful yeast dough braid with dried apricots, ricotta and almonds. That's what the Germans do. It turns out very tasty. Especially suitable for those who like moist filling. The recipe was made for the magazine "Home Restaurant".
So let's make dough. First, pour the yeast with warm milk. Add sugar and let them rise.
Add all other ingredients (melt the butter and sift the flour), knead the dough. Let it rise in a warm place for an hour.

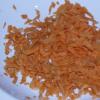
While the dough is rising, prepare the filling. Pour boiling water over dried apricots for 10 minutes. Then cut it finely.

Now mix dried apricots, almonds, ricotta cheese, sugar (if necessary, add more sugar to taste).

Well, our dough has risen.

Let's divide it into 4 parts.

Roll out each part into a long layer. We divide the filling into 4 parts and put one part, distributing it along the length.

Now wrap one edge to the middle.

Let's roll, we will have such a tourniquet. We pinch the ends.

Let's do the same with the rest of the test. Now we put them together. We pinch the ends of these bundles.

We wrap the last tourniquet and pass it under another, according to the wattle principle.

We do the same with each next tourniquet.

Everything is very simple. At the end we pinch everything.

We put the braid on the sheet, let's stand for 30 minutes. You can then brush with beaten egg if desired. Bake at 180 degrees for 25 minutes. But always look at your oven, sometimes it may take more time.
I poured the finished roll with glaze and sprinkled with petals. For the glaze, mix the powder with water and mix well. Bon appetit.


A braid is being prepared on a yeast dough. It is most convenient to use dry yeast, it is much easier and faster to work with them than with pressed ones, there is not even a hint of a yeast smell, and the dough itself rises and grows beautifully, it turns out to be layered.
We will knead the dough with whey, but if you wish, you can use milk (in the same amount). But adding vegetable oil to the dough is important - so the braid with raisins will turn out to be especially soft and will not get stale for a long time. Alternative recipes - and.
Total cooking time: 130 minutes
Cooking time: 35 minutes
Yield: 8 servings
Calories: 305.20
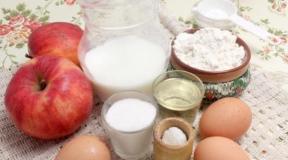
Ingredients
- serum - 200 ml
- wheat flour - 400 g
- fast-acting dry yeast - 6 g
- salt - 1/4 tsp.
- sugar - 100 g
- vanillin - 1/6 tsp
- chicken egg - 1 pc.
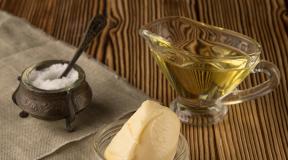
- refined vegetable oil - 80 ml
- raisins - 50 g
- 1 yolk and 1 tbsp. l. milk - for brushing
Cooking
Large photos Small photos
Sift flour through a sieve into a deep bowl to saturate it with oxygen. Add salt, sugar and dry yeast, a little vanilla, and then mix well so that all dry ingredients are evenly distributed. Make a hole in the center. Pour the heated whey into it (up to 35-37 degrees), beat in the egg.

Stir the dough with a spoon, and then start kneading with your hands, gradually adding vegetable oil. Knead for 5 minutes until the dough starts to pull away from the sides of the bowl. It should be soft and sticky to your hands, but do not add more flour than indicated in the recipe, do not hammer the dough, otherwise it will become tough when baking. Round the dough into a ball, dust lightly with flour, cover the bowl with a clean towel and put it in a warm, draft-free place for 1 hour.

After the specified time, add the washed and thoroughly dried raisins. Punch down the dough so that air comes out and the raisins are distributed more or less evenly. Cover with a towel and put back in a warm place for 30 minutes.

Place the risen dough on a floured work surface. Divide it into 3 large and 3 small parts, roll them by hand into long sausage-wires.

Weave a braid from three large bundles. Transfer it to a baking sheet.

Then weave a pigtail of three small bundles. Lay it on top of a large braid. To prevent them from separating during baking, secure the edges with toothpicks.

Lubricate the surface with yolk, loosened with a small amount of milk.

Send the braid to the oven, preheated to 180-190 degrees. Bake for about 30-35 minutes on a medium rack, until browned. Check readiness with a toothpick - pierce in the thickest place, if it comes out dry, without sticky dough, then it is ready.
Remove the hot roll from the baking sheet and cover with a slightly damp towel, leave for 15-20 minutes. Serve the raisin braid warm or completely cool, with milk or tea. Bon appetit!