Coloring eggs for Easter. Video tutorial: Unusual ways to make Easter eggs

It's spring outside, which means that soon the whole country will celebrate one of the main Christian holidays - Easter. Both adults and children are looking forward to this bright day, preparing traditional food and treats with pleasure. On the eve of the bright holiday of Easter, we want to tell you about interesting and unusual, as well as all known methods of painting eggs.
Since ancient times, it has been customary to exchange colored eggs during the Easter holiday. Since childhood, in many families, relatives came to each other and even played some kind of battle with eggs. Two people chose their testicles, in their opinion the strongest, and hit them against each other, first with sharp tips, and then blunt - whoever did not break an egg during the collision won, taking the opponent's egg. It was possible to continue this action as long as there are those willing to fight for victory.

According to memories from childhood, painting Easter eggs is a very entertaining activity. Children so enthusiastically and diligently immerse eggs in multi-colored solutions, stick stickers, tie them with threads and improvised materials to obtain spectacular lines and patterns.
All preparations for Easter begin at Maundy Thursday , the day when the soul and body are cleansed spiritually and physically. It is not for nothing that Thursday is called clean, according to Christian customs, on this day you need to wash yourself thoroughly, take a dip in running water, and even better go to the bathhouse. On Good Thursday, in addition to everything else, you need to thoroughly clean up, wash dirty clothes, clean everything, because on the following days before Easter, you will not be able to do household chores.

And, of course, on Maundy Thursday they bake Easter cakes, make Easter, paint eggs.
Have you ever wondered why eggs are painted on Easter? And do you know what color should be painted according to tradition?
The most beautiful legend says that during the existence of the Roman Empire, in order to get an audience with the emperor, it was required to bring him something as a gift. The rich brought gold, and ordinary people carried everything that they had in their household. So, Mary Magdalene, intending to inform the ruler Tiberius about the resurrection of Christ, was able to bring as a gift just a white chicken egg with the words: "Christ is Risen!"
Seeing him, the emperor laughed and said that he would believe it, if only the egg turns red, and at the same moment the testicle acquired a bloody hue. Then the stunned Tiberius exclaimed: "In truth he was Risen!"
After that, the traditional color for coloring the testicles became red, purple, and the custom of christening is still known to both young and old.

Methods for coloring Easter eggs
Onion peel
Coloring eggs in onion skins is still considered one of the most popular methods. In order to make the testicles even more attractive and cute, you can press the dried leaves, blades of grass to them and tie them with threads, then lowering the husks into the dyeing solution. The color can vary from lighter to darker depending on the time the eggs are kept in the broth.

Natural dyes
- brown or beige color will give the testicles coffee;
- red cabbage gives blue color;
- the husks of black sunflower seeds not fried, red onions, poplar catkins, mallow flowers, snowdrops, blueberries and elderberries will give the eggs a blue and purple color;
- eggs will acquire green color, staining in a decoction of spinach leaves, nettle, lily of the valley, primrose, buckthorn bark, ash;
- the testicles will turn pink if you rub them with beet juice;
- yellow color will give a decoction of birch leaves, calendula flowers;
- the violet flowers will color the testicles purple.
a light yellow color is obtained if you grate boiled eggs with lemon, orange or carrot juice;
In order for the testicles to be colored in the broth, you need to add 1 tablespoon of vinegar (to a small saucepan of the solution). Let the broth steep for about 30 minutes and start laying eggs. You need to cook the eggs for 15-30 minutes, depending on what color you want to get in saturation, in some cases you can leave the eggs in the solution overnight, for example, when stained with spinach or violet flowers.

You can make different patterns on Easter eggs by wrapping them with an elastic band for money, colored threads, cut out blanks, again tying them with threads. You can dip the egg in water, and then roll it in rice, or some other cereal, and after wrapping it in cheesecloth, boil it in a dyeing solution.
The testicles will acquire a marble effect if a little vegetable oil is added to the water a minute before the end of cooking, or you can spread it on already cooked dyes.
Food colors from the Easter set
Probably the easiest way, for those who have no time to bother. As a rule, in small bags there are multi-colored powders that are diluted in boiling water with the addition of a spoonful of vinegar. Our testicles are placed in this solution for 5-15 minutes, depending on what intensity the color you want to get.

Testicle Transfer Stickers
An easy, fast and convenient way to decorate your eggs for Easter. You can apply the film on pre-boiled and painted eggs, or on regular white or brown eggs.

Decorating the testicles with cereals and improvised means
Very unusual testicles are obtained if they are pasted over with cereals, while still drawing various patterns. Try painting the egg with wax crayons and then painting it for an original design. Another idea is to wrap the eggs with insulating tape and paint in this form, the output will be beautiful straight lines, or any word or sign that you stick on.

Decoupage technique
First you need to prepare a gelatinous mass, a kind of glue. Then take a beautiful napkin with a picture or ornament you like, or a flower. Cut out a fragment and press it against our testicle, and apply a layer of gelatinous glue on top. Let it dry and enjoy the beauty of your creation.

Painting testicles with felt-tip pens, markers, paints
Inventive and non-standard people can prepare such eggs for Easter.

And the kids will undoubtedly love the eggs in the form of their favorite characters. The guys themselves will be happy to paint them, dry them and admire their work.

Tissue staining of testicles
Eggs painted with a variety of fabrics look very expensive and uncomplicated. In order for the pattern to move from the fabric to the egg, you need to tightly wrap the raw egg with a cloth (front side) and tie it with elastic bands, or just sew it, making a few stitches around the edges so that everything does not slip during the cooking process.
Then boil in water for about 10-15 minutes, with the addition of a spoonful of vinegar. Then put in cold water, carefully remove the fabric and evaluate the resulting masterpiece.

These are the beautiful testicles that are obtained after staining with tissues.

Permanent testicle makeup
An original way that requires only a little patience, skill and a marker. Place the egg on a special stand and display the most beautiful patterns either according to the scheme or to your taste.

Foil, confetti, beads - egg decorations
Fashion does not stand still, now eggs are not only painted, but simply wrapped in colored foil, beads, sequins, confetti and other bells and whistles are glued on, and eggs are obtained - hand-made.

Patterns on eggs with sweet powder, varnish, paints
Nicely and not too hard to make the testicles fresher and more cheerful, you can use a variety of squiggles, flowers, sticks, specks, dots and other drawings. It all depends on the flight of your imagination. It is convenient to paint with a toothpick.

And more lovely testicles

Cut and pasted fabric patterns
The testicles, which are pasted over with fabric flowers and pieces, look very cute and cozy. They are so soft and warm to the touch that it is even a pity to break them later.

Another option for testicles for babies

But in this way, you can hang the testicles in an unusual way, it looks almost like a Christmas tree, even more beautiful.

Choose from this variety of methods of decorating testicles the most suitable for you, experiment, because creating is always so pleasant and exciting.
Tips and tricks for boiling eggs, preparing eggs for coloring
- 1 hour before the start of cooking, the eggs stored in the refrigerator must be removed and allowed to lie down at room temperature. Then your testicles will not crack when boiling;
- Another option is to gently pierce the shell of a raw egg with a thin needle. In this case, the egg will not burst in boiling water;
- wash and rub the testicles, using a soft sponge or a soapy cloth. This is necessary so that the layer of paint lies as evenly as possible on the egg;
- add a couple of tablespoons of salt to the water where the eggs are boiled - again, it will help from possible cracks, and the shell then peels off better during cleaning;
- before painting, eggs can be grated with vinegar, so they will more intensively absorb dyes;
- Finally, for a glossy effect, you can lightly rub the eggs with vegetable oil.
Some kind of light feeling reigns in my soul when you are preparing for Easter, a feeling that everything will be fine. May there always be love and happiness, health and joy, comfort and prosperity in your home! Happy Easter!
My dear ones, spring has come and we are ready to celebrate the Bright Holiday of Easter! On the eve of this day, we begin to bake cakes and rolls, and paint eggs. The egg is a symbol of new life, and what is remarkable is that it was interpreted in this way in Ancient Egypt and in the East and in Christianity since antiquity. Therefore, this holiday is so widely known and loved all over the world.
In this preparation for the holiday, when you go to visit and treat all your friends, children are sure to participate. The very process of creating different patterns and decor is incredibly inspiring. In my childhood, painting was done only with natural dyes and paints. Now the hostesses have come up with many other ideas, using all the materials at hand, including vegetables and fabric.
Of course, this is a creative process, so I want to create the most beautiful design that has not yet gotten tired of in previous years. And inquisitive minds are in constant search of interesting ideas.
In addition to the exact instructions, in which I will tell you exactly how to use this or that element for painting, we will also consider many designs and unusual ideas for decoration. Some of them are quite jewelry in their performance, but for the closest ones, you can try.
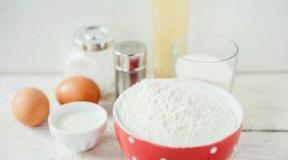
Since we want to do this business wonderfully well, then it is worth choosing and preparing the foundation correctly. After all, this is the basis for jewelry and it is important that it is suitable.
- Choosing light colored eggs. The dye will reflect brighter on them, and the decor will look better. If you have a brown shell, don't be discouraged, it's just that it will convey yellow, orange and green hues so brightly. But it can still turn redder, brownish, or purple. Therefore, we also start up such testicles.
- Want an even color? Then, before cooking, rinse the shell under running water with a sponge to remove any irregularities, adhering pieces of dirt and chicken feathers.
- It will be a shame if the shell cracks during cooking, especially when there is no spare material, and there is no time to go to the store for a new dozen. To avoid this, the eggs must be warmed at room temperature before dyeing. Let them lie on the kitchen table for two hours.
- Also, to avoid cracking, warm eggs should be placed in salt water. Two teaspoons per scoop should be sufficient.
- Before the dyeing process itself, the shell must be degreased. We will do this with vinegar. Just moisten a cotton swab with it and quickly wipe the circle.
- Work with gloves, so there will be no greasy stains on the surface, and you will not get your hands dirty.
- It is important to paint a warm product, because the pores of the shell are more susceptible to color.
- If you want to use thermal stickers on top of a painted egg, then choose category C2. After all, the first category will simply not fit into the sticker, and the third will fall out of it. I tell you this from my own experience, last year I thought with my daughter that eggs of different sizes would look more interesting, went to the store and bought a dozen C1 and a dozen C3, as a result, the stickers had to be postponed until next year and only use dyes.
- For glossiness, grease the shell with a cotton swab with vegetable oil.
Decorating eggs with onion peels
The most common dyeing method is with onion husks. When boiled, the bosom gives beautiful shades of brown, red, yellow. You can experiment and add husks from different varieties, for example, take red onions.
The longer you leave the egg in the solution, the richer the hue will be.

At this time of the beginning of spring, it is still difficult to find some beautiful leaves, so we will not think for a long time and use a leaf of parsley, basil, dill or celery. In our stores, these greens are sold all year round.
We glue the selected piece onto the base on the chicken protein or simply apply it to the wet part of the shell.

Wrap tightly with nylon or gauze. We tie the edges with a thread so that the sheet does not move.
And cook in boiling water for 8 minutes until tender. For a more interesting color, use the husks from different types of onions. After all, each of them has its own saturation and shade, some gives an orange color, and some sort - brown.

There is an idea for painting with onion peel using lace. After all, simple plain eggs are not as interesting as designer ones.
Find an old lace or tulle, tie a piece around a raw base and start boiling these fixtures for 8 minutes.

When you remove unnecessary fabric, you will be delighted with the beautiful pattern on the shell. Trust me, it's worth a little tinkering for this.
As a stand, while the shell dries, you can use trays or strips of cardboard rolled up in the shape of a circle, then you will not spoil the design with a fingerprint or dry trace from a drop.
Natural coloring ideas
They say that purchased food colors are absolutely harmless to the body, but we want to know for sure. Therefore, families with children often use natural products for coloring. Moreover, there are quite a few of them. If there are no vegetables, then there is always some type of tea at hand.
Black tea gives an effect comparable to onion peel, and hibiscus with red cabbage. In order for the egg to acquire the desired shade, simply brew a spoonful of the desired tea in a glass and place the product in it. To make the shell better absorb the dyes, you can pour in 1 tsp. table vinegar.

Also, a good herbal shade will give a decoction of nettle, and a raspberry one - a decoction of cranberries. Only in natural dyes, the base should be kept longer, because the substances do not penetrate into the pores of the shell so quickly.
In fact, there are a lot of coloring options, even using the same products.
For example, below shows how to proceed to color with foods such as coffee, beet juice, carrots or spinach. As well as red cabbage and turmeric. If the previous ones are described quite clearly, then we will now consider in more detail how to act with cabbage and spice.

A spice is used to add a yellow color. To stain 5 eggs, you need to take 3 tablespoons. turmeric. Be careful because it stains everything around you. Next, fill the spice with boiling water and mix. Now add 1.2 tablespoons to this mixture. vinegar and place the eggs in the liquid.
We leave them in the liquid until the mixture cools completely and put them in the refrigerator overnight to get a rich color.
If you decide to use cabbage, then pre-cut it.

Then cover with water and cook for 10-15 minutes. The cabbage will become soft, add 1.2 tablespoons to this liquid, which has turned out to be a saturated purple color. vinegar.

And if you do not filter the broth, but leave the kokoshko inside along with the cabbage, you will get a very beautiful ornament. Where the pieces come into contact with the shell, light spots are obtained.

Fill the eggs and leave to cool completely. This is what the finished decoration looks like. The color turns out to be natural, does not strain the eyes with unnatural brightness, as is the case with store dyes.

And I also prepared a drawing for you, where the products are indicated and the color in which they are dyed, because the above ingredients are not the only ones in the range of dye products.

Choose any of the options you like and do such an exciting business.
Decoration in decoupage technique
This technique is versatile and capable of turning anything into a work of art. When using it, they take PVA glue and napkins.
Before starting, the base must be degreased and the napkins themselves begin to be selected. There are several decor options. The first is to cut out the elements you like and point-by-point glue the top layer with a pattern on the shell.
The top layer is removed from the napkin, and it is used for decoration!

With a brush and glue, gently smooth out the drawing so that wrinkles do not appear. 
You can wrap the base completely. To do this, wet the napkin with glue and begin to gently wrap the workpiece in it.

Here's what happens. You can trim off excess edges.

Or you can dot the pattern on the base, as in this picture.

See how the finished design looks smart. Agree that this is very unusual and festive!

I would love to use this technique for Easter! After all, you can take not even a floral pattern, but a cage, strip or abstraction, and it will still turn out cool!
Tips for the lazy on how to quickly and beautifully arrange eggs with speckled rice
For those who do not want to mess around with diluting a solution or cooking vegetables, I suggest an easy way to give the shell a beautiful pattern and color. For this we need rice, it will create a beautiful speckled pattern. By the way, you don't need water and vinegar here.
This option is great for those who think vinegar is bad for the body.

It all took one and a half glasses of rice. Therefore, I can conclude that the method is not expensive.
We paint the rice like this: pour 0.5 cups of rice into different plastic bags, add 2.3 tsp to it. food coloring. Take any: diluted dry or immediately liquid.

Now you need to shake the bag well so that the rice becomes colored.
In this way, only hot eggs are painted, therefore, in the process of preparing cereals, we set them to boil. After 8 minutes, we take it out and put it in rice, wrapping it in a bag so that the painting goes evenly.

The rice should touch the shell tightly so that the pattern stands out well. Leave the bags on for a couple of hours and get richer hues.

I hope you enjoyed this idea as it is one of the fastest to execute.
How to beautifully paint eggs for Easter with your own hands?
And I will also show you a few simple options with master classes on creating egg decor with my own hands. Remember how you did it as a child? That's right, with paints or felt-tip pens. So we will do it.
Take a wide brush or an old toothbrush. Take a good amount of paint on the bristles and start sprinkling it onto the base. For convenience, take a comb and run the bristles across the teeth. This technique is used in painting, and we will apply it to decor.

Or just apply dots with gouache, letting each side dry well. You can turn them over when you carefully check how dry the paint is.

Using improvised means in the form of elastic bands or floss threads, you can make contrasting lines, see how this is shown in the master class.

Children can easily master these options, only the eggs should be already boiled so that when squeezed with an elastic band, the shell does not crack. And the child can inadvertently press harder and also damage its integrity.
Decorating ideas with purchased dyes
When purchasing commercial dyes, always read the instructions on the packaging. Usually you need to pour the paint into the water, add vinegar and go to boil the eggs. Only warm foods are put into such paint, which must first be wiped dry, otherwise ugly streaks may appear or the color will lie unevenly.

To get unusual patterns, you can do this: dilute not the full consistency, but a third of it. If you dip an egg, it will protrude from the paint. Wait a couple of minutes and then add water. The paint is thinned and the color is less saturated.

An interesting idea with minions.
Using electrical tape, you can create unusual ornaments. To do this, cut off a strip of electrical tape, cut it in half to get a thinner part and glue it to the shell in a spiral.

We place the egg in the solution for a couple of minutes, take it out and let it dry.

We remove the electrical tape. You can leave it that way, or you can wrap it along the painted lines to give the resulting white a different color.
Another way to use this material. Cut out rhombuses, squares or triangles from electrical tape and stick them on the egg, which we also dip into the solution.

Then let it dry and peel off unnecessary pieces.

Or stick straight strips of electrical tape to get the pattern shown in the picture.

Gradually remove the flax when injecting into the new paint so that the stripes are of different colors.
An original way to decorate without dyes and chemicals
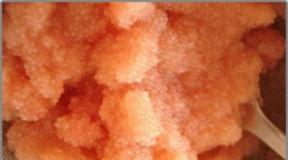
One interesting option to not use dye is to create a "fluffy" design. Such a terry effect is given by semolina, because it is she who we will use for work.

Separate the white from the yolk. Whisk the protein well. Then, with a silicone brush, this mass is applied to the shell and a sprinkle of powdered sugar, dyed sugar or dyed semolina is made on top.

Sugar and semolina are dyed in the same way as described in the method with rice. Only when added with liquid paint, sugar can melt a little, keep this in mind.
Silk fabric dyeing idea
In this way, the base is dyed only with natural silk fabric. To do this, take ties or scarves with different patterns. The batik technique is used. But no one will give a guarantee that you will completely transfer the drawing to the shell, because the composition must be 100% silk, if there are impurities, then you will not wait for a beautiful ornament.
We wrap the fabric with the right side to the shell. Tie the bag well to keep the silk tight.

Now we put these bags in water, pour warm water so that they disappear. Pour 1 tablespoon into the water. table vinegar. Now they need to be boiled for 20 minutes.

One tie is enough for three eggs.

And here is a drawing that turned out using a silk scarf.

Do you like the idea?
Marble design of eggs with onion peel and brilliant green at home
To create this effect, you need to take finely chopped onion peel and a jar of greenery. We pour the husk into a small piece of gauze. Dip the egg in warm water so that the husk sticks to the shell.

And we tie the gauze with a thread.

Now we fill these bags with water and pour half a jar of brilliant green (per 6 eggs) into the pan.

Cook hard-boiled eggs, it takes 8 minutes.

Now we cut the cheesecloth, remove the husk and rinse the egg in warm water. To add shine, grease with vegetable oil.
Quick napkin decor
Napkins can also add an interesting ornament. But we no longer take colored ones, as for decoupage, but ordinary ones. We also need food paints and gloves.

Wrap the egg completely in a napkin or paper towel. If none of this is at hand, then you can use toilet paper.

Blot a little with vinegar.

Dot paint in different places. It will begin to be absorbed by the paper and spread over it.

Wait an hour and unwrap the dried tissue.

Congratulations! You have a rainbow in your hands. Thus, using blue and purple tones, you can create your own home space!
Beautiful ideas for decorating eggs
Of course, there are a lot of original ideas and I made a selection to inspire you to this process. Moreover, I want you and your children to remember it as an interesting joint work. For boys, the creation of Ninja Turtles can be interesting.

To create a golden effect, patal is used, which is glued to the egg white. You need to work with gloves, because the patal is very delicate and can easily stick to your fingers.

Patal is sold in design shops.

You can create emotions with markers!

Or stylish monochrome patterns! Just do not use black in painting, which on this bright holiday is considered the color of nothingness, it is better to replace it with gray, and the picture only as an idea.

Another option is when the egg is not completely immersed in the solution.

Acrylic paints are capable of creating masterpieces, well, or the hands that hold them.

And when you only have one color, you can create different patterns with your imagination!

We made the design with leaves stained in onion skins. But after all, these steps can be repeated when there is already a ready-made packet of store paint.

For those who did not have the right piece of paper at hand, I suggest using this template. Choose the petal you like.

It's just that the masters of their craft create such monochrome beauty!

Or one using feathers and painting.

Of course I will not pass by the paintings! It looks incredibly beautiful. Here's how you can apply well-known motifs in the Gzhel technique.

Or such a painting on a green background! Of course, the first time you will not be able to create even patterns, but it's worth practicing! It's worth it.

Option with Slavic motives!

Using stencils and duct tape can work wonders. And create an imitation of broken mosaics and flowers.

And also beautiful floral patterns that look very warm and festive in spring!

My dear, the article turned out to be very long, but there are so many options for coloring and I have met such unusual ideas great amount that I couldn't finish earlier. I think you will find an interesting option for yourself.
Preparing for Easter, each hostess is sure to paint eggs. Where did this tradition come from and why do they paint eggs on Easter?
Legend has it that for the first time Mary Magdalene presented a painted egg for Easter to the emperor of Rome. But this egg was not simple, it was painted red, symbolizing the blood that Christ shed in the name of humanity. On the scarlet egg there were only two symbols of H.V., which meant Christ is Risen! It was from that very egg that the custom began to paint eggs for Easter.
How to paint eggs for Easter? Myths and Reality.
The most common way to dye eggs is with food coloring. Fast, convenient, but not always safe for health, especially if the dye is purchased from the hands. The safest method is to dye eggs with natural dyes. There are many different methods described on the Internet, but not all of them are effective.
Below I will describe about my experiments, how you can really paint eggs and what methods are a waste of time.
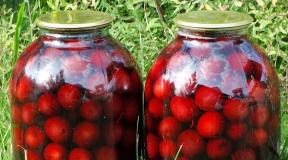
How to paint eggs with onion skins

Our grandmothers and great-grandmothers also painted eggs with onion peels, modern women also prefer this method.
Painting eggs with onion peels:
- We collect onion skins in advance. The more onion skins we have, the better.
- Fill the husk with water and put on fire. Cook under a lid over low heat for at least half an hour. Boil longer for color intensity.
- Cool the broth, filter. You can prepare onion broth in advance.
- We take raw eggs, fill them with a decoction of onion peels so that they are completely covered with natural paint.
- Cook the eggs as usual for 7-10 minutes. It is not advisable to cook longer, since eggs lose their beneficial nutritional properties with prolonged heat treatment.
- Put boiled eggs of a beautiful orange color on a plate. When the eggs are cool, rub them with vegetable oil to make them shine.
Advantages of painting eggs with onion skins: absolutely harmless to the body. In this way, eggs can be dyed from light yellow to intense red-brown. The color saturation depends on the concentration of the decoction. The onion peel broth itself is very simple to prepare.
Flaws: not known.
Conclusion: the method works, it is cheap and reliable.
P.S. I like to experiment, check everything on my own experience. So I decided to paint the eggs with blue onions, it is also called Crimean, it has a blue-violet husk. I expected the eggs to turn blue or purple, but the experiment showed that the eggs turned brown with a slight purple tint. So, I think it is better to paint eggs for Easter with ordinary onions, although ... for a change, you can also blue))))

How to paint eggs with coffee

Honestly, I doubted whether it was possible to dye the eggs with coffee. As it turned out, yes, it is possible, and it turns out very well. So, I'm telling you how to paint eggs in this way.
Egg coloring with natural coffee:
- Pour natural ground coffee into a saucepan, fill it with water. For a glass of water, I took 4 heaped teaspoons of coffee. For a more intense color, you can take more.
- Bring the coffee to a boil, reduce the heat so that it does not boil over and cook for 10 minutes on low heat.
- We filter the coffee and let it cool down.
- Pour the cooled coffee over the eggs. The coffee should completely cover the eggs. We put on fire.
- Cook eggs over low heat for 7-10 minutes.
- Gently take it out, put it on a plate with a napkin. No dark spots form on the underside of the eggs thanks to the quick-absorbent cloth.
Benefits of dyeing coffee eggs: natural, completely harmless dye. You can color the eggs from light coffee to dark coffee, depending on the saturation of the solution.
Flaws: much more expensive than onion skins.
Conclusion: the method works, the coffee hood lays down quite evenly. I experimented with instant coffee. Works too, but not as nice and even color.
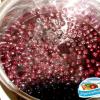
How to paint eggs with chokeberry juice

I read about the fact that eggs for Easter can be painted with berry juice on the Internet, and I immediately wanted to check this method, whether it really works. And I started with chokeberry.
Egg coloring with juice:
- We take out the frozen berries of a chokeberry from the freezer. Defrosting.
- We crush the rowan with a fork to release the juice from the berries.
- Pour raw eggs with water, add the crushed chokeberry fruits. The liquid should completely cover the eggs.
- Cook hard-boiled eggs. At the same time, rowan berries color the water in a dark lilac color. Eggs take on paint poorly.
- Put the boiled eggs on a plate. As you can see in the photo, the eggs are blue-lilac in color.
Advantages: a natural way, completely harmless.
Flaws: weak and uneven coloration. If cracks appear during cooking, then the protein is also painted blue, it turns out not very appetizing. It is better to prepare the most useful aronia tincture from berries.
Conclusion: you can paint eggs with chokeberry juice. True, blue-purple eggs with scary streaks are more suitable for Halloween than Easter.

Despite the not very good result of painting eggs with chokeberry juice, I still did not lose heart and decided to experiment with blackberries. And, lo and behold, everything worked out!
Coloring eggs with blackberry juice:
- We've been freezing blackberries since summer. On the eve of Easter, we take out the blackberries from the freezer. Defrosting.
- We crush the blackberry with a fork, then fill it with water and cook for 15-20 minutes. For every 200 ml. I took a hundred grams of water.
- Strain the broth, cool.
- Degrease the eggs before painting. Cook eggs in blackberry juice.
- We carefully remove the finished eggs. We make sure that no smudges remain on the eggs, since blackberry juice continues to color the eggs after boiling.
- To get stripes on the egg, pour a little juice into the egg holder, carefully place the egg itself and leave it for a few minutes. Then we decrease the liquid level and repeat the operation again.
Advantages: natural way of dyeing eggs, completely harmless.
Flaws: it is quite difficult to achieve a uniform coverage.
Conclusion: blackberries beautifully paint eggs, allows you to create interesting effects.
How to paint eggs with beet juice

From personal experience, everyone knows that beets paint meat, potatoes, and eggs in borscht. Therefore, it is quite logical to assume that beet juice is suitable for dyeing eggs for Easter. Is it so? Judge for yourself.
Coloring eggs with beet juice:
- Take one large beet or several small ones. Choosing dark roots.
- Peel. We cut into plates or strips.
- Cook the beets in a little water to get a rich beet broth.
- We filter the broth, cool.
- Wash raw eggs thoroughly, you can use dish soap.
- Cook the eggs in beet broth for 10 minutes, then put the eggs on a plate.
Advantages: relatively cheap. You can paint eggs in borscht)))
Flaws: the eggs are pale.
Conclusion: the result does not live up to expectations.
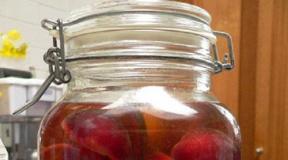
Can eggs be dyed with cherry juice?

I heard about this method of dyeing eggs for Easter for a long time, I wanted to try everything, but there was no fresh cherry. This year, I specially froze cherries to conduct an experiment.
Coloring eggs with cherry juice:
- We take out the frozen cherries from the freezer. Defrosting. I took 12 cherries for each egg.
- We crush the defrosted cherries with a fork, remove the seeds.
- We take raw eggs, fill them with water, add juice and cherry pulp. We make sure that the liquid level is above the level of the eggs.
- Hard-boiled eggs. Despite the bright color of the compote, the eggs are painted very poorly.
- We remove the finished eggs from hot water, cool.
Advantages: natural ingredients.
Flaws: eggs practically do not paint.
Conclusion: the result is unstable, depending on the variety and ripeness of the cherries. It is better to cook cherry jam or delicious compote from cherries, and paint the eggs with onion skins.
How to make a pattern on eggs

There is an opinion that if you wrap the eggs with thick knitting threads, braid, or just attach a flower or a leaf of parsley, then wrap the egg in cheesecloth and boil it in dye, you get a beautiful painted egg.
Honestly, not everything is as simple as it seems at first glance. The dye quickly soaks into threads and fabric, dyeing the egg. Leaves and flowers also leave, letting the paint pass. Perhaps the one hundred and twenty-fifth attempt will be successful, but usually before Easter there is no time to experiment. Therefore, to make a print on the egg, we use strong electrical tape that sticks well.
How to make a print:
- Degrease the surface of the eggs.
- To get a picture, we sculpt pieces of electrical tape on the egg. We carefully press the electrical tape so that the edges adhere properly.
- Cook eggs in dye. Onion peels or coffee give good results.
- Eggs, hard-boiled, removed from hot water, put on a plate.
- When the eggs are cool, remove the stickers.
Symbol meanings on Easter eggs
Pine symbolizes healthOak leaf or oak tree symbolizes strength
Any berries symbolize fertility.
Plum symbolizes love
Hop cones symbolize fertility
Flowers - a symbol of girlhood
The net on the Easter egg is a symbol of destiny
Yellow mesh - a symbol of the sun
Points are fertility. And the more dots, the more fertility
When painting eggs, you can come up with your own drawings and patterns, while it is important to do this with joy and an open mind, because Easter eggs are not just a tradition, they are a symbol that conveys our emotions, energy and wishes.
Original Easter eggs

Eggs can be painted by hand. When my son was still little, we painted eggs with honey watercolors. Yes, with this method, the drawing does not last long and when it gets wet it loses its shape, but how much joy the child has)))
Also, for painting eggs, you can use school gouache, which is tested for safety for children.

Eggs can not only be dyed, they can be wrapped in colored foil or applied using ordinary colored paper. Colored confetti are great for this.
Since ancient times, people have exchanged eggs and cakes for the Easter holiday. The tradition has evolved over the years, as a result of which many ways of coloring and decorating paraphernalia have appeared. With the words "Christ is risen!" men and women, children and the older generation exchange eggs, later examining intricate patterns. Among other things, coloring eggs is a rather fascinating process that can rally households. There are basic methods, we will consider them in more detail.
How to prepare eggs for painting
As mentioned earlier, experienced housewives, through trial and error, have identified the main options for coloring eggs for Easter. However, regardless of the chosen method, they must be prepared in advance.
- Remove the eggs from the refrigerator a few hours before the expected color and leave at room temperature. Such a move will help to avoid temperature extremes, due to which the shell cracks. An alternative is to pierce the shell with a thin sewing needle to prevent bursting of the eggs.
- If food pigments or onion husks will be used as the main coloring method, it is recommended to pre-wash the shells. To do this, use a kitchen sponge and baking soda. As a result, the paint will lay flat without streaks and blotches.
- Before starting the procedure, degrease the shell by wiping it with vodka or medical alcohol. If neither is available, treat the surface with soapy water, then rinse and dry thoroughly.
- To give the shell a shine after painting, wipe the surface of the eggs with vegetable oil or corn oil. Do not use cotton pads for these purposes, gently moisten your fingers with the composition, then spread over the shell.
When you have prepared the "material", start painting. Choose the best option for yourself, then strictly follow the instructions.
Method number 1. Food colorings
Food colors are rightfully considered the most common type of coloring for Easter eggs. You can purchase ready-made colors or bring out your own shades. Pigments can be pearlescent, glossy or matte, it all depends on the manufacturer.
To properly prepare the composition, take care of so many containers in advance that there is a separate bowl for each color. Dilute the paint with water at room temperature, there should be a lot of liquid so that the eggs completely drown in it.
After diluting the paint, pour in 30 ml. 1 tablespoon vinegar solution, then add boiled or raw eggs to the bowl. The exposure time varies, it all depends on the intensity of the shade you want to get.

Stencil
- Purchase tracing paper - ultra-thin paper - online or at a stationery store. Cut out any image from it in the form of a stencil (the inner part is removed). Anything is suitable as a drawing: your favorite cartoon characters, Easter theme, Jesus Christ, etc.
- A picture for a stencil can be downloaded on the Internet. The end result depends on the quality of the original image and the material itself. When you make a stencil base, namely, print and cut it out, dampen the paper in water at room temperature. The material should become elastic, repeating the shape of the egg.
- Attach the stencil to the shell, smooth out the creases. If your drawing is small, duplicate it in several places. Fix the stencil with gauze or a piece of nylon stockings (tights).
- Dilute food or natural color, add eggs to it and cook until tender. At the end of the procedure, remove the eggs, put them on toothpicks or newspaper, cool to room temperature. Once this happens, remove the gauze and stencil and enjoy the result.
Vegetable oil
- A beautiful result is achieved as a result of coloring eggs with the addition of vegetable oil. To carry out the procedure correctly, prepare two containers with the same shade. Pour oil into the first, and leave the second unchanged.
- Boil the eggs hard-boiled, cool to a temperature of 30 degrees (the dye composition should have the same indicator). Dip the "material" into a bowl of paint, wait for the required interval (the exact period is indicated in the instructions).
- After that, remove the eggs, leave the paint to dry. When this happens, send the product to the second container with vegetable oil, wait again. Dry eggs, measure the result.
Insulating tape
- Cut the tape lengthwise to create thin strips (you can skip this step if you wish). Prepare several containers of diluted paint, preferably blue and yellow.
- Apply a strip in the form of a spiral or any other pattern of your choice. Dip the eggs in a bowl of blue, wait a while, remove and wait to dry. Remove the tape.
- Now glue the next strips, which will slightly cover the previously obtained pattern. Dip egg in yellow dye, wait interval, remove and dry.
- You will end up with a yellow egg with blue and green stripes. The good thing about this option is that it allows you to experiment with obtaining new shades by superimposing one color on another.
Stationery rubber bands
- Purchase the rubber bands that are usually used to tighten banknotes (silicone base) from the office supply store. Boil eggs hard-boiled, cool, prepare paint of one or more shades.
- Then you can do it in two ways. The first involves coloring the egg in any color with prominent white lines (rubber bands are attached to an unpainted egg). The second option consists in a two-phase coloring, as a result of which the lines are obtained in the same color in which the egg was originally painted.
- Let's consider the second option, it is more complicated. Color the egg yellow and dry. Wrap the rubber bands in a random criss-cross pattern. Dip the "material" into a green paint, wait for the pigment to set. Dry, remove the gum. You will see that the egg has turned blue with yellow stripes.
Plant leaves
The technique is similar to the stencil technique with only one clarification - plant leaves are used as a pattern, most often parsley and dill act in their role.
- To get an accurate result, tear off a few leaves, attach them to the shell, fix with gauze cloth or nylon stocking. Dip in the paint, wait a while.
- After the expiration date, remove the eggs, cool and dry them. Unfold the fixing material, remove the leaves, grease the surface with vegetable oil and enjoy the result.
- The same electrical tape, self-adhesive paper or scotch tape can serve as an alternative to the leaves. Cut out the pattern you need from the material, attach it to the defatted shell of a pre-cooked egg. Place the product in a bowl of pigment, then remove and dry.
Method number 2. Natural dyes

- Onion peels, beets, turmeric, carrots, birch leaves, calendula, orange or lemon, spinach, red cabbage, nettle, coffee can act as natural dyes.
- The main feature of the "folk" coloring is considered to be that the composition acts slowly. As a rule, it takes about 8-10 hours to get the result.
- To prepare the solution, pour water into a saucepan and add a large number of the selected dye. Pour in 35 ml. table vinegar, stir. Bring the solution until the first bubbles appear, then reduce the power and simmer for another 15 minutes.
- When the paint is ready, insist it for about half an hour, then send the eggs into the container and simmer them over low heat for 25 minutes. Then turn off the hotplate, leave the product in the solution overnight.
Turmeric
Use ground turmeric for a seductive golden hue.
- Boil water in an enamel saucepan, add 90 gr. turmeric, bring to a boil. Place raw eggs in a container, cook until tender, then let it brew for another 8 hours without removing.
- It is recommended to carry out the procedure with extreme caution, since it is quite difficult to remove turmeric from the surface of furniture and clothes, however, like other natural dyes.
Red cabbage
A cabbage-based broth will give the eggs a rich blue hue.
- Grind a whole head of cabbage into small slices, place in a saucepan and cover with boiling water. Add 180 ml. table vinegar solution, cover and leave for 10 hours.
- After the expiration date, send the eggs to the container, control the color intensity every 2 hours. Then remove the product and leave to dry. If desired, paint the surface with gouache or felt-tip pens.
Beet
Beets will help color the eggs in a raspberry or pinkish hue, it all depends on the duration of exposure of the product in solution.
- Grate 4 medium-sized beets, then mash the resulting mixture with a potato crush or chop in a blender.
- Pour boiling water over the prepared mixture so that the water covers the beets completely. Pour in 150 ml. vinegar with a concentration of 9%, wait 6 hours.
- Put boiled eggs in a saucepan, let it brew for 5 hours. After the time has elapsed, remove the product, leave to dry.
Onion husks
Onion skins will color the eggs in a reddish-brown shade with a bronze tint.
- To prepare a coloring solution, you need to take a husk of 4 kg or more. Luke. The raw materials must be sent to a large saucepan and covered with boiling water.
- Place the container on the stove, bring the mixture to a boil and simmer for 1 hour. After that, cover with a lid, leave to infuse for 24 hours.
- After the due date, pass the broth through a colander or cheesecloth, boil the eggs in it for about 10 minutes. Then do not remove the product from the pan, leave until the liquid has cooled completely.
Regardless of the color you choose, you can create patterns on Easter eggs using scrap materials.

- Boil round or long grain rice, soak an egg in water and dip in the rice so that the grains stick. Tie with a stocking or gauze, fix on both sides with elastic bands.
- Prepare the coloring pigment, dip the eggs into it and wait the required period of time. For this method, natural dyes are better suited.
- When the eggs are colored, remove them and leave to dry completely. Remove the cloth, remove the rice, grease the surface of the shell with sunflower oil.
Silk fabric
Eggs can be dyed with fabrics, silk or cotton with existing patterns is ideal for these purposes.
- Soak the egg in hot water, wrap it with a piece of cloth so that the pattern is flush with the face of the shell. Sew along the entire perimeter of the egg to prevent the fabric from slipping.
- Wrap with a piece of nylon, tie on both sides, creating a kind of candy. Pour 100 ml into an enamel pot. vinegar (6%), add water, send to the egg. Cook them for about 15 minutes, then turn off the stove.
- Let the eggs sit in the solution for another quarter of an hour, then place them in a bowl of cold water and leave to cool completely. Carefully remove the retainer and stocking and appreciate the fruits of your labors.
First, prepare the eggs for painting: take them out of the refrigerator, leave them at room temperature, pierce a thin hole in the shell with a sewing needle. Consider staining with food or natural dyes. Use a stencil, parsley leaves, silk fabric, or scrap materials to create a unique design.
Video: how to paint eggs for Easter (different ways)

Would you like to learn how to dye eggs with beets so that they acquire a soft pink hue? Read this recipe. Everything is not easy. And no synthetic paints are needed.

If you have saffron, you can use it to color the eggs orange. Here's how to dye eggs with saffron.

If you want to put blue colored eggs on the Easter table, then read this recipe - I will tell you how to paint eggs with blue cabbage. Why use artificial colors when there is a natural product?

Learn how to dye your eggs with turmeric so you don't have to worry about yellow Easter eggs. Why use synthetic dyes when you can dye your eggs naturally?

Tired of monotonous brown eggs for Easter? Then I bring to your attention the amazing painted hibiscus eggs. Why amazing? You have no idea what color they will turn out to be.

Perhaps the most popular way to color Easter eggs. I am telling you how to paint eggs with onion skins correctly so that they acquire a beautiful shade and do not burst.

Among the many artificial colors, I really want to find something natural that could be used for a holiday. I suggest you one of these options - colored eggs with spinach.

For those who are looking for ideas for Easter, but prefer only natural ingredients, I offer a fairly simple option - colored coffee eggs.

If you prefer to use only natural dyes for Easter, then I suggest you an excellent option - eggs painted with blueberries.

Surprisingly, sometimes completely unusual things can come in handy in the kitchen. I bring to your attention one of these options - eggs painted with brilliant green.

Today, you can find tons of ready-made Easter egg decorations, but let's not forget Grandma's recipes. I show you how to dye eggs with onion skins - according to a traditional Russian recipe!

You probably have scraps of unwanted fabric at home. If so, then I offer you a festive idea - painted eggs in shreds.

I bring to your attention a very interesting and original version for a festive table for Easter - eggs painted with stains.

Do you want to make something bright and unusual for the festive table? Then I bring to your attention one of these options - striped colored eggs.

If you do not have creativity, but have a great desire to do something original for Easter, then spray painted eggs are exactly what you need.

If you are fond of creativity, then you should definitely try to make eggs painted using decoupage technique for Easter.