How to draw a pattern on a cream cake. For such a snow-white crisp decor you will need
I just love homemade cakes, especially cakes. And not only eat, but also bake. Very soon my godson has a birthday, and he asked me to bake him delicious cake. And since the boy loves chocolate very much, the question of how to decorate the cake decided by itself.
Often in stores you can see cakes decorated with thin and neat openwork. She looks so airy and fragile. At first glance, it seems that it is impossible to repeat it.
However, if you understand the technology for creating such delicious beauty, then you understand that chocolate decorations It's very easy to make for a cake. Can be used various chocolate- white, milky, black, the main thing is that it does not contain any fruits or nuts. Even the simplest chocolate pattern will look original. Show all your imagination!
How to decorate a cake with chocolate
Editorial "So simple!" I've put together some super helpful tips for you. experienced confectioner, how to decorate a cake at home with chocolate patterns.
You will need
- parchment paper
- 1-2 chocolate bars

Chocolate drawings look best on a smooth surface. culinary product. The surface should be flat, smooth and preferably uniform. To do this, you need to fill the dessert with either black or white icing.
To prepare patterns, chocolate must be broken into pieces and placed in a dry container, then put on water bath. It is important to ensure that no water gets into the pan with chocolate - otherwise there is a risk that it will curdle. The container should be put on fire and stirred occasionally. The result should be an elastic homogeneous mass.

There are several ways to decorate. The first is more suitable for those who are confident in their artistic abilities. From parchment paper you need to make a small bag (such a self-made confectionery pencil).
Then carefully pour the cooled liquid chocolate into it. Pay attention: the thinner the hole in the bag and the trickle of chocolate itself, the more beautiful they will look. openwork drawings. Lightly pressing on the parchment corner and squeezing out a thin stream of chocolate, start drawing what you want.

And those who are not entirely confident in their abilities can first draw a drawing on parchment paper, and then draw it clearly along the lines with chocolate on it. After that, the paper with the pattern must be placed in the refrigerator so that the chocolate hardens.
Then carefully, using a thin knife, remove the design from the parchment paper and carefully place it on the surface of the cake.

Another effective trick can be decorating a cake using templates. For example, you can use special lace for this paper napkins. Put one of these napkins on a cutting board, cover it with tracing paper on top and carefully repeat the pattern, for example with white chocolate.
Place the finished decoration in the refrigerator until it cools. And then remove it from the tracing paper with a thin knife. You can place such a delightful decor around the edge of the cake or on its surface. It all depends on the flight of your imagination.

And this method is my favorite. It is not very simple, but it looks original and beautiful. Note that you will need green leaves for this trick. And it is better to pick them away from the road.

First you need to melt the chocolate in a water bath. Using a brush, apply melted chocolate to clean and dry leaves. In summer, rose leaves are perfect, they are dense and embossed.

The chocolate blank must be removed for an hour in the refrigerator, and then carefully remove the leaves.

And the easiest decoration option is a chocolate gossamer. And you can try to make it like white chocolate on black glaze, and vice versa. To begin with, the cake needs to be covered with chocolate icing. Squeeze rings of chocolate of a different color from a parchment bag. It is advisable to place them at the same distance from each other. And to create the web itself, just run a skewer or match from the center to the edges of the cake in several places. How do you like the result? I think it's excellent!

I also suggest you look at a small selection of cake decorations. These are patterns and figures made of chocolate for inspiration.
Since the advent of the first photography, this art has become an entire industry. It was improved and it is not surprising that it covered various areas human life. Almost two centuries later, it burst into the culinary world like a whirlwind and produced a colossal effect.
In our time of high technology, there is a unique opportunity: to print any picture or photograph, or maybe even a whole collage on homemade dessert. Compared to boring oily roses and sugary inedible figurines, bright, saturated full-color images win in all respects. And if you add that they are completely safe for health, then the choice is obvious.
Cake with a photo printing of a favorite cartoon character for a baby, a fashionable popular music group for a teenager, or the first family photo for parents on silver wedding, will be a worthy addition to any gift and an unforgettable surprise.
Perhaps, at first glance, the process of photo printing will seem complicated. However, doing it right simple recommendations and not neglecting valuable advice you can understand that this is not the case. In addition, it is performed on any already tested and loved cakes. The simplest "" can be made a masterpiece. From such a design, he will not only not lose his taste appeal, but will also gain original submission and "highlight".
Edible photo printing is made on a special food printer. This device opens up new possibilities for the cook. It works in the same mode as a regular office tool, with the only difference being that it is refilled with edible ink.
It is important to use proven certified dyes. The wide range of colors presented by manufacturers does not cause any damage to health. The ink has a pleasant sweet taste.

Photo printing on the cake is printed on food grade paper. It is obtained from natural ingredients. It differs in thickness, composition, color, texture and taste. Each type has its own characteristics and advantages in decorating desserts.
- Wafer paper for photo printing is the most affordable and popular. It is made on the basis of water, starch and vegetable oil. It is tasteless, porous and matte. white surface. Suitable for working with mastic, marzipan, glaze.
- Sugar paper for photo printing - contributes to better spectrum transmission, sweet in taste, has a snow-white color. It consists of: sugar, molasses, water, cellulose, Palm oil and food emulsifier. All kinds of photo works are possible.
- Chocolate transfer - this paper type has the ability to apply an image to a chocolate base.
Also, there are other types: rice, glazed, nori, vegetable, fruit and berry.
The printing process is as follows:
- The paper is placed in the designated area of the printer.
- Cartridges are refilled with multi-colored natural paints of the required range.
- We put the sheet for printing in the required compartment of the printer, print it in the usual way.
Simplest safe way laying out an illustration on a cake is to first attach it to a layer of mastic.

You can attach a sugar reproduction by slightly wetting the mastic with vodka. It creates a wonderful sticky layer on the surface.
If the confectionery product is covered with cream cheese, then putting paper without mastic is not recommended.
When working with vegetable whipped cream, grease the wafer paper with gel and put it on the cake, sugar first on the mastic.
For wet cream: sour cream, natural cream, cottage cheese edible images put is not recommended.
Considering all the nuances, we attach the picture, trying not to blur the picture. We adjust the shape, the size of the cake, so that it does not go beyond.

It's hard to be surprised these days. The variety of delicious and beautiful confectionery treats is great. But all of them are aimed at the general mass of people. Photo printing made at home allows you to show your individuality, show interest in the inner world and the interests of your loved ones, show your attitude to their hobbies. Create a magical atmosphere of surprise….
Surprise the birthday boy by giving him a cake with beautiful photo, or a pleasant wish now everyone can. The photo on the cake can be made very beautiful if you bring it on a flash drive to any modern pastry shop. There, on order for a certain amount, it will be printed on rice or wafer paper, adjusting the size of the photo to the confectionery. But you can do something similar at home. Here are a few ways to make a beautiful image on the cake and please guests with such an unusual "sweet" card.
In the confectionery
Many candy stores have dedicated food printers. When ordering a cake, you can give an image on a flash drive, which is then applied to a sugar, waffle or rice paper and decorate the dessert with it. The size and quality of the product can be any, as long as the image is flat. Therefore, ordering photos for a cake like Millennium is not worth it, since the pictures must be flat. And what they will be depends on your imagination. You can choose beautiful and very tasty sweet dessert in the catalog and select a picture for it.

The average cost of a cake to order with a photo is from 500 rubles and more, depending on the size of the finished confectionery and the complexity of its manufacture.
Should I make this cake at home?
Special printers with food coloring are not cheap. Therefore, it is advisable to take photos in special stores where they make cakes to order. At the same time, it is absolutely not necessary to order a finished confectionery product, it is enough to buy the dessert you like. And then experts will tell you how to make a photo on the cake. They will print on paper and decorate the middle of the dessert with it. The cost of such an order will be significantly lower than when making a finished cake.
However, if you want to place on the cake not a photo, but a picture, you can use decals. The advantage of using them is simplicity, a significant disadvantage is that you cannot choose a subject or print a photo. Stores usually offer a limited selection of edible decals that can be placed on cakes. However, if you want to do beautiful cake with a photo, it is better to contact the place where confectionery is prepared to order. Although a dessert with a picture made at home can bring a lot of joy to a child and even an adult.

In order to place them, you need to completely cover the cake of the color you like. Although experts write that it is best to choose neutral shades of white or light pink to make the image bright. A picture is applied to it with the bright side down, steamed with an iron, then the tracing paper with the picture is removed. This is the most inexpensive option, as they do pictures on the cake. In order for the picture to look natural, special gels are used, which can be purchased at a confectionery store. However, the photo cannot be printed in this way.
Choose bright pictures
Even if you know how to take a photo on a cake, a gift can make a bad impression on the holiday if you choose a bad photo or take a photo in dark colors. Many even simply do not like to eat someone's image, so before choosing a photo for a cake, think about what this or that person might like or dislike.

Most often, desserts with photos of the birthday boy are liked by people with a well-developed sense of humor, teenagers and children. And then, if the photo for decorating the cake is chosen successfully. The rest will like either the traditional design of a sweet dessert, or a neutral congratulation, a picture from the Internet.
People with a sense of humor, especially men, can find and print a funny cartoon with cool wish. The background is better to choose white or cream. Such a custom-made cake will appeal to everyone who loves funny and original congratulations.
If you choose a photo of a girl, try not to have a lot of dark tones in it. They look ugly on the cake and can even spoil the appetite of the guests of the holiday. Photos look best on sugar paper. It is advisable to choose bright, juicy or light pictures so that they look beautiful and bright. Then a sweet dessert will really create festive mood and will please all the guests at your holiday, especially the birthday man. It is best for children to choose bright pictures and holiday photos, adults - more restrained compositions. But in order for the cake to really look stylish, do not forget to make an inscription in Photoshop or another program that would look beautiful and festive on it. It can be just a wish, the date of an anniversary or wedding, or the words "happy birthday." Such a cake will appeal to all guests and will definitely impress at a birthday or any other holiday.
See how else you can.
I love the first month of summer not only because warm days are coming and now you can take long walks on the street, eat ice cream and seasonal fruits swimming in the river, sunbathing. In June, my two favorite people celebrate their birthdays - mother and daughter. I already wrote about how I decorated the cake for my daughter, and now I want to talk about the cake for mom.
I decided to make a cake for my mother with a mammoth, which, through the waves and the wind, swam to the only mother in the world. At first, I wanted to make a mammoth from mastic, but I realized it too late. The figurine had to be molded in advance so that it would dry out and not spread on the cake.
This upset me, but I did not refuse the idea of \u200b\u200ba mammoth on the cake. I just decided to do it differently. The solution for me was a coloring cake. This method of decorating a cake is very simple and even a novice cook can repeat it.
So, to decorate the cake you will need:
picture to decorate the cake
a bar of confectionery glaze or dark chocolate
document file or cling film
vodka for surface treatment for painting
baking paper
Short version of preparation:
Print your chosen picture for the cake. Place it in a file or in cling film.
Melt chocolate or icing on steam bath.
Pour into a paper cornet for baking and start drawing.
When the contours are outlined, the image must be sent to the refrigerator for 5 minutes.
Then carefully flip the drawing onto the cake and paint over with the appropriate colors.
Working process:
First you need to choose an image. The Internet will help you deal with this quickly. I found my mammoth there.
The picture needs to be printed on paper or redrawn. I chose the second option, bringing my details to the drawing.
The drawing is placed in a file or fixed on cling film. We wipe the surface on which we will draw with vodka for cleanliness and disinfection. 
Melt chocolate in a steam bath confectionery glaze. I used frosting. It is cheaper, but in terms of taste and drawing characteristics it is in no way inferior to chocolate.
We shift the melted icing into a cornet (small bag) of baking paper. We make a small hole in the nose of the bag.
Now let's start drawing. Outline the contours of the image image.
When all the contours are outlined, we send the picture along with the file to the refrigerator so that the icing cools down and grabs for 5 minutes.
After this time, the file with the image is carefully turned over onto the cake. Finger tapping movements go through the chocolate contours and remove the file.
Now it remains to color the drawing, filling the surfaces between the chocolate contours with cream of the corresponding color. I needed yellow, pink, blue and brown colors. Since I didn’t have brown dye, I painted over the fur coat and hairstyle of the mammoth with boiled condensed milk.
Here's what I got:
I think instead of red, you can use and thick jam from raspberries, strawberries or red currants.
When I was decorating the cake, I had an idea: try to paint over the picture colorful jelly and, as soon as I master this “coloring”, I will definitely share the results with you.
Bon appetit!
To receive the best articles, subscribe to Alimero's pages at .
DIY chocolate decorations for cakes, pastries, cookies and more home baking- Aerobatics pastry chef. Of course, you can not philosophize and decorate the cake with chocolate the way your grandmothers did - just melt the bar with cream, and then coat the top and sides of the confectionery with this liquid mass. But you can try and make a chocolate decoration of simply unearthly beauty, similar to real masterpieces.
What kind of chocolate is suitable for decorating a cake?
When choosing which chocolate to make cake decorations, purchase only quality product. Quality chocolate makes beautiful glossy jewelry. Currently, for the manufacture of chocolate decorations, chocolate coatings are used, in which they are replaced with various equivalents of cocoa butter. These glazes are very easy to use due to their considerable fluidity, but palatability they are inferior to real chocolate - couverture.
Despite the long domestic traditions production of chocolate, interest in this product on the part of the consumer and the manufacturer is constantly growing, because chocolate can be used to make various decorations for cakes and pastries: line drawings, three-dimensional figures, bas-reliefs, openwork details and much more. When making chocolate cake decorations, you can give full rein to your imagination.
Among the popular trends in working with this product, one can note “marble pattern”, “velor finish”, “decals”.
As you can see in the photo, chocolate decorations can become real designer sculptures:


Such compositions are not much inferior to those carved from stone or cast from metal.
DIY chocolate decorations (with photo)
On the surface of cakes and pastries, a variety of chocolate decorations do it yourself: geometric ornaments, drawings of flowers and leaves, various drawings of thematic content. Do not use dyes other than those approved by the Ministry of Health. When decorating products, they use special techniques and various devices.

Chocolate decorations at home are made from chocolates and 100 gram tiles. To decorate cakes with chocolate chips, the chocolate is cooled, and then kept at a temperature of 25-30 ° C a little - then, when cut with a knife, the chocolate rolls into a beautiful tube. Strongly chilled chocolate crumbles, and soft does not give shavings.
Look at the photo - decorating cakes with chocolate can be made in the form of twigs, trees, rockets, numbers, letters, antennae, contours of animals and birds:


To do this, it is broken into pieces, melted in a water bath (so as not to burn) and poured into a small parchment cornet. A picture is selected. Tracing paper or cellophane is applied to it and chocolate is deposited from the cornet along the visible contours. Such hand-made chocolate decorations are placed in a cold place, and after hardening, they are removed from the paper with a knife and transferred to a cake or pastry.

Before making a chocolate decoration in the form of a vertical pattern, a “leg” is deposited in advance, on which it will be fixed in right place. Chocolate oak leaves are very elegant on the cake. To make them, on the drawing of a small oak leaf a tracing paper is applied and a contour is first circled with chocolate from the cornet, and then the middle is poured, the back of the knife draws a line in the middle of the sheet, and short oblique lines from it on the sides, thus imitating the veins of the sheet. After that, make the rest of the leaves.

It is not difficult to make decorations in the form of flat figures from chocolate for homemade cakes: for this, the melted product is poured onto parchment paper with a layer of 3 mm and recesses, smeared vegetable oil, cut out various figures. Chocolate for decorating a cake at home should not be hard, otherwise the figures will crumble.
Chocolate cake decorations at home (with video)
For the preparation of three-dimensional chocolate decorations, one- and two-sided molds made of plaster, porcelain, clay, plastic and metal are used. Such forms are fastened together with clamps. The molds are thoroughly cleaned of chocolate residues and wiped dry with a clean cloth so that the figures and bas-reliefs can be easily separated, then they are heated to 30 ° C and poured with chocolate at a temperature of 29-30 ° C. In double-sided, bonded forms, chocolate is poured through the bottom hole, while the form is shaken well for 2-3 minutes and turned over to avoid voids from air bubbles and so that the chocolate is evenly distributed. After pouring, the mold is placed with the hole down and the remains of chocolate are poured, its layer from 2 to 4 mm remains on the inner walls.

If the shapes are large and have a complex pattern, chocolate is applied with a brush. The filled forms are cooled in a refrigerator at a temperature of 10-12°C, and then the figures are cleaned from the seam formed at the place of gluing.
The video "Chocolate Decorations" shows how various figures are made:
To make chocolate decorations, you can not invent complex designs, but simply make a chocolate pyramid. Before making such a chocolate decoration on a cake, first draw the contours of the pyramid details on cardboard with a pencil and cut out the template. A drawing is syringed from the cornet: the lines of the drawing are thinner, the edges of the pyramid are thicker. To make the pyramid firmer, cocoa butter is added to the melted chocolate. For 1-2 hours, the parts are cooled in the refrigerator, then their reverse sides are processed.
The pyramid is assembled as follows: two parts are placed on the board with flat sides one to the other and chocolate is squeezed out along the edges, the halves are compressed and cooled. They put it vertically on the cake and glue the remaining 3-4 parts on the sides, let the pyramid harden and additionally decorate the cake with marzipan, sugar mastic flowers.

As you can see in the photo, do-it-yourself chocolate decorations can also be made from a chocolate substitute. It is prepared from 15% cocoa, 45% butter, 40% powdered sugar and 10% (of the total mass) vanilla sugar. First, a quarter of all the butter is heated to 45 ° C, add vanilla sugar and cocoa, then the rest of the butter is mixed with powdered sugar and with all products.

Glaze decorations can be immediately applied to the product or prepared for future use. In the second case, they are “deposited” on sheets covered with parchment paper and dried for 12 hours at room temperature.

by the most simple decoration is the application of straight or wavy lines on the surface of the product, smeared with cream, using a confectionery comb. It can be made from tinplate, aluminum, plastic. The size and style of the teeth of the comb can be different.
The chocolate cake decorating tutorial below contains interesting information about this product, reveals how tempering is carried out, as well as the technology for preparing figurines, leaves, curls and shavings, which will give holiday look any cake.
Tools for chocolate decorations on the cake: stencils and chocolate cornets
Before making complex chocolate cake decorations, you need to stock up special devices. First, you will need cornets or pastry jigging bags with a set of tubes. The cornet is made from tracing paper, parchment or other thick paper that does not absorb fat: a right-angled triangle is cut out and folded into a conical tube. The protruding ends of the sheet are folded inward to hold the cornet. Its sharp end is cut depending on the pattern that they want to get. The cornet is half-filled with cream or icing, tightly closed so that when pressed, the cream or icing “settles” only from the lower hole. With the help of a cornet, inscriptions, dots and thin graceful drawings and flowers are applied.

To make chocolate decorations, you can make a pastry jigging bag. For its manufacture, a dense fabric is used (teak-eraser is best). The bag has a conical shape, various tubes are inserted into its narrow end. A new bag must be boiled before use. After work, the jigging bags are washed in warm water mixed with drinking soda, and boil for 3-5 minutes, dry and store in a specially designated place.

Jigging tubes for making decorations for chocolate cakes are made in the form of a cone, the end of which has a figured hole, from which the cream is “deposited” in the form various decorations. Sometimes a confectionery jigging bag is used, into the narrow end of which a conical ring with a screw thread is inserted, and tubes of various styles can then be screwed onto it.
To fill the confectionery jigging bag with cream, hold it with your left hand, unfold the bag and put the cream with a spatula or spoon on 1/2 of its volume. The cream must be laid tightly, as the remaining air can ruin the pattern. With both hands, the edges of the bag are connected and, clamping it with the right hand, “set off” the cream, holding the narrow end of the pastry bag with the left.
A variety of chocolate patterns for decorating cakes is achieved not only by different styles of tubes, but also by zigzag or wavy movements of the cornet or jigging bag, slow or instantaneous changes in the pressing force with the right hand, the angle of inclination in relation to the decorated product, the distance from the product, etc.
Before finishing any pattern for chocolate decorations, stop pressure on pastry bag and make a sharp short forward movement along the pattern with the end of the tube.
A variety of openwork chocolate decorations are made by “depositing” the cream from metal shaped tubes inserted into a jigging bag. A set of 10-12 tubes with different cut configurations allows you to make all the variety of decorations needed for decorating cakes and cakes. But most often they use tubes with smooth and straight, serrated and wedge-shaped sections.

Stencils for decorating cakes with chocolate can be useful - especially when you need a lot of decoration elements (for celebratory banquet or children's table). You can also create a hybrid: for example, make some details of the composition according to a stencil for chocolate decorations, and others - by original cutting. The stencil for chocolate decorations has a metal base. Place it on a properly prepared raw material and press hard, cutting through the flesh in the form of a butterfly, leaf, fungus or any other figurine.
Here you can see the photo "Chocolate Decoration Tools" that you will need to create drawings:

Decorating the sides of cakes with liquid chocolate cream with your own hands (with photo and video)
To decorate cakes with chocolate cream, use only a freshly whipped product; from standing cream, patterns will turn out without gloss and pockmarked.

Lines - even, zigzag, wavy - when decorating a cake liquid chocolate carried out with a confectionery comb heated in hot water, slightly pressing it against the smooth edge of the cream. Flowers, figurines and patterns are made by squeezing cream from shaped tubes inserted into a jigging bag. The most delicate drawings and figures of a certain shape or color are made using a cornet, the narrow end of which is either cut off or a shaped tube is inserted into it.

While doing openwork jewelry from chocolate for cakes, the cornet is filled with cream up to half and tightly closed so that when pressed, the cream comes out only at the cut point. It is better not to hold a cornet with cream in your hands for a long time: from the hands of the cream heats up, becomes liquid and the drawings are uneven. Having twisted, the cornet is freed from the remnants of the cream.
To decorate the cake with chocolate with your own hands, the jigging bag is filled as follows: unscrew the wide end of the bag so that it rests on the left hand, and with the right hand, using a spoon, fill the bag with cream to 1/2 of the volume. As little air as possible should remain in the bag, as it spoils the drawings. Then, with both hands, connect the edges of the wide end of the bag and, pinching it with the right hand, release the cream, supporting the narrow end with the left hand.

When making chocolate decorations for a cake at home, depending on the undulating or zigzag movements of the cornet or bag, slow or instantaneous changes in the pressing force with the right hand, changes in the angle of inclination with respect to the product, changes in the distance from the surface of the product, a variety of cream patterns is achieved. At the end of the beautiful chocolate decorations, you need to stop the pressure on the bag or cornet and make a short movement forward from you along the pattern with the end of the tube, then the rest of the cream will fall with an inconspicuous stroke. If you lift the bag or cornet up, then a cone of cream will remain in the figure.

To prepare small chocolate decorations for the cake, to make dots and inscriptions, the narrow end of the cornet is kept close to the surface of the decorated product. You can pre-fill bags and cornets with creams of different colors. This will make chocolate decor to decorate the cake more varied and bright.

If you need to make a rose out of cream, first cut out a small cake from the biscuit (or take candied fruit, profiterole, etc.) - the core of the rose. The core is strengthened on a stick with a pointed end and a cork planted on it or on a table fork. In the left hand they hold a stick with a core, in the right - a pastry bag with a straw. By turning the stick, the cream is squeezed onto the core. When the rose is ready, it is removed from the stick with a spatula or fork, holding it with the fingers of the left hand, and placed on a cake or pastry.
As you can see in the photo, when decorating a cake with chocolate at home, you can weave a basket of one or different colors:

A basket can also be made from biscuit ( shortcrust pastry), gluing the layers chocolate cream or fruit filling. The basket is placed on a stand (for example, a plywood circle) with the wide side down and, lifting one side, cream weaving is applied. When the cream hardens, the basket is placed on the cake. On top of the basket, a handle is made of caramel or special test(ingredients: flour, powdered sugar and egg white). Flowers or sweets are placed in the basket.

To decorate the sides of the cake with chocolate, you can decorate them with cream borders. By the way, borders are made before all other cake decorations. Borders serve not only as a decoration, but also cover gaps, cracks, smooth the edges of the cake. They are mostly made with a smooth, straight-cut tube or a fine-toothed tube.
The video “DIY Chocolate Decorations” shows various confectionery techniques:
How to decorate a cake with chocolate with your own hands: making flowers
Chocolate cake decorations in the form of flowers look very nice. In addition to roses, carnations are often made. They are injected from a flat tube with an oblique cut. The sharp corner of the tube is set motionless on the surface of the cake or pastry and the cream is squeezed out, turning the opposite end of the tube 180 ° C around the fixed end in wave-like movements. Exactly the same, but in the opposite direction they “collect” the second row of petals, etc.

It is desirable to supplement cream flowers with leaves. They are deposited from tubules with a wedge-shaped cut of various diameters. Leaves can be green, brown, yellow or even white.
Completely from the leaves you can make a border or the whole picture. Leaves look especially good on small cakes. Words, names, numbers, congratulations and wishes are often written on cakes and even on pastries. In order for the inscriptions to be expressive, it is necessary that there is a contrast between the inscription and the background. For example, you cannot do chocolate inscription on chocolate or write with white cream on white icing.

The inscriptions are injected from a small cornet with a very narrow round cut or using a metal “pencil” tube. The cream is used protein, custard and oil different colors and shades. But there should not be even the smallest lumps in it, otherwise it will get stuck at the exit from the tube or cornet, and you will get uneven, broken lines. You can also write inscriptions with a two-color cream. In this case, the cornet is filled with cream of two colors with longitudinal stripes.
Watch the Chocolate Cake Decorating video for some fresh ideas:
How to make tempered chocolate cake decoration
From tempered chocolate you can make a variety of decorations for cakes and pastries - full-sized figures, bas-reliefs, flat thin figures, "jigging", etc.
For full-volume figures, it is better to use metal molds from two halves with clamps. When pouring chocolate, the mold and chocolate must be at the same temperature. Chocolate is poured through the bottom hole of the mold and shaken for 2-3 minutes so that the chocolate is completely distributed over all the patterns. Then the excess chocolate is poured out. A layer of chocolate 3–4 mm thick is formed on the inner walls of the mold. After the chocolate has cooled and hardened, the mold is released from the clamps, opened and the figure is removed. Most often, bas-reliefs are made from chocolate.

To obtain flat thin figurines, tempered chocolate is poured onto parchment with a layer of 2–3 mm, allowed to harden a little, and the figurines are cut down with a notch.
For “jigging”, tempered chocolate is laid out in a cornet and “deposited” on parchment in the form of solid patterns and so-called antennae. From tempered chocolate, cast into a bar, and then cooled to almost complete hardening, thin wide chips are cut with a knife, which, when dropped, roll into tubes.
Making chocolate figurines to decorate the cake
Chocolate is a great material to decorate a cookie or cake and will add a festive touch to any baked goods. To decorate the cake, it is better to take a chocolate mixture. It solidifies at room temperature and melts easily in a water bath.
Line a baking sheet with parchment paper and brush lightly with vegetable oil. Break the chocolate into small pieces. Place it in a water bath and melt without water. Pour onto parchment paper, using a round-tipped knife to form a thick, even layer. Leave in a cool place until the chocolate is almost completely set. With a knife or a notch for dough (asterisk, flower, etc.), cut out the figures. They should be stored in a cool dry place.

Chocolate squares- a simple and effective way to decorate a cake or holiday dessert. Line a baking sheet with foil. Spread 200 g of melted chocolate in an even layer and with a slight movement of the fork create a wave effect (make sure that the tines of the fork do not touch the bottom of the baking sheet). Refrigerate until the chocolate is halfway set. Using a sharp knife and a ruler, cut the chocolate into squares with a side of about 6 cm. Put the baking sheet with chocolate decorations in the refrigerator until they are completely solidified. Remove foil. Gently press the chocolate squares onto the top and sides of the glazed cake. They can also be used as a decoration for ice cream desserts.
Chocolate decor for cake decoration: grated chips, crumbs, petals and swirls

Chocolate chips and crumbs. To decorate the cake with grated chocolate, you need to cut the shavings from the chocolate bar with a sharp knife. It is better to remove chips over a plate, with smooth movements. Before decorating the cake with grated chocolate, it should be warmed up, but just enough to make it easy to work with. Leave the chocolate in a warm place for 10-15 minutes. Chips on the cake can be shifted with a spoon or shaken off. Chocolate chips are decorated in the same way, only it is rubbed finer.

Chocolate curls. Melt the chocolate in a bowl over a water bath. Spread a thin layer on a smooth board. Set aside until the chocolate is almost set. Pull the blade of a large wide knife towards you along the entire length of the chocolate, getting long curls.

Chocolate petals. Cut foil into squares. Melt the chocolate in a water bath, then cool slightly. Place a square of foil on the palm of your hand. With a spatula or spoon, spread the chocolate in a thin layer on the foil. Form a petal. While it is still soft, lift your fingers slightly under the foil to slightly curve the petal, giving it a natural shape. Put to cool. When the chocolate has completely hardened, remove the foil. With the help of melted chocolate, petals can be made into a flower.
Chocolate cream dessert at home
Chocolate cream

Ingredients:
- 100 g chocolate by weight,
- 1/2 cup milk
- 3 yolks,
- 4 squirrels,
- 2 tbsp. spoons of powdered sugar.
Pour the chocolate broken into pieces with milk and place in the oven to melt. Then rub it with a spoon, gradually adding one yolk at a time, until a lush mass is formed. Whip egg whites into thick foam, gently mix with chocolate mass. Divide the cream into glasses, top with grated chocolate mixed with powdered sugar.
Note. This cream must be prepared shortly before serving and kept in the refrigerator, otherwise the proteins will fall off and the dish will be spoiled.
Kareem from cocoa

Ingredients:
- 400 g butter (unsalted) butter,
- 250 ml milk
- 200 g sugar
- 3–4 tbsp. spoons of cocoa powder
- 2 eggs.
Heat the milk in a water bath, add cocoa, stir, pour in the eggs mashed with sugar, cook until thickened, stirring occasionally, then remove and cool.
Whip the softened butter until fluffy. Then add chilled mixture to it. Beat the cream until it has a uniform consistency.
Custard chocolate cream

Ingredients:
- 1 cup flour
- 1/2 cup milk
- 1/2 cup granulated sugar,
- 1 st. l. cocoa powder
- 50 g butter.
Cooking method. Bring to a boil over low heat a homogeneous mass of cocoa powder, granulated sugar, flour, milk and butter, stirring constantly. The cream will be ready after it boils and thickens.
How to make chocolate icing for decorating a cake (with photo)
Recipe #1
Easiest to prepare chocolate glaze from chocolate. This product can be used as a cream for cakes, and simply spread on cookies.
Ingredients:
- 200 g chocolate
- 100 g of water
- 25 g butter.
Dissolve chocolate with water in a water bath. Mix with oil. Spread warm icing over the cake, cool.
Recipe number 2
In order to cook this glaze, you need only 2 components.
Ingredients:
- dark chocolate (not less than 56%) - 0.6 kg (3 large bars),
- oil "Peasant" - 0.3 kg.
Chocolate icing from chocolate is prepared in a water bath, so first we will select containers: they will need 2, of such a volume that one is immersed in another, but at the same time, water poured into a large container should not be poured into a smaller one.
So, we set the containers, pour a little water into a large one and put it on fire. When the water heats up properly, melt the butter - it melts easier and faster. Gradually add finely chopped chocolate to liquid butter. Stir continuously, because the mixture thickens quickly and begins to burn near the walls. When all the chocolate has melted and the glaze has become homogeneous, it is ready.
Thus, a mirror chocolate glaze is obtained from butter and chocolate. However, this is a fairly high-calorie product.
As you can see in the photo, when decorating cakes with such chocolate icing, it shines very beautifully:

Chocolate glaze from cocoa and sour cream

Ingredients:
- sugar - ½ cup;
- sour cream with a fat content of at least 20% - 150 g;
- vanillin - 2 sachets;
- cocoa powder - 4 tbsp. spoons.
Cooking:
Since it is not recommended to warm up sour cream, it is better to grind sugar into powder - this way it will dissolve more easily. We mix dry products: grind cocoa powder with powder and vanilla. If using vanilla sugar, grind that too. Add sour cream little by little to avoid lumps. Mix thoroughly until a smooth, shiny, homogeneous mass is obtained. You can use a mixer, then the chocolate icing for the cake will turn out more airy.
You can make a rich glaze by adding cocoa to the chocolate - this recipe is suitable if you could not find chocolate with a high cocoa content. We will tell you how to make chocolate icing from cocoa powder, chocolate and milk.
Chocolate and cocoa glaze

Ingredients:
- mirror chocolate glaze;
- cocoa powder - 4 tbsp. spoons;
- sugar - 1/3 cup;
- milk - ½ cup;
- black chocolate - 1 bar;
- butter - ¼ pack.
Cooking:
Heat the milk, dissolve the butter with it. Gradually add chocolate chips, cook until the ingredients are completely combined, stir. Mix sugar with cocoa and pour in the milk-chocolate mixture in a thin stream. Rub until sugar dissolves. This chocolate icing for decoration should be applied very hot.
Light chocolate icing for decorating cakes and desserts
What to do if you need to decorate a dessert, but at the same time you want fewer calories. To do this, you need to weld light glaze from cocoa.

Ingredients:
- sugar - 1 cup;
- water - 0.5 cups;
- cocoa powder - 2-3 tbsp. spoons.
Cooking:
To cook this icing for decorating desserts with chocolate, first of all we prepare the syrup: pour sugar into hot water and cook the mixture over low heat for so long to get a drop that does not spread on the nail. As soon as the syrup is boiled, gradually introduce cocoa, carefully grinding it with liquid. Quickly enough, sugar will begin to crystallize at the walls. If you do not grind the mass, it will burn, so be careful and careful. The glaze hardens quickly, so it must be applied warm.
It is not necessary to boil the cream to decorate the dessert. If the cake contains jelly, hot chocolate layer cannot be applied. In this case, we will prepare the glaze without heat treatment.
How to make chocolate fudge to decorate a cake

Ingredients:
- 75 g softened butter or margarine;
- 225 g of powdered sugar;
- 3 art. l. water;
- 2 tbsp. l. cocoa.
For cooking chocolate fudge you need to mix 1 tbsp. l. hot water and 1 tbsp. l. cocoa, chill.
Mix oil and powdered sugar. Beat with a mixer on low speed, gradually adding water until the fudge is smooth.
Lubricate the cake with chocolate decoration prepared according to this recipe and decorate in accordance with the theme of the holiday.
How to melt chocolate for cake decoration
To make a product or decoration out of chocolate, it must be prepared, that is, melted. There are several nuances in how to properly melt chocolate to decorate a cake. You can use several methods.

First way how to melt chocolate for decoration - use the microwave, it's very simple.
Second way how to melt chocolate to decorate a cake - use a water bath. To do this, the container with chocolate must be placed in a saucepan with hot (not boiling!) Water.
Third way how to melt chocolate for decoration - use a double boiler. You can melt chocolate in it too.
Fourth way - oven. Heat it up to 60-70 degrees, place a container with chocolate there for 10-15 minutes. Fifth way - steam bath. The container with chocolate must be kept over boiling water.
Not always required liquid mass so the process needs to be controlled.
Chocolate does not like sudden changes in temperature, so do not start melting it cold. Wait for the product to warm up to room temperature.
Melting point of white or milk chocolate is 45 degrees. But bitter dark chocolate will melt only at 50-55 degrees Celsius.
How to make chocolate lace patterns to decorate a cake
Openwork drawings - great option cake decorations.
You will need a brush (it is better to purchase a special culinary one, it is easy and convenient to work with it), a pastry bag or plastic bag, dark and white chocolate.

To begin, you will need to cover the entire cake with the chocolate that you will use for the background (the other chocolate will be used to create the designs). To do this, melt it to a liquid state in any way. Brush over the cake using a pastry brush.
Let the glaze dry completely.
Start melting other chocolate. It should also be quite fluid.
Transfer the chocolate to a piping bag. You can replace it with a regular plastic bag by making a small hole in its lower corner.
Start creating! Draw various patterns, show your imagination!
Master class on making butterfly decorations for a cake
Prepare everything you need in advance: chocolate (you can use white and dark), cling film and a plastic bag (or pastry bag), cutting board, or any other hard surface.
What do we have to do?
Melt chocolate in any way until liquid, transfer it to a pastry bag (or plastic bag with a hole).

Spread cling film on a cutting board.
Start with liquid chocolate cling film draw butterflies. If you use two chocolates (white and dark), then the decoration will be more spectacular.
When the drawing hardens a little, move it to the refrigerator until completely solidified.
Remove the jewelry from the refrigerator, carefully peel off the film.
Plant your butterflies on the cake.
Cake decoration with chocolate, hazelnut and cookie balls
Chocolate balls with nuts

Ingredients:
- cocoa 3 cups;
- sugar 1 glass;
- milk 3 cups;
- butter 150 gr;
- walnut 150 gr;
- shortbread 400 gr;
- coconut flakes 1 sachet;
- egg 1 pc.;
- cognac 1 tbsp. l;
- vanillin 1/2 tsp
Cooking:
To decorate the cake with nuts and chocolate balls, mix cocoa, sugar and milk. Add chopped butter and put on fire. Waiting for it to boil. Cool down.
Add egg, vanilla, cognac and beat well.
We chop the nuts on a coffee grinder (you can pre-fry, it's tastier) and add to the mixture.
Grind the cookies (here the meat grinder is your friend) and add to the mixture.
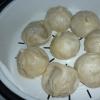
Mix well and form into balls. Each ball is wrapped in coconut flakes. Beautiful!
We spread the balls on a plate with a pyramid and send it to the refrigerator for 3-4 hours.
Bon appetit!
Chocolate balls with cookies

Ingredients
- 250 g cookies;
- 150 g of dark chocolate;
- 50 g of oil;
- 2 tbsp. l. Sahara;
- 1 glass of milk;
- coconut flakes or colored dragee.
Chop cookies. Melt chocolate and butter in a water bath or microwave. Add milk and sugar, stir until a homogeneous mixture is obtained. Add crushed cookies. Mix and make balls out of the resulting dough. Roll the finished balls in coconut flakes or colored dragee. Chocolate balls for decorating the cake should be placed in the refrigerator for several hours.
A selection of photos "Decorate the cake with chocolate at home" clearly illustrates all the above recipes:


Chocolate chips for decorating cakes
If you grind chocolate on a grater, small strips, separated from the bar, twist into spirals and are perfect for the role of the top layer. Moreover, improvising with colors (black, milky and white), interesting combinations come out, and even whole edible pictures. Before you get to work, place the chocolate bar in a warm place, softening it a little. You can also create curls manually: you need to get used to cutting thin strips with a well-sharpened knife.
And for the sake of perfectly even chips, the technique will have to be corrected. To do this, you need ready-made chocolate icing, which must be applied in separate strokes on a corrugated surface and put in the freezer to harden.
When the mass hardens, carefully scrape off the mass and transfer to the cake. Don't stop the fantasy on a solid background. Works of art are also created from such small particles. It is important to attach chocolate cake decorations quickly so that they do not have time to melt on your fingers or stick to each other.
Chocolate cookie decoration

Ingredients:
- 1 part vanilla shortbread dough;
- ground cinnamon added to flour;
- 400 g of a mixture of different whole nuts;
- 175 g of plain chocolate, broken into pieces;
- 175 g milk chocolate, broken into pieces
Preheat oven to 180°C. Butter the base and sides of 2 low pans and line each with a sheet of parchment. Oil the paper.
Divide the dough between the molds and tightly pack it into the molds. Sprinkle with nuts so they are evenly distributed. Press them into the dough with your hands to hold them firmly.
Bake for 40 minutes until the nuts and edges of the cakes are golden. Carefully remove them from the molds and place them on a wire rack.
Melt milk and dark chocolate in separate bowls over pots of boiling water. Leaving the cookies on the paper, carefully cut each cake into 2 cm wide strips.
Arrange the pieces on a wire rack so that they are 1-2 cm apart and drizzle the melted dark chocolate with a dessert spoon. Then sprinkle milk chocolate on top and leave in a cool place for the chocolate to harden. Cut each strip in half lengthwise.
Chocolate chip cookies can be stored for up to a week in a tightly sealed container.
Recipe for pouring chocolate figurines for cake decoration
Such figures can be poured from melted chocolate using the generally accepted casting technology. Just enough to be in shape. We buy in the department for confectionery creativity silicone molds of the desired theme and fill them with melted chocolate, cool, cool to a solid state, remove from the molds, turning them inside out. If you don't need big chocolate products- Pour the chocolate into the molds in a thinner layer. After pouring, smooth the surface with a thin spatula or table knife.
In the absence of volumetric bulk molds, you can use the curly recesses that we usually use to mold cookies or gingerbread. Lay a sheet of parchment paper on a flat tray, set the molds and pour chocolate into them with a layer of the thickness you want, trying to get into the center of the recess so that the chocolate does not stick to its sides above the intended layer. When using notches chocolate mass it is better to be thicker - let the melted chocolate thicken a little so that it does not spread too much from under the recesses on the parchment. After cooling the chocolate figures to a solid state, carefully squeeze them out of the cut-out forms, cooling the hands and putting on gloves so as not to leave fingerprints. Until the figurines have completely hardened, they can be additionally decorated - applied with a knife or a special cutter, notches, or pressed through with a mesh, other textured objects, according to the intended decor. Anything you press on the surface of the chocolate will leave its mark on it. Such massive chocolate figurines are used in confectionery compositions if they are expected to be picked up, for example, to fill baskets or to create a volumetric center of the confectionery composition.
And in conclusion, another video "How to decorate a cake with chocolate", which will help you to cope with this difficult task perfectly: