How to make openwork patterns on a cake. DIY cake decorating
DIY chocolate decorations for cakes, pastries, biscuits and other homemade baked goods are the aerobatics of a pastry chef. Of course, you can not philosophize and decorate the cake with chocolate the way your grandmothers did - just melt the bar with cream, and then coat the top and sides of the confectionery with this liquid mass. But you can try and make a chocolate decoration of simply unearthly beauty, similar to the most real masterpieces.
Which chocolate is suitable for decorating a cake?
When choosing which chocolate to make cake decorations from, buy only a high-quality product. High-quality chocolate makes beautiful glossy decorations. Currently, chocolate glazes are used for the manufacture of chocolate decorations, in which they are replaced with various equivalents of cocoa butter. These glazes are very convenient to use due to their significant fluidity, but they are inferior in taste to real chocolate - couverture.
Despite the long-standing domestic traditions of chocolate production, the interest in this product from the consumer and manufacturer is constantly growing, because a variety of decorations for cakes and pastries can be made from chocolate: line drawings, volumetric figures, bas-reliefs, openwork details and much more. When decorating cakes with chocolate, you can give full free rein to your imagination.
Among the popular tendencies in working with this product are "marble pattern", "velor trim", "decals".
As you can see in the photo, chocolate jewelry can become real author's sculptures:


Such compositions are not much inferior to those that are carved from stone or cast from metal.
DIY chocolate decorations (with photo)
On the surface of cakes and pastries, they make a variety of chocolate decorations with their own hands: geometric ornaments, drawings of flowers and leaves, various drawings of thematic content. Do not use dyes other than those approved by the Ministry of Health. When decorating products, they use special techniques and various devices.

Homemade chocolate decorations are made from chocolates and 100-gram bars. To decorate the cakes with chocolate chips, the chocolate is cooled, and then kept a little at a temperature of 25-30 ° C - then, when cut with a knife, the chocolate is rolled into a beautiful tube. Heavily chilled chocolate crumbles, while soft chocolate does not chip.
Look at the photo - decorating cakes with chocolate can be made in the form of twigs, trees, rockets, numbers, letters, antennae, outlines of animals and birds:


To do this, break it into pieces, melt it in a water bath (so as not to burn) and pour it into a small parchment cornet. A drawing is selected. Trace paper or cellophane is applied to it and chocolate is deposited from the cornet along the visible contours. Such handmade chocolate decorations are placed in a cold place, and after hardening, they are removed from the paper with a knife and transferred to a cake or pastry.

Before making a chocolate decoration in the form of a vertical pattern, a "leg" is deposited in advance, on which it will be fixed in the right place. Chocolate oak leaves are very elegant on the cake. To make them, tracing paper is applied to the drawing of a small oak leaf and from a cornet, they first outline a contour with chocolate, and then fill in the middle, draw a line with the back of a knife in the middle of the sheet, and short oblique lines from it on the sides, thus imitating the veins of the leaf. After that, the rest of the leaves are made.

It is not difficult to make decorations in the form of flat figures from chocolate for homemade cakes: for this, the melted product is poured onto parchment paper with a layer of 3 mm and grooves greased with vegetable oil, various figures are cut out. Chocolate for decorating a cake at home should not be hard, otherwise the figures will crumble.
Chocolate cake decorations at home (with video)
For the preparation of three-dimensional chocolate decorations, one- and two-sided forms of plaster, porcelain, clay, plastic and metal are used. Such forms are fastened together with clamps. The molds are thoroughly cleaned of chocolate residues and wiped dry with a clean cloth so that the figures and bas-reliefs are easily separated, then they are heated to 30 ° C and poured with chocolate at a temperature of 29-30 ° C. Chocolate is poured into double-sided, fastened together forms through the lower hole, while the form is well shaken for 2-3 minutes and turned over to avoid voids from air bubbles and so that the chocolate is evenly distributed. After pouring, the mold is placed with the hole down and the remaining chocolate is poured; a layer of 2 to 4 mm remains on the inner walls.

If the forms are large and have a complex pattern, the chocolate is applied with a brush. The poured molds are cooled in the refrigerator at a temperature of 10-12 ° C, and then the figures are cleaned from the seam formed in the place of gluing.
The video "Chocolate Decorations" shows how various figurines are made:
To make chocolate decorations, you don't have to invent complex designs, but simply make a chocolate pyramid. Before making such a chocolate decoration on a cake, first draw the outlines of the pyramid details on cardboard with a pencil and cut out a template. A drawing is sprinkled from the cornet: the lines of the drawing are thinner, the edges of the pyramid are thicker. To make the pyramid harder, cocoa butter is added to the melted chocolate. For 1-2 hours, the parts are cooled in the refrigerator, then their reverse sides are processed.
The pyramid is assembled like this: two parts are placed on the board with flat sides to one another and chocolate is squeezed along the edges, the halves are squeezed and cooled. They are placed vertically on the cake and the remaining 3-4 parts are glued to the sides, the pyramid is allowed to freeze and the cake is additionally decorated with marzipan and sugar mastic flowers.

As you can see in the photo, DIY chocolate decorations can also be made from a chocolate substitute. It is prepared from 15% cocoa, 45% butter, 40% powdered sugar and 10% (of the total mass) vanilla sugar. First, a quarter of all butter is warmed to 45 ° C, vanilla sugar and cocoa are added, then the rest of the butter is mixed with powdered sugar and with all the products.

Glaze decorations can be immediately applied to the product or prepared for future use. In the second case, they are "deposited" on sheets covered with parchment paper and dried for 12 hours at room temperature.

The simplest decoration is to apply straight or wavy lines to the surface of the product, smeared with cream, using a pastry comb. It can be made of tinplate, aluminum, plastic. The size and style of the comb teeth may vary.
The proposed chocolate cake decorating master class below contains interesting information about this product, reveals how tempering is carried out, as well as the technology for preparing figures, leaves, curls and shavings that will give a festive look to any cake.
Chocolate Cake Decorating Tools: Chocolate Stencils & Cornets
Before making complex decorations for a chocolate cake, you need to stock up on special tools. First, you will need cornetics or piping jig bags with a set of straws. The cornet is made of tracing paper, parchment or other thick paper that does not absorb fat: a right-angled triangle is cut out and folded into a conical tube. The protruding ends of the sheet are folded inward to hold the cornet together. Its sharp end is notched depending on the pattern that they want to get. The cornet is filled with cream or glaze up to half, tightly closed so that when pressed, the cream or glaze "settles" only from the bottom hole. With the help of a cornet, inscriptions, dots and subtle graceful drawings and flowers are applied.

To make chocolate decorations, you can make a piping bag. To make it, use a dense fabric (best of all, a teak-eraser). The bag has a conical shape, various tubes are inserted into its narrow end. A new bag must be boiled before use. After work, the jig bags are washed in warm water mixed with baking soda and boiled for 3-5 minutes, dried and stored in a specially designated place.

Jig tubes for making decorations for chocolate cakes are made in the form of a cone, the end of which has a figured hole, from which cream is "deposited" in the form of various decorations. Sometimes a confectionery jig bag is used, into the narrow end of which a tapered ring with a screw thread is inserted, and tubes of different styles can then be screwed onto it.
To fill the pastry bag with cream, hold it with your left hand, unfold the bag and put the cream with a spatula or spoon to 1/2 of its volume. Apply the cream tightly, as the remaining air can ruin the drawing. With both hands, they connect the edges of the bag and, clamping it with the right hand, "deposit" the cream, holding the narrow end of the pastry bag with the left.
A variety of patterns made of chocolate for decorating cakes is achieved not only by different styles of tubes, but also by zigzag or wave-like movements of a cornet or a jig bag, by slow or instantaneous changes in the pressure force with the right hand, the angle of inclination in relation to the decorated product, distance from the product, etc.
Before completing any pattern for chocolate decorations, you should stop pressing on the pastry bag and make a sharp short movement forward along the pattern with the end of the tube.
Various openwork chocolate decorations are made by "depositing" the cream from shaped metal tubes inserted into a jigging bag. A set of 10-12 straws with different cut configurations allows you to make all the variety of decorations needed for finishing pastries and cakes. But most often they use tubes with smooth and straight, serrated and wedge-shaped cuts.

Stencils for decorating cakes with chocolate can be useful - especially when you need a lot of decoration elements (for a festive banquet or a children's table). You can also create a hybrid: for example, make some parts of the composition according to a stencil for chocolate decorations, and others by original cutting. The stencil for chocolate decorations has a metal base. Place it on properly prepared raw materials and press firmly, cutting through the flesh in the shape of a butterfly, leaf, fungus or any other figurine.
Here you can see a photo of "Chocolate Decorating Tools", which you will need to create your drawings:

Decorating the sides of the cakes with liquid chocolate cream with your own hands (with photo and video)
To decorate cakes with chocolate cream, use only a freshly whipped product; from the standing cream, the patterns will turn out without gloss and pockmarked.

Lines - even, zigzag, wavy - when decorating a cake with liquid chocolate, they draw a confectionery comb heated in hot water, slightly pressing it against the smooth edge of the cream. Flowers, figures and patterns are made by squeezing the cream out of shaped tubes inserted into the jigging bag. The most subtle drawings and figures of a certain shape or color are made using a cornet, the narrow end of which is either cut off, or a shaped tube is inserted into it.

When making openwork chocolate decorations for cakes, the cornetic is filled with cream up to half and tightly closed so that when pressed, the cream comes out only at the cut. It is better not to hold a cornet with a cream in your hands for a long time: from the hands the cream heats up, becomes liquid and the patterns are uneven. By twisting, the cornet is freed from the remnants of the cream.
To decorate the cake with chocolate with your own hands, fill the jig bag as follows: the wide end of the bag is turned off so that it rests on the left hand, and with the right hand, using a spoon, fill the bag with 1/2 volume of cream. As little air as possible should remain in the bag, as it spoils the drawings. Then, with both hands, they connect the edges of the wide end of the bag and, clamping it with the right hand, release the cream, supporting the narrow end with the left hand.

When making chocolate decorations for a cake at home, depending on the wavy or zigzag movements of the cornet or bag, a slow or instant change in the pressure force with the right hand, a change in the angle of inclination in relation to the product, a change in the distance from the surface of the product, a variety of cream patterns are achieved. At the end of the execution of beautiful chocolate decorations, you need to stop pressure on the bag or cornet and make a short movement forward from yourself along the pattern with the end of the tube, then the rest of the cream will fall down with an inconspicuous stroke. If you lift the bag or cornet upwards, then a cone of cream will remain in the figure.

To prepare small chocolate cake decorations, to make dots and inscriptions, the narrow end of the cornet is held close to the surface of the product to be decorated. You can pre-fill bags and cornetics with creams of different colors. This will make the chocolate cake decorating decor more varied and vibrant.

If you need to make a rose from the cream, first cut out a small cake from the biscuit (or take candied fruit, profiterole, etc.) - the core of the rose. The core is fixed on a stick with a pointed end and a cork attached to it or on a table fork. In the left hand they hold a stick with a core, in the right - a pastry bag with a straw. Turning the stick, the cream is squeezed onto the core. When the rose is ready, remove it from the stick with a spatula or fork, holding it with the fingers of the left hand, and place it on a cake or pastry.
As you can see in the photo, when decorating a cake with chocolate at home, you can weave a basket of one or different colors:

The basket can also be made of biscuit (shortcrust pastry), gluing the layers together with chocolate cream or fruit filling. The basket is placed on a stand (for example, a plywood circle) with its wide side down and, lifting one side, a weaving of cream is applied. When the cream has hardened, the basket is placed on the cake. On top of the basket, a handle is made from caramel or from a special dough (composition: flour, powdered sugar and egg white). Flowers or candies are placed in the basket.

To decorate the sides of the cake with chocolate, you can decorate them with cream borders. By the way, borders are made before all other cake decorations. Borders serve not only as decoration, but also cover cracks, cracks, smooth the edges of the cake. They are generally made using a straight cut smooth tube or a finely toothed tube.
The video "DIY chocolate decorations" shows various confectionery techniques:
How to decorate a cake with chocolate with your own hands: making flowers
Figurines-decorations for a chocolate cake in the form of flowers look very beautiful. In addition to roses, carnations are often made. They are injected from a flat tube with an oblique cut. The sharp corner of the tube is set motionlessly on the surface of the cake or pastry and the cream is squeezed out, turning the opposite end of the tube 180 ° C around the fixed end in wave-like movements. Exactly, but in the opposite direction they "gather" the second row of petals, etc.

It is advisable to supplement cream flowers with leaves. They are deposited from tubes with wedge-shaped cut of various diameters. Leaves can be green, brown, yellow, and even white.
Completely from the leaves, you can make a border or the whole picture. Leaves look especially good on small cakes. On cakes and even on pastries, words, names, numbers, congratulations and wishes are often written. For the inscriptions to be expressive, it is necessary that there is a contrast between the inscription and the background. For example, you cannot write chocolate on chocolate or write with white cream on white glaze.

Inscriptions are syringed from a small cornet with a very narrow round cut or using a metal pencil tube. The cream is used proteinaceous, custard and oil of various colors and shades. But there should not be even the smallest lumps in it, otherwise it will get stuck at the exit from the tubule or cornet, and you will get uneven, intermittent lines. You can write inscriptions with two-color cream. In this case, the cornet is filled with cream of two colors with longitudinal stripes.
Watch the Chocolate Cake Decorating video for some fresh ideas:
How to make tempered chocolate cake decorating
Tempered chocolate can be used to make various decorations for cakes and pastries - full-volume figurines, bas-reliefs, flat thin figurines, "jigging" ones, etc.
For full-sized figures, it is better to use metal molds of two halves with clips. When pouring chocolate, the mold and the chocolate must be at the same temperature. Pour chocolate through the bottom hole of the mold and shake it for 2–3 minutes so that the chocolate is completely distributed over all patterns. Then the excess chocolate is poured out. A 3-4 mm thick layer of chocolate forms on the inner walls of the mold. After the chocolate has cooled and hardened, the mold is freed from the clamps, opened and the figurine taken out. Most often, bas-reliefs are made from chocolate.

To obtain flat thin figures, tempered chocolate is poured onto parchment with a layer of 2-3 mm, allowed to solidify a little and the figures are cut out with a recess.
For "depositing" tempered chocolate is laid out in a cornet and "deposited" on parchment in the form of continuous patterns and so-called tendrils. From tempered chocolate, cast into a bar and then cooled to almost complete hardening, thin wide shavings are cut with a knife, which, when dropped, roll up into tubes.
Making chocolate figurines for cake decorating
Chocolate is a great material for decorating a cookie or cake and will add a festive look to any baked goods. It is better to use a chocolate mixture to decorate the cake. It solidifies at room temperature and melts easily in a water bath.
Line a baking sheet with parchment, lightly grease it with vegetable oil. Break the chocolate into small pieces. Place it in a water bath and melt without water. Pour onto parchment, guiding with a round-end knife so that a thick, even layer forms. Leave in a cool place until the chocolate is almost completely solid. Use a knife or a dough hole (star, flower, etc.) to cut out the figures. Store them in a cool dry place.

Chocolate squares- a simple and effective way to decorate a cake or a festive dessert. Line a baking sheet with foil. Put 200 g of melted chocolate in an even layer and gently move the fork to create a wave effect (make sure that the prongs of the fork do not touch the bottom of the baking sheet). Cool until the chocolate is half solid. Using a sharp knife and a ruler, cut the chocolate into squares with a side of about 6 cm. Place the baking sheet with the chocolate decorations in the refrigerator until they solidify. Remove the foil. Gently press the chocolate squares against the top and sides of the glazed cake. They can also be used as a decoration for ice cream desserts.
Chocolate decor for decorating the cake: grated shavings, crumbs, petals and curls

Chocolate chips and chips. To decorate the cake with grated chocolate, you need to cut off the shavings from the chocolate bar with a sharp knife. It is better to remove shavings over a plate, in even movements. Before decorating the cake with grated chocolate, it should be warmed up, but just enough to make it easy to work with. Leave the chocolate in a warm place for 10-15 minutes. Spoon or shake off the shavings on the cake. Decorating with chocolate chips is done in the same way, only it is rubbed finer.

Chocolate curls. Melt the chocolate in a bowl in a water bath. Spread thinly over a smooth board. Set aside until the chocolate is almost solid. Pull the blade of a large wide knife towards you along the entire length of the chocolate, getting long curls.

Chocolate petals. Cut the foil into squares. Melt the chocolate in a water bath, then cool slightly. Place a square of foil in the palm of your hand. Use a spatula or spoon to spread the chocolate in a thin layer on the foil. Form a petal. While it is still soft, lift your fingers slightly under the foil to slightly bend the petal, giving it a natural shape. Put to cool. When the chocolate is completely solid, remove the foil. Melted chocolate can be used to make a flower from the petals.
Homemade chocolate cream dessert
Chocolate cream

Ingredients:
- 100 g of chocolate by weight,
- 1/2 cup milk
- 3 yolks,
- 4 squirrels,
- 2 tbsp. tablespoons of powdered sugar.
Pour the chopped chocolate into pieces with milk and put in the oven to melt. Then grind it with a spoon, gradually adding one yolk at a time, until a lush mass is formed. Whisk the whites into a thick foam, mix gently with the chocolate mass. Put the cream in glasses, sprinkle with grated chocolate mixed with powdered sugar on top.
Note. This cream must be prepared shortly before serving and kept in the refrigerator, otherwise the proteins will fall off and the dish will be spoiled.
Cocoa loaf

Ingredients:
- 400 g butter (unsalted)
- 250 ml of milk
- 200 g sugar
- 3-4 st. tablespoons of cocoa powder,
- 2 eggs.
Heat the milk in a water bath, add cocoa, stir, pour in the eggs crushed with sugar, cook until thickened, stirring occasionally, then remove and cool.
Beat the softened butter until white. Then add the cooled mixture to it. Beat the cream until smooth.
Custard Chocolate Cream

Ingredients:
- 1 cup flour
- 1/2 cup milk
- 1/2 cup granulated sugar
- 1 tbsp. l. cocoa powder
- 50 g butter.
Cooking method. Bring to a boil over low heat a homogeneous mass of cocoa powder, granulated sugar, flour, milk and butter, stirring constantly. The cream will be ready after it boils and thickens.
How to make chocolate icing for cake decorating (with photo)
Recipe number 1
The easiest way to make a chocolate frosting is chocolate. This product can be used as cake cream or simply spread over cookies.
Ingredients:
- 200 g of chocolate
- 100 g of water
- 25 g butter.
Dissolve the chocolate together with water in a water bath. Stir in butter. Spread the warm icing over the cake, cool.
Recipe number 2
In order to cook this glaze, you need only 2 ingredients.
Ingredients:
- dark chocolate (at least 56%) - 0.6 kg (3 large bars),
- butter "Peasant" - 0.3 kg.
Chocolate icing from chocolate is prepared in a water bath, so first we pick up containers: you need 2 of them, such a volume that one is immersed in another, but at the same time, water poured into a large container should not be poured into a smaller one.
So, we install containers, pour some water into a large one and put on fire. When the water heats up properly, melt the oil - it melts more easily and faster. Gradually add finely chopped chocolate to the liquid butter. Stir continuously, because the mixture thickens quickly and begins to burn at the walls. When all the chocolate has melted and the icing has become homogeneous, it is ready.
This creates a mirror-like chocolate glaze from butter and chocolate. However, this is a fairly high-calorie product.
As you can see in the photo, when decorating cakes with such chocolate icing, it shines very beautifully:

Cocoa and sour cream chocolate icing

Ingredients:
- sugar - ½ cup;
- sour cream with a fat content of at least 20% - 150 g;
- vanillin - 2 sachets;
- cocoa powder - 4 tbsp. spoons.
Preparation:
Since it is not recommended to warm sour cream, it is better to grind sugar into powder - this way it will dissolve more easily. We mix dry products: grind cocoa powder with powder and vanilla. If using vanilla sugar, grind that too. Add a little sour cream to the mixture to avoid lumps. Stir well until a smooth, shiny, homogeneous paste is obtained. You can use a mixer to make the chocolate icing for the cake more fluffy.
You can make a rich frosting by adding cocoa to the chocolate - this recipe is great if you can't find high-cocoa chocolate. We will tell you how to make chocolate icing from cocoa powder, chocolate and milk.
Chocolate and cocoa frosting

Ingredients:
- mirror chocolate icing;
- cocoa powder - 4 tbsp. spoons;
- sugar - 1/3 cup;
- milk - ½ cup;
- black chocolate - 1 bar;
- butter - ¼ pack.
Preparation:
Heat milk, dissolve butter with it. Gradually add the chocolate chips, cook until the ingredients are fully combined, stir. Mix sugar with cocoa and pour in the milk-chocolate mixture in a thin stream. Grind until sugar dissolves. This chocolate icing must be applied very hot for decoration.
Light chocolate icing for decorating cakes and desserts
What to do if you need to decorate a dessert, but you want fewer calories. To do this, you need to cook a light cocoa frosting.

Ingredients:
- sugar - 1 glass;
- water - 0.5 cups;
- cocoa powder - 2-3 tbsp. spoons.
Preparation:
To cook this icing for decorating desserts with chocolate, first of all we prepare the syrup: add sugar to hot water and cook the mixture over low heat for so long to get a drop that does not spread on the nail. As soon as the syrup is cooked, we gradually introduce cocoa, carefully rubbing it with liquid. Sugar will begin to crystallize at the walls fairly quickly. If you do not grind the mass, it will burn, so be careful and careful. The glaze hardens quickly, so apply warm.
It is not necessary to cook the cream to decorate the dessert. If the cake contains jelly, the hot chocolate layer should not be applied. In this case, we will prepare the glaze without heat treatment.
How to make chocolate fondant for cake decorating

Ingredients:
- 75 g softened butter or margarine;
- 225 g icing sugar;
- 3 tbsp. l. water;
- 2 tbsp. l. cocoa.
To make a chocolate fondant, mix 1 tbsp. l. hot water and 1 tbsp. l. cocoa, cool.
Mix butter and icing sugar. Beat with a mixer on low speed, gradually adding water until the fudge is smooth.
Brush the cake with the chocolate decoration made according to this recipe and decorate according to the theme of the holiday.
How to properly melt chocolate to decorate a cake
To make a product or decoration out of chocolate, you need to prepare it, that is, melt it. There are several nuances in how to properly melt chocolate to decorate a cake. Several methods can be used.

The first way how to melt chocolate for decoration - using the microwave is very simple.
Second way how to melt chocolate to decorate a cake - use a water bath. To do this, place the container with chocolate in a saucepan with hot (not boiling!) Water.
The third way how to properly melt chocolate for decoration - use a double boiler. It is also quite possible to melt chocolate in it.
Fourth way - oven. Preheat it to 60-70 degrees, place the container with chocolate there for 10-15 minutes. The fifth way is a steam bath. The container with chocolate must be held over boiling water.
A liquid mass is not always required, so the process will need to be controlled.
Chocolate does not like sudden changes in temperature, so you should not start melting it cold. Wait for the product to warm up to room temperature.
The melting point of white or milk chocolate is 45 degrees. But bitter dark chocolate will melt only at 50-55 degrees Celsius.
How to make openwork patterns from chocolate to decorate a cake
Openwork patterns are a great option for decorating a cake.
You will need a brush (it is better to purchase a special culinary brush, it is simple and convenient to work with it), a pastry bag or a plastic bag, dark and white chocolate.

First, you will need to cover the entire cake with chocolate, which you will use for the background (other chocolate will be used to create the drawings). To do this, melt it to a liquid state in any way. Spread over the cake using a cooking brush.
Let the glaze dry completely.
Start melting another chocolate. It should be pretty runny too.
Transfer the chocolate to a pastry bag. You can replace it with a regular plastic bag by making a small hole in its bottom corner.
Start creating! Draw different patterns, get creative!
Workshop on making butterfly decorations for a cake
Prepare everything you need in advance: chocolate (you can use white and dark), cling film and a plastic bag (or pastry bag), a cutting board or any other solid surface.
What do we have to do?
Melt the chocolate in any way to a liquid state, transfer it to a piping bag (or a plastic bag with a hole).

Spread cling film on a cutting board.
Start drawing butterflies with liquid chocolate on cling film. If you use two chocolates (white and dark), then the decoration will be more effective.
When the drawing hardens a little, move it to the refrigerator until it solidifies completely.
Take the jewelry out of the refrigerator, carefully peel off the film.
Place your butterflies on the cake.
Decorating the cake with balls of chocolate, nuts and cookies
Chocolate balls with nuts

Ingredients:
- cocoa 3 glass;
- sugar 1 cup;
- milk 3 glass;
- butter 150 gr;
- walnut 150 gr;
- shortbread cookies 400 gr;
- coconut flakes 1 sachet;
- egg 1 pc .;
- cognac 1 tbsp. l;
- vanillin 1/2 tsp
Preparation:
To decorate the cake with nuts and chocolate balls, mix cocoa, sugar and milk. Add chopped butter and heat. We are waiting for it to boil. Cool it down.
Add the egg, vanillin, brandy and beat well.
Chop the nuts on a coffee grinder (you can fry it beforehand, it tastes better) and add to the mixture.
Grind the cookies (here the meat grinder is your friend) and add to the mixture.
Mix well and sculpt balls. Wrap each ball in coconut flakes. Nice!
Put the balls in a pyramid on a plate and send them to the refrigerator for 3-4 hours.
Bon Appetit!
Chocolate balls with cookies

Ingredients
- 250 g cookies;
- 150 g dark chocolate;
- 50 g butter;
- 2 tbsp. l. Sahara;
- 1 glass of milk;
- coconut flakes or colored dragee.
Grind the cookies. Melt the chocolate and butter in a water bath or microwave. Add milk and sugar, stir until a homogeneous mixture is obtained. Add chopped cookies. Stir and make balls from the resulting dough. Roll the finished balls in coconut flakes or colored dragees. The chocolate balls for decorating the cake should be placed in the refrigerator for several hours.
A selection of photos "Decorating a cake with chocolate at home" clearly illustrates all the above recipes:


Chocolate shavings for decorating cakes
If you grind the chocolate on a grater, small strips, separating from the bar, will twist into spirals and are perfect for the role of the top layer. Moreover, improvising with flowers (black, milky and white), interesting combinations come out, and even whole edible pictures. Before getting to work, place the chocolate in a warm place, softening it a little. You can also create curls manually: you need to get used to cut thin strips with a well-sharpened knife.
And for the sake of perfectly even shavings, the technique will have to be adjusted. To do this, you need ready-made chocolate icing, which must be applied in separate strokes on the corrugated surface and put in the freezer to freeze.
When the mass has hardened, carefully scrape off the mass and transfer to the cake. Don't stop your fantasy on a solid background. Works of art are also created from such small particles. It's important to attach the chocolate cake decorations quickly so they don't melt on your fingers or stick together.
Chocolate Cookie Decorating

Ingredients:
- 1 part vanilla shortbread dough
- ground cinnamon added to flour;
- 400 g of a mixture of various whole nuts;
- 175 g of plain chocolate, broken into pieces;
- 175 g milk chocolate, broken into pieces.
Preheat oven to 180 ° C. Oil the base and sides of 2 short forms and line each with a sheet of parchment. Lubricate paper with oil.
Divide the dough between the molds and pack tightly into the molds. Sprinkle with nuts so that they are evenly distributed. Press them into the dough with your hands so that they hold tight.
Bake for 40 minutes, until nuts and edges are golden brown. Carefully remove them from the molds and place them on the wire rack.
Melt milk and dark chocolate in separate bowls placed on pots of boiling water. Leaving the cookies on the paper, carefully cut each cake into 2 cm wide strips.
Spread the slices on the wire rack so that they are 1–2 cm apart and sprinkle with a thin stream of melted dark chocolate using a dessert spoon. Then sprinkle milk chocolate on top and leave in a cool place to harden. Cut each strip in half lengthwise.
Cookies with chocolate decorations can be stored for about a week in a tightly resealable container.
Recipe for pouring chocolate figurines for decorating a cake
Such figurines can be poured from melted chocolate using conventional casting technology. It's enough just to have a form. We purchase silicone molds of the desired subject in the confectionery department and fill them with melted chocolate, cool them down, cool them to a solid state, take them out of the molds, turning them inside out. If you do not need large chocolates, pour a thinner layer of chocolate into the molds. After pouring, smooth the surface with a thin spatula or a table knife.
In the absence of bulk pouring forms, you can use the curly grooves that we usually use for molding cookies or gingerbread. Place a sheet of parchment paper on a flat tray, place the molds and pour the chocolate into them in a layer as thick as you want, trying to hit the center of the notch so that the chocolate does not stick to its sides above the intended layer. When using grooves, the chocolate mass is better to be thicker - let the melted chocolate thicken a little so that it does not spread too much from under the grooves on the parchment. After cooling the chocolate figurines to a solid state, gently squeeze them out of the cut-out forms, cool down your hands and put on gloves so as not to leave fingerprints. Until the figures are finally hardened, they can be additionally decorated - apply notches with a knife or a special cutter, or press through with a mesh, other textured objects, according to the conceived decor. Anything you press on the surface of the chocolate will leave its mark on it. Such massive chocolate figures are used in confectionery compositions if they are supposed to be handled, for example, to fill baskets or to create a volumetric center of the confectionery composition.
And in conclusion, one more video "How to decorate a cake with chocolate", which will help you to cope with this difficult task perfectly:
To delight and truly surprise your family and friends, as well as guests, you don't have to be a sorceress, you just need to master some amazing skills in creating unusual and incredibly beautiful desserts.
In this article, the news portal "site" specially for you has collected the most amazing ways to create really beautiful and extraordinary cakes.
 Agree, a dessert such as a cake is a must-see at events such as Birthday, Wedding Day, New Year, Defenders of the Fatherland Day and March 8, and many other equally important events.
Many of us prefer to trust purchased cakes or custom-made cakes, because then the cake will certainly be beautiful, albeit not always truly tasty, unlike a homemade self-prepared dessert.
The news portal "site" decided to invite you to try to make a really beautiful cake, using your favorite homemade recipe.
So, you are preparing your signature homemade cake, and we will help you decorate the cake.
"Zebra" cake
Such a beautiful cake can safely become the main culmination of a children's party or a bachelorette party, and at the same time it does not require special skills and efforts from you. You just need to add a little cocoa for color to part of the dough and follow the photo master class below.

Leopard cake
Surprise your guests with a leopard print cake. To get such an original pattern in the cut cake, you need to do everything in the same way as in the case of the Zebra cake, just add one more color to the dough. The new color is tenderly carrot. It can be achieved with food coloring or by mixing white dough with cocoa added.

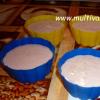
Cake "Multi-colored balls"
 This way of decorating a cake will not leave anyone indifferent. And everything is very simple to do.
First, bake colorful little balls (use food coloring). Put the finished colored balls inside the dough for the future cake and bake (see photo).
This cake will be a great decoration for the festive table.

Chessboard cake
This way of decorating a cake causes incredible surprise, because the first thought that comes to mind is "How is this even possible?"
But in fact, everything is outrageously simple. To create a checkerboard inside the cake, you need two colors of cakes: black (cocoa) and white.
Then, using round molds of different diameters, cut out circles from the cake layers and nest them inside each other (see photo).
 Such an amazing cake will be a great surprise for a checkers or chess lover.
Heart cake
This cake will be an unforgettable surprise for Valentine's Day, Wedding Day or just a romantic evening with your beloved. Making a heart is not difficult. In the finished cake, cut out the middle in a cone shape. Then pour red crumbs made from a previously prepared red crust inside it. In the middle of the red crumbs, make a small indentation, which you fill in with the scraps of the white crust. Cover the creation with another whole crust.
 Here are some more techniques for creating hearts inside a cake, pie, or cupcakes.


Cake with sweets inside
Very unusual and impressive, do you agree? Such a cake will be able to surprise and delight anyone. A great option for a birthday cake or a surprise cake.
Making such a miracle is not at all difficult!
 In the finished cake, cut a recess in the center. Pour multi-colored sweets into the finished recess. Now you can cover the candies with a whole cake, coat it with cream and decorate the cake.


Cake "Rainbow"
 Do you like bright and unusual multi-colored patterns? Then you will like this option. Use the most incredible food coloring to make your cake shine like a bright rainbow.

Cake "Leaf"
 Using this technique, you can create any designs inside the cake. The main thing is to make a template and use it to cut out the necessary shapes from the prepared cakes.
Cake with name

Cake with stars

Halloween cake

Cake "Flag"
 Using this technique, you can create cakes in the form of any flags. These cakes will be very appropriate at international banquets, and will also be a great gift for foreign guests.
Teddy bear cake
 If you want to impress your guests, follow the photo instructions and the funny edible bear will smile sweetly from your homemade cake.
Owl cake

Cake "Watermelon + Melon"
 If you strive to be always slim and beautiful, but love for all sweet and starchy foods interferes with your plans, then use this recipe.
The cake gets very tasty, and most importantly natural and low-calorie.
The cake layers are cut circles from watermelon and melon, and the cream is vegetable cream.
Light, tasty and surprisingly interesting cake will definitely earn the title of your favorite dessert.
Painting on the cake with chocolate icing at home
Decorating a homemade cake with chocolate chips in 5 minutes
An easy way to decorate a cake at home
Decorating the cake yourself with the help of improvised means is not difficult at all. The main thing is to have enough time in stock and to use your imagination. To bring your own ideas to life, it is not at all necessary to have the special knowledge and skills of a professional.
Before you start decorating your dessert, you need to understand the basics of working with this plastic edible material. The consistency of mastic is very similar to plasticine, so you can create different figures from it. In addition, it can be stored for a long time - wrapped in plastic, it can stay in the refrigerator for 10 - 12 weeks. Buy ready-made mastic or do it yourself.
Ingredients for cooking:
- powdered milk;
- condensed milk;
- powdered sugar.
All components are taken in the same ratio and kneaded. After that, the resulting dough is divided into parts and the necessary dyes are added.
Also mastic is prepared from marshmallows.
Ingredients:
- marshmallow - a handful;
- "lemon" diluted with water - 1 tsp;
- oil - 25 g;
- sweet powder and starch in a ratio of 1 to 3.
Mastic is prepared following this algorithm:
- Dissolve the marshmallow in a water bath, add a little dye and, if necessary, water and oil for elasticity.
- Powder with starch is introduced into the liquid and sticky mass in small portions, stirring thoroughly.
- When the mastic ceases to be sticky, it is transferred to the table, abundantly sprinkled with powdered sugar. The mass is kneaded, periodically adding powder until the base becomes plastic.
- Do you feel that the mass has stopped sticking to your palms? This means that it is completely ready for use.
It is difficult to sculpt flawless figures without professional equipment and skills, but why not give it a try. Just prepare at least a minimum of tools - a sharp small knife, toothpicks, paintbrush, rolling pin, roller.
When working with mastic, the following rules are followed:
- Do not leave the mass in the air (it dries quickly and becomes hard), but constantly wrap the remainder in a film.
- Rolling is carried out only on a film sprinkled with powdered sugar.
- They prefer small elements, since three-dimensional figures can crack.
You can decorate the cake in different ways, since the mastic gives a wide scope for imagination. As a rule, first, the material is thinly rolled out to completely cover the cake, and then the finished surface is decorated with figures.
Cream decoration
You can decorate a cake with cream in different ways. Roses, leaves, various curls and borders are made from the creamy mass - it looks very elegant and festive. But in order for these delicate products to keep their shape, you need to choose a suitable cream, and it is better to give preference to oil.

To prepare butter cream, you need a minimum of products:
- melted butter - 1 pack
- condensed milk - 10 tbsp. l.
The oil must first be removed from the refrigerator so that it melts, and then beat with a mixer until tender splendor. After that, condensed milk should be introduced in small portions and beat until smooth.
If desired, the mass is divided into several portions and various dyes are added to them.
They are bought ready-made or made on their own:
- saffron gives yellow color;
- orange - orange or juicy young carrots;
- scarlet - cherries, beets, cranberries;
- light green - spinach;
- brown - cocoa.
To make the decor from the cream neat and beautiful, you need to use special syringes with different nozzles. If there are no such devices, you can make an imitation of a syringe from a dense sheet by rolling it up in the form of a cone and cutting off a sharp corner. You can do the same with a regular tight bag. Then the resulting blank is filled with cream and squeezed out through a small hole. So you can draw straight or wavy stripes, leaves, flowers, ruffles, inscriptions.
Fruit Ideas
Decorating a cake with fruit is very easy. This is one of the fastest and cheapest methods. By creating spectacular compositions from slices of different fruits, you can show your imagination and give free rein to your imagination.

Both decorations from one type of berries and bright, multi-colored fruit and berry mixes look beautiful.
So that the fruits do not lose their original color and the structure does not disintegrate, the whole composition is covered with colorless jelly. The liquid mass is carefully spread over the decor with a brush and placed in the refrigerator. After half an hour, the "gelatinous" treatment is repeated.
If you have time and desire, you can make roses from apples.
- First, a syrup is prepared (a spoonful of sugar is taken for 200 ml of water), adding a dye at this stage, if necessary.
- The apples are cut into thin strips and boiled in syrup to make them plastic.
- Roses are formed from fruit blanks. The inner "petal" is rolled up in a spiral, and the rest are added in a circle, forming a lush flower. Its tips are slightly twisted outward so that the "rose" bud opens.
How to decorate a cake with cream
Whipped cream is an airy and delicate decoration, but you need to work with it quickly.

Ingredients:
- heavy cream - 500 g;
- vanillin - a bag;
- powdered sugar - 150 g;
- gelatin - 1 sachet.
Preparation:
- Pour the chilled cream into a deep bowl and place in a saucepan of ice water.
- Dissolve the gelatin.
- Beat the cream with a mixer until a strong foam appears.
- Add powder, vanillin and mix gently.
- Introduce gelatin in a thin stream.
Whipped cream is placed in a pastry syringe and the cake is decorated.
Chocolate
Decorating a cake is a delicate matter, since the finished look and aesthetics of the entire product depend on it. Chocolate is one of the favorite products for decorating desserts by confectioners.

The easiest way is to chop the chocolate and sprinkle the resulting shavings on the cake. You can try a more complex method: for this, the chocolate is left in a warm place for a short time to make it softer. Then, with a sharp knife, thin long shavings are cut from the tile. They immediately begin to curl, and in order to fix their shape, they are placed in a cold place to solidify.
Openwork curls look very elegant:
- The tile is melted in a small container over minimal heat.
- Patterns of curls and patterns are drawn in advance on parchment paper in the required quantity.
- Then hot liquid chocolate is placed in a syringe and all sketches are carefully traced along the contour. This must be done quickly and efficiently, since the mass quickly solidifies. It is advisable to make several spare patterns, since the finished curls are quite brittle and can simply fly to pieces if handled carelessly.
- The parchment with painted curls is placed in a cold place until it hardens completely.
- Then the openwork products are carefully separated from the paper and laid out on the cake.
It is very easy to make chocolate leaves. To do this, take the foliage from any trees, wash it thoroughly, and then cover it with melted chocolate and place it in a cold place. The most important task is to carefully detach real leaves from edible ones.
With sweets and candies
Even the simplest cake can be decorated with sweets in an original way. The main thing is that the surface of the product is thick and viscous.
There are many design options:
- Line the sides with long thin waffles, straws or bars and tie them with a bright satin ribbon. Fill the top of the cake with multi-colored dragees.
- Make a beautiful inscription or pattern on the snow-white or beige surface of the cake with small toffee.
- Cut the marmalade into small pieces and arrange in a chaotic manner.
- Put a handful of multi-colored dragees inside. Upon cutting, guests will find that the cake is a surprise.
- Also, many people use confectionery dressing. It comes in a variety of colors and shapes. It is advisable to decorate the cake with sprinkles while its surface is not completely frozen.
- Decorations made from chopped nuts, chocolate and coconut flakes, and cookie crumbs are widespread.
- Jelly with sprinkles looks very impressive on the surface of the cake, as it resembles an aquarium. To do this, half of the prepared liquid colored jelly is poured onto the cake and placed in a cold place to solidify. Then the solidified mass is sprinkled with coarse dressing and again poured with the remaining liquid.
- To decorate the cake with sprinkles in an unusual way, use stencils. You can make them yourself by cutting out a pattern, letters, drawing or numbers from a piece of paper. The template is easily pressed against the surface of the cake, and on top is densely crushed with the selected powder. Then the stencil is carefully removed, and a beautiful number or pattern remains on the cake.
Using berries

Berries are one of the healthiest garnishing foods. They contain a lot of vitamins, they are juicy, tasty and bright. The easiest way is to evenly spread the berries of the same type (or several, if desired) on the surface of the cake and grease them with colorless jelly.
How to decorate a baby cake
For children, the appearance of a dessert means much more than its taste. Therefore, mothers have to come up with various unusual decorations from sweets, mastic, fruits, jelly and other products.

Cake Decorating Options:
- sprinkle it with multi-colored Easter powder;
- cover with glaze;
- arrange fruits in the form of a mysterious pattern;
- decorate with self-sculpted figures;
- whip cream and sprinkle with shavings;
- equip a palisade around the edges of oblong cookies;
- pour jelly.
When decorating a cake for a child, you need to consider who it is intended for. Boys love culinary masterpieces in the form of cars, balls or superheroes, girls - in the form of dolls or flowers. But all kids tend to love cartoon-themed cakes.
It is also necessary to remember that many modern babies are allergic to different foods. Therefore, in the manufacturing process, you should not use components that can potentially cause allergic reactions.
Cake decoration for March 8, February 23
Pastries for these dates can be decorated in different ways. As a rule, the decor almost always includes numbers - 8 or 23. They are made from chocolate, mastic and other materials.

Cakes decorated with chocolate, caramel or creamy glaze look very stylish and elegant.
Ingredients for the caramel glaze:
- warm water - ¾ st .;
- granulated sugar - 180 g;
- corn starch - 2 tsp;
- cream with a high percentage of fat content - ¾ st .;
- gelatin in sheets - 5 g.
Preparation:
- Soak gelatin in water.
- Stir the cream with the starch.
- Melt the sugar until it becomes caramelized.
- Pour cream with starch and sticky sugar into warm water. Bring the mixture to a boil, stirring constantly.
- It remains only to cool the mass and add ready-made gelatin to it.
We decorate the meringue with our own hands
Also cakes are decorated with meringues.

For such a crisp white decor you will need:
- proteins - 5 pcs.;
- sugar or powder - 250 g.
The algorithm of actions is already known to everyone:
- Beat the whites into a stable foam, then add the powder in small portions.
- Beat at medium speed for 10 minutes, until the mass acquires a fluffy and dense consistency.
- Then preheat the oven to 110 ° C and cover the baking sheet with paper.
- Put the prepared mass in the form of small cakes with a tablespoon on greased baking paper and place in the oven.
Waffle decoration
Waffles are inexpensive and easy-to-use material. On sale you can find ready-made colorful images on wafer cakes. Their assortment is very large: these are beautiful princesses, and supermen, and characters of your favorite cartoons, and animals. It's almost impossible to make such a decor on your own, so it's easier to buy it ready-made.

The advantage of this decor is that it does not crack, does not melt, unlike cream, and retains its given shape well.
The process of decorating with a waffle picture is as follows:
- Form a perfectly flat cake surface.
- Turn the cake over with the bottom side up and brush with liquid honey using a silicone brush. Instead of honey, sometimes syrup or any light-colored jam is used, so as not to spoil the picture when the cake is soaked.
- Attach the picture to the surface.
- Press down gently with your hands and smooth with a napkin.
- Whip the cream and decorate the edges.
Sometimes the cake is decorated not with a whole picture, but with individual waffle figures. They are laid in the same way as the waffle cake.
Knowing how to decorate a cake at home, you can make real masterpieces, delighting yourself and your loved ones. Turn on your imagination and your dessert will outshine even the products of elite confectionery!
Although they say that a woman loves with her ears, and the way to a man's heart leads through the stomach, guests of both sexes value dishes not only for their taste, but also for their appearance. Children are especially partial to food decor. This is used by manufacturers of confectionery products. But often, behind lush creamy rose trees and marshmallow towers, absolutely fresh cakes, and even dubious freshness, are hidden. Better to bake the cake yourself. This way we can be sure that the product is free from preservatives and the freshest ingredients were used in its manufacture. But how to decorate a cake at home? We will talk about this in the article.
Simple and fast
Agree, making cakes is a long and laborious task. Therefore, there is no longer any strength or special desire to decorate it. If you still have some cream left over from greasing the cakes, simply apply it to the top and sides of your culinary masterpiece. Then head to the store and buy ready-made edible decor. It can be both ordinary coconut flakes of various colors, and wiser decorations: chocolate figurines, marzipan beads, bright mastic sprinkles. All of these gizmos look stylish and are durable. Other sweets familiar to us will also help to decorate the cake with your own hands. But if before we ate marshmallows or bizet "solo", now we are not afraid to use them as an element of decor. M&M dragees look original in the cake (especially for a children's party). And it is convenient to decorate the sides of the cake with biscuit cookies "Ladies Sticks".
Decorating caveats
It is not hard to guess where the hostess turns for advice on how to decorate a homemade cake in an original way. Photos from culinary sites are full of real masterpieces. But it is worth remembering that you will not only look at the cake, but also eat it. Therefore, the entire decor should be exclusively edible, or at least not pose a threat to health. If the cake is baked for an anniversary, special candles should be placed on its surface that do not float. There are only a few exceptions to the use of inedible cake decorations. First: fresh flowers. On March 8, you can decorate the top of the product with mimosa, rose, lily, calendula and lavender petals. These flowers are harmless to the body. Without fear, you can eat mint leaves and physalis. The second exception, the Barbie cake, is for a girl old enough to know not to stick a doll in her mouth. The cake is made like a fluffy hem of a skirt. And a doll is inserted into the middle. Care should be taken not to let her hair touch the cream.
Simple and economical
In the process of baking a cake, each culinary specialist has scraps of cakes, and after they are sandwiched, cream. Do not throw these products away! Roll out the illiquid parts of the baked dough with a mortar into crumbs. Mix them with crushed nuts. Apply the rest of the cream to the sides and top of the product. Sprinkle with a mixture of cookies and nuts. How beautiful to decorate a cake with this simple decor? We use a stencil! We cut out various shapes from paper. Apply to the top of the cake and sprinkle. Ordinary oatmeal can be used to decorate the sides. As a sprinkling, cocoa, powdered sugar, grated chocolate, confectionery confetti are suitable. It is important to correctly combine the colors. Garnish with icing sugar and white buttercream with cocoa powder. Gummies will look good on a jelly coating.
Form as decoration
Let's give free rein to imagination and bake something original instead of boring round cakes. After all, instead of thinking about how to decorate a cake at home, you can already create it. Let's think over a concept: what shape will we give our culinary masterpiece? And it is not at all necessary to build something resembling the Burj Dubai skyscraper from the cakes. It could be a violin-shaped cake. Then we powder the sides of the product with cocoa, and draw the strings with melted chocolate. Curly cakes are especially relevant for children's parties. We already mentioned Barbie Pie. But for a boy, you can bake a cake in the form of a car or a boat. In this case, we will only retouch our sculptural image with a cream. And with what pleasure the little ones will eat some of the stern, some of the bow of the ship, taking with them the sailors from the mastic as souvenirs.
This is a classic in cooking, and as you know, it is always in fashion. Butter cream is an unusually plastic product. From it you can create roses, leaves, flowers, ruffles and flounces. The oil retains its shape quite well, does not settle and does not flow. Protein meringue cream is also good for garnishing. However, eggs are perishable. But the custard is not structural, you cannot create flowers from it. The same can be said for whipped cream. Figures created from them turn into blots after a while. So use a cream with condensed milk, sour cream and proteins only for the layer of cakes. But how to decorate a cake at home with butter cream? If you do not have a pastry syringe with special attachments, do not rush to get upset. You can do something like this yourself. Take a sheet of thick paper and roll it into a little bag. Let's fill it with cream. Cut the edge of the bag. You can carry out truncation simply - in a straight or oblique line, or you can do it with imagination. We will roll the hollow little bag several times along. Cut the narrow tip in the shape of a triangle with the sharp end down. Now unfold the envelope and fill it with cream. Squeeze out slowly onto the surface of the cake. The edges of the cream come out as if corrugated. Moving your hand back and forth, you can create lush ruffles - the design of the sides. Instead of paper for a pastry bag, you can take a regular cellophane bag.
Whatever festive dishes the table is filled with, all guests are eagerly awaiting the final chord - dessert. Beautiful cakes are a delicious end to any holiday. Those with a sweet tooth know that a homemade homemade cake is always better and healthier than a store-bought one. Each hostess wants to amaze those present with her masterpiece, to put on the table not only a delicious, but also a beautiful cake. Decorating cakes with cream is a fun experience. There are many ways to decorate a cake at home. For example, decorate it with cream, chocolate, mastic, fondant, whipped cream, jelly, beautifully place berries and fruits on it, use meringues to decorate the cake. The cake decorating master class suggests how to diversify cake decorating at home.
It is important to take into account that the taste of the decor ingredients is in harmony with the taste of the baked goods:
- puff cake and honey cake are good with boiled or raw condensed milk and nuts;
- shortbread cake is in good harmony with butter, protein cream, jam;
- butter creams, butter creams, chocolate icing are suitable for biscuit;
- for curd baking, take berries and fruits, whipped cream.
A little bit of desire and diligence, and you will be able to cook beautiful cakes, you will be able to create a confectionery masterpiece simply and quickly.
Using buttercream to decorate a cake, for example, is a classic. Since childhood, we remember oil roses, lilac twigs, green leaves on baked goods from the store. Inscriptions, flowers with leaves, openwork patterns - cream decor will never become outdated. The creamy mass should be thick enough. The best option is butter plus condensed milk. This cake decorating cream holds its shape well. You can add syrup, instant coffee (to color and enhance the aroma), cocoa (provides the taste and color of chocolate), sour cream and whipped cream to obtain a more delicate consistency, all kinds of additives to improve the aroma (vanilla, cinnamon, zest). Protein cream is also perfect for decorating a cake.

To decorate a treat with your own hands, you will need pastry bags made of thick film and nozzles made of food-grade metal or plastic or a pastry syringe with curly tips. Instead of a bag, you can simply take a thick plastic bag. If you plan to make the dessert bright, divide the cream into parts and color with food colors, cool. Place it in a piping bag or syringe, choose a nozzle. From cream for decorating a cake, you will make a delicate border, graceful roses, all kinds of small figures or patterns. Protein custard is often used to decorate a cake. The recipe for the cream provides for whipping hot syrup and whipped cream, the cream is durable, does not settle.
Decorate with fruits and berries
Juicy berries, aromatic fruits - it's so appetizing. Fruit cake decorating is a great way to decorate baked goods. Pieces of fruit can be placed between the cakes, added to the cream, placed on the surface of the dessert and poured over with a layer of jelly. In the same way, the cake is decorated with berries. If you are faced with the question of how to decorate the cake with fruits, keep in mind that not all of them are suitable for decoration, too juicy will spoil the appearance. Most often, mangoes, citrus fruits, apples and pears, apricots and peaches, kiwi and pineapples are used for decorating baked goods. And, of course, the colorful strawberry cake decoration is used most often.

You will get a successful fruit dessert at home if you pour the jelly onto the surface. The fruit pieces will hold better and will take very little time to cook. Place the product in a split form, lay out thinly sliced berries and fruits, pour in the jelly. You don't have to think about how to make jelly, just buy ready-made in the store, cook according to the instructions, slightly reducing the amount of water. Place the dessert in the refrigerator for a few hours until it cools down well.

Mastic
Many hostesses are sure that decorating a cake with mastic is a very laborious task. Not to say that it is easy, but when you understand how to decorate a cake with mastic at home, cake decorating will not be a problem for you. There are different types of mastic, it can be painted in different colors, it is soft and plastic and you can create a real masterpiece from it. To make mastic, you will need gelatin, water, powdered sugar, lemon juice, and food coloring. Mix the powdered sugar with the dissolved gelatin, add a little lemon juice and knead. Divide the mastic and paint in the desired colors. First you need to cover the finished cake with a layer of mastic. Roll into a thin layer, place on a surface, press down gently and trim off excess edges.

Cut out small details (flowers, leaves, patterns) and attach them. You can make voluminous figures, mold them from mastic, like from plasticine. If you need to glue individual parts, use protein. This blank should be done in a couple of days so that it has time to dry. The mastic makes everything extremely bright and elegant.
Chocolate Decorations
Everyone loves chocolate and chocolates, so decorating a cake with chocolate is always relevant. You can get very beautiful cakes by filling with icing, but you can create a real masterpiece. Bitter, milk and white chocolate are used. Before making chocolate decorations for a cake, it must be warmed up. The most convenient way to do this is in a microwave oven, in a water bath or in an oven at a temperature of 50-100 degrees. The mass must be stirred frequently and kept away from steam and water.

If the question arose of how to decorate baked goods, and time is running out, fill it with chocolate icing. You can make it from cocoa powder, butter, sugar, milk or sour cream. Decorating with this glaze is cheaper than using chocolate, the main thing is that the cocoa is of high quality.
But the ideal option is to use real chocolate (70% or more cocoa beans), heavy cream and powdered sugar. The glaze will taste great and provide a shiny, even surface.
You can crush the dessert with chocolate chips. Previously, chocolate must be held at a temperature of about 30 degrees, this will make it more plastic. On the wide side of the tile, you need to cut it with a vegetable cutter with a sharp knife on wide shavings. The shavings are rolled up, they can be used to decorate the top layer, lightly sprinkle with powdered sugar on top and decorate cakes at home.
The berries on the cake, framed with chocolate leaves, always attract attention.
Before decorating the cake, try making the leaves yourself:
- Gather living leaves that are strong, not too small, and have many veins.
- Cover the back of the leaf with melted chocolate with a brush, the veins on it stand out better.
- Bring to the cold, chocolate topped. After hardening, carefully peel off the chocolate bar.
With the help of a cornet (pastry bag), you can make chocolate patterns for decorating cakes. It must be melted in a water bath, poured into a cornet and written on the surface of congratulations, draw patterns.

To decorate the cake with cream, you can pick up decor bows. Chocolate bows look beautiful. On a parchment sheet of cornet, pour long strips, while the chocolate is still soft, fold in half and pinch the edges with a clothespin. Remove the parchment from the frozen chocolate and lay the bow details in layers, reducing the number of folds each time. Lay out the bow and secure with hot chocolate.
You can cast chocolate figurines such as butterflies. This requires a pastry syringe and parchment. Line the stencil with parchment and fold it in the center to add volume to the figurine. Apply chocolate along the contour, wait for the chocolate to harden and remove the parchment. The butterfly is ready. The figurine is very fragile, treat it with care. In the same way, you can make an openwork border for the side of the cake. On the parchment, mark a stripe of the required size, draw patterns on it. After hardening, carefully remove the parchment and glue the border to the side surface. These blanks are perfect for children's cakes.
Thematic
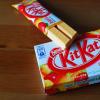
It's impossible to imagine a birthday without sweets. For the children's birthday, mom will bake a delicious dessert and provide the decoration of the children's cake at the highest level. Effectiveness and brightness are very important for children's products. Make a sponge cake decorated with M & M's and a DIY Kit-kat cake. Bake a sponge cake according to your proven recipe, coat it with your favorite cream. Glue the tick-tock sticks on the side surface, you can tie them with a bright elegant ribbon. Pour a large pack of M & M's on top and send everything to the cold. For girls, decorations from bows, beads, flowers from mastic will be appropriate. Boys prefer sports or car decorations, with characters from computer games.

Of course, you need to think about how to decorate a birthday cake for an adult. Here it is worth considering the birthday boy's hobby, his profession. For an anniversary, you can bake a confection in the form of a number - the age of the birthday person, or write a congratulation with cream right on the surface. An avid football fan can bake birthday cakes in the form of a soccer ball on a field with gates and flags of your favorite teams. With the help of mastic, you can beat any hobby of the birthday person, professional features. There is full scope for your imagination.

One of the most important events in life is a wedding. Beautiful wedding cakes are not just a treat, they are a symbol of love and loyalty of the young couple. Most often it is made gentle, in soft pastel colors, and decorated with flowers. Nowadays, baked goods from a wide variety of geometric shapes, most often multi-tiered, are in vogue. Dessert is popular in the form of one or two hearts connected with cream.

Among wedding baked goods, multi-tiered products are in the lead; they look very solemn. The following cake decorating can be used:
- Mastic is very popular. It can be painted in any colors, sculpted figures of the bride and groom, bows, flowers, rings.
- Icing is widely used. From snow-white sugar glaze, you can create the most delicate lace, congratulatory inscriptions.
- It's hard to imagine a cake without flowers, leaves and patterns. The most delicate roses are created from the snow-white oil cream.
- Spread thinly sliced berries and fruits on a cream-covered baking surface, it is advisable to pour them with a layer of jelly.
- You can tame the delicacy with candied rose petals.
It is not only for professionals to create a beautiful culinary masterpiece. The homemade cake, into which the hostess put her soul, decorated with love - will certainly be remembered by all guests. At the same time, the simplest available products are suitable for decoration - ready-made chocolate, simple butter or protein cream, seasonal fruits, frozen berries and even homemade products.