How to make an inscription on chocolate glaze. You can also make a beautiful inscription on the cake at home.
The cake is a delicious dessert that also pleases the eye. Often, some hostesses will want to feel like an experienced pastry chef for a holiday. As a rule, most people prefer freshly baked homemade cakes. Every person wants his cake to be original, exquisite and the best in the world!
After you have baked your pastry, you will probably want to make a chic lettering on the cake at home. It will be especially difficult for beginners to create inscriptions, but if you put in maximum effort and patience, then everything will definitely work out.
The solemn and graceful inscription on this dessert conveys the magical atmosphere of the holiday. Let's find out how to make the inscription on the cake correctly, so that later there will be no disappointments.
Cake cream
In order to create an inscription, of course, you need a delicate cream that can not only give the cake a zest, but also emphasize the theme of the event. The inscriptions on the cakes "Happy Birthday!" will cause unprecedented delight in both adults and children.
Below we provide a recipe for the simplest but delicate cream. We will need:
- 250 grams of butter;
- 400 grams of condensed milk.
Preparation:
Pour condensed milk into softened butter in small portions. The main rule: the mixture should not be watery.
Then we take a pastry syringe and select a nozzle. Then we fill it with ready-made cream and engrave it.
In order to make the inscription colored on the cake, you need to add food coloring to the cream. For example, cocoa can play its role.
Cake decorating method
But on the cream, the light did not converge like a wedge. You can also decorate the cake with fondant. To prepare it, you need to mix sugar and milk in a two to one ratio and bring this mixture to a boil. Then we cook the solution until thickened. The fudge, when cooked correctly, should not run.

After the mass has cooled, you can start drawing.
Prepare the cake. It can be sprinkled with crumbs, covered with a layer of cream, glaze or sugar paste. To get a neat lettering, write it first with a toothpick.
Syringe nozzles are so diverse that it is possible to create wonderful ornaments and patterns of various shapes and lengths.
Creative lettering
Here are some cool inscriptions on the cakes:
- "May you live happily ever after!",
- "Sweetheart, good, glorious - how old you are is not the main thing",
- "Again - twenty-five!".
Also, exciting and funny inscriptions can be selected for the birthday of your beloved child. In addition, your kid will not remain indifferent if you also decorate the cake with characters from his favorite cartoon.
Basic rules when making an inscription
In order to complete the inscription on the cake correctly, several simple conditions must be taken into account.
It must be remembered that after preparing the cake, the inscription is first made. And only then all the other decoration elements are added.

Also, make sure that the lettering you choose is clear, fits well on the cake, looks harmonious and is not obscured by elements.
If you have an oversight or made a mistake, then don't worry - it's easy to fix. Any part of the decor can be easily removed if desired.
Attention! The transfer on the cake looks extremely untidy, so you should not resort to it. For this reason, you don't have to use long words like "nineteen" to write.
Label the confection so that it is short but meaningful. Remember, brevity is the sister of talent.
You can also make a preliminary sketch of the lettering. This way you can think of the perfect accommodation option.
In order for the inscription to sit evenly, you must first draw a little guide lines with the help of toothpicks. Don't worry about lines showing. In any case, they can be covered with letters.
Of course, spelling and punctuation errors on the cake are unacceptable. The inscriptions on the cakes "Happy Birthday" will greatly attract the birthday person. It would also be appropriate to write the name of the hero of the occasion.

It is important that there is a color contrast between the cake and the cream. For example, if the cake is white, then the light inscription will be hard to distinguish. It is better to opt for a cream of a dark shade.
Construction of the correct inscription
So, how to make an inscription on a cake at home so that it looks mesmerizing? Mastic or proteinaceous mass can also be used as a cream.
For the construction of a correct and beautiful lettering, you can use mastic. To do this, you need to do it yourself and wait until it hardens a little. After that, cut the mastic into thin flagella and make a creative inscription from them.
If you want to make an inscription with chocolate chips, then you can use a stencil. This option will look impressive, spectacular and unforgettable! In addition, an excellent inscription can be made using candied fruits, berries and nuts. Words made with pastry beads look very mysterious on the cake.
To begin with, let's figure out in what ways and with what help you can apply the inscription.
Labeling
You can apply the inscription using a special culinary syringe, which can be purchased at a home store.

Another ideal lettering option is to use a stencil. You need to put the right words on it and carefully put it on the cake. It is necessary to lift the stencil with great care so as not to damage the inscription. This option is the simplest and most convenient, but still, be careful and do not allow sudden movements in this matter.
How to write letters on a cake?
Perhaps one of the most difficult writing tasks is the very writing of letters on the surface of the cake. It would seem that any person can write, but remember that you are not holding a pen, but a syringe or cornet. What to do in this case? Savvy will help out a sweet tooth!
In order for the inscription on the cake to come out elegant and neat, it must be printed in advance in a text editor on the computer. You can choose different size and font of letters.
Then you need to put a sheet of baking paper on a piece of paper with the inscription and fix it. After that, along the contours of the letters, you need to make an inscription, for example, with butter or chocolate cream.
This workpiece must be put in the freezer and wait until it hardens. Then use a spatula to carefully remove it and decorate the finished cake.

In addition, there is the option of mirroring the inscription. In this case, you just need to turn the frozen paper with letters over and press it slightly against the dessert. Voila - the result is an exquisite product and you no longer need to worry about how to write an inscription on the cake.
Conclusion
Be sure that with the correct execution of the inscription, it will certainly attract the eyes of all guests and will not leave a single person indifferent!
In conclusion, I would like to say that the inscription on the cake is the brightest and most creative element, therefore, it must be approached with extreme responsibility!
Cake is a delicious delicacy loved by many generations of people. The richness of fillings that can be used in it is simply amazing. But many people strive to make this dessert not only very tasty, but also beautifully designed externally. Professional pastry chefs do not experience any particular problems in this matter, because they have at their disposal a number of tools and appropriate equipment. But what about those hostesses who do not know how to make an inscription on the cake at home?
Indeed, the technology of applying any image or recording on a product is quite difficult, but if you learn this, you can amaze your loved ones with amazingly beautiful desserts. Moreover, it is quite possible to learn this technology if you follow certain advice from connoisseurs of culinary art.
The process has its own nuances that must be taken into account if you want to achieve a positive result in the end. Recommendations will certainly help you:

You can make a beautiful inscription on the cake with your own hands as follows:
- Choose your favorite font on the Internet and write a congratulation phrase on your computer.
- Print it on a printer and put it in a transparent file.
- It is important to understand that the letters should be the same scale as the ones that you would like to transfer to the surface of the product.
- Next, you need to apply the prepared mass directly to the file strictly along the contours of the characters in the record.
All that remains is to put the file with the drawn symbols into the freezer until it is completely frozen.

We use chocolate
Chocolate is a fairly standard decoration and lettering material. You can take a natural one, having previously melted it in a water bath, or prepare the mixture yourself.
This will require:
- softened butter - 2 tablespoons;
- cocoa powder - 2 tablespoons.
Cocoa must be pre-prepared by sifting the powder through a sieve to remove excess particles. Then both ingredients are mixed.
The mixture is ready, but how can you write the desired congratulation with it so that the result is no worse than the store one? The easiest option is to use a pastry bag, but can you do without a syringe? To do this, you need to take an ordinary plastic bag, where the resulting mixture is poured. Then you need to cut off the tip of the bag to make a hole. It is not worth trying to write something on the product right away, it is best to practice on some surface.

We use the cream
There are a great many recipes for cream, and each housewife decides for herself which ingredients to take. For novice cooks, a simple recipe is suitable:
- butter - 200 gr.;
- condensed milk - one can.
Having purchased the food you need, you can start cooking:
- Remove the oil from the refrigerator so that it softens slightly at room temperature.
- Gradually pour condensed milk into a cup of butter. Here it is necessary to monitor the consistency so that it is not too liquid.
- Having finished with the cream, you can proceed to the inscription. If you have a pastry syringe available, then select the desired nozzle, having previously filled the reservoir with the mass.
By the way, the color of the cream can be changed by adding food coloring or cocoa powder to it. Experimenting in this way, you can achieve quite interesting shades of our "engraving".

What else might come up?
The use of chocolate and cream is considered to be a fairly traditional method that is used all over the place. But these are not the only ingredients suitable for the decorating process.
At home, for example, you can make fondant. This will require:
- sugar - 2 cups;
- milk - 1 glass.
The values are approximate, the main thing is that the correct proportion is maintained - two parts of sugar to one part of milk.
Mix the ingredients in a bowl and place them on the stove. When the mixture boils, cook it until the consistency is completely thickened.
It should be transferred to the surface in the same ways, that is, using a pastry syringe or a regular cellophane bag.

The festive table is mainly not limited to birds or birds, which are the usual companions of the celebration. Often, a festive meal ends with a tea party with a cake. Therefore, it is extremely important that it is not only tasty, but also presentable.
Almost any food material that is in the house of every housewife can be used to depict symbols on a confectionery product. You just need to follow certain techniques to do exactly what you want.
The cake is exactly the dessert that is served at the table for various celebrations and holidays; it is customary to decorate this dessert with various figures, cream roses and inscriptions. It is about how to make an inscription on a cake at home that will be discussed in this article. If professional confectioners do not see any problem in this, then ordinary housewives begin to look for simpler methods of how to decorate the surface of the finished dessert with the help of an interesting inscription. There are several simple methods that will make it possible to quickly and in an original way decorate a cake using cream, frosting and other products.
In fact, putting a drawing, picture or inscription on the surface of the cake is not the easiest thing. Here you need to be careful and do everything with great care so as not to spoil the whole dessert. But if you practice, then very soon the inscriptions will turn out beautiful and even. Below will be described the tips that were told by experienced chefs. They will help the hostess to correctly arrange a delicacy for the festive table.
- To apply text beautifully, it is best to buy a special felt-tip pen in the store, it is specially designed for applying thin and even strokes. You can also find various tubes on sale that contain gel dye. The tip of such devices is specially made narrow so that the pastry chef can apply a thin strip of cream or glaze.
- Before applying the inscription, you can make lines on the finished product, and already write on them so that the letters go smoothly, this will make the drawing more attractive. For application, use an ordinary toothpick or needle. The finished lines will not be visible after the finishing touches are applied to the surface of the cake, so there is no point in worrying about this.
- It is best to use a minimum number of letters and symbols, especially for small cakes. If the hostess made a mistake, then it is not worth correcting it right away, so as not to spoil the dessert. The cake is simply removed into the refrigerator chamber, and after the drawing has solidified, you can remove the excess and correct the inscription.
- For brightness, it is worth adding a little dye to the white cream, this applies to the case when the cake also has a light tone. The text should be clearly visible on the finished product. Various nuts and dried fruits are used as material. You can create lettering using mastic. Any elements of the inscriptions are applied before the cake is decorated with other decorative figures or products. Below we will consider options for how to make an inscription on the cake with various compositions.
Photo gallery: how to write on the cake?
We use chocolate for decoration
Chocolate bars are a fairly popular product, with which ready-made desserts are often decorated; it will be very easy to create a beautiful inscription from it. It is used both natural chocolate, which is melted in a steam bath, and a composition made with your own hands. We will tell you exactly how to make a chocolate mass yourself.


Cooking:
To begin with, you should take a couple of tablespoons of softened butter, as well as two tablespoons of high-quality cocoa. Cocoa powder can be pre-sieved through a sieve, this will help get rid of small lumps if they are in the mass. Then these two ingredients are mixed together.

Thus, we get a ready-made chocolate mixture that can be used to decorate the cake.

But there is one difficulty, it is very important to apply this composition correctly, it is best to use a pastry bag for these purposes, then the lines will be of the same thickness and will be even. If there is no such device at home, an ordinary plastic bag can replace it. The resulting mixture is placed in it, and then a very small corner of the bag is cut off.
The thickness of the drawing line will depend on the size of the resulting hole. It is better not to try to apply the drawing directly to the dessert, you can start with the confectionery paper for testing. Thus, we learned how to make an inscription on a chocolate cake.
Lettering with cream
You can find several hundred options for how to make cake cream, the composition itself can be absolutely any, but we will offer the classic version of butter cream. For novice cooks, it will be more convenient to work with a thicker base, for this reason, you can make a creamy mass. To do this, take a can of condensed milk and one pack of soft butter. These products are whipped until smooth and fluffy. If there is a desire, then a pack of vanilla powder is placed in the finished cream.


As soon as the cream is ready, you can make an inscription with it, the easiest way is to apply a drawing using a pastry syringe. Here it is enough to take a suitable attachment, and then fill the container with cream and apply letters to the finished product. Since the cream mass here has a light shade, it can be colored in any desired shade with the help of dyes. You can also use a little melted chocolate or cocoa for coloring.
What other products are used for lettering?
If the hostess needs to know how to make an inscription on the cake at home, the video will make it possible to understand this process. We will tell you here what other compositions can be used to create drawings and patterns on the cake. Cream and chocolate are classic options, but the hostess can use other ingredients as well. For example, the lettering is attractive if you use fondant to prepare it.

For fondant, you need a couple of glasses of sugar and one glass of milk. These ingredients are mixed and then boiled until the mass becomes thick enough. Apply fondant to the cake using a plastic bag or pastry syringe.

Also, the cake can be beautifully decorated with mastic; for this, a layer of material is rolled out as thin as possible, and letters are carefully cut out of the sweet base. You can even make a voluminous inscription from mastic, it is enough to mold these letters and fix them on the dessert.

Many housewives, both beginners and experienced ones, probably thought about how to make an inscription on the cake in an original and at the same time simple way to do it at home. There are a lot of reasons to please relatives and friends throughout life - an upcoming birthday, wedding anniversary, graduation from an educational institution and many other events.
Any housewife can do the inscription on the cake on her own. To make the goal seem simpler, the difficulties can be overcome by dividing them into two types: the inscription concerning the text and the practical way of its implementation. The most important rule is that the inscription on the cake is applied first of all, that is, before other elements of decor and decorations. It's a good idea to think over and have a sketch on hand so that you know exactly where and what should be.
The most common mistake made by novice pastry chefs is when there are a lot of feelings and emotions, you want to say a lot, and the space for creativity, as a rule, is limited in size. Let's agree - whatever I want to say, let it be in the postcard, and the inscription on the cake should be short. Many words are not needed, two or three are enough, but at the same time it is better to avoid the official style, such as "Masha from Lena". This leads to not entirely pleasant analogies.
For the inscription on the cake, you need to choose short, simple and understandable words that can easily fit on the proposed area of the sweet treat. Addressing "Directorate of the Department of Education and Science" is more suitable for an official letter than a cake.
Another thing worth mentioning is that tautology is bad form. To write "to the hero of the day on the day of the anniversary", "To Mommy on the day of the mother" means the same as saying hello twice. It is unacceptable to make mistakes in the congratulatory inscription. If in doubt about the spelling of a word, it is better to replace it with something else.

Technique for making the inscription on the cake
For the inscription to be clearly visible and easy to read, its color should be different from the main background. The contrasting inscription can be easily read by everyone, including the hero of the occasion himself, but isn't that what we wanted?
Think about how and where the inscription on the cake will be located. With what decorations it will coexist. Depending on this, words can be placed in a straight line, diagonally, in a circle. The letters should be written on a flat surface, since the letters displayed over the patterns and cream flowers risk changing beyond recognition.
To make the lettering look neat, try sketching lines on the surface of the cake. To do this, you can use a toothpick. Letters of different sizes will leave an impression of carelessness. Calculate their number and the place that will fall on each of them, carefully avoiding hyphenation. After all, the cake is not a blackboard.

Look for a suitable font, letters can be printed or written, practice writing it first on paper, make a sample for yourself, and just "get your hand". Do not neglect the possibility of "rehearsing" the inscription, because if in life you write like a chicken with a paw, then where does the elegance come from when applying the inscription on the cake, where is it even more inconvenient?
When thinking about the inscription and decorations on the cake, remember: the inscription and numbers should take center stage. If numbers are present in the decoration, then they are more important than the inscription, we write them first. Fill the remaining space with flowers and any figures.
What to do
There are several ways to write on the cake at home without using a special pastry syringe. The most common method is to roll up a bag of parchment or any other thick paper, cut off a corner so that the fondant or pastry mass comes out freely. If you increase the height of the cut, you can adjust the thickness of the letters. The second method is a plastic bag with a hole in it. Do not forget to check it for integrity - fill with air and watch if it comes out. Then you should tightly fill one of the corners of the bag with a mass, tie the remaining edges with a knot so that the mass does not fall out back and carefully cut off the edge.
It is usually enough to cut off one or two millimeters. Even a regular medical syringe without a needle will do. In any case, you need to practice a little on any flat surface in order to get used to and understand at what speed to drive the bag or bag so that the resulting lines come out uninterrupted and with the same thickness.

Composition for sweet lettering
There are a lot of recipes for "sweet ink". You can write on the cake in different ways. To do this, use mastic, glaze, protein or oil cream, fondant. It is permissible to make an inscription on the cake with chocolate, having melted it beforehand. Use the chocolate mass like a regular cream. You can also grate the chocolate, sprinkle it on the cake through a stencil, with slots for letters prepared in advance.
Cream preparation
For the simplest cake lettering cream you will need:
- one pack of butter;
- a can of condensed milk.
The butter must be softened first. Add condensed milk in small portions to the softened butter, thoroughly mixing the resulting mass. Make sure it doesn't get watery. You can add any food coloring to such a cream to get the inscription of the desired color.
Fudge
To prepare fondant, mix milk and sugar in a 1: 2 ratio, keep on high heat until boiling, and then boil over low heat until a thick mass is obtained. The condition of the fondant can be monitored by dripping a small amount onto paper or a plate. If the mass spreads, it is not ready. The desired consistency of the fudge should not flow. Allow it to cool before use. Dyes, vanilla or chocolate are added to the mass.

Chocolate mass
To prepare it, you will need 2 tablespoons of butter and 2 tablespoons of cocoa powder. Add powdered sugar if desired. It is better to sift cocoa powder and powder so that there are no lumps. The consistency should be quite thick. These letters are easy to form, they will not spread out in a puddle.
The mass is placed in a bag, which can be made independently from parchment or other thick paper, the tip is cut off with scissors. You can even use a milk carton at home. They are durable and roomy. First, try writing off the cake, increasing the cut angle if necessary.
It is more convenient to hold the bag with both hands, with one squeezing out the letters, and with the other holding the leading hand, ensuring smooth movements and preventing tremors and jerks.
The easiest way to get a chocolate lettering is to simply melt the chocolate bar in the microwave or in a water bath until it is completely softened, put it in a bag and write the desired text. Such a mass quickly solidifies, so you need to write quickly. Of course, you can re-melt the chocolate and continue writing. There is another way to get beautiful and even letters - to prepare a full-size stencil of the lettering, place something clean and transparent on top, for example, a file for documents, display the letters on it, tracing all the lines along the stencil. After waiting for the letters to harden, carefully remove and transfer them to the cake.

Correction of an unsuccessful inscription
It will be difficult to achieve the perfect result right away; some letter or its element will differ from what was intended. Do not try to erase everything at once - this will only smear more. The cake, together with the failed inscription, must be placed in the refrigerator for a while and the inscription must be allowed to freeze. The hard letter is much easier to remove. A groove may remain in this place, but it will become invisible when writing a new letter.
If it suddenly happens that a whole word has suffered, and not just one letter - it, after freezing, can be removed with a knife or fork. Level the field under it, and write the word again.
If the entire inscription is ugly, it should be re-written on the second half of the cake, and the side with the ugly inscription should be decorated with flowers or patterns, sprinkled with confectionery decorations, nuts, and hidden in some other way.
Congratulations written on the cake are a great opportunity to decorate it. If you have never made inscriptions at home, then the tips from this article will help you understand the intricacies of performing all the work. A solemn cake prepared with your own hands will surely delight the birthday or hero of the day; decorated with an inscription - will cause surprise and delight.
Confectionery can be compared to painting. Cooking a dish is like creating a masterpiece. But this does not mean that you have to be an artist to learn how to make beautiful chocolate inscriptions on the cake. You just need a little imagination, as well as the desire to create beauty. A fun activity like this will help you develop new skills, thus diversifying the look of your baked goods. Let's take a closer look at how to make a spectacular, memorable inscription on a chocolate cake in our article.
Basic Chocolate Lettering Recipe

Before you start decorating, you first need to decide what exactly you will paint the cake with. Often, oil creams are used for this, which are tinted with food colors, fondant, and chocolate icing. The fondant is very plastic, more uniform, and is applied in an even layer. The chocolate icing for the cake is more shiny. Fudge, like chocolate frosting, is pretty easy to make. We will consider the simplest recipes for making a drawing mass.
Ingredients
The fondant recipe differs from the chocolate icing recipe in the absence of one ingredient - the plum. oils. But it is precisely at its expense that such different properties are manifested.
- 1 tbsp. a spoonful of powdered sugar (no slide);
- 1 tbsp. milk;
- 100 g of chocolate;
- vanillin.
- 2 teaspoons of cocoa;
- 3 tbsp. spoons of milk;
- 50 g plums. oils;
- 1.5 tbsp. tablespoons of powdered sugar.
Cooking process

For fondant:
- grate chocolate;
- heat milk together with powdered sugar, stir;
- add chocolate chips;
- stirring constantly, cook over low heat so that the mass does not stick;
- boil down to thicken the mass.
Cool to ~ 40 degrees before applying to the surface.
For glaze:
- melt the oil;
- add milk, powdered sugar;
- stir, add cocoa;
- stirring constantly, warm over low heat;
- do not boil.
Apply to the cake as soon as the chocolate icing has cooled slightly (~ 70 degrees).
What to write on the cake

- The text should be in contrast to the main background, clearly visible on the surface, easy to read.
- An excellent base for decoration is a flat, smooth surface of a contrasting color made of glaze or mastic.
- Before you start writing the text, make straight thin lines on the base cover with a toothpick for even stitching.
- The phrase should not be long, contain compound words.
- If at some stage of writing with the glaze you made a mistake, do not correct the mistake right away. Write a congratulation, put the dessert in the refrigerator. The defective fragment can be removed as soon as it hardens.
- Never use hot paint as the basecoat may melt and the text will float.
Video, where a description of the process of applying chocolate inscription on the cake
Secrets of a beautiful lettering
Even a delicious cake doesn't look festive without a decent decoration. Sometimes it is enough to write a solemn congratulation and the culinary masterpiece becomes perfect. Good wishes, written in beautiful handwriting, transform its appearance. If you doubt your artistic ability to write a congratulation beautifully on the first try, then practice your hand first on an ordinary piece of paper, start with the simplest.
To create signatures, use special pastry tools:
- a pastry bag will do;
- special syringe with accessories;
- different types of food markers.
Make sure that the cutout on the bag or the nozzle of the syringe is thin so that the letters work out with pinpoint accuracy. The chocolate inscription itself should be short and expressive. Try to write correctly.
Errors are permissible as long as they are intentional. Choose large fonts.
First, numbers and text are applied to the surface, only then they are decorated with figures and flowers. This is done so that during the decorating process it does not turn out that there is not enough space for writing congratulatory words.
How to write white or dark chocolate

There are a couple of simple ways to write a holiday message on a cake at home. Even an inexperienced confectioner - an amateur will master it.
The first way to decorate is the simplest:
- First, come up with a congratulation, print it on a printer. Try to make the letters match the size of the space allocated for congratulations.
- Cover the printed text with tracing paper.
- Break a bar of white or dark chocolate, melt in the microwave.
- Using a pastry syringe, bag, or felt-tip pen, apply the drawing material to the stencil.
- Place the stencil in the refrigerator - let the letters cool down.
- Place congratulations on the surface of the cake.
Method # 2 is also pretty simple. We make the inscription on the cake with white chocolate, for this, first melt it. Then add 1 tbsp. l. cream oil, 2 tbsp. l. milk. Stir, let cool. Place the drawing mass in a confectionery tool such as a bag or syringe. You can do the work with a felt-tip pen - the congratulatory text is ready.
How to make an inscription with chocolate "Happy Birthday"

The nature of the decor of the entire composition should correspond to the reason for the celebration. If the cake is being prepared for the birthday person, respectively, the signature is needed "Happy Birthday" or "Happy Anniversary". It is worth indicating the numbers, it is advisable to write the name of the hero of the day - he will be pleased. When designing, try to write words without hyphenation, place the text symmetrically.
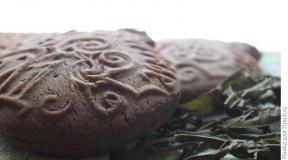
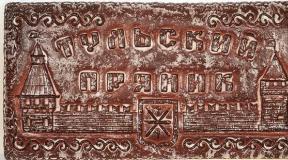
Remember that you can even write with grated chocolate. Cut out a stencil from paper with a congratulation, lay it on top of the cake, carefully pour the grated chocolate (depending on the color of the base). Sweep away excess shavings, remove the stencil. When decorating, remember that the letters should be made large so that it is easy to read what is written.
Another extraordinary idea is to make chocolate letters using stencils, which are then transferred to the surface of the cake.
An easy way to inscribe chocolate on mastic
Inscriptions made of chocolate on a cake covered with mastic can be done in several ways. The simplest option for designing an inscription on a cake is the implementation of several manipulations:
- the words corresponding to the celebration are printed on a printer, or written by hand on paper;
- spread the stencil over the surface of the cake;
- use a simple sewing needle to outline the contours of the letters;
- remove the template, the needle marks on the mastic will remain noticeable;
- arm yourself with a paintbrush, paint over the resulting contours with liquid chocolate, you get chocolate letters on the cake.
DIY chocolate letters will look just as good.
How to make chocolate letters to decorate pastries

For those who like to cook, we offer an answer to the question of how to make chocolate letters. A simple way - for decoration, you can create individual letters or whole non-decaying words.
- Prepare a stencil with printed solemn words.
- Lay the paper blank with the words on the silicone mat (before starting work, cool the mat so that the chocolate does not spread), cover the template with tracing paper on top. Secure everything with tape.
- Using a pastry syringe, felt-tip pen or a bag, write a word with a chocolate mass, trying not to interrupt so that the word turns out to be unbreakable.
- As soon as you write, immediately put the rug in the refrigerator for 10 minutes.
- Peel the words off the paper carefully. To create volume, paint over the edges with a viscous mass on the back side. You will get it very nicely.
On the side of the cake, on top of the pastry, in an upright position - everywhere the letters will create an overall genuine edible picture.
For chefs, there are both plastic molds for the production of chocolate letters at home, as well as silicone molds for such purposes. Glaze or fondant is poured into the mold, allowed to harden. Then the finished letters are taken out of the form, they sign the confectionery masterpiece.
We got to know different writing techniques. Find the one you like. Bring your wildest ideas to life. Don't forget that you can use food paint and other innovations in your cooking. Experiment with shape and color! Read only delicious recipes with us!