How to draw on cakes at home. Made from chocolate and vegetable oil
It is doubly pleasant to receive a cake with your photo or a beautiful picture. After all, just a few years ago it seemed something incredible, fantastic. And today, without much cost, you can do beautiful cake with photo. Many, having seen such desserts with pictures on the windows, think how they are made and whether this “work of art” is edible at all. Here's what you can think of and how to take a beautiful photo on the cake to please the birthday boy and surprise all the guests.
How it's done and what you need to know
In fact, the photos on the cake are made using a special printer. It connects to a computer, and a special program allows you to make beautiful photo food coloring dessert. They are completely harmless and only at first glance the pictures on the cakes may seem unnatural and unsuitable for eating. Both photos and pictures do not affect the taste of the cake. They are made on rice or wafer paper, which has no pronounced palatability and fully usable. 
So, you have chosen a photo on the cake, how to make it at home? To do this, you need to purchase a special food printer. Natural dyes are loaded into it, and with their help they make drawings on desserts. However, it is quite expensive, so not everyone needs to buy it to take photos on dessert several times a year. In pastry shops that make cakes to order, you can come with your photo on a flash drive and the factory workers will transfer the image on it to the finished product. 
At the same time, it is advisable to choose a dessert that is flat, not the same as, for example, "Sphere" or "Millennium". Then the image will look harmonious and beautiful on it. Here are some examples of how to take a photo for a holiday to please guests, depending on the occasion.
Choosing a drawing for a child, an adult, a teacher or a formal event
So now you know how to take a photo on a cake. It remains only to choose a picture to go with it to the place where sweet desserts are made to order in your city, so that they make you a beautiful confectionery. Here are some ideas to make a custom-made cake stand out at the party.
Cake for a child. The younger he is, the brighter and more colorful the image should be. If you want to choose a photo for a child under 7-8 years old, it is better to give preference to the bright characters of his favorite cartoons and choose a beautiful congratulation from the little mermaid or the Winx. Children will like such gifts much more than his own photo. See how to cook at home. 
For a girl or teenager. If a young birthday girl is happy to see her own image on the cake, then it is better for a young man to choose on the Internet beautiful picture with bright and interesting congratulations. Many guys love car photos, original congratulations and wishes. This design will appeal to all young people. The main thing is that he be restrained and masculine in character. 
Graduation Cake. Many people order a design or a group photo of a class for sweet dessert. However, even knowing how beautiful photos are taken on cakes, it is best to make a simple dessert design for this holiday. For example, with roses and a neutral pattern. You can just as easily make text with a beautiful inscription out of cream, decorate the cake with flowers. 
For the birthday of an adult. Select best photos birthday boy and decorate a cake for them. This confectionery product will make a worthy impression on any anniversary. Also, if you congratulate a woman, you can download a picture on the Internet from beautiful photo a beautiful and successful lady who leaves her car in a beautiful expensive dress with lots of shiny jewelry. This decoration of your cake can be a very stylish gift and decorate your birthday even better than just a photo. 
For Wedding. For this event, large cakes with photographs are rarely ordered. Usually they are decorated with roses, figurines of a couple, as well as various mastic hearts or doves. But some can make an interesting design of a cake with a photo of the newlyweds, the shape of which is made in the form of a heart, but this is not done at all weddings. After all, the photo needs to be printed, and this takes time, so it is possible if the couple plans in advance for photography before the start of the celebration, which is very rare. By the way, find out. 
Usually, such a practice exists in Israel, when young people, before an official marriage, first take a photo session in different places of the city, order desserts in a restaurant, and on the day of the wedding itself, have fun with the guests and do not take pictures. However, this is rare, so it is not customary to give wedding cakes with the image of young people, even if they are of very high quality and beautiful.
The choice of photo depends largely on your imagination. But in order for the cake with a photo to really please the guests, choose beautiful and high-quality images, no matter if they are pictures from the Internet or processed digital photos.
We also invite you to find out.
Most birthday people expect to receive surprises on their birthday. It doesn't matter if you're 10 or 40.
There are 1000 and 1 way to do it. For example, decorate birthday cake an image of your favorite character or a funny photo.
To really please the birthday boy original cake, it is not at all necessary to spend an impressive amount on the services of a professional confectioner. Try baking your own treat using your favorite recipe, then decorate it with a fun image of your favorite cartoon character, movie character, football club logo, or even a photo of the hero of the occasion. Can't draw? It doesn't matter, because almost any picture can be "printed" on the surface of the cake using confectionery glaze and this one is not sophisticated technology. The creative mom and author of the brasstacksandbasics blog shares the secret.
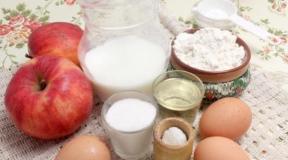
You will need:
Confectionery glaze of different colors;
Confectionery syringe or equivalent;
Waxed paper or baking parchment. The main condition is translucency;
Printed drawing;
Optional - glass or plastic from the photo frame and adhesive tape (this will greatly simplify the process).
Prepare the canvas. Grease the finished cake with cream or icing. The top should be flat. Not perfect (as it turns out), but flat.
Print out the picture. For the best result, it should be non-colored, in coloring format, with clear outlines. If you want to decorate the cake with an inscription, do not forget to print it in a mirror.
We make the task easier. Take the glass from the photo frame and tape the image to the back of it. Then cut a piece of parchment/wax paper of the same size and glue it to the front. The result should be a "sandwich": drawing-glass-paper. Thanks to this design, nothing will go anywhere out of hand in the process.
Prepare the icing by distributing it into different containers. You will definitely need a dark color (chocolate) for the outline.
"Contouring". Fill the syringe with dark glaze. Take your pattern-glass-paper layered design and lay it parchment side up on the table. Start right on it with glaze to outline the contours of the pattern, which should be well visible through glass and paper. If there are dark areas in the final image, paint over them.
More color!
Paint all the necessary details with glaze of other colors.
"Fill". Directly on top of the painstaking art, apply a thick layer of "base fill": the skin/fur color of the character and their clothes. As a result, you should get an image "without a face", as in the photo below.
The focus is in end result(i.e. on the cake) all the dark areas from the "outline" step will be on top, and the "fill" will be on the bottom.
Place your carefully crafted pattern-glass-paper-icing sandwich in the refrigerator for 15-30 minutes to set the icing. While you can decorate the cake with cream ribbons or just drink coffee.
Responsible moment. Remove the design from the refrigerator and carefully peel off the sheet of parchment with icing from the glass. Quickly and also gently place it on the surface of the cake (icing - to the cream, parchment on top) and press lightly. Remove the parchment like a sticker or film from the "translation" picture.
Decorate with candles and surprise the birthday boy
To finally understand all the intricacies, watch this video.
Recall that earlier "Observer" wrote,.


AT modern world Technology doesn't stand still. Things that until recently seemed fantastic to us are already beginning to come true. So an innovation appeared in the confectionery business - cakes with photo printing. Edible photo printing for a cake is made on special sugar or wafer paper. Below we will talk about how to make photo printing on a cake at home and not only.
A bit about edible paper
Photo paper looks like the most ordinary paper sheet. Has a translucent or dense texture. It is ideally white or with a yellowish, grayish tint. It can be round or rectangular, with a diameter of 22 or 33 cm. Edible paper is practically tasteless, odorless and has a very low calorie content.

Food paper comes from Japan, and appeared about 400 years ago. Paper, to which we are accustomed now, appeared at the end of the twentieth century.
Types of food paper:
- Rice.
- Sugar.
- Waffle.
- Glazed.
- Vegetable.
- Nori.
- Fruit and berry.
What is edible paper made from?
The main components are rice flour, salt and water. And then, depending on the type of paper, the following can be added to the composition: starch, vegetable oil, sugar, sweeteners, molasses, Palm oil, nutritional supplements, syrups, stabilizers, preservatives, emulsifiers and more.

Now manufacturers often experiment with ingredients, using flavors, dyes, and take vegetable or fruit and berry puree as a basis. Thus, the variety of colors is growing, and there is room for a flight of fancy when creating cakes with photo printing.
Edible paper is used:
- to create photo printing on cakes;
- to decorate a variety of dishes;
- for making rolls, chips, pancakes, rolls;
- as a packaging material;
- to create business cards, flyers, books.
edible photo printing
Photo printing on food paper is gaining more and more popularity. For these purposes, sugar, wafer or rice paper is often used. The printing process looks like this: paper is loaded into a special food printer filled with colored inks made from natural dyes.

Often food paper with printed pictures and photographs decorate the surface of the cake. Before this, the upper part is moistened with sweet syrup and lubricated vegetable cream, sugar glue, mastic, marzipan. To give greater clarity to the picture, confectioners recommend lubricating the food paper itself with icing. It also helps to avoid peeling during transportation or storage. After the sheet is printed, it must be thoroughly dried at room temperature. Also for these purposes, it is suitable to put the sheet in the freezer for ten seconds. Only when the paper has dried properly, you can start decorating the cake with it.

To get a richer, clearer and more contrasting picture, experts advise using sugar food paper. And glazed paper is perfect for creating artistic hand-painted. Wafer paper has almost no taste, and sugar paper is sweetish. This should be taken into account when creating culinary masterpieces.
How to make photo printing on a cake at home
Cake with photo printing for a birthday will become original gift for your friend, lover or colleague. This does not mean at all that you will have to spend a lot of money on an expensive pastry chef, because you can make photo printing on a cake at home. You can simply prepare any cake of your choice (whichever you prefer), and then decorate it with photo printing.

There are many options for the image: it can be your favorite cartoon character, or a comic book hero, the emblem of a football club, or even a photo of a birthday person. The most important advantage of edible photo printing is that it is not necessary to be able to draw. You can simply take any picture or photo you like and, using a special glaze, print it on the surface of the cake.
Those with a sweet tooth love chocolate for its melting taste and delicate texture, doctors value it for its high content of trace elements, vitamins and antioxidants, and decorators love it for its great amount a technique that can be used to decorate any cake. Professionals use special tools to create their masterpieces. But you can do it at home too chocolate decorations for a cake that will be not only tasty, but also spectacular.
What kind of chocolate can decorate a cake at home
Only a product that contains cocoa butter has the right to be called chocolate.. The main components of chocolate also include grated cocoa and sugar. They also produce unsweetened chocolate, which contains 99% cocoa.
When decorating cakes, the following types of chocolate are used:
- bitter (dark) - contains at least 40-55% cocoa;
- dairy - contains at least 25% cocoa and dairy products;
- white - contains at least 20% cocoa butter, but does not contain grated cocoa and powder.
Professional confectioners use chocolate, which is available in blocks and dragees (drops). Chocolate bars can also be used to decorate at home.
Cocoa powder can also be used for decor, but it should be of high quality, bad powder can squeak on your teeth.
Photo gallery: chocolate release forms suitable for decoration
Chocolate in the form of dragees is convenient for melting  Chocolate blocks are often used by professional confectioners.
  Bar chocolate can be used to decorate at home
In addition to real chocolate, you can find in stores confectionery chocolate(icing) in which cocoa butter is substituted vegetable fats. It is produced in tiles or in the form of chocolate figurines.
Confectionery chocolate is much inferior to the real one in taste, but, on the other hand, it is less capricious and can be used for applications, patterns, glazes.
What you need to know about chocolate
How to store and melt properly
Chocolate has a long shelf life, but it should be kept tightly closed, away from foods with a strong smell, protected from light and moisture. Storage temperature - 12° C to 20° C.
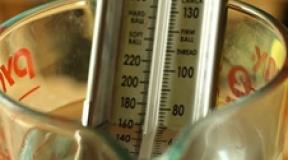
Before you start decorating the cake, in most cases, the chocolate is crushed and heated. For heating, you can use a microwave oven, water or steam bath or an oven preheated to 50-100°C. In all cases, stir the chocolate frequently.
Attention! When heated, chocolate must be protected from steam and drops of water, otherwise it will curdle.
Tempering
Cocoa butter is very capricious. It contains fats, the crystals of which melt at different temperatures. If the chocolate is not properly melted, it can become coated, melt quickly in your hands, or thicken too much. In tempering (targeted recrystallization), the chocolate is heated, cooled and stirred in succession, resulting in chocolate that melts in the mouth but remains firm and crunchy at room temperature. For tempering, you should take high-quality chocolate.
Confectionery chocolate (glaze) does not need tempering, as it does not contain cocoa butter.
Professional confectioners use a marble board and special thermometers for tempering. The easiest way to temper chocolate at home is to use the microwave:
- Chop the chocolate, put in the microwave.
- Turn on the oven at maximum power.
- Take out and stir the chocolate every 15 seconds until almost completely melted, small lumps should remain.
- Remove chocolate and stir until completely combined.
Properly tempered chocolate, applied in a thin layer on parchment, hardens within 3 minutes at 20°C indoors.
If the chocolate thickens too quickly, over-crystallization has occurred. A little melted untempered chocolate is added to such chocolate and mixed.
A simple do-it-yourself cornet
For jigging chocolate patterns use pastry bags, disposable polyethylene options are especially convenient. If they are not there, you can roll the paper cornets yourself. To do this, a square is cut out of parchment, divided into 2 triangles diagonally. The resulting right triangle is folded into a cone, combining sharp corners with a right one. The corner is folded outward to secure the cornet. A corner is cut off at the bottom only when the cornet is already filled with chocolate.
The bag or cornet is filled with melted chocolate. It is convenient to fill the cornet if you put it in a tall glass.
You can also replace pastry bags with a transparent paper file or a dense one. plastic bag from milk.
Express design options
m&m's and KitKat
This is a very simple and effective way to decorate a cake. Bright chocolate dragees icing sugar perfect for a children's party.
You will need:
- m&m's;
- kitkat.
The cake will look good if the height of the chocolate bars exceeds the height of the cake itself by 1.5–2 cm.
Procedure:
- Attach chocolate sticks to the sides of the cake. If the sticks are interconnected, it is better to separate them.
- Fill the top of the cake with m&m's.
- Additionally, the cake can be tied with a ribbon.
You can also decorate the cake with others: Kinder chocolate, chocolate balls.
Photo gallery: how to decorate a cake with finished chocolate products
 square cake lined with bricks of slab chocolate and decorated with towers of cookies glued together with chocolate
  From white and milk dragees you can lay out flowers
  In such a candy platter, any sweet tooth will choose a piece to your taste.
  Chocolate candies are laid out in a circle, and two-color chocolate tubes complement the composition, which can be replaced with wafer tubes
chocolate chips
You can sprinkle chocolate chips on the top and sides of the cake. Making it at home is very simple: bar chocolate is rubbed on a grater or cut with a vegetable peeler. In the latter case, curly curls of chocolate are obtained.
Depending on the chosen grater, you can get different chocolate chips - small or larger. The heat from your hands softens the chocolate quickly, so it's best to rub small pieces of chocolate. It is impossible to cool chocolate in the refrigerator before or during operation, too cold chocolate will crumble and break.
Drawing with cocoa and stencil
The famous tiramisu is simply sprinkled with cocoa on top. You can decorate other cakes in the same way. The top of the cake should be even, then it will look neat. And with the help of cocoa and a stencil, you can create a pattern on the cake.
You will need:
- cocoa;
- sieve;
- stencil.
Procedure:
- Put the stencil on the cake.
- Sprinkle cocoa on top through a sieve.
- Carefully remove the stencil.
You can use a ready-made stencil or make it yourself by cutting out a pattern from paper. As a stencil, you can also use an openwork cake napkin, a fork, and more.
If the surface of the cake is covered with soft or gentle cream(whipped cream, custard, sour cream), then it is better to keep the stencil at a small distance from the cake so that it does not stick to the surface and spoil it.
Covering the cake with icing
Chocolate icing is very appetizing, especially when combined with fruit or fresh berries. You can also add colored sugar sprinkles or beads to the icing. Cool the cake well before icing it. But the glaze should be warm.
Read more about chocolate icing in our article:.
The cake can be glazed entirely or just the top, leaving mouth-watering smudges on the sides. Icing is poured into the center of the cake in a circular motion, then helping it to spread with a knife or spatula. If you need to make more uniform smudges, then first apply liquid glaze in a circular motion on the edges of the cake using a cornet or a bag, and only then pour the top.
Chocolate and heavy cream ganache
Ingredients:
- 100 ml heavy cream (30–35%);
- 100 g dark, 150 g milk, or 250 g white chocolate.
Cooking:
- Chop chocolate.
- Heat cream until boiling.
- Add the chopped chocolate to the cream, mix thoroughly with a whisk.
You can adjust the thickness of the glaze by increasing or decreasing the amount of cream or chocolate.
If the ganache is cooled for several hours in the refrigerator, then let it warm up to room temperature and beat, you get chocolate cream, which can be used for cream jewelry and layers of cakes.
Made from chocolate and milk
Ingredients:
- 100 g milk chocolate;
- 3–4 tbsp. l. milk.
Cooking:
- Chop chocolate, add milk.
- Warm up in microwave oven or in a water bath, stirring constantly.
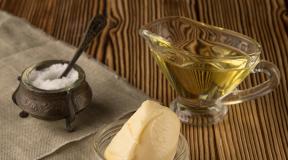
Made from chocolate and vegetable oil
Ingredients:
- 100 g of chocolate;
- 2–4 tbsp. l. vegetable oil without smell.
Cooking:
- Chop chocolate, melt.
- Add vegetable oil, stirring constantly.
Can be used to make frosting different types chocolate. Less is added to white oils, more to bitter ones.
From cocoa powder
Ingredients:
- 1 cup of sugar;
- 1/2 cup cocoa powder;
- 1/4 cup milk;
- 50 g butter.
Cooking:
- Put all ingredients in a bowl.
- Put on a boil water bath. Stirring constantly, heat for about a minute.
- Remove from the bath, beat with a mixer until smooth.
Mirror glaze with gelatin
Cake for coating with such icing should be even (mousse cakes filled in silicone molds are ideal). Before coating with a mirror glaze, it is necessary to keep it in the freezer for several hours.
Ingredients:

Cooking:
- Soak sheet gelatin in cold boiled water. Let the gelatin swell for 10 minutes. When using powdered gelatin, pour 50 g of it cold water, stir thoroughly and also allow to swell.
- Mix sugar, water, cocoa powder and heavy cream bring to a boil with constant stirring. After boiling, add chopped chocolate and stir until completely dissolved.
- Squeeze out excess water from leaf gelatin.
- Pour the swollen gelatin into the glaze and stir until completely dissolved.
- To get rid of bubbles and for smoothness, the mixture is passed through a fine sieve or whipped with an immersion blender, and then poured into a jar and cover the surface with cling film. Frosting should be left in the refrigerator overnight before use..
- Before coating the cake, you need to heat the chocolate icing to a temperature of 35-45 ° C. To get smudges, you can reduce the temperature to 30 ° C, then it will harden faster. If there are a lot of bubbles in the glaze, it should be filtered again through a sieve with small holes. To cover the whole cake, place it on a wire rack and a baking sheet or other suitable surface lined with cling film. Pour warm glaze from the center in a spiral to the edges. The excess glaze on the baking sheet is collected to be used further.
Photo gallery: cake design options with flowing and mirror glaze
 Dripping icing looks great on a cake with a contrasting color
  Using fruits and mirror glaze, you can create a bright composition on the cake.
  Glaze can be made white
Video: how to make beautiful smudges on the cake
Drawing on glaze with liquid white chocolate
Glaze drawings with a toothpick or a bamboo stick have already become classics. On a dark chocolate icing, a pattern is applied with melted white chocolate, on a light icing - with bitter or milk chocolate. You need to apply chocolate while the icing is still liquid..
You can also apply a drawing on a cake covered with cream, if the cream has a soft consistency.
Options:
- Gossamer. Chocolate is applied to the icing in a spiral from the center. Draw lines from the center to the edges.
- Chevrons. Chocolate is applied to the icing in parallel stripes. Draw lines perpendicular to the stripes in both directions.
- Hearts. Chocolate is applied to the icing in small circles in a straight line or in a spiral. Draw a line through all the circles in the same direction.
- Marble. Chocolate of different colors is applied to the icing with chaotic movements. Mix the glaze in a circular motion, creating a marble effect.
Photo gallery: options for applying patterns to glaze
 To draw a cobweb, the wand moves from the center to the edges
  Drawing a pattern in the form of chevrons involves moving the stick in turn from left to right and from left to right.
  Hearts are obtained by passing the wand over the center of round drops of melted chocolate.
  Marble effect is formed by the free, chaotic movement of the wand
Cake side decoration
The sides of the cake can be wrapped with chocolate ribbon, lined with chocolate teeth, tiles or tubes.. The most difficult way to decorate is tubes. They will need not only a lot of chocolate, but also a lot of patience.
Lace (chocolate)
Delicate chocolate swirls or a simple geometric pattern are not difficult to make from chocolate, but they look very impressive. A dark or milk chocolate bar looks great on a white background, and a white pattern will accentuate a dark background.
You can also use confectionery chocolate. It is less capricious, but significantly inferior in taste to natural.
You will need:
- chocolate;
- pencil, scissors.
Procedure:
- Melt the chocolate in the microwave or over a water bath.
- Cut out a rectangular strip of baking paper with a length equal to the circumference of the cake plus 2-3 cm, and a width equal to the height of the cake plus 2-3 cm. Draw a pattern with a pencil and turn the drawn side over to the table. You can print the pattern on the printer and just put it under the baking paper.
For a wide cake, it is more convenient to make a chocolate ribbon from 2 halves.
- Place the chocolate in a cornet or bag, cut a corner.
If the chocolate flows out too quickly, it should be allowed to cool slightly.
- Gently squeeze the chocolate onto the paper strip in a pattern.
- Attach the paper ribbon with the chocolate to the sides of the cake.
- Place the cake in the refrigerator for at least 30 minutes.
- Take out the cake, carefully remove the paper.
After that, you can decorate the cake with a cream border, berries, fruits or fresh flowers.
Video: how to make chocolate
Panels or teeth
For this spectacular decoration, you will need at least 400–500 g of chocolate, depending on the size of the cake.. You can use bitter, milk, white chocolate, and also combine them, creating marble patterns.
You will need:
- chocolate;
- knife or spatula;
- parchment or baking paper.
Procedure:
- Melt chocolate.
- Spread the chocolate on parchment or baking paper, spread evenly with a knife or pastry spatula.
- Let the chocolate harden.
- Cut with a knife or break with your hands into pieces of arbitrary shape. The height of the panels must be higher than the cake.
- Attach to the sides of the cake so that the panels slightly overlap each other.
For an embossed texture, you can crumple the parchment before applying chocolate to it. To create a pattern, a pattern is first applied to the parchment with white or dark chocolate, and then poured on top with a contrasting color.
Photo gallery: options for decorating a cake with chocolate panels
 Cake with chocolate panels can be supplemented with fresh flowers
  Chocolate panels can be made in an unusual shape
  The combination of white and dark chocolate gives an interesting marble pattern.
  The embossed texture and irregular shape of the teeth give the cake a special charm.
Video: how to make chocolate teeth with nuts and dried fruits
tubules
Ready-made chocolate tubes are sold in specialized confectionery stores. However, they can be made independently, including white chocolate or mix white and dark chocolate.
You will need:
- chocolate;
- acetate film;
- thin tape;
- knife, scissors.
Instead of acetate film, you can use transparent folders-corners for papers.
Procedure:

"Cigars"
You will need:
- chocolate;
- marble board or metal sheet for baking;
- scapula;
- metal scraper or spatula.
If you don't have a special metal pastry scraper, a new stainless steel construction spatula will do.
Procedure:
- Temper chocolate.
- Cool the marble board or metal sheet, put it on the table.
- Spread the chocolate in a thin layer on the sheet using a spatula.
- With a knife, mark rectangles on the chocolate layer.
- Let the chocolate thicken a little, but do not harden..
- With a metal scraper or spatula at an angle of 45 degrees, remove the layer of chocolate along the marked lines, it will roll into a tube.
Video: how to make chocolate "cigars"
Decorative elements made of chocolate
Curls, numbers, inscriptions and patterns
Various decorative elements, figures, figures are drawn with melted chocolate. Butterflies and various curlicues are very popular. These elements can decorate both the top and sides of the cake..
You will need:
- chocolate;
- pastry bag or paper bag;
- parchment or baking paper;
- patterned stencil.
Procedure:
- Melt chocolate. Fill a cornet or bag with melted chocolate, cut a corner.
- Print or draw on paper the desired pattern (curls, numbers, inscriptions). Put a sheet of parchment on a sheet with a pattern, you can fix it with paper clips along the edges. Gently squeeze chocolate onto parchment paper.
- Let the elements dry.
- Remove chocolate blanks from parchment.
If parchment is put on a rolling pin during chocolate hardening, wrapped around a glass, or other suitable items are used, the blanks will turn out to be voluminous. In this way, you can create chocolate spirals, flowers, butterflies.
Photo gallery: options for decorating a cake with decorative chocolate elements and examples of stencils
 Openwork triangles are laid in a circle based on cream rosettes or berries
  The cake can be decorated with a chocolate inscription or numbers.
  Graceful decorative elements are usually fixed in cream rosettes.
  You can put one large or several small butterflies on the cake.
  Openwork butterflies can be flat or consist of two halves located at an angle to each other.
  Openwork decorative elements will decorate the top or sides of the cake
  From small decorative elements, a border is usually made along the edge of the cake.
Video: creating a chocolate flower
Outline Appliques
Unlike lace, such decorative elements have a background and a contrasting stroke along the contour.
You will need:
- white and dark chocolate (bitter or milk);
- pastry bag or paper bag;
- parchment or baking paper;
- patterned paper.
Procedure:
- Lay a sheet of parchment on top of the drawing.
- Melt dark chocolate. Squeeze it onto the parchment along the contour of the drawing placed under it and let it harden.
- Melt white chocolate. Complete the rest of the application. Let cool completely and then turn over.
By mixing white and dark chocolate, or by adding dyes to white chocolate, you can achieve different shades and make the application colorful. Color applications require special dyes for chocolate. Do not use fruit juices for this, as the chocolate may curdle.
Simple cutouts
Even a child can handle the manufacture of these parts, so feel free to call your son or daughter to help you.
You will need:
- chocolate;
- parchment or baking paper;
- spatula or knife;
- punches, cookie cutters.
Procedure:
- Melt chocolate.
- Using a knife or spatula, spread the chocolate in an even layer of 2-3 mm on the parchment.
- When the chocolate begins to harden, cut out the elements using molds or cuttings.
If the chocolate sticks to the mold, it hasn't cooled down enough. If the chocolate breaks, it has already hardened too much and needs to be reheated.
chocolate leaves
This is a very simple idea with excellent results. You can fantasize and use a variety of leaves as a basis.
You will need:
- chocolate;
- tassel;
- leaves, such as roses.
Procedure:
- Wash the leaves and dry well. Melt chocolate.
- You need to apply chocolate - attention! - on the reverse side of the leaves. Then, using a brush, distribute it from the middle of the sheet to the edges and transfer it to a clean surface for solidification.
- Leave the leaves with chocolate until completely solidified.
- Carefully remove the base leaves from the hardened chocolate. Such chocolate leaves will be good on an autumn cake, for example, on a cake in honor of September 1st. You can decorate both the top and sides of the cake with chocolate leaves.
Photo gallery: chocolate leaf cake design options
Making figurines with molds
Moldova is silicone molds specially designed for molding chocolate. With their help, you can easily and quickly get a lot of decorative elements to decorate one or even several cakes.
You will need:
- chocolate;
- silicone or plastic molds for chocolate.
Molds must be clean and completely dry before pouring chocolate.
Procedure:
- Melt chocolate.
- Pour the chocolate into the molds, remove the excess chocolate from the top, let it harden.
- Get chocolate figurines. For this, the silicone mold can be turned out, and the plastic one turned over and lightly tapped on the table.
Chocolate molds are sold in specialized confectionery stores, craft stores, and housekeeping departments with utensils. Molds for making soap or ice are also suitable.
chocolate bow
This cake will perfect gift. In addition, he will practically not need any other decorations: a huge bow will make an amazing impression on its own, rest assured.
You will need:
- chocolate;
- parchment;
- scissors, ruler, pencil.
Procedure:
- Draw on parchment rectangles about 3 * 18 cm in size, cut. For 1 bow you will need about 15 of these blank strips.
- Melt chocolate.
- Apply chocolate to strips. Each strip must be completely covered.
- Remove the strip with chocolate and transfer to a clean place.
- When the chocolate begins to set, connect the ends of the strip, put the resulting loops on one side. Let it freeze.
- Remove the parchment from the chocolate once it has cooled.
- On a sheet of parchment, use melted chocolate to connect the bottom row of 6 loops. Let it freeze.
- Similarly, make the second and next row, gluing the loops in the center with melted chocolate.
- After hardening, transfer the bow to the cake.
Chocolate molding
Chocolate mastic allows you to create quite complex figures, flowers, it can also completely cover cakes, create draperies, bows, ruffles. Fresh mastic is plastic, reminiscent of soft plasticine, but when it dries, it becomes hard. Plastic chocolate is similar to mastic, but it is more used for modeling.
Store the mastic in the refrigerator, wrapping it tightly in several layers with cling film.
plastic chocolate
Modeling chocolate is prepared from bitter, milk and white chocolate and glucose syrup. At home glucose syrup can be changed to light liquid honey or invert syrup.
Ingredients:
- 200 g of white, milk or dark chocolate;
- respectively 50 g, 80 g or 100 g of invert syrup.
- For syrup:
- 350 g of sugar;
- 150 ml of water;
- 2 g citric acid;
- 1.5 g of soda.
First you need to cook the invert syrup:
- Boil water with sugar, stir until sugar dissolves.
- Add citric acid, cover and simmer for about 20 minutes. Cool down to 50–60°C.
- Add soda, stir. The syrup will start to foam.
- Cool down. The foam will go away as it cools.
- Pour into a closed container and leave at room temperature.
We proceed to the preparation of mastic:
- Chop chocolate and melt.
- Heat the syrup until warm.
- Thoroughly mix the syrup with chocolate so that no lumps remain.
The resulting mass may seem rather liquid at first, but after cooling it becomes thicker and harder.
- Carefully wrap the mastic with cling film so that there is no contact with air.
- After a few hours, you can sculpt figures. Before sculpting, take chocolate in small pieces, knead thoroughly with your hands. big chunks mastics are heated for a few seconds in the microwave.
The proportions given are approximate, as they depend on the thickness of the syrup and the percentage of cocoa in the chocolate.
Video: making chocolate for modeling and decorating a cake with ruffles and roses
Chocolate marshmallow mastic
Marshmallows are air marshmallows, which are produced in the form of pillows or braids. By combining chocolate with marshmallows, you get a mastic that can be used both for modeling and for covering the cake.
Ingredients:
- 180 g marshmallows;
- 200 g of dark chocolate;
- 150 g of powdered sugar;
- 1–3 tbsp. l. water;
- 1 st. l. butter.
Cooking:
- Sift the powdered sugar.
Powdered sugar is better to put a little less than more.
- Melt the chocolate.
- Add water to the marshmallows, melt in the microwave at maximum power, stirring every 20 seconds.
- Mix marshmallows with chocolate butter.
- Add the chocolate-marshmallow mass to the sifted powder, knead until smooth.
- Wrap tightly in cling film to avoid contact with air.
- After a few hours, you can use it for sculpting figures and for covering the cake. At first, the mastic seems very soft, but after it has matured, it hardens.
Prepare for the holiday delicious cake everyone can. interesting recipe It's not a problem to find these days either. It remains only to do everything according to the instructions and a chic confectionery product is already ready to be served on the festive table. Although ... a birthday cake without decoration is like a beautiful lady at a party in a dressing gown. Therefore, no matter how wonderful a homemade cake is, it must be properly decorated.
Decorating a cake at home requires certain skills. Therefore, before preparing and decorating a culinary masterpiece for a big celebration, it makes sense to practice a little on simple confectionery. After all, no one bothers to decorate homemade cookies prepared on a regular day off.
It is equally important to think over the composition in advance, otherwise unforeseen difficulties may arise during the design process.
It's a good idea to stock up on some pastry tools for decorating. Of course, the inquisitive collective mind of the almighty Internet will find a way to do without them, having adopted an ordinary spoon or fork, you will also find master classes on this dyeing option below. But if you plan to decorate cakes with a certain frequency, then it is better to simplify your task. Well, now it's time to talk directly about the means and methods of decorating homemade cakes.
Decorating a homemade cake with cream
Cream is one of the most famous and popular ways to decorate a cake. No wonder most store confectionery products are decorated with numerous roses, cream borders and other oily trinkets.
buttercream recipe
Making a real pastry cream based on butter is a rather tricky process. If desired, of course, you can tinker, but for decoration homemade cake such physical and financial costs are completely inappropriate. It is fashionable to prepare a high-quality and simple oil cream with just two ingredients:
- butter- 100 g;
- condensed milk- 5 tablespoons.
A detailed step-by-step recipe for making a simple butter cream for decorating a homemade cake with a photo. To prepare the cream, the butter must be taken out of the refrigerator in advance. When it becomes soft, it must be beaten properly with a mixer. When the oil becomes fluffy, you need to pour condensed milk into it and continue to beat until a homogeneous and airy mass is obtained. The simplest cream ready to decorate a home masterpiece. By the way, for its preparation, you can use not only ordinary condensed milk, but also its cooked version. In this case, the cream will acquire a pleasant beige hue, and it will taste like a classic crème brulee.

Natural homemade food coloring
Of course, decorating a cake exclusively with white cream is boring. And for coloring creamy treats You can use any food coloring. They can be purchased at the store in the form of powders, or you can cook it yourself, for example:
- a little saffron diluted in a small amount of water will make the mastic yellow;
- juices of beets or cherries - red;
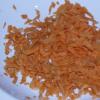
- carrot juice - orange;
- decoction of spinach - green;
- cocoa brown.
The cream is easy to work with. It is better, of course, to use a special syringe with different nozzles for decoration. With this tool, you can draw real masterpieces on a confectionery product. However, you can get by with an ordinary packing bag or a bag folded out of paper with a neatly cut corner. When you press the bag, the cream is evenly squeezed onto the surface of the cake. Having practiced even with the help of such a primitive tool, you can decorate any cake with borders, and inscriptions, and roses with petals.
After the decoration of the surface of the cake is over, the dessert must be put in the refrigerator so that the cream freezes a little. And the leftover cake is also best stored in the refrigerator. In this case, the cream will be edible for at least three days.

homemade icing recipes
Another wonderful and most importantly simple way to decorate a homemade cake is icing. You can make frosting with just three ingredients:
- powdered sugar- 3 tablespoons;
- milk- 1 tablespoon;
- butter- 50 g.
Melt the butter over low heat in a crust and let cool slightly. Then add to the oil sugar ingredient and mix well. Then add milk and mix again. Finished mass and there is white milk icing to decorate homemade cake. It can be smeared on the surface of the biscuit and allowed to harden.
You can also make chocolate icing. Only the proportions of the products should be slightly different:
- powdered sugar- 3 tablespoons;
- milk- 2 tablespoons;
- butter- 30 g;
- cocoa- 1 tablespoon.
Mix cocoa powder with powdered sugar. Pour milk into the resulting mixture, mix well again and put on fire. When the mass boils, remove the crust from the heat and stir in the butter. The chocolate icing is ready to be applied to the cake.
You can also make real confectionery glaze - ganache. This is a denser variety of this "finishing" material. And to prepare it you need to take:
- chocolate- tiles (180-200 g);
- butter- 50-70 g.
To get a ganache, just melt the chocolate and mix it with melted butter.

Decorating a cake with mastic at home
This is not to say that this is a very simple way to decorate cakes. However, with some skill and enough practice with the help of mastic from their confectionery, you can make real works of art.
Mastic is a sweet, plastic mass, somewhat reminiscent of plasticine in its characteristics. You can cut out various figures from it, or you can simply “wrap” the entire cake with it, decorating it on top in some original way. Volumetric mastic compositions can also be made as a decoration for a homemade cake, but when dried, they can begin to crumble, so it is better to use other “materials” for this.

confectionery mastic recipe
Many recipes for making mastic have been invented. However, at home, it is easiest to make milk mastic. For this you will need:
- condensed milk- 200 g;
- powdered milk - 150 g;
- powdered sugar- 150 g;
- lemon juice- for improvement.
Mix powdered sugar and milk powder thoroughly. Then gradually pour the condensed milk into the mixture, kneading the dough. The result should be a homogeneous, elastic mass. We must immediately make a reservation that the amount of dry products is indicated approximately. If the resulting mass sticks to the hands, then a little more powder should be added to it. It happens the other way around: the dough does not want to stick and crumbles in your hands, then you will need to pour 1-2 teaspoons into it lemon juice. And a few more words about the ingredients. For mastic, you should take powdered sugar of the finest grinding. Furthermore, this product must be passed through a sieve. This guarantees a quality end result.
The resulting mastic is almost white in color. To sculpt colored figures from it to decorate a homemade cake, food coloring must be added to the mass. They have already been mentioned in the description of the preparation of mastic. Working with mastic is quite simple. A ball of “dough” is rolled out on a surface covered with starch or powdered sugar, after which the canvas can be applied to the cake for its “covering” or decorative elements can be cut out of it. Some confectioners advise rolling the mastic between two regular packing bags. In principle, this is also possible. You can connect several elements of mastic by slightly wetting the gluing places with plain water.
It is worth warning that mastic should not be covered biscuit cakes soaked in syrup or sour cream. Such impregnation will easily dissolve all decorations. There are no other serious restrictions on the use of this material. The mastic left after decorating the cake should not be thrown away. It is perfectly stored in the refrigerator, provided that the material is tightly wrapped in two or three ordinary plastic bags.

Marzipan for cake decoration
Marzipan can be a great option for decorating a homemade cake. This material can cover the surface and make a wide variety of decorative elements out of it.
What is marzipan? This name hides a delicate and elastic nut mass, perfect for decorating a homemade cake. In pastry shops, you can probably buy it in ready-made. However, marzipan can be made independently. To do this, you only need to purchase:
- almond- cup;
- granulated sugar- cup;
- water- a quarter of a glass.
Peel the nuts and roast on a dry baking sheet in the oven until golden brown. Grind the finished nucleoli with a blender or grate on a fine grater. Boil from sugar and water thick syrup and sprinkle in the ground nuts. Stir the mixture properly and cook for 3 minutes. Pour the mass into a bowl, generously greased with butter, and let cool. Remove the finished marzipan from the bowl, pass through a meat grinder and you can start decorating the cake.
Working with marzipan is as easy as working with mastic. A “lump” of material is rolled out, after which they cover the cakes on top with it or cut out figures and other elements from it. If marzipan spreads during rolling, then powdered sugar should be added to it and kneaded well. If the product, on the contrary, is too dense, then it should be sprinkled warm water. After such a procedure, it will roll out much easier.
One thing to keep in mind is that marzipan needs some time to harden properly. So confectionery creativity should be done in advance - at least 8 hours before the culinary masterpiece is taken out to the guests.

Icing
Icing or ice pattern is another great way to decorate a homemade cake. Usually this technique is used in the confectionery business when decorating wedding cakes. However, no one bothers to decorate a cake with icing, for example: for New Year's Eve.
Icing is rightfully considered a universal decor method, since such patterns do not spread and adhere well to any confectionery surface. A similar decoration looks like an ice pattern on glass. To make such an ornament you will need to take:
- powdered sugar- 500 g (usually takes a little more);
- egg whites- 3 pcs.;
- lemon juice- 3 teaspoons;
- glycerol- 1 teaspoon.
First, chill all ingredients. Then carefully crack the eggs, separate the whites from the yolks and transfer to a clean fat-free bowl. The last procedure can be carried out by simply wiping the inside of the dish with a slice of lemon.
Beat the whites with a mixer at the lowest speed. You don’t need to beat for a long time - two minutes is enough. Now you can add the rest of the ingredients to the proteins and continue to beat the mixture until it turns white. Cover the bowl with the finished “ice” mass with a film and put it in the refrigerator for an hour. During this time, all the formed bubbles should burst. Ready! However, working with this material without special equipment will not work. You will have to purchase a confectionery syringe with special nozzles.
Aising needs to be transferred to a syringe. In this case, the nozzle on the tool must be put on the narrowest. With this material, you can draw lace, make various inscriptions, decorate borders, etc. The only limitation is the surface confectionery should not be sticky or have a tendency to drip. But icing fits perfectly on mastic or hard glaze.

Wafer homemade cake decoration
Waffles are a good material for decorating a homemade cake. The scope for imagination here is not limited to anything. With the proper skill on a waffle plate, you can make a portrait or draw a magnificent still life. Of course, this should only be done edible paints. From a waffle plate, you can also make any volumetric elements for decoration.
One is bad. Ordinary wafer cakes are not very suitable for such purposes. They get wet or break. So you have to buy special wafer paper. It is produced in two types. More dense - it is good just for applying images (often sold with an image already applied) and very thin - it can be cut into parts. However, not in every locality such confectionery delights can be purchased. Therefore, it’s easier to still get by with the usual waffle cake.
It’s worth starting with the fact that such a workpiece should be cut to give the desired shape only with a very sharp knife. It is also advisable to moisten it in warm water. Otherwise, the waffles will just crumble.
After applying the pattern, the cake should be carefully laid on the surface of the cake. Just to begin with, this very surface needs to be made perfectly smooth. For leveling, materials such as mastic or thick glaze. So that the waffle layer does not move out, the back side of the cake must be smeared with something sticky. For this purpose, thick sugar syrup, jam or honey.
In order to apply the "glue" the cake must be placed on a smooth surface. The adhesive layer must be evenly applied to the surface with a special brush. If there is no such tool in the house, then you can even out the adhesive mass with a spoon.
Prepared waffle cake should be laid on the cake, covered with a napkin and gently leveled, squeezing out the air inside. The edges of this pattern can be decorated with cream or whipped cream.
With figures cut out of waffles, they do about the same. They are lubricated on one side with an adhesive and laid on Right place. Volumetric figures can also be assembled from waffle parts. For example, the body and antennae of a butterfly can be made from cream, and wings made from wafers can be stuck next to it.

Chocolate at home, for decorating the cake
Chocolate is the most affordable decoration material. homemade cake. You can buy it at any store, and working with sweet tiles does not require any complicated tools.
The easiest way to decorate a cake with chocolate is to sprinkle with shavings. To do this, you can simply grate the chocolate and sprinkle the entire surface of the cake smeared with cream. Having worked longer, you can make a pattern or an inscription from chocolate chips. To do this, you first need to cut out a stencil of the desired pattern from paper, put it on the surface of the confectionery masterpiece, and then evenly sprinkle with chocolate chips. When the stencil is removed, only the desired image will remain on the creamy surface. Of course, the choice of chocolate in this case depends on the color of the background. On a light cream, a regular chocolate pattern looks good, and on a brown cream, a pattern of white chocolate chips will look contrasting.
The topping can be made even more interesting if the chocolate is not grated, but cut. fine chips using a regular vegetable cutter. The resulting curls look very impressive, being in themselves a wonderful decoration.

Chocolate is also good because it can be melted. Many culinary publications write that turning chocolate bars into a liquid mass should be done on steam bath. In fact, this is not entirely correct. It is better to melt the chocolate over low heat in a ladle, stirring it constantly. Alternatively, you can also use the microwave. But in the pore bath, chocolate will absorb part of the condensate and it will no longer be possible to make a normal pattern out of it. But it's time to get back to embellishment.
received chocolate mass you can type in a culinary syringe and use it to draw a wide variety of patterns. In order for the pattern to turn out to be an openwork nozzle for the tool, you need to choose the thinnest one. If there is no syringe at hand, it does not matter. You can put the chocolate mass into a regular packing bag, make a small hole in it with a darning game and start decorating the cake.
However, you should not draw directly on the surface of the confectionery. It is better to pre-apply the desired pattern on parchment paper or foil, and then circle the contours of the pattern with a liquid chocolate mass. The sheet with the applied pattern must be carefully transferred to the refrigerator for solidification. After some time, the base must be carefully separated from the chocolate patterns, and the resulting parts should be laid out on the prepared surface of the cake.
To create such decorations, you can use not only paper or foil. fine jewelry for a cake, you can make a pure wood leaf with melted chocolate. Then the blanks must also be sent to the refrigerator, and then the natural leaf should be separated from the chocolate one. By the way, it is better to apply chocolate on the back of the leaf, then the real “veins” will be visible at the decorative leaf.
With the help of special stencil molds from chocolate, you can cut out a wide variety of figures. To do this, the melted chocolate mass must be poured onto a cold, buttered baking sheet and leveled with a knife. When the mass is almost solidified, you can start cutting out the figures with molds.
And you can do without molds simply by cutting the chocolate layer into various geometric figures: squares, triangles, rhombuses and other "wedges".

Whipped cream
This is also a good way to decorate a homemade cake. In principle, you can buy a can of ready-made whipped cream, but this is too banal. It is better to make whipped cream yourself, especially since it is not difficult at all. For this you need to take:
- cream (fat content not less than 30%)- 0.5 l.
The trick to whipping cream is its temperature. To make everything turn out, the dairy product must be cooled for 4-5 hours in the refrigerator. The container in which the cream will be whipped and the whisk with which this process will be carried out should also be cold. Speaking of capacity. It is better to take a larger bowl for whipping, since the cream will increase significantly in volume in the process of working on it.
Now about the process itself. The first minute the product must be whipped at the lowest speed, and then it can be increased. The whole action should take 7-8 minutes. It is not necessary to beat longer, the cream from this can lose all airiness.
The classic version of whipped cream can be modified. For example, before whipping dairy product you can dissolve sugar or powdered sugar (the second is preferable). Vanillin or vanilla sugar will add a pleasant aroma to whipped cream. Can be poured into cream and any food coloring. Then ready cream will become colored.
Some sources suggest adding gelatin there as well. However, this should not be done. Whipped cream keeps its shape so well, but you need to put them on slightly sticky surface. Otherwise, the decoration may "slide".
And working with whipped cream is as easy as working with cream. Especially if the kitchen has a pastry syringe. Only unlike desserts with cream, it is advisable to eat a cake with whipped cream immediately. They still don't hold their shape very well.

Decoration of homemade meringue cakes
Meringue towers look very impressive on any cake. Of course, you can’t decorate a cake with crispy hemispheres alone. Putting such a decoration should be on a surface smeared with cream, icing or at least jam. You can cook meringue at home if you have:
- egg whites- 5 pieces.;
- sugar- 250 g.
Crack the eggs carefully and separate the whites from the yolks. Pour the egg whites into a large bowl and beat with a mixer until strong foam. After that, you need to start pouring sugar into the mass. This should be done gradually - 1-2 tablespoons, while continuing to beat the mixture. The mixer speed should not be too high, but it should not be too small either. In total, the whole process takes 12-15 minutes.
Put the finished protein mass on a baking sheet covered with oiled baking paper. You can spread it using an ordinary tablespoon or the same confectionery syringe. Baking time at 100°C is approximately 1.5-2 hours, depending on the size of the meringue.

Fruit for decoration
What could be easier than decorating a homemade cake with fresh fruit or delicious fruit slices? Perhaps this is a rhetorical question. This design option could indeed be considered the simplest, if not for one "but". Fruits do not really tend to fit on the cakes baked for the cake. So you can’t do without cream, icing or jelly.
The choice of "substrate" largely depends on the fruit. For strawberries the best option It will be plain buttercream. Not so now exotic bananas match perfectly with chocolate icing. But win-win of course is jelly. How to make it? This will be discussed below. In the meantime, a couple of words about fruits.
To decorate the cake, any options for natural goodies are suitable. You can take both fresh fruits, and canned or frozen. In principle, even jam is suitable. After all, this is also a fruit, only in a processed form.
Fresh strawberries can be beautifully cut into halves and covered with them on the surface of the confectionery. Small berries - raspberries and blackberries, can be laid whole, dividing the cake into several contrasting triangular sectors. From exotic fruits, you can make whole compositions. In short, the fantasy here is practically not limited to anything.

How to decorate a jelly cake
So it's time to talk about how to decorate a homemade cake with jelly. Theoretically, you can buy a concentrate of this product in the store, dilute according to the instructions and decorate the cake with it. This is even a very good option, allowing you to get a wonderful decor element without much effort. Although in fact, jelly is not so difficult to make on your own. To do this, you need to have at hand:
- fruit juice- 0.6 l;
- powdered sugar- 200-250 g;
- instant gelatin- 1 sachet.
Allow gelatin to swell in one glass of juice, then melt in a water bath. After that, pour the remaining juice into the mixture, pour in the powder, mix everything well and refrigerate. You don't need to let the jelly dry completely. It just needs to be a little tight.
Place the finished cake in a detachable form so that the sides rise above the cake layers by about 30 mm. Remove the prepared jelly mass from the refrigerator and put it into a mold. You can immediately put fresh fruits on the surface of the jelly and send the cake to the refrigerator for 12 hours.
What to do with the rest of the jelly? It can be put into molds and stored in the refrigerator. When they have cooled a little, put them on a jelly surface that has not yet hardened.
By the way, it is not necessary to make jelly from one juice. You can take several varieties of multi-colored fruit drinks, divide the surface of the cake into sectors and make a colorful fill. And you can make the surface plain, and put colored figures on it.

Finished confectionery (sweets and marmalade)
Without particularly straining, you can decorate a homemade cake with ready-made sweets or marmalade. Of course, caramel or lollipops are not suitable for decoration. And here chocolate candies, chocolates, waffle rolls and even M&M's are excellent material for decorating homemade confectionery.
Lay sweets on a surface covered with cream or icing. Moreover, the cream is preferable, because it is less sweet. Finished confectionery products can decorate not only the surface of the cake, but also its end part. For this, for example, waffle tubes placed vertically are perfect.
It is interesting to decorate the cake with the help of ready-made multi-colored marmalade. The easiest option is to lay out a surface for them in the form of a pattern or inscription. You can do it smarter too. Marmalade melts perfectly in the microwave in just seconds. You can work with the prepared mass in the same way as with jelly. Only the marmalade hardens faster - only 3-4 hours.
You can draw whole pictures with liquid marmalade. True, in this case, it is better to cover the surface of the cake with mastic. Then, using a confectionery syringe with the thinnest nozzle and melted chocolate, you need to apply the contours of the drawing to the surface of the future masterpiece. When the chocolate has cooled, you can fill the corresponding places in the pattern with liquid marmalade of the desired color.

Sprinkle for decorating homemade cake
Well, if all the above methods seem complicated, then you can do it quite simply - sprinkle the surface of the cake with some kind of bulk material, for example: powdered sugar, cocoa or purchased multi-colored sprinkles.
It is worth remembering that the topping will not stick to a dry surface. Therefore, before proceeding with the design of a homemade cake, its top and sides should be smeared with something sticky: cream, icing or jam. It is necessary to apply the dressing immediately after smearing, until the “sticky” base has hardened.
As a rule, no housewife has any difficulties with sprinkling the top surface of the cake. But to decorate the ends of a confectionery product with such material is quite problematic. But this is only if you do not know one secret. In order to sprinkle on the sides, you need to put the cake on a piece of fabric, pour the desired material around it directly onto the fabric, and then gently press the fabric to the side of the cake. Most of the topping will stick to the sides.

Just a cake sprinkled with something will turn out delicious, but the decoration will look too boring. A stencil will help correct the situation. From plain paper, you can cut out any pattern or inscription, put it on the surface of the confectionery and start sprinkling. When the stencil is removed, the desired pattern will appear on the cake.
Sprinkling can be done not only with one material. Thanks to stencils, you can also make drawings from different contrasting materials, for example: all from the same cocoa and powdered sugar. What else can be sprinkled on the cake? Yes, basically anything. As a "finishing material" you can use crushed nuts, cookie crumbs or waffles, instant coffee, grated chocolate and so on, and so on, and so on ... The main thing is that the topping harmoniously combines with the taste of the cake.
That, in fact, is all. creative success and bon appetit!
Video "Cake Decoration"