Cream for painting on cakes. "painted" cake or how to draw flowers on a cake
Getting a cake with your photo or a beautiful picture is doubly pleasant. After all, just a few years ago it seemed like something incredible, fantastic. And today, without special costs, you can make beautiful cake with photo. Many people, seeing such desserts with pictures on display windows, wonder how they are made and whether this “work of art” is edible at all. Here's what you can think of and how to take a beautiful photo on the cake to please the birthday person and surprise all the guests.
How it's done and what you need to know
In fact, the photographs on the cake are taken using a special printer. It connects to a computer, and a special program allows you to take a beautiful photo of a dessert made from food colors. They are completely harmless and only at first glance the pictures on the cakes may seem unnatural and unsuitable for human consumption. Both photos and pictures do not affect the taste of the cake in any way. They are made on rice or waffle paper, which has no pronounced taste and is completely usable. 
So, you have chosen a photo on the cake how to make it at home? To do this, you need to purchase a special food printer. It is loaded natural dyes, and with their help they make drawings on desserts. However, it is quite expensive, so not everyone needs to purchase it in order to take photographs at dessert several times a year. In pastry shops that make custom-made cakes, you can come with your photo on a flash drive and the factory workers will transfer the image on it to the finished product. 
In this case, it is advisable to choose a flat dessert, not the same as, for example, "Sphere" or "Millennium". Then the image will look harmonious and beautiful on it. Here are some examples of how to take a photo for a holiday to delight guests, depending on the occasion.
Choosing a drawing for a child, adult, teacher or official event
So now you know how to take a photo on a cake. It remains only to choose a picture in order to go with it to where in your city they make sweet desserts to order, so that they can make a beautiful confection for you. Here are some ideas for making a bespoke cake to make a big splash at your party.
Baby cake. The younger it is, the more vivid and colorful the image should be. If you want to choose a photo for a child up to 7-8 years old, it is better to give preference to the bright heroes of his favorite cartoons and choose a beautiful congratulation from a little mermaid or Winx. Children will like these gifts much more than his own photo. See how to cook at home. 
For a girl or teenager. If the young birthday girl is happy to see her own image on the cake, then it is better for the young man to choose a beautiful picture on the Internet with bright and interesting congratulations. Many guys love car photos, original greetings and wishes. This design will appeal to all young people. The main thing is that he is restrained and masculine in character. 
Graduation cake. Many people order a design or a group photo of the class for a sweet dessert. However, even knowing how to make beautiful photos on cakes, it is best to make a regular dessert design for this holiday. For example, with roses and a neutral pattern. You can just as easily make a text out of cream with a beautiful inscription, decorate the cake with flowers. 
For an adult's birthday. Please select best photos birthday boy and decorate the cake with it. This confection will make a decent impression on any anniversary. Also, if you congratulate a woman, you can download on the Internet a picture with a beautiful photo of a beautiful and successful lady who leaves her car in a beautiful expensive dress with many shiny decorations. This decoration for your cake can be a very stylish gift and decorate your birthday even better than just a photo. 
For the wedding. Large cakes with photographs are rarely ordered for this event. Usually they are decorated with roses, figurines of a couple, as well as various mastic hearts or doves. But some can make an interesting cake design with a photo of the newlyweds, the shape of which is made in the form of a heart, but this is not done at all weddings. After all, the photo must be printed, and this takes time, so it is possible if the couple plans a photo shoot in advance before the start of the celebration, which is very rare. By the way, find out. 
Usually, this practice exists in Israel, when young people, before the official wedding, first make a photo session in different places of the city, order desserts in a restaurant, and on the wedding day they have fun with the guests and do not take pictures. However, this is rare, so giving cakes for a wedding with the image of young people, even if very high-quality and beautiful, is not accepted.
The choice of a photo largely depends on your imagination. But in order for guests to really like the cake with a photo, choose beautiful and high-quality images, it does not matter whether they are pictures from the Internet or processed digital photos.
We also invite you to find out.
Everyone can prepare a delicious cake for the holiday. An interesting recipe finding in our time is also not a problem. It remains only to do everything according to the instructions and the chic confection is already ready to be served on the festive table. Although ... a birthday cake without decoration is like a beautiful lady at a party in a dressing gown. Therefore, no matter how wonderful a homemade cake is, it must be properly decorated.
Decorating a cake at home requires certain skills. Therefore, before preparing and decorating a culinary masterpiece for a big celebration, it makes sense to practice a little on simple pastries. After all, no one bothers to decorate homemade cookies made on a regular weekend.
It is equally important to think over the composition in advance, otherwise unforeseen difficulties may arise during the design process.
It's also a good idea to stock up on some pastry tools for decorating. Of course, the inquisitive collective mind of the almighty Internet will find a way to do without them, using an ordinary spoon or fork; you will also find master classes on this dyeing option below. But if you plan to make cakes at regular intervals, then it is better to simplify your task. Well, now it's time to talk directly about the means and methods of decorating homemade cakes.
Homemade cake decorating with cream
Cream is one of the most famous and popular ways to decorate a cake. It is not for nothing that most of the store's confectionery products are decorated with numerous roses, cream borders and other oil tricks.
Butter cream recipe
Cooking the present pastry cream based on butter - the process is quite tricky. If you wish, of course, you can tinker, but for decoration homemade cake such physical and financial costs are completely inappropriate. It is fashionable to prepare a high-quality and simple butter cream from just two ingredients:
- butter- 100 g;
- condensed milk- 5 tablespoons.
A detailed step-by-step recipe for making a simple butter cream for decorating a homemade cake with a photo. To prepare the cream, the butter must be removed from the refrigerator in advance. When it becomes soft, beat it well with a mixer. When the butter acquires splendor, you need to pour condensed milk into it and continue beating until a homogeneous and airy mass is obtained. The simplest cream for decorating a home masterpiece is ready. By the way, for its preparation, you can use not only ordinary condensed milk, but also its cooked version. In this case, the cream will acquire a pleasant beige shade, and will taste like a classic crème brulee.

Natural homemade food colors
Of course, decorating a cake with exclusively white cream is boring. And for coloring creamy goodies any food coloring can be used. They can be purchased in the store in the form of powders, or you can prepare them yourself, for example:
- a little saffron diluted in a small amount of water will make the mastic yellow;
- beet or cherry juices - red;
- carrot juice - orange;
- spinach broth - green;
- cocoa brown.
It is quite easy to work with the cream. Better, of course, to use a special syringe with different attachments for decoration. With this tool, you can paint the most real masterpieces on the confectionery. However, you can do with a regular packing bag or paper bag with a neatly cut corner. When you press the bag, the cream is evenly squeezed onto the surface of the cake. Having practiced, even with the help of such a primitive tool, you can decorate any cake with borders, and inscriptions, and roses with petals.
After the surface of the cake is finished, the dessert must be put into the refrigerator so that the cream hardens a little. And the leftovers of the cake are also best kept in the refrigerator. In this case, the cream will be edible for at least three days.

Homemade icing recipes
Another great and most importantly simple way to decorate a homemade cake is icing. You can make icing with just three ingredients on hand:
- powdered sugar- 3 tablespoons;
- milk- 1 tablespoon;
- butter- 50 g.
The butter should be melted over low heat in a crust and allowed to cool slightly. Then add to the oil sugar ingredient and stir well. Then add milk and mix everything again. The finished mass is the white milk frosting for decorating a homemade cake. It can be spread on the surface of the biscuit and allowed to harden.
You can also cook and chocolate icing... Only the proportions of the products should be slightly different:
- powdered sugar- 3 tablespoons;
- milk- 2 tablespoons;
- butter- 30 g;
- cocoa- 1 tablespoon.
Mix cocoa powder with icing sugar. Pour milk into the mixture, mix well again and put on fire. When the mass boils, remove the crust from the heat and stir in the butter. The chocolate frosting is now ready to be applied to the cake.
You can make a real one confectionery glaze- ganache. This is a denser version of this "finishing" material. And to cook it you need to take:
- chocolate- tiles (180-200 g);
- butter- 50-70 g.
To get ganache, it is enough to melt the chocolate and mix it with the melted butter.

Decorating a cake with mastic at home
This is not to say that this is a very simple way to decorate cakes. However, with a certain skill and enough practitioners with the help of mastic, you can make real works of art from your pastries.
Mastic is a sweet, plastic mass, somewhat reminiscent of plasticine in its characteristics. You can cut various figures from it, or you can simply "wrap" the whole cake with it, decorating it on top in some original way. Bulky mastic compositions can also be made as decoration for a homemade cake, but when they dry, they can begin to crumble, so it is better to use other "materials" for this.

Confectionery mastic recipe
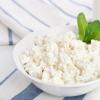
A lot of recipes for making mastic have been invented. However, it is easiest to make milk paste at home. For this you will need:
- condensed milk- 200 g;
- powdered milk - 150 g;
- powdered sugar- 150 g;
- lemon juice- for revision.
Mix the powdered sugar and milk powder thoroughly. Then gradually pour condensed milk into the mixture, kneading the dough. As a result, a homogeneous, elastic mass should be obtained. It is necessary to immediately make a reservation that the amount of dry products is indicated approximately. If the resulting mass sticks to your hands, then a little more powder should be added to it. It also happens the other way around: the dough does not want to stick and crumbles in the hands, then 1-2 teaspoons will need to be poured into it lemon juice... And a few more words about the ingredients. For mastic, you should take powdered sugar of the finest grinding. Moreover, this product be sure to sift through a sieve. This guarantees a quality end result.
The resulting mastic is almost white in color. To sculpt colored figures from it for decorating a homemade cake, food colors must be added to the mass. They have already been mentioned in the description of the preparation of mastic. Working with mastic is quite simple. A ball of "dough" is rolled out on a surface covered with starch or powdered sugar, after which the canvas can be applied to the cake for its "covering" or decorative elements can be cut out of it. Some pastry chefs advise rolling the mastic between two regular packing bags. In principle, this is also possible. You can connect several mastic elements by slightly moistening the gluing points with plain water.
It should be warned that mastic should not be wrapped around biscuit cakes soaked in syrup or sour cream. Such impregnation will easily dissolve all jewelry. There are no other serious restrictions on the use of this material. The mastic remaining after decorating the cake should not be thrown away. It keeps well in the refrigerator, provided that the material is tightly wrapped in two or three ordinary plastic bags.

Marzipan for cake decorating
Marzipan can be an excellent option for decorating a homemade cake. You can cover the surface with this material and make a variety of decorative elements out of it.
What is marzipan? This name hides a delicate and elastic nut mass, perfect for decorating a homemade cake. In confectionery stores, you can probably buy it ready-made. However, you can also make marzipan yourself. To do this, you just need to purchase:
- almond- glass;
- granulated sugar- glass;
- water- a quarter of a glass.
Peel the nuts and fry on a dry baking sheet in the oven until golden brown. Grind the finished nucleoli with a blender or grate on a fine grater. Boil sugar and water thick syrup and pour the ground nuts into it. Stir the mixture well and cook for 3 minutes. Pour the mass into a bowl, abundantly greased with butter, and let cool. Remove the finished marzipan from the bowl, mince it and you can start decorating the cake.
Working with marzipan is as easy as working with mastic. The "lump" of material is rolled out, after which the cakes are covered with it on top or figures and other elements are cut out of it. If marzipan spreads during rolling, then add powdered sugar to it and knead it properly. If, on the contrary, the product is too dense, then it should be sprinkled warm water... After such a procedure, it will roll out much easier.
What you shouldn't forget is that marzipan needs some time for normal hardening. So confectionery work should be done in advance - at least 8 hours before taking out. culinary masterpiece to the guests.

Icing
Icing or ice patterns are another great way to decorate a homemade cake. Typically, this technique is used in the confectionery business when decorating wedding cakes. However, no one bothers to arrange a cake with icing, for example: for New Year's Eve.
Icing is rightfully considered a universal way of decoration, since such patterns do not spread and adhere well to any confectionery surface. This decoration looks like an ice pattern on glass. To make such a decoration you need to take:
- powdered sugar- 500 g (usually it takes a little more);
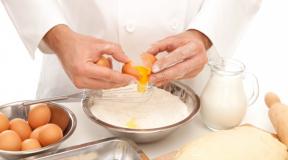
- egg whites- 3 pcs.;
- lemon juice- 3 teaspoons;
- glycerol- 1 teaspoon.
First, all the ingredients must be cooled. Then gently crack the eggs, separate the whites from the yolks and transfer to a clean, fat-free bowl. The last procedure can be done by simply wiping the inside of the crockery with a slice of lemon.
Beat the whites with a mixer at the lowest speed. It is not necessary to beat for a long time - two minutes is quite enough. Now you can add the rest of the ingredients to the proteins and continue beating the mixture until it turns white. Cover the bowl with the ready-made "ice" mass with a foil and put in the refrigerator for an hour. During this time, all the bubbles formed should burst. Done! However, working with this material will not work without special equipment. You will have to purchase a confectionery syringe with special attachments.
Icing needs to be put into a syringe. In this case, the narrowest one must be put on the tool tip. With this material, you can draw lace, make various inscriptions, decorate sides, etc. The only limitation is that the surface of the confection should not be sticky or prone to dripping. But icing fits perfectly on mastic or hard glaze.

Homemade cake waffle decoration
A good material for decorating a homemade cake is waffles. The scope for imagination is not limited here. With the proper skill, you can make a portrait or paint a magnificent still life on a waffle plate. Of course, this should be done exclusively with food paints. Any volumetric decorative elements can be made from a wafer plate.
One thing is bad. Regular wafer cakes are not very suitable for such purposes. They get wet or break. So you have to buy special waffle paper. It is produced in two types. More dense - it is good just for drawing images (often sold with an already applied image) and very thin - it can be cut into parts. However, not in every locality such confectionery delights can be purchased. Therefore, it is still easier to get by with the usual waffle cake.
To begin with, cutting such a workpiece to give the desired shape should only be done with a very sharp knife. It is also advisable to moisten it in warm water. Otherwise, the waffles will simply crumble.
After applying the pattern, the cake layer should be carefully laid on the surface of the cake. Just to begin with, this very surface must be made perfectly smooth. For leveling, materials such as mastic or thick glaze are perfect. To prevent the waffle layer from sliding off, the back of the cake should be greased with something sticky. For this purpose, thick sugar syrup, jam or honey are perfect.
In order to apply the "glue", the cake should be placed on a smooth surface. The sticky layer must be evenly applied to the surface with a special brush. If there is no such tool in the house, then you can even out the sticky mass with a spoon.
Prepared waffle cake should be laid on the cake, covered with a napkin and gently smoothed out, squeezing out the air inside. The edges of this pattern can be decorated with cream or whipped cream.
They do about the same with figurines cut from waffles. They are lubricated on one side with an adhesive and placed in the right place. Three-dimensional figures can also be assembled from waffle pieces. For example, you can make the body and antennae of a butterfly from the cream, and stick the wings made of waffles next to it.

Homemade chocolate, for cake decorating
Chocolate is the most affordable material for decorating a homemade cake. You can buy it at any store, and working with sweet tiles does not require any complex tools.
The easiest way to decorate a cake with chocolate is to sprinkle it with shavings. To do this, you can simply grate the chocolate and sprinkle the entire surface of the cream-smeared cake. After working a little longer, you can make a pattern or inscription from the chocolate chips. To do this, first you need to cut out a stencil of the desired pattern from paper, put it on the surface of the confectionery masterpiece, and then sprinkle it evenly with chocolate chips. When the stencil is removed, only the desired image will remain on the cream surface. Of course, the choice of chocolate in this case depends on the background color. A regular chocolate pattern looks good on light cream, and a pattern of white chocolate chips will look contrasting on brown cream.
The topping can be made more interesting if the chocolate is not grated, but cut into thin shavings using an ordinary vegetable cutter. The resulting curls look very impressive, being a wonderful decoration in themselves.

Chocolate is also good because it can be melted. Many culinary publications write that turning chocolate bars into a liquid mass should be done on steam bath... In fact, this is not entirely correct. It is best to melt the chocolate over low heat in a ladle, stirring constantly. As a last resort, you can also use a microwave. But in a porous bath, chocolate will absorb part of the condensate and it will no longer be possible to make a normal pattern from it. But it's time to get back to decorating.
The resulting chocolate mass can be drawn into a culinary syringe and with its help draw a wide variety of patterns. In order for the pattern to turn out to be an openwork tool tip, you need to choose the thinnest one. If you don't have a syringe at hand, it doesn't matter. You can put the chocolate mass into a regular packing bag, make a small hole in it with a darning game and start decorating the cake.
However, you should not paint directly on the surface of the confectionery. It is better to first apply the desired pattern on parchment paper or foil, and then circle the contours of the pattern with liquid chocolate mass. The printed sheet must be carefully transferred to the refrigerator for solidification. After a while, the base must be carefully separated from chocolate patterns, and put the resulting details on the prepared surface of the cake.
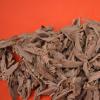
To create such jewelry, you can use not only paper or foil. Lovely decorations for the cake, you can make a clean wood leaf with melted chocolate. Then the blanks must also be sent to the refrigerator, and then the natural leaf must be separated from the chocolate one. By the way, it is better to put chocolate on the back side of the sheet, then the real "streaks" will be visible on the decorative leaf.
With the help of special stencil molds from chocolate, you can cut out a wide variety of figures. To do this, pour the melted chocolate mass onto a cold, greased baking sheet and smooth with a knife. When the mass is almost solidified, you can start cutting figures with molds.
And you can do without molds simply by cutting the chocolate layer into various geometric shapes: squares, triangles, rhombuses and other "wedges".

Whipped cream
It is too good way home cake decorating. In principle, you can buy a can of ready-made whipped cream, but this is too commonplace. It's best to make your own whipped cream, especially since it's not difficult at all. For this you need to take:
- cream (fat content not less than 30%)- 0.5 l.
The trick to whipping cream is its temperature. For everything to work out, the dairy product must be cooled for 4-5 hours in the refrigerator. The container in which the cream will be whipped and the whisk with which this process will be carried out should also be cold. Speaking of capacity. It is better to take larger utensils for whipping, as the cream will significantly increase in volume during the process of working on them.
Now about the process itself. For the first minute, the product must be whipped at the lowest speed, and then it can be increased. The whole action should take 7-8 minutes. It is not necessary to whip for a long time, the cream from this can lose all its airiness.
The classic version of whipped cream can be tweaked. For example, before whipping in dairy product you can dissolve sugar or icing sugar (the latter is preferable). Pleasant aroma add vanillin to the whipped cream or vanilla sugar... Can be added to cream and any food coloring. Then ready-made cream become colored.
Some sources suggest adding gelatin there as well. However, this is not worth doing. The whipped cream will hold its shape just fine, but it should be placed on a slightly sticky surface. Otherwise, the decoration may "slip".
And working with whipped cream is as easy as working with cream. Especially if the kitchen has a pastry syringe. But unlike desserts with cream, it is advisable to eat a cake with whipped cream right away. They still do not keep their shape so well.

Decorating homemade meringue cakes
Meringue turrets look very impressive on any cake. Of course, you can't decorate a cake with crispy hemispheres alone. Putting such a decoration should be on a surface greased with cream, glaze or at least jam. You can make meringues at home if you have:
- egg whites- 5 pieces.;
- sugar- 250 g.
Crack the eggs gently and separate the whites from the yolks. Pour the whites into a large container and beat with a mixer until they are firm. After that, sugar should be added to the mass. This should be done gradually - 1-2 tablespoons, while continuing to beat the mixture. The mixer speed should not be too high, but it should not be too low. In total, the whole process takes 12-15 minutes.
Ready protein mass Place on a baking sheet covered with oiled baking paper. You can spread it using a regular tablespoon or the same pastry syringe. Baking time at 100 ° C approx. 1.5-2 hours, depending on the size of the meringue.

Fruit for decoration
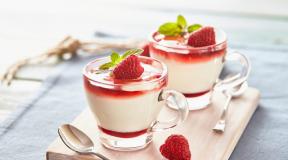
What could be easier than decorating a homemade cake with fresh fruit or mouth-watering pieces? Perhaps this is a rhetorical question. This design option could indeed be considered the simplest, if not for one "but". Fruit is not very eager to fit on the cakes baked for the cake. So you can't do without cream, glaze or jelly.
The choice of "substrate" depends a lot on the fruit. For strawberries the best option will be a simple buttercream. Not so now exotic bananas go well with chocolate icing. But a safe bet of course is jelly. How to do it? This will be discussed below. For now, a few more words about fruit.
Any options for natural delicacies are suitable for decorating the cake. You can take as fresh fruits and canned or frozen. In principle, even jam will do. After all, this is also fruit, only in processed form.
Fresh strawberries can be beautifully cut into halves and spread over the surface of the confectionery. Small berries - raspberries and blackberries, can be laid whole by dividing the cake into several contrasting triangular sectors. Of exotic fruits you can make whole compositions. In short, fantasy is practically unlimited here.

How to decorate a jelly cake
Now it's time to talk about how to decorate a homemade cake with jelly. Theoretically, you can buy a concentrate of this product in a store, dilute it according to the instructions and decorate the cake with it. This is even a very good option, allowing you to get a wonderful decor element without much effort. Although, in fact, jelly is not that difficult to make on your own. To do this, you need to have at hand:
- fruit juice- 0.6 l;
- powdered sugar- 200-250 g;
- instant gelatin- 1 sachet.
Let the gelatin swell in one glass of juice, then melt in a water bath. After that, pour the remaining juice into the mixture, add powder, stir everything well and refrigerate. You do not need to completely let the jelly harden. It just needs to grab a little.
Place the finished cake in split form so that the sides rise above the cakes by about 30 mm. Remove the prepared jelly mass from the refrigerator and put in a mold. Immediately on the surface of the jelly, you can put fresh fruit and send the cake to the refrigerator for 12 hours.
What to do with the rest of the jelly? It can be laid out in tins and stored in the refrigerator. When they have cooled down a little, put on a not yet solidified jelly surface.
By the way, it is not necessary to make jelly from one juice. You can take several varieties of multi-colored fruit drinks, divide the surface of the cake into sectors and make a colorful fill. Or you can make the surface a solid color, and put colored figures on it.

Ready-made confectionery (sweets and marmalade)
Without too much strain, you can decorate a homemade cake with ready-made sweets or marmalade. Of course, caramel or candy is not suitable for decoration. But chocolates, chocolates, wafer rolls and even M&M are excellent materials for decorating homemade confectionery.
Sweets should be laid on a surface covered with cream or glaze. Moreover, the cream is preferable because it is less sweet. Ready-made confectionery products can be used to decorate not only the surface of the cake, but also its end part. For this, for example, wafer rolls, placed vertically, are perfect.
It is interesting to design a cake using ready-made multi-colored marmalade. The easiest option is to lay out a surface for them in the form of a pattern or inscription. You can make it more cunning. The marmalade melts perfectly in the microwave in just seconds. You can work with the prepared mass in the same way as with jelly. Only the marmalade freezes faster - only 3-4 hours.
You can paint whole pictures with liquid marmalade. True, in this case, it is better to cover the surface of the cake with mastic. Then, using a confectionery syringe with the thinnest nozzle and melted chocolate, it is necessary to apply the contours of the drawing to the surface of the future masterpiece. When the chocolate has cooled down, you can fill in the corresponding parts of the pattern with liquid marmalade of the desired color.

Sprinkle for decorating homemade cake
Well, if all of the above methods seem complicated, then you can do it quite simply - sprinkle the surface of the cake with some loose material, for example: powdered sugar, cocoa or purchased multi-colored sprinkles.
It is worth remembering that the dressing will not stick on a dry surface. Therefore, before proceeding with the design of a homemade cake, its top and sides should be coated with something sticky: cream, icing or jam. It is necessary to apply the dressing immediately after coating, until the "sticky" base has hardened.
As a rule, no housewife has any difficulties with sprinkling the top surface of the cake. But to arrange the ends of the confectionery with such a material is quite problematic. But this is only if you do not know one secret. In order to sprinkle the sides, you need to place the cake on a piece of cloth, sprinkle the desired material around it directly on the cloth, and then gently press the cloth against the side of the cake. Most of the sprinkles will stick to the sides.

Just a cake sprinkled with something will turn out delicious, but the decoration will look too boring. A stencil will help to correct the situation. You can cut out any pattern or inscription from plain paper, put it on the surface of the confectionery and start sprinkling. When the stencil is removed, the desired pattern will appear on the cake.
Sprinkling can be done with more than just one material. Thanks to stencils, you can also make drawings from different contrasting materials, for example: all from the same cocoa and powdered sugar. What else can you sprinkle on the cake? Yes, in principle, whatever. As a "finishing material" you can use crushed nuts, biscuit crumbs or waffles, instant coffee, grated chocolate and so on, and so on, and so on ... The main thing is that the sprinkling is in harmony with the taste of the cake.
That, in fact, is all. Creative success and Bon Appetit!
Cake Decorating Video
Exclusive birthday cakes photography became popular with the advent of food coloring printers. When self-preparing a photo for printing in the Russian Photoshop program, the cost of this service (no need to pay for the design and editing of the picture) is available to almost everyone. Read how to take a photo on a cake and present a person with a unique confectionery masterpiece.
Preparing a photo for printing on a cake
Step 1. in Russian to the computer.
Download the distribution package of the program from our website, start the installation process, check the box "Place a shortcut on the desktop". This is a modern editor for working with graphic images, which supports advanced color schemes and allows you to create photos for printing (including food) printing.
Step 2. Find and add photos to the utility.
Pick a photo from the PC's memory, it can be a photo of the birthday person (with a loved one or friends), an image of an object with which his hobby is associated (for example, download a picture with a car from the Internet).

Step 3. Edit the photo for the cake.
Click the "Image" tab, select "Brightness and Contrast", change these options on the right side of the menu. Correction of lighting is done in the same way (a separate window opens), hue, saturation, lightness.

For curly cropping of a photo, click the "Decoration" tab and the "Photomontage" item, in the window that opens, click on the "Crop Photo" icon, select a cropping shape (for example, round), select an area of the image, click "Apply".

Through the "Photomontage" ("+" button), new decorations are applied to the image. Among the categories of clipart are flowers, funny animals, romantic pictures. Examples of their successful use are. Click on the Effects icon and decorate the photo with flashes of light, stars, and more.

Step 4. Resize the image.
On the Image tab, click Resize. In the window that opens, enter new values for the print size of the photo, specify the size in dot and resolution in DPI. For convenience, use the presets function - ready-made photo parameters.

Step 5. Save the photo for printing.
Use the "File" tab to save the photo in any of the available formats; for the convenience of printing, we recommend using the TIFF file type.

For making photos on cakes, food grade paper is used. It comes in several varieties: waffle, sugar, with a vanilla base. Buy a foundation that works for you. Take the photo (on a flash drive or other medium) to a studio that has a printer for working with food paints.

In the studio, the printer is connected to the computer into which the photo is uploaded. The image is printed and cropped (figuratively) to the size of the confection. Food grade paper is applied to the top of the cake, and a glaze coating can be used to secure the picture and give it a glossy sheen. The photo is often decorated with cream vignettes around the perimeter, turning the cake into a masterpiece of confectionery art.
DIY chocolate decorations for cakes, pastries, biscuits and other homemade baked goods are the aerobatics of a pastry chef. Of course, you can not philosophize and decorate the cake with chocolate the way your grandmothers did - just melt the bar with cream, and then coat the top and sides of the confectionery with this liquid mass. But you can try and make a chocolate decoration of simply unearthly beauty, similar to the most real masterpieces.
Which chocolate is suitable for decorating a cake?
When choosing which chocolate to make cake decorations from, buy only a high-quality product. High-quality chocolate makes beautiful glossy decorations. Currently, chocolate glazes are used for the manufacture of chocolate decorations, in which they are replaced with various equivalents of cocoa butter. These glazes are very convenient to use due to their significant fluidity, but in terms of taste they are inferior to real chocolate - couverture.
Despite the long-standing domestic traditions of chocolate production, the interest in this product on the part of the consumer and the manufacturer is constantly growing, because it is possible to make various decorations for cakes and pastries: line art, volumetric figures, bas-reliefs, openwork details and much more. When decorating cakes with chocolate, you can give full free rein to your imagination.
Among the popular tendencies in working with this product are "marble pattern", "velor trim", "decals".
As you can see in the photo, chocolate jewelry can become real author's sculptures:


Such compositions are not much inferior to those that are cut from stone or cast from metal.
DIY chocolate decorations (with photo)
On the surface of cakes and pastries, a variety of chocolate decorations with your own hands: geometric ornaments, drawings of flowers and leaves, various drawings of thematic content. Do not use dyes other than those approved by the Ministry of Health. When decorating products, they use special techniques and various devices.

Homemade chocolate decorations are made from chocolates and 100-gram bars. To decorate cakes with chocolate chips, the chocolate is cooled, and then kept a little at a temperature of 25-30 ° C - then when cutting with a knife, the chocolate is rolled into a beautiful tube. Heavily chilled chocolate crumbles, while soft chocolate does not chip.
Look at the photo - decorating cakes with chocolate can be made in the form of twigs, trees, rockets, numbers, letters, antennae, outlines of animals and birds:


To do this, break it into pieces, melt it in a water bath (so as not to burn) and pour it into a small parchment cornet. A drawing is selected. Trace paper or cellophane is applied to it and chocolate is deposited from the cornet along the visible contours. Such handmade chocolate decorations are placed in a cold place, and after hardening, they are removed from the paper with a knife and transferred to a cake or pastry.

Before making a chocolate decoration in the form of a vertical pattern, a “leg” is deposited in advance, on which it will be fixed in the right place. Chocolate oak leaves are very elegant on the cake. To make them, to the drawing of a small oak leaf apply tracing paper and from the cornet, first draw a circle with chocolate, and then fill in the middle, draw a line with the back of the knife in the middle of the sheet, and from it on the sides - short oblique lines, thus imitating the veins of the leaf. After that, the rest of the leaves are made.

It is not difficult to make decorations in the form of flat figures from chocolate for homemade cakes: for this, the melted product is poured onto parchment paper with a layer of 3 mm and grooves greased with vegetable oil, various figures are cut out. Chocolate for decorating a cake at home should not be hard, otherwise the figures will crumble.
Chocolate cake decorations at home (with video)
For the preparation of three-dimensional chocolate decorations, one- and two-sided forms of plaster, porcelain, clay, plastic and metal are used. Such forms are fastened together with clamps. The molds are thoroughly cleaned of chocolate residues and wiped dry with a clean cloth so that the figures and bas-reliefs are easily separated, then they are heated to 30 ° C and poured with chocolate at a temperature of 29-30 ° C. Chocolate is poured into double-sided, fastened together forms through the lower hole, while the form is well shaken for 2-3 minutes and turned over to avoid voids from air bubbles and so that the chocolate is evenly distributed. After pouring, the mold is placed with the hole down and the remaining chocolate is poured; a layer of 2 to 4 mm remains on the inner walls.

If the forms are large and have a complex pattern, the chocolate is applied with a brush. The poured molds are cooled in the refrigerator at a temperature of 10-12 ° C, and then the figures are cleaned from the seam formed in the place of gluing.
The video "Chocolate Decorations" shows how various figurines are made:
To make chocolate decorations, you don't have to invent complicated designs, but simply make a chocolate pyramid. Before making such a chocolate decoration on a cake, first draw the outlines of the pyramid details on cardboard with a pencil and cut out a template. A drawing is sprinkled from the cornet: the lines of the drawing are thinner, the edges of the pyramid are thicker. To make the pyramid harder, cocoa butter is added to the melted chocolate. For 1-2 hours, the parts are cooled in the refrigerator, then their backs are processed.
The pyramid is assembled as follows: two parts are placed on the board with flat sides to one another and chocolate is squeezed along the edges, the halves are squeezed and cooled. They are placed vertically on the cake and the remaining 3-4 parts are glued to the sides, the pyramid is allowed to freeze and the cake is additionally decorated with marzipan and sugar mastic flowers.

As you can see in the photo, DIY chocolate decorations can also be made from a chocolate substitute. It is prepared from 15% cocoa, 45% butter, 40% powdered sugar and 10% (of the total mass) vanilla sugar. First, a quarter of all butter is warmed to 45 ° C, vanilla sugar and cocoa are added, then the rest of the butter is mixed with powdered sugar and with all the products.

Glaze decorations can be immediately applied to the product or prepared for future use. In the second case, they are "deposited" on sheets covered with parchment paper and dried for 12 hours at room temperature.

The most simple decoration is the application of straight or wavy lines on the surface of the product, lubricated with cream, using a pastry comb. It can be made from tinplate, aluminum, plastic. The size and style of the comb teeth may vary.
The proposed chocolate cake decorating workshop below contains interesting information about this product, reveals how tempering is carried out, as well as the technology for preparing figures, leaves, curls and shavings that will give festive look any cake.
Chocolate Cake Decorating Tools: Chocolate Stencils & Cornets
Before making complex decorations for a chocolate cake, you need to stock up on special tools. First, you will need cornetics or piping jig bags with a set of straws. The cornet is made of tracing paper, parchment or other thick paper that does not absorb grease: a right-angled triangle is cut out and folded into a conical tube. The protruding ends of the sheet are folded inward to hold the cornet together. Its sharp end is notched depending on the pattern that they want to get. The cornet is filled with cream or glaze up to half, tightly closed so that when pressed, the cream or glaze "settles" only from the bottom hole. With the help of a cornet, inscriptions, dots and subtle graceful drawings and flowers are applied.

To make chocolate decorations, you can make a piping bag. For its manufacture, use a dense fabric (best of all, a teak-eraser). The bag has a conical shape, various tubes are inserted into its narrow end. A new bag must be boiled before use. After work, the jig bags are washed in warm water mixed with baking soda, boiled for 3-5 minutes, dried and stored in a specially designated place.

Jig tubes for making decorations for chocolate cakes are made in the form of a cone, the end of which has a figured hole, from which cream is "deposited" in the form various decorations... Sometimes a confectionery jigging bag is used, into the narrow end of which a tapered ring with a screw thread is inserted, and tubes of different styles can then be screwed onto it.
To fill the pastry bag with cream, hold it with your left hand, unfold the bag and put the cream with a spatula or spoon to 1/2 of its volume. Apply the cream tightly, as the remaining air can ruin the drawing. With both hands, they connect the edges of the bag and, clamping it with the right hand, "deposit" the cream, holding the narrow end of the pastry bag with the left.
A variety of chocolate designs for decorating cakes is achieved not only by different styles of tubes, but also by zigzag or wave-like movements of a cornet or a jig bag, a slow or instantaneous change in the pressure force with the right hand, the angle of inclination in relation to the decorated product, distance from the product, etc.
Before finishing any pattern for chocolate decorations, you should stop pressing on the pastry bag and make a sharp short movement forward along the pattern with the end of the tube.
Various openwork chocolate decorations are made by "depositing" the cream from shaped metal tubes inserted into a jigging bag. A set of 10-12 straws with different cut configurations allows you to make all the variety of decorations needed for finishing pastries and cakes. But most often they use tubes with smooth and straight, serrated and wedge-shaped cuts.

Stencils for decorating cakes with chocolate can be useful - especially when a lot of decoration elements are needed (for festive banquet or children's table). You can also create a hybrid: for example, make some parts of the composition using a stencil for chocolate decorations, and others by original cutting. The stencil for chocolate decorations has a metal base. Place it on properly prepared raw materials and press firmly, cutting through the flesh in the shape of a butterfly, leaf, fungus or any other figurine.
Here you can see a photo of "Chocolate Decorating Tools", which you will need to create your drawings:

Decorating the sides of the cakes with liquid chocolate cream with your own hands (with photo and video)
To decorate cakes with chocolate cream, use only freshly whipped product; from the standing cream, the patterns will turn out without gloss and pockmarked.

Lines - straight, zigzag, wavy - when decorating a cake with liquid chocolate, they draw a confectionery comb heated in hot water, slightly pressing it against the smooth edge of the cream. Flowers, figures and patterns are made by squeezing the cream out of shaped tubes inserted into a jigging bag. The most subtle drawings and figures of a certain shape or color are made with the help of a cornet, the narrow end of which is either cut off, or a shaped tube is inserted into it.

While doing openwork jewelry from chocolate for cakes, the cornetic is filled with cream to half and tightly closed so that when pressed, the cream comes out only at the cut. It is better not to hold a cornet with cream in your hands for a long time: from the hands the cream heats up, becomes liquid and the patterns are uneven. By twisting, the cornet is freed from the remnants of the cream.
To decorate the cake with chocolate with your own hands, fill the jig bag as follows: the wide end of the bag is turned off so that it is held on the left hand, and the bag is filled with 1/2 volume with the right hand using a spoon. As little air as possible should remain in the bag, as it spoils the drawings. Then, with both hands, they connect the edges of the wide end of the bag and, clamping it with the right hand, release the cream, supporting the narrow end with the left hand.

When making chocolate cake decorations at home, depending on the wavy or zigzag movements of the cornet or bag, a slow or instant change in the pressure force with the right hand, a change in the angle of inclination in relation to the product, a change in the distance from the surface of the product, a variety of cream patterns are achieved. At the end of the execution of beautiful chocolate decorations, you need to stop pressure on the bag or cornet and make a short movement forward from yourself along the pattern with the end of the tube, then the rest of the cream will fall down with an inconspicuous stroke. If you lift the bag or cornet upwards, then a cone of cream will remain in the figure.

To prepare small chocolate cake decorations, dots and inscriptions, the narrow end of the cornet is held close to the surface of the product to be decorated. You can pre-fill bags and cornetics with creams of different colors. This will allow you to do chocolate decor to decorate the cake more varied and vivid.

If you need to make a rose from the cream, first cut out a small cake from the biscuit (or take candied fruit, profiterole, etc.) - the core of the rose. The core is fixed on a stick with a pointed end and a cork attached to it or on a table fork. In the left hand they hold a stick with a core, in the right - a pastry bag with a straw. Turning the stick, the cream is squeezed onto the core. When the rose is ready, remove it from the stick with a spatula or fork, holding it with the fingers of the left hand, and place it on a cake or pastry.
As you can see in the photo, when decorating a cake with chocolate at home, you can weave a basket of one or different colors:

The basket can also be made of biscuit (shortcrust pastry), gluing the layers together with chocolate cream or fruit filling. The basket is placed on a support (for example, a plywood circle) with its wide side down and, lifting one side, a weaving of cream is applied. When the cream has hardened, the basket is placed on the cake. A handle is made from caramel or from special test(composition: flour, icing sugar and egg white). Flowers or candies are placed in the basket.

To decorate the sides of the cake with chocolate, you can decorate them with cream borders. By the way, borders are made before all other cake decorations. Borders serve not only as decoration, but also cover cracks, cracks, smooth the edges of the cake. They are generally made using a straight cut smooth tube or a fine-toothed tube.
The video "DIY chocolate decorations" shows various confectionery techniques:
How to decorate a cake with chocolate with your own hands: making flowers
Figurines-decorations for a chocolate cake in the form of flowers look very beautiful. In addition to roses, carnations are often made. They are injected from a flat tube with an oblique cut. The sharp corner of the tube is set motionlessly on the surface of the cake or pastry and the cream is squeezed out, turning the opposite end of the tube 180 ° C around the fixed end in wave-like movements. Exactly, but in the opposite direction "gather" the second row of petals, etc.

It is advisable to supplement cream flowers with leaves. They are deposited from tubes with wedge-shaped cut of various diameters. Leaves can be green, brown, yellow, and even white.
Completely from the leaves, you can make a border or the whole picture. Leaves look especially good on small cakes. On cakes and even on pastries, words, names, numbers, congratulations and wishes are often written. For the inscriptions to be expressive, it is necessary that there is a contrast between the inscription and the background. For example, you cannot write chocolate on chocolate or write with white cream on white glaze.

Inscriptions are injected from a small cornet with a very narrow round cut or with a metal pencil tube. The cream is used protein, custard and oil different colors and shades. But there should not be even the smallest lumps in it, otherwise it will get stuck at the exit from the tube or cornet, and you will get uneven, intermittent lines. You can write inscriptions with two-color cream. In this case, the cornet is filled with cream of two colors with longitudinal stripes
Watch the Chocolate Cake Decorating video for some fresh ideas:
How to make tempered chocolate cake decorating
Tempered chocolate can be used to make various decorations for cakes and pastries - full-volume figurines, bas-reliefs, flat thin figurines, "jigging" ones, etc.
For full-size figures, it is better to use metal molds of two halves with clips. When pouring chocolate, the mold and the chocolate must be at the same temperature. Chocolate is poured through the bottom hole of the mold and shaken for 2-3 minutes so that the chocolate is completely distributed over all patterns. Then the excess chocolate is poured out. A 3-4 mm thick layer of chocolate forms on the inner walls of the mold. After the chocolate has cooled and hardened, the mold is freed from the clamps, opened and the figure taken out. Most often, bas-reliefs are prepared from chocolate.

To obtain flat thin figures, tempered chocolate is poured onto parchment with a layer of 2-3 mm, allowed to freeze a little and the figures are cut out with a recess.
For "depositing" tempered chocolate is laid out in a cornet and "deposited" on parchment in the form of continuous patterns and so-called tendrils. From tempered chocolate, cast into a bar and then cooled to almost complete hardening, thin wide shavings are cut with a knife, which, when dropped, roll up into tubes.
Making chocolate figurines for cake decorating
Chocolate is a great material for decorating a cookie or cake and will add a festive look to any baked goods. It is better to use a chocolate mixture to decorate the cake. It solidifies at room temperature and melts easily in a water bath.
Line a baking sheet with parchment, lightly grease it with vegetable oil. Break the chocolate into small pieces. Place it in a water bath and melt without water. Pour onto parchment, guiding with a round-end knife so that a thick, even layer forms. Leave in a cool place until the chocolate is almost completely solid. Use a knife or a dough notch (star, flower, etc.) to cut out the figures. They should be stored in a cool dry place.

Chocolate squares- a simple and effective way to decorate a cake or festive dessert... Line a baking sheet with foil. Put 200 g of melted chocolate in an even layer and gently move the fork to create a wave effect (make sure that the prongs of the fork do not touch the bottom of the baking sheet). Cool until the chocolate is half solid. Using a sharp knife and a ruler, cut the chocolate into squares with a side of about 6 cm. Place the baking sheet with the chocolate decorations in the refrigerator until they solidify. Remove the foil. Gently press the chocolate squares onto the top and sides of the glazed cake. They can also be used as a decoration for ice cream desserts.
Chocolate decor for decorating the cake: grated shavings, crumbs, petals and curls

Chocolate chips and chips. To decorate the cake with grated chocolate, you need to cut the shavings from the chocolate bar with a sharp knife. It is better to remove shavings over a plate, in even movements. Before decorating the cake with grated chocolate, it should be warmed up, but just enough to make it easy to work with. Leave the chocolate in a warm place for 10-15 minutes. Spoon or shake off the shavings on the cake. Decorating with chocolate chips is done in the same way, only it is rubbed more finely.

Chocolate curls. Melt the chocolate in a bowl in a water bath. Spread thinly over a smooth board. Set aside until the chocolate is almost solid. Pull the blade of a large wide knife towards you along the entire length of the chocolate, getting long curls.

Chocolate petals. Cut the foil into squares. Melt the chocolate in a water bath, then cool slightly. Place a square of foil in the palm of your hand. Use a spatula or spoon to spread the chocolate on the foil in a thin layer. Form a petal. While it is still soft, lift your fingers slightly under the foil to slightly bend the petal, giving it a natural shape. Put to cool. When the chocolate is completely solid, remove the foil. Melted chocolate can be used to make a flower from the petals.
Homemade chocolate cream dessert
Chocolate cream

Ingredients:
- 100 g of chocolate by weight,
- 1/2 cup milk
- 3 yolks,
- 4 squirrels,
- 2 tbsp. tablespoons of powdered sugar.
Pour the chopped chocolate into pieces with milk and place in the oven to melt. Then grind it with a spoon, gradually adding one yolk at a time, until a lush mass is formed. Whisk the whites into a thick foam, mix gently with the chocolate mass. Put the cream in glasses, sprinkle with grated chocolate mixed with powdered sugar on top.
Note. This cream must be prepared shortly before serving and kept in the refrigerator, otherwise the proteins will fall off and the dish will be spoiled.
Cocoa loaf

Ingredients:
- 400 g butter (unsalted) butter,
- 250 ml of milk
- 200 g sugar
- 3-4 st. tablespoons of cocoa powder,
- 2 eggs.
Heat the milk in a water bath, add cocoa, stir, pour in the eggs crushed with sugar, cook until thickened, stirring occasionally, then remove and cool.
Beat the softened butter until white. Then add the cooled mixture to it. Beat cream until smooth.
Custard chocolate cream

Ingredients:
- 1 cup flour
- 1/2 cup milk
- 1/2 cup granulated sugar
- 1 tbsp. l. cocoa powder
- 50 g butter.
Cooking method. Bring a homogeneous mass of cocoa powder, granulated sugar, flour, milk and butter to a simmer, stirring constantly. The cream will be ready after it boils and thickens.
How to make chocolate icing for cake decorating (with photo)
Recipe number 1
The easiest way to make a chocolate frosting is chocolate. This product can be used as cake cream or simply spread over cookies.
Ingredients:
- 200 g of chocolate
- 100 g of water
- 25 g butter.
Dissolve the chocolate together with water in a water bath. Stir in butter. Spread the warm icing over the cake, cool.
Recipe number 2
In order to cook this glaze, you need only 2 ingredients.
Ingredients:
- dark chocolate (at least 56%) - 0.6 kg (3 large bars),
- butter "Peasant" - 0.3 kg.
Chocolate icing from chocolate is prepared in a water bath, so first we select containers: you need 2 of them, such a volume that one is immersed in another, but at the same time, water poured into a large container should not be poured into a smaller one.
So, we install containers, pour some water into a large one and put on fire. When the water heats up properly, melt the oil - it melts more easily and faster. Gradually add finely chopped chocolate to the liquid butter. Stir continuously, because the mixture thickens quickly and begins to burn at the walls. When all the chocolate has melted and the icing has become homogeneous, it is ready.
This creates a mirror-like chocolate glaze from butter and chocolate. However, this is a fairly high-calorie product.
As you can see in the photo, when decorating cakes with such chocolate icing, it shines very beautifully:

Cocoa and sour cream chocolate icing

Ingredients:
- sugar - ½ cup;
- sour cream with a fat content of at least 20% - 150 g;
- vanillin - 2 sachets;
- cocoa powder - 4 tbsp. spoons.
Preparation:
Since it is not recommended to warm sour cream, it is better to grind sugar into powder - this way it dissolves more easily. We mix dry products: grind cocoa powder with powder and vanilla. If using vanilla sugar, grind that too. Add a little sour cream to the mixture to avoid lumps. Stir well until a smooth, shiny, homogeneous paste is obtained. You can use a mixer to make the chocolate icing for the cake more fluffy.
You can make a rich frosting by adding cocoa to the chocolate - this recipe is great if you can't find high cocoa chocolate. We will tell you how to make chocolate icing from cocoa powder, chocolate and milk.
Chocolate and cocoa frosting

Ingredients:
- mirror chocolate icing;
- cocoa powder - 4 tbsp. spoons;
- sugar - 1/3 cup;
- milk - ½ cup;
- black chocolate - 1 bar;
- butter - ¼ pack.
Preparation:
Heat milk, dissolve butter with it. Add gradually chocolate chips, cook until the ingredients are fully combined, stir. Mix sugar with cocoa and pour in the milk-chocolate mixture in a thin stream. Grind until sugar dissolves. This chocolate icing must be applied very hot for decoration.
Light chocolate icing for decorating cakes and desserts
What to do if you need to decorate a dessert, but at the same time you want to have fewer calories. To do this, you need to cook a light cocoa frosting.

Ingredients:
- sugar - 1 glass;
- water - 0.5 cups;
- cocoa powder - 2-3 tbsp. spoons.
Preparation:
To cook this icing for decorating desserts with chocolate, first of all we prepare the syrup: pour sugar into hot water and simmer the mixture over low heat for so long to get a drop that does not spread on the nail. As soon as the syrup is cooked, we gradually introduce cocoa, carefully rubbing it with liquid. Sugar will begin to crystallize at the walls quickly enough. If you do not grind the mass, it will burn, so be careful and careful. The glaze hardens quickly, so apply warm.
It is not necessary to cook the cream to decorate the dessert. If the cake contains jelly, hot chocolate layer can not be applied. In this case, we will prepare the glaze without heat treatment.
How to make chocolate fondant for cake decorating

Ingredients:
- 75 g softened butter or margarine;
- 225 g icing sugar;
- 3 tbsp. l. water;
- 2 tbsp. l. cocoa.
To make a chocolate fudge, you need to mix 1 tbsp. l. hot water and 1 tbsp. l. cocoa, cool.
Mix butter and icing sugar. Beat with a mixer on low speed, gradually adding water until the fudge is smooth.
Grease the cake with the chocolate decoration made according to this recipe and decorate according to the theme of the holiday.
How to properly melt chocolate to decorate a cake
To make a product or decoration from chocolate, you need to prepare it, that is, melt it. There are several nuances in how to properly melt chocolate to decorate a cake. Several methods can be used.

The first way how to melt chocolate for decoration - using the microwave is very simple.
Second way how to melt chocolate to decorate a cake - use a water bath. To do this, place the container with chocolate in a saucepan with hot (not boiling!) Water.
Third way how to properly melt chocolate for decoration - use a double boiler. It is also quite possible to melt chocolate in it.
Fourth way - oven. Preheat it to 60-70 degrees, place the container with chocolate there for 10-15 minutes. The fifth way is a steam bath. The container with chocolate must be held over boiling water.
A liquid mass is not always required, so the process will need to be controlled.
Chocolate does not like sudden changes in temperature, so you should not start melting it cold. Wait for the product to warm up until room temperature.
Melting point of white or milk chocolate is 45 degrees. But bitter dark chocolate will melt only at 50-55 degrees Celsius.
How to make openwork patterns from chocolate to decorate a cake
Openwork patterns are a great option for decorating a cake.
You will need a brush (it is better to purchase a special culinary brush, it is simple and convenient to work with it), a pastry bag or a plastic bag, dark and white chocolate.

First, you will need to cover the entire cake with chocolate, which you will use for the background (other chocolate will be used to create the drawings). To do this, melt it to a liquid state in any way. Spread over the cake using a cooking brush.
Let the glaze dry completely.
Start melting another chocolate. It should be pretty runny too.
Transfer the chocolate to a pastry bag. You can replace it with a regular plastic bag by making a small hole in its bottom corner.
Start creating! Draw different patterns, get creative!
Workshop on making butterfly decorations for a cake
Prepare everything you need in advance: chocolate (you can use white and dark), cling film and a plastic bag (or pastry bag), a cutting board or any other solid surface.
What do we have to do?
Melt the chocolate in any way to a liquid state, transfer it to a pastry bag (or a plastic bag with a hole).

Spread cling film on a cutting board.
Start drawing butterflies with liquid chocolate on cling film. If you use two chocolates (white and dark), then the decoration will be more effective.
When the drawing hardens a little, move it to the refrigerator until it solidifies completely.
Take the jewelry out of the refrigerator, carefully peel off the film.
Place your butterflies on the cake.
Decorating the cake with balls of chocolate, nuts and cookies
Chocolate balls with nuts

Ingredients:
- cocoa 3 glass;
- sugar 1 cup;
- milk 3 glass;
- butter 150 gr;
- walnut 150 gr;
- shortbread cookies 400 gr;
- coconut flakes 1 sachet;
- egg 1 pc .;
- cognac 1 tbsp. l;
- vanillin 1/2 tsp
Preparation:
To decorate the cake with nuts and chocolate balls, mix cocoa, sugar and milk. Add chopped butter and heat. We are waiting for it to boil. Cool it down.
Add the egg, vanillin, brandy and beat well.
Chop the nuts on a coffee grinder (you can fry it beforehand, it tastes better) and add to the mixture.
Grind the cookies (here the meat grinder is your friend) and add to the mixture.
Mix well and sculpt balls. We wrap each ball in coconut flakes... Handsomely!
Put the balls in a pyramid on a plate and send them to the refrigerator for 3-4 hours.
Bon Appetit!
Chocolate balls with cookies

Ingredients
- 250 g cookies;
- 150 g dark chocolate;
- 50 g butter;
- 2 tbsp. l. Sahara;
- 1 glass of milk;
- coconut flakes or colored dragee.
Grind the cookies. Melt the chocolate and butter in a water bath or microwave oven... Add milk and sugar, stir until smooth. Add chopped cookies. Stir and make balls from the resulting dough. Roll the finished balls in coconut flakes or colored dragees. The chocolate balls for decorating the cake should be placed in the refrigerator for several hours.
A selection of photos "Decorating a cake with chocolate at home" clearly illustrates all the above recipes:


Chocolate chips for decorating cakes
If you grind the chocolate on a grater, small strips, separating from the tile, will twist into spirals and are perfect for the role of the top layer. Moreover, improvising with flowers (black, milky and white), interesting combinations come out, and even whole edible pictures. Before getting to work, place the chocolate in a warm place, softening it a little. You can also create curls manually: you need to get used to cut thin strips with a well-sharpened knife.
And for the sake of perfectly even shavings, the technique will have to be adjusted. To do this, you need ready-made chocolate icing, which must be applied in separate strokes on the corrugated surface and put in the freezer to freeze.
When the mass has hardened, carefully scrape off the mass and transfer to the cake. Don't stop your fantasy on a solid background. Works of art are also created from such small particles. It's important to attach the chocolate cake decorations quickly so they don't melt on your fingers or stick together.
Chocolate Cookie Decorating

Ingredients:
- 1 part vanilla shortbread dough
- ground cinnamon added to flour;
- 400 g of a mixture of various whole nuts;
- 175 g plain chocolate broken into pieces;
- 175 g milk chocolate, broken into pieces.
Preheat oven to 180 ° C. Oil the base and sides of 2 short forms and line each with a sheet of parchment. Oil the paper.
Divide the dough between the molds and pack it tightly into the molds. Sprinkle with nuts so that they are evenly distributed. Press them into the dough with your hands so that they hold tight.
Bake for 40 minutes, until the nuts and edges are golden brown. Carefully remove them from the molds and place them on the wire rack.
Melt milk and dark chocolate in separate bowls placed on pots of boiling water. Leaving the cookies on the paper, carefully cut each cake into 2 cm wide strips.
Spread the slices on the wire rack so that they are 1–2 cm apart, and sprinkle with a thin stream of melted dark chocolate using dessert spoon... Then sprinkle milk chocolate on top and leave in a cool place to harden. Cut each strip in half lengthwise.
Cookies with chocolate decorations can be stored for about a week in a tightly resealable container.
Recipe for pouring chocolate figurines for decorating a cake
Such figurines can be poured from melted chocolate using conventional casting technology. It's enough just to have a form. We purchase silicone molds of the desired theme in the confectionery department and fill them with melted chocolate, cool, cool to a solid state, take them out of the molds, turning them inside out. If you do not need large chocolates, pour a thinner layer of chocolate into the molds. After pouring, smooth the surface with a thin spatula or a table knife.
In the absence of bulk pouring forms, you can use the curly grooves that we usually use for molding cookies or gingerbread. Lay a sheet on a flat tray parchment paper, install the molds and pour the chocolate into them in a layer as thick as you want, trying to get into the center of the notch so that the chocolate does not stick to its sides above the intended layer. When using grooves chocolate mass it is better to be thicker - let the melted chocolate thicken a little so that it does not spread too much from under the grooves on the parchment. After cooling the chocolate figurines to a solid state, carefully squeeze them out of the cut-out forms, cool your hands and put on gloves so as not to leave fingerprints. Until the figures have finally hardened, they can be additionally decorated - apply notches with a knife or a special cutter, or press through with a mesh, other textured objects, according to the planned decor. Anything you press on the surface of the chocolate will leave its mark on it. Such massive chocolate figures are used in confectionery compositions if they are supposed to be handled, for example, to fill baskets or to create a volumetric center of the confectionery composition.
And in conclusion, one more video "How to decorate a cake with chocolate", which will help you to cope with this difficult task perfectly:
Sweet tooths adore chocolate for its melting taste and delicate texture, doctors appreciate it for its high content of trace elements, vitamins and antioxidants, and decorating pastry chefs love it for great amount technique that you can use to decorate any cake. Professionals use special tools to create their masterpieces. But even at home, you can make chocolate cake decorations that will be not only tasty, but also spectacular.
What kind of chocolate can decorate a cake at home
Only a product that contains cocoa butter has the right to be called chocolate.... The main components of chocolate also include grated cocoa and sugar. Unsweetened chocolate is also produced, which contains 99% cocoa.
When decorating cakes, the following types of chocolate are used:
- bitter (dark) - contains at least 40–55% cocoa;
- dairy - contains at least 25% cocoa and dairy products;
- white - contains at least 20% cocoa butter, but does not contain grated cocoa and powder.
Professional pastry chefs use chocolate, which is available in blocks and dragees (drops). Chocolate bars can also be used for home decoration.
Cocoa powder can also be used for decoration, but it should be chosen High Quality, bad powder can grind on your teeth.
Photo Gallery: Forms of Chocolate Suitable for Decorating
Dragee-shaped chocolate is easy to melt  Block chocolate is often used by professional pastry chefs
  Bar chocolate can be used for decoration at home
In addition to real chocolate, in stores there is confectionery chocolate(glaze) in which the cocoa butter is replaced vegetable fats... It is produced in bars or in the form of chocolate figurines.
Confectionery chocolate is much inferior to the real one in taste, but, on the other hand, it is less capricious and can be used for applications, patterns, glaze.
What you need to know about chocolate
How to store and melt properly
Chocolate has a long shelf life, but it should be kept tightly closed, away from foods with strong odors, and protected from light and moisture. Storage temperature - 12 ° C to 20 ° C.
Before you start decorating the cake, in most cases the chocolate is crushed and heated. For heating, you can use a microwave, hot water or steam bath or an oven preheated to 50–100 ° C. In all cases, stir the chocolate frequently.
Attention! When heated, chocolate must be protected from steam and water droplets, otherwise it will curdle.
Tempering
Cocoa butter is very moody. It contains fats, the crystals of which melt when different temperatures... If the chocolate is not properly melted, it can become coated, melt quickly in your hands, or thicken too much. With tempering (targeted recrystallization), the chocolate is successively heated, cooled and stirred, resulting in a chocolate that melts in the mouth but remains firm and crunchy at room temperature. Use high quality chocolate for tempering.
Confectionery chocolate (glaze) does not need tempering, as it does not contain cocoa butter.
Professional pastry chefs use marble boards and special thermometers for tempering. The easiest way to temper chocolate at home is to use the microwave:
- Chop the chocolate, put in the microwave.
- Turn on the oven at maximum power.
- Take out and stir the chocolate every 15 seconds until it is almost completely melted, small lumps should remain.
- Remove chocolate and stir until smooth.
Properly tempered chocolate, applied in a thin layer on parchment, hardens in 3 minutes at 20 ° C indoors.
If the chocolate thickens too quickly, excessive crystallization has occurred. A little melted untempered chocolate is added to such chocolate and mixed.
Simple do-it-yourself cornet
To plant chocolate patterns, use pastry bags, disposable polyethylene options are especially convenient. If they are not there, you can roll paper cornets yourself. To do this, a square is cut out of parchment or cut out, divided into 2 triangles along the diagonal. The resulting right-angled triangle is folded into a cone, combining acute corners with a right one. The corner is folded outward to secure the cornet. At the bottom, a corner is cut off only when the cornet is already filled with chocolate.
A bag or cornet is filled with melted chocolate. It is convenient to fill the cornet if you put it in a tall glass.
You can also replace the piping bags with a transparent paper file or a thick plastic milk bag.
Express design options
m & m’s and KitKat
This is a very simple and effective way to decorate a cake. Bright chocolate dragees in sugar glaze will fit perfectly into a children's party.
You will need:
- m & m's;
- KitKat.
The cake will look good if the height of the chocolate bars exceeds the height of the cake itself by 1.5-2 cm.
Procedure:
- Attach the chocolate sticks to the sides of the cake. If the sticks are connected together, it is better to separate them.
- Cover the top of the cake with m & m's.
- Additionally, the cake can be tied with a ribbon.
You can decorate the cake with others: Kinder chocolate, chocolate balls.
Photo gallery: how you can decorate a cake with ready-made chocolate products
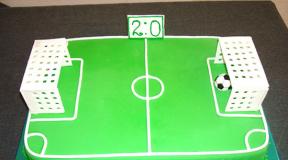
 Square cake lined with chocolate bar bricks and decorated with towers of cookies glued together with chocolate
  Flowers can be made from white and milk dragees
  In such a candy assortment, any sweet tooth will choose a piece to his taste.
  Chocolate candies laid out in a circle, and the composition is complemented by two-color chocolate tubes, which can be replaced with wafer rolls
Chocolate shavings
You can sprinkle chocolate chips on both the top and sides of the cake. Making it at home is very simple: slab chocolate is grated or cut with a knife for peeling vegetables. In the latter case, curly curls of chocolate are obtained.
Depending on the selected grater, you can get different chocolate chips - small or larger. The warmth of the hands softens the chocolate quickly, so it is better to rub small pieces of chocolate. It is impossible to cool the chocolate in the refrigerator beforehand or during operation, too cold chocolate will crumble and break.
Drawing with cocoa and stencil
The famous tiramisu is simply sprinkled with cocoa on top. You can decorate other cakes in the same way. The top of the cake should be flat so it looks neat. And with the help of cocoa and a stencil, you can create a pattern on the cake.
You will need:
- cocoa;
- sieve;
- stencil.
Procedure:
- Place the stencil on the cake.
- Sprinkle cocoa on top through a sieve.
- Remove the stencil carefully.
The stencil can be used ready-made or made yourself by cutting out a drawing from paper. You can also use an openwork cake napkin, a fork, etc. as a stencil.
If the surface of the cake is covered with soft or delicate cream(whipped cream, custard, sour cream), then it is better to keep the stencil at a short distance from the cake so that it does not stick to the surface and spoil it.
Coating the cake with icing
Chocolate icing is delicious, especially when paired with fruit or fresh berries. You can also add colored sugar or beads to the icing. Chill the cake well before icing it. But the glaze should be warm.
Read more about chocolate glaze in our article:.
The cake can be glazed whole or just the top, leaving appetizing smudges on the sides. The icing is poured into the center of the cake in a circular motion, then spreading out with a knife or spatula. If you need to make more even smudges, then first apply liquid icing in a circular motion to the edges of the cake using a cornet or a bag, and only then pour the top.
Chocolate and heavy cream ganache
Ingredients:
- 100 ml heavy cream (30-35%);
- 100 g dark, 150 g milk, or 250 g white chocolate.
Preparation:
- Chop the chocolate.
- Heat the cream to a boil.
- Add chopped chocolate to cream, stir thoroughly with a whisk.
You can adjust the thickness of the glaze by increasing or decreasing the amount of cream or chocolate.
Chilling the ganache for a few hours in the refrigerator, then letting it warm to room temperature and whisking it creates a chocolate cream that can be used for cream decorations and cakes.
Chocolate and milk
Ingredients:
- 100 g milk chocolate;
- 3-4 st. l. milk.
Preparation:
- Chop the chocolate, add milk.
- Heat in a microwave or water bath, stirring constantly.
Made from chocolate and vegetable oil
Ingredients:
- 100 g of chocolate;
- 2-4 st. l. odorless vegetable oil.
Preparation:
- Chop the chocolate, melt it.
- Add vegetable oil, stirring constantly.
You can make glaze from different types chocolate. IN white oil add less, in bitter - more.
From cocoa powder
Ingredients:
- 1 cup of sugar;
- 1/2 cup cocoa powder
- 1/4 cup milk
- 50 g butter.
Preparation:
- Place all ingredients in a bowl.
- Put in a boiling water bath. While stirring constantly, heat for about a minute.
- Remove from the bath, beat with a mixer until smooth.
Mirror glaze with gelatin
The cake to be coated with this icing should be even (mousse cakes filled in silicone molds are ideal). Before covering with mirror glaze, it must be kept in the freezer for several hours.
Ingredients:

Preparation:
- Soak gelatin sheet in cold boiled water... Let the gelatin swell for 10 minutes. When using powdered gelatin, pour 50 g of it cold water, stir well and also allow to swell.
- Mix sugar, water, cocoa powder and heavy cream, bring to a boil with constant stirring. After boiling, add chopped chocolate and stir until completely dissolved.
- Squeeze the excess water out of the gelatin sheet.
- Add the swollen gelatin to the glaze and stir until completely dissolved.
- To get rid of bubbles and for smoothness, the mixture is passed through a fine sieve or whipped with an immersion blender, and then poured into a jar and covered with cling film. Glaze must be refrigerated overnight before use..
- Before covering the cake, you need to heat the chocolate icing to a temperature of 35–45 ° C. To get smudges, you can reduce the temperature to 30 ° C, then it will harden faster. If there are a lot of bubbles in the glaze, strain it again through a fine mesh sieve. To cover the whole cake, place it on a wire rack and baking sheet or other suitable surface lined with cling film. Pour warm glaze from the center in a spiral to the edges... Collect excess glaze on the baking sheet for further use.
Photo gallery: options for decorating a cake with flowing and mirror icing
 Flowing icing looks great on a contrasting color cake
  Using fruits and mirror glaze, you can create a bright composition on the cake
  Glaze can be made white
Video: how to make beautiful smudges on the cake
Painting on the glaze with liquid white chocolate
Glaze designs using a toothpick or bamboo stick have become classics. On dark chocolate glaze, a pattern is applied with white melted chocolate, on light glaze - bitter or milk. You need to apply chocolate while the icing is still liquid..
You can also apply a drawing on a cake covered with cream, if the cream has a soft consistency.
The options are:
- Cobweb. Chocolate is applied to the icing in a spiral from the center. Draw lines from the center to the edges.
- Chevrons. Chocolate is applied to the icing in parallel stripes. Draw lines perpendicular to the stripes in both directions.
- Hearts. Chocolate is applied to the icing in small circles in a straight line or in a spiral. Draw a line through all circles in the same direction.
- Marble. Chocolate of different colors is applied to the glaze with chaotic movements. Mix the glaze in a circular motion, creating a marbled effect.
Photo gallery: options for applying patterns on glaze
 To draw a cobweb, the stick moves from the center to the edges.
  Applying a pattern in the form of chevrons involves the movement of the stick in turn, spar left and left to right.
  Hearts are obtained by holding a stick in the center of round drops of melted chocolate
  The marble effect is formed by the free, chaotic movement of the stick
Cake side decoration
The sides of the cake can be wrapped with chocolate tape, lined with chocolate prongs, tiles, or rolls... The most difficult way to decorate is with straws. They will require not only a lot of chocolate, but also a lot of patience.
Lace (chocolate)
Graceful chocolate curls or a simple geometric pattern are not difficult to make from chocolate, but they look very impressive. Dark or milk chocolate chocolates look great on a white background, and a white pattern will favorably emphasize a dark background.
You can also use confectionery chocolate. It is less capricious, but significantly inferior in taste to natural.
You will need:
- chocolate;
- pencil, scissors.
Procedure:
- Melt the chocolate in the microwave or water bath.
- Cut out a rectangular strip of baking paper with a length equal to the circumference of the cake plus 2-3 cm and a width equal to the height of the cake plus 2-3 cm. Draw a pattern with a pencil and turn it over with the drawn side to the table. You can print the pattern on a printer and just put it under the baking paper.
For a wide cake, it is more convenient to make a chocolate ribbon from 2 halves.
- Place the chocolate in a cornet or a bag, cut a corner.
If the chocolate flows out too quickly, let it cool slightly.
- Gently squeeze the chocolate onto the paper strip along the pattern.
- Place a paper tape with chocolate on the sides of the cake.
- Put the cake in the refrigerator for at least 30 minutes.
- Take out the cake, carefully remove the paper.
After that, you can decorate the cake with a cream border, berries, fruits or fresh flowers.
Video: how to make a chocolent
Panels or Prongs
For this spectacular decoration, you will need at least 400-500 g of chocolate, depending on the size of the cake... You can use dark chocolate, milk chocolate, white chocolate, or combine them to create marble patterns.
You will need:
- chocolate;
- knife or spatula;
- parchment or baking paper.
Procedure:
- Melt the chocolate.
- Apply chocolate to parchment or baking paper, spread evenly with a knife or pastry spatula.
- Let the chocolate harden.
- Cut with a knife or break with your hands into pieces of any shape. The height of the panels should be higher than the cake.
- Apply to the sides of the cake so that the panels overlap slightly.
For embossed texture, you can crush the parchment before applying the chocolate. To create a pattern, a pattern is first applied to the parchment with white or dark chocolate, and on top it is poured with a contrasting color.
Photo gallery: options for decorating a cake with chocolate panels
 Cake with chocolate panels can be supplemented with fresh flowers
  Chocolate panels can be made in an unusual shape
  The combination of white and dark chocolate gives an interesting marble pattern.
  The embossed texture and irregular shape of the teeth give the cake a special charm
Video: how to make chocolate teeth with nuts and dried fruits
Tubules
Ready-made chocolate tubes are sold in specialized pastry shops. However, you can make them yourself, including from white chocolate or mix white and dark chocolate.
You will need:
- chocolate;
- acetate film;
- thin scotch tape;
- knife, scissors.
Instead of acetate foil, you can use transparent corner folders.
Procedure:

"Cigars"
You will need:
- chocolate;
- marble board or metal sheet for baking;
- scapula;
- metal scraper or spatula.
If you don't have a dedicated metal pastry scraper, a new stainless steel construction trowel will do.
Procedure:
- Temper the chocolate.
- Cool the marble board or metal sheet and put it on the table.
- Spread the chocolate in a thin layer on the sheet with a spatula.
- Use a knife to mark rectangles on the chocolate layer.
- Let the chocolate thicken slightly, but not harden..
- With a metal scraper or spatula at an angle of 45 degrees, remove the chocolate layer along the outlined lines, it will roll up into a tube.
Video: how to make chocolate "cigars"
Decorative items made of chocolate
Swirls, numbers, lettering and patterns
Various decorative elements, figures, numbers are drawn with melted chocolate. Butterflies and various curls are very popular. These elements can be used to decorate both the top and sides of the cake..
You will need:
- chocolate;
- pastry bag or paper cornet;
- parchment or baking paper;
- stencil with a pattern.
Procedure:
- Melt the chocolate. Fill a cornette or bag with melted chocolate, cut a corner.
- Print or draw on paper the desired drawing (curls, numbers, inscriptions). Put a sheet of parchment on a sheet with a drawing, you can secure with paper clips at the edges. Gently squeeze the chocolate onto the parchment according to the pattern.
- Allow the elements to harden.
- Remove the chocolate blanks from the parchment.
If you put the parchment on a rolling pin, wrap it around a glass or use other suitable objects while the chocolate is solidifying, the blanks will turn out to be voluminous. Thus, you can create chocolate spirals, flowers, butterflies.
Photo gallery: options for decorating a cake with decorative elements of chocolate and examples of stencils
 Openwork triangles are laid in a circle based on cream rosettes or berries
  The cake can be decorated chocolate inscription or numbers
  Graceful decorative elements are usually fixed in cream rosettes.
  One large or several small butterflies can be planted on the cake.
  Openwork butterflies can be flat or consist of two halves located at an angle to each other
  Openwork decorative elements will decorate the top or sides of the cake
  Small decorative elements usually make a border around the edge of the cake.
Video: creating a chocolate flower
Appliques with outline
Unlike lace, such decorative elements have a background and a contrasting outline along the contour.
You will need:
- white and dark chocolate (bitter or milk);
- pastry bag or paper cornet;
- parchment or baking paper;
- paper with a pattern.
Procedure:
- Place a sheet of parchment on a sheet with a drawing.
- Melt dark chocolate. Squeeze it out onto the parchment along the contour of the drawing placed under it and let it harden.
- Melt the white chocolate. Fill in the rest of the applique. Allow to solidify completely and then turn over.
By mixing white and dark chocolate or by adding dyes to white chocolate, you can achieve different shades and make the applique colored. For colored appliques, special chocolate dyes are required. Do not use fruit juices for this, as the chocolate can curdle.
Simple cut-out elements
Even a child can cope with the manufacture of these parts, so feel free to call your son or daughter to help you.
You will need:
- chocolate;
- parchment or baking paper;
- spatula or knife;
- cuttings, forms for cookies.
Procedure:
- Melt the chocolate.
- Using a knife or spatula, spread the chocolate in an even layer of 2-3 mm on the parchment.
- When the chocolate begins to solidify, cut out the elements using molds or cut-outs.
If the chocolate sticks to the mold, it hasn't cooled down enough. If the chocolate breaks, it has already hardened too much, it must be reheated.
Chocolate leaves
This is a very simple idea with great results. You can fantasize and use a variety of leaves as a base.
You will need:
- chocolate;
- brush;
- leaves such as roses.
Procedure:
- Wash and dry the leaves well. Melt the chocolate.
- You need to apply chocolate - attention! - on the back of the leaves. Then, using a brush, distribute it from the middle of the sheet to the edges and transfer it to a clean surface to harden.
- Leave the leaves with chocolate until they solidify.
- Carefully remove the base leaves from the frozen chocolate. These chocolate leaves will be great on an autumn cake, such as a September 1st cake. You can decorate both the top and sides of the cake with chocolate leaves.
Photo gallery: options for decorating a cake with chocolate foliage
Making figures using molds
Molds are silicone molds specially designed for molding chocolate. With their help, you can easily and quickly get a lot of decorative elements for decorating one or even several cakes.
You will need:
- chocolate;
- silicone or plastic molds for chocolate.
Before pouring chocolate, molds must be clean and completely dry.
Procedure:
- Melt the chocolate.
- Pour chocolate into molds, remove excess chocolate on top, let harden.
- Get out the chocolate figurines. For this, the silicone mold can be turned out, and the plastic one can be turned over and lightly knocked on the table.
Chocolate molds are sold in specialized confectionery stores, art stores, in the household departments with utensils. Molds for making soap or ice are also suitable.
Chocolate bow
This cake will be the perfect gift. In addition, he practically does not need any other decorations: a huge bow will make an amazing impression on its own, be sure.
You will need:
- chocolate;
- parchment;
- scissors, ruler, pencil.
Procedure:
- Draw rectangles about 3 * 18 cm on parchment, cut. For 1 bow, you will need about 15 such blank strips.
- Melt the chocolate.
- Apply chocolate to strips. Each strip must be covered completely.
- Remove the strip of chocolate and transfer to a clean place.
- When the chocolate begins to set, connect the ends of the strip, put the resulting loops on one side. Let it freeze.
- After hardening, remove the parchment from the chocolate.
- On a sheet of parchment, use melted chocolate to connect the bottom row of 6 loops. Let it freeze.
- Similarly, make the second and next row, gluing the loops in the center with melted chocolate.
- After hardening, transfer the bow to the cake.
Chocolate molding
Chocolate mastic allows you to create rather complex figures, flowers, it can also completely cover cakes, create draperies, bows, ruffles. Fresh mastic is plastic, reminiscent of soft plasticine, but when it dries, it becomes hard. Plastic chocolate is similar to mastic, but it is mostly used for sculpting.
Store the mastic in the refrigerator, tightly wrapped in several layers with cling film.
Plastic chocolate
Modeling chocolate is made from bitter, milk and white chocolate and glucose syrup. At home glucose syrup can be replaced with light liquid honey or invert syrup.
Ingredients:
- 200 g of white, milk or dark chocolate;
- respectively 50 g, 80 g or 100 g of invert syrup.
- For syrup:
- 350 g sugar;
- 150 ml of water;
- 2 g citric acid;
- 1.5 g of soda.
First you need to boil the invert syrup:
- Boil water with sugar, stir until sugar dissolves.
- Add to citric acid, cover and keep on low heat for about 20 minutes. Cool to 50-60 ° C.
- Pour in soda, mix. The syrup will begin to foam.
- Refrigerate. The foam will go away during the cooling process.
- Pour into a sealed container and leave at room temperature.
Let's move on to making mastic:
- Chop and melt the chocolate.
- Heat the syrup until warm.
- Mix the syrup and chocolate thoroughly so that no lumps remain.
The resulting mass may seem quite liquid at first, but after cooling it becomes thicker and harder.
- Carefully wrap the mastic with cling film so that there is no contact with air.
- After a few hours, you can sculpt the figures. Before sculpting, take chocolate in small pieces, knead it thoroughly with your hands. Large chunks The mastics are heated for a few seconds in the microwave.
The proportions given are approximate, as they depend on the thickness of the syrup and the percentage of cocoa in the chocolate.
Video: making chocolate for modeling and decorating the cake with ruffles and roses
Chocolate marshmallow mastic
Marshmallow is an airy marshmallow that is produced in the form of pillows or braids. Combining chocolate with marshmallows, you get a mastic that can be used both for sculpting and for covering the cake.
Ingredients:
- 180 g marshmallows;
- 200 g of dark chocolate;
- 150 g icing sugar;
- 1-3 st. l. water;
- 1 tbsp. l. butter.
Preparation:
- Sift the icing sugar.
It is better to put a little less powdered sugar than more.
- Melt the chocolate.
- Add water to the marshmallows, melt in the microwave at maximum power, stirring every 20 seconds.
- Mix marshmallows with chocolate and butter.
- Add the chocolate-marshmallow mass to the sifted powder, knead until smooth.
- Wrap tightly in plastic wrap to avoid contact with air.
- After a few hours, it can be used to sculpt figurines and to cover the cake. At first, the mastic seems very soft, but after curing, it hardens.