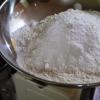
How to make tasty and cheap cheese. How to cook cheese
So amazing, delicious and useful product! And, by the way, ancient origin. Also in Ancient Greece, according to historians, they knew how to cook homemade cheese from milk.
A bit of history
Of course, the industrial production of this product has not yet been discussed. But in every family they made homemade cheese from milk. At the beginning - with the aim of more long-term storage food (after all, milk "lives" not so long, and cheese can be stored much longer). After - already with the aim of feasting on cheese. This product has become an indispensable component of many culinary specialties. Especially in countries where animal husbandry and milk collection were originally developed: cow, sheep, goat, mare and even camel.
The current state of affairs
Now, in view of the extensive industrial production, this product at home, only a few risk doing it. Whether because of the lack of confidence in their culinary skills, or because of lack of time and effort. But recently, interest in a natural product has increased significantly, because some of those who monitor their own health prefer to make homemade cheese from milk with their own hands in order to be as sure as possible that the product does not contain unwanted ingredients, usually added at the factory. production.

Important information for a cheese maker
In recipes (some) you can find such a component as renin. This is a special rennet that has been used for centuries to make cheeses. IN pure form it is quite difficult to get it, and it is impossible to replace it with something - a specific ingredient allows high-speed fermentation without much heating of the product. How to cook cheese, if found in the recipe this component and you don't have it on hand? It is known that abomasum is part of some medicines(for example, "Abomin" and the like), so that in this case, drugs can be used. Animal renin can also be replaced with vegetable renin, derived from fungi.

Homemade milk cheese
Most regular cheese good to use in fresh, and in many famous dishes: pizza, pies, sandwiches, pastries. There are two methods of cooking proven by the people: fast and long. Let's consider them in turn.
Quick Option #1
If there is no time to wait until they ripen, you can try using an express recipe that allows you to cook the product almost instantly.
We will need: cottage cheese of moderate fat content - a kilogram, whole milk - a liter, cow butter- 50 grams, half a spoonful of soda, a spoonful of salt, add seasonings to choose from in a small (so as not to spoil the taste) amount.
Boil the milk and immediately reduce the heat to the very minimum. Grind the cottage cheese thoroughly, until there are no grains in it. Pour a little into the milk, stirring. We wait a bit and turn off the fire. The resulting mass is decanted through double gauze until the serum stops dripping. In a prepared frying pan over very low heat, melt the butter and pour the mixture. We stir the mass constantly, not allowing it to burn, until completely homogeneous (it should begin to stretch when prying with a fork). At the end, add the selected spices. Then soft cheese put it in a special mold and put it under pressure in the cold (from 6 hours or more). It turns out quite a competitive dish, very tasty.

Quick Option #2
Soft cheese can be quickly prepared with eggs and sour cream if you like very fatty foods.
We need: liter whole milk, a glass of medium-fat sour cream, three eggs, a small spoonful of salt.
Pour milk into a saucepan and bring to a temperature of 70 degrees. Salt. The fire must be very small. IN separate dishes beat eggs with sour cream. Pour this mixture into hot milk. Do not forget to constantly stir the brew with a wooden spatula. Do not bring to a boil, but simply heat for 5-7 minutes. During this time, the milk usually completely curdles, and specific flakes appear. Pour the mixture from the pan into a colander with a fine mesh and let it drain. You can put it under pressure right in a colander so that the whey continues to drain. Leave in this position for six hours. Then we put it in the refrigerator, continuing to hold it under oppression for some more time.
This is another way to make cheese quite quickly.
long option
To implement the plan, you will need: five liters of whole milk, yogurt without additives - a few spoons (or dry, 1 capsule), renin - 0.5 grams, salt on the tip of a knife, purified water.
We introduce yogurt into the milk heated to a temperature slightly above 30 degrees and stir. We make a rennet solution: renin, salt, a little water. We add it to the total mass. We stand in this state for more than an hour. Then we express through a double gauze until the serum stops dripping. After we mix and put under pressure (for about 12 hours).
Final: we wash the product in a weak saline solution and put it under the press for longer storage. Homemade cheese will be ready in about three weeks. And it will turn out much tastier than store-bought. So it's worth the hassle!

Adyghe homemade cheese
We will need: two liters of store-bought milk 2.5% fat, a small spoon citric acid.
How to make cheese similar to store-bought Adyghe without special efforts? In a saucepan, bring the milk to a boil, stirring with a slotted spoon, but do not boil! Remove milk from heat and add citric acid while stirring. The curdling process begins immediately. We continue to stir for a few more minutes. When the characteristic flakes cease to form, we finish the process. Strain the mixture through a double gauze. We put under load for 6 hours. All whey should drain well, and the resulting cheese should take on a rounded shape. We take it out and put it in a plastic container with a lid. We take a glass of whey left over from pumping and salt it well. Pour the serum into a container with the product, close the lid and put it in the refrigerator overnight. After the specified time Adyghe cheese ready. At the output of 2 liters of milk, more than two hundred grams of cheese and one and a half liters of whey are obtained, which can be drunk or used, for example, to make okroshka.
Nostalgic option: processed cheese
How to make melted cheese at home? After all, this type of product has not ceased to enjoy steady popularity among our people since the days of the USSR! And homemade cottage cheese cheeses are not so difficult to cook, even without some experience.
Have to take fatty cottage cheese- half a kilo, a glass of milk, a spoonful of cow's butter, salt and soda on the tip of a knife. For getting refined taste additives can be used: cinnamon, ginger, cocoa, nuts. We do it at will.
Further preparation of cheese is quite simple. In milk, slightly warmed up, add salt and mix with grated cottage cheese. We put the mixture on a very small fire, stir constantly so as not to burn. Then add the oil, follow the process, stirring constantly. The curd starts to melt. Do not let it stick to the bottom and sides of the dish. As soon as the boiling process begins, remove from heat. Additives can be added at this stage. We leave to drain on a fine mesh. We put it in a container for storage (keep it at the bottom of the refrigerator). Such cheese at home can be used to make sandwiches, pizza, soup, oriental pastries. It is perfectly stored in the refrigerator for at least a week (but, as a rule, it is already eaten during this time).

With greenery
Cheese at home, low-calorie and nutritious, can be cooked with herbs. It is full of vitamins and minerals. It is good to use a similar product in the spring, when beriberi is planned. In addition, for people who follow their figure, it is extremely relevant.
We will need: 3 liters of milk, 1.5 liters of low-fat kefir, fresh herbs, salt.
"Green" vitamin cheese at home is prepared easily and simply. Let's start by heating the milk (but not boiling)! Next, pour in a thin stream of kefir, stirring constantly. Characteristic cheese flakes are formed. Still do not boil the mixture! Remove the pan from the heat and add a couple of pinches of salt. The resulting mass is thrown back on gauze, folded in several layers. Let the whey drain and form the heads. At this stage, we introduce greens into our cheese. As ingredients, you can use fresh cilantro, dill, parsley, basil, onion. Here, focus on your own taste - who loves what more. We tie the formed heads in gauze and put them under pressure overnight to further “dry” the product.
What is a press: useful information
What is this device? After all, not every housewife has a branded kitchen in the kitchen. It is very easy to make it with your own hands. Dial in glass jar water (half a liter or a liter, depending on the size of the head of cheese). Close the jar tightly with a lid. Place the jar on top of the prepared head, wrapped in cheesecloth and placed in a colander so that the whey can drain, maintaining balance. Here's a primitive press for you. But he must act, performing his functions.
How to salt?
How to make cheese at home finished product did you get a salty taste (since cottage cheese sometimes turns out to be too sweet cheese)? We do the following procedure. In a glass of whey, dissolve a spoonful of salt. Place the head of cheese in a container according to size. Pour salted whey on top so that it completely covers the cheese. Cover with a lid and put in the bottom of the refrigerator overnight. When ready cheese well salted, take it out and store it already without whey (although you can not take it out and keep it in the same form).
In a slow cooker

This device has long gained popularity in many kitchens. Therefore, we give a recipe for how to make cheese in a slow cooker. We will cook with seasonings and herbs, but if you like pure cheese, you can use these ingredients without a doubt end result, just exclude.
So, we need: 2 liters of milk, two large spoons of rock salt, half a liter of low-fat sour cream, 5 fresh eggs, a bunch of dill, dry sweet paprika - a couple of tablespoons.
Eggs, sour cream, paprika, dill, chopped finely, mix in a separate bowl until smooth. Pour milk into the multicooker bowl and add salt, stirring. We turn on the steam cooking mode (10 minutes). Cook with the lid open, stirring constantly with a silicone spatula. Milk is ready to boil. Pour the prepared mixture into it, stirring constantly. Extend the timer by five minutes. Then pour the mass into a colander, covered with gauze in several layers. Let drain and lay under the press for 6 hours. Cheese in a slow cooker is soft and tender: with the indicated amount of ingredients, the output is about 400 grams of a product ready to eat.
We use the oven
In the oven, the product turns out to be slightly baked, browned. Cheese in the oven is quite simple to prepare using the previous skills.
We will need: milk - three liters, kefir - a liter, 3 fresh eggs, two small spoons of salt, two small spoons of sugar. If we want to do with greens, then a bunch of fresh herbs is optional.
Beat eggs and mix with kefir. We put the milk on the fire, but do not bring it to a boil. Add the prepared mixture, sugar, salt to the milk. Stir constantly so that it doesn't burn. With the advent of stratification (flakes), remove the pan with the cheese mass from the heat. Next, you need to drain and put under pressure, as in previous recipes. The difference is the process of baking cheese in the oven. We put the finished head in a baking dish, coat with yolk, slightly beaten. We heat the oven to 220 degrees and bake our cheese for 10-14 minutes, until a golden crust forms.

Results
As you can see, making cheese at home is easy. With a sufficient supply of food and a desire to experiment, you can not buy cheese in the store at all, since the cooking process itself will result in an interesting culinary action, and it will be difficult for you to stop.
Homemade cheeses made with dried fruits are very popular. Used prunes, dried apricots, dried apples and berries. To prepare the product, dried fruits must be thoroughly washed and poured over with boiling water. After that cut small pieces and mix with the cheese mass at the stage of head formation. And after already - under pressure. Such cheeses have a delicate fruit and cheese aroma, exquisite taste.
Try to cook, using basic recipes, cheeses with the addition of all kinds of nuts. The most accessible are walnuts. They must be peeled and veined, poured over with boiling water and finely chopped or ground in a mortar. Then mix the nuts with the base and form a head.
In general, in the preparation of homemade cheeses, you can really show flight culinary fantasy. After all, there are many variations of recipes. And I want to try everything!
In fact, this cheese is milk fermented with rennet. During the day, it thickens, salts, and then you can safely eat it. In many countries of the world there are such cheeses. For example, cheese, Imeretinsky, mexican cheese cueso. These cheeses are stored for no more than a month. In addition, any of these cheeses, ripened in the refrigerator for another 2-3 days, can become the basis for Suluguni or Mozzarella cheeses.
So we have 5 liters of fresh cow's milk. To be more precise - fresh milk. As it turned out later, new milk it is better not to use, it should stand for several hours in the refrigerator. Many sources claim that cheese will never come out of paired cheese, but beginners are lucky! Our cheese turned out great!
We calculate required amount dry enzyme, dilute it in water room temperature and set aside.

We heat the milk to a temperature of 38-40 degrees, constantly stir from top to bottom so that the milk warms up evenly and measure with a thermometer. Any manipulation in the preparation of cheese is very closely related to the temperature of the milk. Enzymes and fermenting bacteria are introduced at certain temperatures. This condition is not difficult, but mandatory. So, desired temperature received.

We introduce the enzyme and a couple of drops calcium chloride, it will help the formation of a cheese clot. Close the pan with a lid and forget about it for 30-60 minutes. If the cheese clot does not appear, you need to wait a little more. We had a dense clot appeared almost 2 hours later.

Now gently mix the clot and spread it with a slotted spoon in special cheese molds [cheese molds]. The clot must be laid out to the very top of the form, it will become very dense and decrease in size, giving off the whey.

When all the cheese is laid out in molds, one must not forget to turn it over periodically to give the cheese head a more even and beautiful shape.

After 4 hours, the cheese is finally compacted, it must be well salted on both sides and put in the refrigerator overnight. In the morning our cheese is completely ready and you can eat it.
So, here's what we have in the end - out of 5 liters of milk, we got 870 grams of cheese. This is very good result!

After making the cheese, we have as much as 4 liters of whey left. Of course you can bake pancakes for a couple large families, put the dough on pies, make okroshka on whey, but we will continue to make cheese further! Let's make Ricotta.
Ricotta Recipe
What is required for cooking:
- Serum after cooking homemade cheese - about 4 liters;
- Milk - 500 ml;
- Vinegar 6 or 9%;
ricotta is traditional Italian cheese product. Ricotta translates as "re-cooked". Indeed, this type of cheese is made from whey after some types of cheeses have been prepared. For the preparation of ricotta, the whey obtained after the manufacture of cheese from fresh milk using rennet. This is just our case! But there is one caveat. Our milk has given almost all of it to the homemade cheese, the whey is completely clear, not cloudy or pale white. But there is a way out - you just need to add a little milk to the whey. Because homemade milk we used completely, then we will add the usual, bought in the store. For 4 liters of completely transparent whey, add about 500 ml of milk. If your whey is white and not transparent, then we cook only from it. You don't need to add milk.

Ricotta is very easy to make. The serum is heated to 90 degrees and a little vinegar or citric acid is poured into it. Then everything is well mixed and left under the lid. We left until the mass cools down completely. During this time, the flakes will settle to the bottom and it will be very easy to get them out. Put the mass back into special form and let the excess whey drain off. You can add spices, salt, herbs, garlic to your own taste.

From 4 liters of whey, two molds of 200 grams were obtained. For breakfast, the whole family can eat fresh Ricotta with bread or toast for a couple of days.

The recipe for Suluguni
To prepare Suluguni, we specially left one head of homemade cheese, it had to lie in the refrigerator and ripen for two or three days.

Cut the cheese into cubes about one and a half centimeters.

Heat a pot of water to 90 degrees hot water into a cup and pour cubes of homemade cheese into it. It is required, as it were, to melt the cheese and form one common mass out of it.

We change the water several times so that it is constantly hot. We stir the mass with wooden spoons in a special way- first we flatten the mass, then we turn it off and again make a cake. This is how we form cheese layers.
The cheese should become soft and pliable yeast dough. Now we place it in a cheese mold, leave it to seal and drain excess liquid. Once the head of cheese has formed, place it in saline solution(200 grams of salt per liter of water) for 24 hours.

Suluguni is ready!
P.S.: If you want to try yourself in home cheese making, keep in mind that we have everything you need to make any kind of cheese - from soft to hard. All products and materials for cheese production are sent cash on delivery to any location in Russia.
- Curd - 2 kg
- Cow's milk (you can cook homemade cheese from goat milk) - 2 liters
- Butter - 200 g
- Eggs - 2 pcs.
- Tea soda - 1 tablespoon
- Salt - to taste
(it is better to take homemade cottage cheese, in the market from a familiar milkman)
Cooking process:
Very interesting recipe making cheese at home from Valentina Gorbacheva, easy, fast and easy to prepare:
When I had a household, I often made homemade delicious cheese from milk and cottage cheese for myself. Cooking cheese at home is very simple, the main thing is that the products are of high quality. The recipe for making homemade cheese can be changed, when cooking cheese, add cumin seeds, dried fragrant herbs(for example, Provencal or Italian), sun-dried tomatoes, sun-dried bell pepper(paprika) or just chopped dill, parsley and cilantro.
To get a harder cheese, with a low fat content, you can reduce the amount of butter, put it in 100-150 g. But you can’t spoil the porridge with butter, so my homemade cheese also turned out delicious, here it is in the photo.
Of course, maybe not the same as store-bought, but environmentally friendly and you know that in your homemade cheese everything is natural, from a cow, fresh and there is no palm oil without dyes and preservatives. Initially, in the preparation of my homemade cheese, I used 3 liters of milk per 1 kg of cottage cheese, then I tried to reduce the amount of milk. Quality differences homemade cheese I didn’t notice, so I began to add enough milk so that it only covered the cottage cheese.
PREPARING HOMEMADE CHEESE FROM MILK AND COTTAGE CHEESE
 I put 2 kg of cottage cheese in a saucepan, poured 2 liters of milk. I put it on fire. While stirring lightly (mostly only along the bottom, the cottage cheese can stick), so that the mass warms up evenly, bring the milk with cottage cheese to a hot state. Once you see whey forming, it's all done. Cottage cheese becomes like soft plasticine. Strongly this curd bun does not need to be broken. In time, it takes 7-10 minutes, no more.
 Then you need to separate the whey from the resulting cheese mass, I usually throw it on cheesecloth, you need to try so that, if possible, all the liquid escapes and the curd mass is almost dry, without whey. Then, in a cauldron, where you will cook homemade cheese, lay the resulting mass, there are 200 g of softened butter, 2 eggs, 1 tbsp. l. soda and salt. Salt, of course, to your taste, someone likes salted cheese, someone slightly salted.
Mix all the ingredients for homemade cheese in a cauldron or other vessel with a thick bottom (not enameled) and put on fire.
 Making cheese at home requires constant monitoring, so you can’t move away from it, as the cheese may burn during cooking. Constantly stirring, cook over medium heat, the curd mass will begin to melt and stretch, boil homemade cheese for about 5-7 minutes. I have a wooden spoon that I use all the time cheese mass I'm in the way. You will be able to determine when the cheese is ready. It will be sticky and sticky. You can determine the readiness of cheese by mouth: try it, if it sticks to your teeth, then everything is ready! Another sign of cheese readiness is that it begins to lag behind the walls of the dishes in which it is cooked.
Then you pour hot cheese home cooking into any container (cup or container) to shape it. It is necessary to handle the cauldron with care, as the cheese mass is very capricious. Top with warm homemade cheese cling film so that the crust does not wind.
 I got homemade cream cheese, it is not quite hard, because it has a high fat content, but it keeps its shape and can be cut with a knife.
Tips from Notebook:
- The remaining whey from making homemade cheese from milk and cottage cheese can be used for baking or put yeast dough for bread on it or cook okroshka on whey in the summer.
- I would like to highlight separately: the store often sells not cottage cheese, but a CURD PRODUCT, which in its composition is not cottage cheese at all, cheese will not work out of such not real cottage cheese, it is better to buy real farm cottage cheese with milk and get a good result and taste of homemade cheese! Ultra-pasteurized and sterilized milk from boxes should not be used.
We also have a recipe on our website. diet cheese on kefir, try it too:
Bon appetit and delicious cheese wishes you Notebook recipes!
Home-made cheese is unrivaled not only in terms of cost and taste, but also in terms of the entire spectrum of unlimited creative space that opens up for a home cheese maker.
To make 1.3 kg of soft homemade cheese you will need:
- 9 liters of whole milk
(you can also use purchased, not sterilized, but here you need sourdough). 
- Sourdough.
I took "Bifilyuks" 400 ml., You can kefir or some other sour-milk product with a shelf life of no more than a week. It is even better, of course, to use specialized cheese starters. Although if the milk is homemade, whole, then it is possible without sourdough at all. (before that I did it with pure milk, now I decided to try it differently)
- Pot. 
- A sieve or colander.
- Thermometer. 
- A piece of cotton or gauze.
- Form for cheese - container.
The container can be can or plastic from under mayonnaise, saucepan, or any other container. According to the inner diameter of the container, we select the piston, it can be either a wooden circle or a saucer. He (this piston) should freely enter the container with a gap along the edges of 2-5 mm.
- Enzyme for curdling milk.
Pepsins are used as an enzyme. Today, the most acceptable in terms of price and quality indicators is the Japanese-made “meito” enzyme. You can also buy Acidin-pepsin tablets at the pharmacy, but the result is not always stable (at least for me). 
Pepsin, Meito microbial rennin, is used in the production of soft and hard cheeses both at home and in factories. Meito pepsin can be used to make: regular homemade cheese, pickled cheeses(brynza, suluguni, feta, etc.), as well as almost all known hard varieties cheese.
Meito- natural product containing milk-clotting enzymes.
These enzymes are specific proteases that are identical in their amino acid composition to calf rennet. But Meito does not contain animal and chemical components, which favorably affects the shelf life and palatability cheese.
Meito is produced through fermentation and further drying vegetable food fungus.
MeitoTM was approved at a meeting of the Expert Council of the State Research Institute of Epidemiology and Microbiology. N.F.Gamalei at the Russian Academy of Medical Sciences; Approved by the Institute of Nutrition of the Russian Academy of Medical Sciences
The enzyme is included in the national standard of the Russian Federation - GOST 52686-2006 “Cheese. General technical conditions".
Producer: MEITO SANGYO CO.,Ltd (Japan)
- Press.
However, a press substitute can be built from two pans.
- and time 2-3 hours :)
Making soft homemade cheese.
1. In some recipes, it is recommended to pasteurize milk, but I have tested milk, so I decided not to do this, but pasteurize at a temperature of 62 degrees for half an hour - this is critical if homemade milk is of unknown origin. It is better to heat milk in a water bath. 
2. Cool to a temperature of 33 degrees. 

3. Pour "Bifilyuks" into milk and wait 20-30 minutes for our lactic acid bacteria to work.
4. Pour 1/10 of a bag of meito pepsin into half a glass of cold (previously boiled and cooled) water and stir until completely dissolved.
There is only 1 gram in a sachet and all this is for 100 liters of milk. How to divide 1 gram into 10 parts? We watch movies about drugs and learn how to make tracks. :)) You can still dissolve the whole bag in 100 ml. water and already measure with a syringe right amount. Store in this case in a tightly closed sterilized container in the refrigerator for no more than 2-3 weeks.
5. Pour these half a glass into milk and mix thoroughly once for 2-3 minutes (this is important!) And leave.
6. The process of coagulation (coagulation) begins. Coagulation turns milk into whey and curd. This happens after 30-60 minutes.
7. Check the readiness of the cottage cheese. It should look like a cream with a clear separation between curd and clear whey. If the whey still resembles milk, then leave the cottage cheese for a few more minutes. We do a clean finger test. This is a very simple test: you just need to dip your finger (clean! :)) in curd mass and look at it. If a white milky mass remains on the finger, then the cottage cheese is not yet ready. If the finger remains clean, then the readiness of the cottage cheese is guaranteed. 

8. We lower the long knife to the very bottom of the container, cut the mass with a “mesh” of 2-3 cm. 

9. Then we try to cut horizontally with a slotted spoon, so that the result is something similar to cubes 2-3 cm in size. Of course, it is impossible to cut into even geometric cubes in this way, but in this case it is not necessary. 

10. Gradually increasing the temperature of the water to 38 degrees, and maintaining it at this level, gently mix the cheese mass from time to time (now it is already a cheese mass), trying to prevent the pieces from sticking together. If you come across big chunks, at the same time we cut them. You can stir b/w every 20 minutes. 

11. After 2-3 hours, drain the whey into a separate container, it will come in handy on the farm. 
12. Throw the cheese mass into a sieve or colander. When the remaining whey drains and the mass cools to room temperature, we will get soft homemade cheese. 
It can be stored in the refrigerator, but not more than a week, since it is not recommended to store soft cheese for longer.
How to do hard cheese.
In order to make hard cheese from homemade soft cheese, you just need to press it.
13. Break the cheese mass into pieces with your hands and add salt to taste (I added 1.5 tablespoons).
We mix and put in a container form, previously lined with a dry, clean piece of cotton fabric, put a saucer-shaped piston on top.
In the process of making cheeses, he experimented with various forms. Here in the photo on the right is a vessel for spoons and forks, and on the left is a lid from a box for 100 CDs (as a result, I threw it away - it cracked, thin - I used an enameled colander) 

14. We put all this economy under pressure. We increase the load smoothly - up to 10 kg. 
In a simplified version (a press of two pans), we put a container with cheese on the bottom of a large pan, put some kind of elevation in the form of a small bowl on the piston, and lower a small pan onto this elevation, filling this small pan with water for weight. So that the small container stands in the center of the large one and does not lean, we radially thrust three folded towels between the containers
15. After 5 hours, we take out the slightly pressed cheese: 
16. Drain the serum, wipe it dry, change our piece of cotton fabric for a fresh one, only this time the load is more from above - 40-50 kg. The hardness and shelf life of the cheese depends on the mass of the load - the heavier the load, the less moisture the product will have and the longer the shelf life.
17. After 12 hours of standing under pressure, we take out 

Here is the cheese from the last batch
This is already a cheese that is almost ready and can be tasted, but has not yet matured as real cheese. For maturation, it is necessary to put the cheese on a wooden base or on a plate lined with a clean cotton cloth - and in the refrigerator for lack of a cellar. We are waiting for the formation of a crust and maturation of the cheese within one to two weeks. In order for this to happen evenly, the cheese will need to be turned over periodically.
Our cheese is ready! It is slightly swollen and rounded, this is due to holes inside the cheese (eyes), which are formed as a result of carbon dioxide pressure. Carbonic acid is released during the work of the irreplaceable little helpers of the cheese maker - lactic acid bacteria.
This cheese is a week old 
This is 12 days
How to cook cheese at home - TOP-8 recipes with photos from the magazine website
Cheese is unique milk product. It is rich in vitamins - A, B1, B2, B12, C, D, E, PP, and the ratio of phosphorus and calcium in it is perfectly balanced. It is also very valuable that nutrients, which are contained in cheese, are absorbed by the human body by 98-99%.
People have been making cheese since time immemorial. It was invented, most likely by accident, in the 8th millennium BC, at a time when sheep began to be domesticated: milk, stored in the stomachs of these animals, turned into curd and whey thanks to rennet.
Shop counters abound today different types cheeses. Soft and hard, creamy and melted, smoked and moldy... However, many cheeses contain flavors, thickeners, preservatives, and therefore resemble a natural product very remotely.

Fortunately, there is a way out of this situation: you can learn how to cook cheese at home, tasty and healthy, without production additives harmful to health. We invite you to try your hand at making homemade cheese. We will reveal to you a few secrets on how to make it delicious, and share the most delicious recipes homemade cheese.
How to make homemade cheese
Recipe 1.

You will need: 1 kg of cottage cheese, 1 egg or 2 yolks, 1 liter of milk, 120 g of butter, 2-3 teaspoons of soda, 1 coffee spoon of salt and spices (dill or cumin seeds) if desired.
Bring milk to a boil in a large saucepan. Put the cottage cheese into the milk and cook, stirring constantly, for about 4 minutes over low heat - until the whey separates. Then take clean gauze, soak it in water, fold it in two layers and cover the colander; pour the hot curd mass into it. When the serum has drained well, tie the gauze tightly and hang it over the sink. Whisk the softened butter, salt, baking soda, and egg (or egg yolks) in a separate bowl while excess liquid drains. When the whey is completely drained, transfer the cottage cheese to a clean bowl, combine with the yolks and butter, and mix well. If desired, add dill, cumin seeds or other aromatic herbs to the cheese to taste. IN large saucepan boil a small amount of water. Place other dishes on top smaller, and put the prepared curd mass into it. Boil in a water bath for about 9 minutes, stirring constantly. When the curd mass begins to melt and becomes viscous, transfer it to a greased butter form, press down on top with a light press and let stand in the refrigerator for 2-3 hours. Remove the finished cheese from the mold and serve on the table, cut into pieces.
Recipe 2.

You will need: 1 kg of homemade non-grained cottage cheese with a fat content of at least 9%, 100 g of butter with a fat content of at least 82%, 3 eggs, 1 liter of milk with a fat content of 3.2%, 1 teaspoon of soda and salt.
Boil the milk, add cottage cheese and boil for about 30 minutes after boiling, stirring constantly. Place a colander in another saucepan, lay gauze folded in 2-3 layers on it and lay out the prepared cottage cheese. After draining the whey (from it, by the way, very delicious pancakes), put the cheese mass in another, clean bowl, add well-beaten eggs, softened butter, salt and soda in it. Combine all the ingredients well, boil on a fire slightly above average for about 10 minutes, stirring constantly, and put the curd mass in a deep bowl greased with butter, gently level with a spoon, and when the cheese has cooled, put it in the refrigerator for 2-3 hours. Remove the finished Adyghe cheese from the bowl by turning it over. Serve cut into nice slices.
Recipe 3.

You will need: 1 liter of milk, 1 tablespoon coarse salt, 3 eggs, 200 ml sour cream, spices to taste.
Add salt to milk, mix, boil. Combine sour cream well with eggs and pour in a thin stream into hot milk. Cook over low heat, stirring occasionally, 3-4 minutes. Immediately after they form large flakes, you can add your favorite spices, herbs that you like, or garlic to the curd mass. It is simple and at the same time win-win, wonderful recipe homemade suluguni. To taste, the finished cheese resembles tender cheese. You can also make it with cilantro, dill, paprika, olives, sun-dried tomatoes, walnuts- additives can be whatever you like. After cooking, strain the cheese through a fine sieve (or gauze folded in 2-3 layers), put it in a bowl and put it in the refrigerator for a couple of hours.
Recipe 4.

It will take (for 1 kg of finished product): 1 dessert spoon natural wine vinegar, 10 liters of milk + 200 ml of milk for starter, 1 g of pepsin for starter (you can buy it in the market or in a pharmacy).
For starter in a separate bowl, combine 200 ml of milk at room temperature with wine vinegar. Dilute the pepsin in the resulting mixture. Strain 10 liters of milk through a fine sieve (or gauze), heat to a temperature of 30 degrees in a cauldron (or aluminum pan), pour in the starter and let stand for half an hour in a warm place. Then put the bowl of milk on slow fire. Collect the mass that folds with clean hands to the sides of the pot. The cheese curdles in about 5 minutes. If you take the lumps out of the pan, put them on a prepared colander with gauze and squeeze out the whey, you get a young homemade cheese; it's already ready to use. And for the classic suluguni, it must be left to ferment for fermentation in unsalted whey in a warm place for a couple of hours. To check if the cheese is done, cut off a thin piece and dip in hot water for 1-2 minutes. If the cheese is slightly stretched, you can proceed to it. further processing. The main thing is that it does not break. Divide the prepared cheese into strips about 2 cm thick and dip into hot water (about 85º). Melt it over low heat, stirring with a wooden spatula in one direction. When the mass has completely melted, remove it from the pan, glue it into a lump, giving the cheese the shape of a head. The classic suluguni is ready!
Recipe 5.

You will need: 200 ml heavy cream, 800 ml sour cream 20% fat, 2 teaspoons of lemon juice.
Cream (you can take full-fat milk instead) mix well with sour cream and heat to 75º over low heat with continuous stirring (but do not overheat, in no case let the mass boil!). Pour into hot cream lemon juice and stir - the liquid will curdle. After that, immediately turn off the heat and let the cheese mass cool. Moisten gauze folded in several layers in water, put in a colander, transfer the cheese mass and leave for at least an hour - the excess liquid should drain completely. After that, the cheese can be pressed, and the better it is pressed, the denser, more beautiful and tastier it will turn out. Store homemade mascarpone in the refrigerator.
Recipe 6.

You will need: 5-6 liters of goat milk, 2 eggs, 1 tablespoon of soda, 100 g of butter, salt and spices to taste.
To prepare cottage cheese from goat's milk, pour it into a large container, preferably glass, and put 1 tablespoon of kefir, sour cream or a crust of black bread there. Milk will turn sour in a couple of days. When this happens, heat it in a water bath right in the jar. There is one secret: the slower the sour milk is heated, the softer and more tender the cottage cheese will turn out. When the whey separates, fold the cottage cheese into a colander lined with gauze folded in 4 layers. After the liquid has drained, tie the corners of the gauze and hang the "pouch" over a container. Leave overnight. The next morning, melt the butter in a saucepan, beat in the eggs, salt, add soda and spices. Combine all ingredients well, add cottage cheese, put the pan on water bath and heat over very low heat with continuous stirring. The cheese is ready when the curd starts to melt and becomes viscous. For fully prepared while the cheese is liquid, pour it into a greased sunflower oil form and place in the refrigerator.
Recipe 7.

You will need: 1 teaspoon of soda, 400 g homemade cottage cheese, 1 egg, 50 g butter, salt and spices to taste.
Cottage cheese to make it more tender, pass through a meat grinder or grind through a sieve. Then add butter, egg, salt and soda. Put the cauldron with this mixture on a quiet fire and knead with a spoon until smooth. Optionally, add spices - garlic, basil, dill, parsley, and if you want to processed cheese acquired a beautiful yellowish tint, add turmeric. Stir the curd mixture continuously - until it melts (bubbles should appear). The main thing is not to overexpose it on fire, otherwise you will get not melted cheese in consistency, but something similar to cheese. Pour the resulting mass into a bowl, and when it cools down, the melted cheese is ready. Garnish with fresh herbs when serving.
Recipe 8.

You will need: 2 liters of kefir, 50 g of butter, 1 egg, 0.5 teaspoon of soda, 1 teaspoon of salt, 0.5 coffee spoon of paprika.
Build a water bath: put a cauldron with a small amount of water on the fire, and put a smaller pot or bowl of kefir on top, so that it does not touch the water. On the steam bath hold the kefir until it turns into curd: when the whey separates, the kefir will begin to thicken. The main thing is not to overdo it, make sure that it does not boil. As soon as the kefir becomes dense, discard it on a colander lined with three-layer gauze, squeeze out the excess liquid and leave it in the “bag” for at least a quarter of an hour so that it is completely glass. After that, transfer the cottage cheese to the bowl in which the kefir was “steamed”, add salt, soda, paprika, butter and an egg. Mix everything well with a fork and put it back in a water bath. The melting process will start in about 3 minutes; once this happens, start stirring the mixture with a wooden spatula. Stir continuously until a yellowish mass without lumps is obtained; this will take about 10-15 minutes. Lubricate the cheese mold (it is better to take a bamboo bowl or a plastic container), grease it with butter in advance, put the finished cheese mass in it in a dense layer and refrigerate for 1-2 hours. If desired, you can add your favorite spices, nuts, fragrant herbs to the cheese.

As you can see, making cheese at home is very simple. The main thing is that all products are fresh and of high quality. Good luck with this exciting endeavor! And delicious homemade cheese!