Royal icing recipe. icing royal icing
Icing is a sugar-protein drawing mass used for decorating cakes and other confectionery. It can be white or colored if special dyes are added.
icing recipes
There are several recipes for icing, but most often confectioners use the following options for its preparation:
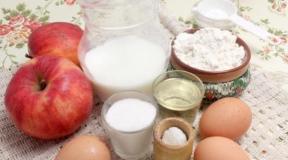
Ingredients:
- 250 g of powdered sugar;
- 0.5 tsp lemon juice;
- 1 egg white.
To prepare the icing, the powder should be sifted, and the protein should be carefully separated from the yolk and beat with a fork until a light foam is obtained. While constantly stirring the mass, it is necessary to pour in the powdered sugar in a thin stream and beat until a stable mixture is formed. Lemon juice is added at the very end, because if you pour it in earlier, the products are more fragile.
Recipe for icing with albumin.
The difference between this cooking method and the previous one is that instead of raw egg white, dry albumin is used, but the time of whipping the mixture increases slightly (from 3-4 minutes when working with raw protein to 6-7 minutes with albumin).
Recipe for icing "Mering pudder".
Ingredients:
- 450 g of powdered sugar;
- 3 tbsp powder "Mering pudder";
- 6 tbsp warm water.
The mixture is whipped with a mixer at low speed for 7-10 minutes. Its consistency is regulated by water. You can buy dry protein in specialized stores.
After preparing the drawing mass, it can be painted with watery or gel paints, and so that the icing does not spread, you need to add a little powdered sugar to it.
Flexible icing
The art of confectionery decoration has reached a new level with the advent of flexible icing. Prior to this, sugar decorations required very careful handling, and work with them was long and meticulous. Such products dried for a long time, broke easily, and in order to give the decor elements the desired shape, they had to be dried on uneven surfaces. Flexible icing (Sugarveil) solved most of these problems.
The main advantages of the Shugavale mixture are:
- kneading for a few minutes by adding the right amount of water;
- Drawings freeze in half an hour, and from a regular mixture in about 12 hours;
- Decoration elements are easily separated from parchment or polyethylene, while they are elastic and do not break even if the pattern is very thin;
- A flat design easily takes the shape of the surface on which it is placed, that is, lace can be glued to the curve of the cake or to its side;
- Flexible icing decorations can be applied to the product immediately before serving.
It is extremely difficult to draw Shugavale lace by hand, so it is better to use silicone molds with ready-made drawings. The solution is poured into the stencil, and then leveled, after which it is easily removed.
You can work with silicone molds only with Shugavale mixture, as it, when it hardens, forms an elastic structure that can be easily removed. Drawings from the usual mass are likely to break during such manipulations. Flexible lace can be used as a full ribbon, or cut out of them as separate decorative elements.
How to work with icing
The technique of decorating cakes with icing is one of the most ancient, sophisticated and expensive. Currently, there are more than 10 ways to decorate confectionery products with sugar-protein mass, but the principle of working with icing remains unchanged.
To prepare an ornament, you need to make a sketch of the product or take a stencil. Then a piece of cellophane is placed on the selected template so that the outlines of the pattern are clearly visible.
After that, a cone-shaped bag with a hole at the base is rolled up from thick paper, which is filled with drawing mass. Then, gently squeezing the icing out of the cone, you need to circle the pattern on the stencil, applying the mass to the cellophane. The resulting sketch is left to dry.
Since icing products for decorating a cake are very fragile, you should make a little more blanks than necessary. To give the decor elements some form, you need to prepare fixtures of the appropriate shape. For example, painted butterflies are dried on a slightly ajar book. In this case, they are not flat, but with raised wings.
To get openwork spherical products, the protein mass should be applied to small inflated balloons lubricated with vegetable oil. After the icing dries, the balls are pierced and carefully removed from the resulting decorations.
 Separate parts can be glued together with egg white, previously mixed with powdered sugar.
Depending on the size of the part and the humidity of the air, the drying time of the products also varies. An ordinary flower dries in two days, and huge elements take up to 5-6 days. Blanks can be placed in the oven, but the temperature in it should not exceed 40 ° C.
Icing cake decorations can be placed on the surface of ready-made (baked and cooled) sufficiently dry confectionery products, on chocolate and other sweets that do not require special storage conditions.
Finished decorative blanks can be stored in a box for a long time at room temperature and normal humidity. In no case should you put icing decorations in the refrigerator, as they liquefy under the influence of cold, so pre-cooked products are placed on the cake immediately before serving.
Everyone loves. Cookies, muffins, gingerbread - all this improves mood. And when they are also beautifully decorated, they look doubly appetizing. Professional confectioners create works of art that are sometimes even a pity to eat. Housewives today also do not lag behind them in their desire to make a real holiday for their relatives.
Sweets decoration
And other pastries are very diverse. Since ancient times, they have been decorated with various creams, fruits, chocolate chips, nuts and coconut flakes. A more complex option is pouring jelly, coating with sugar fudge, chocolate icing (ganache). Foreign notions also came to us: mastic and icing. These are more complex baking options, including a variety of figurines and decorative elements. Icing decoration is considered the pinnacle of confectionery art. Some masters create masterpieces that are simply breathtaking. However, knowing some secrets, each hostess, with a certain skill and patience, will be able to amaze her guests.
Aising - what is it?
From English, this word is translated as "icing", the full name is "royal icing" (Royal Icing). Aising came to us from England, where confectioners at the court of monarchs decorated cakes in this way. This is a mass for drawing and creating edible decorations based on protein and sugar. Aising can be different in composition and consistency depending on the purpose: contour decor, airy decorations or modeling products.
- Plastic - used for modeling jewelry and creating lace. Helpers here will be a silicone mat for icing and molds). The mass is placed in the base, slightly dried, carefully removed and placed decoratively on the cake. Plastic icing is somewhat different from the classic one - in composition it is closer to mastic.
- Classic - a more liquid mass, which is applied directly to the confectionery product, or the decor is made on a stencil, and after hardening, the parts are folded into figures. It has a very fragile structure.
We will tell you how to make classic icing for gingerbread, cookies, cakes and other pastries.
Cooking process

The icing recipe is actually incredibly simple. You will need:
- powdered sugar - 150 g,
- raw egg white - 1 pc,
- lemon juice - 1 tsp
From this composition, a rather large amount of mass is obtained, which is enough to decorate a small cake or a kilogram of gingerbread. Any pastry looks much more appetizing with decor such as icing. How to cook it? Let's consider this process step by step.
- Separate the protein from the yolk. Make sure not a drop of the yolk gets into the bowl with the protein. If this happens, it is better to take another egg.
- Beat the protein with a whisk or mixer at low speed. No need to beat it into a lush foam - just mix until smooth.
- Add the sifted icing sugar in small portions, without ceasing to beat the mass.
- At the end, pour in the lemon juice, which will give the glaze a shine.
The perfect decoration for confectionery is ready. Nothing complicated, right?
Consistency
The amount of powdered sugar and whipping time may vary slightly depending on what your frosting is for. Aising is usually distinguished by density:
- The mass of the consistency of thick sour cream. It is obtained by using a slightly smaller amount of powder. Reminds us of our usual icing, which is used to decorate Easter cakes. Such icing is used for gingerbread and cookies, the top of which is poured in a uniform even layer. The readiness of the mass can be checked by running a knife over it. For some time, a trace of the cut remains, which gradually smoothes out, and the glaze again becomes homogeneous and perfectly even. If this does not happen, then you have beaten the mass too much, and such icing is no longer suitable for pouring - the top of the cookie will be ribbed and uneven. However, do not be upset, as you just prepared the next version of the glaze.
- Soft peaks. This icing is ideal for inscriptions and linear decor, which is applied directly to the confectionery. Readiness is checked very simply: remove the spoon or whisk from the protein mass - the icing should hang from it with soft peaks, slightly bending depending on the turn of the spoon.
- Solid peaks. This is a denser mass. When you take out the spoon, the icing reaches for it and remains on the surface in stable hard peaks. This icing is ideal for squeezing patterns from a pastry bag with different nozzles directly onto a cake or cookie. Also, this glaze is suitable for complex decorations, which are first squeezed onto a stencil, and after solidification, they are assembled into shapes.
little secrets

Does royal icing seem incredible and are you scared to even try it? Do not worry, use the classic recipe, pay attention to some of the nuances, and you will see that the preparation of icing will be easy. You will definitely succeed!
Colour
Glaze can be colored using food coloring. To do this, divide the mass into several parts and add the desired shade to each. Dyes come in different properties and degrees of intensity, so add color little by little, kneading the mass well. Follow the instructions printed on the package.
Powdered sugar
Cooking icing is possible only with powder - sugar will not work here, as it will not have time to dissolve and make the mass heavy. Moreover, it is advisable to sift the powdered sugar before this, saturating it with oxygen. If you have a good electric mill, you can grind your own powdered sugar.
Consistency
You can adjust the mass density. If you beat it too hard and it turned out to be too liquid, just add powdered sugar. If the icing is very thick, it will be difficult to squeeze out of the piping bag. In this case, add egg white to it.
Storage
If you did not use the entire mass at once, you can store it in a tightly closed container for 3-5 days. Keep in mind that frosting hardens quickly when exposed to air. You can use leftover icing for cookies. Its recipe can be anything, with the exception of wet, too porous baking.
Lemon acid
If desired, a glaze component such as lemon juice can be replaced with citric acid.
Creation of figurines

If you create voluminous figures by squeezing the mass onto a stencil, grease it with a little olive oil first to make it easier to separate the dried parts. Ordinary sunflower oil will not work here.
To create three-dimensional flowers and other figures, apply glaze to the stencil, and then lay it on any curved surface. For example, a flower can be placed in a cup with the leaves spread out; butterflies - on the fold of the book (when they dry, you get a fluttering effect).
Incredibly beautiful are large volumetric icing decorations: shoes, carriages, houses, towers and more. It seems that this is impossible to do, but in fact, everything is not so scary. These figures are made up of many individual parts, which are pre-applied to the stencil and dried, and then joined together with a cream.
Remember that the average drying time for the glaze is 12 hours, so it must be applied to the finished cake in advance. Icing for cookies also requires time to dry, otherwise the shortbreads will simply stick together. It is better to start the preparation of bulk or prefabricated figures, which are preliminarily applied to the stencil, a day in advance so that they have time to dry well and are easy to assemble. Make them with a margin, because the parts are very fragile and can break during the assembly process.
Common Mistakes
It seems that everything was done according to the recipe, but the icing did not work out? Here are the most common mistakes that can completely ruin the icing:
- Lemon juice must be added clearly according to the recipe - one teaspoon per protein from one egg and 150 grams of powder. If you put in too much egg white, the frosting will be too brittle.
- Carefully add powdered sugar depending on the desired consistency. Too liquid mass will spread over baking, too dense it will be difficult to squeeze out of the pastry bag. Adjust the density of the icing with protein and powder.
- The glaze needs air to dry. Do not put the decorated product or the drying parts of future figures in the refrigerator - the icing will become limp and flow.
- For the same reason, do not apply the mass on cream or wet biscuits. Ideal for dry biscuits and cakes, pre-coated with a base - mastic, marzipan, ganache.

Accessories
You can not do without auxiliary accessories if you are preparing icing. What it is? First of all - a pastry bag. With classic royal icing of any density, it is impossible to work with your hands, so you can’t do without a pastry bag or a syringe. Using various nozzles, you can create beautiful patterns, but more often the glaze is drawn in straight lines. The real helpers will be icing pencils, acting like a syringe, but with their help, especially thin lines are created.
Stencils, silicone mats and molds help create intricate patterned decorations that are difficult to make by hand. You can apply a pattern or its details on plain baking paper, after placing the drawn contours of the future product under it.
Decorations
Professional confectioners create real works of art from icing. No wonder it is called royal icing - confectionery decorated with it is truly worthy of kings. We will reveal some of the secrets of the masters, using which you can make beautiful icing decorations at home.
Biscuit

Frosting cookies and gingerbread cookies is a great start to your workout. Drawings can be both the simplest and complicated with a large number of small details. Icing for cookies, the recipe of which can be anything (short and ginger is good), can be of two types: soft peaks (for contours and patterns) and the consistency of thick sour cream (for pouring).
If you want to completely fill the surface of the cookie with icing, apply a contour around the edges, let it dry a little and fill the rest of the area with soft mass. The contour will hold it back, preventing it from combing. Use fine-lined tips or icing pencils to create fine lines and patterns.
Lace of kings
The thin lace that decorates cakes using icing looks incredibly beautiful. an edible glaze decoration of very fine workmanship. There are three options for creating it:
- Applying a plastic glaze to a silicone mat. After drying, this lace can be bent and laid as you like. It is quite convenient to use, but it cannot be prepared from classic glaze.
- Drawing a lace pattern directly onto the surface of the cake using a pastry bag with a fine tip or icing pencils.
- Drawing lace on a stencil. After drying, they are carefully transferred to baking.
Aising: master class

Airy lace covering the cake with a dome, or decoration with balloons looks very beautiful, and it seems that it is impossible to do it manually. However, having learned a couple of secrets, every housewife will be able to perform such a miracle. Of course, icing will help with this. How to cook it? Here is a step by step guide:
- Take an ordinary balloon. Wash it well and inflate it to the size you want the final decor to be.
- Prepare the frosting to the consistency of hard peaks. A softer mass will simply drain, and the pattern will not come out.
- Fill a piping bag fitted with a fine tip or an icing pencil.
- Squeeze out the icing with a thin branched thread over the ball, imitating lace, braiding the ball completely or half.
- Leave to dry for at least 12 hours. After that, pierce the ball and carefully pull out the remnants.
Just a magical decoration for the cake is ready!
Conclusion
From this article, you learned everything about icing: what it is and how to cook it. By adhering to simple rules, even at home you can create incomparable culinary masterpieces worthy of the highest praise.
Ingredients:
- 1 fresh egg white, carefully separated from the yolk;
- about 250 g of powdered sugar until the desired density is obtained; the powder must first be sifted to loosen it;
- about 0.5 tsp. lemon juice or dry citric acid on the tip of a knife, a little more if you want to get a sour taste of icing; add lemon juice towards the end of cooking, otherwise the finished products will turn out to be too fragile;
for greater plasticity, 1 teaspoon of a strong (saturated) glucose solution can be added to the mass.
Icing preparation technology:
The egg white is carefully separated from the yolk.
Even traces of yolk are unacceptable.
Beat the protein with a fork until a light foam forms. The task of this procedure is not to beat the protein, but only enough to destroy its structure before liquefaction.
Air bubbles in the finished icing mass are not needed.
Then we begin to gradually add powdered sugar to the protein in portions, each time thoroughly rubbing until smooth.
In the middle of cooking, add dry citric acid or almost at the very end - lemon juice.
By the end of cooking, you can add the desired food coloring.
Adding powdered sugar in portions, grind and knead until a homogeneous stable viscous plastic mass of the desired consistency is formed.
Our icing is ready for making jewelry!
NOTE. For jigging with a cornet, the mass is made more liquid, and for sculpting with hands, it is thicker, easily kneaded by fingers.
When sculpting with your hands, icing can be dusted with powdered sugar.
We put the desired stencil into the file (for example, a lace butterfly).
Lubricate the working surface of the substrate with the stencil with olive oil (sunflower is not good - see explanation below!)
We apply icing on a stencil.
We shift the stencil in the file to another position and draw the next double of the figure.
After filling the entire working surface of the substrate, carefully lay it aside to dry the products.
Usually this is room temperature and 1-2 days.
If you want to get not a flat, but a voluminous product (for example, a butterfly wing, a plant petal or a semicircular diadem), then put the substrate with the products to dry on a jar of the desired diameter lying on its side, or on the spread of a book. As a result, the product will acquire the shape you need.
The finished product becomes quite hard, but very brittle!
If you need to make additional details on your jewelry (for example, a second layer and a different color), then apply them and again put the products to dry.
DETAILS:
"Royal Icing" is a sugar-protein mass, which is used to make voluminous decorations of various confectionery products. Aising can be pure white, or it can be colored when food coloring is added to it.
Aising is a fairly thick plastic mass obtained by rubbing fresh egg white with sifted icing sugar with the addition of some acidifier for plasticity - lemon juice, dry citric acid, cream tartar, etc.
Sometimes, for greater plasticity, glucose syrup or a little glycerin is added to the mass, but the addition of glycerin can make the mass too sticky, which makes it difficult to peel it off from the substrate on which the figures are made for decoration. When applying icing directly to the surface of the decorated gingerbread, i.e. when subsequent detachment of the icing lace is not expected, the addition of glycerin can greatly facilitate the work.
To create icing jewelry, there are drawing masses with a different composition - for example, based on albumin (1 kg of albumin replaces 316 chicken egg proteins) and some others that are more convenient not at home, but in industrial conditions.
How to work with icing:
They draw future icing patterns on paper or print ready-made templates in the right scale.
As templates, it is also very convenient to use children's coloring pages.
Enclose the paper template under the plastic wrap or put it in a plastic "file" (thin transparent bag for documents).
It uses the property of polyethylene that it does not stick to anything, unlike tracing paper, parchment or wax paper, to which products can stick “tightly”, especially if the icing mass is too liquid.
For better subsequent sticking of icing products, a very thin layer of olive oil is applied to the plastic film (it does not dry out, i.e. does not polymerize).
Sunflower oil is highly undesirable, because. upon contact with air, it polymerizes by combining with oxygen and hardens (like oil paint), therefore it can additionally glue the product, especially during long-term drying of large parts.
ICE DRAWING.
Freshly prepared protein mass (icing) is placed in a cornet with a suitable nozzle or in a plastic bag with a cut corner (for example, in a document file).
The mass should be prepared every time in the amount needed right now for work.
Storage of the icing mass can cause undesirable changes in its plasticity, which will have to be corrected with additives or powdered sugar, or a few drops of water and thorough grinding again, which is very troublesome and time consuming.
The icing mass should not be too liquid - so that when it is applied it does not blur and lose its shape, and not too thick - so that it is squeezed out of the cornet without undue effort and does not tear when applied.
If you prepare a thicker icing mass, you can sculpt jewelry from it with your hands, like from plasticine. You should not sculpt too thick decorations, because. they take too long to dry.
The icing is squeezed onto the plastic film along the pattern laid under it.
If you have sufficient artistic skills, you can do without templates, freely drawing in mass according to your imagination.
When drawing, you can consistently use icing dyed with food coloring in different colors, which will allow you to get multi-colored decorations.
Icing can be applied directly to the surface of a finished (baked and cooled) sufficiently dry confectionery product (gingerbread, including glazed, shortbread), as well as to chocolate and other products that can be stored outside the refrigerator.
However, icing should never be applied to confectionery cream, biscuit and other wet surfaces, as well as other products for which storage is required only in the refrigerator.
On such products, icing decorations are installed immediately before serving.
A film with a pattern applied to it (or a decorated confectionery product) is left to dry at room temperature (but not higher than +40 ° C) for 1-2-3 days until the mass is completely dry.
Icing dries differently depending on the size of the part and the humidity in the room.
1-2 days of drying is enough for an ordinary small flower.
Large parts can dry up to 5-6 days.
To speed up drying, the products can be placed in a warm, dry place with a temperature not exceeding +40°C.
If you use ready-made icing, then the drying speed increases several times. Volumetric decorations from icing If you want to get a volumetric decoration, a film with a pattern applied to it is placed for drying on some curved surface - for example, on the side surface of a cylindrical pan, in the spread of an open book, etc.
Properly prepared icing mass (not too liquid) does not flow down on inclined surfaces.
If the deposited mass is watery, you should first let it dry a little to the desired thickening (but not to brittleness) in a horizontal position and only then place it on a curved surface.
To obtain openwork spherical products, the protein mass is applied to small inflated balloons lubricated with vegetable oil.
After the icing has dried, the balloons are pierced and the deflated shells are carefully removed from the resulting decorations.
Dried icing jewelry is carefully removed from the substrate.
It is better to remove products from the substrate at the edge of the table, starting from the corner of the substrate, which is gently pulled down, bending the substrate over the edge of the table edge.
Since icing products are very fragile, they must be prepared with a certain margin in quantity.
Aising and the Eiffel Tower Aising decorations can be glued together with egg white, loosened with powdered sugar, and then allowed to dry.
For the manufacture of large volumetric icing jewelry, separate parts are made for them according to the drawings, which, after complete drying, are glued into a single product.
Broken products are tasty on their own and can be successfully served with tea.
It often happens that icing decorations are eaten by family members, especially children, much before they dry out.
So a solid supply of prepared icing jewelry never hurts.
The resulting sweet edible lace is used to decorate various confectionery products.
Ice jewelry can be stored in boxes for a long time at room temperature, provided there is no high humidity.
Ice jewelry should not be stored in the refrigerator, because. after being in the cold, they liquefy.
Therefore, pre-prepared icing decorations are placed on cakes only immediately before serving.
The icing is applied with beautiful lace on a number of washed glass goblets.
Glasses are set on a gift cake and served to the newlyweds, who immediately drink champagne from them.
After using the glasses, the icing is washed off with water.
ICE BALLS
We take: icing, pounded to the consistency of peaks; small balloons; a little olive oil; threads for tying balls; confectionery syringe with nozzle number 1 or 2.
We prepare in advance a place where we will hang the balls for drying.
We inflate the balloons to the desired size and tie them with longer threads, so that later we can hang them for drying.
Lightly grease each ball with olive oil so that after drying, the icing will more easily come off the rubber surface. To do this, use a brush to drip oil on an inflated ball, and then rub it with your hands over the entire surface.
Lace balls from icing We take the ball by the tied tip and start from the pastry bag, through the nozzle (preferably the 1st number for greater grace) we apply a pattern with icing, while scrolling the ball.
Then we hang it to dry for 10-24 hours, and we take the next ball to work.
We take the dried icing ball carefully in the palm of our hand and gently poke something blunt (for example, a blunt brush handle) into the holes of the pattern to completely unstick the icing from the walls of the ball. To make the ball easier to separate from the icing, it is advisable not to inflate it too much.
Then we pierce the balloon. ATTENTION!
If you pierce an inflated balloon immediately, without separating its walls, then there is a very high probability that our icing balloon may break.
Carefully by the thread, we remove the shell of the bursting balloon from the product.
Our ball is ready to be used for decorations.
When drawing with icing, you can use cornets with multi-colored icing, fingers, various stacks, as well as brushes slightly moistened with water.
Large wedding cakes painted with icing look especially beautiful! But even small confectionery forms are very decorated with icing patterns.
You can also draw on white icing with a brush with food coloring, practically turning the confectionery into a real picture!
Aising for sculpting with hands is prepared thicker than for working with a cornet.
So that the icing does not stick to the hands during modeling, the hands are smeared with a thin layer of vegetable oil, and the icing is dusted with powdered sugar.
Anything can be sculpted from icing!
Recently, the so-called sugar flowers have gained particular popularity, which an inexperienced eye can easily confuse with real fresh flowers!
Aising is a terrible force for decorating absolutely any confectionery!
December 27, 2014
I have been looking for a recipe for a safe icing for covering gingerbread for Christmas for a very long time, but the presence of raw egg white in the composition has always confused me. It is categorically unacceptable in my recipes unless heat treatment is applied.
Today I tested the recipe for royal icing, which was introduced to us at MK by Maria, the founder of Gingerbread & Cookies. So here's this frosting that uses dried egg white, which is completely safe. You can buy it at any health food store that sells proteins and supplements for athletes. It is sold there in kg, but much cheaper than in pastry shops for 100 gr.
To apply the glaze, I recommend stocking up on a damp towel, pastry bags up to 25-30 cm, no more. By the way, it is not worth filling them up to the end. Clips for pastry bags (I took it in Ikea), so that the icing would not leak out and caps on the nozzle (foil will do).
INGREDIENTS:
25 gr. - dry egg white
150 g - water at room temperature
1 kg. powdered sugar
5 ml. lemon juice
COOKING:
Mix egg white and water. In the meantime, start grinding the powder, if your powder is ready, then I recommend sifting it through a sieve, otherwise there is a high risk of a grain of sugar getting into the nozzle hole (this can clog it). When the powder is completely sifted and the protein has dissolved, check for lumps that can be rubbed through a sieve.
Beat egg white and water with a mixer until stiff meringue-like peaks form (about 5 minutes). Add lemon juice as desired. Add powdered sugar (add a little at a time). If you have a weak mixer, I'm sure you can stir with a spatula by hand, but you need to knead well until smooth. Usually everyone says that the icing is not whipped, but mixed by hand, so that bubbles do not form when stirred, but we were taught this way at MK, that's why I write this way. I assure you there were no bubbles. Glaze is perfect after whipping. Beat the glaze for another 5 minutes. It will turn out very thick, white and dense. There will be a spoon in it (stiff pics-hard peaks).
In order to dilute the glaze, it is necessary to moisten it. You don't have to do this with everything. Take what you need in a cup, it is enough for 10-20 gingerbread cookies over the entire surface. Smooth the rest of the glaze immediately and cover with polyethylene. The polyethylene must be in contact with the glaze over the entire surface. So the air will not let it dry out and crystals will not form, which can later clog the nozzles.
So, how do you wet the frosting? It is to moisten, not to dilute with water, but to moisten. This method eliminates bubbles on the surface of the glaze. It is with water that these evil bubbles get in. Pour a couple of tablespoons of water into a cup with thick icing and immediately pour it all off, the icing is already moistened. Mix well, then moisten again, pouring a little water (literally a spoon or two) and draining immediately without residue. And so on until the desired consistency 3-5 times.
Checking the correct consistency is easy:
- for the soft pics contour, soft peaks, after dilution the icing is still thick, but the peak is no longer on the spoon, but is bent like a bird's beak. Let's check, dip the spoon into the icing, take it out, put it vertically, the peak falls like a bird's beak. If diluted too much with water, add a thick glaze (stiff pics-hard peaks) and knead to the desired consistency.
- to fill the main picture run sugar liquid glaze, dilute further as in the previous stage until the glaze begins to fall off the spoon like melted ice cream. Be careful here, don't overdo it. Checking out this frosting is easy. Drop a little glaze from a spoon onto a plate and divide it into two parts with a toothpick, exactly after 20 seconds the groove completely disappears and the divided droplet is restored. If it recovers much faster, the glaze is likely to be waterlogged and will leak. Add more thick and bring to the desired consistency, and if on the contrary, a toothpick mark remains, then add water drop by drop and stir well with a spoon.
MAIN 3 TYPES OF GLAZE CONSISTENCY:
Stiff pics are hard peaks, this is what we will get after adding powder. This glaze is used to create flowers and glue the gingerbread house.
Soft pics soft: peaks for contour.
- run sugar liquid glaze: for filling the main pattern.
Draw or print out patterns of stripes, a circle, a heart, approximate images of cookies on paper and practice on paper. The hand will immediately understand.
HIGHLIGHTS FOR PREPARING ROYAL ICE:
- Always use finely ground icing sugar and sift it through a fine sieve to remove the sugar residue. It settles at the bottom of the icing and will clog the nozzles in the future or may not allow the squirrel to rise.
- Cover the finished icing tightly with cling film or a wet towel, because the icing dries very quickly. Crystals that form after the glaze has dried can also get into the nozzles and interfere with decoration.
- Powdered protein glaze can be stored for up to 1 week at room temperature.
- If you are making a glaze based on raw proteins (which is basically not safe), then replace 25 grams of dry protein and 150 ml of water with 4 egg whites. The procedure for preparing a glaze based on raw proteins is the same. But icing on raw proteins is stored much less - only 2-3 days and strictly in the refrigerator.
- The amount of powdered sugar may vary depending on the climate or the weather. For example, if the weather is humid, then more powdered sugar needs to be added. If the climate or weather is dry, then you can put less powdered sugar (800-900g.). Add a little bit of powdered sugar. And remember that the icing should not seem dry. It should look like ice cream in a tray.
- I don't use raw egg based frosting because it's dangerous, only dry egg white based. (all experiments are on your conscience)
- Lemon is added to the glaze so that it is more elastic, for me, it is also more tasty.
- If you are making a frosting based on dry egg white, then always read the instructions. You may need to adjust the proportions of dried egg white and water. Diluted protein foams well.
GLAZE AND NOZZLES:
Nozzle 1mm, 2mm, suitable for the contour, I even managed to use 3mm, but this is on a large gingerbread. At 1 mm, see the consistency of the glaze yourself, you may need to slightly dilute the glaze. In general, I cut off a corner from the package to the desired hole and adjusted it myself, because. I don't have that many attachments yet.
Apply the icing on the gingerbread with a falling thread of icing. So it can be evenly applied and adjusted, its direction. If you scratch a gingerbread with a nozzle, then your trembling hands will let you down and a curved contour is provided. Touch the nozzle to the gingerbread, squeeze out a little icing and lift the nozzle from the gingerbread. Let the icing flow out over the gingerbread. Practice before applying to the gingerbread.
When applying the fill, use a nozzle with a hole of at least 2 mm, so it will spread over the surface faster, and by the way, it’s easy here.correct the edge directly with a nozzle, and the rule of falling glaze is useless to us here. We remember that all errors will merge into a flat surface. Some first draw the outline with glaze soft pics are soft, and then filled, I do not recommend doing this, the borders can be very noticeable. Filling is best done immediately with the desired consistency.
When you use more than one color, but several, be sure to put a foil cap on the tip of the nozzle or hide it in a damp towel so that it does not dry out and ruin your drawing. With the same towel, you can also wipe it from the ever-leaking glaze.
GLAZE AND COLORS:
You dilute the icing in small quantities, therefore it is better to add the dye at the tip of the toothpick, gradually adding if desired. Delicate flowers can be achieved by adding toothpicks at the very tip. I use american color helium dyes.