What to cook with expired yogurt? How to quickly prepare the perfect yogurt in a yogurt maker Temperature of yogurt fermentation.
Yogurt sourdough is intended for making live yogurt at home. Such yogurt contains a high amount of live and beneficial bacteria. Does not contain any harmful additives and sugar. Yogurt from sourdough can be consumed every day by adults and children.
Application possible
without fermentation
Can be used without fermentation
This starter can be taken in its pure form, as a probiotic, to restore intestinal microflora and normalize digestion.
Dilute the contents of the sachet in a small amount of boiled water at room temperature. Take 1 sachet 1-2 times a day, directly after meals for 1-3 weeks.
detailed information
VIVO yogurt is a starter for making homemade yogurt with your own hands.
Yogurt is perhaps one of the most famous fermented milk products, which has a very delicate and pleasant sour milk taste. Homemade yogurt is recommended for daily nutrition, as it has a number of useful and nutritious properties, especially if VIVO dry bacterial starter is used for preparation.
VIVO yoghurt starter culture does not just ferment milk into yogurt, but endows it with very useful features, because it contains a high amount of live probiotic bacteria. Such yogurt helps to normalize the intestinal microflora and improve digestion, strengthen immunity, restore strength and normalize weight. Regular use helps to compensate for the lack of protein, calcium, vitamins, amino acids, minerals and trace elements in the body.
Natural sourdough yogurt does not contain harmful additives such as sugar, preservatives, dyes, flavorings, etc. It is guaranteed fresh and safe, therefore it is ideal for consumption by people of all ages, children, athletes, pregnant and lactating women, the elderly and everyone who follows a healthy diet.
VIVO sourdough yoghurt is a great and natural alternative to store-bought yoghurts that the whole family will love.
Cooking
Homemade yogurt is very easy to make. For this preparation, you will need quite a bit of your personal time, VIVO bacterial starter, a saucepan or a jar, a blanket or a large towel.
The sourdough must be added to milk at a temperature of +37..+40 °C (slightly warmer than body temperature) and mix well. After that, the container with milk must be wrapped in a blanket or a large towel to ensure that the temperature is maintained and left to ferment for 6-8 hours. Once the yogurt is cooked, it should be put in the refrigerator to cool. But you can eat immediately after cooking.
And if you have a yogurt maker or slow cooker with a yogurt setting, the fermentation process will be even easier.
Instructions for cooking in a saucepanInstructions for cooking in a yogurt maker
Instructions for cooking in a slow cooker
Bacterial composition
Compound Lactose
Streptococcus thermophilus
Lactobacillus delbrueckii ssp. bulgaricus
lactobacillus acidophilus
Bifidobacterium lactis
The amount of bacteria in the sachet is enough to guarantee the fermentation of 3 liters of milk (at the end of the starter expiration date).
Storage conditions and shelf life
In the refrigerator (at a temperature of +2..+8)- 12 months.
Payment to the current account: You can pay for an order to our account using your online banking, through the cash desk of any bank in Russia, as well as through a payment terminal.
As a rule, these mechanisms make it possible to create a homogeneous mixture rich in beneficial microorganisms in the shortest possible time. By maintaining the set temperature inside the device, the dairy product is uniformly fermented. At the same time, beneficial strains of bacteria present in the sourdough begin to multiply intensively.
Remember, the optimal temperature for fermenting yogurt is 37 - 42°C, and its holding period is 6-8 hours. After reaching the set parameters, the yogurt maker automatically switches to the mode of maintaining the set characteristics.
Choice of base for yogurt
The quality of the fermented drink directly depends on the type of milk chosen. Therefore, before buying a base for yogurt, you should determine in advance the desired consistency of the final product.
Varieties of milk
Pasteurized or UHT. A distinctive feature of these products is the absence of the need for their pre-boiling.
The consistency of the prepared mixture will directly depend on the degree of fat content of the selected milk.
If a non-fat yoghurt base (2.5 - 3%) is used, the fermented product will have a liquid structure and a slightly sour taste. To obtain a dense mixture with a neutral taste, it is necessary to use milk, the fat content of which is at least 6%.
sterilized. As a rule, this product has a long shelf life and a specific taste. However, in the process of its use, it is worth considering the possibility of the presence of non-natural components in the composition of milk.
homemade. If, as a basis for yogurt, whole cow's milk is chosen, then it is important to remember that the product is presented for sale without special processing.
That is why such raw materials must be boiled before ripening. After that, it must be cooled to a temperature of 37-42°C.
Yogurt made from homemade milk often has a firm texture and a creamy taste.
Ghee. As a rule, this product is used to make ryazhenka, as well as yogurt with a “special” taste. At the same time, for fermentation of baked milk there is no need for its heat treatment.
In addition, homemade cream can act as the basis for yogurt.
Thanks to this component, yogurt acquires a dense texture and creamy taste. To prepare such a dessert, combine milk and cream in the desired proportion, after which they are intensively mixed.
Making yogurt in a yogurt maker
Compliance with the technological sequence of preparing yogurt allows you to get a high-quality healthy product with a dense structure and a neutral taste..
Algorithm for making yogurt
boil milk. This procedure allows you to destroy pathogenic microorganisms, if any.
The duration of boiling milk should be at least three minutes.
After that, the resulting mixture should be cooled to 40°C.
Remember, the high temperature of milk (more than 44 degrees) has a detrimental effect on the state of beneficial bacteria.
Remove foam from the surface of milk. This action should be performed using a pre-sterilized spoon.
Prepare starter. This concentrate is produced in the form of powders, tablets or suspensions. As a rule, it contains live or freeze-dried strains of microorganisms.
To prepare the mother starter, combine the bacteria concentrate with a small amount of milk. Due to this, in the thickness of the dairy product, there is a uniform distribution of clots of sourdough.
After that, the resulting mixture is poured into the rest of the milk and mixed. At the same time, the ratio of sourdough and base for yogurt must comply with the manufacturer's instructions.
Remember, to prepare a fresh portion of the product, you should use the fermented milk mixture of the previous fermentation.
The storage period of the mother sourdough is no more than two days.
Prepare the yogurt maker. Before preparing yogurt, you should pre-treat the device using special detergents. To do this, the container is washed under running water, and the containers are sterilized.
This procedure will minimize the risk of pathogenic bacteria getting into the fermented product.
Pouring milk into jars. At the same time, sterile containers should be filled with the mixture to the top, using a ladle. After that, open jars are placed in a yogurt maker and covered with a common body lid.
Set the yogurt maker timer.
The duration of preparation of yogurt depends, first of all, on the fat content of milk, as well as on the food preferences of a person. As a rule, the optimal ripening period for the product is 6-8 hours. At the same time, prolonged heating of yogurt often leads to the appearance of a sour taste.
The finished product should be removed from the yogurt maker and left, for 15 minutes, in the open air. Then the containers are covered with lids and placed in the refrigerator for 4 hours. Thanks to this, the yogurt will acquire additional density and the desired flavor.
Remember, a fermented milk product can be used as a starter culture no more than 5 times.
The reason for this is the degeneration of yogurt bacteria, as well as their gradual displacement by colonies of lactic acid microorganisms.
Using a yogurt maker allows you to get a high quality fermented milk product at home.
At the same time, various desserts, mousses and sauces can be prepared on the basis of yogurt. To do this, it is enough to add fruits, berries, syrups, nuts, dried fruits, jam, spices or herbs to the mixture.
Sugar should be added to yogurt immediately before eating. If the ingredient is poured into the mixture before fermentation, then beneficial microorganisms will process sucrose instead of lactose, as a result, yogurt may not work.
In addition, granulated sugar is poorly soluble in a chilled product. Therefore, it must first be dissolved in a small amount of water.
Before combining the starter culture with the yogurt base, it is necessary preheat milk product. As a rule, after placing the jars with the mixture in the yogurt maker, their temperature automatically rises to the set value.
The milk mixture with sourdough must be intensively mixed.
Fulfillment of this requirement will ensure uniform distribution of the bacterial concentrate throughout the volume of the product.
Ready curdled milk should refrigerate for at least three hours in order to complete the course of biochemical reactions in it.
To make high quality yoghurt, use fresh milk and sterile dishes. In this case, the whole product must first be boiled.
Fresh fruits, berries, nuts and dried fruits should only be added to yogurt. after final thickening.
At the same time, at the initial stage of fermentation, it is allowed to combine the milk mixture with canned fruits only.
As a rule, these ingredients do not affect the process of milk fermentation.
During the operation of the yogurt maker, you should eliminate the possibility of mechanical impact on the device R. To do this, it must be installed on a stable table away from the working area of the room.
After turning off the yogurt maker, gently lift the body cover of the device. At the same time, it is necessary to ensure that the formed drops of condensate do not fall into the yoghurt.
Almost every housewife can find a small supply of food, both in the refrigerator and in kitchen cabinets. This includes not only packages of cereals, sugar and tea, but also vegetables, convenience foods and, of course, dairy products. Who among us does not like to eat yogurt, and the desire may arise unexpectedly, so the hostesses have everything ready.
When everything is fresh, it's good. What to do if supplies start to go bad, such as yogurt. It is no longer possible to eat an expired one, but it’s a pity to throw it away, in this case it can be put into action, that is, to cook something. So that the stomach does not hurt from confinement, the ideal option is baking. Here are some recipes.
Expired yogurt pancakes
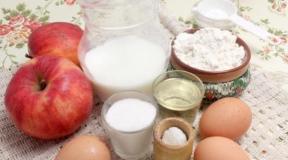
We combine two glasses of yogurt, two eggs, three tablespoons of sugar and a pinch of salt, beat in a blender, gradually add one and a half glasses of flour (you may need a little more). The dough will turn out thick, so pancakes may look more like the American version - pancakes. Pour a pinch of soda into the mixture for splendor and add three tablespoons of odorless vegetable oil.
We heat the pan with a spoonful of oil, pour a small amount of dough and fry on both sides, like ordinary pancakes. Serve with any topic, jam, honey or condensed milk.
Pancakes are made from the same dough, the dough is made a little thicker and laid out in hot (!) Oil in a pan with a spoon.
Chocolate muffin and expired yogurt
In a bowl, combine one and a half cups of yogurt, two cups of flour, three eggs, a glass of sugar, a spoonful of baking powder (if not, soda or a spoonful of lemon juice will do). We divide the finished dough into two parts, into one we introduce 2-3 tablespoons of cocoa (depending on the love of chocolate baking).
We cover the form with parchment, grease it with butter and spread it on a spoonful of one test, then another (you can use two to make it faster). When all the dough is used, send the form to the oven and bake for 30-40 minutes. Pour the finished cake with chocolate icing if you want or cut it lengthwise and soak it with cream or condensed milk / jam. We serve. Another name for this pie is Zebra.
Excellent cherry pie made from stale yogurt
In a deep bowl, we combine the components for a dough - a glass of expired yogurt, a glass of jam (any) in this case, cherry and a spoonful of soda. Let stand for 10-14 minutes, then add two eggs beaten with a fork, sugar to your taste (note that the jam is quite sweet), a glass of chopped nuts (again, optional) and flour. We add it so much that the dough resembles thick sour cream, mix everything thoroughly.
We cover the form with parchment, be sure to grease it with butter or margarine and pour out the dough. It takes about an hour, maybe a little more. Readiness is best checked with a wooden skewer or a toothpick.
When the cake has cooled down a bit, it can be poured with whipped cream or sour cream.
Expired yogurt - the basis of a delicious biscuit
We combine a glass of cocoa, half a spoonful of baking powder, 300 grams of flour, a whisper of salt and a spoonful of soda. Add sugar to them in the amount of a glass. Separately, with a mixer, bring a glass of yogurt, three eggs and half a glass of vegetable oil to homogeneity. Combine both mixtures, mix well. Pour the dough onto greased parchment in a form or on a sheet, send to the oven until completely baked. Check for readiness with a toothpick.
To make the biscuit even tastier, we prepare the cream. We boil one and a half glasses of milk (fresh) with 120 grams of sugar and a pinch of vanillin (you can even put a vanilla stick, the smell will be delicious). Beat another glass of fresh milk again with 4 tablespoons of flour and one egg. Carefully pour the finished mixture into boiling milk (it is on minimum heat) and boil until the mass thickens.
We cut off the finished and slightly cooled biscuit along the edges (so that there is an even shape of the cake), cut it along and grease it well with cream, cover the halves, grease the top. Biscuit trimmings can be chopped with a knife or hands and put on top of the cake, pouring cream again. We coat the sides and let it soak for 60 minutes. If you like fruits or berries, you can put them between the cakes, it will turn out even tastier and more original.
Yogurt is a very useful product in every sense, because it helps digestion, is non-caloric, and in case of gastritis it is also a healing food. And, of course, it is very tasty - even men, having snorted in words, after a while can no longer do without a jar of homemade yogurt in the morning.
It probably goes without saying that homemade yogurt contains much less preservatives and dyes that are identical to natural, ingredients per 1 jar will cost much less than store-bought yogurt, and, finally, homemade yogurt is simply much tastier.
You can also highlight other undoubted advantages:
1. Homemade yogurt will go great with thawed berries or fresh fruit, while many store-bought yogurt - because they are too sour or taste - natural fruit is not always well suited.
2. You can add any component you want to homemade yogurt - from spices to cocoa, from coconut to syrup, and create the most original taste for yourself. Experiment.
3. You can make yogurt of any density.
4. You can make yogurt with any base - someone likes it from cream, someone from baked milk, someone from Mozhaisk, etc.
5. Buying cow's milk and country sourdough at the market (or taking it from your own farm), you can get perfectly natural yogurt.
6. The opportunity to try fresh still warm yogurt - its taste cannot be compared with anything.
Despite the fact that, it would seem, the cooking process "boil milk (cream) - add sourdough - pour into jars - put in a yogurt maker" does not involve any difficulties, it contains a lot of nuances, thanks to which yogurt can turn out different consistency, it may not turn out at all, or it may take longer to cook than you would like.
Let's start with the stage container preparation- it must be properly washed, dried, and kept closed until the new cooking process, otherwise there is a chance to achieve completely undesirable homemade kefir instead of the desired yogurt. Kefir can also be obtained in several other cases: if ordinary pasteurized (or rural market natural) milk is not boiled; if you overdo the yogurt; if the leaven has deteriorated; and, finally, if the yogurt maker broke down, and during the time it was turned on, it did not maintain the optimal temperature.
Further selection and preparation of the base. That is, according to your taste: milk, various types of cream. Only full-fat milk is suitable for making yogurt, that is, above three percent - otherwise it tastes a little like standard yogurt, just a kind of fermented milk product. Keep in mind that each brand of milk also has its own flavor, which will undoubtedly affect the taste of yogurt.
Baked milk does not need to be boiled before making yogurt, and this is its undoubted plus. It gives a pleasant original flavor.
Milk Sterilized also, accordingly, does not need to be boiled, but some do not like its taste and degree of usefulness.
Mozhaisk milk needs to be boiled, but it also has its own aftertaste for an amateur.
From 3% pasteurized milk you will get a yogurt very similar to Danone's Activia - just as sour, slimy and just as liquid.
From 5-6%, you will get a much thicker yogurt, almost without sourness.
From 10-11% of cream in classical preparation, a substance will turn out that is already more like a cream, with a very delicate, velvety, but dense texture.
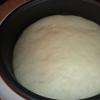
So, if you have cream or pasteurized milk, you need to boil it. When the hat begins to rise - enough, remove from heat, and set to cool. Not completely, but up to about 40-50 degrees. Other bases that do not need to be boiled can be heated to a warm state, then the cooking time in the yogurt maker will be reduced by 2-3 hours!
.jpg)


Then comes selection and addition of sourdough. Someone adds a spoonful to each jar, but it is more convenient to stir the entire volume of the sourdough in a common saucepan. Add more sourdough - you will need to reduce the cooking time, and the yogurt will also turn out to be somewhat thicker (and in the case of Narine, also more viscous).
Drinking yoghurts are absolutely not suitable for cooking. Bio-yogurts (yogurts with beneficial bacteria) are required. Or various types of artificial sourdough, which can be bought at the pharmacy / on the manufacturer's websites. Or village sourdough.
There are many types of sourdough. And the taste and consistency of the finished product also directly depends on it. Any store-bought natural yoghurt without additives will end up with a taste very similar to itself, regardless of the base. For example, Activia natural from Danone is hardly suitable for making cream yogurt, as their soft, fatty, creamy taste is completely incompatible with the pronounced sourness of Activia.

Narine in terms of consistency, it creates excessive ductility and, as it were, viscous stickiness, and not everyone likes the resulting empty, inexpressive taste of yogurt. Also, she and her analogues are artificial (according to experts) and expensive sourdough options, which are far from suitable for many. Plus, Narine powder must first be diluted and prepared separately for 12 hours to obtain a starter.

Therefore, I recommend, for example, as the best option, Bioyogurt Biomax Classic 5 vitamins as having a completely neutral, lively, mild taste. After preparing the first batch, just leave 1 of the jars of homemade yogurt as a future starter.

So, the proportion is about 70 ml of finished sourdough per liter of milk (this is 1 full teaspoon per cup, if your yogurt maker is equipped with portioned glasses). More sourdough - somewhat thicker yogurt and less cooking time. It is necessary to stir properly so that the finished yogurt is homogeneous.

Spilling the foundation in jars after heating / boiling and adding the starter, it is necessary to filter it through a sieve so that the foam and other large particles do not get into the jars.
Together with the sourdough, you can use a number of additives that, in the process, will not allow the yogurt to turn sour and turn it into kefir, for example, regular sugar, cocoa, and so on. With fruits and berries, it is somewhat more complicated - they are also added to jars, then pouring the base with sourdough, but if you are not lucky, you will end up with a mixture of cottage cheese and kefir.
The density of the finished yogurt can be adjusted in three ways:
- density (fat content) of the base;
- the amount of sourdough (more sourdough - also less cooking time);
- the time you leave the yogurt in the yogurt maker. Here you need to remember that if you overdo it, you get a sour-milk lumpy product, partly reminiscent of kefir, partly cottage cheese!


Finally, put necessarily open jars in a yogurt maker / pour the finished mass into a common glass of a yogurt maker. Open - since oxygen is involved in the process of creating a product. Remember that the optimal temperature for making yogurt is around 40 degrees. Usually it is her that the device supports all the time until it is turned off.


So:
- If you use the optimal scheme, and have a heated base with a normal amount of starter, then the cooking time will be 5-6 hours.
- If the starter base was cold, then the time is increased to 8 hours.
- If there is not enough sourdough, then the cooking time can increase to 10 or more hours.
It is important to catch the moment when the yogurt is already beginning to thicken. It takes an average of 1.5-2 last hours out of 6 (if you cooked according to our scheme). Here you can adjust the density of the final product: keep the whole two hours or turn off the yogurt maker shortly after (or at any time during the last two hours) when the contents of the jars become thicker. Do not forget that after the refrigerator, the yogurt will become denser again by 1.5.
Later, having worked out your own scheme, and choosing the consistency of the finished product you need, you can simply track the time and no longer approach the yogurt maker from the moment you turn it on until the end of the process.
.jpg)
When ready, you can use the yogurt immediately or let it cool and refrigerate to stop the process supported by the yogurt maker. Before use, you can add any ingredient to taste, such as pieces of fruit, jam, nuts, etc.

Bon appetit!