The top of the bread becomes soft in the bread maker. Common problems with bread makers and their solutions
Sometimes it happens, especially for beginners, that the bread in the bread maker does not work or has ceased to work. In this article you will find answers to how to solve the main problems that may arise when baking bread in bread makers. We hope that they will help to cope with your problem if it has arisen, or to prevent mistakes in the future.
The bread has risen too much:
- You are using excessive amounts of yeast or water. Check the recipe and measure correct amount using a measuring cup for yeast and liquids. Make sure that excess water is not coming from other ingredients.
- You don't have enough flour. Weigh the flour gently with a scale.
- It's too warm in the kitchen. To keep it cooler, ventilate the kitchen.

The bread is pale and sticky:
- You are not using enough yeast. Add more yeast, or rather weigh it before laying.
- Check the expiration date of the yeast. After opening the yeast, store it in the refrigerator.
- There was a power outage, or the home breadmaker stopped while baking the bread. The home breadmaker turns off if it is stopped for more than 10 minutes. You need to remove the bread from the mold and start the cycle again with new ingredients.
- Check the recipe and measure the correct amount of flour with a scale or required amount liquid with a measuring cup.
Bread falls off during baking:
- The dough could stand.
- Too little or no salt.
- Lots of liquid.
- Cheese is used that prevents the dough from rising.
There is flour on the walls of the baked bread:
- You are using too much flour or you are running low on liquid. Check the recipe and measure out the correct amount of flour with a scale or the required amount of liquid with a liquid measuring cup.
The ingredients did not mix well when baking the bread:
- You added late additional ingredients, add them at the beginning of the batch.
- You did not insert the kneading spatula (this also happens) into the bread pan. Make sure the spatula is in the baking dish before loading the ingredients.
- The power supply has been cut off, or home bread maker was stopped. You will probably need to start baking the bread again, but this can be negative if kneading has already started.
The bread is not baked:
- There was a batter.
- Excessive amount of dough.
- Excess oil or other fats.
- Low quality flour.
- The "Dough" program has been selected. The Dough program does not include the baking process.
- A power failure has occurred or the bread maker has been stopped. You can try to bake the dough in your oven if it has risen and spread.
- There was not enough water and the motor protection was activated. This happens only when the device is overloaded, the engine had to work at its maximum power. Next time, check the recipe and measure out the correct amount of ingredients.
- The baking dish kneading shaft does not rotate when the paddle is inserted. The attachment shaft assembly needs to be replaced. Contact an authorized service center.
An air bubble appears under the crust of the bread:
- The dough is not well kneaded or the dough is too hard. Little liquid. Pay attention to the amount of liquid when adding ingredients.
Too nostril bread:
- The dough is too moist. A lot of liquid ingredients or little flour was added.
- When adding the ingredients, they forgot to put in the salt.
Burnt crust:
- A lot of sugar. Try to reduce the amount of sugar.
- Set the mode to "Light crust".
The edges of the bread have dropped and the bottom is wet:
- A power failure has occurred. If the dough has risen and spread, you can bake it in your oven.
The bread is sticky and the chunks are uneven:
- The bread was too hot when you cut it. Allow the bread to cool on a wire rack before slicing to allow all the steam to escape.
You smell the burnt bread when baking. Smoke comes out of the steam outlet:
- Perhaps the ingredients woke up on a heating element... Sometimes a small amount can get onto the heating element during mixing. Just wipe off the items after baking when the bread machine is completely cool.

The kneading spatula is in the bread when it is removed from the mold:
- The dough is too thick. Let the bread cool, then remove the spatula.
- A crust formed under the scapula. Wash the spatula and its shaft after each use.
The crust wrinkles and becomes soft when cooled:
- The water vapor remaining in the bread after baking can soften the crust slightly. To reduce the amount of water vapor, reduce the amount of water by 10-20 ml or use half the amount of sugar.
Perfect Bread in a Bread Maker July 20th, 2013
I’ve already told you a little about my new bread maker. Now, the more I bake, the more I am surprised. Not to the bread maker ... but to yourself. And why was I so stubborn before? I don’t need it - and that's it! Now I just don't understand how to live without her.
It's great when there is a good bakery just a stone's throw away and you are sure that it is really good. And when she's not there? In such a situation, a bread maker simply has to be! Remember the proverb? Hood lunch, if there is no bread. I can limit the use of bread, but it is somehow difficult to imagine my life without it. I am very sensitive to bread, and no matter how varied the food on my table is, no matter what strict dietary rules I adhere to, good bread should always be!
It all started with bread, which Julia showed in her magazine. He impressed me so much that after testing the recipes from the bread maker book and Kitaeva's book, I baked it without hesitation. He was just super! Moreover, she baked it both with fresh and dry yeast. My bread maker bakes 2 sizes of bread - 750 g and 1000 g. I always bake a smaller volume. I have never tried the big one yet. So: this bread has risen by 750 g so that there would be simply nowhere for a large loaf to rise - that is, to the maximum! The crumb is airy and porous! The crust is crispy. After him, no other bread even wanted to try baking. So I started experimenting with it and came up with my perfect recipe.
The first thing that interested me: why does bread rise so unrealistically steeply? I began to ask the owners of other bread makers about the modes, and it turned out that the Philips HD 9046 bread maker, instead of 2 strokes and 2 rises of dough, does 3. The whole process seems to take the same amount of time - 4 hours, baking about 1 hour (maybe a little less , to be honest, I don't remember already). But this repeated kneading, apparently, allows the dough to fit better and faster. The temperature may be slightly higher when kneading and raising the dough. This also affects. Hence, apparently, the problems with the bread from some mixtures: they are "over-sorted", and during baking they lose the top.
I began to observe the baking process. After the second workout and the second lift, his shape is perfect! It seems: well, why the third time? After the third kneading of the dough, the "smoothness" is broken, the surface becomes loose, but an excellent rise appears, which, surprisingly, does not fall off.
I wanted to understand how the amount of ingredients affects the rise. To find out, I started experimenting. Once I increased the amount of flour by 10 g - the rise is almost the same, maybe a little less. Another time, I reduced the amount of yeast and slightly reduced the liquid component - the rise also changed slightly. In general, I really liked that in the end you can get by with less yeast.
There was another experience as well. Your Philips bread maker has only 3 baking modes white bread: regular (4 hours), quick (2.50) and express baked goods (about an hour). I decided that since the bread rises so well, the fast regime will probably be enough for him. and was not mistaken. The result is a perfect bread. Both breads are undeniably good, but ... the one that was baked in the standard mode, I liked more, despite the ugly (looseness) top - very airy, which is why it tastes even better.
Well, now the recipe itself. I tried to adjust the composition in such a way that those who do not have scales could use only those containers that are attached to the bread maker (a measuring cup and a measuring double-sided spoon - a table and a teaspoon). Although it is much more convenient for me to use weights.
2 tbsp vegetable oil (20 g)
1.5 tsp dry instant yeast (in my HP I tried to limit myself to one with the top, it turns out no worse, but for other HP I still recommend the standard amount)
2 tbsp granulated sugar
1 tsp salt
2 full + 1/3 cups wheat flour(360 g)
1/3 cup whole grain flour(50 g)
5 tbsp wheat bran (30 g)
2 tbsp Siberian fiber(10 g)
5 tbsp flaxseed (30 g, I like to mix with white)
a handful of pumpkin seeds (optional)
260 g water
Load the ingredients in accordance with the instructions: wet ingredients, water and vegetable oil are first put in the Philips CP, then dry ingredients, and so that the yeast does NOT come into contact with water and salt (I put salt on top of the flour in one direction, sugar in the other and yeast). Last but not least add flaxseeds, washed hot water... Switch on the white bread baking mode and enjoy your free time!
Well, now the details are in the details and photos.
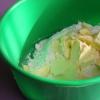
It is more convenient for me to sift the flour onto a flexible cutting sheet (I sift it with the Kenwood kitchen machine) and then pour it into the bucket of a bread machine. I always spill everything from the bowls.
At the beginning of kneading, the dough may seem a little dry, but as soon as the machine kneads it to the end and it warms up, it will become noticeably wetter.
This is what fiber looks like. I store flax seeds in containers - it's very convenient)
Bread in the 2nd stage of the rise of the main program (flat top) and after the third stirring, the last rise before baking. After the second, you can bake videale. You can try to set up your individual mode with two lifts-kneading.
More bread during the third ascent. And already just before baking.
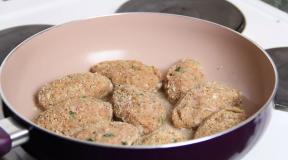
This is how the finished 750-gram bread looks like, baked in the standard four-hour (1st) mode. Those. a kilogram would simply bump into the lid. I have good yeast from a painful package, bought sometime in bread shop at VDNKh.
Bread in fast (2nd) mode. Smooth top and slightly lower. The first cutaway photo is he.
Use not active dry yeast, but instant yeast (they are instant or instant).
Fresh I took 8 g, next time I will try even less, 6. Fresh yeast you need to dilute in part of the water and add to the rest of the water with oil in a bucket at the beginning.
And one more piece of advice: let the bread stand for a little while in the heating mode, then the bottom of the crust will become slightly softer and when removing the bread from the bucket, the knives will remain in place. If, nevertheless, it remains in the bread (this usually happens when the crust is dense), there is a special device to extract it - this is such a hook.
The last loaf, by the way, was made in the basic mode with 1 measuring teaspoon. yeast (with top, the scales ranged between 2-3 grams).
The toasts with this bread are incredibly tasty! On the first day we always eat bread like this, and from the second day we start toast.
There are the following main reasons:
1. Increased increase in the volume of the dough piece, high yeast content.
2. Increased moisture content in the dough piece, non-compliance with the flour / liquid balance.
3. Wrong choice of baking program, time of the first or second proofing, depending on the type of dough. This factor is called "the dough has stopped."
4. Elevated temperature inside the x / oven during the proofing of the dough.
Let's take a closer look at these reasons.
1. Increased increase in the volume of the dough piece.
The following factors contribute to an increased increase in the dough piece:
1. Basic: Too much yeast is added when kneading the dough, more than the standard for setting.
2. When kneading the dough, large quantity sugar than stipulated by the bookmarking standards and necessary for the dough to rise. Excess sugar greatly affects the action of the yeast.
3. When kneading the dough, salt is not included, or is included in a smaller amount. The salt controls the rise of the dough and prevents it from rising too high.
4. The dough was kneaded too hot weather, or at high temperature on the kitchen. Here, the room temperature is superimposed on the heating temperature of the bread maker during kneading and proofing of the dough. When the room temperature is over 27 * C, the products are placed in a bucket from the refrigerator.
5. When kneading the dough in the bread maker, food was placed too hot in advance (water, milk, butter, hot mashed potatoes and others), which was superimposed on the heating temperature of the bread machine during the kneading and proofing of the dough. The overall temperature was higher than that for proofing.
6. Excessive proofing time of the dough before baking than necessary for of this recipe test. The bread maker cannot independently visually control the time and degree of readiness of the second proofing of the dough piece before baking.
2. Increased moisture content in the dough piece.
The following factors contribute to the increased moisture content in the dough piece:
1. Basic: Too much liquid was added when kneading the dough. Liquid is a combination of water, juice, eggs, etc. liquid products, such as cottage cheese, mashed potatoes, and others.
2. When kneading, too much a large number of cheese, which melted and added excess liquid when the bread machine was heated.
3. Too much humidity and warm weather, as well as high temperatures in the kitchen and outside. From rising temperatures environment and heating the bread machine when kneading the dough, makes the dough thinner and softer than required by the rules of the bun.
4. When kneading, grains, bran, dried fruits, raisins, soaked in liquid the day before, were added to the dough, which gave an additional amount of moisture.
5. During kneading, more fruits and vegetables, chopped or grated, were added to the dough than was required to form a bun, and these products were added at the very beginning of the dough kneading, and were ground to a fine state with a kneading knife.
6. When kneading the dough, too much food was added and the bread maker did not handle the dough. There was not enough space for the dough piece, the kneading blade could not cope with kneading a large number of products.
7. During kneading, too much oil was added to the dough, butter in pieces, fatty foods that are also liquid. From heating the bread maker when kneading solid fats become soft and give excess moisture to the dough.
8. When kneading the dough, low-quality flour, ground from sprouted or frosty grain, was laid. Therefore, flour and bread contain a lot of water-soluble substances, a large amount of starch, and due to hydrolysis, there is a lot of water in bread. When kneading the dough, flour of high moisture content was used.
3. Incorrect selection of the baking program, extended proofing time of the dough.
If in the first two cases, the dough smells of yeast and the crumb is very wet or wet, then in this case the crumb is baked, the bread is porous and tasty, and the dome of the bread has fallen down, and sometimes a dough rises on the bucket along the edges. And there may be a faint taste and / or sourdough smell.
The reason is the wrong selection of the bread baking program or the dough has stood still during the proofing.
1. Incorrect selection of the baking program. For example, wheat dough should rise for a certain time, sufficient to double the dough, but if the dough is in the x / oven much long time, has already risen, but continues to rise - at some stage it drops sharply, that is, it stalled and lost its strength, overextended.
The same cases can occur with wheat-rye and rye bread, when the time allotted for proofing by the bread-making program does not correspond to the actual time, the requirements of the dough itself.
2. Temperature of the environment, premises. When proving the dough, pay attention to the conditions in which the dough is proving. Optimum temperature the environment should be at the level of 26-28 * C. At the same time, you need to pay attention to the temperature inside the dough, if it rises, then the dough will grow faster and at some point may settle and lose its shape. it important point: correspondence of the proofing time of the dough (until doubled) and the proofing temperature (26-28 * С).
4. The increased temperature inside the x / oven during the proofing of the dough.
Many bread makers sin with this quality, the temperature inside the bucket during the proofing of the dough reaches 35-40 * C - which is very undesirable for the dough. This speeds up the process of raising the dough, and very high, sometimes to the very top of the bucket, but has a bad effect on the quality of the bread when baking or already ready.
It is optimal that the temperature of the dough proofing passes at T * 25-28 and no more!
At the same time, it is optimal for the dough piece to increase by about 2-2.5 times - and no more !!!
When the fermentation temperature rises above 25 degrees, the properties of the dough deteriorate significantly. Speaking simple language, the dough liquefies, retains its shape worse, gluten is noticeably weakened. And even worse, fermentation in a bread maker affects the dough, where fermentation is accompanied by heating to 40 degrees.
If the dough liquefies, then it is difficult for it to keep its shape, and sometimes it settles during proofing or during baking.
At first glance it seems a simple matter... I added all the products to the bucket, pressed the "Start" button and after 3 hours the baked goods are ready. But the housewives have a question: why does not bread in a bread maker work (unbaked bread comes out), what mistakes can be and how to fix them. I will understand using the example of one comment that was left on my blog.
Frequent question about baking bread in a bread maker
Good evening Olga! Today I baked bread for the first time. The daughter gave a Redmond bread maker. Programs for 500, 750 and 1000 gr. I took the recipe for 560 grams of flour, chose the mode for the weight of 1000. The bread did not work out. At first, the dough turned out to be very liquid, I had to throw off the program, add flour and start over. When kneading, the dough rose in a cone and stuck its top to the wall of the bucket, so I poured flour onto the walls of the container several times. The bread did not rise and turned out to be heavy. What did you do wrong?
Why does the bread not rise in the bread maker, how to bake the perfect bread, what are the typical problems with bread makers. I will answer these questions later in the article. I will describe all the reasons that I have encountered over the course of 8 years. Here I will share exclusively my experience of trial and error, as well as proven ways to solve them.
Ingredients for regular white bread in a bread maker
- wheat flour
- dry yeast
- vegetable oil
- sugar
Only 6 ingredients are needed to bake regular white bread in a bread machine. Knowing all the subtleties described below, you will definitely succeed. Energy value such bread - 233 Kcal per 100 g.
Nutritional value per 100 g:
- Calories: 233
- Proteins: 6
- Fats 3
- Carbohydrates: 47
How to choose yeast for baking bread in a bread maker
I use dry yeast. I buy them in advance and store them along with the spices. Be sure to check the expiration date in the store, looking for the pack as fresh as possible. She is at the very end of the row with yeast, in the back.
If the pack has already been opened, then I tightly wrap the leftovers in the place of the incision of the pack and fix it with a regular paper clip, store it in the refrigerator until next bake(but not more than 5 days). Over time, an open pack of dry yeast loses its activity and the bread may not rise.

I do not recommend buying a large pack of 100 g, despite the fact that it is much cheaper this way. I take packs of 7 g or 12 g. They are enough for 2-3 loaves. Yeast is not a price-forming component in this recipe, and baking bread directly depends on its activity. I buy a large pack of dry yeast only when I bake it.
Baking experience with regular yeast, alas, no, perhaps I will soon check their effect. Hell on rye sourdough white and Rye bread... It turns out tasty, more useful, but much longer in time. I will share this experience in subsequent recipes.
What liquid to use to form bread
There are a few combinations I've experimented with here:
- water in full;
- water + milk in equal parts;
- in pure milk;
- milk + 1 egg;
- water + 1 egg;
- kefir + water;
- water + sour cream.
I must say right away that when yogurt and sour cream were added to the dough, the taste of the finished bread was a little sour. Therefore, I settled on the first 5 options. Most often it is just water. If you want a whiter crumb or pastry that looks like a pastry, then add water with milk and no more than 1 egg.
It is very easy to calculate by weight. For example, the recipe indicates 350 g of liquid, then the weight of 1 egg, milk and water in total should be exactly 350 g. We weigh everything in 1 container. It is better to pre-beat the egg with a fork, then with the rest of the liquid. And only then add this homogeneous mixture to the bucket for the bread maker.
Optimum fluid temperature
The baking liquid should not be cold. Take either room temperature, or slightly warm. I often heat 350 ml of water (for 1 loaf) in the microwave at 600 W for 1-1.5 minutes.
If the water is subcooled - not as bad as if you add too hot. In this case, the yeast will react earlier than expected and the bread will not be baked. Take either room temperature or slightly warm. Perhaps plain water dilute with a little boiling water.
If you use a mixture with an egg as a liquid, then it is definitely not worth heating it in the microwave. If it is from the refrigerator, then heat the liquid a little more so that the total temperature of the egg, milk and water is slightly above room temperature.

What kind of flour to take for baking bread
I bake from ordinary wheat flour top grade... Sometimes I mix it with whole grain, or add 1 grade. To add fiber to the bread, I use up to 50g bran per loaf. Sometimes I bake rye bread. Experimenting with rice corn flour, oatmeal, buckwheat and bread mixtures. For every day I chose a proven recipe for white bread in a bread machine.
The main thing in baking bread in a bread maker is to take flour with minimal moisture and be sure to sift it. This parameter is difficult to check at home, so the recipe has to be adjusted during the baking process. There is nothing complicated here:
- If the bun in the bucket is mixed tightly, which means flour with the lowest moisture - add 1 teaspoon of water to the optimal state of the dough. We wait about a minute and look at the dough. If necessary, add more liquid, but a little bit. The mixer takes time to smooth the dough.
- Conversely, if the dough constantly sticks to the sides of the bucket, then add 1 tsp. wait 1-2 minutes for flour. Let's look at the gingerbread man and its consistency again. From experience I will say, first I add 1 tsp. flour, and after 30 seconds - 1 tsp. vegetable oil to the place where the dough sticks to the bucket. This saves the dough from excess flour. If you overdo it with flour, then the dough will be tight and will not be able to rise and bake fully.

How to properly add flour to dough
Flour must be sifted - this is a pledge lush bread in a bread maker. By enriching flour with oxygen, you increase your chances of success several times. You can sift with anything that is in the house. I used several options for kitchen utensils:
- Tea strainer. Better with a coarse mesh and a handle.
- Regular round sieve. My grandmother still had such a device. It requires a large area, or a bowl with a large diameter.
- Corolla. Use a regular hand whisk to fluff the required amount of bread flour for 1-2 minutes. Visually, you will see how the structure of the flour changes and it is enriched with oxygen.
- Mechanical sieve mug. Sieve cup. It can be metal or plastic. Now I use a Tescoma mechanical sieve with two lids for flour. I tried many and settled on this option, I'm very happy with the build and performance. And the presence of two lids allows you to leave some of the flour inside until the next time, or for cooking other dishes.

Kitchen tools for baking bread
- Electronic balance. I do not use the glass that comes with the flour weighing kit. Checked with scales, does not always measure the exact amount of flour. From here there are gaps with baking and bread does not work. The weight of all ingredients must be accurate.
- Measuring spoon. It comes in the kit and allows you to measure salt, sugar and yeast without a slide, only the right amount... Don't neglect them. It is better not to use a regular teaspoon, especially for yeast. They need measurement accuracy. Otherwise, the bread will not rise or there will be an unpleasant yeast smell, instead of aromatic, and the top of the pastry will fall off.

As you may have guessed, buying a bread maker does not replace human intervention in the process. For tasty and lush baked goods you need a hostess equipped with the subtleties and secrets of successful baking. If you follow all the tips and a little practice, you will succeed. Now it takes me no more than 10-15 minutes to prepare the dough to add to the bucket. At the same time, I have time to weigh everything, heat it up and follow the formation of the kolobok in the bucket at the 1st stage of mixing.
Bread does not rise in a bread maker: reasons
Once again, I will repeat the main points of baking bread for each ingredient:
- Flour. Be sure to sift and weigh on an electronic scale.
- Salt, sugar, dry yeast. We measure with a measuring spoon from the complete set of the bread machine.
- Liquid (water, milk). Weigh it on a scale and heat it to a temperature slightly above room temperature.
Write any questions, if any. If necessary, I will supplement the article with new secrets of baking. Well, the main advice: start making bread in good mood, with bright and positive thoughts. This is how each housewife brings and enhances well-being in her home. Delicious and lush bread for you, dear readers of the blog "".
Why didn’t rise homebaked bread when baking in a bread maker? Why does bread rise poorly or does not rise at all when baked in a bread maker or oven? There are several main reasons why bread does not rise when baked. Indeed, in fact, the finished bread should be fluffy, but sometimes the result is a heavy lump of raw dough.
And this, unfortunately, also happens sometimes. It is not always immediately clear why this happened, because the bread maker automatically kneads the dough and bakes bread itself, practically without human participation in this process. In order not to translate products in vain, you need to find out the reason why the bread is not baked as it should, and only then eliminate this reason so that there is always fresh, aromatic bread in your home.
Why does not the bread rise in the bread maker
- Too much salt above the recipe's norm can interfere with the yeast function, causing the bread to not rise.
- Expired yeast or no yeast at all when setting the ingredients for the dough. I had such that the old yeast did not raise the bread when baking. As it turned out, after opening the package, the yeast lives only for 2 weeks, so it is better to buy small packs. Keep an eye on the expiration dates for this very important ingredient.
- Salt came into contact with yeast while kneading the dough. Since salt inhibits the work of the yeast, you should always pour them separately from each other so that they do not mix when stirring the dough. For example, separating them with flour when placing ingredients in a bread maker.
- Wholemeal flour can also cause bread to fall off when baked, although it is not as frequent compared to old yeast that has expired. But all the same, the flour should also be sieved before baking in order to saturate it with oxygen and the bread was beautiful and fluffy.