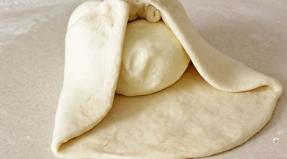
How to make salty dough. We sculpt together with the kids! Salted dough - dough recipe and how to work with it
The use of various natural materials for creativity has recently gained more and more popularity. This is especially useful for children. So, let's look at a few recipes on how to make salted modeling dough.
How to make salted modeling dough: a list of recipes
There are many recipes for salt dough, each one finds a more suitable one for himself, with which it is pleasant and successful to work.
Recipe number 1.
You should take:
- four glasses of flour;
- two glasses of fine salt;
- two glasses of warm water.
If you want to make a colored dough, then take the necessary paint, ink or gouache.
Knead the dough for about ten minutes, kneading it well. As a result, it should be soft and free of cracks. It shouldn't stick to your hands.
You need to keep such a dough in a closed container or plastic, because it dries quickly in air. You can start working with the dough prepared in this way right away.
Recipe number 2.

You should take:
- two cups of flour;
- one cup of salt;
- two-thirds of a cup of water.
To prepare the dough according to this recipe, you should take boiling water. Pour salt into it and wait until it dissolves.
After that, all the flour should be added to the salt water, pouring it in gently and stirring constantly. The result should be a thick and fairly firm dough.
Recipe number 3.

You should take:
- two glasses of flour;
- one glass of fine salt;
- one glass of water.
Mix the salt with flour, then slowly pour in water and knead the dough until a plastic mass is obtained.
If the dough turns out to be dry, then you should add a little water, and if it is thin, then flour and salt.
You need to knead the dough for about ten or fifteen minutes in order for the result to be better.
Recipe number 4.

You should take:
- one hundred grams of wheat flour;
- one hundred grams of rye flour;
- 400 grams of salt;
- one glass of water;
- two tablespoons of wallpaper glue.
By adding rye flour to the dough, you change its color from white to a warm brown shade. But if you use only rye flour for the dough, then it will turn out to be inelastic and hard. This is why wheat flour should be added.
To prepare the dough, mix flour, glue and fine salt. Then we add water. The dough must be kneaded and kneaded well so that it does not break or crumble during molding.
Advantages and disadvantages of salted modeling dough over other materials
Of course, each material has its own disadvantages and advantages. Consider those for salty dough.
- no special funds are needed for its preparation;
- after it, it is easy to wash your hands and work surface, also does not leave marks;
- there are recipes (prepared without glue) that are absolutely safe for children when they get into the mouth;
- the correct preparation of the dough is a guarantee that it will stick well and will not stick to your hands;
- products made from it can be dried in the oven, or simply in the air;
- the surface of the prepared dough product is well suited for painting with almost any paints;
- when covering an already finished and painted product with varnish, it is well preserved for many years.
If we talk about shortcomings, then they actually do not exist, except that the product is dried for a long time. It is important to observe the technology when preparing it, otherwise the crafts simply will not work.
In order for the dough to turn out well, you should follow some tips:
- salt for the dough must be taken fine, "Extra" is better, but if there is none, then take the usual one and grind it in a coffee grinder;
- use a baking sheet to make figures, then the reverse side of the product will turn out to be even;
- add water to the dough gradually, use only cold water (unless otherwise stated in the recipe);
- if glue is used, then it must be diluted with water to the consistency of sour cream;
- varnishes for fixing and protection, you need to use transparent furniture or art;
- it is not recommended to store the finished dough for more than three days;
- natural dyes can also be used to color the dough, for example, curry, nutmeg, instant coffee, cocoa powder, cinnamon, cumin (all ground);
- after baking already painted products, their color changes.
What can be made from salted dough?
 Almost anything can be made from salted dough. Various figurines for the Christmas tree, fridge magnets, key rings or just products for decoration. An experienced craftsman can make a complete picture from this material!
For the preparation of figures, you can use all the materials at hand - from children's molds to various more professional tools. Various impressions are made with the dough not yet dried. Use a wet brush to join the parts.
After cooking the product, it must be dried. This can be done in the oven (as the pros do) or outdoors. The main thing is to wait until it is completely dry.
The most important thing is that you can then play with dough products or they can just stand as decoration. Observing all the stages of preparation, the product will turn out to be strong and durable. I wish you creative success !!!
How? You haven't read yet:
Modeling dough is an ideal product for games and activities with young children.
It is pleasant to the touch, elastic, beautiful, and most importantly, completely safe even for the smallest children.
Any mother who has salt, flour and cold water in the kitchen can cook a wonderful mass.
Modeling dough: what is it for?
Modeling dough for children is a mass very similar to ordinary plasticine. Unlike the usual solid blocks of colored plasticine, it is much softer, does not stain hands and clothes, does not stick, does not smell like rubber, does not cause allergic reactions. A baby can try such a modeling dough by a tooth. Putting a piece of salty, tasteless mass in his mouth, the child will immediately lose gastronomic interest in it and will engage in an interesting business - modeling.
Parents should definitely know that working with plastic masses is not only exciting, but also very useful in terms of early child development. It is no coincidence that they say that the mind of a baby is at the tips of his fingers. The development of fine motor skills activates such points of the brain that are responsible not only for object-related actions, coordination of movements, but also for speech.
Funny modeling is important for the full development of the baby:
Develops the skill of working with small objects and the ability to manipulate them;
Increases perseverance;
Improves the ability to concentrate, attention, perception;
Due to the fact that both hands work, it develops the right and left hemispheres, that is, logical and creative thinking at the same time.
Many children stick out their tongue out of zeal - they are so interested in kneading, sculpting, doing wonderful doughy things! This is also very useful, as it trains the speech apparatus.
Classes can start as early as 8-9 months. Of course, you won't have to wait for anything like the thoughtful work of a three-year-old: the baby will tear the mass into pieces, scatter and smear it, squeeze it into a fist and taste it. But even this will bring a lot of delight and pleasure, plus it is very useful for development. The only thing is to choose a dough for modeling for children without dyes, flavors, baby cream, glycerin. It can be the simplest and very tasteless salty dough.
From one and a half years old you can start full-fledged classes: to acquaint with the simplest geometric shapes, to learn to sculpt a "string", a flower, a funny face. With age, the kid will learn to create real masterpieces: figurines, architectural structures, Christmas tree decorations. It is enough to see examples of handicrafts made from salted father-in-law for modeling to get an idea on fire and immediately go to the kitchen.

Modeling dough for children: what is it like?
Depending on the recipe, salty dough for making crafts at home can be very different. Dozens of recipes have been invented by creative parents and teachers:
Classic salty;
Brewed on fire;
Microwaved;
Glow in the dark;
Edible;
With starch;
White and colored;
Soft, not very salty, play-do style;
With the addition of citric acid, glycerin, vegetable oil, baby cream, food colors, spices and even wallpaper glue.
Even if the first time some recipe “didn't work”, it doesn't matter. The final result can be influenced by the quality of the flour, the amount of ingredients (many mothers get an excellent result by mixing everything by eye), the temperature of the water.
Salted modeling dough: recipes
There are actually a lot of recipes for salt dough for sculpting crafts at home. You can start with the classics or go straight to the more complex options. However, you need to focus on the age of the baby. For very young children, the simplest options with a minimum of components are needed, it is worth refraining from custards for a while.

Classic salty
The material turns out to be quite plastic, although it can crumble (this is due to the large amount of salt). You can make any crafts from it, complete tasks and even sculpt decorations on the Christmas tree. Absolutely safe and the easiest option for salted ornamental mass.
Ingredients:
200 grams of white flour;
200 grams of extra fine salt;
125 ml chilled water.
Cooking method:
Pour salt into flour and mix well.
Pour water into the dry mixture in portions and stir continuously, achieving smoothness and homogeneity of the mass.
The finished modeling dough should not turn out to be very liquid, so you need to monitor the consistency.

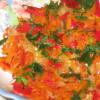
Colored with tartar
An interesting recipe for colored mass with a long term of use. Tartar is needed to extend the life of the salt dough. This ingredient prevents the crystallization of the mass.
Ingredients:
A cup of chilled water;
Half a cup of fine salt;
A cup of coarse flour;
Two teaspoons of tartar;
Any food coloring;
A tablespoon of vegetable oil.
Cooking method:
Prepare a salty flour base.
Pour in a little water, knead the dough.
Pour oil into it, the right amount of tartar and (optional) coloring pigment.
Top up with water, mix evenly.
Heat the mass over medium heat until it gathers into a kind of plastic ball.
Put the warm dough on a cutting board, knead until smooth.

Brewed with glycerin on boiling water
The addition of glycerin will give the dough a pleasant shine. An article made from such a mass does not need to be varnished: it will shine anyway.
Ingredients:
Two glasses of boiling water;
Two glasses of white flour;
Half a spoonful of liquid glycerin;
Two large spoons of sunflower oil;
The same amount of tartar;
Half a glass of salt;
Food dye.
Cooking method:
Prepare a flour base from salt, flour, tartar, oil.
Boil water, put the resulting mass in it.
Pour in glycerin, dye, boil until smooth.
Cool the mass and begin to knead.
Continue kneading until the stickiness disappears (you can add a little flour to the dough).

Salt mass in the microwave
The microwave oven allows you to quickly prepare the mass for modeling.
Ingredients:
Two parts of water;
Two parts coarse white or rye flour;
Part of fine salt;
A tablespoon of tartar;
Dye;
A spoonful of vegetable oil.
Cooking method:
Mix all components of the dough.
Pour the mass into a microwave oven dish.
Set the power to medium.
Keep the mixture in the oven for five minutes.
Knead the cooled mass.
Glowing in the dark
Such dough will cause a storm of emotions in kids, because it glows in a dark room! You can simply stick the pieces onto your fingertips and enjoy the magical effect. You will need an ultraviolet lamp to light in a dark room.
Ingredients:
Two glasses of warm water;
Two glasses of white flour;
Incomplete glass of salt (about two thirds);
Vitamin B, liquid in capsules or tablets (two pieces);
Two tablespoons of vegetable oil;
Four teaspoons of tartar.
Cooking method:
Grind vitamins to a powder.
Prepare the base of their vitamin powder, flour, salt, tartar.
Pour in oil and water, stir until smooth.
Cook over low heat until the flour mass begins to resemble plasticine, sticking.
Once the dough has cooled down, you can experiment with plenty of it.
Modeling dough without water
An interesting version of the mass for modeling.
Ingredients:
Three hundred grams of fine salt;
Three hundred grams of white flour;
Two tablespoons of vegetable oil;
Two spoons of tartar;
Dye.
Cooking method:
Pour flour, salt, tartar into a saucepan.
Pour in sunflower oil, add the coloring matter, mix with a spoon.
Simmer the stewpan over low heat, not forgetting to stir constantly.
Remove a homogeneous thick mass from the stove.
Cool and knead.
From starch and soda
Is it possible to prepare a plastic mass without flour at all? Can. However, you will have to buy more soda in the store.
Ingredients:
A glass of potato starch;
Two glasses of regular (baking) soda;
Half a glass of water;
Dye.
Cooking method:
Pour all the soda and starch into a saucepan, mix with a spoon.
Pour in a little water while mixing the ingredients vigorously.
Simmer the mixture on a small burner until a characteristic ball forms.
Cool, knead and use.
Edible from butter and cream
Delicious dough for crafts - isn't it an intrigue for a little creator? True, the dough will turn out to be not salty, but sweet. You can mold a figurine, play enough, and then eat it.
Ingredients:
Half a glass of soft butter;
A large spoonful of any heavy cream;
A pinch of vanillin;
Four glasses of powdered sugar;
Gel food coloring.
Cooking method:
Mix the butter and cream, beat with a mixer.
Add powdered sugar to the mixture in small portions, mix.
The resulting mass should be dense.
Add vanillin.
Put the mass on a board sprinkled with sweet powder.
Divide into pieces.
Drop a gel-like dye on each piece and knead.
Sculpt figures, if you want - eat them.
Modeling dough: homemade Play Doh
Modern parents know how much their children love Play-doh play sets. One sadness: the price of the set bites, and it goes out of use very quickly.
That is why parents should learn how to make a modeling dough for children, which does not differ at all from the promoted brand. A pleasant, elastic mass that is completely safe for children's hands, despite the presence of citric acid. And adults will enjoy its consistency. You can play with your child and have a relaxation session.

Ingredients:
Half a glass of water;
Half a glass of salt;
A glass of white flour;
Two teaspoons of citric acid;
A teaspoon of glycerin;
A large spoonful of sunflower oil;
Dye.
Cooking method:
Stir all ingredients in a saucepan or saucepan.
Turn on medium heat, put in a saucepan.
Pour water in spoons without stopping stirring.
Cook the dough for about five minutes. It should become transparent and uniform.
Add dye to the whole portion of the dough or divide it into several parts and paint each in a different color.
Put the dough from the pan on a board sprinkled with a pinch of flour.
Knead until smooth.
The resulting dough will be just magical: soft, elastic, beautiful.
You don't have to buy food colors at the store. You can use analogs that are always at hand. So, brown color gives cocoa powder, turquoise - ordinary brilliant green, red - cherry or currant juice, ocher - turmeric.
The home "play before" is kept for a very long time, three to four weeks. After the game, the mass should be tightly wrapped in a plastic bag or placed in a food container and refrigerated.
Vanillin or other flavoring can be added to give the homemade sculpting mass a complete resemblance to store-bought plasticine or play-do. Small details are obtained from such ornamental material: it does not crumble, unlike the classic salt dough.
For Christmas tree figurines, the classic very salty dough is best. It hardens perfectly, resembling clay toys. For making the simplest figures and plot pictures, any recipe for salt dough for sculpting crafts at home will be good.
There are several ways to dry finished crafts:
In the oven at a temperature not exceeding one hundred degrees with the door ajar;
Naturally, by leaving next to a battery or in the sun.
The addition of dye can negatively affect the result: the dough starts to stick to your hands. It needs to be kneaded again by adding dumb flour.
When mixing homemade plasticine, the water should be cold. You need to pour it out in parts. Depending on the quality of the flour, you may need a little less or more water.
Examples of crafts from salt dough for modeling
To make a wonderful craft, you need to show creative imagination. And also know that it is better to work with small pieces of mass. They need to be pinched off, and the main piece should be kept in a bag or container. There is a salt-flour mass lying in the air, it becomes covered with a nasty crust.

If we are already engaged in the manufacture of real crafts, it is better to prepare auxiliary tools. At the same time, kids can be taught the non-standard use of objects for creative purposes. You will need: a rolling pin, a stack, scissors, a comb (to sculpt baskets), coins, buttons, a rod from an old ballpoint pen, stencils, rings. Even a mixer whisk and garlic press can come in handy.

There are a lot of examples of crafts from salt dough for modeling. With little children, you can conduct classes of wonderful transformations. Show how to make an apple or a funny snowman from a ball, and make a funny snail or a flower from a thin "string". Armed with a garlic press, you can make a warm coat for the lamb.

Modeling dough provides a wonderful opportunity to play with your child in an interesting, fun and beneficial way.
All children at an early age are fond of sculpting all kinds of figures. It develops fine motor skills, imagination, logic and other skills. Earlier, solid Soviet plasticine was used for this purpose, which was not very malleable in work, but made from natural ingredients. Today, the market is full of all kinds of bright products for modeling, but they do not inspire confidence in most moms. Therefore, today our magazine will tell you how to knead salted dough, which will become an ideal material for modeling with your toddler.
The main thing in the article
Varieties of salt dough for modeling
 Testoplasty- it is this term that today is called classes, where salted dough is used as the main element for work. Testoplasty is actively used in medicine, both in psychology and for the development of premature and lagging babies. As for the material used for training and modeling, its "palette" is quite diverse. There are all kinds of mixing options:
- Classical.
- Brewed.
- Edible.
- From the microwave.
- No water usage.
- On boiling water.
- With the use of starch.
- Colored, etc.
It should also be noted that such a material for sculpting figures, prepared at home, can be conditionally divided into three types:
- classical - great for the smallest children who do not yet have "work experience";
- dough with a steep consistency, designed for large, voluminous figures;
- plastic dough, from it you can sculpt miniature details of figurines. Older children like to work with him.
Below we will tell you how to knead the material for modeling according to different recipes.
In addition to having a pleasant pastime with your child, the very process of kneading such a dough can turn into an exciting game.
Salted dough for modeling at home: what is needed?
 Flour Is the main ingredient. It is on her that 80-85% depends on what kind of material for work will ultimately be. Therefore, do not skimp and choose good wheat flour for kneading the dough.
Salty dough, even in name, suggests content in itself salt... Preference should be given to salt having small grains, this includes extra class salt. Since grains of coarse salt can come across in the finished plasticine, which complicates the process of making figures.
Also, do not forget about additional materials. These include:
- the container in which the batch is made;
- a baking sheet for baking the figures made;
- plank and modeling props;
- for decorating figures a brush and paints (gouache, watercolor);
- beads, buttons and other decorative elements, etc.
Important: We draw your attention to the fact that often recipes indicate proportions in ratios, but you should know: the mass of salt and wheat flour is different, respectively, for the same mass indicated in the recipe, there will be a different volume. So, 0.5 tbsp of salt \u003d 1 tbsp of flour.
Classic Salted Modeling Dough: Step by Step Recipe
 Initially, we will present a dough recipe, which is considered to be classic, that is, the main one. For kneading, you need to purchase:
- One tbsp is salt.
- One item is flour.
- Half of the art is water.
- Vegetable oil - 1 tbsp.
The dough is prepared quite simply:

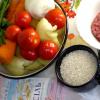
Recipe for colored dough for modeling with a photo
To make it more interesting for children to spend time modeling, you can knead colored material for sculpting figures. And how, now we'll tell you. 
We prepare the following components:
- 300 g - flour.
- 300 g - salt.
- 200 g - water.

With regard to dyes, you can use ordinary food, but they can remain on the skin of the hands or natural, such as:
- turmeric - will give the material a yellow color;
- beet juice - will make it pink, burgundy (depending on how much juice you add);
- cocoa - will paint in brown tones.
We knead the dough like this:

When using turmeric and cocoa powder, dilute with water to a creamy consistency and also mix into the dough.
Modeling dough, brewed on fire

Choux pastry can be used not only for cakes or pasties (by the way, about pasties, you will find an excellent dough for them). So, choux pastry is an excellent material for working and creating all kinds of shapes. In order to knead it, you need to stock up:
- One cup of flour.
- A quarter cup salt.
- Half a cup of water.
- Sunflower oil in the amount of 1 tbsp.
You can knead the dough by following the instructions below:
- Add flour to salt in a separate container. Dye can be added if desired. But it should be exclusively edible, since the dough is meant to be played with children.
- Boil water, when it boils - pour in vegetable oil.
- Send dry ingredients into water and boil. Don't forget to stir.
- When the dough is brewed and becomes a lump, you need to knead it, just wait for it to cool slightly. The mass should not stick to your hands.
How to cook salted dough in boiling water?

When preparing a dough on boiling water, glycerin is introduced. It gives shine to the finished product. We prepare the following products:
- One tbsp - boiling water.
- One item is flour.
- A quarter cup is salt.
- 2 tbsp - tartar.
- 2 tbsp - butter.
- 1/4 tsp - liquid glycerin.
- Dyes (food).
The dough is kneaded like this:
- Combine dry ingredients.
- Pour boiling water into a container, add oil, add glycerin, add food coloring.
- Pour in dry food, stirring occasionally.
- When the brewed dough has cooled slightly, knead.
- So much flour is added so that the dough loses its excessive stickiness.
Salted starch dough: an alternative recipe for soft mass

You can replace wheat flour when making homemade plasticine with starch. This dough is no different from the classic version. You will need:
- Starch (preferably from potatoes) - 1 tbsp.
- Soda - 2 tbsp.
- Water - 1/2 tbsp.
The dough is prepared without flour like this:
- Combine the starch and baking soda in a deep bowl.
- Pour water in a thin stream. In this case, stir the mass.
- Send to the stove and brew.
- When the dough is knotted, lay it out.
- Once it has cooled slightly, sprinkle with starch and stir.
How to make salted modeling dough without water?
Are you wondering how to knead the dough without using water? Let's knead together. Cooking components:
- 150 g - flour.
- 1 tbsp - sunflower oil.
- 1 tbsp - tartar.
- 150 g - salt.
Now we will describe the way how to cook it:
- Pour all the ingredients into a container with a thick bottom.
- Put this container on the stove, boil, stirring.
- Remove the thickened mass from the stove, leave for a while, in order to cool, knead.
Tartar is readily available in spice shops.
Salted dough with citric acid with photo

Another interesting way of making material for playing with children. For kneading you need:
- Two tbsp - flour.
- One tbsp is salt.
- Two tbsp - water.
- Citric acid - 1 tbsp.
- Sunflower oil - 1 tbsp.
Cooking the dough:
- Boil water, add oil.
- Mix all loose ingredients.
- Introduce water in a thin stream into the dry mixture.
- The dough initially has a rather liquid consistency, but under the influence of hot water it steamed, becoming a lump.
Now for the dough coloring: 
- Dilute the dyes with water and mix them into the dough to give it color.
- For more effect, multi-colored glitter can be used that interfere with the colored dough.
Children really like this unusual sparkling material for sculpting all kinds of figures.
How to make salted modeling dough with glycerin?

It should be noted right away that kneading according to this recipe is an excellent option for sculpting small products. Working with such material will take even the most fastidious fidgets. By the way, about how to keep your hyperactive toddler busy, read: ““. It is very pleasant to work with it, as the dough is distinguished by its softness and pliability. We prepare the following products:
- One and a half tablespoons - flour.
- One tbsp is salt.
- Half of the art is water.
- Glycerin - 2 tbsp (sold in pharmacies).
- Dry wallpaper glue - 2 tbsp.
To knead a pliable, soft mass, you need to do the following:
- Mix all dry ingredients.
- Add glycerin and add water in portions. Knead the dough with a spoon.
- When it gets into a ball, knead it with your hands.
- If necessary, add more flour, the mass should not stick to your hands.
Play Dough plasticine recipe at home

Plasticine Plau Dough has become one of the most modern materials for developing all kinds of skills in a child, but it is not cheap. Therefore, we propose an option according to which the dough intended for modeling is no worse than Play Dough plasticine. We prepare the following ingredients:
- One item is flour.
- Half a cup is salt.
- Half of the art is water.
- 2 tsp - citric acid.
- 1 tbsp - sunflower oil.
- 1 tsp - glycerin.
- Food coloring.
Play Dough is prepared according to the following recipe:

Play dough that glows in the dark
In order for the plasticine to emit light, you need a lamp, but not a simple one, but an ultraviolet one. Under its rays, the dough you cook will emit light. 
To knead such material you will need:
- One item is flour.
- Incomplete art - salt.
- 1 tbsp - vegetable oil.
- 2 tsp - tartar.
- Vitamin B - 1-2 tablets or 1 ampoule.
Kneading secrets:
- Grind vitamins into powder if they are in tablets.
- Combine vitamin B with flour, add salt and tartar.
- Connect oil and water.
- Boil on minimal heat until a knocked-down lump forms.
- Take out the dough, knead it with your hands if necessary.
Vitamin B can be purchased at the pharmacy, B100 is also actively used (a vitamin supplement used by athletes). The secret of the glowing dough lies precisely in the B vitamins, as they glow in ultraviolet light.
How to make salted modeling dough: the easiest recipe
An excellent composition can be prepared in 5 minutes. Cooking components: 
- One item is flour.
- 2 tsp - soda.
- 1 tsp - oil.
- Incomplete art - salt.
- One item is water.
We do the batch like this:
- Mix all solids initially.
- Add water and oil, send to the stove and cook until smooth.
- Sticking the dough to the spoon with a lump indicates its readiness.
- After the composition has cooled, knead it well with your hands.
You can play with your own hand-made modeling dough for several weeks. For storage, it is placed in an airtight container and sent to the refrigerator. You can also wrap it in plastic wrap, but it will not be stored for more than a week. If you expect to play with a mass for 1-3 days, then you can store it hermetically sealed at room temperature.
Salted modeling dough: video recipes
Reading time: 7 minutes
The benefits of sculpting are undeniable. Another question is what material is best for this. Plasticine? Clay? Salty dough? Each of them has its own advantages and features.
www.strana-sovetov.com
Salted dough is considered the most suitable for working with young children - already in a year and a half you can start teaching your child to manual creativity using this material.
Why not? It is much more plastic than plasticine, does not need special processing and special storage conditions, like, say, clay, and after you finish working with salt dough, you will not have hard-to-remove stains on clothes, furniture, hands. And the cost of this material is significantly lower.

img-fotki.yandex.ru
Of course, both plasticine and clay have their advantages. However, for classes with small children, salty dough is most suitable. Let's take a closer look at the advantages of this material over others.
We wrote about the recipes for making homemade plasticine, you will surely find one that you and your baby will like.
Salt dough advantages:
- The dough can be easily made with your own hands at any time.
- It leaves no residue and is easy to clean.
- It is completely safe for the child, since all the ingredients are natural.
- The child will not pull it into his mouth if he just tastes the dough once.
- When properly prepared, the dough has an excellent structure, sticks well, has plasticity and does not stick to your hands.
- If necessary, you can dry it both in the fresh air and in the oven.
- The dough can be colored in almost any way, and also has unlimited painting possibilities.
- If desired, you can varnish it so that the product retains its appearance for many years.
- When making a product, you can use it as a toy - it does not lose its shape and attractive appearance.
Now that we have determined that this material is best suited for handcrafting small crumbs, let's talk about the process itself. How? Of what? Where to get? What tools? What to sculpt?
How to make salt dough for modeling with your own hands: a recipe

www.livemaster.ru
You can find a huge variety of recipes for making salted modeling dough online, but the basis is always the same.
Basic recipe for making salty dough incredibly simple - to do this, mix ¾ cup salt, 1 cup flour, 5 tablespoons vegetable oil and add a little warm water. If you want the dough to be more plastic, replace warm water with starch jelly.
Before cooking, the salt must be dissolved in warm water, and then all other components can be added.
If you want to dye the dough in different colors, then when working with older children, you can safely add gouache. If you are planning to do some manual art with a very small child, use carrot juice, beet juice, or even coffee.
We wrote how to make colored salt dough.
To prevent the dough from drying out, just cover it with a glass. If you have a very large amount that you cannot use with your baby in one go, you can store the dough in the refrigerator. To do this, simply place it in a bag or in a closed jar so that moisture does not evaporate from the mass.

www.google.by
When you have finished working with the dough and want to save the result of your joint creativity with your child, just put the figurines in the cold oven, turn on the heating to a low temperature, and open the oven door slightly. This is necessary so that when the temperature rises in the oven, the dough does not crack.
Once the figurine has cooled down, it can be varnished or painted in different colors.
Dough exercises for young children

originalnie-podarki.com
Kids love to work with the dough! Their handles are drawn to this material in order to crush it, tear off a piece, stick it back. This material is simply ideal in the understanding of children, because it lends itself easily to any transformations that a child can think of!
Toddlers may well work with the dough on their own - to do this, just push them, showing what you can do with it. And you can do the following:
- Pinch off pieces of dough with two fingers, and then stick them back to the general coma.
- Clap the dough with your entire palm, the edge of your palm, roll the sausages with your fingers or with your entire palm.
- Leave traces of fingers or palms on a piece of dough, imprint traces with various objects - a stick, a fork, etc.
- Blind bagels and invite the child to put them on a string, sculpt small sweets and wrap them in paper or foil.
- Roll up balls for future beads or make pendants, and then bake in the oven. It is not recommended for children or adults to wear such jewelry, but it will be possible to paint them at will - and this is a separate type of joint creativity.

busi.su
- Offer the child to stick a jar, glass, lid, walnuts with dough.
- Roll out the dough into a layer and cut out different figures from it with a glass, a glass, cookie cutters, which, after drying, can be painted with watercolors or gouache. And if you make holes in the figures before drying, then you can use them as decorations for the Christmas tree. If this is too difficult for the kid, just roll balls with him, dry them and then decorate with interesting patterns - this will make wonderful homemade Christmas balls.
- You can mold letters from salt dough, and when they dry up, play with words.
- Offer the child to close up the prepared cardboard base with dough - this will be a kind of cake), and then let him decorate the "festive dish" with different cereals, peas, beans or other natural materials (pebbles, shells, twine, etc.). Cones, dry grass, curly pasta, beads and other trifles are excellent decorations and excellent assistants in the development of fine motor skills of the child's hands.

originalnie-podarki.com
- Cut out a template from cardboard in advance (for example, a house, an apple, a fungus) and invite the child to close it up with dough and decorate.
- Take a small cardboard or plastic plate as a basis, fill it with a large amount of dough and invite the child to stick various dried plants, leaves, spruce cones into the "clearing". The resulting "forest" can be decorated with live leaves, pieces of cotton wool, chestnuts, nutshells (depending on the season).
- You can mold figures of different animals from salt dough and show your child fairy tales. Or you can simply show with the help of molded figures of animals how the animals stomp and where they live, with whom they are friends, who they visit.
Making salted dough for modeling is simple: choose tools for working with the material

originalnie-podarki.com
After the dough is ready, you can start sculpting. If your child is no longer interested in just pinching off pieces of dough and sticking them back on, you can offer him to work with different tools.
Moreover, for this it is absolutely not necessary to use any special equipment. Use standard household appliances that are safe for your child: a standard cutting board, a dull small knife, a fork, a colander, a rolling pin, a spoon, and dough cups.
Before starting a modeling lesson, let your child get to know each tool so that he carefully studies and touches it. At this time, it is not worth the child to teach anything - give him complete freedom of action. After he has more or less studied the subjects, you can give him the dough. Here, too, there is no need to rush - let the child turn the piece of dough in his hands, twirl it, remember. Getting to know new objects and sensations can take from several minutes to several lessons, so don't rush.

podelkidlyadetei.ru
Once the child learns the properties of the test, he will most likely want to try what will happen when the material interacts with other objects. Here you will offer him kitchen utensils. You can first show the child how you can work, or you can immediately give him the right to act and figure out how to use this or that object.
Demonstrate how a simple rolling pin can turn a piece of dough into a flat pancake, how different traces are left on this cake by different objects - a fork, a colander, a child's finger, etc.
If your child is already playing in the sandbox with cookie cutters and a bucket, they will probably be interested in cookie cutters. In fact, these are the same "Easter cakes", the advantage of which will be that they will perfectly keep their shape. Such lessons are ideal for the initial acquaintance of children with geometric shapes - square, circle, triangle, rhombus.
When children already know how to repeat simple movements for adults, you can show them how to roll a ball on their own - roll a piece of dough between two palms or between a palm and a flat hard surface (table, board). You can start rolling the ball on the child's palm so that he “feels” this process.

4.bp.blogspot.com
Have your child roll balls of different sizes - large and small. With an older child, you can begin to connect balls, resulting in a snowman, caterpillar or an unusual animal (here the child can fully express his imagination).
A wonderful tool that is always at hand are the baby's own hands. With their help, he can sculpt sausages of different thicknesses and in different ways. For example, by making a thick sausage, you can prepare the body for the future dog. Thinner sausages can be used to make legs and a tail. By flattening the edges of the sausage, you can make great ears.
Since the children are still too young, let the adults do the joining. To do this, you can slightly cut the joints with a knife and grease them with water.
There are no exact, perfect and unambiguously correct recipes!
0:124 0:133
Water hardness, flour and salt quality, even temperature can affect the final result. So, if you are just starting to get interested in testoplasty, use the recommendations below. Do not be afraid to experiment, and, quite possibly, over time, you will develop your own, exclusive recipe for making salty dough!
1:1286 1:1295
2:8
The classic salty dough recipe
Flour
First of all, flour should be very ordinary. No baking powder, dyes or other flavors! Usually the cheapest wheat flour is used. In contrast, rye contains more gluten. Crafts made from such flour turn out to be coarser, but when dried they deform and crack less. If, in the process of making a future craft, I do not plan small and refined details, I usually mix wheat and rye flour in equal proportions.
2:961 2:970
Extra salt
In one book I read that you can take rock salt and grind it in a coffee grinder. Well, let's try the sea or, for example, bath salt. I will repeat once more - no need to be wise! We're not talking about rare earth metals now. Salt "Extra" is more than available, sold in any village food store. It is fine enough and dissolves well.
3:21833:8
Water
Don't be smart either. Ordinary cold water.
3:110 3:119Dough preparation and all kinds of additives
3:213Stir the salt and flour
Some "experts" recommend dissolving salt in water beforehand. Like, thus, the salt will dissolve completely and there will be no crystalline inclusions in the dough. In fact, we get a saturated solution with an incomprehensible precipitate. In addition, the exact amount of water that we may need, we can not always guess. And in the manufacture of decorative tiles and tiles, the amount of salt is almost doubled! The water will not accept so much salt in itself. Therefore, we will not reinvent the wheel and continue.
3:1249 3:1258Adding additional ingredients
To make our crafts more durable after drying and finishing, add one or two tablespoons of wallpaper glue. If you add potato starch, the dough becomes very tender and plastic. It is good to create delicate, exquisite works with many small details from such a test. Although, if you want to add starch, it would be more correct to boil the paste and use it instead of water. It should also be remembered that starch makes the craft more fragile. Therefore, it is important not to overdo it here. For the amount of flour given in our recipe, a heaping tablespoon will suffice.
3:2456
Kneading the dough
Mixing thoroughly, add cold water. The degree of readiness of salty dough can only be determined by hand.
3:253If the dough is crumbling, add water. If, on the contrary, it stretches too well and sticks to your hands, then there is a lot of water, and you need to add a little flour.
3:521 3:530Roll the ball, make several indentations in it with your finger. If the dough does not blur and keeps its shape, then it is ready.
3:756 3:765
During the mixing process, I recommend adding vegetable oil. Now the dough will not stick to hands, dry quickly and become crusty during operation. However, remember that the best is the enemy of the good! If there is a lot of oil, the dough will get dirty and the final drying may take a very long time. For our recipe, a couple of tablespoons are enough.
4:1936 4:8For the same purpose, some use glycerin and, even, baby cream. ... I won't say anything about the cream. But if you plan to work with your child, you can add some kind of pleasant fragrance. For example - a few crystals of vanillin.
4:446 4:455We wrap the finished dough in a bag and put it in the refrigerator. In this form, it can be stored for a long time. By the way, after a few hours of such storage, the salt residues will completely dissolve. And the rest of the components will enter into a final reaction with each other. The main thing is not to forget to knead the dough again before work. As a rule, I cook it in the evening, and do the modeling the next day.
4:1234 4:1243Colored dough
4:1282
A properly made colored dough is a great alternative to expensive and sometimes harmful plasticine:
5:200- it is much more interesting for a child to sculpt from such a dough, and mixing and creating new shades will make this process even more fun,
- the use of bright colors has a beneficial effect on the positive emotions of the child,
- the color contrast of individual details makes the craft visually more pleasing than the dough ineptly painted with a brush.
Of course, hand-painted painting has its considerable advantages! However, this becomes noticeable only when you have drawing skills. In the meantime, the best option for the first step into the world of dough plastic, I suggest using colored dough.
5:1275 5:1284How to make colored dough? What dyes to use?
5:1406
6:8
More details can be found here. As you yourself understand, the main thing is that the dye does not harm the child, if you sculpt with the kids, the most ecological and a little exotic - natural juice ! Carrot, beetroot, you can still come up with options.
6:466 6:475Alas, making such a colored dough is quite laborious and expensive. Especially when it comes to large quantities. If you intend to use a lot of colored dough, you can use dyes to make soaps and candles. The colorants are sold in large enough bottles, and they should last for a long time. The only and, alas, the biggest problem is to find these same dyes. The fact is that they are sold, as a rule, from a warehouse and in small wholesale!
6:1335 6:1344So, the most optimal ingredient in the recipe for colored salt dough remains regular food coloring. It is sold, as a rule, in church shops or in ordinary groceries.
6:16856:8
Well, the last, personally, acceptable for me, options are gouache. Unlike acrylic paints, it is cheaper and more readily available. And given the variety of colors currently on sale, there is no need to select and knead the desired color.
6:484 6:493Colored salt dough recipes.
6:571
Take a classic salty dough recipe as a sample:
7:1195- 2 tbsp. flour,
- 1 tbsp. salt,
- 250gr. water
Although I can not resist making small remarks. You can take less salts - from it the dough becomes brittle. As you can see, it makes sense to experiment. Surely you will find your own, exclusive, recipe!
7:1661 7:8And now about some of the secrets of colored salt dough
Just as every self-respecting chef who prepares his favorite dish has a couple of secrets, so every person who deals with salt dough will have a couple of details that he will remember when preparing colored dough.
7:503 7:512First of all, dyes should not be overused! Think the resulting dough is too pale? Take, for testing, your "pale" red dough, stick a "pale" green cake on it, add two "pale" white balls, and in the center of each place one point of the "unsuccessful" black, add a stack of a smile ... See what a funny face. ? We just played with the contrast of colors! And too strong saturation of the dough with dyes will spoil its structure.
7:1433 7:1442
8:8
One more point. When we sculpt from a simple dough, we do not pay attention to the remains of the dough remaining on our hands. But when working with a colored dough, it can spoil another color.
8:352 8:361Therefore, there are three tips at once:
8:414After kneading or eating dough of the same color, try to wash or wipe your hands with a damp cloth. The same applies to the work surface. In general, use rubber gloves when mixing primary colors. It's easier to wash your hands this way.
8:882 8:891After the main color batch is made, immediately place it in cellophane... Until you reach the last one, the first will turn into a crust! Kneading colored dough takes time.
8:1230 8:1239And last and most important! When working with colored dough, feel free to use vegetable oil! In the recipe above, add at least a tablespoon. It, of course, interferes with subsequent drying. But it's better to lose one more day drying the craft than to spoil it with dirty stains.
8:17938:8
By the way, after the figurine is dry, it may not be covered with a strong whitish bloom. Do not be alarmed, cover it with varnish and the plaque will disappear.
8:264 8:273Prepare your desktop
It is best to work with colored dough on a smooth, washable surface. For these purposes, special plastic sheets for working with plasticine are perfect. You can easily find them in any office supply store. Place containers of water and oil nearby. Think about what kind of tool you will need. Well, that seems to be all. You can start!
8:962 8:971
9:8
Fantasy or pictures from the Internet will tell you what to sculpt! Our site also has themes with salt dough crafts. You can blind or Good luck with your creativity!
9:413