Arabic pita bread recipe. Hello from Turkey! traditional arabic pita bread
Arabic pita bread swells a lot during baking. This creates a "pocket" in the middle, into which the filling can be applied later. Pita can be used both for lunch (filling it with, for example, baked meats and vegetables, or serving as bread for meat dishes) and for breakfast (you can put some salad or canned vegetables inside).
These cakes are the oldest type of bread and do not require special tools or ovens. They could easily have been obtained by nomadic peoples such as the Bedouins, who mixed flour with water and formed round cakes, which they fried over a fire. The word pita comes from the Greek (????) and means a flatbread, and probably comes from the ancient Greek words pektos meaning "hard." Pita is translated from Greek as lavash. In Arab countries, lavash is called khubz arabi or Arabic bread.
This is one of the oldest human-made breads. It is common in the cuisines of many countries in the Mediterranean. It is popular in the Eastern Mediterranean countries (eg Greece, Cyprus, Turkey, Egypt) and North Africa. This round wheat bread is popular in the Middle East and you can often buy pita bread in our stores as well. There is Turkish pita bread and Arabic pita bread. It is usually served with a savory sauce, but its versatility in the kitchen allows us to open our imaginations in terms of adding toppings to it. How does this type of bread differ from traditional ones and how can you make fluffy pita at home?
This is bread made from ordinary simple dough, the same from which ordinary bread is prepared or. The dough includes flour, water, salt, sugar and yeast. As a rule, pita bread is cooked in a hot oven at a very high temperature - up to 230 degrees, while the dough rises very quickly. The outer layer of thin dough grows rapidly under the influence of temperature, carbon dioxide and water vapor, thus, after the separation of the upper layer from the lower layer, the well-known pockets of bread appear. Some pita recipes suggest frying it in a pan, but it's not a fact that this method will result in corresponding pockets.
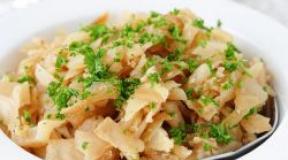
Pita bread - what to eat with
Pitu is often called Arabic bread. Interestingly, in Greece, it takes the form of a cone, which is filled with filling. When it comes to ingredients that can be added to it, there is a huge variety. It can be used to prepare Cypriot sandwiches with halloumi cheese or, according to the Brindisi recipe, with anchovies, olives and herbs such as spinach.
These crispbreads have traditionally played two roles - food and food utensils, successfully replacing cutlery and plates. Cut into triangles, they are used to scoop sauces and dips, such as hummus (lentil dip) and taramosalata (Greek pasta with caviar). It is as if various components are wrapped in these crispbreads or they are placed in an inner pocket. Examples are the famous Greek and Turkish dishes - kebabs, falafel, gyros and souvlaki. In Arab countries, almost any dish can be eaten with a pita. It can also serve as the bottom of a pizza, which is popular in Turkey, where it is topped with minced meat and herbs.
Pita bread fillings:
- This cake will go very well with kebabs and hot sauce.
- It is also a good idea to split the tortilla in half and place a nutritious mixture of vegetables and meat in the middle. For such a composition, you can add garlic sauce or mayonnaise for a delicious flavor, or simply drizzle olive oil over the ingredients.
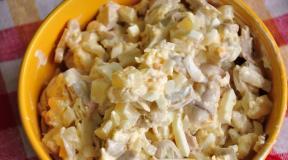
To fill pita bread, the filling can be varied:
- finely chopped cabbage,
- tomatoes,
- pickles,
- slices of cheese
- pieces of fried poultry.
Greek pita is also good as an oven baked snack. Thus, we can add to it the previously fried minced meat with the addition of grated cheese, pineapple, red beans and corn. It is enough to lightly bake the bread obtained in this way so that the ingredients combine well and the cheese melts. These appetizers can be used as a side dish for dinner with a Mexican-style spicy sauce. This food is quite high in calories, and harmoniously combines carbohydrates and fats.
How to prepare pita?
A characteristic feature is that during baking, a pocket is formed in the dough, which greatly facilitates filling it with minced meat.
Pita bread - recipe number 1
In order to make pita you must have the following ingredients:
- 1 kg of flour
- 1.5 cups of milk
- 4 grams of yeast
- 6 tablespoons olive oil
- 2 tablespoons of sugar
- 2 tablespoons of salt
- 600 ml warm water.
Yeast should be combined with milk and sugar, then add 4 tablespoons of flour. The prepared mixture is placed in a warm place, and when it doubles in volume, all other ingredients must be added and mixed thoroughly. If the mixture is too thick it can be diluted a little with water and then set aside to rise for about 2 hours. You must remember to cover the dough with a cloth, because in this case it will grow faster. After it has grown, it must be kneaded on a floured table and divided into small elliptical pieces, and then rolled out the tortillas, which are placed in the oven on a greased baking sheet with olive oil. Pita is ready when the dough has grown and is plump. This usually takes a few minutes, about 6-8 minutes. The oven should be heated to a temperature of approximately 220 degrees.
Pita bread - recipe number 2
- 300 g flour (approximately 2 cups.)
- 20 g yeast
- salt,
- a pinch of sugar
- spoon of olive oil.
Mix yeast with sugar and a few tablespoons of warm water. Let it stand to grow up. Sift flour. Add salt and yeast, mix by adding warm water (the dough should be like dumplings). Knead, adding flour until it comes off your fingers. Grease your hands with olive oil and grease the dough on top and let stand under the lid in a warm place. When it increases in volume, divide it into four parts, leave it to rise again. Form into thin cakes and place in dry trays, cover and let stand to grow. Bake at 250 degrees for about 10 minutes. Take it out, wrap it in a cloth so as not to dry out. Serve hot straight from the oven.
Note: You can replace half the flour with coarse flour or whole grain.
Pita in a bread maker:
All ingredients for the dough must be placed in the kneading container in the order indicated by the manufacturer of the bread maker. Set the program for kneading the dough and proving the dough (about 1.5 hours), and then take out the dough, knead and proceed as described above.
Notes:
The amount of water required for the dough depends on the type of flour and moisture content, so it is likely that the dough will consume different amounts. Add more water little by little and check the consistency of the dough.
Some chefs advise adding olive oil.
If you do not eat the crispbreads right away, let them cool down. Then you need to pack them tightly in a bag and store for 2-3 days. Sprinkle with water before serving and then heat in the oven.
Pita is a traditional Arabic flat bread - a flatbread, which is interesting in itself, because it is delicious, and as a "basis for creativity", because there is a void inside the pita that can be filled with almost any filling. Making pita is a snap. Let's try?
To prepare 8 pits you will need:
500 g flour (I took 350 g of premium wheat and 150 g of whole grain wheat)
1 teaspoon with a small heap of salt
1 teaspoon sugar
0.5 teaspoon baking soda (quicklime)
1 packet of instant fast-acting yeast (7 g)
1 tablespoon each of olive and sunflower oil
COOKING:
For the dough, sift flour into a bowl, add yeast, salt, sugar, soda and stir everything. If you are using dry active yeast that is not fast-acting, pre-dissolve it in a small amount of water (50-100 g), add a little flour from the general rate, stir until a homogeneous batter without lumps and leave warm until a frothy cap, and then the foamed chatterbox add to the flour and then everything according to the recipe.
Gradually adding water, knead a soft dough.
Cover the bowl with the dough and leave it alone for 15 - 20 minutes. During this time, the flour will absorb water, form gluten, and the dough will be easier and easier to knead.
Knead the rested dough well until smooth and homogeneous. Gradually add vegetable oil while kneading. Knead gently and gently if you use whole grain flour to make dough, as this flour contains bran that can break the gluten strands. If you won't be using whole grain flour, knead the dough long enough (at least 5 to 7 minutes) and vigorously. In the process of kneading, remember it well, rub it, fold it, you can even beat it off, it will only benefit.
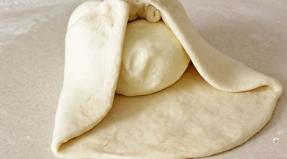
Cover the finished dough and leave warm until it doubles in volume, then wrinkle and divide into 8 equal parts.
Roll each piece into a smooth ball.


Cover the dough balls with plastic wrap and leave to rest for 10 - 15 minutes. During this time, the gluten will have time to relax and the dough will become softer and more pliable, it will be easier to roll it out. Roll out the rested dough into flat cakes 3-4 mm thick.

Cover the rolled cakes with foil and leave for 30 - 40 minutes to distance. It is very convenient, after rolling, to immediately transfer the cakes to baking paper and then bake on it.

Preheat the oven and baking sheet (just place it inside the oven) to the highest possible temperature. Preheat the oven in advance - before placing the first baking sheet in the oven, it should stand for 20 minutes in the most heated state.
Gently drag the parchment and cakes onto a hot baking sheet and place on the very bottom of the oven.
Pits are baked very quickly - literally 3-4 minutes. During the baking process, they will swell up a lot, but at the same time they will almost not brown at all.
Cover the pita with a towel immediately after baking and let cool completely.


Good appetite!
A simple and very tasty food - Arabian pita bread, can be served for lunch or for a snack, adding your favorite filling to the pita.
These are very simple homemade baked goods that use only the most affordable ingredients. The peculiarity of the pita can be called its round flat shape, and also the emptiness in the middle. Thanks to the water vapor that forms inside the cake during baking, the dough swells like a ball and flakes. It turns out a kind of pocket in which you can easily put absolutely any filling of your choice.
Pitas are usually made from wallpaper flour, but I prefer to use premium wheat flour. Of course, the finished cakes will not be brown, but this does not at all affect the taste and aroma of this unleavened bread. In a city apartment, billets are baked in a well-heated oven at a high temperature directly on a dry baking sheet. I hope that the recipe will be useful to you and you will often indulge in homemade Arabian pits.
- wheat flour - 500 gr
- water - 300 ml
- vegetable oil - 50 ml
- fast-acting yeast - 1.5 tsp
- salt - 1 tsp
To prepare these fresh Arabian tortillas, we will take such simple and affordable ingredients as wheat flour (premium or first grade), water, refined vegetable (I have sunflower) oil, salt and yeast. I used fast-acting yeast, which does not require prior activation in the liquid, but is added directly to the flour. If you just have dry (also 1.5 teaspoon) yeast or pressed / fresh yeast (15 grams), dissolve them in warm water and let stand for 10-15 minutes.
Add 1.5 teaspoons of fast-acting yeast and 1 teaspoon of salt (preferably fine). If the salt is coarse, it is advisable to dissolve it in warm water in advance. Stir the flour and yeast with your hand or spoon to make the mixture relatively smooth.
We knead a rather soft dough that keeps its shape perfectly and practically does not stick to our hands. You need to knead for a long time (with your hands - at least 10 minutes) so that the dough becomes completely homogeneous and smooth. Tighten the bowl with cling film or cover with a towel and leave it warm for 2 hours. After 1 hour of fermentation, we do a light kneading in order to release gas, round the dough and return to heat for another 1 hour.
After 2 hours of fermentation, yeast dough for tortillas will work very well and will grow in volume by at least 3-3.5 times.
We divide it into small pieces of the same size, round each one, giving the shape of a ball. We leave on the work surface, lightly dusty with flour, cover with a film or towel and let the blanks rest at room temperature for about 15 minutes.
Then we roll out each piece of dough into a flat cake (no more than 5 millimeters thick), remembering to sprinkle the dough with flour (lightly) so that it does not stick to the rolling pin. Thus, we roll out all the blanks. Let them rest for 10 minutes on the table.
In advance (30 minutes before baking), turn on the oven to warm up to 220 degrees along with the baking sheet - it should be hot. When the oven has warmed up properly, we take out a hot baking sheet (you can not get it, but just push it out) and quickly put several blanks on it.
Immediately close the oven door and cook pita bread on a medium level for about 7-8 minutes. During this time, they will swell like balls and completely bake. When the first batch is ready, remove the cakes from the baking sheet and bake the rest immediately.
Ready-made pits, if you did everything correctly, will inflate well, and will not tear - all the air will remain inside.
We serve the pitas warm, although after cooling they remain fresh for several days if stored in an airtight container or tightly tied bag. These cakes, by the way, can be frozen.
Arabian pita bread is soft, tender, aromatic and very tasty. They are hollow inside and are great for filling a wide variety of fillings. Try it, you must love this simple yet delicious homemade bread.
Recipe 2: yeast pita bread (step by step)
Under ordinary home conditions, it is difficult to repeat the traditional technological process, but nevertheless, our hostesses were able to adapt the recipe for making this amazing bread, and now pita can appear on every table. It will take a very high temperature and knowledge of some secrets. When baked for a short time, the pita cake swells up and forms inside a pocket that can be filled with any filling after cooking. Pita is perfect for the first and second courses, it is convenient to take it with you on the road, to work. Any recipe for pita at home is simple, because products are used that are in any kitchen.
- water 200 ml
- salt 1 tsp
- sugar 1 tsp
- dry yeast 2 tsp
- olive oil 2 tablespoons
- wheat flour 350 g.

Prepare basic foods before making pita at home. Pour room temperature water into a deep bowl. Add salt and granulated sugar. Stir until dissolved.

Sift wheat flour into another bowl with high sides. Add dry yeast. Arm yourself with a hand whisk and stir to distribute the yeast evenly throughout the flour.

Pour liquid to the flour mixture. Begin kneading with a spoon until a thick dough forms. Continue kneading on a dusty board until a soft dough forms.

Transfer the ball of dough back to the bowl. Pour in olive oil. Stir until the butter is absorbed into the batter.

Cover with a tea towel and leave to raise in a warm place for about 40-60 minutes. If the room is very warm, the dough will rise faster.

Pound the rested dough. Add a little flour if necessary. Divide into 8 pieces. Form a ball out of each piece. Cover the blanks with a towel and work with each separately.

Roll out into a round layer 5-7 mm high.

Turn on the oven in advance. Cover the baking sheet with parchment and send to the oven to heat up. Set the temperature to 260-270 degrees. Place the rolled pieces directly into the oven on a hot baking sheet.

Bake the breadcake for 5-7 minutes. Pita must remain white.

Fancy tortillas are ready. Serve warm without anything or stuff. Any pita filling is easy to prepare. Enjoy your meal!

Recipe 3: air pita at home
- Flour - 1 kilogram
- Salt - 2 teaspoons
- Sugar - 2 teaspoons
- Dry yeast - 1.5 teaspoon
- Vegetable oil - 4 tablespoons
- Water - 600 milliliters

Sift one kilogram of flour into a mixer bowl and, stirring at low speed, add two teaspoons of salt and two teaspoons of sugar. When the flour is well mixed with sugar and salt, add 1.5 teaspoons of dry yeast and mix well again.

Gradually, while continuing to stir, pour about 600 milliliters of warm water into the flour.

Knead at low speed until a homogeneous dough is obtained and gradually, continuing to knead, pour in 4 tablespoons of vegetable oil. Knead the dough for about 10 minutes more.

We transfer the dough into a large bowl, cover with kitchen wrap or a slightly damp towel and leave at room temperature to rise for about an hour and a half, the dough should double in volume.

Knead the risen dough or fold it several times. And once again put in a bowl, cover with a film or towel and leave for 20-30 minutes.

After 20 minutes, knead the dough, divide into four parts. We roll each part into a ball and divide it into four parts again.

We got 16 identical pieces of dough, cover them with a towel and leave for 10 minutes.

After 10 minutes, roll each piece of dough into a ball and, observing the order, roll each ball into a cake with a diameter of 15 centimeters.

Place the pits on a baking sheet lined with baking paper and bake in a preheated oven at 250 degrees Celsius for 5-6 minutes. At the same time, pits should be soft and not ruddy.

Ready pits, remove from the oven, transfer to a wooden board, cover with a towel and let cool slightly.

We serve warm pita to the table with meat and salads.

Recipe 4: hollow pita bread (step by step photos)
- Flour - 750 g
- Fresh yeast - 25 g
- Sugar - 2 tsp
- Water - 450 ml.
- Sunflower oil - 2 tablespoons
- Salt - 1 tsp

First of all, dissolve sugar in warm water, add yeast, mix well. Cover with a napkin, leave alone for 15 minutes.

After 15 minutes, the liquid should bubble.

Meanwhile, sift flour into a bowl, add salt. Do not pour all the flour right away. Better then, when kneading the dough, add if necessary (it may be needed and vice versa - more)

Add yeast mixture to flour, knead the dough. The dough should not be "clogged" with flour, it should be quite soft. Knead for at least 10 minutes, the dough becomes smoother and softer every minute. And best of all - entrust this business to the bread maker!

Sprinkle the bowl with flour just a little, send the dough here, having previously rolled it into a ball. Cover with foil, leave in a warm place for 1-1.5 hours until the volume doubles. Now the most suitable place for this is the oven with the light on.

After the specified time, we take out the dough, knead it.

We cut it into 12-15 approximately equal parts. Roll each part into a ball. Do not forget to cover the balls with a napkin to avoid chapping. Let's leave them alone for 15 minutes, covering them with a napkin and protecting them from drafts.

In the meantime, prepare the trays. In order to save time, I use 3 pieces (but I ONLY bake one at a time!). We put parchment paper on them, sprinkle with a little flour. Turn on the oven to warm up to 250 degrees.
After 15 minutes, we take the ball that we formed first, roll it out. The thickness should be approximately 6-8 mm. We spread on a baking sheet. We will do the same with the second, third, etc. balls.

I prefer to prepare all the blanks at once, since then we will act very quickly and they will be baked instantly. After preheating the oven to 250 grams, quickly put the first batch there, trying not to keep the oven door open for a long time. We bake for about 8 minutes.

This is how they swell in the oven at the 6th minute, but you should always navigate by your oven!
The pits should not brown too much, otherwise they will be dry. Enough 2-3 minutes after "fanning" (again, remember the nature of your oven).
We bake only one baking sheet at a time in the "bottom" or "bottom + top" mode (without letting them brown too much).
When the first batch is ready, we quickly take it out, let the oven warm up again to 250 grams, repeat the process.
I usually bake one batch at 180 degrees, it turns out ordinary, but very tasty bread cakes.

Recipe 5 simple: yeast-free pita bread
This easy recipe will help anyone to make yeast-free Arabic pita bread. The tortilla is easy and simple to prepare, it can also be baked in the oven at 250 degrees. Be sure to try it at home and you will not regret it!
- Wheat flour - 2 Glasses
- Salt - 1 Teaspoon
- Vegetable oil - 4 Tbsp. spoons
- Water - To taste (How much dough will take)
Mix wheat flour and salt in a separate container, add oil and mix everything thoroughly with your hands. Gradually add water to the mass and begin to knead the dough. We do this until the dough is elastic and sticky enough. Cover the dough with a towel and leave in a warm place for 10 minutes.
After the expiration of time, we begin to roll out the dough on the working surface, previously sprinkled with flour. Roll out a thin dough cake and put it in a frying pan without oil. Bake over high heat, turning over. Each side will take approximately 30 seconds. Now we transfer the cake to the wire rack over the fire and bake until bubbles appear. Yeast-free pita is ready, bon appetit!
Recipe 6: Filled Crunchy Pita
- Wheat flour / Flour - 150 g
- Water - 100 ml
- Yeast (dry) - 5 g
- Salt - 1 pinch.
- Sugar - 1 tsp
- Vegetable oil - 1 tsp.
- Cucumber - 1 piece
- Lettuce / Salad - 6 pcs
- Chicken (boiled) - 100 g
- Champignons (fried) - 3 pieces
- Green onion - 2 branches.
- Mayonnaise - 2 tbsp. l.
- Black pepper (to taste) - 1 pinch.

Dissolve yeast in warm water. Then add salt, sugar and butter. Leave alone for 5 minutes.

Then add flour and knead the dough. We leave to come up for 40-50 minutes.

Divide the dough into 6 parts. We roll each thinly into a circle. We bake on a wire rack, it is possible from the microwave, in a preheated oven at 250C. While we are rolling out the next one, the first is already ready.

You will see if the pita is puffed up and turns golden, then it's time to take it out.

For the filling, you need to chop the cucumber and green onions. Boil the chicken and fry the mushrooms.

Cut the pita from one edge.

We spread the sixth part of the filling and pour a little mayonnaise. Pepper to taste.

Enjoy your meal!

Recipe 7: pita bread in a pan or oven
Recipe for pita tortillas, made from wallpaper flour or wheat. Pita is a flat, round unleavened bread that is very popular in the Middle East. I will tell you how to make such a flatbread at home in 2 ways: in a pan and in the oven. Also, "oriental bread" is prepared with various fillings; for this, a "pocket" is made in a flat cake.
- Flour - 3 cups
- Dry yeast - 2 tsp
- Warm water - 1 glass
- Olive oil (optional) - 2 tsp
- Salt - 2 tsp
Dissolve the yeast in a deep bowl in warm water, let it stand for 5 minutes, a reaction should occur. Then add flour, add salt and olive oil. Mix, you get a crumbly dough. Sprinkle a little flour on the table, dump the dough and knead it until it is solid, smooth and elastic (5-7 minutes). Transfer the tortilla dough to a lightly oiled bowl, cover with a towel, and leave in a warm place for a while.
As soon as the dough has doubled, after about an hour, lay out on a work surface, divide into eight parts, roll each into a cake, about 5 mm thick.
The first option, we cook in the oven, grease a baking sheet with oil, put a cake on it and bake at 220 C for 3 minutes. In the oven, the pita will begin to swell, as soon as it takes almost the shape of a ball, then the bread is ready. Place on a plate, cover with a tea towel.
We cook the second option in a pan, it is better to take a cast iron, thick-walled one. Heat well, drip a little oil and fry the cake on both sides for 1-2 minutes, until bubbles appear on it. Serve ready pita bread. Enjoy your meal!
Recipe 8: homemade oriental pita bread
- Olive oil 2 tbsp the spoon
- Sugar 1 tsp
- Salt 1 tsp
- Dry yeast 6 g
- Flour 2.5 glass
- Water 1 glass

Mix yeast with flour, if instructed to do so.

Dissolve sugar and salt in warm water.

Mix a water solution with flour, knead a soft dough. Add olive oil, knead the dough until smooth, put in a warm place.

Knead the doubled dough again until it is smooth and elastic.

Divide the dough into 8 pieces, roll into balls.

Roll each ball into a circle with a diameter of 12-15 centimeters and a thickness of 5-7 mm. Cover the blanks with a napkin or foil and leave to lie down while the oven warms up. Bake pita bread for 5 minutes in the hottest oven (250-270 degrees), put the cakes for baking on a hot baking sheet. You do not need to brown, remove the pits when they are swollen.

Put the cakes on a towel separately from each other, cover with another towel on top.

Use tortillas for filling with different fillings or just like bread. You can bake pita for future use, wrap it in foil and freeze it in the refrigerator.

This recipe is my pride, in part because no one I know bakes it. Although there is nothing complicated in this bread. The recipe for pita at home is quite within the power of even beginners. After all, the pita dough is not special, but ordinary yeast dough. The whole secret lies in the formation of bread in the form of cakes, which in the oven swell like balls and become hollow inside. The area of \u200b\u200bapplication of ready-made cakes is very extensive. The Arabs pinch off pita and use it instead of forks, grabbing food with a flat cake. Pita is also extremely popular in the form of a pocket that you can fill with anything. The main components in this case are chickpea paste "" and chickpea cutlets "", about them a little later.
By the way, not all of my pits are inflated into a ball, as expected. I don’t know what it’s connected with, because the dough and the temperature regime are the same. If this happens, then I am not very upset, because then the failed cake automatically turns into an excellent base for pizza!

- Flour - 500 g
- Fresh yeast - 15-20 g (7-8 g dry)
- Warm water - 300 ml
- Olive oil - 3 tbsp l.
- Sugar - 1 tsp
- Salt - 1 tsp
Cooking ordinary yeast dough. We dilute yeast in warm water with sugar. As soon as the yeast is "working", add the rest of the ingredients and knead the dough. It should not be tight, but it should not stick to your hands either. You can go the more difficult path and first make a dough with a little flour, and when it comes up, add the rest of the flour and knead again. To be honest, I didn't notice much difference in the result.
So, put the dough in a warm place to approach, for about an hour and a half. Once it has risen well, we take it out of the bowl, crush it and divide it into balls the size of a golf ball. For larger cakes and balls, we make more, almost the size of a tennis ball. We cover the balls with a towel so as not to dry out and start rolling the cakes. By that time, we heat the oven together with the baking sheet to the maximum temperature.
In advance, all the cakes should not be rolled out so that they do not dry out and rise well in the oven. I have 2 pits on a baking sheet, and 2 rolled ones are usually ready. We take out a hot baking sheet and slap 2 cakes on it. Try not to leave the oven door open for a long time, otherwise you will lose heat. While the cakes are baking, roll out the next 2.
Pita is baked very quickly, literally 3 minutes on one side, until it swells. It looks like this:

Then we turn it over to the other side, literally for 30-40 seconds. If you overexpose the pita, it will dry up, and there will remain such a stale ball. By the way, the thinner the cake is rolled out, the more it swells, becoming almost round. If you need a pita with filling as a result, then its optimal thickness is 2-3 mm. The thicker the pita is needed at the exit, the larger the original ball should be in size, otherwise it will turn out to be quite small in diameter. Although, here it is for an amateur ...
Put the finished pitas in a stack on a plate. Let it cool. To prevent the cakes from drying out, then they can be folded into a bag.
Now that the cakes are ready, you can start baking. I bake in a special saucepan, which I have already talked about more than once.
It consists of 2 large "ladles" with handles, similar to our miracle stoves. The only difference is that in the miracle oven the spiral is closed in the top cover, i.e. it is not visible, but in my saucepan the spiral is open - you can see it in the photo.
The "secret" of getting an empty pocket inside the cake is the baking method.
The fact is that pita must be placed on a hot surface and baked at a very high temperature, the dough does not have time to rise evenly as in the oven and "breaks", forming an empty pocket inside. For example, here pita is baked in special ovens, placed near the fire, that is, the temperature is very high.
Another "secret" is that the baking pita should be placed on the same side as in the proofer. To do this, raise the edge of the towel and turn the pita over onto your hand, like this.
That is, it turns out that the pita is on the hand upside down. Now we turn the pita directly onto the hot surface of the stove and it turns out to be in the "correct" position, ie. she lies on the "bottom", on the same side on which she lay on the board in the proofer.
When baking pita, I first put the cake on top of the lid, as it starts to swell slightly, I push it inward, and put the next pita on the lid, then I take out the first pita (I just turn the lower pan by the handle - the pita falls on the table), and the second pita I push it inward, I put the 3rd pit on the lid, etc.
These are the Pitas you get.
I really love whole wheat bran Pitas, that's how I get them.
For whole grain pits, I make exactly the same dough. But since whole grain flour takes more water, then I make the dough a little softer, after raising the dough it becomes denser.
If you do not have such a pan, this does not mean at all that you cannot bake pita. The main condition for baking pita is high temperature.
You can bake pita in a skillet, and only brown it in the oven. To do this, heat the oven properly, put the frying pan on the fire (it would be nice to put a flame divider on top of the burner, but not necessary). DO NOT LUBRICATE WITH OIL! As soon as the pan is well heated (but no need to heat it!), Put Pita on it, when Pita is swollen, put it in the oven. It literally takes minutes. You cannot keep pita in the oven for a long time, otherwise it will turn into a crouton, because the dough is thin and baked instantly.
I tried to bake pita just in a frying pan, without using the oven, and it worked. Of course, her color is not as even as from the oven, but she baked wonderfully. Heat a frying pan, then turn the heat to moderate so that the pita does not burn. Put the pita on a hot frying pan, as it starts to swell, turn it over to the other side with a spatula - I didn't even put it in the oven, I just fried it from 2 sides in a pan and that's it. You don't have to wait for the pita to start swelling, but just turn it over after 2-3 minutes and it will still swell. I have a usual frying pan, however, I also covered the pita with a lid on top and made the fire light.
The frying pan is the most common, I took the convex lid from the pan.
The girls also baked pita in a pan with a glass lid - they put the pita in a hot pan, covered it with a lid, after 2 minutes they turned the pita over and it swelled up. In general, try it and you will definitely succeed!
Pits may not inflate if the temperature is not high enough or there is mechanical damage to the cake (the bottom is torn, for example).