How to properly cook apple juice in a juicer. How to cook apple juice in a juicer for the winter? Very simple! Subtleties and tricks: with what and how to cook juice in an apple juicer
How to cook apple juice for the winter at home, how to close correctly banks as well how to do we will tell you a blended drink mixed with the juice of other fruits, berries and vegetables in our article.
The apple drink prepared for the winter is rich in vitamins, and is also very useful and aromatic, in terms of taste it is not inferior to the analogue from the store. 100 grams of homemade juice contains only:
- 42 kcal,
- proteins - 0.4 g,
- fat - 0.4 g,
- carbohydrates - 9.8 gr.
Homemade apple juice for the winter – classic recipe cooking
The juiciest apples are only taken from the tree; these fruits should be used for harvesting juice for the winter. It is recommended to give preference to varieties:
- Antonovka,
- "Semerenko"
- "Strey fling",
- "Anise",
- other varieties can also be used.
To get a blended drink that has an unusual taste and aroma, you need to mix fruits of different varieties.
A classic, step-by-step recipe for making juice at home:

At room temperature in this state, the juice should be stored for 10-12 days. After that, it is recommended to transfer the cans to a cool place for long-term storage, but this should be done only on condition that the drink has not become cloudy, fermented and mold has not appeared on its surface.
The juice is stored for a very long time, so the whole family can enjoy its great taste at any time of the year until the new harvest appears.
Advice! A drink that has foamed in the first weeks can be used to make jelly, fruit drinks, it should first be boiled for 5-7 minutes or wine.
Reheating is necessary in order to remove the sediment that appears on the bottom of the container during storage; this procedure is not necessary. Fully clarified juice at home it is impossible to get it, but it will not spoil the taste of the drink.
Advice! It is best to use enamel cookware to heat the juice.
Apple juice recipefor the winter through a juicer
Ingredients:
- apples;
- vegetables, fruits or berries - optional;
- granulated sugar - if necessary (100 g per 1 liter of juice).
Preparation:
This recipe is widely used to prepare a healthy, fruit and berry drink. To preserve the juice for the winter, you can use the pasteurization method described in the first recipe, or the second method - sterilization, this method will be described in this recipe.
- We pass apples to juice in a convenient way for you with a juicer, a meat grinder. If you used a meat grinder, the juice should be filtered through cheesecloth and poured into pre-prepared jars. If the drink is sour, then sugar can be added to it.
- Jars should be tightly closed with boiled lids.
- Put cheesecloth or a circle of wood on the bottom of a large saucepan and fill with water. Put the container on fire and bring to a boil.
- Juice cans should be carefully placed in a saucepan, while boiling water should reach their neck and leave to sterilize for 15 minutes, if they are liter containers, 30 minutes for three-liter containers. The foam is periodically removed.
- After the procedure, take out the container, roll it up, leave to cool wrapped up, turned upside down.
Watch the video! Apple juice from a juicer for the winter

Apple and pear juice
Many housewives prepare this drink for the winter, since it has an excellent taste and aroma. For cooking you will need:
- apples;
- pears.
The number of components should be selected based on your own taste preferences.
- The fruit should be washed and cut into quarters.
- Pass through a juicer.
- The mass must be poured into an enamel pan and put on fire.
- As the liquid heats up, foam begins to appear on its surface, which should be removed with a spoon or slotted spoon.
- Sugar is added as needed if the drink is not very sweet.
- After boiling, the pan is removed from the heat and filtered through 2-3 layers of gauze.
- Hot juice should be poured into previously prepared containers and rolled up, after which the cans should be turned upside down and covered with a blanket.
- After 1-1.5 weeks, if the juice does not deteriorate, it can be stored in a cool place.
Watch the video! Pear and apple juice for the winter
Homemade apple juice: recipe without juicer with pulp
Required components:
- 3 kg of apples;
- 1 liter of water;
- Sugar syrup (made from 4 glasses of water and 4 glasses of sugar).
Preparation:
- The fruits should be sorted out, rotten places and seeds should be removed, and peeled.
- The apples are cut into slices 1-2 cm wide and placed in an enamel container.
- Pour the pieces with water.
- After that, the pan should be put on fire and wait for the liquid to boil, cook for 15 minutes.
- Remove the saucepan from the stove and puree the contents. To do this, the pulp is passed through a meat grinder or blender two times.
- The mass is mixed with syrup and put on fire again.
- After 5 minutes, remove from heat and cool slightly.
- Rub everything through a fine sieve.
- Put on the stove and bring to a boil, then pour the juice into glass containers and roll up the lids, leave to cool upside down.
Apple juice prepared in this way contains a lot of dietary fiber, which is so beneficial for the intestines. For those on a diet, this drink is best eaten without sugar.
The classic cooking recipe is suitable for those who want to prepare clarified juice, but do not have a juicer on the farm. To do this, you need to pass the apple pulp through a meat grinder or grate it, and then squeeze the mass through cheesecloth several times. Next, you should continue to prepare the drink, adhering to the recommendations from the very first recipe.
Watch the video! Apple juice without a juicer
How to make apple juice in a juicer
- Before sending apples to the juicer, they should be well washed and cut.
- Removing the seeds and core is very important as the fruits will be cooked. From them, the drink can acquire a bitter taste. Seeds can become clogged in the openings in the top compartment of the juicer and prevent the liquid from draining.
- Damage and rot must be cut off.
- You do not need to chop the fruit finely. Medium-sized fruits can be cut into 4 pieces, larger ones into 6-8 pieces.
 The juicer consists of three parts:
- upper tank - sieve / hopper;
- middle - juice receiver;
- bottom - pots for water.
Training
- Apples are placed in a hopper with holes, and water is poured into a saucepan. Boiling water can be used to shorten the heating time.
- The water must be filled up to the marked level. When there is no mark, you should carefully study the instructions, usually 2 liters of water is enough.
- You can put the juicer on the stove only when the drain valve of the juice collector is closed. In some devices, a rubber tube with a clip is used as it.
How to cook juice in an apple juicer for the winter? Making apple juice in a juicer is a traditional way of preparing a drink for the winter.
A hot and sterile drink flows out of the tap, which does not need to be boiled.
A delicious drink can be obtained using only ripe and juicy fruits.
- It is recommended to add sugar to increase juice production.
Required Ingredients:
- apples;
- sugar (no more than 100 g per 1 liter of juice).
Step by step cooking:
- The fruits should be washed, cut and put into a juicer pan. Apples need to be packed tightly to fit as much volume as possible.
- From above, the slices must be sprinkled with sugar, you can also sprinkle each layer of fruit with them. You don't need to add too much granulated sugar as it can make the drink sugary.
- Pour water into the last compartment and place the juicer on the stove, cover the apples with a lid.
- The juicer must be left on the stove with the tap closed for an hour.
- Then, the slices should be mixed with a spatula, pressing movements. If the pulp has not yet become damp, then cover the juicer again and leave it on the stove for another 30 minutes.
- Wash and sterilize the jars in advance, pour boiling water over the lids.
- The jar should be brought to the tap, opened and filled with juice. After that, close the container with a lid and roll up.
- Jars or bottles should be refilled until the juice runs out.
Watch the video! Apple juice in a juicer
In contact with
Summer is a great time to prepare blanks for the winter. Fruit can be used to make not only preserves and jams, but also delicious drinks. Apples are an affordable food product that is also very tasty and healthy. Late varieties are best used as they stand out for their juiciness. Despite the fact that you can buy various drinks in stores, their composition does not inspire confidence, the hostesses continue to prepare them at home.
How to make apple juice at home?
I would like to say right away that if you want to make homemade drinks from fruits, then buy a juicer. Modern technology options help to quickly and easily get a quality product. We will only use fresh fruits for cooking.
- The apples need to be sorted, washed, and juiced to create a fruity liquid. Pour it into a saucepan and place it on the stove. It is important not to bring the contents to a boil, as this will destroy most of the nutrients and also impair the taste. The temperature should be no more than 90 degrees;
- During heat treatment, foam forms on the surface, and particles of cake float, which must be removed with a slotted spoon. If the drink seems too dark, then it can be lightened, this will be described below. After reaching the required temperature, filter everything through cheesecloth and pour into cleaned jars. It remains only to roll everything up, turn the cans upside down and leave to cool.
How to lighten apple juice at home?
If you know some secrets, then the drink can be made a little more transparent. After you get the liquid from the fruit, let it sit for a while, and then strain through several layers of cheesecloth. Squeeze out any residue that remains on the filter. Transfer the liquid to a small container and place it in the steam bath.
After the water boils, heat everything up for 4 minutes. Remove the formed foam with a slotted spoon.

Then you need to quickly cool everything, for this, put the container in a large saucepan with cold water for 3 hours. During this time, a clear liquid will separate from above, and a cloudy precipitate will be at the bottom.
It is necessary to carefully drain the top layer, for example, using a rubber tube. If desired, you can repeat the process with heating on a steam bath. After that, cool the drink at room temperature and filter through cheesecloth.
Homemade apple juice recipe in a pressure cooker
Thanks to the use of a juicer, the drink is cleaner and without sediment. It is believed that this cooking option is better than using a juicer. The remaining cake can be used to make jam. For cooking, you should take 1 kg of apples and 150 g of granulated sugar.
Step-by-step cooking process:
- Apples must be washed and cut into slices, the thickness of which should not be more than 15 mm. Each piece should also be cut across;
- Pour water into the bottom of the appliance and boil it. After that, place a second container that has a small hole. Put a colander with prepared fruits in it. The principle of operation of cooking in a juicer is based on the fact that the steam that is released during boiling softens the fruit, and as a result, liquid begins to be released;
- When the apples are absolutely soft, you can disassemble the apparatus, and mix the fruit liquid from the pan with sugar and pour into hot jars. Roll up and chill.
How to make pumpkin apple juice at home?
Sweet and bright pumpkin gives the drink an original taste and also makes it even healthier. Even after heat treatment, many useful substances remain in it.
For this recipe, take: 1 kg apples, pumpkin, 200 g sugar and lemon.
Step-by-step cooking process:

- Use a juicer or any other method known to you to get liquid from the fruit. Pour it into a saucepan and put it on fire. Add lemon zest;
- When everything is warmed up a little, add granulated sugar and stir until completely dissolved. Bring to a boil and simmer for a couple of minutes. It remains to pour into cans and roll up.
Grape and apple juice at home for the winter
You can use sweet apples and sour grapes, or vice versa, which allows you to get an original sweet and sour taste. However, you can cook everything to your liking.
Juice preparation passes using such products: 0.5 kg of grapes, 1 kg of apples and sugar to taste.
Step-by-step cooking process:
- Do not remove the berries from the brushes, but simply sort through them to remove the spoiled ones. Wash them and place them in a juicer bowl. Wash the apples, cut them into small cubes and place with the grapes. Add granulated sugar if desired;
- Place the container with fruit in a juicer and turn on the fire. After an hour, you can open the shutter to drain the fruit liquid. Pour it still hot into the jars and roll it up.
Homemade carrot and apple juice recipe
Carrot fresh is very useful for the body, but it is very difficult to get a child and even an adult to drink it. In this case, you can go for the trick and make a drink with apples. The amount of ingredients is calculated for 4 servings.
For this recipe for 1 liter of drink, you should take such products: 400 g carrot puree, 600 g fresh apple and 150 g granulated sugar.
Step-by-step cooking process:

- To puree carrots, take vegetables, peel and wash, and then cut into small strips. Place in a double boiler and cook until soft for half an hour. After that, rub the vegetables through a sieve;
- Peel the apples, cut into pieces and remove the seeds. Use a juicer to make fresh. If there is no such equipment at home, pass the fruits through a meat grinder and squeeze them by hand;
- Combine the apple and carrot parts and dissolve the prepared sugar in the resulting mixture. Put on the stove and heat up to 85 degrees for 5 minutes. Pour into jars and roll up.
How to make apple pear juice?
Another version of the drink, which, thanks to the use of pears, has an unsurpassed aroma and original taste. The proportions of fruits used may vary. It is not recommended to use loose and damaged fruits. In addition to fruit, you can also use sugar to taste.
Step-by-step juice preparation process:

- Cut the prepared fruit into small pieces. The middle part can be left on to save time. Squeeze the fruits with a juicer and put the resulting fruit liquid on the stove;
- After boiling, foam will begin to form on the surface, which should be removed. If you think you need to add sugar, now is the time to do it. Pour the drink while hot and roll up the cans.
Apple, currant and chokeberry juice recipe
Another option for a delicious drink that has tremendous benefits. Both children and adults will like it.
Delicious juices without chemical additives and concentrates are also useful. To get a really high quality drink, you need a juicer. The principle of operation of this device is very simple: products are processed with steam, due to which all useful substances are preserved. At the exit we get pasteurized juice, ready for spinning.
How does it work?
A juicer consists of several elements:
- water tanks;
- juice containers equipped with a valve and a tube;
- containers with holes for food.
The modern juice cooker receives good reviews, since it is easy to use it, and the cost pleases with its availability. All models offered on the market differ in volume, material of manufacture of containers, design features of the bottom, while they all have a common principle of operation. The water boils and the steamed fruit or vegetables release their juice. By the way, the leftover pulp can also be used, for example, canned along with the juice.
How to use?

First, the juicer, the principle of which is simple and straightforward, must be prepared for the process. That is, you need to rinse all containers well, treat the rubber tube with boiling water, then fix the device elements - for this you need to use the instructions. Experts recommend adhering to the following tips to extend the life of the device:
- Keep the water level under control and do not allow food to stick to the bottom.
- The reservoir for the liquid must not be completely filled, leaving about 15-20% of the free volume.
- Containers should not be treated with abrasive, alkaline products or removed carbon deposits with sharp objects.
- The valve and tube should be cleaned regularly.
How is the juice prepared?
Today, many have a juicer in their kitchens. How do I use it? This process should be approached responsibly. First, food and containers are prepared. Vegetables, fruits, berries are washed well, sorted out, seeds, stalks are removed, the peel is peeled. Then the food is cut into small pieces. By the way, the juices are sweet enough, so you need to take this into account so as not to oversweeten. Experts recommend returning the first bottle to the food container, and sterilizing the bottle itself. The finished drink is immediately spun and then sent to a cool place.
Stages of the technological process

We begin to prepare the juice. Pour at least two liters of water into the base of the appliance and heat it up. After boiling, a juice collector and a fruit container are installed. The device is closed with a lid, after which it is heated again over low heat. Close the rubber hose with a clamp. During operation of the device, make sure that the water does not completely boil away. As soon as the liquid boils, juice begins to stand out (this lasts from 45 to 70 minutes, depending on how ripe the berries / fruits are). The finished product is poured into clean bottles and sent to storage.
Manual
A steam juicer is a simple device, but you still need to study the instructions for it. The official manual for almost every appliance contains recommendations on how to use a juicer:
- The bottom of the appliance must be 80% filled with water.
- When loading fruits or berries, you can add sugar to the same container.
- The filled container is immersed in the casing, closed with a lid, and then placed on the bottom with water. The hose is closed with a clamp.
- An electric juicer is connected to the network, models without automation are put on a heating source.
- As the water temperature rises, steam appears, which rises up and enters the grid. Here it acts on the berries / fruits, promoting the formation of pasteurized juice.
- The finished drink flows into the container through the mesh openings.
Juice cooker for cooking meat and vegetables

A device such as a juice cooker is amazing: the principle of operation is almost the same as that of a double boiler, so many housewives use the first one to prepare healthy stew. Vegetables, meat, fish products - all this turns out in a juicer just as well! The cooking process is the same as when making juice, only spices and salt are added instead of sugar. True, after cooking, all containers should be very thoroughly rinsed, since the remaining smell of fish or meat may also be present in the juice.
Types and features
Sokovarka collects positive reviews, and mostly a lot of good opinions about electric models. However, manufacturers also offer appliances that work from an external heating source, that is, they are placed directly on the stove.
The capacity of containers varies from 4 to 20 liters, which should be specified upon purchase. Another important point is the material from which the device is made. It is best to choose stainless steel models - they are more reliable and of high quality.
Most popular products

A juicer, the principle of which even an inexperienced user can understand, is a handy device, especially if fruits and vegetables disappear in your garden. Let's make a reservation right away that there are a lot of firms producing this type of household appliances, so we will have to study the features of the devices even before buying. We will include devices of different price categories in the review so that you can consider all the arguments and make the right choice.
Budget model originally from Russia
The cheapest juicer is offered under the Russian brand "Kalitva". The instruction will tell you that this model has a bowl volume of 6 liters and is made of. With this household appliance, you can get juice from fresh vegetables, fruits, berries. According to the instructions, only 4 liters of water can be added to the tank. The principle of operation of the device is simple: after the liquid has boiled, a juice collector, a mesh glass is placed on the tank, a mesh with products is installed. The device is covered with a casing, and the branch pipe is closed with a clamp. The average juice separation time takes up to one hour, after which the resulting drink is drained through a drain pipe into cans. By the way, such a juicer costs only 1100 rubles.
Chinese models
Webber BE-08 is another affordable juicer. How do I use it? To begin with, we note that the bowl of this device is larger - 8 liters, while it is made of stainless steel. That is, this unit is also suitable for juicing, even on an induction hob. As for the configuration, it is traditional: juice, a colander for fruits and vegetables, a rubber tube for draining water and a glass lid. This juicer is also cheap - up to 2,000 rubles.
Bohmann BH 3205 is a very compact juicer. The instruction is simple and straightforward, so any user can understand it. The Chinese manufacturer offers equipment in the form of a 5-liter stainless steel bowl. The pan has a thickened bottom, the main feature of which is the presence of six layers of different materials:
- copper and aluminum - with high thermal conductivity;
- steel - with low thermal conductivity.
Thanks to this combination, heat quickly passes through the layers, evenly distributed over the bottom of the pan. The bottom heats up evenly in the center and along the edges. The absence of a deepening at the bottom is a guarantee that the dishes will not deform under the influence of high temperatures. This model costs about 2,000 rubles.
Berghoff deluxe
This juicer (photo shows its stylish design) costs about 12,000 rubles, while the capacity of the container is more than 15 liters! To create it, the manufacturer uses stainless steel, and you can prepare juices on any type of stove. A special heat-collecting bottom allows you to reduce energy costs when heating water, and in the kit you will be offered standard elements:
- containers for water and juice;
- a metal lid with a valve that allows you to regulate the juice release pressure);
- a tube serving juice;
- bracket.
In this model, the handles are connected to the pan by means of riveting, while they are made of steel with silicone inserts, which makes it safe to use the device.
Rommelsbacher EE-1505
This is a compact juicer - the photos allow you to understand that it takes up very little space in the kitchen. The juice container is designed for 4 liters, and the colander, in which vegetables, fruits or berries will be placed, is for 10 liters. The metal body of the juicer is covered with two layers of a special composition that is resistant to acids. The principle of the juicer is traditional: water is poured into the tank, fruits are added, the resulting juice is released through a special tube into a special vessel. This model costs about 5,000 rubles.

Before using any device, you should first study the instructions, and the device in question is no exception. The use of a juicer has its own characteristics that should be taken into account:
- It is recommended to rinse the device well before first use.
- When the juicer is in operation, make sure that there is always water in the tank, otherwise the bottom may burn and the appliance can be thrown away.
- So that the juice does not disappear, you need to put the jar where it will go in a special plate.
- If you like sugary drinks, add sugar to a colander.
- If fruits with seeds or seeds are used, it is recommended to remove them before using the appliance.
Juice recipes
To preserve the summer harvest for the long and cold winter, you need to process it in a timely manner. The best juicer is a device that will allow you to quickly and easily prepare delicious compotes and juices, while retaining the maximum useful properties in them. Moreover, the advantages of this device are that it combines the functions of a juicer and a double boiler. We will tell you several recipes for making juices in a juicer:
- Apple juice. We cut the apples, put them in the upper compartment. To make the process of juice extraction go faster, you need to cut the fruits as little as possible. But you should avoid too small pieces, because instead of juice, you will get fruit puree, which will clog the holes of the colander.
- Pumpkin juice. It is recommended to put up to 150 grams of sugar on one kilogram of pumpkin. First wash the pumpkin, cut off the peel, get rid of seeds and fibers. The prepared vegetable is placed in a container, after which it is cooked for about an hour. If you don't like the pumpkin smell, you can get rid of it by adding lemon or sugar to the drink.
- Tomato juice. To create this drink, you will need to finely chop ripe tomatoes, it is best to give preference to juicy fruits. We fill them with a teaspoon of sugar and salt, after which we begin to prepare the juice. Culinary experts advise throwing a couple of celery sprigs on the bottom of the container to add flavor to the drink.
- Grape juice. The prepared berries are placed in a container, after which the device is placed on heating. The berries will gradually acquire a brown color, settle to the bottom, they will need to be crushed and poured fresh, since the volume will decrease. Juicing will take about 45 minutes (depending on the ripeness of the berries). After this time, the clamp opens and the juice is drained into cans.
Modern manufacturers of household appliances provide our selection with many types of appliances that greatly facilitate housework. So, juicers allow you to prepare natural drinks from fruits and vegetables in large quantities for the winter. This technique is interesting because it is easy to work with. And the preparation of juices in it does not take much time.
Juice cooker: reviews and methods of use
By the principle of its action, the juice cooker resembles a double boiler. Most often, the device is produced in the form of a container with 3 compartments. At the bottom there is a wide, not very high bowl. Above is a container for the resulting juice. From it departs "faucet" for the drainage of juice. It can be made in the form of a rubber or silicone hose. The most recent is a colander. Vegetables and fruit are placed on it.
First you need to determine in which case you should buy a juicer. This is due to the fact that a juicer can also be used for juicing. You definitely need to choose a juicer if you have a large family. The juicer, of course, allows you to prepare a drink in some cases in a few minutes. But it happens that its volume is limited. At the same time, juicers are produced even in a volume of 8-10 liters.
Another interesting feature of the juicer is that it allows you to make drinks for winter preparation. Juicers give fresh juice, which is better to just drink. For preparation for the winter, it will still have to be boiled. Moreover, such a drink will always contain pulp. The juice cooker works on a completely different principle. As a result, you will get a pure concentrated extract without any inclusions. The juicer saves a lot of time. To create a winter preparation, you just need to pour the drink into sterile cans. The only disadvantage with this juice is that it contains fewer vitamins than freshly squeezed juice.
Pros of a juicer:
- Easy maintenance - juicers are made up of many parts. Therefore, they are inconvenient to wash. You can simply rinse the juice cooker. Due to its simple design, it will also last longer on the farm.
- Juice quality - a drink prepared in a juicer oxidizes less. You don't need to drink it right away.
- Waste management - the juicer converts the raw material into cake. Then it is problematic to use it somewhere else. Any leftover apples or berries that were used to juicing in a juicer can be put into baked goods.
How to cook juice in a juicer?

Even a novice cook can handle the juice preparation process. First you need to prepare vegetables, berries and fruits. The advantage of the juicer is that it allows you to make juice even from quince. It is necessary to wash the products, remove, if any, bones, stalks. Rotten or spoiled places are also necessarily cut off. Put fruits or vegetables in a colander top. Pour water into the lowest wide bowl. It should take up about 2/3 of the total volume. Then all parts of the juicer are installed inside. After that, we proceed to direct preparation. To do this, either put the juicer on the stove, or turn on the device to the mains.
The juicer works as follows. In the lower part of the appliance, in the bowl, when the water is heated, steam begins to form. It rises up and passes through pieces of berries or fruits. Then he "lowers" the place with juice into a medium container. Thus, over time, it begins to fill with a concentrated liquid. The preparation time depends on the volume of the appliance and the type of raw materials for the juice. After the extraction of juice is completed, it remains only to drain it. To do this, use a hose built into the middle part of the juicer.
As you can see, juicing is really very simple. It should be remembered that for trouble-free cooking, you need to be very careful about the choice of the device.
Material - juicers are made of aluminum and stainless steel. Each of them has its own advantages. For example, an aluminum juicer is lightweight. However, such a device must not be placed on an induction hob. Stainless steel is more versatile. In addition, it is easy to clean. Despite the fact that aluminum cookware is cheaper, steel cookware still lasts longer in the kitchen. So if you plan to cook a lot, then you should choose a stainless steel juicer.
Juice cooker parts - it is important to pay attention to the fit of the lid. It is better if it is rubberized from below. This will prevent the steam from escaping. The lid can be made of glass. This will help you periodically monitor the condition of the food. The juice drainage hose can be rubber or silicone. The second option is preferable in terms of strength.
Type of juicers - they can be used for cooking on the stove. Dr. type of juicer - electric. To prepare the juice, you just need to plug the device into a power outlet. Such a juicer is great for giving.
Juice in a juicer for the winter: preparation method

- To prepare apple juice, take an arbitrary number of sweet apples. It is better not to choose sour fruits. This juice will have a characteristic taste that can cause stomach problems. Wash the apples, cut them into slices and remove the seeds. We put them on top of the juicer with holes. We spread them until they fill almost the entire volume of the device. Add water about 2-2.5 liters to the bottom bowl. If you want to make sweet juice, sprinkle the sliced \u200b\u200bapples with 70 gr. Sahara.
- Put the lid on the pressure cooker. We put it on the stove for about 1 hour. If the apples were of hard varieties, then the cooking time is increased. You can boil the readiness by their softness. After the time required for making the juice has expired, we drain the drink through a hose into clean sterilized cans. To prepare for the winter, we immediately roll up the iron lids lying in boiling water.
- For the preparation of grape juice, we take any grape variety. We wash it under a stream of running water, remove the faded parts. Separate the berries from the brush and place them in the upper bowl. There should be enough grapes so that 5 cm remains to the upper side. We fill in about 70 gr. Sahara. If you chose the Isabella variety, then the amount of sugar can be doubled. Pour about 3 liters into the lower bowl. Water. Close the juice cooker with a lid and put on fire.
- Bring the liquid in the appliance to a boil and reduce it. We evaporate the juice for 40 minutes. Then, in a known manner, pour into jars and close. If there are a lot of grapes, then you can do it differently. We boil the same amount of product not for 40 minutes, but for 3 hours. All this time, carefully add water as it evaporates. It is also necessary to periodically pour berries into the upper bowl. At the end, turn off the fire and let the berries stand for another 30 minutes. Then pour the juice into jars and close.
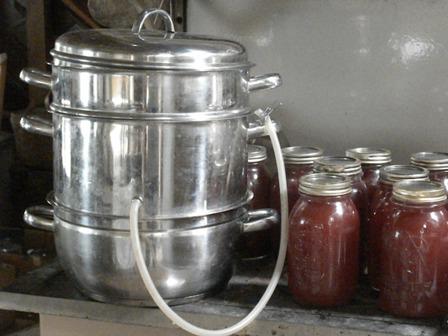
Home-made fruit preparations are distinguished by their special taste and aroma. This is due to the fact that they are made from fresh natural fruits, almost immediately from the tree. One of the options for such seaming is apple juice. It is canned quite often, and you can learn how to make a healthy drink using a juicer for the winter from this article, which we have accompanied with video and step-by-step pictures.


Recipe for making juice from apples in a juicer
First of all, you need to understand the design and how to use the device. It consists of 3 parts: apples are placed in the upper part, the middle part remains empty (equipped with a tube through which the evaporated juice flows), and water is poured into the lower part.
Instructions for using the device are simple: you need to put the fruits in the upper container and wait until the high temperature of the steam violates the integrity of the cell membrane. If the description of the process is not enough, you can always see the photo. Usually, a product is prepared from apples or grapes in a juicer. This technology makes them better than other fruits.
Important: at the very beginning of the event, you need to check that the tap of the juicer is securely closed, otherwise a delicious drink will spill past the can, and since it is hot, you can get burned.
Ingredients
Servings: - +
- Apples 10 Kg
- Sugar 250 g
Per serving
Calories: 49 kcal
Proteins: 0.5 g
Carbohydrates: 11.7 g
60 minutes Video Recipe Print

Rate the article
Did you like the recipe?
Gorgeous! Need to fix
When the drink cools down, you can immediately drink it or roll it up in jars while still hot. In order to properly preserve the juice for the winter, the preservation conditions must be observed: containers must be clean and sterilized.
Important: if the apples are still wet after an hour of cooking, leave the juicer on the fire for another 30 minutes. Time is spent depending on the variety and the degree of ripeness of the fruit.

Benefit and harm
Apple juice is very healthy, but you should not overdo it with its use, because in large doses it can harm the body.
The beneficial properties of apple juice include: removing toxins and toxins, normalizing digestion, reducing weight, cholesterol levels, and preventing aging. Many diets are based on apple juice, since it is a low-calorie product. It is recommended for people suffering from heart and vascular diseases.
Tooth enamel can harm the drink (due to its high acid content). There is a risk of allergic reactions. It should be taken with caution by people suffering from diseases of the gastrointestinal tract. It is strictly forbidden to use 100% concentrated apple juice for drinking, especially for children. It must be diluted with water in a 1: 1 ratio.

It is not for nothing that this golden drink is held in high esteem by nutritionists and people committed to a healthy and wholesome diet, because it has a rich, bright taste and helps the body to cope with a number of diseases. Apple juice is easy to make and can significantly improve your well-being and mood if you don't overdo it.
Rate the article
Did you like the recipe?
Gorgeous! Need to fix