How to make bread quickly. How to bake bread at home in the oven - do it yourself soft, fresh homemade bread
In the new Russia, interest in home baking appeared along with foreign bread makers. The loaves in them really turned out to be tasty, and when asked "is it worth buying" the happy owners answered: "Worth it!" Few bought these ovens as a result - it was expensive, but the stereotype that baking bread without a miracle machine is too troublesome remained.
All ingenious is simple!
In fact, there is nothing complicated in making homemade bread (it is much more difficult to make pies or dumplings). The classic recipe has just four simple ingredients - wheat flour, water, yeast and salt. And this is his strength! Chasing dietary flour and country sourdough is absolutely useless.
“I would recommend taking ordinary wheat flour of the highest grade, this flour is the easiest to work with,” says Mikhail Bakunin, executive director of the Khlebnaya istoria company, project coordinator ibake.ru. “You can also bake with other types of flour, but this is a rather specific process. and you can discourage any desire to engage in bread. "
The fact is that even if the bread is called rye or corn, it is prepared on the basis of wheat flour, while other types are added in small quantities for taste. And all attempts at home to bake rye bread only from rye flour are doomed to failure - the dough simply will not rise.
Experiments with starter cultures - old substitutes for yeast - can also end in a deplorable way. They are made from flour and water by simple mixing, and everything would be fine, but the fermentation process takes 3-4 days and requires careful control.
"The sourdough literally needs to be fed like a small child, adding flour, water, kneading it. It can be on honey, using grapes, raisins, hops. This is incredibly interesting, but this is for those people who are interested in baking." Bakunin warns.
Therefore, it is better to start with ordinary yeast, it is much more difficult to spoil it. The main thing is to follow the instructions and use warm water for breeding, and not boiling water - this is the most common mistake!
A breath of air for the dough
The main fear associated with baking in general and bread in particular is caused by the need to knead the dough for a long time. Who likes to bend over a table and work their hands intensively for two hours? But, fortunately, bread does not require such sacrifices - the ingredients need to be mixed for only 5-10 minutes.
"An option for the lazy is a food processor, where there is a special hook that kneads the dough. But I advise those who use the mixer to knead the dough with their hands for one or two minutes anyway, because they have not yet invented such a kneader that completely replaces their hands. baker, "says Mikhail.
It is difficult to "ruin" bread at the kneading stage, but it is possible - by constantly adding flour to the dough so that it does not stick to the table. And it sticks not because of a lack of flour, but from a lack of air. To saturate it with oxygen, a kneading process is needed.
After kneading, the dough is left to rise. In some recipes, it is placed for an hour or two in a warm, windproof place, in others, it can be sent to the refrigerator overnight. For those who bake for the first time, it is better to follow the first path.
No unnecessary movements
After an hour's rest, the next stage is kneading and shaping. In total, it will take about 20 minutes. Provided, of course, that you want to bake a loaf "like in a store" - a beautiful elongated shape with notches. If a more "modest" loaf is suitable, you can keep within ten.
The purpose of the kneading is to release excess carbon dioxide bubbles from the dough that have formed during fermentation. It is important to limit yourself to just a few "folding" movements (see video).
“If you knead the dough for a long time, it makes it denser, it removes the splendor, ie the less you touch it, the better,” says Mikhail Bakunin.
The crumpled dough, if there is strength and desire, is divided into portions and molded. Or they just put it in a baking dish - so it certainly won't spread and tear when trying to make a beautiful loaf.
Now the bread again needs warmth (to return the splendor of the forms and the airiness of the crumb, lost during molding), and it is left to stand for 40-60 minutes. Only this time, in contrast to the lifting stage, you need to keep an eye on the dough (but without fanaticism).
"You do not need to open every five minutes and look how it is there. It is guaranteed that you can not touch it for 20-30 minutes. And then you need to gently press on the workpiece with your finger, and the fingerprint should completely disappear. This shows that the bread is ready - it has risen. and at the same time retained its elasticity, "says Bakunin.
Bread loves hot
Before sending bread to the oven, you need to take care of its appearance (exterior, as bakers say) - make notches on the surface. A normal razor blade or sharp knife will do this. It is customary to make 4-5 diagonal cuts on loaves, on loaves - one long cuts along the "bread ridge".
"By making notches on the bread, you determine where the bread will open up, where the gas that is formed during the rise in the oven is released from the bread. Thus, you additionally control its shape so that it does not crack, does not burst," explains Mikhail ...
Bread loves a hot oven, so it is better to turn it on in advance, even during kneading, and heat it up to a temperature of 250-260 ° C. Before loading, you can sprinkle the camera with water - this will make the crust of the bread more tender.
"How to check that the bread is ready? One way is to knock on the bottom of the bread, it should make a hollow, hollow sound," - advises Mikhail Bakunin, ibake.ru project coordinator.
It is almost impossible to resist the aroma of freshly baked bread. But bakers still recommend making an effort on yourself. Bread, like wine, needs to ripen, so at least let it cool before sampling. And it is better to store "precious" hand-made loaves and loaves in linen bags - they stale more slowly in them.
Homemade bread dough
Rye bread dough
To bake homemade bread, you will need: - 1 kg of rye flour; - 0.5 liters of water; - 1 tablespoon of salt; - 20-25 g of baker's yeast.
The most important thing for delicious homemade rye bread is the correct fermentation process. To do this, you need to make a good leaven. It should be prepared in advance, 1-2 days before when you plan to bake bread. Dissolve the yeast stick in a glass of warm water, add 100 g of flour. You should have a mass that looks like pancake dough. Place the starter culture in a warm place. She will be ready at least in a day.
Dissolve the prepared starter in warm water and mix. Pour warm water, diluted sourdough into a bowl and add about 300 g of flour. Stir the mixture quickly and thoroughly with a wooden spatula or spoon. Smooth the surface of the dough, sprinkle with flour, cover the sauerkraut with a clean cotton towel and place in a warm place.
After 12 hours, add salt and the rest of the flour to the dough. Knead the dough for a long time and thoroughly (grandmothers say that it must be kneaded at least 100 times). Place the dough to rise again in a warm place.
The finished dough should double in volume, characteristic bubbles appear on the surface. The mass must be sufficiently elastic.
Press your finger on the dough. If the hole is slowly leveled out, the dough is ready, but if it remains, then it has fermented and good bread will not work out of it.
Wheat bread dough
This dough is prepared much faster than for rye bread, but the technology for its preparation is not much different. Take: - 1 kg of flour; - 20 g of yeast; - 2.5 cups of warm water; - 1 tbsp. l. salt; - 1 tsp. Sahara.
Pour 1 glass of warm water into a container, add yeast, sugar and mix everything thoroughly until a homogeneous mass is obtained. Pour half a glass of flour into the liquid and stir to avoid lumps. Place the dough in a warm place.
After half an hour, add all the flour, water, salt and knead the dough until it begins to lag behind the walls of the container. Place it in a warm place again until it starts to rise. Usually after 3-4 hours the dough ripens.
Making bread
Modern housewives prefer to use bread makers, undoubtedly it is very convenient, but still the most delicious bread is obtained in the oven. In Russian villages, from ancient times, they baked wheat or rye bread in the form of round loaves. They did it like this. A wooden shovel was sprinkled with flour or bran (sometimes covered with a cabbage leaf), pieces of dough were placed on it, and a round cake was formed. The surface of the future bread was moistened with water and carefully put into the oven from a shovel. The loaf was baked for 2 hours.
Any dough loves good hands, a positive attitude. Working with dough, especially for bread or, is not an easy task. If you decide to make homemade bread and want it to turn out to be great - a good mood and silence in the house must be present.
Silence does not mean that no one speaks, but that no one swears or shouts negatively. The very process of making homemade bread is simple, one might even say easy: kneaded and baked. The most important thing is how to do it, with what soul. And, of course, patience. If you have it, then your bread will turn out to be the most delicious and not the last.
1. So, let's start kneading the dough. Dissolve the yeast with salt and sugar in warm, but not hot water. Pour in milk. The liquid should be exactly 700 ml.

2. Now, in a wide bowl, add flour (half the norm) and make a hole in it. Pour the prepared liquid into it and alter it.

When the dough turns out like this, add the rast. butter and continue to knead, but with your hands.

Pour all the remaining flour on the table, and put the dough from a bowl on it. Knead dough for bread good, since it loves it. When the kneading process is over, take another dish higher, grease it with oil and flour and move the finished dough into a clean dish. Cover with a towel and put in a warm place for 2 hours. During this time, you need to press on the dough twice, freeing it from the collected carbon dioxide. This must be done, otherwise the finished bread will be sour. All these two hours you can be free.

3. Put the matched dough on the table, oiled. The dough does not need to be wrinkled with your hands once again. We will simply divide the resulting dough into 3 parts. Shape each piece of dough to fit.

And put the dough in already pre-greased molds with butter. Place the forms in a warm place and cover them with a light napkin. Proofing dough, like buns, should stand for 30-40 minutes, depending on the temperature in your room. Avoid drafts! The matched dough (doubled) is placed in a preheated oven for 1 hour, with medium heat.

The readiness of the bread is determined by its golden brown crust and in another way. Remove the bread from the oven, turn it over and tap on it. If the sound is ringing, then it's ready.
4. Ruddy, fragrant hot homebaked bread put on the wire rack, sprinkle with a wet hand and cover the bread with a napkin. The finished bread can be sliced \u200b\u200bwhen it has cooled completely. And then you can spread it on it or just pour it with butter. Wow, goodies!

Home-baked bread is much healthier, tastier and lasts longer than store-bought bread.
Bake homemade bread from wheat flour or rye, corn and bran. It is really very healthy and delicious.
Good appetite!

Craftsmanship in homemade bread is considered to be a foundational moment in the culmination of the culinary craft.
Of course, many housewives today think that it is a luxury to spend precious time cooking what is enough on the shelves of any store. And besides, there are an abundance of varieties and varieties. However, one should disagree with this. Homemade baked goods are much tastier and more flavorful. In order for it to whet your appetite, you just need to follow a few rules, and the fruits of your labor and patience will bring glorious joy to everyone.
The key condition for cooking is a state of mind and a good mood. You cannot be in a nervous state, scold and shout, because the dough may not rise, and the finished baked goods may "fall" or may not bake well.
We want to offer you some tips and a couple of recipes.
We need yeast to bake homemade bread. Today, housewives mainly use dry ones. They are subdivided into unpaired and unpaired. The first ones must be diluted in water or milk to make a dough. The latter are used immediately, mixing with flour. To determine which ones you bought, you need to carefully read the packaging. It indicates the characteristics and rules of preparation. Before you tell you how to properly bake bread at home, give you a recipe, read the useful tips, without which nothing will succeed.
* Sift the flour by all means! At this point, the flour is filled with oxygen, which ensures the porosity of the bread.
* To avoid clumps, pour liquid into flour. And it doesn't matter whether the dough is sponge or not, you should always put all the ingredients in the flour (milk, water, yeast, butter, spices, eggs, spices, etc.).
* Knead the dough in a cup until it peels off the spoon, and then transfer to a floured table and continue the process with your hands. The kneading should be elastic, soft and pliable.
* Kneaded dough, to increase in volume, must be left for 2 hours, in a warm place, covered with a blanket. If it is not disturbed at this time, then it should rise 2-3 times, and by sticking a few straws into its middle, we will speed up this process.
* When the dough comes up, you need to crush it a little again to remove the remaining carbon dioxide. Then shape it into bread. Transfer to an oven leaf, previously sprinkled with flour, and place the already formed dough for another 25 minutes. in heat (just not on the stove or oven), for re-lifting.
* Remember that future bread in an apartment should not be in a draft.
* During this time, turn on the oven to warm it up. Bring the temperature to 250-300 degrees C. The bread is baked on such a fire for about 20 minutes, during this period the door cannot be opened, then you can see its condition and then slightly reduce the gas flow. In total, baking can range from 30 minutes to 1.5 hours, it all depends on the flour, its density, variety and variety.
* To prevent the loaf from getting dry, create a steam effect by placing a mug of water on the bottom shelf.
* Want to bake beautifully crispy bread? Then, before putting it in the oven, brush the dough with an egg or plain water.
* When slicing, the crust will not crumble if the bread after baking is covered with a damp cloth and left alone.
* You can put nuts, raisins, seeds, various spices in the dough.
White bread
Ingredients:
Warm water - 3 tbsp. (40%)
Dry yeast - 3 tbsp. l.
Salt - 3 tsp
Oil (vegetable) - 1/3 tbsp.
Sugar - 100 gr.
Flour - 1 kg.
For dough, put butter, salt, yeast, sugar, water and 0.5 kg in a bowl. flour. Having mixed well, we rearrange it in a warm place for a couple of hours to rise.
When the dough comes up, knead the dough, slowly adding the rest of the flour. As soon as the kneading acquires elasticity, having coated it with oil, put it in a cup, and send it for another 1.5 hours in a warm place, for re-lifting.
After slightly wrinkling the finished dough, leave it for 5 minutes to come to its senses. Then we will form 3 loaves from it, and put them in oiled forms. Let it brew to double the volume.
Heating the oven to 180 degrees C, baking bread in it for 35-45 minutes. If the top starts to burn, cover it with foil. Cool the finished bread.
Azerbaijan sweet bread
Products:
dry yeast - 1 tsp
milk (warm) - 0.5 l.
egg - 1 pc.
sugar - 1/3 kg.
oil - 200 gr.
flour - 750 gr.
flour for dough - 10 tbsp. l.
ginger (yellow) - 0.5 tbsp. l.
salt to taste.
Stir yeast, sugar, spices (salt, ginger) and flour in milk until you get a slurry consistency. Rearrange the dough in a warm place, let it bubble. Stir occasionally.
Pour 0.5 portions of flour and sugar into the kneading bowl, add the risen dough, pre-melted butter, and an egg. Knead the dough, adding handfuls of the rest of the flour. It should be soft and slightly sticky to your palms. Covering the dishes with a napkin, put the dough in warm place for 1.5 hours. During this period, it must be wrinkled 2-3 times.
From the finished dough, make 4 flatbreads 2 cm in height. Lubricate them with an egg, apply the pattern with the back of a fork.
Bake the cakes in the oven at t 200 gr. C. After 5 minutes, take out - re-grease with an egg and apply a pattern, sprinkle with seeds on top, sprinkle with caraway seeds, sesame seeds or poppy seeds and then bake for half an hour.
If you want to preserve the slender shape of your body, then you need to eat bread and all flour products at a certain time of the day - from 11.00 to 15.00. During this period, the digestive system functions more energetically and everything that is eaten in a given time interval (in moderate doses) is burned without harm to health!
Homemade homemade baked goods are highly prized. So, freshly baked bread, exuding a unique aroma, stimulates the appetite by its very appearance. Modern housewives return to tradition and prefer to cook homemade bread in the oven with dry yeast.
Benefits of homemade bread
The production technology of baking often involves the addition of all kinds of preservatives. The store product contains dextrose, soy flour, vegetable fat, vinegar, wheat protein, emulsifiers and nutritional supplements. This allows the manufacturer to improve the appearance and taste of the finished product and extend its shelf life. It is also possible to use low-grade grain. These factors significantly reduce the useful qualities of purchased bread.
Homemade baked goods have an unrivaled taste. It is inexpensive and useful. Everyone can master the skill of making bread. Having received some skills in working with the dough, you can constantly delight your household with the most delicious and healthy bread. You can also experiment with different recipes by adding interesting ingredients.
What do you need to make delicious homemade bread?
In the old days, bread was baked in an oven. Today, many housewives have bread makers and slow cookers in which you can quickly cook it. Now we will learn how to make delicious bread, even without such special devices, using a conventional electric or gas oven.

Every housewife has devices for baking bread at home. Otherwise, they can always be purchased at any supermarket. In order to bring to life the recipe for delicious bread in the oven, you will need the following kitchen utensils:
- a large bowl in which it will be convenient to knead the dough;
- a wooden spoon or a special spatula for kneading dough;
- baking dish (with thick walls and high sides);
- cling film to cover the dough (you can use a cloth or small towel).
The main ingredient for cooking is yeast. The result of our efforts depends on their quality. The use of yeast makes the dough fermentation process fast and stable.
Dry yeast types
Dry yeast (granular) is of two types:
- Active or vigorous. They look like small balls. Yeast should be diluted in water, whey, milk until it is completely dissolved or a “cap” of foam is obtained.
- Safe. They look like a light brown powder. This product is used for baking quick bread. The yeast is simply mixed with the flour and the rest of the ingredients.
Rye bread
There are many recipes for homemade dry yeast bread, which even a beginner can quickly prepare. One of the most useful is rye, as it contains a lot of useful substances. Compared to wheat flour, rye flour contains more valuable trace elements such as potassium, magnesium and iron.

For cooking, you will need the following components:
- dry yeast - 2 teaspoons;
- rye flour - 5 glasses;
- water - 400 ml;
- salt - 2 teaspoons;
- refined sunflower oil.
Recipe step by step
Consider the preparation of food in stages:
- using a sieve.
- Add water, yeast and salt. It turned out to be a dough on dry yeast for bread.
- Knead the dough thoroughly and, covering it with cling film, refrigerate for 15 hours. The dough should increase by approximately one and a half times.
- Remove the dough from the refrigerator and place on a floured table.
- Distribute the dough by overlapping it on all four sides. You should get a five-layer cake.
- Lightly dust the dough with flour and leave to proof on the table, covered with a towel.
- grease with vegetable oil and place it in an oven preheated to 250 ° C for 5 minutes.
- Gently transfer the dough into a floured form. Place it in the oven.
- Bake for 40 minutes. Homemade bread in the oven with dry yeast is ready!
White bread
To cook wheat bread with dry yeast in the oven, you need simple ingredients. It:
- wheat flour - 600 g;
- water - 400 ml;
- dry yeast - 1.5 teaspoons;
- sugar - 1 tablespoon;
- salt - 1 teaspoon;
- vegetable oil - 2 tablespoons.

Recipe step by step
In the oven, the following steps are required:
- Pour water into a bowl, dissolve yeast and sugar in it. Add salt and sifted flour.
- Stir the mixture thoroughly with a spoon. The flour should absorb all the water. Let the dough sit for 5 minutes.
- Pour in vegetable oil and continue kneading. When the dough is firm and no longer sticky, leave it in a warm place for 4 minutes. Now you should knead it again. Then let it come up again. Knead the dough again.
- Send the resulting ball to a baking dish. Leave him to come up one last time.
- When the dough has doubled in size, brush it with egg yolk or milk.
- Send the future bread to bake for 50 minutes in an oven preheated to 180 ° C.
Features of making dough
Experienced housewives advise to approach the preparation of dough very seriously:
- Water for dough should be taken heated to 35-40 ° C. Withstanding the temperature is an important condition. In cold water, yeast bacteria will not multiply, and in too hot water, they will die.
- Don't add all the flour at once. First, dissolve dry yeast, salt, sugar and a few tablespoons of flour in water. Stir the mass with a whisk until the lumps disappear completely. The solution should have the consistency of liquid sour cream.
- Add the remaining flour to the water, but not vice versa. This will allow you to adjust it to the amount of liquid and not to increase the volume of the finished dough by adding additional water.
- Dough on dry yeast does not like drafts and loud sounds.
- Its appearance will indicate the readiness of the dough: it should significantly increase in volume and become covered with bubbles.

How to knead the dough?
This question is often asked by beginners. After all, they are preparing homemade bread in the oven with dry yeast for the first time. Therefore, let us dwell on this stage of preparation in more detail.
- Wash your hands before kneading the dough. Kneading involves working with bare hands. Remove all jewelry from your fingers before touching the dough.
- Collect the dough in a pile. When you first touch it, it will have a rather sticky consistency that will be difficult to put together. Work with the mass, pressing and gradually creating a ball-like shape. This should be done until the dough is smooth and no longer sticks to your hands. If stickiness remains, dust the mixture with flour, gently stirring in.
- Kneading. Push the dough forward slightly with your palms against it. "Hit" until it starts to spring. Usually 10 minutes are enough. The kneading process should be rhythmic, not too slow. The dough after such processing will completely get rid of lumps and stickiness. Its surface will become smooth, shiny, the consistency will be elastic.
- Test form. Now you should check if the dough keeps its shape. Roll it into a ball and leave it on your desktop. The shape of the dough after such manipulations should remain unchanged. Poke it with your finger. If the dough is ready, it will return to the shape of a ball.

The baking depends on the batch. With the right actions, the cooked bread will be soft and will acquire a beautiful crispy crust. If the dough has not been thoroughly kneaded, the product will end up flat with a tough, dense texture.
Cooking secrets
Here are some helpful tips to make delicious bread.
- Sift the flour through a sieve before kneading the dough. This will fill it with oxygen and give the dough a porous structure. The baked goods will turn out fluffy and light.
- To avoid getting lumps in the dough, all ingredients should be added to the flour.
- At the initial stage, the dough must be kneaded in a bowl using a spoon. When it begins to separate from the container, knead should be done by hand. Put the mass on the table, previously sprinkled with flour.
- To make the dough "fit", that is, increase in volume, cover it with a towel and place in a warm place. This process can be significantly accelerated by sticking a few straws into the future bread.
- Do not place the dough in a draft.
- The dough will increase in volume several times if air bubbles are removed by wringing with your hands a little.
- After the dough is placed in a baking dish, place it in a warm place for 20 minutes. The product will become even more magnificent.
- It is necessary to place future bread in an oven preheated to the required temperature.
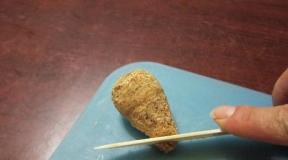
- An ordinary toothpick will help determine readiness. If it remains clean after piercing the product, then it is ready.

No one can resist the fluffy, delicate crumb of bread with a thin golden crust. It is impossible to overestimate the taste and aroma of baked goods. Homemade bread with dry yeast cooks quickly in the oven, and the result exceeds all expectations.
