Larry from Andy Chef. Cake Dark Larry
Cake Dark Larry
Send
cool
Pin it
Meet Dark Larry Cake, a discovery cake for all chocoholics on the planet. The proportions and ingredients of the dough give us indecently sticky cakes that are so porous that they weigh nothing, while being amazingly soft and juicy. Strong chocolate taste even the sensational "Cake for one-two-three" will be put on the shoulder blades. Real revolution in ingredients, their proportions and technology of preparation. And if you promise to follow all the steps exactly, this cake will become your favorite. He absorbed the best from the world of brownies, chocolate cakes and air mousses, thereby becoming the standard chocolate cake.
You will need:
For the test you will need:
Flour - 375 g
Cocoa - 90 g
Baking powder - 10 g
Soda - 7 g
Vegetable oil - 150 g
Sugar - 450 g
Eggs - 3 pcs
Vanilla extract - 5 g
Milk - 150 g
Hot coffee - 340 g
Alcohol - 75 g
For cream:
Cream 33% - 100 gr
Cream cheese - 500 gr
Powdered sugar - 70 gr
cake 16-18 cm,
How to cook:
1. Sift dry ingredients into a large bowl: flour (375 g), cocoa (90 g), baking powder (10 g), soda (7 g). Please take the maximum good cocoa. No green packs. We need taste, color, and the absence of particles that squeak on the teeth. I recommend Barry Callebaut Belgian alkalized to everyone.
Repeatedly said that you need to mix everything carefully, with a whisk. Especially mixtures where there is soda or baking powder. Otherwise, you may have different parts of the cake in composition, in one there are more of these agents and the cakes will go in bubbles. We take it aside.
2. And in the mixer bowl we combine any vegetable oil(150 g) and sugar (450 g). Beat well with a mixer.
3. Next, lower the speed to low and enter all the eggs (3 pcs) and vanilla extract(5 g). For vanilla, everything is as usual, we do not replace vanilla or chemical flavors, it is better not to add anything. Beat the mass for 2 minutes.
4. We introduce half of the dry mixture. We beat.
5. Pour in milk (150 g), the temperature is not important here.
6. And now the most interesting - hot coffee(340 g). Once again I pay attention - yes, grams. You can take instant coffee, brew it yourself or use a coffee machine. The main thing is boiling water. By the way, if you, for some reason, are afraid of coffee - just add water. Boiling water activates the baking powder, and although we are used to seeing it work already in the oven, in this case we need air in the dough right away. The second moment, cocoa is brewed. It literally turns into hot chocolate so the cakes will be surprisingly darker. Alcohol (75 g) must also be sent there. I took Marsala, you can whiskey, cognac, liqueurs, in short, everything that has a pleasant tart flavor (not wine, of course). Again, special housewives can replace this with water or juice.
7. Beat on low speed and pour in the rest of the dry ingredients.
Look, we get quite a lot of dough. Now is the time to decide how we will bake. I find it more convenient to bake one cake at a time, so I made a French shirt for my 16th form and will bake SIX cakes. The weight of each dough is about 300 grams. In principle, if you are in a hurry, you can make three doubles (then just cut off). If you are confident in your abilities, you can make two calls (in each form, then you will have three cakes). The dough will be liquid, this may confuse you. Do not be afraid if everything was done by weights - it means you have right dough, and although it seems that it runs straight - this is normal.
8. Bake at 180 degrees, preheat the oven, top and bottom.
We bake a single cake for about 25 minutes, if there are more servings in the form, the time will increase. There is subtle moment- the dough is very dark, and in the process of baking it will turn completely black, so you may not catch the moment when the cake burned out. Check with a skewer, as soon as it comes out dry - take it out. You can simply press the center of the cake with your finger, as the pros do, if the cake springs, it is clear that it is completely baked. The remaining cakes can be safely baked for exactly the same amount of time. And don't worry about the dough, it will wait. There will be a bump on top, we all know that it will need to be trimmed.

9. They took it out of the mold immediately, put it on a wire rack and removed the parchment. We use it again for the next games. I always turn the cake over so as not to deform the bottom important edge.
So in turn we bake all the cakes. Each time we repeat the French shirt. For silicone, only parchment at the bottom, but I would make these cakes in metal.
When the cakes have cooled completely, wrap in cling film and put in the refrigerator for a couple of hours (better at night). During this time, moisture from the center of the cake is distributed to the edges, and the film does not allow it to leave the cakes. Look, the cake seems to be sticky. It turns out so juicy, it's unbelievable.
10. Cut the cakes to one thickness. Since the cakes are very wet, I line each with parchment so that they do not stick together. 
11. Next cream.
Which cream to take you, decide for yourself. Also in portions - this is always an individual parameter. It is clear that we tint it with dye, I take those - Americolor.
First, whip cream (100 gr) in a bowl. We take strictly from 33% fat content, no less fatty ones will do. The secret to quick whipping: cold bowl, cold beaters and cold cream. Chefs joke that you can put whisks, a pack of cream in a bowl and put everything in the freezer for 10 minutes.
Then, with a mixer at maximum speed, whip the cream. At the beginning, it will seem that nothing is happening, but at the 5th minute, the mass will begin to thicken. See, as soon as the mass holds its shape (stable peaks), stop beating. So as not to overwhip the cream, getting butter.
Now add cream cheese(500 gr) and powdered sugar(70-90 gr). And finally beat.
The mass has become homogeneous, we remove it in the refrigerator. Let it lie down for an hour, gain strength. What I like about this cream is that it does not have an oily taste at all, the cream is lighter. In addition, it turns out to be snow-white. It keeps its shape very well. The proportions of cheese and powder can be changed, it all depends on your taste. 
12. Building a Dark Larry Cake. We follow the geometry. Remember about the rough coating. 
13. Now about the icing.
The first thing we need is a well-cooled Dark Larry Cake. It's great if you cover it with cream in the evening, and pour glaze over it in the morning. cold cake will help to quickly cool the icing and it will harden with beautiful smudges.
How do I make frosting? Dark chocolate and oil. You can also use ganache, but you still need cream.
For such a cake, you will need about 80 grams of chocolate, I took it with a margin. If you take tiles, chop them finely, we need a homogeneous paste, and if there are large pieces, they melt for a long time and the process stretches.
Melt it in my favorite way - pastry bag into boiling water. This way you will NEVER overheat the chocolate. Once the chocolate has melted, pour it into a wide bowl.
Add chopped pieces of cold butter. The calculation is - for 100 grams of chocolate - 60-80 grams of butter. Why is it? Firstly, the chocolate will shine, and secondly, the icing will be softer on the cake, and not become a hard crust that cannot be cut and eaten.
Stir the mass with a silicone spatula until smooth. If the chocolate does not cope with the oil, you can put it in the microwave. 15 seconds, removed, mixed everything, another 15 seconds. You should get an emulsion - that is, a completely homogeneous mass without lumps.
Let the chocolate frosting cool down a bit. At first, it will run from the shoulder blade like water, it will gradually become thicker, like kefir, this is the state we need. 
14. In the meantime, let's do the decor.
Many asked to tell about kandurin. It is a harmless powder of gold or silver color. Used for coloring and decoration.
For example, we can cover blackberries with it. Pour the part onto a plate, dip a soft brush into it and gently grease the berries. It is clear that we will work gently with raspberries, but we will not stand on ceremony with strawberries at all. You can cover the berries completely or lightly dust. 
And here is how the cakes are covered. Pick up kandurin on a brush, bring it to the surface of the cake by 4 cm and blow strongly on the side of the cake. Gold dust is applied to the sides of the cake. You can't just apply with a brush. Hair streaks will be visible and the gold layer will be too thick. And in this way you very clearly regulate the density of application. I went over the bottom third of the cake like this, creating a slight gradient. At first it may not work for you, but gradually you will understand the essence. We apply dust again and again, to the desired shade. Clearly, the darker the cream, the more beautiful and obvious the gold coating will be. 
15. And now about the icing. And now I'm summarizing everything for you. First, Dark Larry Cake is cold, waiting in the fridge. Second, chocolate glaze liquid, without lumps, similar in texture to kefir, a ribbon flows from a spatula.
Prepare a small spatula. We will “draw” our smudges with it. Pour frosting onto the center of the cake. It is necessary to pour so much that 1.5-2 cm remain from the edges. And carefully, slowly distribute the icing with a spatula from the center to the edges. To get a smudge, you just need to “push” the icing down with a spatula, that’s all, gravity and the cold sides of the cake will do the rest. If you want thicker smudges, cool the icing a little more. But it seems to me that not everyone likes a thick hat of chocolate, so we have nice smudges. Did you notice that they are different heights? This is also achieved by the fact that we shovel more or less frosting bring to the edge of the cake. Practice, I think that your second cake will turn out perfect.

When the icing has cooled, you can also cover it with kandurin, it will give a pleasant shine and specularity to our Dark Larry Cake.
For the test you will need:
Flour - 375 g
Cocoa - 90 g
Baking powder - 10 g
Vegetable oil - 150 g
Sugar - 450 g
Eggs - 3 pcs
Vanilla extract - 5 g
Milk - 150 g
Hot coffee - 340 g
Alcohol - 75 g
For cream:
Cream 33% - 100 gr
Cream cheese - 500 gr
Powdered sugar - 70 gr
cake 16-18 cm,
How to cook:
- Sift dry ingredients into a large bowl: flour (375 g), cocoa (90 g), baking powder (10 g), soda (7 g). Please use the best quality cocoa. No green packs. We need taste, color, and the absence of particles that squeak on the teeth. I suggest Barry Callebaut Belgian alkalized to everyone
Repeatedly said that you need to mix everything carefully, with a whisk. Especially mixtures where there is soda or baking powder. Otherwise, you may have different parts of the cake in composition, in one there are more of these agents and the cakes will go in bubbles. We take it aside.
- And in the mixer bowl we combine any vegetable oil (150 g) and sugar (450 g). Beat well with a mixer. It is clear that such butter will not whip into foam, like butter, so we just wait for the uniformity of the mass
- Then lower the speed to low and add all the eggs (3 pcs) and vanilla extract (5 g). For vanilla, everything is as usual, we do not replace vanilla or chemical flavors, it is better not to add anything. Beat the mass for 2 minutes
- We introduce half of the dry mixture. Whip
- Pour milk (150 g), the temperature is not important here
- And now the most interesting - hot coffee (340 g). Once again I pay attention - yes, grams. Because the bowl is on the scales and it's easier than measuring with glasses. You can take instant coffee, brew it yourself or use a coffee machine. The main thing is boiling water. By the way, if you, for some reason, are afraid of coffee - just add water. What is happening at this moment? Boiling water activates the baking powder, and although we are used to seeing it work already in the oven, in this case we need air in the dough right away. Then you will see the difference. The second moment, cocoa is brewed. It literally turns into hot chocolate (we have cocoa, fats and temperature to heat up), so the cakes will be surprisingly darker. Alcohol (75 g) must also be sent there. I took Marsala, you can whiskey, cognac, liqueurs, in short, everything that has a pleasant tart flavor (not wine, of course). Again, special housewives can replace this with water or juice.
- Beat on low speed and add the rest of the dry ingredients.
Look, we get quite a lot of dough. Now is the time to decide how we will bake. I find it more convenient to bake one cake at a time, so I made a French shirt for my 16th form and will bake SIX cakes. The weight of each dough is about 300 grams. In principle, if you are in a hurry, you can make three doubles (then just cut off). If you are confident in your abilities, you can make two calls (in each form, then you will have three cakes). The dough will be liquid, this may confuse you. Do not be alarmed if everything was done with weights - it means that you have the right dough, and even though it seems that it runs straight - this is normal.
8. Bake at 180 degrees, preheat the oven, top and bottom.
We bake a single cake for about 25 minutes, if there are more servings in the form, the time will increase. There is a subtle point here - the dough is very dark, and in the process of baking it will turn completely black, so you may not catch the moment when the cake burned out. Check with a skewer, as soon as it comes out dry - take it out. You can simply press the center of the cake with your finger, as the pros do, if the cake springs, it is clear that it is completely baked. The remaining cakes can be safely baked for exactly the same amount of time. And don't worry about the dough, it will wait. There will be a bump on top, we all know that it will need to be trimmed.
- They took it out of the mold immediately, put it on a wire rack and removed the parchment. We use it again for the next games. I always turn the cake over so as not to deform the bottom important edge
So in turn we bake all the cakes. Each time we repeat the French shirt. For silicone, only parchment at the bottom, but I would make these cakes in metal.
When the cakes have cooled completely, wrap in cling film and put in the refrigerator for a couple of hours (better at night). During this time, moisture from the center of the cake is distributed to the edges, and the film does not allow it to leave the cakes. Look, the cake seems to be sticky. It turns out so juicy, it's unbelievable.
- We cut the cakes to one thickness. Since the cakes are very wet, I line each with parchment so that they do not stick together.
- Next cream. I took my standard. Which cream to take you, decide for yourself. Also in portions - this is always an individual parameter. It is clear that we tint it with dye, I take those - Americolor
First, whip cream (100 gr) in a bowl. We take strictly from 33% fat content, no less fatty ones will do. The secret to quick whipping: cold bowl, cold beaters and cold cream. Chefs joke that you can put whisks, a pack of cream in a bowl and put everything in the freezer for 10 minutes.
Then, with a mixer at maximum speed, whip the cream. At the beginning, it will seem that nothing is happening, but at the 5th minute, the mass will begin to thicken. See, as soon as the mass holds its shape (stable peaks), stop beating. So as not to overwhip the cream, getting butter.
Now add cream cheese (500 gr) and powdered sugar (70-90 gr). And finally beat.
The mass has become homogeneous, we remove it in the refrigerator. Let it lie down for an hour, gain strength. What I like about this cream is that it does not have an oily taste at all, the cream is lighter. In addition, it turns out to be snow-white. It keeps its shape very well. The proportions of cheese and powder can be changed, it all depends on your taste.
About curd cheese also a lot of questions. First of all, do not confuse cream cheese and cottage cheese - the first is more like processed cheese, the second is like finely ground cottage cheese. If you try it out of the pack, it will be a little salty, don't be alarmed - salt enhances the sweet ingredients and slightly shades them (so that the cream does not become cloying).
You can even use soft ricotta or other cheeses like mascarpone and philadelphia - but basic recipe it will still be the same as I wrote above.
- We are building a cake. We follow the geometry. Remember about the rough coating
- Now about the icing. The first thing we need is a well-cooled cake. It's great if you cover it with cream in the evening, and pour glaze over it in the morning. A cold cake will help to quickly cool the icing and it will harden with beautiful smudges.
How do I make frosting? Dark chocolate and butter. You can also use ganache, but you still need cream.
For such a cake, you will need about 80 grams of chocolate, I took it with a margin. If you take tiles, chop them finely, we need a homogeneous paste, and if there are large pieces, they melt for a long time and the process stretches.
Melt in my favorite way - a pastry bag in boiling water. This way you will NEVER overheat the chocolate. Once the chocolate has melted, pour it into a wide bowl.
Add chopped pieces of cold butter. The calculation is - for 100 grams of chocolate - 60-80 grams of butter. Why is it? Firstly, the chocolate will shine, and secondly, the icing will be softer on the cake, and not become a hard crust that cannot be cut and eaten.
Stir the mass with a silicone spatula until smooth. If the chocolate does not cope with the oil, you can put it in the microwave. 15 seconds, removed, mixed everything, another 15 seconds. You should get an emulsion - that is, a completely homogeneous mass without lumps.
Let the chocolate frosting cool down a bit. At first, it will run from the shoulder blade like water, it will gradually become thicker, like kefir, this is the state we need.
- In the meantime, let's get decorating. Many asked to tell about kandurin. It is a harmless powder of gold or silver color. Used for coloring and decoration
For example, we can cover blackberries with it. Pour the part onto a plate, dip a soft brush into it and gently grease the berries. It is clear that we will work gently with raspberries, but we will not stand on ceremony with strawberries at all. You can cover the berries completely or lightly dust.
And here is how the cakes are covered. Pick up kandurin on a brush, bring it to the surface of the cake by 4 cm and blow strongly on the side of the cake. Gold dust is applied to the sides of the cake. You can't just apply with a brush. Hair streaks will be visible and the gold layer will be too thick. And in this way you very clearly regulate the density of application. I went over the bottom third of the cake like this, creating a slight gradient. At first it may not work for you, but gradually you will understand the essence. We apply dust again and again, to the desired shade. Clearly, the darker the cream, the more beautiful and obvious the gold coating will be.
- And now for the frosting. And now I'm summarizing everything for you. First - the cake is cold, waiting in the refrigerator. Second, the chocolate icing is liquid, without lumps, similar in texture to kefir, it flows down from the spatula with a ribbon
Prepare a small spatula or spatula. We will "draw" our smudges with it. Pour frosting onto the center of the cake. It is necessary to pour so much that 1.5-2 cm remain from the edges. And carefully, slowly distribute the icing with a spatula from the center to the edges. To get a smudge - you just need to "push" the icing down with a spatula, that's all, gravity and the cold sides of the cake will do the rest. If you want thicker smudges, cool the icing a little more. But it seems to me that not everyone likes a thick hat of chocolate, so we have cute smudges. Did you notice that they are different heights? This is also achieved by the fact that we bring more or less glaze to the edge of the cake with a spatula. Practice, I think that your second cake will turn out perfect.
Meet "Dark Larry", a discovery cake for all chocoholics on the planet. The proportions and ingredients of the dough give us indecently sticky cakes that are so porous that they weigh nothing, while being amazingly soft and juicy. A strong chocolate taste will put even the sensational “Cake for one-two-three” on the shoulder blades, and this is a serious request, do you agree? A real revolution in ingredients, their proportions and cooking technology. And if you promise to follow all the steps exactly, this cake will become your favorite. He absorbed the best from the world of brownies, chocolate cakes and airy mousses, thereby becoming the standard of chocolate cake. I even admit that a third of readers will not even have time to make cream for cakes, because they will no longer be. Actually, don't try it. ready-made cakes or pieces before you assemble the cake, otherwise you will have to come up with stories about why the cake disappeared. And at the same time, I give the long-awaited step by step guide on chocolate icing, beautiful smudges and fashionable today kandurin. 
Look, a 16-18 cm cake will be cooked, for other diameters I will make a traditional plate at the end. We take the ingredients as much as I write in the text and in the composition, we don’t take the photo into account, here I experimented with the number of cakes.
Sift dry ingredients into a large bowl: flour (375 g), cocoa (90 g), baking powder (10 g), soda (7 g). Please use the best quality cocoa. No green packs. We need taste, color, and the absence of particles that squeak on the teeth. 
Repeatedly said that you need to mix everything carefully, with a whisk. Especially mixtures where there is soda or baking powder. Otherwise, you may have different parts of the cake in composition, in one there are more of these agents and the cakes will go in bubbles. We take it aside. 
And in the mixer bowl we combine any vegetable oil (150 g) and sugar (450 g). The attentive reader will notice that I have oil Green colour. it grape seeds I decided to try it and I liked it. Not only is the color cool while cooking, but there are also no familiar smells. But this is not critical, replace with your favorite oil. 
Beat well with a mixer. It is clear that such butter will not whip into foam, like butter, so we just wait for the uniformity of the mass. I continue to test the SMEG mixer, I will soon be ready to give a review. 
Then lower the speed to low and add all the eggs (3 pcs) and vanilla extract (5 g). For vanilla, everything is as usual, we do not replace vanilla or chemical flavors, it is better not to add anything. Beat the mass for 2 minutes. 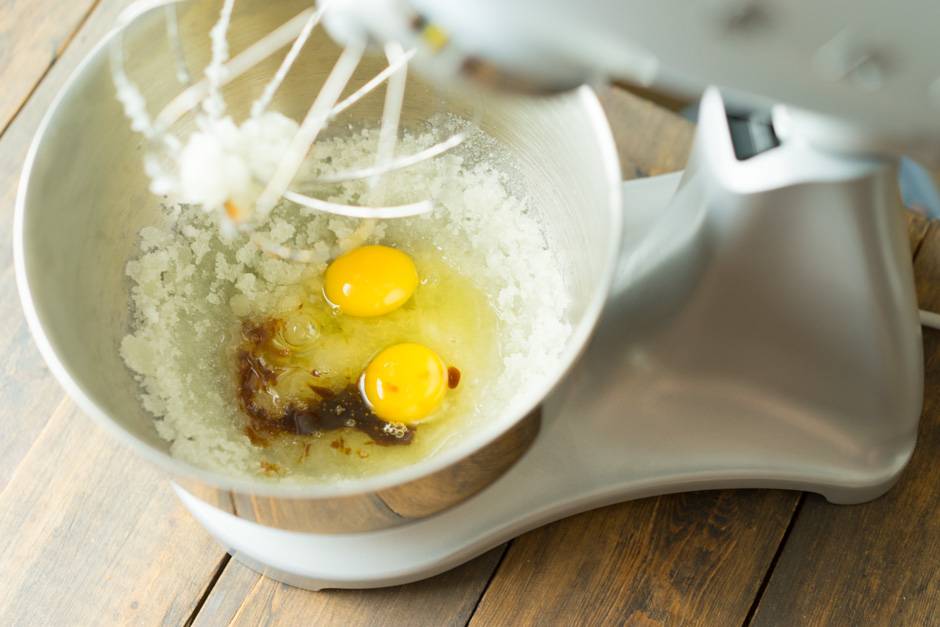
We introduce half of the dry mixture. We beat. 
Pour in milk (150 g), the temperature is not important here. 
And now the most interesting - hot coffee (340 g). Once again I draw your attention - yes, grams. Because the bowl is on the scales and it's easier than measuring with glasses. You can take instant coffee, brew it yourself or use a coffee machine. The main thing is boiling water. By the way, if for some reason you are afraid of coffee, just add water. What is happening at this moment? Boiling water activates the baking powder, and although we are used to seeing it work already in the oven, in this case we need air in the dough right away. Then you will see the difference. The second moment, cocoa is brewed. It literally turns into hot chocolate (we have cocoa, fats and temperature to heat up), so the cakes will be surprisingly darker. Alcohol (75 g) must also be sent there. I took Marsala, you can whiskey, cognac, liqueurs, in short, everything that has a pleasant tart flavor (not wine, of course). Again, special housewives can replace this with water or juice. 
Beat on low speed and add the rest of the dry ingredients. 
Look, we get quite a lot of dough. Now is the time to decide how we will bake. I find it more convenient to bake one cake at a time, so I made a French shirt for my 16th form and will bake SIX cakes. The weight of each dough is about 300 grams. In principle, if you are in a hurry, you can make three doubles (then just cut off). If you are confident in your abilities, you can make two calls (in each form, then you will have three cakes). The dough will be liquid, this may confuse you. Do not be alarmed if everything was done with weights - it means that you have the right dough, and even though it seems that it runs straight - this is normal. 
We bake at 180 degrees, preheated the oven, top and bottom. 
We bake a single cake for about 25 minutes, if there are more servings in the form, the time will increase. There is a subtle point here - the dough is very dark, and in the process of baking it will turn completely black, so you may not catch the moment when the cake burned out. Check with a skewer, as soon as it comes out dry - take it out. You can simply press the center of the cake with your finger, as the pros do, if the cake springs, it is clear that it is completely baked. The remaining cakes can be safely baked for exactly the same amount of time. And don't worry about the dough, it will wait. There will be a bump on top, we all know that it will need to be trimmed. 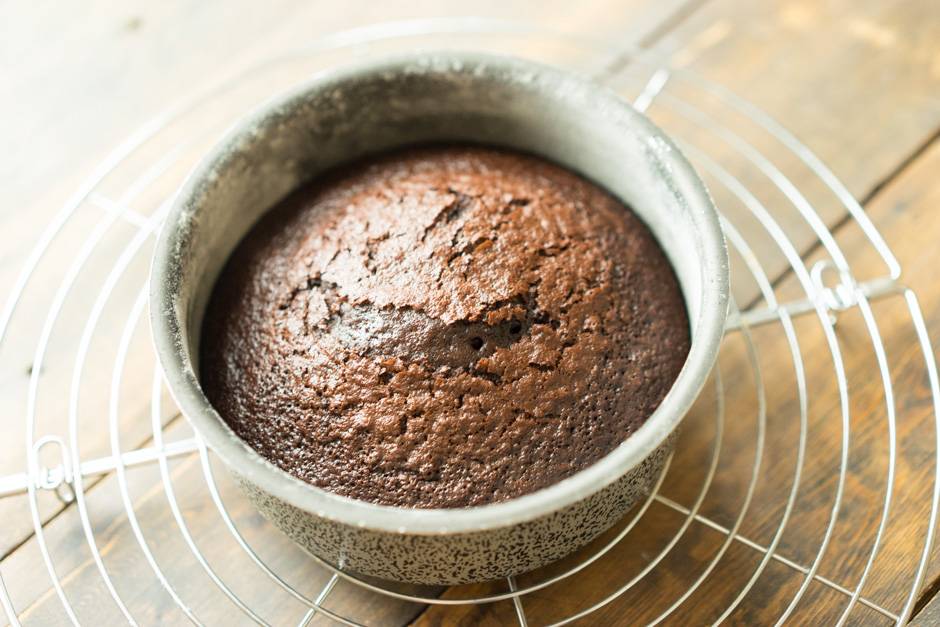
They took it out of the mold immediately, put it on a wire rack and removed the parchment. We use it again for the next games. I always turn the cake over so as not to deform the bottom important edge. 
So in turn we bake all the cakes. Each time we repeat the French shirt. For silicone, only parchment at the bottom, but I would make these cakes in metal. 
When the cakes have cooled completely, wrap in cling film and put in the refrigerator for a couple of hours (better at night). During this time, moisture from the center of the cake is distributed to the edges, and the film does not allow it to leave the cakes. Look, the cake seems to be sticky. It turns out so juicy, it's unbelievable. 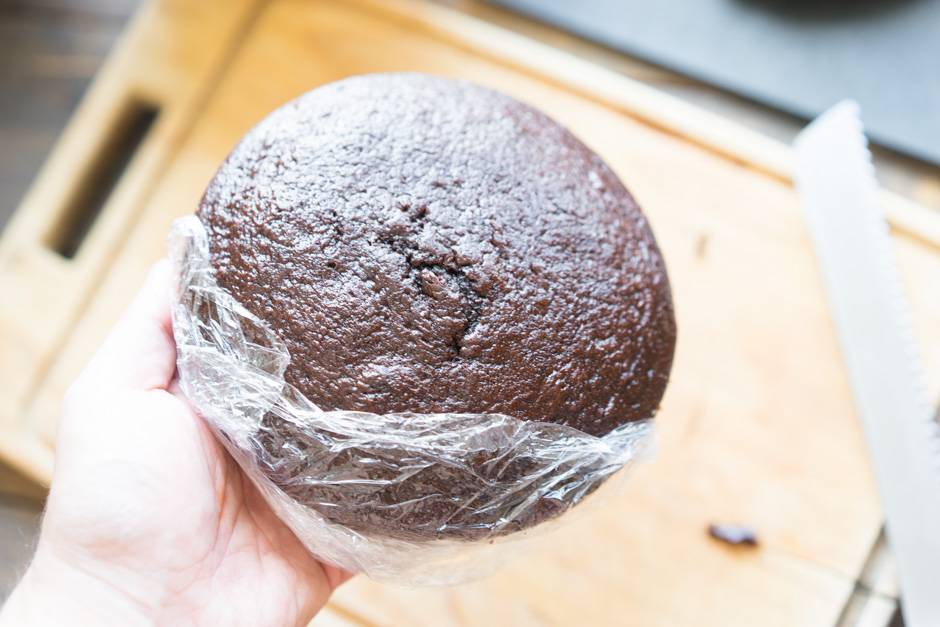
We cut the cakes to the same thickness, we talked about this in a special lesson. 
Since the cakes are very wet, I line each with parchment so that they do not stick together. 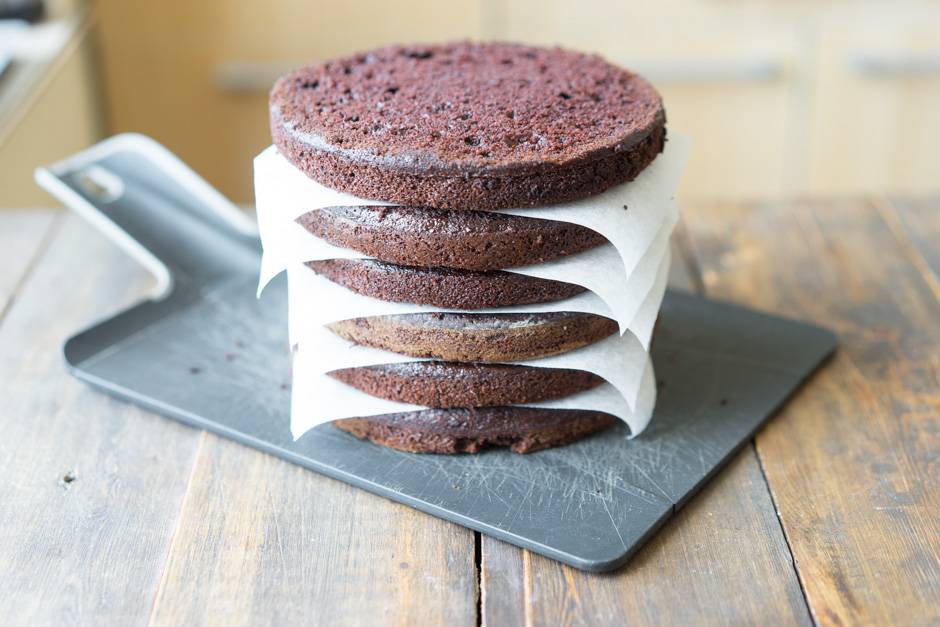
Next cream. I took my standard, 2.5 servings. Which cream to take you, decide for yourself. Also in portions - this is always an individual parameter. 
We are building a cake. 
We follow the geometry. 
Remember about the rough coating. 
Now about the icing, I will add this block to the cake assembly material, but let it be here. The first thing we need is a well-cooled cake. It's great if you cover it with cream in the evening, and pour glaze over it in the morning. A cold cake will help to quickly cool the icing and it will harden in beautiful smudges.
How do I make frosting? Dark chocolate and butter. You can also use ganache, but you still need cream. 
For such a cake, you will need about 80 grams of chocolate, I took it with a margin. If you take tiles, chop them finely, we need a homogeneous paste, and if there are large pieces, they melt for a long time and the process stretches. 
Melt in my favorite way - a pastry bag in boiling water. This way you will NEVER overheat the chocolate. 
Once the chocolate has melted, pour it into a wide bowl. 
Add chopped pieces of cold butter. The calculation is this - for 100 grams of chocolate - 60-80 grams of butter. Why is it? Firstly, the chocolate will shine, and secondly, the icing will be softer on the cake, and not become a hard crust that cannot be cut and eaten. 
Stir the mass with a silicone spatula until smooth. If the chocolate does not cope with the oil, you can put it in the microwave. 15 seconds, removed, mixed everything, another 15 seconds. You should get an emulsion - that is, a completely homogeneous mass without lumps. 
Let the chocolate frosting cool down a bit. At first, it will run from the shoulder blade like water, it will gradually become thicker, like kefir, this is the state we need. In the meantime, let's get decorating. Many asked to tell about kandurin. This is a harmless powder of gold or silver color (I have it in the store). Used for coloring and decoration.
For example, we can cover blackberries with it. Pour the part onto a plate, dip a soft brush into it and gently grease the berries. It is clear that we will work gently with raspberries, but we will not stand on ceremony with strawberries at all. You can cover the berries completely or lightly dust them. 
And here is how the cakes are covered. Pick up kandurin on a brush, bring it to the surface of the cake by 4 cm and blow strongly on the side of the cake. Gold dust is applied to the sides of the cake. You can't just apply with a brush. Hair streaks will be visible and the gold layer will be too thick. And in this way you very clearly regulate the density of application. I went over the bottom third of the cake like this, creating a slight gradient. At first it may not work for you, but gradually you will understand the essence. We apply dust again and again, to the desired shade. Clearly, the darker the cream, the more beautiful and obvious the gold coating will be. 
And now for the frosting. I made a video. And now I'm summarizing everything for you. First - the cake is cold, waiting in the refrigerator. Secondly, the chocolate icing is liquid, without lumps, similar in texture to kefir, it flows from a spatula like a ribbon.
Prepare a small spatula or spatula. We will “draw” our smudges with it. Pour frosting onto the center of the cake. It is necessary to pour so much that 1.5-2 cm remain from the edges. And carefully, slowly distribute the icing with a spatula from the center to the edges. To get a smudge, you just need to “push” the icing down with a spatula, that’s all, gravity and the cold sides of the cake will do the rest. If you want thicker smudges, cool the icing a little more. But it seems to me that not everyone likes a thick hat of chocolate, so we have cute smudges. Did you notice that they are different heights? This is also achieved by the fact that we bring more or less glaze to the edge of the cake with a spatula. Practice, I think that your second cake will turn out perfect.
When the glaze has cooled, you can also cover it with kandurin, it will give a pleasant shine and specularity. 
I chose the color of the cream in the theme of Halloween, but at the usual time you can take turquoise, it looks good with the filling. 
And here is the cut of our handsome man. 
You can read about how to properly bake cakes, assemble a cake and work with cream here.
By the amount of dough for cakes (3-6 cakes from 1.5 to 2.5 cm):
mold diameter (cm)
16-18
20-22
24+
servings of dough
1
2
3
My first naked cake. Inside "Dark Larry" from Chef Andy, buttercream with cherry syrup, fruit.
Chocolate smudges didn't quite come out. When the chocolate cooled, everything seemed to be still very liquid, I wanted it to be thicker. That's what I've been waiting for.
Well, I'm not upset, it's still an experience. And what a delicious experience. They ate quickly.
On the next smudge, I was much more pleased. 

Husband's birthday cake. Inside - "Hummingbird" from Andy Chef and butter cream flavored with Tarragon syrup.
My husband loves this lemonade very much, and I can't stand lemonade or seasoning.
Well, I thought everything in the cake was delicious. But nooo. It seems to me that now I don’t like tarragon even more
Someone peeped the inscription here. Husband was happy
Third birthday cake for my aunt. Inside - Red velvet; cream: butter, condensed milk, cocoa, cognac (maybe this cream has a name, but I don’t know it); and outside buttercream with orange juice.
Just arrived my ordered kondurin. She did everything as the chef explained - she blew it off the brush. But it still didn't work out very well.
Kondurin was blown away not by one grain of sand, but by heaps at once. You can see it in the photo. Can anyone advise what is wrong and how to deal with it?
There was no time to mess around with the inscription. The guests came and had to finish it quickly.
This cake is made to order. A friend asked for her son. Inside - Chef Andy's "Chocolate Cake of Passion", peaches, buttercream with peach syrup, letters and numbers from marmysh mastic. 2.5 kg. 
I suffered very much. As always, I started making the cake three days before the event. But the cream conceived a new, not yet tested.
As a result, the cake began to blur. And there were days.
Made new cakes overnight. Cream in the morning. At lunch, while my son was sleeping, I decorated.
Well, the race ... Well, the nerves ... And after I gave the order, as if the wings were straightened ...
But now I decided, if there will ever be orders - no experiments. Only proven recipes!
Luckily, the next day was my birthday. And I collected all the remnants of the cakes and blinded myself a cake.
So, everything that is done, everything is really for the better.
The photo shows that the figure was made as it was thought up. I have several stencils for letters.
But for numbers - one single and very tiny. I can't find anything at all.
If anyone bought stencils of numbers in online stores, share the links, please. Especially if with aliexpress.
All cakes are aligned oil cream Andy Chef's recipe. Here is his recipe. Maybe someone will come in handy.
Put soft butter (150 g, 82% fat content) and powdered sugar (125 g) into the mixer bowl.
Powder, if in doubt about the quality, it is better to sift in order to get rid of pieces that will then crunch on your teeth.
Beat this mass for a very long time at the maximum speed of the mixer.
A hand mixer may take about 12-15 minutes. The idea is to get a snow-white mass.
Continuing to beat the mass, pour milk (50 g) in a thin stream.
It is better to do this in portions, for example, pour a teaspoonful, beat for 30 seconds and pour in another portion. Room temperature.
If there is some kind of syrup, add it (all 50 g or part).
I really look forward to your advice! Thank you very much for your attention!

Meet "Dark Larry", a discovery cake for all chocoholics on the planet. The proportions and ingredients of the dough give us indecently sticky cakes that are so porous that they weigh nothing, while being amazingly soft and juicy. A strong chocolate taste will put even the sensational “Cake for one-two-three” on the shoulder blades, and this is a serious request, do you agree? A real revolution in ingredients, their proportions and cooking technology. And if you promise to follow all the steps exactly, this cake will become your favorite. He absorbed the best from the world of brownies, chocolate cakes and airy mousses, thereby becoming the standard of chocolate cake. I even admit that a third of readers will not even have time to make cream for cakes, because they will no longer be. In general, it's best not to try the finished cakes or pieces before you assemble the cake, otherwise you will have to come up with stories about why the cake disappeared. And at the same time, I give a long-awaited step-by-step guide to chocolate icing, beautiful smudges and the fashionable kandurin today.
Cooking time: 100 minutes + cooling
Servings: 8-10
Dish complexity: #m3_of_5
Similar recipes: #preparing_cakes #from_chocolate
You will need:
For the test you will need:
Flour - 375 g
Cocoa - 90 g
Baking powder - 10 g
Soda - 7 g
Vegetable oil - 150 g
Sugar - 450 g
Eggs - 3 pcs
Vanilla extract - 5 g
Milk - 150 g
Hot coffee - 340 g
Alcohol - 75 g
For cream:
Cream 33% - 100 gr
Cream cheese - 500 gr
Powdered sugar - 70 gr
Cake for 16-18 cm,
How to cook:
1. Sift dry ingredients into a large bowl: flour (375 g), cocoa (90 g), baking powder (10 g), soda (7 g). Please use the best quality cocoa. No green packs. We need taste, color, and the absence of particles that squeak on the teeth. I recommend Barry Callebaut Belgian alkalized to everyone.
Repeatedly said that you need to mix everything carefully, with a whisk. Especially mixtures where there is soda or baking powder. Otherwise, you may have different parts of the cake in composition, in one there are more of these agents and the cakes will go in bubbles. We take it aside.
2. And in the mixer bowl we combine any vegetable oil (150 g) and sugar (450 g). Beat well with a mixer. It is clear that such butter will not whip into foam, like butter, so we just wait for the uniformity of the mass.
3. Next, lower the speed to low and add all the eggs (3 pcs) and vanilla extract (5 g). For vanilla, everything is as usual, we do not replace vanilla or chemical flavors, it is better not to add anything. Beat the mass for 2 minutes.
4. We introduce half of the dry mixture. We beat.
5. Pour in milk (150 g), the temperature is not important here.
6. And now the most interesting thing is hot coffee (340 g). Once again I pay attention - yes, grams. Because the bowl is on the scales and it's easier than measuring with glasses. You can take instant coffee, brew it yourself or use a coffee machine. The main thing is boiling water. By the way, if you, for some reason, are afraid of coffee - just add water. What is happening at this moment? Boiling water activates the baking powder, and although we are used to seeing it work already in the oven, in this case we need air in the dough right away. Then you will see the difference. The second moment, cocoa is brewed. It literally turns into hot chocolate (we have cocoa, fats and temperature to heat up), so the cakes will be surprisingly darker. Alcohol (75 g) must also be sent there. I took Marsala, you can whiskey, cognac, liqueurs, in short, everything that has a pleasant tart flavor (not wine, of course). Again, special housewives can replace this with water or juice.
7. Beat on low speed and pour in the rest of the dry ingredients.
Look, we get quite a lot of dough. Now is the time to decide how we will bake. I find it more convenient to bake one cake at a time, so I made a French shirt for my 16th form and will bake SIX cakes. The weight of each dough is about 300 grams. In principle, if you are in a hurry, you can make three doubles (then just cut off). If you are confident in your abilities, you can make two calls (in each form, then you will have three cakes). The dough will be liquid, this may confuse you. Do not be alarmed if everything was done with weights - it means that you have the right dough, and even though it seems that it runs straight - this is normal.
8. Bake at 180 degrees, preheat the oven, top and bottom.
We bake a single cake for about 25 minutes, if there are more servings in the form, the time will increase. There is a subtle point here - the dough is very dark, and in the process of baking it will turn completely black, so you may not catch the moment when the cake burned out. Check with a skewer, as soon as it comes out dry - take it out. You can simply press the center of the cake with your finger, as the pros do, if the cake springs, it is clear that it is completely baked. The remaining cakes can be safely baked for exactly the same amount of time. And don't worry about the dough, it will wait. There will be a bump on top, we all know that it will need to be trimmed.
9. They took it out of the mold immediately, put it on a wire rack and removed the parchment. We use it again for the next games. I always turn the cake over so as not to deform the bottom important edge.
So in turn we bake all the cakes. Each time we repeat the French shirt. For silicone, only parchment at the bottom, but I would make these cakes in metal.
When the cakes have cooled completely, wrap in cling film and put in the refrigerator for a couple of hours (better at night). During this time, moisture from the center of the cake is distributed to the edges, and the film does not allow it to leave the cakes. Look, the cake seems to be sticky. It turns out so juicy, it's unbelievable.
10. Cut the cakes to one thickness. Since the cakes are very wet, I line each with parchment so that they do not stick together.
11. Next cream. I took my standard. Which cream to take you, decide for yourself. Also in portions - this is always an individual parameter. It is clear that we tint it with dye, I take those - Americolor.
First, whip cream (100 gr) in a bowl. We take strictly from 33% fat content, no less fatty ones will do. The secret to quick whipping: cold bowl, cold beaters and cold cream. Chefs joke that you can put whisks, a pack of cream in a bowl and put everything in the freezer for 10 minutes.
Then, with a mixer at maximum speed, whip the cream. At the beginning, it will seem that nothing is happening, but at the 5th minute, the mass will begin to thicken. See, as soon as the mass holds its shape (stable peaks), stop beating. So as not to overwhip the cream, getting butter.
Now add cream cheese (500 gr) and powdered sugar (70-90 gr). And finally beat.
The mass has become homogeneous, we remove it in the refrigerator. Let it lie down for an hour, gain strength. What I like about this cream is that it does not have an oily taste at all, the cream is lighter. In addition, it turns out to be snow-white. It keeps its shape very well. The proportions of cheese and powder can be changed, it all depends on your taste.
There are also a lot of questions about cottage cheese. First of all, do not confuse cream cheese and cottage cheese - the first is more like processed cheese, the second is like finely ground cottage cheese. If you try it out of the pack, it will be a little salty, don't be alarmed - salt enhances the sweet ingredients and slightly shades them (so that the cream does not become cloying).
You can even use soft ricotta or other cheeses like mascarpone and philadelphia - but the basic recipe will still be the same as I wrote above.
12. Building a cake. We follow the geometry. Remember about the rough coating.
13. Now about the icing. The first thing we need is a well-cooled cake. It's great if you cover it with cream in the evening, and pour glaze over it in the morning. A cold cake will help to quickly cool the icing and it will harden in beautiful smudges.
How do I make frosting? Dark chocolate and butter. You can also use ganache, but you still need cream.
For such a cake, you will need about 80 grams of chocolate, I took it with a margin. If you take tiles, chop them finely, we need a homogeneous paste, and if there are large pieces, they melt for a long time and the process stretches.
Melt in my favorite way - a pastry bag in boiling water. This way you will NEVER overheat the chocolate. Once the chocolate has melted, pour it into a wide bowl.
Add chopped pieces of cold butter. The calculation is - for 100 grams of chocolate - 60-80 grams of butter. Why is it? Firstly, the chocolate will shine, and secondly, the icing will be softer on the cake, and not become a hard crust that cannot be cut and eaten.
Stir the mass with a silicone spatula until smooth. If the chocolate does not cope with the oil, you can put it in the microwave. 15 seconds, removed, mixed everything, another 15 seconds. You should get an emulsion - that is, a completely homogeneous mass without lumps.
Let the chocolate frosting cool down a bit. At first, it will run from the shoulder blade like water, it will gradually become thicker, like kefir, this is the state we need.
14. In the meantime, let's do the decor. Many asked to tell about kandurin. It is a harmless powder of gold or silver color. Used for coloring and decoration.
For example, we can cover blackberries with it. Pour the part onto a plate, dip a soft brush into it and gently grease the berries. It is clear that we will work gently with raspberries, but we will not stand on ceremony with strawberries at all. You can cover the berries completely or lightly dust.
And here is how the cakes are covered. Pick up kandurin on a brush, bring it to the surface of the cake by 4 cm and blow strongly on the side of the cake. Gold dust is applied to the sides of the cake. You can't just apply with a brush. Hair streaks will be visible and the gold layer will be too thick. And in this way you very clearly regulate the density of application. I went over the bottom third of the cake like this, creating a slight gradient. At first it may not work for you, but gradually you will understand the essence. We apply dust again and again, to the desired shade. Clearly, the darker the cream, the more beautiful and obvious the gold coating will be.
15. And now about the icing. And now I'm summarizing everything for you. First - the cake is cold, waiting in the refrigerator. Secondly, the chocolate icing is liquid, without lumps, similar in texture to kefir, it flows from a spatula like a ribbon.
Prepare a small spatula or spatula. We will “draw” our smudges with it. Pour frosting onto the center of the cake. It is necessary to pour so much that 1.5-2 cm remain from the edges. And carefully, slowly distribute the icing with a spatula from the center to the edges. To get a smudge, you just need to “push” the icing down with a spatula, that’s all, gravity and the cold sides of the cake will do the rest. If you want thicker smudges, cool the icing a little more. But it seems to me that not everyone likes a thick hat of chocolate, so we have cute smudges. Did you notice that they are different heights? This is also achieved by the fact that we bring more or less glaze to the edge of the cake with a spatula. Practice, I think that your second cake will turn out perfect.
When the glaze has cooled, you can also cover it with kandurin, it will give a pleasant shine and specularity.


Enjoy your meal!


