Cake "Dark Larry". Chocolate biscuit "Dark Larry"
Have you ever heard of Dark Larry? If not, then get acquainted! Dark Larry cake is a recent discovery in the confectionery world. This is a completely unique piece of sweet art.
Miracle dessert
Chocolate lovers will appreciate the Dark Larry cake. The proportions of the recipe are such that the cakes are incredibly sticky and at the same time porous, almost weightless, but at the same time very soft and juicy.
The chocolate taste of this dessert pushes all the famous chocolate treats into the background. No matter how pathetic it may sound, but the Chocolate Larry cake claims first place in this nomination. This is something completely new and unsurpassed. The recipe for this cake has revolutionized the technology and proportions of confectionery. If you can follow all the recommendations step by step exactly, then you will become a real guru in preparing this masterpiece.
Connoisseurs of the chocolate world claim that at present, "Chocolate Larry", which has taken all the best from light mousses and sweet cakes, has become the standard of culinary art.
I must say that it is difficult to resist the temptation to try ready-made cakes even before they are assembled into a cake. By themselves, they are very tasty. If you bite off at least a piece, then you will not see the finished dessert. There is simply nothing to collect it from.
What ingredients are needed to make a cake?
So how do you prepare such an unusual and wonderful dessert?
Andy chef Andrey Rudkov offers his recipe. To bring it to life, you will need the following ingredients:
- Cocoa - 90 g.
- Flour - 375 g.
- Soda - 7 g.
- Baking powder - 10 g.
- Oil (vegetable) - 150 g.
- Eggs - 3 pcs.
- Sugar - 450 g.
- Milk - 150 g.
- Vanilla extract - 5 g.
- Coffee (hot) - 340 g.
- Alcohol - 75 g.

Cake "Dark Larry": recipe
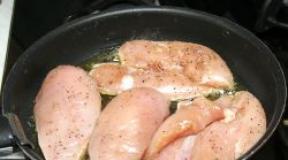
So, let's move on to cooking. In a large bowl, sift dry ingredients: cocoa, flour, soda and baking powder. Cocoa must be of high quality. This is a very important point in cooking.
We mix everything with a whisk, and very persistently. Then your future dough will turn out homogeneous.

As soon as the mixture has become more or less homogeneous, reduce the speed and add all three eggs alternately together with Beat for several minutes.
By the way, coffee can be taken both instant and prepared in a coffee maker. A prerequisite is that it must be very hot. The fact is that boiling water activates the baking powder, it should start working even before the oven. Next, you need to brew cocoa. It should be like Thanks to him, the chocolate cake turns out surprisingly dark. There is also alcohol added. You can take liquor, cognac, whiskey. Alcohol gives a tart pleasant aroma.

All this is beaten at low speed of the mixer. Add the last batch of dry ingredients. It turns out a pretty decent amount of dough.
Cake baking
Now you can start baking cakes. The recipe suggests using the sixteenth diameter of the mold. Then from this amount of ingredients six shortcakes are obtained. Of course, you can use any shape, just not very large.
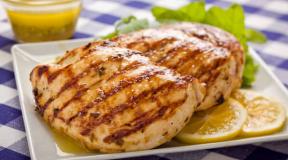
On average, each finished cake weighs about three hundred grams. Each chocolate cake is baked separately. You can make thicker cakes, then each of them will have to be cut in half, although this is not very convenient and difficult to make evenly and beautifully.
We want to emphasize that the dough is liquid. Don't be scared, that's how it should be.
We must preheat the oven at a temperature of one hundred and eighty degrees (both the top and bottom should warm up). Each cake is baked for about twenty-five minutes. We want to warn about one important nuance. The dough itself is dark. In the process of cooking, it will become even darker, almost black. Therefore, you simply may not catch the moment when the baking is ready. To prevent the cakes from burning, constantly check the degree of their readiness with a skewer.
In general, professionals check readiness a little differently. They press their finger on the center of the cake, if it springs, then this indicates its readiness. But you can get burned.

After taking out the form from the oven, immediately take out the cake and transfer it to parchment or a wire rack. So, alternately bake all six shortcakes.
Let them cool a little, then wrap everything together in polyethylene, put it in the refrigerator overnight. This is done so that the moisture is evenly distributed from the center of the cake throughout the entire volume, the bag will not let it go outside. As a result, the cakes are incredibly sticky and juicy.
Assembling the cake
What will we grease homemade chocolate cake with? Of course, cream. But which one you prefer, it's up to you. There is no need to use any specific recipe. Choose the cream that you find delicious.

The only thing to consider is that it will need to be tinted with dye. In finished form, the cream may be orange in color.
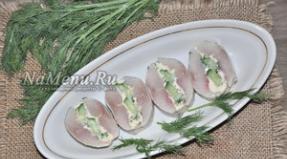
Next, we place it in and begin to coat the cakes. It needs to be done in a special way. A kind of spiral of cream is applied to the cake (like a twisted snail). So we coat layer by layer. Then, with the same cream, you need to process the outer area of \u200b\u200bthe cake.
Making the Glaze for Dark Larry
Now our Dark Larry cake can be refrigerated overnight. In the morning we will start preparing the glaze.
It will harden very quickly and beautifully on a cold cake. You should get great smudges.
To prepare the glaze, you will need butter and chocolate (eighty grams). If you take a tile, then it needs to be crushed. We should get a homogeneous paste. And large pieces will melt for a long time, delaying the process.
To melt the chocolate quickly, put it in a pastry bag and dip it in hot water. As soon as it melts, squeeze it into a bowl. We also add butter there in proportion: for every hundred grams of chocolate, 80 grams of butter. This is done to add shine to the glaze. It will be softer on the cake and turn into a delicious crust.
Stir until smooth with a silicone spatula. If the butter does not melt, then you can put the bowl in the microwave for fifteen minutes. Mix everything again. It turns out a chocolate homogeneous emulsion. The frosting must be cold. You can start using it when it acquires the consistency of kefir.

In the meantime, decorate our cake with kandurin. It is such a harmless food dye. So, our task is to cover the side surface of the product with it. How will we do it? Yes, very easy! We will take the gold dust with a brush and, bringing it to the cake, blow hard on it. Kandurin in the form of dust will settle on the surface with a golden layer, the thickness of which you yourself regulate. Just applying it with a brush will not work, ugly stains will remain on the surface. Dust is applied layer by layer until the desired shade is obtained.
How to make spectacular chocolate smudges?
As soon as the icing has cooled down a bit, we begin to apply it on the cake. To do this, pour it on the center of the upper cake. Then with a spatula (silicone) we begin to smear it over the surface, pushing the glaze to the edges. So it will begin to flow unevenly down. She will not run far from us, because she will quickly harden on the cold surface of the cake. For beauty, the glaze can be powdered with kandurin, giving a rich golden hue.
Meet "Dark Larry", a discovery cake for all chocoholics on the planet. The proportions and ingredients of the dough give us indecently sticky cakes that are so porous that they weigh nothing, while being amazingly soft and juicy. A strong chocolate taste will put even the sensational “Cake for one-two-three” on the shoulder blades, and this is a serious request, do you agree? A real revolution in ingredients, their proportions and cooking technology. And if you promise to follow all the steps exactly, this cake will become your favorite. He absorbed the best from the world of brownies, chocolate cakes and airy mousses, thereby becoming the standard of chocolate cake. I even admit that a third of readers will not even have time to make cream for cakes, because they will no longer be. In general, it's best not to try the finished cakes or pieces before you assemble the cake, otherwise you will have to come up with stories about why the cake disappeared. And at the same time, I give a long-awaited step-by-step guide to chocolate icing, beautiful smudges and the fashionable kandurin today.
You will need:
For the test you will need:
Flour - 375 g
Cocoa - 90 g
Baking powder - 10 g
Soda - 7 g
Vegetable oil - 150 g
Sugar - 450 g
Eggs - 3 pcs
Vanilla extract - 5 g
Milk - 150 g
Hot coffee - 340 g
Alcohol - 75 g
For cream:
Cream 33% - 100 gr
Cream cheese - 500 gr
Powdered sugar - 70 gr
cake 16-18 cm,
How to cook:
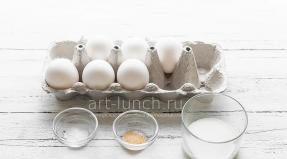
1. Sift dry ingredients into a large bowl: flour (375 g), cocoa (90 g), baking powder (10 g), soda (7 g). Please use the best quality cocoa. No green packs. We need taste, color, and the absence of particles that squeak on the teeth. I recommend Barry Callebaut Belgian alkalized to everyone.
Repeatedly said that you need to mix everything carefully, with a whisk. Especially mixtures where there is soda or baking powder. Otherwise, you may have different parts of the cake in composition, in one there are more of these agents and the cakes will go in bubbles. We take it aside.
2. And in the mixer bowl we combine any vegetable oil (150 g) and sugar (450 g). Beat well with a mixer. It is clear that such butter will not whip into foam, like butter, so we just wait for the uniformity of the mass.
3. Next, lower the speed to low and add all the eggs (3 pcs) and vanilla extract (5 g). For vanilla, everything is as usual, we do not replace vanilla or chemical flavors, it is better not to add anything. Beat the mass for 2 minutes.
4. We introduce half of the dry mixture. We beat.
5. Pour in milk (150 g), the temperature is not important here.
6. And now the most interesting thing is hot coffee (340 g). Once again I pay attention - yes, grams. Because the bowl is on the scales and it's easier than measuring with glasses. You can take instant coffee, brew it yourself or use a coffee machine. The main thing is boiling water. By the way, if you, for some reason, are afraid of coffee - just add water. What is happening at this moment? Boiling water activates the baking powder, and although we are used to seeing it work already in the oven, in this case we need air in the dough right away. Then you will see the difference. The second moment, cocoa is brewed. It literally turns into hot chocolate (we have cocoa, fats and temperature to heat up), so the cakes will be surprisingly darker. Alcohol (75 g) must also be sent there. I took Marsala, you can whiskey, cognac, liqueurs, in short, everything that has a pleasant tart flavor (not wine, of course). Again, special housewives can replace this with water or juice.
7. Beat on low speed and pour in the rest of the dry ingredients.
Look, we get quite a lot of dough. Now is the time to decide how we will bake. I find it more convenient to bake one cake at a time, so I made a French shirt for my 16th form and will bake SIX cakes. The weight of each dough is about 300 grams. In principle, if you are in a hurry, you can make three doubles (then just cut off). If you are confident in your abilities, you can make two calls (in each form, then you will have three cakes). The dough will be liquid, this may confuse you. Do not be alarmed if everything was done with weights - it means that you have the right dough, and even though it seems that it runs straight - this is normal.
8. Bake at 180 degrees, preheat the oven, top and bottom.
We bake a single cake for about 25 minutes, if there are more servings in the form, the time will increase. There is a subtle point here - the dough is very dark, and in the process of baking it will turn completely black, so you may not catch the moment when the cake burned out. Check with a skewer, as soon as it comes out dry - take it out. You can simply press the center of the cake with your finger, as the pros do, if the cake springs, it is clear that it is completely baked. The remaining cakes can be safely baked for exactly the same amount of time. And don't worry about the dough, it will wait. There will be a bump on top, we all know that it will need to be trimmed.
9. They took it out of the mold immediately, put it on a wire rack and removed the parchment. We use it again for the next games. I always turn the cake over so as not to deform the bottom important edge.
So in turn we bake all the cakes. Each time we repeat the French shirt. For silicone, only parchment at the bottom, but I would make these cakes in metal.
When the cakes have cooled completely, wrap in cling film and put in the refrigerator for a couple of hours (better at night). During this time, moisture from the center of the cake is distributed to the edges, and the film does not allow it to leave the cakes. Look, the cake seems to be sticky. It turns out so juicy, it's unbelievable.
10. Cut the cakes to one thickness. Since the cakes are very wet, I line each with parchment so that they do not stick together.
11. Next cream. I took my standard. Which cream to take you, decide for yourself. Also in portions - this is always an individual parameter. It is clear that we tint it with dye, I take those - Americolor.
First, whip cream (100 gr) in a bowl. We take strictly from 33% fat content, no less fatty ones will do. The secret to quick whipping: cold bowl, cold beaters and cold cream. Chefs joke that you can put whisks, a pack of cream in a bowl and put everything in the freezer for 10 minutes.
Then, with a mixer at maximum speed, whip the cream. At the beginning, it will seem that nothing is happening, but at the 5th minute, the mass will begin to thicken. See, as soon as the mass holds its shape (stable peaks), stop beating. So as not to overwhip the cream, getting butter.
Now add cream cheese (500 gr) and powdered sugar (70-90 gr). And finally beat.
The mass has become homogeneous, we remove it in the refrigerator. Let it lie down for an hour, gain strength. What I like about this cream is that it does not have an oily taste at all, the cream is lighter. In addition, it turns out to be snow-white. It keeps its shape very well. The proportions of cheese and powder can be changed, it all depends on your taste.
There are also a lot of questions about cottage cheese. First of all, do not confuse cream cheese and cottage cheese - the first is more like processed cheese, the second is like finely ground cottage cheese. If you try it out of the pack, it will be a little salty, don't be alarmed - salt enhances the sweet ingredients and slightly shades them (so that the cream does not become cloying).
You can even use soft ricotta or other cheeses like mascarpone and philadelphia - but the basic recipe will still be the same as I wrote above.
12. Building a cake. We follow the geometry. Remember about the rough coating.
13. Now about the icing. The first thing we need is a well-cooled cake. It's great if you cover it with cream in the evening, and pour glaze over it in the morning. A cold cake will help to quickly cool the icing and it will harden in beautiful smudges.
How do I make frosting? Dark chocolate and butter. You can also use ganache, but you still need cream.
For such a cake, you will need about 80 grams of chocolate, I took it with a margin. If you take tiles, chop them finely, we need a homogeneous paste, and if there are large pieces, they melt for a long time and the process stretches.
Melt in my favorite way - a pastry bag in boiling water. This way you will NEVER overheat the chocolate. Once the chocolate has melted, pour it into a wide bowl.
Add chopped pieces of cold butter. The calculation is - for 100 grams of chocolate - 60-80 grams of butter. Why is it? Firstly, the chocolate will shine, and secondly, the icing will be softer on the cake, and not become a hard crust that cannot be cut and eaten.
Stir the mass with a silicone spatula until smooth. If the chocolate does not cope with the oil, you can put it in the microwave. 15 seconds, removed, mixed everything, another 15 seconds. You should get an emulsion - that is, a completely homogeneous mass without lumps.
Let the chocolate frosting cool down a bit. At first, it will run from the shoulder blade like water, it will gradually become thicker, like kefir, this is the state we need.
14. In the meantime, let's do the decor. Many asked to tell about kandurin. It is a harmless powder of gold or silver color. Used for coloring and decoration.
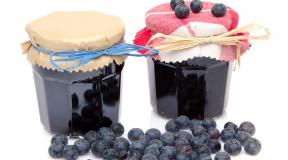
For example, we can cover blackberries with it. Pour the part onto a plate, dip a soft brush into it and gently grease the berries. It is clear that we will work gently with raspberries, but we will not stand on ceremony with strawberries at all. You can cover the berries completely or lightly dust.
And here is how the cakes are covered. Pick up kandurin on a brush, bring it to the surface of the cake by 4 cm and blow strongly on the side of the cake. Gold dust is applied to the sides of the cake. You can't just apply with a brush. Hair streaks will be visible and the gold layer will be too thick. And in this way you very clearly regulate the density of application. I went over the bottom third of the cake like this, creating a slight gradient. At first it may not work for you, but gradually you will understand the essence. We apply dust again and again, to the desired shade. Clearly, the darker the cream, the more beautiful and obvious the gold coating will be.
15. And now about the icing. And now I'm summarizing everything for you. First - the cake is cold, waiting in the refrigerator. Secondly, the chocolate icing is liquid, without lumps, similar in texture to kefir, it flows from a spatula like a ribbon.
Prepare a small spatula or spatula. We will “draw” our smudges with it. Pour frosting onto the center of the cake. It is necessary to pour so much that 1.5-2 cm remain from the edges. And carefully, slowly distribute the icing with a spatula from the center to the edges. To get a smudge, you just need to “push” the icing down with a spatula, that’s all, gravity and the cold sides of the cake will do the rest. If you want thicker smudges, cool the icing a little more. But it seems to me that not everyone likes a thick hat of chocolate, so we have cute smudges. Did you notice that they are different heights? This is also achieved by the fact that we bring more or less glaze to the edge of the cake with a spatula. Practice, I think that your second cake will turn out perfect.
When the glaze has cooled, you can also cover it with kandurin, it will give a pleasant shine and specularity.
Bon Appetit!

Meet "Dark Larry", a discovery cake for all chocoholics on the planet. The proportions and ingredients of the dough give us indecently sticky cakes that are so porous that they weigh nothing, while being amazingly soft and juicy. A strong chocolate taste will put even the sensational “Cake for one-two-three” on the shoulder blades, and this is a serious request, do you agree? A real revolution in ingredients, their proportions and cooking technology. And if you promise to follow all the steps exactly, this cake will become your favorite. He absorbed the best from the world of brownies, chocolate cakes and airy mousses, thereby becoming the standard of chocolate cake. I even admit that a third of readers will not even have time to make cream for cakes, because they will no longer be. In general, it's best not to try the finished cakes or pieces before you assemble the cake, otherwise you will have to come up with stories about why the cake disappeared. And at the same time, I give a long-awaited step-by-step guide to chocolate icing, beautiful smudges and the fashionable kandurin today.
Cooking time: 100 minutes + cooling
Servings: 8-10
Dish complexity: #m3_of_5
Similar recipes: #preparing_cakes #from_chocolate
You will need:
For the test you will need:
Flour - 375 g
Cocoa - 90 g
Baking powder - 10 g
Soda - 7 g
Vegetable oil - 150 g
Sugar - 450 g
Eggs - 3 pcs
Vanilla extract - 5 g
Milk - 150 g
Hot coffee - 340 g
Alcohol - 75 g
For cream:
Cream 33% - 100 gr
Cream cheese - 500 gr
Powdered sugar - 70 gr
Cake for 16-18 cm,
How to cook:
1. Sift dry ingredients into a large bowl: flour (375 g), cocoa (90 g), baking powder (10 g), soda (7 g). Please use the best quality cocoa. No green packs. We need taste, color, and the absence of particles that squeak on the teeth. I recommend Barry Callebaut Belgian alkalized to everyone.
Repeatedly said that you need to mix everything carefully, with a whisk. Especially mixtures where there is soda or baking powder. Otherwise, you may have different parts of the cake in composition, in one there are more of these agents and the cakes will go in bubbles. We take it aside.
2. And in the mixer bowl we combine any vegetable oil (150 g) and sugar (450 g). Beat well with a mixer. It is clear that such butter will not whip into foam, like butter, so we just wait for the uniformity of the mass.
3. Next, lower the speed to low and add all the eggs (3 pcs) and vanilla extract (5 g). For vanilla, everything is as usual, we do not replace vanilla or chemical flavors, it is better not to add anything. Beat the mass for 2 minutes.
4. We introduce half of the dry mixture. We beat.
5. Pour in milk (150 g), the temperature is not important here.
6. And now the most interesting thing is hot coffee (340 g). Once again I pay attention - yes, grams. Because the bowl is on the scales and it's easier than measuring with glasses. You can take instant coffee, brew it yourself or use a coffee machine. The main thing is boiling water. By the way, if you, for some reason, are afraid of coffee - just add water. What is happening at this moment? Boiling water activates the baking powder, and although we are used to seeing it work already in the oven, in this case we need air in the dough right away. Then you will see the difference. The second moment, cocoa is brewed. It literally turns into hot chocolate (we have cocoa, fats and temperature to heat up), so the cakes will be surprisingly darker. Alcohol (75 g) must also be sent there. I took Marsala, you can whiskey, cognac, liqueurs, in short, everything that has a pleasant tart flavor (not wine, of course). Again, special housewives can replace this with water or juice.
7. Beat on low speed and pour in the rest of the dry ingredients.
Look, we get quite a lot of dough. Now is the time to decide how we will bake. I find it more convenient to bake one cake at a time, so I made a French shirt for my 16th form and will bake SIX cakes. The weight of each dough is about 300 grams. In principle, if you are in a hurry, you can make three doubles (then just cut off). If you are confident in your abilities, you can make two calls (in each form, then you will have three cakes). The dough will be liquid, this may confuse you. Do not be alarmed if everything was done with weights - it means that you have the right dough, and even though it seems that it runs straight - this is normal.
8. Bake at 180 degrees, preheat the oven, top and bottom.
We bake a single cake for about 25 minutes, if there are more servings in the form, the time will increase. There is a subtle point here - the dough is very dark, and in the process of baking it will turn completely black, so you may not catch the moment when the cake burned out. Check with a skewer, as soon as it comes out dry - take it out. You can simply press the center of the cake with your finger, as the pros do, if the cake springs, it is clear that it is completely baked. The remaining cakes can be safely baked for exactly the same amount of time. And don't worry about the dough, it will wait. There will be a bump on top, we all know that it will need to be trimmed.
9. They took it out of the mold immediately, put it on a wire rack and removed the parchment. We use it again for the next games. I always turn the cake over so as not to deform the bottom important edge.
So in turn we bake all the cakes. Each time we repeat the French shirt. For silicone, only parchment at the bottom, but I would make these cakes in metal.
When the cakes have cooled completely, wrap in cling film and put in the refrigerator for a couple of hours (better at night). During this time, moisture from the center of the cake is distributed to the edges, and the film does not allow it to leave the cakes. Look, the cake seems to be sticky. It turns out so juicy, it's unbelievable.
10. Cut the cakes to one thickness. Since the cakes are very wet, I line each with parchment so that they do not stick together.
11. Next cream. I took my standard. Which cream to take you, decide for yourself. Also in portions - this is always an individual parameter. It is clear that we tint it with dye, I take those - Americolor.
First, whip cream (100 gr) in a bowl. We take strictly from 33% fat content, no less fatty ones will do. The secret to quick whipping: cold bowl, cold beaters and cold cream. Chefs joke that you can put whisks, a pack of cream in a bowl and put everything in the freezer for 10 minutes.
Then, with a mixer at maximum speed, whip the cream. At the beginning, it will seem that nothing is happening, but at the 5th minute, the mass will begin to thicken. See, as soon as the mass holds its shape (stable peaks), stop beating. So as not to overwhip the cream, getting butter.
Now add cream cheese (500 gr) and powdered sugar (70-90 gr). And finally beat.
The mass has become homogeneous, we remove it in the refrigerator. Let it lie down for an hour, gain strength. What I like about this cream is that it does not have an oily taste at all, the cream is lighter. In addition, it turns out to be snow-white. It keeps its shape very well. The proportions of cheese and powder can be changed, it all depends on your taste.
There are also a lot of questions about cottage cheese. First of all, do not confuse cream cheese and cottage cheese - the first is more like processed cheese, the second is like finely ground cottage cheese. If you try it out of the pack, it will be a little salty, don't be alarmed - salt enhances the sweet ingredients and slightly shades them (so that the cream does not become cloying).
You can even use soft ricotta or other cheeses like mascarpone and philadelphia - but the basic recipe will still be the same as I wrote above.
12. Building a cake. We follow the geometry. Remember about the rough coating.
13. Now about the icing. The first thing we need is a well-cooled cake. It's great if you cover it with cream in the evening, and pour glaze over it in the morning. A cold cake will help to quickly cool the icing and it will harden in beautiful smudges.
How do I make frosting? Dark chocolate and butter. You can also use ganache, but you still need cream.
For such a cake, you will need about 80 grams of chocolate, I took it with a margin. If you take tiles, chop them finely, we need a homogeneous paste, and if there are large pieces, they melt for a long time and the process stretches.
Melt in my favorite way - a pastry bag in boiling water. This way you will NEVER overheat the chocolate. Once the chocolate has melted, pour it into a wide bowl.
Add chopped pieces of cold butter. The calculation is - for 100 grams of chocolate - 60-80 grams of butter. Why is it? Firstly, the chocolate will shine, and secondly, the icing will be softer on the cake, and not become a hard crust that cannot be cut and eaten.
Stir the mass with a silicone spatula until smooth. If the chocolate does not cope with the oil, you can put it in the microwave. 15 seconds, removed, mixed everything, another 15 seconds. You should get an emulsion - that is, a completely homogeneous mass without lumps.
Let the chocolate frosting cool down a bit. At first, it will run from the shoulder blade like water, it will gradually become thicker, like kefir, this is the state we need.
14. In the meantime, let's do the decor. Many asked to tell about kandurin. It is a harmless powder of gold or silver color. Used for coloring and decoration.
For example, we can cover blackberries with it. Pour the part onto a plate, dip a soft brush into it and gently grease the berries. It is clear that we will work gently with raspberries, but we will not stand on ceremony with strawberries at all. You can cover the berries completely or lightly dust.
And here is how the cakes are covered. Pick up kandurin on a brush, bring it to the surface of the cake by 4 cm and blow strongly on the side of the cake. Gold dust is applied to the sides of the cake. You can't just apply with a brush. Hair streaks will be visible and the gold layer will be too thick. And in this way you very clearly regulate the density of application. I went over the bottom third of the cake like this, creating a slight gradient. At first it may not work for you, but gradually you will understand the essence. We apply dust again and again, to the desired shade. Clearly, the darker the cream, the more beautiful and obvious the gold coating will be.
15. And now about the icing. And now I'm summarizing everything for you. First - the cake is cold, waiting in the refrigerator. Secondly, the chocolate icing is liquid, without lumps, similar in texture to kefir, it flows from a spatula like a ribbon.
Prepare a small spatula or spatula. We will “draw” our smudges with it. Pour frosting onto the center of the cake. It is necessary to pour so much that 1.5-2 cm remain from the edges. And carefully, slowly distribute the icing with a spatula from the center to the edges. To get a smudge, you just need to “push” the icing down with a spatula, that’s all, gravity and the cold sides of the cake will do the rest. If you want thicker smudges, cool the icing a little more. But it seems to me that not everyone likes a thick hat of chocolate, so we have cute smudges. Did you notice that they are different heights? This is also achieved by the fact that we bring more or less glaze to the edge of the cake with a spatula. Practice, I think that your second cake will turn out perfect.
When the glaze has cooled, you can also cover it with kandurin, it will give a pleasant shine and specularity.


Bon Appetit!
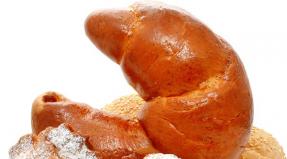
In fact, this is not a biscuit, but a cupcake, but cakes with it are just fire) Delicate, juicy, with a rich and deep taste. I will describe a couple of nuances of cooking, and how I use it for cakes, trifles and cupcakes. It was already in the mousse cake recipe "" but it is so versatile that it needs to be described separately =))
Accurate proportions and the right technology are the most important thing in a confectionery. Stick to the recipe and you'll be fine.
Ingredients are given on cakes 18 cm in diameter. If you have a different mold size, use the base area ratio. (). I advise you to first determine how much and what you need, write it out on a piece of paper, and only then start cooking.
| Ingredients | For 1 cake | For 2 cakes | For 4 cakes |
|---|---|---|---|
| Cocoa | 15 gr. | 30 gr. | 60 gr. |
| Flour | 62.5 gr. | 125 gr. | 250 gr. |
| Baking powder | 1.6 gr. (0.4 tsp) | 3.2 gr. (0.8 tsp) | 6.4 gr. (1.6 tsp) |
| Soda | 1 gr. (0.25 tsp) | 2 gr. (0.5 tsp) | 4 gr. (1 tsp) |
| Vegetable oil | 25 gr. | 50 gr. | 100 gr. |
| white sugar | 75 gr. | 150 gr. | 300 gr. |
| Eggs | 27 gr. (0.5pcs) | 55 gr. (1 PC) | 110 gr. (2 pcs) |
| Milk is cold | 25 gr. | 50 gr. | 100 gr. |
| Alcohol | 12.5 gr. | 25 gr. | 50 gr. |
| Coffee, hot | 57 gr. | 114 gr. | 228 gr. |
- Can you not use alcohol? Yes, but add milk instead, don't just take it out of the recipe.
- Hot coffee is a liquid, already brewed hot drink, not a heated powder.
- Vegetable oil - ordinary sunflower oil, odorless. You can try something else, but keep in mind that some oils can give taste and smell.
- Here, milk can be replaced with cream of any fat content. The fatter, the denser and more obedient the biscuit is.
- Cocoa is the highest quality, most flavorful and delicious you can find. Pure cocoa, without sugar, not Nesquik, but cocoa powder. The taste of the biscuit depends on it to the maximum. I use the Callebaut brand.
Cooking.
0. We set the oven to warm up - for cakes at 180 ° C, for cupcakes - 165 ° C. We brew coffee.
1. Sift cocoa, flour, baking powder and soda into a bowl. It is imperative to sift to break up the lumps and saturate the mixture with air (). Mix well with a whisk so that the soda and baking powder disperse throughout the volume, and do not accumulate in one place. Here we need both soda and baking powder for the correct reaction. No need to get rid of soda - the cake will turn out flat and hard.

2. In a separate bowl, mix vegetable oil, sugar, eggs.


If you take eggs not piece by piece, then first shake them in a separate bowl so that the protein and yolk connect, and only then measure the right amount.


3. Add half of the dry ingredients to the mixture of butter, sugar and eggs. We mix well.


4. Next, add milk, alcohol, stir well. After - we introduce hot coffee, and stir again. The coffee needs to be hot to brew the cocoa (so the flavor will be richer) and start to react with the baking powder to make the cakes fluffier.
 Adding milk
  coffee…
  mix
mix
5. After that, we introduce the rest of the dry mixture, and stir well so that there are no lumps.


It is quite easy to deal with a small volume, but if you are preparing the dough for 4 cakes, then lumps may appear at this stage - we beat them carefully, at low speed. Start freaking out, increase speed and wave the whisk - huge air bubbles will get into the dough, and when baking they will be like caves inside a biscuit.
The dough is liquid, if the baking dish is detachable, then it can leak out. To minimize losses - you can wrap the form with foil, a silicone form, or put it on a baking sheet - this way less will flow out and will not flood the bottom of the oven.
Bakery products.
Cakes and pastries.
lay out the bottom of the mold with baking paper - butt-to-butt, so that the bottom of the biscuit is even, without deflections, which is formed by the paper clamped by the sides (for 3-4 passes, you will need 2 circles - while one is in the oven, the second is scraped off the dough, and alternate) . Grease the edges with oil. Pour the dough into the form - 300 gr. for 1 cake You can bake 1 cake, you can pour a double portion, and then cut.


We bake 1 cake 300 gr. ∼17-18 minutes at 180°C. Readiness is checked with a toothpick.
We take it out of the oven, run a knife along the edge, separating the dough from the form, cover with a napkin, on top with a plate or wire rack, and carefully turn it over. The cake falls out freely due to the paper backing.


Next - put another substrate in the form, fill in a new portion and send it to the oven. If I bake more than 2 cakes, then I scrape off the used paper from the biscuit with the blunt side of the knife, and use it further. When finished, we throw everything away, no need to store it for the next cake.
We cool on the grate.
If you are collecting cake- as soon as the cake has become a little warm, wrap it in a film, and send it to the refrigerator to rest for at least 3 hours. Better at night. I usually bake cakes in the evening, collect the cake in the morning, and by the evening you can already eat it. This helps moisture spread from the center to the edges - the biscuit becomes uniformly moist, crumbles less, and squashes a little - sometimes this is enough not to cut off the top, but to use it as is.

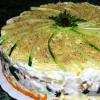
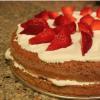
For 1 cake ∼10 cm high, you need 3 cakes (∼1.7 cm each). Usually I bake 4 because of my curvature and the ability to spoil at least 1 ... If everything goes smoothly, then this 1 cake goes to trifles))) This is how the cake turns out:

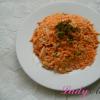
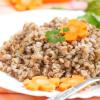
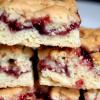
If you collect trifles- you can also send it to the refrigerator, but I usually don’t bother like that. As soon as the cake has cooled down - cut it into layers of 5-10 mm - it’s like trample, they can break, etc., it’s not scary, we’ll break them further anyway, and lay them out in overlapping forms.
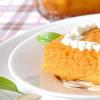
From 1 cake of 300 grams, 6 jars of cake are obtained, with a volume of 200 ml (the height of the jar is about 6.5 cm, the shape of a truncated pyramid). We spread the cake layer + cream layer 2-4 times, depending on the height of the biscuit pieces. You can pour ganache on top - it perfectly complements the taste of the cakes.

Cupcakes.
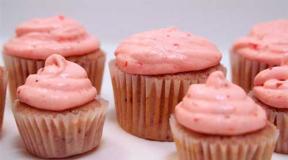
Pour the dough into forms with paper liners - it's a thousand times more convenient. I do this with a pastry bag and a couple of IKEA clips to keep the batter from spilling out. It turns out much cleaner, less smudges, and the amount of dough in the mold is more precisely controlled. Be sure to pinch the bottom of the bag before pouring the dough into the bag so that it does not leak out.


Fill cups 2/3 full. Bake small cupcakes at 165°C for ∼15 minutes. Readiness is checked with a toothpick.


Base diameter ∼4 cm, dough height ∼6cm. With this size for 1 pc. leaves ∼38 gr. test. This means that the proportion of 1 cake is enough for ∼8 pcs.
P.S. It is better not to store the dough - it is kneaded and baked immediately, otherwise all our shamanism with hot coffee and baking powder activation will be ineffective. I bake 4 cakes in succession, and it retains volume well, so you don’t need to knead it separately each time.
P.P.S. And the cake, and trifles and cupcakes can be supplemented with a classic one. Yes, I want you to go to this page, so I'm inserting a link to it for the fourth time =D
Meet "Dark Larry", a discovery cake for all chocoholics on the planet. The proportions and ingredients of the dough give us indecently sticky cakes that are so porous that they weigh nothing, while being amazingly soft and juicy. A strong chocolate taste will put even the sensational “Cake for one-two-three” on the shoulder blades, and this is a serious request, do you agree? A real revolution in ingredients, their proportions and cooking technology. And if you promise to follow all the steps exactly, this cake will become your favorite. He absorbed the best from the world of brownies, chocolate cakes and airy mousses, thereby becoming the standard of chocolate cake. I even admit that a third of readers will not even have time to make cream for cakes, because they will no longer be. In general, it's best not to try the finished cakes or pieces before you assemble the cake, otherwise you will have to come up with stories about why the cake disappeared. And at the same time, I give a long-awaited step-by-step guide to chocolate icing, beautiful smudges and the fashionable kandurin today.
Look, a 16-18 cm cake will be cooked, for other diameters I will make a traditional plate at the end. We take the ingredients as much as I write in the text and in the composition, we don’t take the photo into account, here I experimented with the number of cakes.
Sift dry ingredients into a large bowl: flour (375 g), cocoa (90 g), baking powder (10 g), soda (7 g). Please use the best quality cocoa. No green packs. We need taste, color, and the absence of particles that squeak on the teeth. I recommend Barry Callebaut Belgian alkalized to everyone, I have it in my store. 
Repeatedly said that you need to mix everything carefully, with a whisk. Especially mixtures where there is soda or baking powder. Otherwise, you may have different parts of the cake in composition, in one there are more of these agents and the cakes will go in bubbles. We take it aside. 
And in the mixer bowl we combine any vegetable oil (150 g) and sugar (450 g). The attentive reader will notice that my oil is green in color. These are grape seeds, I decided to try it, and I liked it. Not only is the color cool while cooking, but there are also no familiar smells. But this is not critical, replace with your favorite oil. 
Beat well with a mixer. It is clear that such butter will not whip into foam, like butter, so we just wait for the uniformity of the mass. I continue to test the SMEG mixer, I will soon be ready to give a review. 
Then lower the speed to low and add all the eggs (3 pcs) and vanilla extract (5 g). For vanilla, everything is as usual, we do not replace vanilla or chemical flavors, it is better not to add anything. Beat the mass for 2 minutes. 
We introduce half of the dry mixture. We beat. 
Pour in milk (150 g), the temperature is not important here. 
And now the most interesting - hot coffee (340 g). Once again I draw your attention - yes, grams. Because the bowl is on the scales and it's easier than measuring with glasses. You can take instant coffee, brew it yourself or use a coffee machine. The main thing is boiling water. By the way, if for some reason you are afraid of coffee, just add water. What is happening at this moment? Boiling water activates the baking powder, and although we are used to seeing it work already in the oven, in this case we need air in the dough right away. Then you will see the difference. The second moment, cocoa is brewed. It literally turns into hot chocolate (we have cocoa, fats and temperature to heat up), so the cakes will be surprisingly darker. Alcohol (75 g) must also be sent there. I took Marsala, you can whiskey, cognac, liqueurs, in short, everything that has a pleasant tart flavor (not wine, of course). Again, special housewives can replace this with water or juice. 
Beat on low speed and add the rest of the dry ingredients. 
Look, we get quite a lot of dough. Now is the time to decide how we will bake. It is more convenient for me to bake one cake at a time, so I made for my 16th form and I will bake SIX cakes. The weight of each dough is about 300 grams. In principle, if you are in a hurry, you can make three doubles (then just cut off). If you are confident in your abilities, you can make two calls (in each form, then you will have three cakes). The dough will be liquid, this may confuse you. Do not be alarmed if everything was done with weights - it means that you have the right dough, and even though it seems that it runs straight - this is normal. 
We bake at 180 degrees, preheated the oven, top and bottom. 
We bake a single cake for about 25 minutes, if there are more servings in the form, the time will increase. There is a subtle point here - the dough is very dark, and in the process of baking it will turn completely black, so you may not catch the moment when the cake burned out. Check with a skewer, as soon as it comes out dry - take it out. You can simply press the center of the cake with your finger, as the pros do, if the cake springs, it is clear that it is completely baked. The remaining cakes can be safely baked for exactly the same amount of time. And don't worry about the dough, it will wait. There will be a bump on top, we all know that it will need to be trimmed. 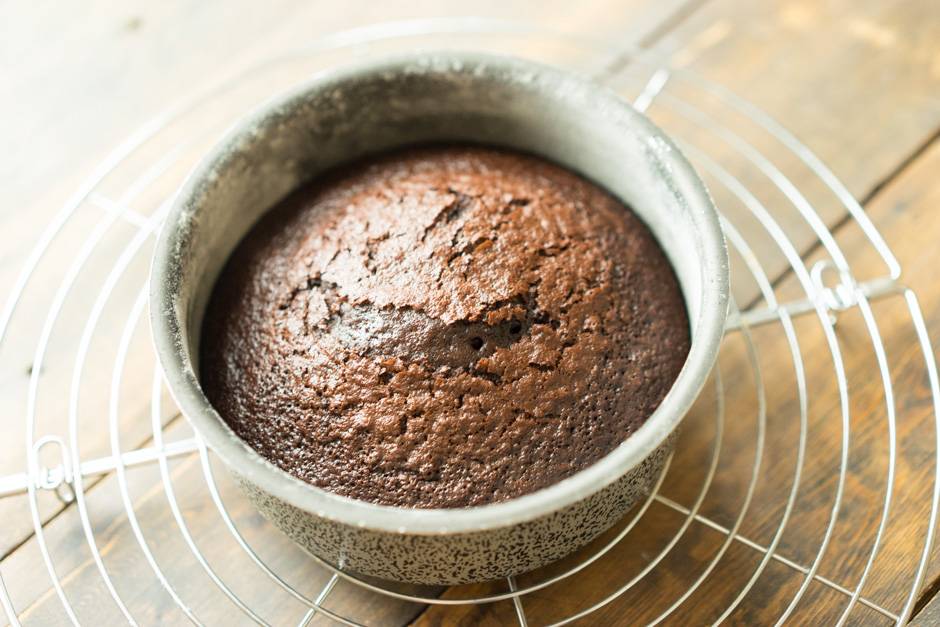
They took it out of the mold immediately, put it on a wire rack and removed the parchment. We use it again for the next games. I always turn the cake over so as not to deform the bottom important edge. 
So in turn we bake all the cakes. We repeat every time. For silicone, only parchment at the bottom, but I would make these cakes in metal. 
When the cakes have cooled completely, wrap in cling film and put in the refrigerator for a couple of hours (better at night). During this time, moisture from the center of the cake is distributed to the edges, and the film does not allow it to leave the cakes. Look, the cake seems to be sticky. It turns out so juicy, it's unbelievable. 
We cut the cakes to the same thickness, we talked about this in a special lesson. 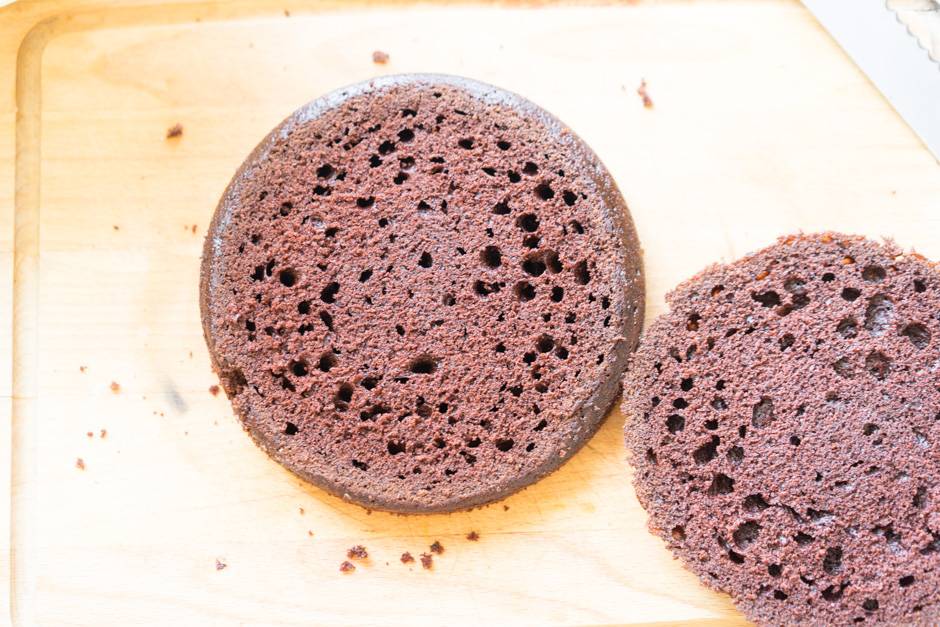
Since the cakes are very wet, I line each with parchment so that they do not stick together. 
Next cream. I took my standard, 2.5 servings. Which cream to take you, decide for yourself. Also in portions - this is always an individual parameter. It is clear that we tint it with dye, I take those that I have in my store - Americolor. For some reason, few people go to the Mistress section for a note, there is a collection of creams, choose the one you like, everyone has their own taste. 
We are building a cake. 
We follow the geometry. 
Remember about the rough coating. 
Now about the icing, I will add this block in , but let it be here too. The first thing we need is a well-cooled cake. It's great if you cover it with cream in the evening, and pour glaze over it in the morning. A cold cake will help to quickly cool the icing and it will harden in beautiful smudges.
How do I make frosting? Dark chocolate and butter. You can also use ganache, but you still need cream. 
For such a cake, you will need about 80 grams of chocolate, I took it with a margin. If you take tiles, chop them finely, we need a homogeneous paste, and if there are large pieces, they melt for a long time and the process stretches. 
Melt in my favorite way - a pastry bag in boiling water. This way you will NEVER overheat the chocolate. 
Once the chocolate has melted, pour it into a wide bowl. 
Add chopped pieces of cold butter. The calculation is this - for 100 grams of chocolate - 60-80 grams of butter. Why is it? Firstly, the chocolate will shine, and secondly, the icing will be softer on the cake, and not become a hard crust that cannot be cut and eaten. 
Stir the mass with a silicone spatula until smooth. If the chocolate does not cope with the oil, you can put it in the microwave. 15 seconds, removed, mixed everything, another 15 seconds. You should get an emulsion - that is, a completely homogeneous mass without lumps. 
Let the chocolate frosting cool down a bit. At first, it will run from the shoulder blade like water, it will gradually become thicker, like kefir, this is the state we need. In the meantime, let's get decorating. Many asked to tell about kandurin. This is a harmless powder of gold or silver color (I have it in the store). Used for coloring and decoration.
For example, we can cover blackberries with it. Pour the part onto a plate, dip a soft brush into it and gently grease the berries. It is clear that we will work gently with raspberries, but we will not stand on ceremony with strawberries at all. You can cover the berries completely or lightly dust them. 
And here is how the cakes are covered. Pick up kandurin on a brush, bring it to the surface of the cake by 4 cm and blow strongly on the side of the cake. Gold dust is applied to the sides of the cake. You can't just apply with a brush. Hair streaks will be visible and the gold layer will be too thick. And in this way you very clearly regulate the density of application. I went over the bottom third of the cake like this, creating a slight gradient. At first it may not work for you, but gradually you will understand the essence. We apply dust again and again, to the desired shade. Clearly, the darker the cream, the more beautiful and obvious the gold coating will be. 
And now for the frosting. I made a video. And now I'm summarizing everything for you. First - the cake is cold, waiting in the refrigerator. Secondly, the chocolate icing is liquid, without lumps, similar in texture to kefir, it flows from a spatula like a ribbon.
Prepare a small spatula or spatula. We will “draw” our smudges with it. Pour frosting onto the center of the cake. It is necessary to pour so much that 1.5-2 cm remain from the edges. And carefully, slowly distribute the icing with a spatula from the center to the edges. To get a smudge, you just need to “push” the icing down with a spatula, that’s all, gravity and the cold sides of the cake will do the rest. If you want thicker smudges, cool the icing a little more. But it seems to me that not everyone likes a thick hat of chocolate, so we have cute smudges. Did you notice that they are different heights? This is also achieved by the fact that we bring more or less glaze to the edge of the cake with a spatula. Practice, I think that your second cake will turn out perfect.
When the glaze has cooled, you can also cover it with kandurin, it will give a pleasant shine and specularity. 
I chose the color of the cream in the theme of Halloween, but at the usual time you can take turquoise, it looks good with the filling. 
By the amount of dough for cakes (3-6 cakes from 1.5 to 2.5 cm):
| mold diameter (cm) | 16-18 | 20-22 | 24+ |
| servings of dough | 1 | 2 | 3 |