How Kiev cutlets are breaded. Chicken Kiev: cooking secrets
Today, Kiev cutlets are found in almost every restaurant, and the hostess, who knows how to cook such a dish at home, will never have an end to the guests. At the same time, French, Russian and Ukrainian chefs ascribe to themselves the first recipe. At one time, chicken breast cutlets were called "de-volay", or "Mikhailovsky". Nevertheless, they were quickly forgotten, but in the "Kiev" version the dish still exists.
The main feature of Kiev cutlets is the addition of butter to the meat. In the original version, it was carefully hammered into the chicken fillet, but later, to speed up the process, they began to simply wrap it up. One way or another, this ingredient gives the dish a special softness, delicate taste and delicate aroma.
For the manufacture of the cutlets themselves, a special part of the chicken is used, cutting off the breast from it along with the wing. Next, the wing is separated, leaving only the bone. It is for her that the finished dish should be kept during the meal. For convenience, a special napkin is put on the bone - a papillote. The meat is carefully beaten off and the filling is wrapped in it. In addition to butter, it can be cheese, herbs, ham, mushrooms, etc. Also, at home, they often use not whole fillet, but minced chicken.
After the cutlets are formed, they are generously sprinkled with breadcrumbs and fried in a large amount of vegetable oil. At the end of cooking, you can shift it for a more even cooking.

Photo of classic chicken Kiev cutlets
Chicken Kiev, cooked according to a traditional recipe, always look very presentable and appetizing. The most important thing is not to spoil the integrity of the dish, so you need to very carefully peel the bone and arbot with the fillet. Double breading will perfectly keep the butter inside the patty.
Ingredients:
- 2 chicken breasts;
- 50 g butter;
- 2 eggs;
- 2 tbsp. l. flour;
- 1 glass of vegetable oil;
- 1 lemon;
- 1 bunch of parsley;
- 2 tbsp. l. bread crumbs;
- Salt pepper.
Cooking method:
- Separate the breast together with the wing, remove the meat after the first joint.
- Separate the large breast fillet from the small one.
- Remove the tendons and make longitudinal cuts in both pieces up to the middle.
- Soften the butter, add finely chopped herbs to it.
- Squeeze lemon juice there and salt the mixture to taste.
- Put butter on foil, wrap and refrigerate.
- Beat off small fillets, rub a little with salt and pepper, put butter inside and wrap.
- Put the resulting cutlet inside a large fillet and wrap it as well.
- Fasten the edges with wooden sticks or toothpicks.
- Dip the cutlet in flour, then in an egg and breadcrumbs.
- Fry the Kiev cutlet in well-heated vegetable oil until golden brown.
Interesting from the net

Photo of chicken Kiev cutlets in the oven
Forming the right Kiev cutlet is not such an easy task as it seems at first glance. If you use minced meat for cooking, then this process becomes easier than ever. You can add a few drops of lemon juice to the filling.
Ingredients:
- 500 g chicken fillet;
- 2 eggs;
- ½ glass of milk;
- 50 g parsley;
- 50 g dill;
- 1 cup bread crumbs
- 100 g butter;
- 2 tbsp. l. flour;
- Salt pepper.
Cooking method:
- Pass the meat through a meat grinder.
- Add chilled milk to the minced meat, a pinch of salt and pepper.
- Knead the minced meat until elastic.
- Finely chop the herbs and butter.
- Form cakes from the minced meat (about the size of the palm), put butter and herbs in the center of each.
- Blind the cutlets like patties and leave them in the freezer for 20 minutes.
- Beat eggs, salt and pepper.
- Roll the cutlets in flour, egg and breadcrumbs in turn.
- Fry the cutlets on both sides in vegetable oil for 3-4 minutes.
- Transfer the patties to a baking sheet and cook for 15 minutes at 180 degrees.

Photo of Kiev cutlets with cheese in a slow cooker
Butter and so gives the dish a special tenderness, and with hard cheese, Kiev cutlets turn into a real masterpiece. During cooking, the cheese melts and flows out of the meatballs appetizingly when cut. Instead of "Baking" in certain models of the multicooker, the "Fry" mode can be used.
Ingredients:
- 300 g chicken fillet;
- 40 g butter;
- 40 g of hard cheese;
- 2 eggs;
- 100 g bread crumbs;
- 100 g flour;
- Greenery;
- Salt pepper.
Cooking method:
- Cut fillets from the breast along with the wing.
- Separate the bone from the meat, peel.
- Separate the upper part of the fillet from the bottom, remove the veins.
- Beat the meat to a thickness of 0.5 cm.
- Soften the butter, finely chop the greens, grate the cheese.
- Combine cheese, butter, herbs, salt and pepper.
- Allow the resulting mixture to freeze in the refrigerator.
- Season the meat with salt and pepper on all sides.
- Wrap the butter in sausage-shaped fillets.
- String the sausages on the bones and put them in the freezer for 5 minutes.
- Beat eggs with spices.
- Dip the cutlets in flour, then in eggs and breadcrumbs.
- Breaded again in egg and breadcrumbs.
- Pour a large amount of vegetable oil into the multicooker bowl.
- Fry the cutlets in the "Baking" mode for 15 minutes on each side.
- Leave the dish in the “Warm up” mode for 5-10 minutes.
Many may not figure out the first time how to cook Kiev cutlets. Although the technology is quite simple, you need to make a similar dish at least several times for a perfect result. As for inexperienced chefs, they can be helped out by a detailed video on how to cook Kiev cutlets at home:
Now you know how to cook Kiev cutlets according to the recipe with the photo. Bon Appetit!
Chicken Kiev is an ideal dish for lovers of tender chicken meat in all its interpretations. Juicy filling, crispy rusks and aromatic spices have long won the hearts of gourmets around the world. To pamper your loved ones with such a treat, you need to learn a few simple rules on how to fry Kiev cutlets at home:
- Before cooking the cutlets, it is important to remove the white tendons, otherwise they will spoil the taste of the dish;
- Cutlet oil must be frozen until it solidifies;
- If you cook cutlets from large breasts, be sure to send them to the oven for a few minutes after frying in a pan;
- It is better to bread all the cutlets before frying, so as not to be distracted from the cooking process later;
- If the meat breaks during the formation of the cutlet, you can close the resulting gap with any other piece of fillet, after beating it off;
- Oil during frying should cover the patties at least halfway.
The delicate center in a crispy breading will appeal to all family members. Recipes for Kiev cutlets are in the cookbook of beginners and experienced chefs. The cutlet is based on fillet, separated from the chicken breast along with the bone from the wing. It is carefully beaten off with a kitchen hammer and prepared for the rest of the ingredients from the recipe. To prepare the filling in the classic recipe, butter mixed with herbs and lemon juice is used.
The five most commonly used ingredients in recipes are:
For a change, some fans of culinary experiments put garlic, cheese, fried mushrooms, pieces of bacon in the filling. The ingredients are frozen in a freezer, then cut into oblong cubes and wrapped in meat. The cutlet is breaded in breadcrumbs and eggs, and fried in an abundant amount of vegetable oil until crispy. Delicious cutlets with juicy filling are prepared very quickly. They are served with mashed potatoes and vegetable salads, cereals and creamy sauce.
Chicken Kiev is a certain kind of a similar dish, which is a beaten off chicken fillet in which a piece of cold butter with herbs is wrapped.
Whoever is not credited with the history of the origin of this dish. It is so tasty and tender that each country from the contenders of its origin would like to have the palm.
First, of course, this is France. In France, similar products are prepared, they are called "cutlets de volaille" (côtelettes de volaille). The only difference is that butter is put into the dish we know. And in their French counterpart they add some kind of sauce, or the same butter, but with a lot of seasonings, or nothing at all.
It is believed that this recipe was brought to Russia during the reign of Empress Elizabeth Petrovna. She simply adored French cuisine, and sent many court chefs to study in France. It was they who brought the recipe to the royal table.
The famous Russian scientist, historian V.V. Pokhlebkin believed that they were invented in Russia in 1912, and were served in one of the St. Petersburg restaurants. They were called "Novo-Mikhailovsky".
The further history of the dish is such that in 1918 they appeared in Kiev. But for some reason they did not take root. Then they appeared again, after 30 years. They began to cook in one of the restaurants in Kiev. And they have already received the well-known name
The Americans, on the other hand, believe that this is their invention. And their version sounds in such a way that there were a lot of emigrants from Ukraine in America. And that in restaurants they ordered these cunning products, which they later began to call Kiev.
In America, this dish is cooked and loved. There they are called "Chicken Kiev" (Chicken Kiev).
Let's not argue with anyone. Let everyone think as they think. I think that the dish would be unremarkable, ordinary, no one would even argue. And so, what can I say, the cutlets are delicious, the most delicate in taste, and very original in appearance.
Therefore, let's leave all the conversations and get down to business right away.
Ingredients: (Makes 2 servings)
- Chicken fillet - 2 pcs.
- Butter - 100 g
- Eggs - 2 pcs.
- Dill - 50 g
- Flour - 50 g
- Breadcrumbs - 150 g
- Salt, pepper to taste
- Vegetable oil for deep fat -500-700 gr.
Preparation:
1. Let's start with the filling. Leave the oil at room temperature to soften. Chop the dill, mix with butter. Put the filling in plastic wrap, roll in the form of a sausage. Place in the freezer to set.
2. The butter filling is called "green butter", it is this filling that gives the dish a unique aroma. If you don’t want to, or you don’t have time to deal with butter, you can simply cut it into small cubes and dip it in dill. Be sure to send the filling to the freezer to solidify.
 3. It is necessary to cut the chicken fillet correctly. You need to cut it with a sharp knife from the thickened edge so as not to cut through. Make a neat cut and unfold the fillet in the form of a book. Cut off a small fillet from each piece (it will still come in handy).
 4. The fillets should now be beaten off. Wrap each piece in plastic wrap and beat. The film will protect the fillets from tearing. You need to beat off so that the finished product turns out to be soft and tender, and to cook faster.
5. Let's start forming blanks. Put a large fillet on plastic wrap, put half of the butter and dill from the freezer on top of the fillet. Put a small fillet on top, wrap a large fillet, forming an elongated blank.
 6. Wrap with cling film, shape again, and put in the freezer for 10-15 minutes.
7. In separate bowls, prepare eggs (beat them with salt and pepper), sifted flour and bread crumbs.
8. Take out the blanks, remove the film, blot with a paper towel to remove excess moisture.
 9. Then roll in flour, use it to form an elongated shape again. Then dip it into the egg mixture, hold it there, turn it over several times so that it grabs better and the egg mixture has time to penetrate everywhere. Then roll in bread crumbs.
10. To prevent the workpiece from falling apart during frying and the oil from leaking out, repeat the same procedure again. Those. first flour, then eggs, then crackers.
11. Heat oil in a thick-walled saucepan. You need a lot of oil so that the cutlets that will be fried are immersed in oil at least half. Fry until a beautiful golden crust forms for 3-4 minutes, turning occasionally.
12. Preheat the oven to 200 degrees. Put the products on a baking sheet and bring to readiness, this will take another 10 minutes.

How to cook chicken Kiev. Secrets and features
- In the classic recipe, a chicken bone is fixed at one end of the formed cutlet, on which it is customary to put on a papillote. This way the dish looks more aesthetically pleasing, and this is how it is served on the festive table and in the restaurant.
- "Green butter" is best done as in the first option, that is, mix the oil with chopped dill, and then send it to the freezer. In this case, the oil is better absorbed by the taste and smell of dill, and the finished product is more aromatic.
- Sometimes chopped garlic is added to the oil with dill, this is an option. You can try it too. It turns out delicious!
- When beating. Be sure to wrap the fillet in foil, beat off carefully, otherwise it will tear, and the oil will leak out during frying. And for a finished dish, it is important that oil flows out of it only in the finished form when cutting.
- For frying, it is better to take refined oil so that excess taste and smell are not mixed.
- Do not use margarine or butter for frying. It will burn and it will be difficult for you to achieve a uniform golden color in the finished product.
- While the meat is cooking in the oven, cook the French fries or country style in the remaining deep fat. Serve it as a side dish. Can also be served with
You can cook chicken Kiev by adding fried mushrooms or cheese to the filling. You can cook - from minced chicken. You can think of other ways. Try, fantasize. Cook from already tried recipes and come up with your own. The main thing is to always do it with pleasure and soul. Then the food you cook will always be tasty and healthy.
Bon Appetit!
To cook Kiev cutlets, remove the skin from the chicken breasts. Place them with the inside facing up. Cut the fillets lengthwise and flatten each piece so that the filling fits.
Cover the breasts with cling film and beat gently. Trim the white tendons in several places to prevent the patties from shrinking when frying.
For the filling of Kiev cutlets, chop the parsley very finely. Put it in a bowl, add butter at room temperature. Salt. Mix thoroughly until smooth.
Using two tablespoons, shape the filling of the cutlets from the butter and herbs. Put it in the freezer for 3-5 minutes so that the butter does not spread. Remove, put on the fillet and wrap the cutlet so that the edges are on top of each other. Place in the freezer for 5 minutes. While the cutlets are freezing, mix the eggs with milk and beat with a whisk, as for an omelet.
Pepper the cutlets and roll them in flour. Dip in an egg and milk and roll in breadcrumbs. Dip again in an egg with milk and once again roll in breadcrumbs.
Preheat the oven to 200 ° C. Heat oil in a frying pan and fry the Kiev cutlets until golden brown, 5 minutes, then bring them to readiness in the oven for 10 minutes.
Classic Kiev cutlets are a very tasty and satisfying dish made from thinly beaten chicken fillet with green butter inside. If everything is done correctly, melted aromatic butter flows out of the hot Kiev cutlet when cutting, which makes the meat especially tasty and juicy. Of course, making this recipe for chicken Kiev at home requires some experience with meat, but I'm sure you will succeed.
Especially for you, I have prepared a whole excursion with step-by-step photos and a detailed description of how to cook Kiev cutlets. You just need to follow the step-by-step recipe and in the end you will get very tasty and mouth-watering classic Kiev cutlets with a golden brown crust and juicy filling inside. So, welcome: Chicken Kiev - a recipe with step-by-step photos at your service on the site!
Ingredients:
- 1 chicken breast
- 100 g butter
- 1 bunch fresh dill
- 2 eggs
- 200 g bread crumbs
- 100 g wheat flour
- 300 ml of sunflower oil for frying
- salt and black pepper to taste
How to cook chicken Kiev:
First, let's prepare the green butter for the cutlets. In a deep bowl, combine softened butter, a pinch of salt and finely chopped dill.

Place the mixed mixture on plastic wrap to form a sausage. Wrap it tightly and refrigerate it in the freezer.

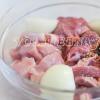
Wash and dry the chicken breast. Remove the skin, cut open the breast to separate the fillets from it. Cut off the fat from the fillet, if any.
Now let's cut off the inner protruding part from each fillet - the dewlap. Thus, we got two fillet pieces - large (main) and small. We make an incision on the main fillet with a knife, starting from the thickened edge, in order to open the fillet like a book, observing the recipe for Kiev cutlets at home.

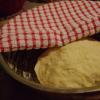
Cover the meat with cling film and gently beat off the meat so that it becomes as thin as possible, but does not break.

Salt and season the chicken with ground black pepper.

Divide the frozen butter with herbs in half. Place one piece inside the beaten fillet.

Cover it with a dewlap and smooth it with your hand to remove all the air, otherwise the cutlet may deform during frying.

We wrap the fillet in such a way that the filling stays inside like a roll. For reliability, you can fasten the Kiev cutlets at home with toothpicks.

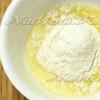
Now let's prepare the breading. In a separate bowl, beat two eggs with a pinch of salt with a fork. Pour wheat flour and bread crumbs into deep bowls.
Dip fillet Kiev cutlets in flour.

Then dip in beaten eggs.

We will brew in breadcrumbs.

To prevent the oil from leaking out of the cutlet during frying, we will make a double breading. Dip the blank again in the egg and then roll it a second time in bread crumbs. We will also prepare the second cutlet.
How to fry cutlets in Kiev:
It is ideal to use deep fat or pour oil into a ladle or deep frying pan. The butter can cover the patties completely or half. In the latter case, the cutlets must be carefully turned over during cooking so that they are fried evenly.