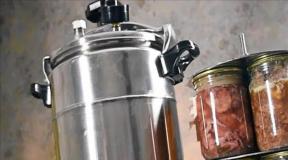
How a home autoclave works: instructions for use. Canned food in an autoclave
Stew and various canned food have always been in demand in our country, but not purchased, but homemade, from homemade meat, vegetables and fruits. The canning process using the conventional method is time consuming and requires considerable effort. In addition, canned meat and fish must be prepared under certain conditions to ensure their safety. So, the usual boiling over low heat for six to seven hours provides heat treatment at 1000 degrees, which means that not all harmful microorganisms die. In addition, there are practically no useful substances in canned food with such processing.
The way out in this situation will be an autoclave, which provides rapid heating to 120 degrees at a pressure of 4-4.5 atm., And keeps this mode for 30-60 minutes. Further, rapid cooling occurs. This canned food preparation process has several advantages, namely:
- The process of making canned food becomes safer, as contact with hot cans, boiling marinades and syrups is reduced to zero. Raw food is put into jars, rolled up with lids and placed in an autoclave. They are also taken out cold.
- The preparation time for canned food is reduced by at least 3-4 hours.
- Vitamins, microelements and taste are preserved in the products.
- Canned food comes out natural and safe, since sterilization at a temperature of 110-120 degrees ensures the death of bacteria.
How to autoclave

How to cook canned meat
Stew meat must be prepared in a special way. It is cut into pieces large enough to fit in jars. The bones of the brain are removed and the rest of the bones can be cooked. It is better to cut the ribs into pieces.
Banks with a volume of 0.5 or 1 liter are thoroughly washed and rinsed, the meat and bones are placed tightly up to half the volume, spices are added (a teaspoon of salt, 4-5 black peppercorns, 1 bay leaf), and then meat and bones are again applied like this, so that the top of this layer does not reach the top of the jar by 1 cm. If this condition is not met, then during the cooking of the stew, the lid may rip off and the canned food will be spoiled. Then the cans are tightly rolled up with tin lids.
The meat must be fresh and the dishes clean, otherwise the canned food will be unsafe.
Autoclave recipes
Pork pate.
- The pork head (without brains0 and the legs are thoroughly cleaned, washed, chopped into large pieces, poured with cold water and boiled until the meat is separated from the bones. After that, the meat is removed from the broth, cooled, separated from the bones and passed through a meat grinder.
- The whole liver is boiled for 10 minutes, cooled, passed through a meat grinder.
- Various by-products (heart, lungs, kidneys) are boiled until half cooked, cooled and also ground in a meat grinder.
- All components are mixed in a large container, about two dozen eggs, 10 onions fried until golden brown, ground black pepper and salt to taste are added to the minced meat.
- The minced meat is thoroughly mixed, half a bay leaf is placed on the bottom in half-liter jars and the minced meat is laid, not reaching the top of the jar by two centimeters. Jars are rolled up with lids and then canned food is prepared in the same way as stew.
Peas.
- Peas taken at the rate of 1 small glass per half-liter jar, washed in cold water. A piece of meat, raw onions, carrots, a couple of black peppercorns, one bay leaf, a teaspoon without a hill of salt are added to it.
- Everything is put in jars and the components are poured with the broth remaining after cooking the pork head and legs. You should also leave 2 centimeters up to the top of the can.
Beans or beans can be cooked using the same principle. By the way, the marrow bones left over from the meat can be poured with cold water, salt, spices and bay leaf can be added and boiled. Thus, a delicious aspic is obtained, and all the ingredients of the dish are used.
The crazy rhythm of life makes us bad housewives. Building a career and at the same time cooking "first, second, third and compote" every day is difficult. And you need to eat meat.
The solution is pretty simple: why cook a new portion of meat every day if there is a delicious homemade stew in the cellar? Sometimes it is still worth looking up from the stove and devoting a little time to yourself.
Twist a few jars of this traditional dish - and in a month or two you will say “thank you!” It is better to cook stew in an autoclave. Here are some of the best recipes.

Pork stew
You will need:
- Pork - 450 grams.
- Grated onion - 1 tablespoon.
- Salt - 1 teaspoon.
- Pepper - a few peas to taste.
- Bay leaf - 1 piece.
- Lard or lard - 50 grams (optional: if the meat is not very fat).
Cut the meat into pieces of about 50 grams. We put onion, pepper and bay leaf on the bottom of the jar. For a pronounced aroma, you can break the bay leaf into several pieces.
Before adding salt, dilute it in a little water. We put the meat, leaving 1-2 centimeters to the top.

Beef stew
Would need:
- Fatty beef - 2 kilograms.
- Carrots - 2 pieces.
- Onions - 2 pieces.
- Salt and pepper to taste.
- Bay leaf.
Cut the meat into 3-4 cm cubes. Coarsely cut the carrots. Onions can be sliced \u200b\u200binto rings or grated. Put bay leaf and pepper on the bottom.
note! To make the stew more aromatic, you can break the bay leaf, and crush the peppercorns with a spoon or glass bottle.
Place the chopped vegetables in the jar. We put the meat loosely - there should be air on top. You can close!

Poultry stew
Duck and chicken recipes are not very different. Therefore, it doesn't matter which one you choose. The main thing is fatter.
We need:
- Chicken or duck meat - 1 kg.
- Salt - 2 tablespoons.
- Bay leaves and other spices to taste.
We cleanse the bird from everything unnecessary. Separate fat from meat. Cut the meat into pieces of 5-6 centimeters. Grind the fat thoroughly.
Break a few pieces of bay leaves into small pieces and mix with the rest of the spices (optional). Rub the meat with a mixture of spices and salt.
Important! Do not overdo it with seasonings, or they will clog the flavor of the meat.
Italian herbs, if desired, can be tasted with prepared food. To do this, it is not necessary to add them to the stew.
We put the received on the banks. We alternate between meat and fat. Leave some space on top. We close and put in an autoclave.

Pork liver pate
Would need:
- Liver - 1 kg.
- The head is 1 kg.
- Pork meat - 1 kg.
- Eggs - 8 pcs.
- Butter - 300 g.
- Salt - 30 g.
Grind the meat, liver and head in a meat grinder with a fine mesh. Add the beaten eggs, salt. We let it brew for 8-10 hours in the refrigerator and put it in clean jars.
note! Do not add lard to the pate - it will exfoliate from the total mass in the jar.
Canned food must be sterilized. An autoclave will help to do this efficiently and reliably. You can cook anything in it: squash caviar, beans with mushrooms, jam, your favorite condensed milk from childhood, and much more. With it, the twists will stand for a long time, and the lids will not swell.
How to make an autoclave with your own hands at home?
You will not surprise anyone with a homemade autoclave. With the older generation in the villages, such a unit is almost more popular than a moonshine still.

There are many diagrams and drawings of different autoclaves on the Web. If there is a jack of all trades in the house, riveting the device will not be a problem.
We need:
- Old gas cylinder. The more liters the better.
- Steel rings from 1 cm thick.
- Bolts.
- Safety valve.
- Valve - it can be unscrewed from the old water heater.
- Thermometer with an upper limit of 150 degrees.
- Pressure gauge up to 0.4 MPa.
- Rubber gasket.

How to make an autoclave?
- Thoroughly clean and blow through the cylinder... There should be no gas residues, otherwise the cylinder will explode when sawing.
- Cut off the top... Let's make a lid out of it. We drill holes for the bolts - with them the autoclave will close firmly.
- Fixing bolts and flanges... For a tight fit of the cover to the body, place a rubber gasket.
- We install a thermometer, a manometer and a valve.
Finally, we test the autoclave. We pour water. Using a pump, we pump air to a pressure of 0.375 MPa. We wait 5 minutes, if everything is normal and there are no leaks, the autoclave is reliable.
Instructions for use of the autoclave
No special skills are required to use the autoclave. The whole process is reduced to heating, sterilization and cooling.

Where to buy an autoclave?
You can buy this wonderful machine at a hardware supermarket, a hardware store or on the Internet. The average price is about 5 thousand rubles.
There is no need to go far: there are a lot of autoclaves of a domestic manufacturer on the market. Belarusian autoclaves are in good standing.
Useful video
The characteristics for using the autoclave in everyday life indicate the ease and accessibility of work, which differ from both imported and domestic models.
Cooking a traditional snack in an autoclave
The Kuban salad is distinguished by a piquant taste that has absorbed all the aromas and specifics that distinguish the Krasnodar Territory. This salad is also known in industrial design, it is also popular among housewives who want to make a delicacy with their own hands.
For cooking, take the components:
- 250 g cabbage;
- 150 g sweet bell pepper;
- tomatoes - about half a kilogram;
- 120 g onions;
- 50 g sunflower oil;
- salt - 15 g;
- spices to taste;
- vinegar essence - 5 g.
Preparation:
- Prepare glass containers and lids.
- Cut and chop vegetables, put in layers in jars.
- Pour the cabbage with marinade, leave for a quarter of an hour.
- Prepare the marinade, pour the salad in jars, seal the jars.
- The salad is prepared in an autoclave for a specified time.
To taste, beans are added to such a salad, which should be boiled a little beforehand. Suitable for salad and corn: preserved in this way, it retains all the nutritional properties.
Natural fish in oil sauce: a simple recipe
Cooking fish is also simple.
Such a dish is prepared from the following ingredients:
- a kilogram of fish without a head and entrails;
- 11 g salt;
- laurel leaf, peppercorns;
- 30 g of sunflower oil.

Canning method:
- Prepare containers and lids.
- The fish is cut into pieces, placed in a jar, after placing all the spices on the bottom.
- The fish itself is sprinkled with salt and pepper.
- Pour oil over the fish, roll up the lids.
- Placed in an autoclave and carry out the sterilization process according to the principle of canned meat.
DIY home autoclave is easy!
For a long time it has been no secret for a good housewife that with the help of an autoclave the canning process is quick and convenient. How can you make a useful unit yourself? Home craftsmen have adapted to use ordinary gas cylinders for these purposes.
The sequence of actions is as follows:
- A metal container, previously relieved of gas, is purged with air.
- Carefully, using a special cutting tool, the upper part of the cylinder is separated (later it will turn into a lid).
- Flanges for bolts are welded to both parts (lid and main vessel).
- Holes are cut in the cover and installed: a pressure gauge, a thermometer, a safety valve (suitable for a water heater), a tap.
- A circle of dense rubber or paronite will serve as a gasket between the main part of the unit and the cover.
- The manufactured autoclave must necessarily pass a test, for which compressed air is injected into it.
- A grid or a stand is installed inside the autoclave, on which containers with conservation will be installed later (it is forbidden to place containers made of glass on the unprotected bottom of the unit!).
Here is such a simple, but very useful device that will greatly simplify the life of your beloved wife in the kitchen.
Proper use of a self-made autoclave: instructions for use
Before you start sterilizing cans with conservation, you need to check the quality of the closure. How to do it correctly? Pour water into a bucket or other large container and lower the cans of meat or fish. No bubbles appear?
Everything is fine, you can start the sterilization process:
- To prevent the caps from breaking off from pressure from the inside, special metal staples that are worn on each can will help.
- Place containers with conservation in two rows, placing an interlayer with several holes between them.
- Pour several liters of lukewarm water into the bottle and tightly connect both parts of the unit.
- The sterilization process will take up to 2 hours (including the heating process, the sterilization itself and the cooling).
- It is important to remember that the meat in the preparation will be more juicy and tasty if it is cooked at a high temperature and not for too long.
- It is forbidden to open the cylinder after sterilization for up to half an hour - during this time the pressure will equal to atmospheric.
- Finish the process by carefully examining the containers with conservation - if the lids are slightly swollen - it's okay, after complete cooling, the deformation will disappear.
Ode to the autoclave: reviews
The opinions of the hostesses about using the autoclave during the difficult canning season are unambiguous - the unit helps to reduce the time required for sterilization, allows you to deal with a difficult process on the street, and has a positive effect on the storage time of workpieces.

Experienced housewives recommend observing the condition of the contents in the jars for several weeks. If the sterilization process went wrong and of poor quality, then the remaining microbes will certainly begin their destructive effect in conservation. Alarming symptoms in jars are a reason to throw out the contents. There is no need to panic - if everything is done correctly, then unpredictable unpleasant consequences usually do not arise.
Do not forget about the unpleasant moments - some Kulibins manage to make an autoclave from old iron sheets, which threatens with a strong explosion during operation. Metal not designed for high pressure has miniature chips or cracks, which must be taken into account before proceeding with the manufacture of the appliance necessary in the kitchen. Better to play it safe and use a gas cylinder.
Budget chicken stew in an autoclave (video)
In every modern family, seasonal preparation of winter delicacies is a traditional and very responsible occupation. Each hostess, and sometimes the male half of the family, is happy to do home canning. This is not only a profitable economy of the home budget and the ability to preserve the grown crop, but also a real chance to distinguish yourself with unusual recipes, to show the world an example of practicality and diligence. Labor-intensive and costly production has long been given a new color thanks to the use of new technologies for the kitchen: combines, blenders, mixers, autoclaves. Modern home autoclaves differ in their assortment: they are adapted for use on gas appliances, there are also options that have their own heater.
The modern selection of autoclaves for canning is very extensive: Finland makes devices, the American autoclave is also popular, canning in mini-devices or devices of a high degree of operation. The appliance can be bought inexpensively and profitably, usually a recipe book is attached to it, so most housewives prefer to have it in their kitchen.
Conservation is not the easiest thing to do. In order to do everything quickly and efficiently, it is very convenient to use an autoclave. What is it?
What is an autoclave?
An autoclave is a special device that can create conditions characterized by high pressures and temperatures. Such a device can be any container made of strong and heat-resistant material, which can be closed so that it does not allow air to pass through.
Autoclaving is used in many industries, in medicine, as well as for domestic purposes. For example, autoclaves for canning are in great demand.
Purpose of using the autoclave
Some chemical reactions only occur under certain conditions, such as elevated pressures and high temperatures. Others, in such conditions, proceed much faster than at normal rates.
In addition, the action of such factors as high values \u200b\u200bof temperature and pressure contributes to the death of most pathogens, thereby ensuring the prevention of diseases caused by them.

No one will argue that none of the properties listed above will interfere with canning. Some options for canned food, for example the well-known stew, can be cooked correctly only using the autoclaving method. Therefore, we can come to the conclusion that the use of such a device for canning is quite justified and useful.
There are many options for industrial, factory-made autoclaves. But they are not cheap. A DIY canning autoclave is not a great alternative to a factory one? Therefore, it will not be superfluous to find out how it can be made at home.
What you need to make an autoclave at home

In order to make an autoclave with your own hands, you need a metal sheet about 4-5 mm thick or some kind of durable metal container. You will need a welding machine and the ability to use it. And also a certain knowledge of how the autoclave should be arranged in order for it to function correctly.
The components or parts of such a device that need to be prepared in order to make an autoclave for canning with your own hands include the following components:
- A body or shell made of sheet metal or some kind of metal container.
- Cover with a hole for a thermometer and valves: safety and working. The safety valve is designed for emergency use. For example, when a worker is unable to function or his work is insufficient to maintain a safe environment.
- Seals.
- Screws.
- Nuts.
If the volumes of the autoclave to be produced allow, it will be advisable to divide it into several tiers using a special cassette.
For example, you can analyze in more detail how to make an autoclave with your own hands from available tools: a gas cylinder or a milk can.
Autoclave from a gas cylinder
To make a home autoclave from a gas cylinder, it is necessary to adapt the lid for its new purpose. To do this, a pressure gauge is fixed on it, as well as a fitting through which it will then be possible to pump air. Such a fitting can be a valve that was previously located on the chamber of the truck. A section with a valve is separated from the car camera, an M8 thread is cut on it. Then a hole 6.8 mm in diameter must be drilled in the cover and the same thread must be made. Using it, the valve is screwed into the cover. For reliability, it is advisable to secure it with a lock nut. By the same principle, a pressure gauge is installed (only the thread on the cover is made according to the one that is present on this device).
The next step is the manufacture and installation of a heat-resistant, that is, a tube in which the thermometer will be located. It can be made from a small diameter water pipe, one of the ends of which is welded or seamed. The heat-resistant is welded into the lid of the autoclave being manufactured so that the welded part of the tube is at the bottom. When it is necessary to measure the temperature, automotive oil should be poured into the heat-resistant. And then lower the thermometer into it, making sure that it does not touch the bottom of the tube. To achieve this, you can attach a clothespin to it across it and hang it on the heat-resistant wall with it.
To fix the autoclave lid, use M10 or M12 screws.
Milk can autoclave
To make a home autoclave with your own hands, it is convenient to use a 25 liter milk can.
From tools there is a need for a drill, grinder and locksmith's tool. The transformation of the milk can into an autoclave takes place in several stages. To make it more clear how to make an autoclave with your own hands, you need to consider each of them separately.

Stage 1: reinforcement of the bottom
The milk can has a flat bottom. When exposed to high pressure, it can bend very easily. To prevent this from happening and the autoclave can be used comfortably, the bottom must be strengthened.

To do this, you can use a flat metal pancake, which has a special mount. In this situation, a car drive will come in handy, which can be taken from a small car. The desired size is 12 inches. The disc is cut so that you end up with two metal cups. They are then placed on the bottom and in the tapering part of the top so that one is opposite the other. Then a metal circle with a diameter of 28.5 mm and a thickness of 5 mm is inserted into the lower cup and fixed by tightening with rods-spacers. When making an autoclave with your own hands, it is very important to ensure that all parts and parts are securely fixed.
Stage 2: strengthening the cylindrical part
The cylindrical (main) part of the can also needs strengthening. To do this, you need to take five steel clamps. The diameter of each of them is from 280 to 300 mm. Clamps must be evenly spaced (at the same distance) and tightened firmly.

Stage 3: changing the lid pressure
The clamp on the lid of the milk can is not designed to withstand as much pressure as an autoclave must withstand. Therefore, its latch is removed and another is made.
The lid of the can is tapped around the perimeter in order to secure the rubber gasket more securely. Otherwise, it may not hold in place when exposed to high pressure.
Then you need to make the pressure plate in a round or hexagonal shape. It should have six holes with a diameter of 10 mm, which will be located at the corners of an equilateral hexagon. The diameter of the plate itself is 24 cm.
Step 4: Install Instruments
To regulate and control the operation of the autoclave, a lot of instruments and apparatus are needed. It is necessary to install a thermometer, a valve for the pump, a pressure gauge, a safety valve.
The valve can be taken from the chamber of the truck and fixed on the body of the autoclave being manufactured with nuts. A valve from a truck, for example from an automobile pneumatic brake system, can also be used as a safety valve.
The pressure gauge should have a scale of at least 6 bar, and the thermometer up to 160 degrees. Only such devices will be able to reflect the processes taking place in the autoclave.
Making an autoclave with your own hands is not so easy, you need to spend time, find the right tools and parts. But the result is worth it.
In the hot season, household people begin to make seams for the winter. The manual process is very laborious - you need to prepare the food that you are going to preserve, sterilize the jars, lids. Sweat pours in a stream, strength is running out, and as a result, only a few jars are obtained. Another thing is a gas or electric autoclave for home canning - its use allows you to speed up the process and increase the product yield without significantly increasing the temperature in the kitchen. A minimum of physical effort is required from you.
What is an autoclave
The apparatus is a sealed structure designed for heating under pressure above atmospheric. Under these conditions, the boiling point shifts towards an increase in temperature, food is cooked faster. The home canning autoclave has the following advantages:
- makes delicious blanks with the preservation of all nutrients, natural color, holistic shape;
- kills pathogenic bacteria, destroys spores;
- holds a large number of cans;
- significantly reduces the cooking time of meat, pickles, beans, corn, peas, vegetable preparations, juices, mushrooms.
Device
Autoclave is a sealed container, which consists of a loading chamber, a cover with locking mechanisms for sealing, a fitting for attaching a pump. Control and measuring devices are installed on the body - a manometer (shows the pressure of gas and liquids in an enclosed space), a thermometer, an emergency relief valve. Popular models of home preservation appliances are made of stainless steel.
Standard dimensions of the apparatus: 22 liters (holds 14 cans of 0.5 liters), 46 liters (22 cans of 0.5 liters), 125 liters (48 cans of 0.5 liters). Another important characteristic is the heating source. Some models heat up on a gas stove, gasoline burner, others are only suitable for electric stoves. Autonomous autoclave installations designed for home canning operate from the mains - heating elements are built into them.
Principle of operation
Buying a device is an expensive pleasure, but how much is it useful with a minimum of human effort! How does an autoclave from a modern manufacturer work? The scheme is simple. At standard rates, water evaporates at 100 ° C, the temperature cannot rise above. To change the situation, conditions of increased pressure are created in the sealed container. This causes the boiling point to shift.
When the pressure in the autoclave is increased, the liquid begins to boil at 120-125 ° C. What does it mean? That at an elevated temperature the cooking process is in full swing, but the water does not boil away, which means that all vitamins, useful elements remain unchanged. The appearance of the products in the autoclave does not lose its integrity, it becomes appetizing, and the seaming acquires a wonderful taste.
How to use an autoclave at home
The technology for preparing seaming in the device is simple. Wash the household autoclave, then pack the food into jars, roll up the can lids. Place the cans in the canning appliance. Further actions will differ depending on the type of device:
- Pressure pumped autoclave. Fill the cans with cold water 2-3 cm, then pump air to a pressure of 1 atm. Warm up the device to a temperature of 100-120 ° C and hold this indicator for 60-70 minutes (depending on the recipe). After cooking, let the appliance cool down, then release the air using the safety valve.
- Autoclave without pressure pumping. Home canning in such a device is even easier. Load the rolled cans into special cassettes that protect the lids from breaking off. Fill the autoclave with water, not topping up to the upper edge of the tank 2 cm. Close the lid of the device, place the device on the stove and observe the temperature-pressure ratio. When the home preservation is ready, turn off the heat and wait for the autoclave to cool down to room temperature.

The ratio of temperature and pressure
For each autoclave there is a different ratio of these indicators, for more details on the parameters, see the operating instructions. The numbers depend on the volume of the device, heating intensity, design features. You will learn the specific values \u200b\u200bempirically as you work. A small electric autoclave operating from the mains, after 5 hours of operation, shows on a thermometer 120 ° C at a pressure of 4.7 atm. Appliances heated on the stove reach their operating parameters faster. Most home preservation is prepared at temperatures no higher than 120 ° C and 4.5 atm.
How to choose an autoclave
Today it is not difficult to buy a device in Moscow or St. Petersburg, in hardware stores there are always several models to choose from, which you can touch, ask the seller in detail about the characteristics and warranty. If you want to buy a home canning machine relatively cheaply, look for great deals in online stores. They often have good promotions and discounts up to 20%.
There are two body materials - black metal and stainless steel. The advantage of the first is cheapness. However, the material has several drawbacks: it is not resistant to corrosion, short-lived (it lasts about 5 years), and requires careful maintenance. Stainless steel lasts up to 50 years, is not afraid of corrosion, but is expensive. The capacity of the autoclave is selected depending on the needs. The most popular ratio of the diameter and height of the device is that it holds 24 cans of 0.5 liters.
Gas
This type of home canning machine is heated on a gas stove. If the hostess decided to choose it, then when ordering, she must estimate the weight of the device - it can be very difficult to lift the autoclave with cans and water to a height. The optimum weight of the device is 8 kg. The bottom must be flat and at least 3 mm thick. It is better to buy the product from trusted manufacturers who have been creating autoclaves for many years.
Electric
Such a device is more convenient for housewives, since it can be placed at a low height near the outlet. Another plus of the electric autoclave is the stand-alone operation. The thermostat maintains the desired values \u200b\u200bfor the allotted time. The power of the devices is different. Small appliances with a volume of 22 liters consume 2 kW, medium autoclaves with a volume of 46 liters consume 3.2 kW. The mains voltage must be 200 V.


