How to make mimosa from cream. Delicate Italian cake "Mimosa
Today I am preparing an Italian cake "Mimosa". The cake turns out to be very tasty, light, airy, beautiful and it is quite easy to prepare. Let's cook !.
For the recipe you will need:
For a 24 cm cake mold:
125 g flour
125 g sugar
4 eggs
1/2 lemon zest
(for a cake you need to bake 2 such biscuits)
For the cream:
500 ml milk
4 egg yolks
120 g sugar
50 g flour
vanilla pod (can be substituted for vanilla sugar)
50 g butter
10 g gelatin
70 ml water or juice
250 ml cream 33-35%
30 g icing sugar
can of canned pineapples (I have a can of 560 ml)
powdered sugar
Cake weight - 1.8 kg
COOKING:
We need to bake 2 biscuits. First, beat the eggs for just a couple of minutes without sugar, then gradually add sugar in portions.
Beat the egg mixture for about 8-10 minutes until light, fluffy. So that the dough mark left on the surface remains visible for 10 seconds.

Pour the zest into the flour and mix the flour into the egg mass in 3-4 doses. Stir in with folding movements, from bottom to top, trying to preserve as much as possible the volume that we have achieved by beating the eggs.

I baked a sponge cake in a detachable form with a diameter of 24 cm, covered the bottom of the form with baking paper, did not grease the sides with anything.
Pour out the biscuit dough

level and bake in an oven preheated to 180 ° C until tender. The biscuit is baked for about 40 minutes. For the first 20 minutes, do not open the oven door, as the biscuit dough may settle. We bake until sample on a dry stick, i.e. a wooden stick stuck in the center of the biscuit should come out clean, without traces of dough.
Put the freshly baked sponge cake on the wire rack and let cool. After the biscuit has cooled completely, it can be cut out of the mold. Before cutting into cakes, the biscuit must be allowed to stand for 5-6 hours.
Cut the biscuit into 3 cakes.

Cut the second biscuit into 3 cakes. We get 6 cakes.

We select 2 central cakes from each biscuit, they are the whitest and they have almost no crust. The first selected cake is completely cut into small cubes, the size of the cubes is at your discretion.

Cut out a circle from the second cake layer, which will go to the top of the cake and give it a domed shape, the diameter of this circle is about 18-19 cm.

Cut the rest into cubes. This number of cubes is quite enough for us to sprinkle the whole cake.

Let's go to the cream. Add a small amount of cold milk to the flour, dilute it to a lump-free batter. Pour the rest of the milk into a saucepan, put the vanilla seeds and the pod here, put it on the stove and bring to a boil. And then we leave it to brew for a few more minutes.
Beat the yolks a little with sugar, then add the flour diluted with milk.

Once again, work well with a whisk. We remove the milk from the stove, take out the vanilla pod from the hot milk. If desired, the milk can be filtered to drain the seeds. Then, in a thin stream, without stopping whipping, in very small portions, so that the yolk does not curdle, pour hot milk into the egg mixture.

Pour into a saucepan and boil until thickened. Boil on high heat with constant vigorous stirring. The mixture cannot be boiled, the maximum temperature is 82 ° C, otherwise the eggs will curl. Therefore, in order not to overheat the mixture, you can periodically move the pan to the edge of the stove, without stopping the intensive stirring, and then return it to the fire again. Cook until thick, as it thickens, remove from heat. The custard base is about the consistency of sweetened condensed milk.

We put 50 g of butter,

stir until the oil is completely dispersed, immediately pour into a separate bowl and let cool until very warm. It should not cool completely, not to room temperature, the custard base should remain quite warm. In order not to form a crust on top, cover with a foil, put the foil directly on the surface of the custard base.

Open the jar with canned pineapples, strain the syrup, finely chop the pineapples. Add gelatin to the syrup and leave to swell. Then we very gently heat until the gelatin is completely dissolved. Pour the gelatinous solution into the custard base and stir well. The custard base should remain warm by this time.
Whisk the cold cream with powdered sugar until soft peaks. It is highly advisable not to interrupt the cream, it should hold its shape well, but at the same time remain soft. Next, very carefully, but quickly, mix the whipped cream into the custard.

Quickly, because our cream is cold, and the custard contains gelatin, if you don't rush, then the gelatin can grab into strands already in the process of making the cream. As a result, the cream will be heterogeneous and it will not harden, so mix carefully so as not to lose volume and airiness, but quickly. The result is a completely thin cream, but gradually, as the gelatin begins to work, the cream will thicken.
And we have everything ready. We just have to collect the cake. Put the first cake on a serving plate, install a split form. Saturate the cake with syrup, spread the cream, level it, put some pineapple on top.

Put the second cake on top.

The second cake is preliminarily slightly trimmed around the circumference so that it is slightly smaller in diameter and fits easily into the form. Soak the cake, spread the cream, level it.

We spread pineapples. Likewise, the third cake - soak, cream, pineapples. And we spread the last fourth cake.

Use our hands to lightly press the edges of the cake to make the cake more rounded.

We put this whole structure in the refrigerator for about half an hour. The cream should cool and thicken. We still have a small amount of cream for spreading the cake on top and impregnation. To prevent the cream from thickening and winding up, cover the bowl with the left cream and put it in a deep bowl, where we pour slightly warm water. Not hot, just slightly warm.
After half an hour, we take out the cake from the refrigerator, carefully separate and remove the form. Saturate the top small cake and coat the whole cake with cream.

Decorate the cake with prepared biscuit cubes.

The cream is soft, so the cubes stick easily. We trim the cake, slightly compact it with our hands.

Sprinkle with powdered sugar and refrigerate for 3-4 hours, the cake should be soaked well. It is very desirable to cover the cake on top so that the biscuit cubes do not dry out.
And our cake is ready.

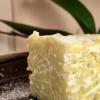
The cake turned out to be very tasty, delicate, airy, with a delicious vanilla aroma and a light citrus hint of cakes.
Enjoy your tea!
It is customary to bake this delicate, moist, unusually tasty cake in Italy during the celebration of the onset of spring, namely on March 8! And the cake, in my opinion, fully justifies its name - well, real mimosa! The same yellow, fluffy and tender! ...)) There are already several recipes for "Mimosa" on the sow, but they all differ from my version. I would like to bring to your attention the "Mimosa" cake, as it is baked in the north of Italy. P.S. The process of making a cake is not complicated enough, but a long description for the recipe ... so that everyone can cope with its preparation!
Ingredients for "Italian Mimosa Cake":
Nutritional and energy value:
Recipe "Italian cake" Mimosa "":

Break 4 eggs into a bowl of a kitchen processor (or simply into a large bowl if you will be using a hand mixer for beating). Pre-break each egg into a glass and only then add to the rest. We always use this method when working with eggs in cooking, but for me this rule is especially important when using a large number of eggs! This little rule will help you avoid unnecessary trouble.

Add sugar and start beating the egg mass until it doubles in volume, about 10 minutes at high mixer speed. In the meantime, we separate the 8 yolks we need. After 10 minutes, start adding the yolks, continuing to beat the egg mixture (while adding the yolks, the speed of the mixer can be slightly reduced, and then continue beating again at high speed). As a result, we get a fluffy and airy egg mass. It has increased in volume by about 3-4 times.

While the eggs are beating, sift the flour with starch a couple of times (I sift once into a bowl and the second time directly into the bowl with eggs). Introduce the flour mixture in parts into the egg mass, each time very gently stirring with smooth rolling movements from bottom to top, saturating the dough with additional air. We do not mix for a long time so that the eggs do not settle, only until a smooth dough structure is obtained, without lumps.

Prepare 2 tins for biscuits with a diameter of 22-24 cm. Grease them with butter and sprinkle lightly with flour. Spread the dough evenly into 2 tins. One biscuit will become the cake itself, and the second we will use to decorate the surface of the cake with delicate pieces of biscuit ...

Bake the biscuits in an oven preheated to 180 degrees for about 30 minutes. Check the readiness of the biscuit with a wooden skewer and, in any case, watch over your oven. Turn the finished biscuits over and cool on a wire rack. It is best to give the biscuits a "rest" overnight, or at least 5-6 hours.

In the meantime, let's prepare Patisier cream (its difference from the custard we are used to is that we only use egg yolks). Pour milk and 300 ml (!) Cream into a saucepan with a thick bottom. Add the seeds from the vanilla pod (in a pinch, you can substitute vanilla extract). Heat over fire, but do not bring to a boil.

Separately in a bowl, grind the yolks with sugar. Add flour and stir until smooth. When the milk mixture just starts to boil, add the yolks to it. Do not in any way interfere! The yolks will rise to the surface of the milk (as in the photo). Allow the mixture to come to a point where the milk begins to boil, ie the milk begins to "bubble" between the sides of the pan and the eggs, and small volcanoes form in the center.

At this point, whisk the yolks with the milk until a homogeneous mass is formed. The cream is ready! It should come out smooth and lump-free. In this recipe I offered you the so-called express method of brewing cream, offered by the Italian pastry chef Luca Montersino ... But, you can prepare the cream with the method you are familiar with, the old fashioned way!))

Transfer the finished cream into a wide container and cool, covering with cling film in contact with the surface of the cream so that a crust does not form on the cream.

When the cream has cooled, beat the remaining cream (200 ml) with the icing sugar. Transfer the cream to a large bowl. Set aside literally 3 tablespoons from the cream, and add the rest of the cream in portions to the Patisier cream, stirring gently each time so that the cream does not settle. Put the finished cream in the refrigerator.

Prepare biscuits. Carefully cut the first biscuit into 3 equal cakes. This is how bright and yellow it is due to the use of a large number of yolks, and no additional dyes!))

Remove the second biscuit from the top crust, and then cut into strips and at the end into small squares (the smaller the better). The biscuits are very soft and fluffy in structure. (This time, the children and I tore the biscuit into pieces a little ...)

Prepare liquor impregnation. Put the water in a small saucepan to heat up, add sugar and liquor (preferably orange, like Cointreau). Stir well until the sugar is completely dissolved (do not overheat!), Remove from heat and allow to cool. Let's start assembling the cake. Put the first cake on the dish, moisten it abundantly with impregnation.

Then apply a thin layer of cream - 1/2 of the deferred amount of cream, and distribute properly over the surface of the crust.
I bake this delicate, moist, unusually tasty cake once a year, namely during the celebration of the onset of spring ..., during the 8 March holiday! There are some varieties of this dessert. I would like to present to your attention the Mimosa cake, as it is baked in the north of Italy. I think that no one has any questions about the origin of the name of this cake! Its name fully corresponds to the appearance of the dessert, which resembles a mimosa flower - the same yellow and fluffy!
In Italy, they began to celebrate Women's Day in 1946, and the mimosa flower immediately became a recognized symbol of this holiday, since it begins to bloom just in the first days of March. In general, without further ado, I suggest you pamper yourself with this delicate cake that melts in your mouth!
I want to note that the cake turns out to be "expensive" in terms of the number of eggs used! .. But, to justify it, I can say that this cake has not left anyone indifferent, neither by its appearance, nor by its taste! Pamper yourself too!
The recipe for the "Mimosa" cake was created in Northern Italy, but today it is considered the heritage of the entire Italian gastronomic culture, and is prepared with pleasure by hostesses throughout Italy. It owes its name to the fact that its appearance resembles a mimosa flower. Mimosa cake is traditionally prepared for a holiday dedicated to Women's Day.
Let's learn how to make this lovely cake.
Ingredients
For biscuit:
+ 4 eggs,
+ 8 yolks,
+ 220 g sugar
+ 200 g flour,
+ 40 g of potato starch.
For the custard:
+ 300 ml whole milk,
+ 300 ml cream,
+ 200 g sugar
+ 8 yolks,
+ 55 g flour
+ half a vanilla pod.
For impregnation:
+ 100 ml of water,
+ 50 ml orange liqueur,
+ 50 g sugar
For whipped cream:
+ 200 ml whipping cream,
+ 20 g icing sugar.
Preparation
Biscuit
1. Beat well - until fluffy foam - 4 eggs with sugar.
2. Add 8 more yolks to the egg mass and continue beating until the mass increases in volume.
3. Sift flour with starch and add small portions to the egg mass. Stir gently with a spatula from bottom to top, additionally saturating the dough with air.
4. Divide the resulting dough into two parts and put in two oiled and floured tins (22-24 cm). One biscuit will become the basis of the cake itself, and the second we will use to decorate the entire surface of the cake with delicate pieces of biscuit.
5.
Bake in an oven preheated to 180-190 degrees for about 30 minutes. Willingness to check with a toothpick.
Cream
1. Pour milk and cream into a container, add the seeds from the vanilla pod and leave to warm.
2. Mix the yolks with sugar separately, add flour. Then add a little milk and cream to the egg mixture. Mix thoroughly again and pour in the remaining milk. Stir the cream constantly and bring it to thicken over low heat. Remove and leave to cool.
Impregnation
Prepare liquor impregnation. To do this, put the water to heat, to which sugar and liquor (preferably orange) are added. Stir well until the sugar is completely dissolved (do not overheat!) And leave to cool.
Cream
Whip the cream with powdered sugar and refrigerate.
Assembling the cake
1.
Prepare the cakes. If necessary, trim the biscuits with a knife. Cut one biscuit into three cakes.
2. The second biscuit can be baked in a smaller mold
3. At the second biscuit we cut off the top crust properly ... And cut into longitudinal strips of the same width. Then we cut these strips into three parts each, and, finally, we cut the strips into small cubes.
4. We finish preparing the cream. We take out the whipped cream from the refrigerator, put literally 2-3 tbsp. tablespoons of cream, put the rest in the custard and mix as follows.
5. We put the first cake on a tray and grease it with liqueur impregnation.
6. Then we apply a thin layer of cream - just one spoon - and distribute it properly over the surface of the cake.
7. Lay out a layer of cream on top (divide it visually into three parts, for all three cakes). And cover with the second cake. We do the same with the second cake: we saturate it with liqueur impregnation, grease it with the remaining cream and cover it with a layer of cream. Above - the third, last cake.
8. The retaining ring can now be removed.
9. Lubricate the top and sides of the cake with the remaining cream.
10. We cover the entire surface of the cake with the previously cut biscuit cubes. The cream allows the pieces of biscuit to adhere properly to the surface of the cake, and it begins to resemble mimosa.
And I continue to study complex and not very complex cakes of all stripes. Some do not work the first time and go into a distant box. Others are moving into the ranks of family traditional dishes, like this cake.
- Sugar 2 cups
- Flour 1 Glass
- Egg 6 Pieces
- Egg Yolk 4 Pieces
- Canned peaches 200 Gram
- Gelatin 20 Gram
- Orange juice 750 Milliliters
- Soda 1 Teaspoon
- Vinegar 1 Teaspoon
Separate the whites from the yolks, beat them into a stiff foam. Carefully add a glass of sugar to them, continue whisking. Then add 6 yolks and soda, slaked with vinegar. Pour in flour, gently knead the dough. Bake the crust in a round shape at 180 degrees for 35 minutes.

Cut the cooled cake into 3 pieces lengthwise. Cut 3 circles of different diameters from two parts: small, medium and large.

Prepare the cream. Place the orange juice in a saucepan on the stove until it boils. Separately combine the yolks with a glass of sugar and four tablespoons of flour, and pour in a little juice. Stir. After boiling, immediately add this mixture to the juice. Cook for 5 minutes until thick.

Place the gelatin to swell according to the instructions on the package. Melt it in a water bath after an hour. Pour into orange cream. Stir.

Line a deep plate with cling film. Place the smallest crust on the bottom.

Slice the peaches. Place some peach slices on top of the crust, and then brush all over with cream.

By the same principle, fold the rest of the cakes in ascending order, smearing with cream and stacking the peaches.

Cover the cake with foil, put it in the refrigerator for 5 hours. Then take it out, remove the film, and turn the cake over.
Finally, brush the cake with the remaining cream and sprinkle with the rest of the crust. Enjoy your tea!
Read also ...
- Chicken liver pate
- Delicious zucchini with cheese in sour cream in the oven - a step by step recipe with video Zucchini recipes in the oven with sour cream
- Banana rice and corn flour pancakes (gluten free) with homemade banana sauce Banana pancakes with semolina
- Cabbage casserole with chicken Chicken fillet casserole with cabbage
