Sweet girl cake recipe. Milk girl cake - Recipes at home
Cake Milk girl, I learned how to bake quite recently. Today I'm preparing a "girl" with butter cream. And although on the Internet everyone believes that Sundae cream is best suited for soaking the cakes of this cake, we can use any of our favorite cream. Sour cream, cottage cheese or yoghurt is not important. The main thing here is not to spare the cream so that the biscuits are soaked through and through.
The cake owes such an interesting name to the condensed milk "Milch Mädchen". Translation sounds like Milk girl. With this condensed milk, culinary specialists in Germany learned how to bake a cake. When I first tasted a piece of cake melting in my mouth, I realized that this was a good find. I wrote down the recipe right away. Once again I bake this cake and every time it turns out more and more delicious.
If you haven't made the Milk Girl cake at home yet, be sure to try it. Moreover, no exquisite products are needed. However, please be patient. After all, the cakes are baked separately. And they are not baked in tins, but laid out on a baking sheet, and the thinner each cake is, the better it will be soaked in cream and the cake will be tasty and tender. Just find real condensed milk made from whole milk. It is not necessary to use condensed milk in the cake, which is made from soy milk with palm oil.
When assembling the cake, you can put berries or bananas, kiwi cut into slices between the cakes. Finely chopped orange pulp works well too. Today I cook according to the classic recipe without additives. For decoration, I took only a bar of white, porous chocolate.
Today in the article:
Step-by-step cake recipe Dairy girl
From such simple and affordable products, we will get an extraordinary yummy! Some of Dairy Girl's recipes do not involve the addition of butter. But I am making the most delicious classic.
What you need:
How to cook:
- First, I melted the butter to cool down a bit before adding it to the dough.
- In one bowl I combine flour with salt, baking powder and vanilla sugar.
- I break the eggs into another large bowl and pour the condensed milk. I mix all this with a mixer.

- Now I begin to pour in the mixture of dry products in portions and pour in the melted butter. One by one. Poured oil, mixed, added flour, mixed. Finally, I combined all the ingredients and got such a tender dough.

- Blanks for cake layers can be made in two ways. Draw a circle with a diameter of about 20 cm on a sheet of baking paper.And on this circle, spread the dough with a layer no thicker than one centimeter. Neatly, without going beyond the edges of the drawn circle.

- The second way is much easier. I placed the ring from a round, split form on a sheet of paper, spread on the dough and removed the form. It turns out a perfectly even circle.

- There are only two baking trays in my oven. I put two cakes in there and bake at 180 gr. seven minutes. The oven is already preheated. It is very important here to constantly monitor so that the biscuits do not burn. Ovens are different for everyone, you may have a different baking time.

- She took out two ready-made cakes from the oven and set them aside to cool. The next two cakes are sent to bake. And when they cooled down, I turn them over and remove the paper from them. Here is another advantage of the presence of butter in the dough. The paper is easily separated from oily cakes.

- I continue to bake this pattern until I have used up all the dough. I got 8 pieces of beautiful, ruddy cakes. I leave them to cool, and I myself will do the cream. Yes! Another important point - do not stack the cakes one on top of the other until they cool down, otherwise they will stick together.
Butter cream for cake
For my "girl" I will make a 35% fat cream with whipped cream. I take the cream for the cream very cold, and I also put the bowl in which I will beat in the freezer for a while. Then the cream whips well and quickly turns into a thick, airy mass. Beat with a mixer, gradually increasing the speed to maximum. Adding, in the process of whipping, a little powdered sugar and vanilla sugar. 
The cream is already thick and lush. He's quite ready. I start the most creative process - picking up the cake.
I spread a little cream on the dish and spread the first cake. I apply a layer of cream. And I continue to shape the cake, smearing all the cakes with cream one by one. At the end, I thickly coat the top and sides. I do not level the cake, but rather spattered it on the top with a spatula to give such an uneven, wavy surface.
Ideal if you cook the cake in the evening and leave it in the refrigerator overnight. So it will be perfectly saturated and the cream will harden.
The next day I take out the finished cake and sprinkle it with grated white milk chocolate. It goes well with the milky taste of the "girl". This, without any frills, cake decoration does not clutter up its airiness and does not interrupt its native, milky taste.
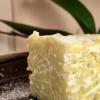
This photo shows in section how well all the cakes were soaked in cream.
An amazing light and airy cake will decorate any festive table. And it is not difficult to prepare it and the products are the simplest.
Cake Milk girl with ice cream (video)
Also check out the version of this cake from the Culinary Adventures video channel. This video clip shows in detail the preparation of a delicious dessert at home with ice cream. This cream is most suitable for the Milk girl.
Although I am not a fan of such a cap of berries on the cake, it looks fun and delicious. Great option for kids. And I say goodbye to you until the following recipes. I thank everyone who cooked with me today!
If you liked the recipes, click on the social media buttons to save them on your page!
Delicate and tasty - Milk Girl cake, with butter or curd cream, condensed milk, nuts.
The original Milk Girl cake is what is baked in Germany from Milch Mädchen condensed milk, and the name of the dessert was born from the name of this condensed milk.
for cakes:
- butter - 100 gr
- flour - 200 gr
- condensed milk - 1 can
- baking powder - 2 tsp.
- eggs - 2 pcs
- a pinch of salt
- vanilla sugar - 1 packet
for cream:
- cream - 400 ml
- icing sugar - 4 tbsp. l.
- vanilla sugar - 1 packet

Melt the butter, but before putting it in the dough, the butter should cool slightly.
Prepare a dry mixture for the dough - pour flour into a bowl, add salt, baking powder and vanilla sugar.
In another bowl, beat eggs with condensed milk with a mixer.
Now we proceed to the step-by-step preparation of the dough. Add part of the oil to a bowl with condensed milk, mix, then add part of the dry mixture, mix. We continue to make in this sequence and as a result, you get a tender dough for the cake.

Bake the cakes in the oven, covering the baking sheet with baking paper. There is no need to grease the paper. The dough turns out to be thick, but not so much that it would be rolled out. We spread it with a spoon

and level it to size, no more than 1 cm thick.

To make the cakes the same, you can put a ring from a detachable baking dish on paper, spread the dough inside the ring, then remove it.

If there is no such shape, then you can draw a circle of the desired diameter with a pencil on the back of the paper, and carefully lay out the dough within this circle.
Bake the cakes in a preheated oven at t 180 0 minutes 5 - 7.

The time depends on your oven, be careful not to burn the skin. It is important - do not stack the baked cakes on top of each other until they have completely cooled down, otherwise they may stick together.
In order for the cream to turn out the right way, you need to take into account several important points when preparing:
- cream must be natural with a fat content of at least 30%.
- cool the cream well before whipping. Ideally, if they stand in the refrigerator for a day, if this is not possible, then you can put cream in the freezer for 30 - 40 minutes.
- the dishes in which the cream will be whipped must also be cooled. Place the whisk and bowl in the freezer for 15 minutes.
- filling cream made from natural cream is considered the most unstable cream and so that it does not "float", it must be prepared immediately before work.
- powdered sugar is an essential ingredient for a cream; you should not replace it with sugar if you want to get a fluffy, delicate cream with an ice-cream taste.
All the nuances have been discussed, we proceed to the preparation of the cream.
We begin to whip the cream with a mixer, turning it on at the minimum speed. Then, continuing to beat, gradually add the powder, vanilla sugar and increase the speed to the maximum. As soon as the cream begins to hold its shape, turn off the mixer so that the cream does not turn into butter.

Lightly grease the cake dish with cream, then lay the cakes one by one, smearing each with cream.

You can make a decoration - pour chocolate icing, decorate with fruits, various confectionery.

Recipe 2: milk girl cake at home
Cake "Milk Girl" is a famous dessert consisting of thin cakes, richly coated with cream. The recipe originally appeared in Germany. Basically, it contained locally produced condensed milk under the brand name Milch Mädchen, which means “milk girl” in Russian. Later, the dessert reached our compatriots. And although condensed milk of a different brand is already used in an adapted form, the name of the cake remains the same.
After impregnation, the cakes are incredibly tender, light and juicy, and every piece of this delicacy literally "melts in your mouth." Ice cream, which is a combination of whipped cream and custard, perfectly complements the taste. This mixture tastes like melted ice cream, hence the name "ice cream".
For the test:
- condensed milk - 370 g;
- eggs - 2 pcs.;
- flour - 140 g;
- baking powder - 10 g.
For the cream:
- milk - 300 ml;
- flour - 1.5 tbsp. spoons;
- potato starch - 2 tsp;
- sugar - 120 g;
- butter - 70 g;
- cream 33-35% - 120 g.

Combine condensed milk with eggs. Stir with a whisk until the components are combined into a single homogeneous mass.

Sift flour with baking powder, add to egg-milk mixture. Stir until the flour lumps are completely dissolved. The consistency of the dough is approximately the same as for pancakes.

On the back of the parchment paper, draw a circle with a diameter of 20-21 cm (draw a pencil around the lid, plate or other object of a suitable size). We spread 2 full tablespoons of dough in the center and distribute evenly, without going beyond the drawn borders.

We bake the cake for 5-10 minutes at a temperature of 200 degrees (until lightly browned). We immediately remove the hot cake from the parchment sheet. Sometimes milk cakes do not separate well from the paper - this happens if the parchment is not of very high quality. If this problem occurs, apply a thin layer of oil to the paper before applying the next batch of dough to prevent sticking.

Cut the edges of the hot cake on a plate of a suitable diameter. Save the cuttings for sprinkling the cake. Using the same principle, we bake and cut the rest of the blanks. In total, you will get 6-7 thin cakes.

Pour half a glass of milk into a small saucepan, add flour and starch. Stir thoroughly until the dry ingredients are dissolved.

Pour in sugar, add the remaining portion of milk and place the mixture over low heat. Cook the cream, stirring constantly. As soon as the mass boils, remove the pan from the heat.

Cool the custard until warm. Add butter thawed at room temperature. Stir vigorously until smooth.

Whip cold cream until thick.

Mix the custard and butter. You should get a smooth and uniform filling cream.

We collect the cake. Put one cake on a plate, apply a generous portion of cream. Place the next cake on top, coat it again, etc. We do not regret the cream - the cakes must be soaked thoroughly.

We coat the top and sides of the dessert. Grind the dough cuts remaining after baking the cakes with a blender into small crumbs and sprinkle the sides of the cake.

We put the dessert in the refrigerator for 2-3 hours or overnight for full impregnation. The surface of the finished product can be decorated with whipped cream or in any other way.

We cut the dessert in portions and enjoy the delicate taste of milk cakes. Cake "Milk Girl" with ice cream is ready!

Recipe 3: milk girl cake with ice cream
Today we are preparing a simple homemade Milk Girl cake with ice cream. Delicious dessert with German roots and a gentle Russian soul.
Only 4 ingredients are required for the cakes:
- 2 eggs;
- 1 can of condensed milk
- 160 g flour;
- 15 gr. baking powder.
For the cream "Plombir" you will need:
- 350 gr. good sour cream;
- 100 g Sahara;
- 20 gr. vanilla sugar;
- 1 egg;
- 120 g softened butter;
- 3 tbsp. l. corn starch.
For glaze:
- 1 bar of milk chocolate;
- 50 gr. heavy cream;
- 20 gr. butter.

It is because of the presence of condensed milk in the dough that the cake is called "Milk Girl", by analogy with the once popular brand of dairy products in Germany. The recipe itself is so easy and successful that it has firmly established itself in the notebooks of our grandmothers, and now it has migrated to the arsenal of modern home cooks.
Let's move on to a step-by-step description of the cooking process.

Beat eggs until light foam appears. Then add the condensed milk and mix until the ingredients are combined.
To distribute the baking powder evenly, mix it with flour in advance. Sift and add flour to the egg mixture. Beat a little more and that's it - the dough is ready in just 5 minutes!
Now you need to let it stand for a while. The baking powder will react with the rest of the ingredients and the dough will become airy.

When baking cakes, it is convenient to use a silicone mat with a circular pattern. Is there no such assistant in your kitchen yet? Then it can be easily replaced with quality parchment paper. On the reverse side, we draw a circle with a diameter of 18-20 cm. With this size, 5-6 cakes are obtained and, accordingly, the same number of blanks.
Put 2 tablespoons of dough on the smooth side of the parchment and spread it in a very thin layer of 3-4 millimeters. Don't worry, the baking powder will still make the dough rise. At the end, we get a delicious crust that is easily and quickly soaked.
We send the dough into an oven preheated to 180 degrees. The baking time depends on the characteristics of your oven, the size of the crust itself and is on average 5 minutes. The color of the finished baked goods remains, like the dough, milky. Readiness can be checked by simple pressure - if the dough does not stick, and the cake is slightly springy, you can take it out!
The baking process resembles a conveyor - while one piece is in the oven, we prepare another. We immediately remove the baked blanks from the parchment and leave to cool on a kitchen towel or a special wire rack.
At home, a cream with sour cream is cheaper and easier to prepare. Especially with our step-by-step recommendations.

Any custard is prepared in a steam bath. Therefore, first you need to pour water into a saucepan and put it on fire. While the water is boiling, prepare the custard base.
To do this, lightly beat the egg. Then stir in sour cream, sugar and vanilla sugar. Add starch and quickly mix the mass until the lumps disappear.
We put the heat-resistant bowl with the prepared mass on the steam bath. The water should not touch the edge of the bowl.
We simmer and constantly stir the future cream for 5 minutes or a little longer. Here, the cooking time depends on the fat content of the sour cream. We define readiness as follows - if you run a spatula along the bottom of the bowl, a deep groove remains and the cream will not flow back.
After the custard base is ready, it must be cooled, covered with a film "in contact". This helps to avoid winding.
Is the custard cold and you haven't eaten it yet while taking the sample? Then we will continue to prepare the cream. To do this, beat the butter until it turns white and fluffy.
Then add the cooled custard base in parts, while continuing to beat. At the exit, we get a thick and airy cream with the taste of melted ice cream.
Before assembling, you need to trim the cakes so that they are the same size. So the cream will require less, and the effort spent on leveling.
The actual assembly of the "Milk Girl" is very simple and does not contain any special tricks.

We leave a drop of cream on the platter so that the future cake is fixed and does not slide out.
We spread part of the cream on the first cake and distribute it evenly.
We collect further on the same principle. Keep track of the thickness of all layers - they should be approximately the same. Cream "Sundae" is very stable and perfect for leveling, so cover the top cake and sides with the first layer of cream and send it to the refrigerator until it hardens.
After the cake is soaked and well set in the refrigerator, you can proceed to the final alignment and search for ideas on how to decorate your masterpiece.
What could be tastier than ice cream? Only chocolate ice cream! Therefore, for the decoration of the "Milk Girl", we propose to make ganache on dark chocolate in order to set off its creamy taste and delicate texture.
We combine all the ingredients and, stirring, heat them in a water bath or in a microwave. The finished glaze is smooth and shiny. She needs to be allowed to cool to room temperature. When the frosting thickens, but is still quite pliable, you can pour the top of the cake and form beautiful smudges.
Delicious desserts and bright victories in the culinary field!

Recipe 4: caramel chocolate milk girl
Surprisingly tasty and easy-to-prepare cake "Milk Girl" will become not only a decoration of the festive table. It will forever remain a favorite dessert of households and guests - you just have to cook it for the first time. The pronounced milky-creamy taste will appeal to children and adults.
This famous German dish is suitable for a festive feast, buffet tables and homemade tea drinking. It is based on sweet cakes with condensed milk.
This recipe differs from the classic one in a modified composition of the cream, a simplified baking method and the use of dark chocolate for decoration. The cream contains boiled condensed milk, which gives the cake a caramel aftertaste.
- condensed milk - 380 g
- condensed boiled milk - 380 g
- egg - 2 pcs.
- flour - 1 tbsp.
- baking powder - 2 tsp
- sour cream 20% fat - 400 g
- dark chocolate - 50 g

Eggs should be washed thoroughly, and in a suitable dish, place the bare eggs and baking powder.

Beat lightly - not until firm foam, but just until smooth and the first bubbles. Add condensed milk.

Stir and add flour.

Now everything needs to be mixed until smooth.

The dough should be slightly thicker than the pancakes. Put parchment on the sheet. Pour the dough on top. It will seem that it is not enough for the whole sheet. Slowly tilt the sheet in different directions while holding the parchment. Achieve complete filling of the sheet, especially the corners.

Send to the oven, preheated to 200 degrees for 10 minutes.
Let's prepare the cream. Mix the boiled condensed milk and sour cream with a blender.

The cream is thick and balanced in sweetness.

We take out the finished cake from the oven.

Quickly turn over onto a new sheet of parchment and remove the bottom parchment from the crust until it cools. Do it gently, the cake is tender.

Turn the cake over again, remove the parchment. Leave to cool.

Cut the cake in half. Put the cream on one of the halves of the cake, as in the photo. Leave it on for 5 minutes.

Cover with the other half of the crust, apply the cream on top, grease the sides and sprinkle with grated chocolate.

The cake is soaked quickly, in 10 minutes. Store in the refrigerator.

Recipe 5: Dairy Girl - Butter Cream Cake
Delicate, simple and insanely delicious cake. Today we will prepare the famous Milchmadchen cake at home. Cover the top and level it with cottage cheese, and decorate it to your taste. If he is preparing for his birthday, then you can put a figure out of multi-colored dragee candies, and make a Christmas tree for the New Year.
- Condensed milk - 1 can (400 ml)
- Eggs - 2 pcs.
- Flour - 160 g
- Baking powder for dough - 10 g
Butter cream:
- Cream 33% - 400 ml
- Powdered sugar - 100 g
Curd cream (for decoration):
- Cream 33% - 200 ml
- Cottage cheese or cream cheese - 150 g

Drive eggs into a deep container and beat with a mixer.
When the mass increases in volume and a light foam appears, pour condensed milk to them.
Beat at medium mixer speeds for about 1-2 minutes.
While whisking, slowly add flour and baking powder.
Stir until smooth. The dough is ready. It should not be very liquid so as not to spread.

Cover the baking sheet with parchment paper and pour it over half a ladle of dough.
Use a silicone spatula to shape into a circle. This is best done with a split ring without a bottom.
We put to bake in the oven, preheated to 180 C.
On average, one cake is baked for 3-7 minutes.
Depending on the size of the circles, you will have 5-7 cakes. We bake them one at a time.

Let's make butter cream.
Pour the chilled cream into a deep container and add all the icing sugar (sugar can be used)
Beat until firm and firm.

When the cakes are baked and completely cooled, you can start assembling the cake.
Put the first cake on a nice plate and brush with cream. Put the next cake on top and grease it too.
Do not cover the top cake with cream.
We send it to the refrigerator for a couple of hours to solidify.

For decoration and leveling, you will need a thicker cream - curd.
Mix the cottage cheese and cream. Those with a sweet tooth can add 2 more tbsp. l. Sahara.
Instead of cottage cheese, you can take cream cheese - this will have a more delicate taste.

Beat the mass until smooth. We turn on the mixer first for small ones, then for medium ones and at the end for high ones.

Cover the top and sides of the cake with curd cream.

We decorate to your taste.

Recipe 6, step by step: milk girl cake with nuts
Treat yourself to a cake. Very easy to prepare, tender, 40 minutes - and the cake is ready.
- Condensed milk (1 jar) - 397 g
- Chicken egg - 2 pieces
- Baking dough (1 pack) - 15 g
- Wheat flour / Flour - 1 stack.
- Cream (from 22% and above) - 400 g
- Powdered sugar - 100 g
- Walnuts (for dusting)
- Sugar (glaze) - 5 tbsp. l.
- Cocoa powder (glaze) - 3 tbsp. l.
- Butter (glaze) - 80 g
- Milk (glaze) - 2 tbsp. l.

Add baking powder, eggs to condensed milk. Mix well. Add flour.

Cover the 26 cm form with paper. We spread 2 tbsp. l. (with a slide) of dough and spread with a thin layer. It will seem that the dough needs to be added, but this is not necessary!

We bake at 200 * C for 5 minutes. Take out, turn over, immediately remove the paper! 5 cakes should come out.

Whip the cream with the icing sugar.

Smear the cakes.
According to the recipe - do not coat the last cake, cover with glaze.
For the glaze: mix sugar, cocoa powder, butter, milk. Bring to a boil, let cool, cover the cake. Sprinkle the sides with nuts.

The cake is very tender. Enjoy your tea and have a great weekend.

First of all, if there is no mold for flowers, you can cut it out of the lid of a tin can (after drawing a flower of the required size).
Roll out the mastic and squeeze out the flowers, roll them out a little with a skewer.
Insert a skewer into the middle and bend the flower (the photo shows how I did it). Let the flower dry.

To prepare the stem, roll out the mastic in the form of a thin stick. For threadlike leaves, roll out even thinner.
Connect with some water, slightly moistened. Let dry.

Cut out the leaves, also let them dry.
Again, with the help of some water, glue the flowers to the threadlike leaves, let them dry.

Recipe 7: homemade milk girl cake (step by step)
If you want to bake a delicious sponge cake at home, Milk Girl is the perfect option. If making a biscuit is almost always a lottery, it is not known whether it will rise or not. That cakes of the "Milk Girl" cake always turn out to be lush, tender and airy.
This recipe is one of my favorite recipes. It does not require a lot of food to prepare it. The basis of the cake is condensed milk, which is why this dessert got its name.
Be sure to try making this cake and, perhaps, it will become one of your favorite recipes.
For the test:
- Condensed milk - 400 gr;
- Chicken eggs - 2 pieces;
- Kefir - 2 tablespoons;
- Baking powder dough - 1 tablespoon;
- Wheat flour - 1 glass.
For the cream:
- Sour cream (20%) or cream (33%) - 500 gr.;
- Granulated sugar - ¾ glass.

First, let's prepare the cake layers. Beat eggs lightly with a whisk.

Add condensed milk.

Pour in kefir.

To stir thoroughly.

Mix flour with baking powder.

Add dry ingredients to the condensed milk mixture.

Knead the dough thoroughly. It should turn out like thick sour cream.

On parchment paper, draw a circle about the size of a medium saucer with a pencil.

Put out 2 tablespoons of dough.

You need to try so that it does not go beyond the boundaries of the circle, so that later you have to cut it a little.

Bake in an oven preheated to 200 degrees for 8-10 minutes. In this way, bake the rest of the cakes. From the specified amount of ingredients, 5 cakes should be obtained. Leave them to cool. Let each cake cool on separate parchment paper. Do not stack the cakes on top of each other, as their surface is sticky and, thus, you can ruin the cake.

In the meantime, let's get down to making cake cream.
Combine sour cream (cream) and sugar in a deep bowl. How much sugar you put in should be considered based on personal preference. In the classic recipe for the "Milk Girl" cake at home, the amount of sugar is 1 glass. But it must be borne in mind that the cakes are also quite sweet. Therefore, ¾ glass was enough for me.

Beat the sour cream with sugar with a mixer at medium speed for 7-10 minutes, until the mass becomes airy and increases in volume.

Liberally grease the cooled cakes with cream.

How to decorate the Milk Girl cake is up to you. You can decorate it with chocolate icing, fruit or cream. For homemade tea, you can simply sprinkle with cocoa or nuts. Send the cake to the refrigerator for soaking for at least 2 hours.
Beat until smooth.

Add flour mixed with baking powder.

Knead the dough.
It will be runny, that's okay.

It's time to bake.
There are several options:
1. Draw a circle with a diameter of 16-18 cm on a sheet of parchment and spread out the dough.
2. But it is easier to take a detachable form or a form with a removable bottom, spread the dough, and then just take it off. I chose the second one, it's more convenient for me.
So, spread out two tablespoons of dough, distribute evenly.
Continue until all the dough is finished.
Since the cakes are baked very quickly, it is convenient to make several blanks at once on parchment, and then transfer them to a baking sheet.
We bake in an oven preheated to 190 degrees for 5 minutes.

The caramel cake base is ready.

Immediately, while hot, remove it from the parchment. Since the cakes are very tender, it is convenient to help yourself with a spatula or a knife.

The surface of the finished cakes is quite sticky, so all cakes must be shifted with parchment.
The blanks for the future cake are ready.

Whisk the cream until soft peaks.

Combine cottage cheese and whipped cream.

Let's add the icing sugar.

Beat everything together for literally half a minute so that everything comes together.
The cream is ready: it is lush and light.

Put 4 pieces of parchment on a plate, with a cake on them. On the cake - cream.
The parchment is used to keep the plate from getting dirty. Then, when the cake is assembled, just take out the sheets: all the cream will remain on them. Of course, you don't need to use this technique.
So we collect the whole cake: the cake is cream, lightly pressing the cakes with our hands.

Cover the whole cake with cream. Can be decorated as desired. I left it like that, just made careless divorces.
Cake "Milk Girl" with cottage cheese cream is ready. It is quite heavy in weight (although only 18 cm in diameter) and very satisfying!
But remember that the composition contains cottage cheese, so I do not recommend storing such a cake for a long time.
We put it in the refrigerator for at least three hours. Better, of course, at night. During this time, the cakes are well saturated with cream.
Enjoy your tea!

Would you like to have a romantic dinner with a light yet delicious dessert? Try baking a cake for lovers. It is with this delicacy that it is customary to savor in Germany. In our country, the recipe for the "Milk Girl" cake has become very popular. The recipe traditions of German confectioners have successfully taken root in Russian cuisine.
Delicate dessert from Germany
For the first time, the recipe for the "Milk Girl" cake with ice cream was tested by German confectioners. Since then, immigrants have spread the legend of this dessert to all corners of the globe. Cooking it at home is a breeze. The zest of such baked goods lies in the ice cream. Although modern housewives do not stop at anything and use other impregnations, including from condensed milk.
If you want to make the traditional Milk Girl cake, we will tell you the recipe with the photo. But before that, let's focus on some tricks:
- the dough in its consistency resembles thick sour cream: no more, no less;
- bake the cakes only on parchment;
- to set the desired shape, usually round, a circle is drawn on paper using a plate or dish;
- thin dough on the mold is distributed using a spatula or fingers;
- baked cakes are uneven, but this is skillfully hidden by an airy filling cream;
- real cream sundae can be made from very fatty, better homemade cream;
- if you are a city dweller, buy cream with a fat concentration of 33%, but not less;
- if you plan to decorate the cake with mastic, you need to level it with sour cream;
- oily cream will play the role of a putty before applying the mastic;
- the irregularities of the cakes can be trimmed;
- do not rush to dispose of the scraps, chop them into crumbs, and then decorate the cake with this mass.
Now you are fully armed, or rather, you know all the tricks of the preparation of this exquisite dessert. Even if your decoration and imagination are limping, no one will pay attention to it. The taste, tenderness and aroma of such a cake will make an indelible impression on any gourmet.

Composition:
- 2 eggs;
- 0.3 kg of condensed milk;
- 1 pack of baking powder;
- 0.2 kg of sifted flour;
- 0.5 l cream;
- 1 can of canned peaches;
- 100 g icing sugar.
Preparation:
- The minimum set of products is the maximum gastronomic pleasure. Let's check the list for the availability of the required ingredients. In total, we need 4 units of products for the test.

- Pour condensed milk into a bowl or bowl, only whole and natural.
- Let's add eggs.
- For whipping, we need a mixer or blender.
- Experienced housewives can turn any product into a homogeneous mass with a hand whisk.

- Let's take a separate dry dish.
- Sift flour into it and mix with baking powder. Packages are different, we need an average of 10 g of baking powder.
- Add the pastry cement to a bowl of beaten eggs.

- We do not stop in the middle of the way and continue to actively beat the dough for the cakes.

- Initially, you will be intimidated by its liquid consistency, but as it is processed, the mass will begin to thicken.

- Take a roll of parchment paper.
- Cut a piece no more than 26 cm wide.
- Let's circle the plate or dish with a pencil and get a circle corresponding to the dimensions of our cake.
- Follow the drawing in accordance with the size of the baking sheet.

- We lay out the parchment on a baking sheet, in the center of the circle we lay out literally one, maximum 1.5 tbsp. l. test.
- Smear the dough evenly, without getting out of the circle.

- Turn on the oven and heat it up to a temperature of 190-200 °.
- Do not be too lazy to time the time, otherwise the consequences can be dire, and instead of a fragrant cake, we will get a handful of coals.


- The same fate awaits the rest of the cakes.
- Do not be alarmed if they turned out to be thin, this is exactly what we achieved.
- Remember the golden rule: the more dough on the parchment, the thicker the crust?
- In the culinary field, we are all Julia Caesari, so we combine business with pleasure. In parallel, we will prepare the cream.
- Let's check the availability of the required ingredients according to the list.

- Little secret: in order to achieve the desired consistency of the filling cream, we will put the cream and the bowl in the refrigerator. We need cold food.
- As soon as we have removed the cream from the refrigerator, we immediately begin to whip it.

- In a few minutes, we will double the speed of the whisk.
- Now we need two more hands in order to add the powdered sugar.
- Sift the sugar dust through a sieve and gradually add it to the creamy mass.
- Note: the cream is ready when grooves form on its surface.
- In the meantime, we opened a can of peaches, drained the juice and chopped them into slices.

- Another trick: some peach syrup can be used to soak the cakes.
- We start construction - we collect the cake.
- Lubricate the surface of each cake with cream, do not forget about the side part.

- Place the peach slices between the cakes.
- Any pastry looks more appetizing and attractive if it is originally decorated.
- We turn on imagination and decorate our cake.
Confectionery tip: It's best to put the cake in the refrigerator overnight. If you don't have that much time, one hour will be enough.
Note to a pastry chef genius
You have already familiarized yourself with the classic way of making the Milk Girl dessert. The recipe for a cake for mastic is almost the same, but still there are a couple of nuances. Of course, we will not hide anything and will tell you how to make the Milk Girl cake. Step by step recipe? Please! Write it down quickly. Please note that we will have to spend money on the purchase of Marshmallows. What for? You will find out now.

Composition:
- 0.5 kg of sifted flour;
- 0.4 kg of Marshmello sweets;
- 5 eggs;
- vanilla - to taste;
- 1 kg of powdered sugar;
- 0.5 l sour cream;
- baking powder - 1 sachet;
- 1 chocolate bar;
- 0.2 kg of butter;
- 100 g food starch;
- 1 can of condensed milk.
Preparation:
- Put the marshmallow sweets in a glass bowl and send them to the microwave oven for exactly 1 minute. The result is a homogeneous viscous mixture.
- Now we gradually add sifted icing sugar to this mass.
- As soon as you notice that the marshmallow is taken in lumps and does not stick to the sides of the bowl, proceed as follows. Pour starch on a horizontal surface.
- Spread out this mixture and continue kneading, adding the powdered sugar.
- The elastic mass is ready. Dough? No, it's mastic.
- We will cover it in food wrap and send it to the refrigerator.
- Prepare a classic dough for a German dessert in a separate bowl.
- You already know that we only need four components.
- Read the previous recipe carefully. Using this algorithm, we will bake cakes.
- Prepare the cream: mix the sour cream with powdered sugar. We need about 300 g of sweet dust.
- Add vanilla for flavor.
- Remember that dairy products for cream are best whipped chilled?
- Now let's prepare the ganache.
- To do this, melt butter in a bowl and combine it with chocolate.
- As soon as the chocolate and butter come together in a single dance, set aside the mass from the heat and cool.
- Let's put together our dessert.
- Smear the cakes with sour cream cream, treat the sides with chocolate-butter ganache.
- A little trick: put the cake in the freezer for half an hour.
- Time has passed and we are continuing to decorate.
- Wet your hands with water and smooth out all the roughness on the surface of the cake.
- From above we dress the cake in mastic.
- Secret: you need to roll the mastic with a rolling pin on the table. Sprinkle the surface with powdered sugar.
- The remnants of the mastic can be used to create figures.
- Decorate the romantic cake with lovers' figurines.
In spite of everything, the cake with the original name "Milk Girl" is easy to prepare. If you are not satisfied with its classic interpretation, you can complement the taste of the cake with canned or fresh fruit, nuts or chocolate chips. Your imagination and sleight of hand - that's all you need to create your next masterpiece. Bon Appetit!
Hello dear sweet tooth! Looking for a good milk girl cake recipe? I have it! And an additional bonus - the secrets of making an exquisite dessert and practical advice that will help you bake a delicious cake according to all the rules.
I have no doubt that some sweet lovers will first come across the name of the product. So, be familiar. Milk girl cake is thin cakes based on condensed milk, thoroughly soaked in cream. It is as gentle as the name, even if you eat it with your lips. And also sweet, tall and handsome.
Don't be surprised that I immediately started talking about secrets. Dairy girl is a special dessert. Simple and sophisticated at the same time. So practical tips will come in handy. Even if this is not the first time you will bake it.
That is why I am here. And to your attention - step-by-step recipes for a milk girl cake at home with useful recommendations.
Classic recipe for making a milk girl cake

I will not talk about how good the milk girl cake is. Everyone has already understood this. Let's get down to practice right away.
I would briefly describe the technological process as follows:
- Kneading the dough.
- Baking the cakes.
- Cream preparation.
- Assembling the product.
The process will take up to 4 hours. The most time consuming is baking cakes. In the classic version, up to 15 of them are obtained, if you use a standard form with a diameter of 20 cm.
But don't let time scare you. It goes quickly, and the process itself is not complicated. But you can treat your loved ones with a real masterpiece of confectionery art and improve your level of culinary skills.
Immediately I draw your attention to the necessary equipment. Bowls, a mixer, a baking sheet - you will find all this. But you also need parchment on which the dough will be baked. And how good it will be depends on fast and successful work. Baking on parchment is one of the features of the milk treat.
Hence the conclusion: get a good quality parchment with a silicone coating. The dough will bake well, not stick and separate well from the paper.
And one more piece of advice. I am sure that after the first time, you will prescribe this dessert in your kitchen. Therefore, I recommend purchasing Teflon rugs. Or Teflon cloth. With such helpers, it will be a pleasure to bake a dairy girl. The cakes will fly off on their own and fold into a pile. This is a joke, of course, but there is some truth in it. So think about your proposal.
One more recommendation. Putting the test on parchment is like a plasterer. You need to lay out the dough and level it. This is usually done with a spoon. But it takes a long time, and it doesn't work out smoothly enough. Therefore, such accessories as a palette knife or an ordinary construction scraper, new of course, can help out here. Yes, yes, don't smile. We are culinary specialists such people, we will get out of any situation.
A palette knife can be purchased at art stores. Believe that he will help you out in the future. Indeed, with its help, you can level, make beautiful and other confectionery products. And in the case of the dairy girl, he is generally like a godsend. The cakes will be in perfect shape. And it will help to make the sides even.
If you have a metal rack in the form of a lattice, then the path will be at hand. It will be possible to overturn the cakes on it, so that they cool faster.
Now we can talk about products.
To prepare the dough, you need to prepare:
- Wheat flour 200 gr.
- Baking powder 15 gr.
- Condensed milk 500 gr.
- Eggs 3 pcs.
- A pinch of salt
- Butter 80 gr.
For the cream "Plombir":
- Milk 400 ml.
- Cream 200 ml. (fat content not less than 30 percent)
- Butter 200 gr.
- Starch 3 tbsp with a hill
- One egg
- Sugar 180 gr.
Before the cooking process, I draw your attention to the fact that the order and sequence of the ingredients are very important here. Almost like in a bread maker - everything is in strict order.
How to make dough and bake cakes
- Take a bowl, sift flour into it.
- Add baking powder, stir.

- Send condensed milk, salt and eggs to a separate bowl. Beat with a mixer until smooth.

- Melt the butter. It will be required liquid, but cooled down.
- Add dry foods to the milk mixture. This should be done quickly, while mixing the mass with a mixer at low speeds.

- Add oil to the rest of the ingredients. Mix everything together with a mixer. The dough is ready.
Pay attention - it turned out to be homogeneous, without a single lump of flour and quite liquid. Everything is correct, it should be so.

- Take the parchment. Draw a circle on it. You can trace a round, removable baking dish with a pencil.
- Place the parchment on a baking sheet, pattern side down.
- Apply 2 tablespoons to the circle. test. Align strictly around the circle. The surface of the circle should also be even.

Now do you understand why I was so persistent in advising you to use special accessories? A spoon, of course, is also possible, but longer and of lower quality. Yes, I almost forgot. The paper does not need to be greased or crumbly with flour.
- Send the baking sheet to a preheated oven (180 degrees). Baking time - min. 5 on average. But everyone's ovens are different, so the time can be adjusted. Be guided by the still browned cake.

- Remove the cake when ready. Let it cool slightly. Minutes 3 - 4 will be enough.
- Peel off the paper.

- Bake all the cakes in the same way. Of this amount, 14 - 15 of them should be obtained. Please note that warm blanks cannot be stacked, they will stick. Let it cool down thoroughly.
If you suddenly get uneven circles, cut off the edges with a sharp knife. This procedure must be done with cooled cakes.
The base is ready, now you can move on to the cream. The cakes respond gratefully to any cream - and curd, and creamy, and custard. I like the combination with Plombir cream the most.
Cream preparation

You can start assembling the product. This is not difficult to do, you just need to grease the cakes, stacking them in a pile.
The assembled cake can be decorated at your discretion.

A dairy girl with fresh berries laid on top will look beautiful and tasty. And the sides can be smoothed with cream. Only for these purposes a thicker cream is needed, for example, creamy. Or a cream cheese that can be cooked in 10 minutes. To do this, beat 500 gr. cottage cheese with a glass of sugar. Then add 250 gr. mascarpone. Whisk everything together until smooth.

Smear the sides of the milk girl with the resulting cream, align with the same palette knife.
Mascarpone can be substituted with any curd cream cheese. Take this cream into service. It can be used for other products as well.
Simple homemade milk girl cake recipe

When you need to pamper your family with sweet and tasty things, you can bake a milk girl cake according to a simple recipe. The product will turn out to be delicate, lush and very tasty. The simplicity is due to the lack of decoration and smaller size.
What products are needed for cake layers
- Condensed milk 400 gr.
- Eggs 2 pcs.
- Flour 160 gr.
- Baking powder 1 tbsp.
Ingredients for the cream
- Fat cream 400 ml. (fat content over 30 percent)
- Powdered sugar half a glass (200 ml.)
Cake preparation

The treat is ready. At home, you can decorate it with nuts. If you have time, prepare the chocolate icing and pour over the top crust. Seasonal berries laid on top will also be good. Enjoy your family tea party!
Tips from personal experience. If the quality of baking paper confuses you, it is better to lubricate it with lean oil or butter. Then the dough will certainly not stick. And if it is not possible to buy heavy cream for the cream, use heavy sour cream. It is easier to get it.
At home, you can also make a chocolate milk girl cake. To do this, add a tablespoon of cocoa powder to the indicated proportions. The cakes will have a pleasant chocolate color. Combined with white cream, it will be a real bomb. Be sure to cook a striped miracle.

Milk Girl Cake Recipe from Andy Chef

At one time, I walked a lot on culinary sites, studying the merits of an extraordinary delicacy. I was amazed by Andy Chef's cake recipe. My friends, this is an extraordinary yummy with peaches!
And what design is beyond words. It is better to watch the video recipe and admire the process yourself, and at the same time learn some tricks. Which is what I propose to do. And then back to the recipe.
Cake ingredients:
- Eggs 2 pcs.
- Condensed milk 380 gr.
- Butter 100 gr.
- Flour 200 gr.
- Baking powder 0.5 tsp.
For the cream:
- Cream 650 gr. (33 percent)
- Powdered sugar gr. 150. (or to taste)
- Jar of canned peaches.
For a leveling cream and decoration:
- Curd cheese 300 gr.
- Cream 100 gr. (33 percent)
- Powdered sugar 100 gr. (You can adjust the amount to your liking)
- A few drops of food coloring of the desired color (optional)
- A small amount of fresh berries.
For ganache:
- White chocolate without additives 100 gr.
- Cream 33% fat content 100 gr.
Cooking process
- Beat eggs with condensed milk.
- Add cooled melted butter and stir.
- Add flour and baking powder, mix until smooth.
- Draw a circle on the parchment.
- Place paper on a baking sheet, pattern side down.
- Apply 2 tablespoons to the circle. dough, align.
- Bake the cakes at 180 gr. 5 - 7 minutes
- Prepare the cream by whipping the cream with powdered sugar.
- Cut the peaches into slices.
- Assemble the cake as follows. Lubricate the bottom cake with cream, lay the next one on it.
- Grease it with cream, and then lay out a layer of peaches. Etc. It turns out that the peaches are stacked through the circle.
- Fold all the cakes in this way. Send the cake to soak for a few hours.
- Prepare a leveling cream. To do this, you need to mix curd cheese, cream and powder. Beat. Add a few drops of food coloring. Whisk again to obtain an even color. Refrigerate.
- Make a ganache. Bring the cream to a boil.
- Add chocolate pieces. Dissolve it while stirring. Remove from heat, cool.
Now look, in our case, the ganache does not need to be strongly cooled. After all, we will draw them beautiful smudges on the cake.

- Apply a leveling cream to the sides and top of the cake.
- Align with special blades.
- Draw smudges around the edges of the cake using ganache.
- Put fresh berries on top of the product.
You see how it turns out: I described cake decorating so dryly, but in fact it is real art. But you watched the video, and my inventory is just for consolidation.
Having looked through the selection, you probably noticed that the cake dough is prepared, in principle, in the same way. Only original creams and decorations. And if you have any ideas on this subject, please share. The cake is wonderful, I want to present it in different ways. Deal? See you soon, then!
I want to share with you a recipe for a wonderful cake with a wonderful name "Milk Girl". I wanted to do it for a long time, but there was no reason.
This is a pretty simple and incredibly delicious recipe. The cakes are very sweet and tender, they can be combined with any cream, from the simplest sour cream with berries to quite expensive with mascapone. I'll make a simple yet delicious crème brulee.
It will turn out straight condensed milk cake =) biscuits on condensed milk, cream on condensed milk-mmm =) to the delight of the sweet tooth
I made the cake large enough - 3 kg, so I recommend that you divide all the ingredients in half.
So let's get started.
Step 1. Bake the cakes.
For the dough, we only need 4 ingredients.
Mix the condensed milk with baking powder and eggs. I took 5, because I got too small.

Add flour, mix until smooth. The dough should look like pancakes. (In the photo, the dough is a little watery - this cake is tightly stuck to the paper, I added flour, everything became wonderful. Apparently the thickness of the dough and the size of the glass depend on the flour)

Draw a circle of the required diameter on baking paper, turn it over, put it on a baking sheet. Put 2 tablespoons (no more! Maximum 2.5) of dough in the center and spread it over the drawn circle with a thin layer.
We bake at a temperature of 200 degrees for 4-7 minutes.

While we remove the hot ones from the paper and cut off the edges, then it will be difficult to do it. These are the biscuits I made. 12 pieces!

I baked on paper at first, but they stuck to me a little (apparently the paper was not of very good quality), then I switched to silicone.
Step 2. Baby.
You need this step if you will be decorating the cake with leveling mastic, if not, then just make a crumb and sprinkle it on your cake.
Grind the scraps from the cakes in a blender to almost flour.

Combine the resulting crumb, 100 grams of butter and 100 grams of condensed milk. It will turn out the so-called "potato", we will fill it with "holes" in the cake so that the mastic does not sink anywhere.

Step 3. Cream.
The cream will be very simple and delicate creme brulee, I used it in the cake of the same name. Whip 600 grams of cream, at the end add 400 grams of boiled water, beat until an airy mass that does not flow. In general, here you need to try. The cakes are very sweet, so in the cream I tried to avoid unnecessary cloying.
Received 1 kg of the most delicate cream.

Step 4. Putting the cake together.
I did it in an improvised detachable form. Mine is only 8.5 cm, and I expected to get 12 centimeters. Therefore, dense corner files (3 pieces) came to the rescue. I installed them in the ring and fixed them.
On the bottom, covered with cling film, lay out the smoothest cake. For what? At the end we will turn it over and this very cake will become a flat top.
Then we apply a "potato" along the edge. It is very convenient to do this from a tight bag with a cut corner.

Now 2-3 tablespoons of cream. We level it.

Again the cake-"potato" -cream and so on until the cakes run out.

Do not grease the last cake with cream.
We get such a tall cake. We send our construction to the refrigerator for two hours, or at night if you want. On top I put a glassy round board wrapped in cling film and exactly in the center something like 200-400 grams for weight.
Our cake should be perfectly flat, so we keep an eye on this.

Step 5. Alignment for mastic.
Carefully remove the ring or, in my case, the files. This is the kind of miracle we get after "withdrawing" from the form. As you can see from the photo "potatoes" I didn't have enough for all the cakes = (

Now we need to deftly flip the cake onto a prepared substrate or a nice tray.
You can start leveling with a cream under the mastic. For the cream, beat 250 grams of butter at room temperature and the same amount of condensed milk. I'll tell you a secret - half of the cream remained unused. The photo was taken at night, so the color of the cream is slightly distorted.

We begin to coat from the sides, then the top. We try to align everything with a long flat spatula or improvised means. Even if you have to do this several times, our task is to get as smooth a surface as possible, while using a minimum of greasy cream. But the cream must also be safely hidden inside. pay attention to the horizon line.

Aligned, put it in the refrigerator for at least 1 hour.
We take it out, if necessary, repeat the procedure. If by eye everything is smooth, proceed to smoothing with a hot knife.
We warm a knife or a spatula in hot water, wipe it dry and level the surface of the cake. It is necessary that not a single dimple remains. We put it in the refrigerator to solidify. If necessary, repeat again.

Step 6. Covering with mastic.
This time I used mastic from white chocolate. You can read her recipe. You can use any, but this one tastes great.
If the mastic was prepared in advance, then we take it out of the refrigerator an hour before covering it. Knead in hands, knead so that there are no air bubbles (they can ruin the whole look for us)

We roll out a layer 3 mm thick, with a diameter equal to two heights and the diameter of your cake, plus a margin of about 15 cm.
To be honest, 600 grams of mastic turned out to be not enough for me for this cake. Saved the ribbon from below.

Step 7. Decoration. Final touches.
For decoration, I made such a flower. It is not difficult to do it. How? I told you in a recipe with mastic.

Bow. It is better to prepare the base of the bow in advance so that it has time to take shape. (30 minutes in the refrigerator with this mastic is enough) The height of the bow should be equal to the height of the ribbon, in my opinion it looks prettier. We attach the bow to the ribbon using water and a brush. By the way, and the tape with glue using water, the main thing is not to overdo it, do not forget that the mastic melts from water.

I got such a delicate (despite its size) cake.

Oh yeah, another inscription. I applied it with gel pencils. The flower was shifted to the center for the time of drying.

Here is the cake ready-made. As you can see, here the flower and the stamens have appeared.

And of course the cut of the cake.

Bye everyone! If someone went to the kitchen to cook this wonderful cake, then I wrote this recipe for a reason!
Cooking time: PT05H00M 5 h.
Estimated Serving Cost: RUB 30
Read also ...
- Chicken liver pate
- Delicious zucchini with cheese in sour cream in the oven - a step by step recipe with video Zucchini recipes in the oven with sour cream
- Banana rice and corn flour pancakes (gluten free) with homemade banana sauce Banana pancakes with semolina
- Cabbage casserole with chicken Chicken fillet casserole with cabbage
