Thick yogurt at home. How to cook yogurt at home in a thermos? How to cook homemade yogurt in a slow cooker without the "Yogurt" function: features, recommendations
Natural yogurt is literally everything. It will perfectly cope with the feeling of hunger, help to get rid of extra pounds in record time, ideal as a healthy breakfast.
Photo: thinkstockphotos.com
Natural yogurt is literally everything. It will perfectly cope with the feeling of hunger, help to get rid of extra pounds in record time, ideal as a healthy breakfast.
If you have dull hair, skin rashes, digestive problems or you are just too lazy to cook the first, second and third - enjoy homemade yogurt, getting the maximum benefit and benefit for your body!
And do not think that you will need a yogurt maker to make delicious natural yogurt. Everything is much easier than you could imagine!
5 important rules:
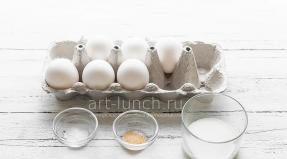
1. Milk must be boiled in order to kill all pathogenic bacteria that may be contained in it. It is recommended to bring even pasteurized milk to a boil.
2. Do not use too hot milk to make yogurt, otherwise the beneficial bacteria will die. The ideal temperature is + 38 ° С ... + 40 ° С, that is, slightly above warm.
3. Cutlery and all the dishes in which you will cook yogurt must be poured over with boiling water.
4. The quality and consistency of homemade yogurt is affected by the fat content of milk, so choose the optimal 3.2-3.5%. Those who do not care about the figure and just want delicious natural yogurt can use milk with a fat content of 6%.
5. Do not shake or stir the fermented product, so as not to destroy the structure, otherwise the yogurt will not ripen.
Classic yogurt in a thermos

Photo: thinkstockphotos.com
What do you need:
1 liter of milk
200 g of natural yogurt (carefully study the composition, yogurt must be fresh)
How to cook classic yogurt in a thermos:
1. Boil milk and cool to a temperature of 38-40°C.
2. Rinse the thermos with boiling water, pour out the water and leave for 1-2 minutes until the steam comes out. Then cover with a lid.
3. Combine 100 ml of milk with yogurt and stir so that there are no lumps.
4. Add diluted milk with yogurt to the remaining milk and mix.
5. Pour the resulting mixture into a thermos, close the lid and leave for 6-8 hours.
6. Pour the finished yogurt into small jars and refrigerate for another 8 hours.
Greek yogurt

Photo: thinkstockphotos.com
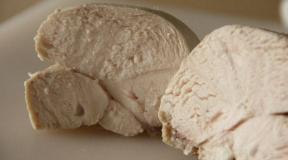
Greek yogurt differs from classical yogurt not only in its consistency, more like a creamy soft cheese, but also in the way it is prepared. After traditional fermentation, Greek yogurt is hung in a clean cloth or paper filter to get rid of excess whey, for which Greek yogurt is also called filtered.
What do you need:
1 liter of milk
200 g natural yoghurt
How to make Greek yogurt:
2. Dilute yogurt in a small amount of milk.
3. Combine diluted yogurt with the remaining milk in a saucepan. Cover with a lid and wrap with a thick terry towel, or better with a blanket.
4. Leave in a warm place for 6-7 hours, then put in the refrigerator. Do not stir or shake the contents of the pot!
5. Line a colander with several layers of gauze and carefully pour the resulting yogurt.
6. Cover and leave for a few hours until the excess whey is gone. As a result, you should get 350-450 g of real Greek yogurt.
Fruit yogurt in a slow cooker

Photo: thinkstockphotos.com
If regular yogurt isn't your thing, make a great low-calorie dessert using fresh summer fruits and berries. Gourmets, your choice!
What do you need:
1 liter of milk
200 g natural yoghurt
200 g fruits or berries
How to cook fruit yogurt in a slow cooker:
1. To prepare yogurt in a slow cooker, thoroughly wash portioned jars, dry and bake in the oven or microwave.
2. Peel the fruit and chop in a blender. If using berries, after the blender, wipe the resulting mixture through a sieve to get rid of small seeds.
3. Boil milk and cool to 40°C. Add natural yogurt and berry-fruit mass to the milk, mix until smooth.
4. Pour the prepared milk into serving jars.
5. Place a clean cloth or silicone mat on the bottom of the multicooker. Place the jars in the slow cooker, pour warm water directly into the bowl so that the jars are 1/3 covered.
6. Turn on the "Yogurt" mode. After 7-8 hours, the jars should be put in the refrigerator, and after another 6 hours you can eat natural yogurt of your own production.
What to do if there is no “Yogurt” mode in the slow cooker:
1. Do everything up to point 6.
2. Jars in the bowl, now close the lid of the multicooker and turn on the “Heating” mode for 15 minutes.
3. After 15 minutes, turn off the mode for 1 hour.
4. Reheat for 15 minutes.
5. Turn off the heating and leave the yogurt for 3 hours. The multicooker lid must be closed at all times!
6. After three hours, put the jars of yogurt in the refrigerator for 6-8 hours.
IMPORTANT
When preparing yogurt in a slow cooker, check the temperature of the water - it should not be less than 40 ° C.
Homemade sourdough yogurt

Photo: thinkstockphotos.com
Yogurt on pharmacy sourdough is obtained with a delicate creamy taste and a very pleasant texture.
What do you need:
1 liter of milk
1 bottle of sourdough starter (available at any pharmacy)
How to make homemade sourdough yogurt:
1. Boil milk and cool to 40°C.
2. Dissolve dry sourdough in a few tablespoons of milk and pour into the rest of the milk. Pour into portioned glass jars.
3. Cover with cling film or close with lids, wrap with a terry towel, and preferably with a blanket.
4. Leave for ripening for 12-14 hours.
5. Cool in the refrigerator for 3-4 hours and the yogurt is ready to eat!
Natural yogurt in the oven

Photo: thinkstockphotos.com
If you don’t have a thermos or a slow cooker, and you always miss the temperature of the milk in the pan, then the recipe for making homemade yogurt in the oven is just for you.
What do you need:
1 liter of milk
200 g of natural yogurt (you can take fresh sour cream with a fat content of 20%)
How to cook natural yogurt in the oven:
1. Boil milk and cool to room temperature.
2. Dilute yogurt / sour cream in 0.5 tbsp. glass of milk.
3. Combine the resulting starter with the rest of the milk and mix gently.
4. Pour milk into portioned glass jars.
5. Preheat the oven to 50°C and switch off.
6. Arrange jars of milk on a baking sheet, cover each jar with foil, packing tightly.
7. Place the tray in the oven and close the door.
8. Turn on the oven at 50°C every hour for 5-7 minutes. Cooking time for yogurt is 6-8 hours.
9. Put the finished yogurt in the refrigerator overnight. Sweet tooth can in each jar, before pouring milk, put 1-2 tbsp. homemade jam. published
The growing popularity of homemade fermented milk treats makes any yogurt recipe a godsend. Here are some popular recommendations and original recipes that will help you prepare this tasty and nutritious product.
The set of ingredients for homemade yogurt can be extensive and consist of many items. As additives to the main elements, you can use:
- fresh or frozen berries and chopped fruits, candied fruits;
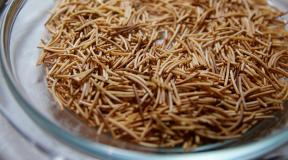
- cereals, bran, any nuts;
- cocoa or melted chocolate bars;
- coffee or honey;
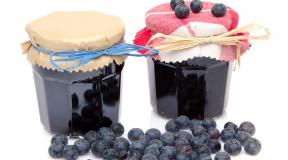
- condensed milk, various jams, jams;
- vanilla sugar and vanilla;
- freshly squeezed juices, fruit puree, syrups.
But the basis is always sourdough and, used for mixing with it, milk. Both ingredients are widely represented on the market, but the relative quality of the first can only be guaranteed by a purchase in a pharmacy, in extreme cases, in a health food store. Popular options for this ingredient are:
- sour sour cream or kefir;
- natural types of yogurt or cottage cheese;
- probiotics Symbilact, Vitalact, Acidolact;
- starter cultures from Vivo Streptosan or Bifivit;
- serum acidophilus.
It is easier to purchase milk for mixing with sourdough, at any available outlet. It is important that it is not a milky drink, and it must be boiled before mixing.
In the process of searching for suitable elements, it is worth listening to some recommendations from experienced housewives, for example:
- ladies who are worried about the calorie content of their menu should pay attention to this indicator in the initial components, on which the calorie level in the final result depends, but you should not worry too much, the delicacy is well absorbed and is not deposited in the form of fat;
- when using live yogurt as a starter, it is advisable to take the most expensive one, in which there are no additives, with a minimum shelf life, which allows us to hope for a minimum of dyes and flavors in the composition;
- for a home recipe, starter cultures under the brands of Evitalia or Activia are most often recommended, their use eliminates the appearance of extraneous tastes and odors, provides maximum benefit;
- to make the mass thick and tender, the best option would be to choose homemade milk, fresh only from under the cow;
- the pasteurized analogue from the store should be as fat as possible, this affects the density of the mixture, in this case boiling is not required, warming up within 40 ° C is enough;
- many positive reviews can be heard about fermented analogues prepared at home by fermenting fresh milk.
To make such a starter, 130 grams of milk is enough. If the product is from under the cow, it must be boiled, then cooled to body temperature, removing the foam from the surface. It is enough to heat the store analogue to the same temperature. In the milk prepared in this way, add:
- vial of Bifidumbacterin;
- up to three sachets of Narine.
The components are thoroughly mixed, the finished mixture is left alone for a day, ensuring the temperature regime is not more than 40 ° C. For this purpose, a container with the mixture is placed in any warm place wrapped in a towel or placed in a yogurt maker.
Classic recipe

Classic yogurt excludes the addition of sugar and its analogues during the preparation process. Various sweetening options, such as jam or fruit syrup, finely chopped fresh fruit, are added later when the mass has cooled and is ready to eat. You need to prepare such yogurt exclusively from two elements:
- milk with a fat content of at least 3.5% from 750 ml to 1 liter;
- packages of dry fermenting substance or a jar of Activia.
In a step-by-step version, the cooking process is as follows:
- The first step is to prepare the milk. If a fresh product is selected, it will need to be brought to a boil and immediately cooled under ice water. It is important that the temperature does not exceed 40°C. It’s easy to check it, dip your finger into a container with a drink, if you don’t feel heat, then everything has cooled down to body temperature and is ready for use. If available, you can use a cooking thermometer, which will be more reliable.
- Containers and lids for them must be boiled. If you have a dishwasher, washing at high temperatures will suffice. After drying, the jars will need to be closed with sterile lids and left until the ingredients are mixed.
- Prepared Activia should be transferred to a small cup of about 50 ml. Add the same amount of milk and mix thoroughly. This will achieve greater homogeneity of the mixture. If you mix the entire volume of the components at once, it will be more difficult to achieve good uniformity. Pour the prepared mixture into a container with milk and mix thoroughly again.
- If a fermenting substance is used, add a teaspoon of milk to the bottle with it and shake well. Dry analogue is poured into Art. spoon of the dairy product and beat with a whisk or blender until completely dissolved. Then the fermenting composition is poured into the rest of the milk and mixed again.
- The prepared mass is poured into jars from the yogurt maker kit. For insurance, they can again be doused with boiling water. The containers are closed with scalded lids.
- Banks are placed in the tray of the device and covered with a lid. At a temperature of 38 to 40°C, the cooking time will be from 6 to 8 hours. We set the desired hours on the timer and set an alarm for insurance. When using Activia or Evitalia, the cooking time will be less. In any case, it is advisable to first familiarize yourself with.
- When the timer goes off and the alarm goes off, the jars need to be moved to a cold place and held there for 4 to 6 hours. This will make the final product denser.
It can be served in its pure form or with natural additives from fruits, freshly squeezed juices, and other additional components.
Treats for the little ones

Homemade fermented milk products are often recommended for babies from an early age, usually from ten months. This will minimize the baby's intake of harmful food additives, which are still present in factory-made baby food, albeit in small doses. For mothers who are familiar with the classic way, preparing a fermented milk treat for babies is not difficult. However, in this case, you need to take into account several important nuances:
- it is undesirable to use store-bought types of starter cultures, it is better to cook it yourself;
- no need to add sugar or honey to the composition, which has strong allergenic properties;
- sweet aftertaste can be created with natural additives from applesauce or its analogue prepared from other fruits;
- do not forget that a fermented milk product prepared in this way is stored for a maximum of 3 days, and with the addition of fruits up to 12 hours, so it is recommended to use it immediately after preparation and carefully calculate the required volume in advance.
In this case, it is not necessary to describe a detailed method of cooking, the procedure differs little from the classic version, taking into account the listed features. The milk component is brought to the desired temperature, mixed with sourdough, then mixed with one of the types of puree. The cooking time is at least 5 hours.
List of original recipes
Yogurt with Activia

In this case, instead of the standard fermenting component, Danone drinking Activia is offered in the amount of 5 tbsp. spoons. The only condition is to make sure that this ingredient is extremely fresh. To the two main components, you can add nuts or bran of any kind. The cooking process is identical to the one described above:
- boil and cool the homemade dairy ingredient, bring the store to the desired temperature;
- pour a small amount of it into a bowl with Activia and mix until smooth;
- then mix the workpiece with the remaining milk;
- if additional components are used, lay out a small amount of them at the bottom of each jar;
- we lay out the mixture in containers and rearrange them in the pallet of the apparatus;
- Set a timer for 6 to 8 hours.
The longer the time, the thicker the consistency will be at the end. But you need to be careful, busting over time can result in excessive acidity and loss of taste. After the device is finished, we rearrange all the containers in the refrigerator and keep it there for up to 4 hours.
Sour-milk dessert with jam

This recipe is almost similar to the previous one; Activia is also recommended as a fermenting substance. But an additional element in the composition is jam, which can be supplemented with nuts. The composition contains:
- fatty dairy product from 3.5 to 6%;
- Danone up to 5 tbsp. spoons;
- any kind of jam spoon for each jar;
- nuts of your choice.
We prepare according to the well-known scheme:
- boil the milk base;
- pre-mix a small amount of it with Activia;
- mix the components completely;
- put a spoonful of jam on the bottom of all containers and add nuts if desired;
- we rearrange in the pallet and set the timer for 4 - 8 hours.
After cooking, give time to cool in any cold place. It is advisable to mix the complex composition before use.
Greek yogurt with vegetables

This type of fermented milk treat is an important an element of the popular Greek appetizer sauce Tzatziki. From it you can make a topping for a cake or use it for the same purposes with ice cream. True, the latter is an amateur. Naturally, it is useful in itself. In the recipe:
- a liter of milk component of medium fat content;
- sourdough from Evitalia.
Below is a step-by-step recipe for preparing a Greek delicacy.
- We mix the last one with a small amount of the first ingredient so that the mixture comes out homogeneous. Then finally mix with the rest of the composition.
- We put it in jars and put it in the container of the device for a known time. If there is no special apparatus, you can get by with an ordinary stainless steel pan, which we wrap with a towel and keep overnight to thicken.
- To bring to readiness, wrap the mixture in several layers of gauze and hold for up to 4 hours. The output should be up to 500 gr. soft and thick texture.
- Then it can be used as a cream on the cake or served on its own, mixed with finely chopped banana or sprinkled with chocolate chips.
After reading the rules for choosing products and instructions for making homemade yogurt, it will not be difficult for you to treat your family and guests with a healthy dessert. Original recipes for a fermented milk delicacy will appeal not only to children, but also to adults. And if the delicacy starts to take on an ordinary taste, you can always diversify it with a variety of delicious fillers.
- 1 liter of milk;
- 50–100 g skimmed milk powder (optional)
- 1 tablespoon of sugar;
- 2 tablespoons prepared yogurt with live cultures or freeze-dried yogurt starter.
You can take any milk: cow, goat, soy, whole or skimmed.
Unsweetened yogurt without flavorings and additives and marked "Contains live cultures" on the package is suitable as a starter culture. Since beneficial bacteria die quickly, try to choose the freshest yogurt. Try a few options until you find the one that tastes the best to you.
You can also use freeze-dried yogurt starter. It is usually sold online and works even better than ready-made yogurt.
In a pinch, sweet flavored yogurt will do. Just keep in mind that it will affect the final taste of your product.
How to make yogurt
It is best to do this in a water bath: this way the contents of the pan do not burn, and you do not have to stir it often. If you don't have a thermometer, 85 degrees is the temperature at which milk starts to foam.
Wikihow.com
UHT milk can only be heated to 40-45 degrees and skip the next step.
2. Cool the milk to 40–45 °C
The easiest way to do this is by placing it in cold water: this way the temperature will drop quickly and evenly. If cooling at room temperature or in the refrigerator, be sure to stir the milk frequently.
You can determine whether the liquid has reached the desired temperature without a thermometer: with your finger. If the milk is hot, but no longer burns, then it's time to start sourdough.
Simply remove the store-bought yogurt you'll be using from the refrigerator and let it sit at room temperature while the milk cools.
 wikihow.com
 4. Mix the starter with milk
To distribute the bacteria evenly, use a whisk or blender. If fibers remain in the mixture, you may have heated the milk too much or too quickly.
Milk powder can be added at this stage: it will increase the nutritional value of the yogurt and make it thicker.
5. Grow bacteria
A mixture of sourdough with milk will need to be kept for 6–8 hours at a temperature of 38–40 ° C.
The best way to do this is in a yogurt maker. Just pour the mixture into a container and place it in it.
 wikihow.com
 But the oven is fine too. Heat it up to the required temperature, turn it off and put the container with the yogurt mixture inside. Turn the oven on from time to time to maintain the same temperature. This method is quite tedious, as you need to constantly monitor that the oven does not overheat.
Yogurt in a slow cooker is easier to cook. Pour boiling water over the bowl and pour the mixture of milk and sourdough into it. If cooking in jars, put them in a slow cooker and fill with water almost to the brim. Use the "Yogurt" mode or turn on the heating for 6-8 hours. Please note that the heating temperature must not exceed 40 °C. If it is higher in your model, turn on the heating for 15-20 minutes, and then turn it off for an hour so that the yogurt does not overheat. Repeat the procedure 5-6 times.
In the microwave, the process is about the same: set the temperature to 40 ° C and leave the mixture for 6-8 hours. If there is a "Fermentation" mode, use it.
If you don't have any of these, place the container of the mixture on a sunny windowsill or in a large container of warm water.
Gradually, the consistency of the mixture will become similar to custard, a cheesy smell will appear, and whey will stand out from above.
It can be simply poured, used in baking or eaten with yogurt.
6. Check the readiness of yogurt
After 6-8 hours, shake the container slightly: the ready-made yogurt under the whey should be of a homogeneous consistency. The longer you stand it, the thicker it will be.
7. Strain the yogurt through cheesecloth
So serum will come out of it, it will become thicker. Line a colander with cheesecloth and put it in a large container, then transfer the yogurt into it, cover with a plate and put it in the refrigerator. After a couple of hours, you will have Greek yogurt. And if you leave the mixture overnight - a very thick yogurt, similar in texture to cream cheese.
What's next
You can eat homemade yogurt with jam, or maple syrup, fruits or berries.
Use part of the resulting product as a starter for the next portion. You can store yogurt in the refrigerator for no more than 5-7 days.
Yogurt in our understanding is a dessert, a delicious fermented milk delicacy, which, however, has recently ceased to be available to all categories of consumers. At the same time, for example, Greeks or Bulgarians use yogurt as a dressing for salads, cold soups and other dishes, since this product is like a base: you can add fruits and make a dessert, and if left in its original form, it will perform the role of sour cream.
Traditional yogurt: what is it and how is it prepared
Yoghurt is the result of fermentation (fermentation) of milk by lactic acid bacteria, as a result of which the product gets its density, color and characteristic taste. Even doctors often recommend it to those people who have certain problems with the stomach or intestines, as yogurt stabilizes their microflora, improves the metabolic process, improves the functioning of the gastrointestinal tract. In addition, it is well absorbed and digested by the body, so even people with allergies or lactose intolerance, who are contraindicated in the use of milk and dairy products, can in some cases consume yogurt. But before that, you still need to consult a doctor about this.
Natural yogurt should not contain any additives in the form of preservatives, sweeteners, colors, flavors or stabilizers - only in this case it can really have a beneficial effect on the body. In addition, it can be stored for about a month, but not more, since over time the number of vitamins and live bacteria decreases, and the effectiveness of the product is minimized.
For the production of factory-made yogurt, live fermented milk cultures - bacteria (thermophilic streptococcus and Bulgarian bacillus) - are introduced into milk, after which fermentation begins. To do this, the required temperature is provided - within 45 degrees and about 10 hours of exposure. After this time, the resulting yoghurt is cooled to 5 degrees, and thus it is possible to preserve the bacteria, and, accordingly, to obtain the best quality product.
The process is easy to repeat on your own, at home, both with and without a yogurt maker. Such yogurt is more useful, because it does not contain sugar, and is allowed even for people who are forced to give up sweets due to diabetes. A homemade fermented milk product contains a much lower amount of fat in its composition, therefore salads and dishes seasoned with it will not cause any harm to the figure - on the contrary, yogurt tends to speed up metabolism, so the process of getting rid of extra pounds can go faster and without any harm for the body. In addition, homemade yogurt contains more fermented milk cultures, and its usefulness significantly prevails over the properties of the purchased one. The latter, in turn, contains a lot of preservatives that allow you to store the product for months without compromising on taste, but at the same time - with a complete loss of healing.
Sourdough and milk for yogurt
One of the most important and responsible stages in the preparation of yogurt is the search and selection of starter. By itself, it is a substance that causes fermentation. So, sourdough for bread is yeast, and for yogurt it is a fermented milk culture that contains all the necessary lactobacilli. This leaven can also be used in its pure form, by itself, it is also very useful for the body: it strengthens the immune system, creates protection against viruses, especially with the onset of bad weather, improves the gastrointestinal tract, speeds up metabolism and helps to normalize body weight.

There are several types of yoghurt starters:
- Live acidophilic cultures - they stop the inflammatory process, remove toxins, help cleanse the body, relieve side effects from taking antibiotics, and normalize disorders after eating foods.
- Live curd cultures are based on bifidobacterium bacteria, which are invariably found in the human body, support the intestinal microflora, break down proteins, normalize cholesterol, and have an immunoprotective property.
- Live yoghurt bacteria - such starter cultures are dosed and completely ready for home use.
The necessary sourdough is sold in pharmacies, as a rule, a jar implies obtaining several liters of the finished product. You should not buy store-bought yogurt to use as a starter, as it inevitably contains pathogenic microbes (most often E. coli). In this form, they pose a minimal risk to the body, but when fermented, they can multiply, and then disorders, infections and food poisoning are possible.
Next, you need to choose milk. The amount of yogurt obtained depends on its quantity; it is recommended to use from 1 to 3 liters at a time. The ideal option is a pasteurized or ultra-pasteurized product that is not subject to long storage. Better yet, home-made milk, fresh, quality and reliability of which inspire confidence. It must be boiled for a few minutes before proceeding with the preparation of yogurt. Pasteurized should be heated to 90 degrees, do not bring to a boil; ultra-pasteurized can be used immediately, without preparatory measures.
You should not prepare yogurt when using sterilized milk, as it undergoes tough processing, all vitamins and beneficial lactobacilli disappear, and properties are lost. Plus, during sterilization, salt and stabilizers are added to the milk, which will subsequently affect the quality of the prepared yogurt.
Preparatory activities
Preparing dishes
First of all, you should take care of the cleanliness of the dishes in which the yogurt will be prepared. Even spoons that will come into contact with sourdough should be subjected to the strictest measures, since a change in its microflora can lead, at a minimum, to a loss of taste of the resulting product, and at most to the multiplication of pathogenic microbes and poisoning due to the use of low-quality yogurt.

So, the dishes must be thoroughly washed and scalded with boiling water, as well as jars where yogurt will be poured, and plastic lids to close them. And at the end of the scalding process, immediately cover / close the jars. In addition to this, aluminum appliances should not be used, and the thermometer should be wiped with alcohol, and in no case should hot water be poured over it. During the process of preparing yogurt, it is strictly forbidden to touch the inner surface of jars and lids with your hands or consumable utensils; .
Milk preparation
You need to open the package immediately before starting cooking, otherwise later you will get not yogurt, but yogurt. Pour it into a clean stainless steel saucepan and heat it up (how to deal with different types of milk is described above). Do not use enamelware - the product will quickly burn in it. If you boiled milk, then you should cool it to 38-45 degrees (in the case of ultra-pasteurized milk, immediately heat it to this temperature). If you don’t have a thermometer, try to determine “by eye” - firstly, tolerable heat should be felt through the glass lid that covers the pan; secondly, put a couple of drops of milk on the inside of the wrist, as the most sensitive area of \u200b\u200bthe skin, it should be hot, but not burn the skin. In their own way, both overheating and underheating are bad for yogurt; but the latter option is still more acceptable, because in this case the product will only turn out to be not very thick (although it still depends on milk - choose the thicker, the richer in consistency you want yogurt). In case of overheating, if you add the starter to too hot milk - at a temperature of 50 degrees - the bacteria that contribute to fermentation will begin to die, and then all efforts will be in vain.
Leaven
Each sourdough is accompanied by instructions with a recipe, which indicates how much to use for each liter of milk - focus on it. The most important thing is to mix the sourdough with warm milk well. To dissolve it, pour about 10 ml of milk (depending on the amount of starter and milk in general) from the pan into the bottle, shake several times to stir, and pour the resulting mass into the pan with the remaining milk.
It is believed that cooked homemade yogurt (if, of course, it is cooked correctly - not viscous and not slippery) can be used as a starter in the future. So, it can be re-fermented several times, but it should still be remembered that at home we cannot ensure complete sterility during storage of the product, and it is still better to prepare yogurt using the starter purchased at the pharmacy. Especially if it will be part of the children's diet. In addition, such manipulations can affect the taste and properties of the product.
Making your own yogurt
In a yoghurt. Not every home has a yogurt maker, but if your future plans include this fermented milk product prepared at home, then it is highly recommended to purchase it. Why is a yogurt maker good? It maintains the required temperature throughout the entire fermentation period (meanwhile, milk should remain warm from 6 to 12 hours, without any special drops, which is difficult to control on your own). If you have a yogurt maker, you only need to mix milk with sourdough, pour it into special jars that come with the kit, and turn on the device. After about 10 hours, you can already take a sample.

Without yogurt maker
This is more difficult. There are several ways to maintain the temperature of milk:
- Use a thermos for fermentation, which retains heat well.
- Wrap the dishes in a blanket or cover them with a pillow and place them by the hot battery.
- Pour the future yogurt into jars, cover with cling film, fill any flat container with warm water, put the jars there and wrap it again with cling film; after that, put in a warm place - for example, in a preheated turned off oven.
If you want the consistency of yogurt to be thicker and more dense, put it in the refrigerator for several hours. In addition, this way you will extend its shelf life and increase the benefits by preserving live cultures.
Video: how to make delicious homemade yogurt
Yogurt is a fermented milk product, which is obtained due to the fact that the lactic acid bacteria that make up yogurt, under certain conditions, ferment (ferment) milk (milk sugar lactose), giving the product a characteristic taste, color and texture.
Yogurt is considered a useful product, since lactic acid bacteria friendly to the human microflora help to establish and maintain the activity of the gastrointestinal tract, normalize bowel function, and stimulate metabolic processes.
Due to the fact that yogurt bacteria ferment lactose, yogurt, like most fermented milk products, is digested and absorbed better and easier than milk. Quite often, people who are lactose intolerant or allergic to milk protein can consume yogurt (but if you are affected by a similar problem, it is better to consult a doctor first).
So, the essence of the production of yogurt is that live yogurt fermented milk cultures are introduced into milk (usually this is, more on yogurt cultures will be discussed below). A suitable constant temperature is created (optimally - 42-45 ° C, this is important to consider, since bacteria die at t above 50 ° C), which lasts for 8-12 hours. During this time, bacteria ferment milk sugar, and yogurt is obtained. To complete the fermentation process, get the best consistency and keep the bacteria alive after the required time, the yogurt is cooled to ~ t 5 ° C. As you can see, the process is quite simple and quite feasible at home.
Before continuing the article, I suggest you take part in a short survey.
Homemade yogurt (how to make yogurt at home in a yogurt maker and without).
Now consider the process of making yogurt at home in more detail. For the preparation of yogurt, we also need a starter culture from lactic acid bacteria. (About some reasons for failure, for example: yogurt curdled, too much , very sour taste, )
Milk.
If you have the opportunity to use fresh village milk, the quality and safety of which you are sure of, that's fine, but it must be boiled for several minutes. If you are using industrial milk, then I prefer pasteurized or ultra-pasteurized. Pasteurized milk is also recommended to be preheated to 90 ° C, ultra-pasteurized milk is safe and completely ready for use, it does not require boiling, it is enough to heat it to the desired temperature. The foam formed during heating of milk must be carefully removed. Then the milk must be cooled to a temperature of ~ 38-45 ° C. This is the optimal temperature, but if you do not use a thermometer, then to determine the temperature “by eye”, drop a few drops of milk on your wrist. Milk should be hot, but not scalding. In this case, underheating is better than overheating, because at t more than 50 ° C, as I mentioned earlier, lactic acid bacteria begin to die. For product safety reasons, heating milk for making yogurt is recommended by all yogurt maker manufacturers and by most recipes. In practice, if you take pasteurized or ultra-pasteurized milk at room temperature (I would recommend boiling fresh milk anyway, especially if you give yogurts to children), ferment it with industrial yogurt and place it in a yogurt maker, then you will still get yogurts (without a yogurt maker I have not experienced this option, and if I use dry sourdough, then I heat the milk).
To boil or heat milk, use a stainless steel saucepan with a thick bottom or, if the stove allows, a ceramic or glass one. It is better not to use enameled dishes, as milk burns very quickly in such dishes.
By the way, you don't have to use cow's milk. You can also ferment goat, sheep, soy, and possibly some other milk.
Leaven.
You can use it as a starter, you can find it in pharmacies or buy it in stores selling healthy foods, including online stores. The composition of such a sourdough usually includes the classic yogurt bacteria Lactobacillus bulgaricus, Bulgarian stick, and Streptococcus thermophilus, thermophilic streptococcus. It is prepared according to the instructions. At the same time, the taste and texture of yogurt may differ from the usual store. Yogurt sometimes turns out to be more viscous, slippery, this happens due to a violation of the cooking technology. And you can use natural yogurt (or bio-yogurt) of industrial production. One standard cup of yogurt (~125 ml) per liter of milk. The main task is to mix the sourdough and milk as best as possible, to do this, add a small amount of warm milk to the sourdough, stir thoroughly until a homogeneous consistency is obtained, and then dilute the resulting mixture in the rest of the milk, mix thoroughly again. For the next batch of yoghurts, you can use homemade yoghurt as a starter. There is an opinion that yogurt can be re-fermented 4-10 times, but it must be taken into account that we cannot provide sterile conditions at home, therefore, with each re-fermentation, the composition of yogurt changes and not always for the better.
Tableware.
Warm milk, which should be at a temperature of 42-45 ° C for 6-12 hours, is an ideal breeding ground for not only beneficial, but also harmful microorganisms, so special attention should be paid to the cleanliness of dishes. Before use, all the necessary utensils must be doused with boiling water, and if possible, then sterilized, for example, in a double boiler.
Yoghurt maker.
A yogurt maker, and other electrical appliances that allow you to make yogurt, is a great solution for those who often pamper their family with homemade sour-milk products. The main advantage of this device is that it maintains the optimum temperature throughout the fermentation of yoghurt, which ensures a very good result. The yogurt maker takes up little space and comes with convenient jars-lids for yogurt. The yogurt maker reduces your direct participation in the preparation of yogurt to a minimum: mix milk with sourdough, pour it into jars, press the "pour" button. and that's it! After 8-10 hours, enjoy the result (the consistency will be optimal if you put the yoghurts in the refrigerator for at least 4 hours after fermentation).
Making yogurt without a yogurt maker.
After we have mixed warm milk and sourdough, we need to create a constant temperature for yogurt ~ 42-45 o C for 6-10 hours. This can be achieved in several ways:
- you can use a thermos;
- you can cover the container with yogurt with a warm blanket (and cover it with a pillow) and leave it next to the battery;
- you can arrange yogurts in portioned jars, tighten with cling film, put in a flat shape, carefully pour warm water into the mold, water should not get into the yogurt, tighten the whole mold again with foil and put in a warm place without drafts (for example, in a tighter turned off, but preheated to 50o oven).
Whether you are making yogurt in a yogurt maker or not, do not disturb the yogurt as much as possible during the ripening process: do not stir, do not open, do not shake.
The preparation time for homemade yogurt is approximately 6-10 hours, depending on how well you manage to maintain the required temperature and on what consistency and taste you would like to achieve. At a constant optimum temperature, 6-8 hours is enough; at a falling temperature, 8-10, and possibly 12 hours are required. The longer the yogurt ferments, the more acidic it becomes.
In order to competently complete the fermentation process, yogurt must be cooled, as mentioned above, you need to put the product in the refrigerator for at least 4 hours. In this case, you will not only get a denser and more delicate texture, but also extend the shelf life of yogurt by preserving live bacteria in it.
Yogurt keeps well in the refrigerator for 7-8 days.
Additives for yogurt (sugar, fruits, nuts, muesli, etc.).
Natural yoghurts are great, but what if you like sweet yoghurts or yoghurts with fruits, chocolate, muesli, etc.?
Of course, you can add all these sweets to yogurt at the moment when you lay it out in portioned cups before sourdough, but there is one but!
Yogurt bacteria ferment milk sugar, lactose, but if you add sugar or sweet fruits to yogurt before the end of the fermentation process, the bacteria will switch to the fructose contained in these products and begin to ferment not lactose, but, say, fruits. And citrus fruits and other fruits with a high content of fruit acids, such as, for example, kiwi, do not combine with milk at all. And upon contact with these fruits, the milk will curdle even before the fermentation process begins. Therefore, it is much more useful (and safer) to introduce all kinds of additives (fresh fruits, jams, syrups, jams, muesli, nuts, dried fruits, cookies, chocolate) already into ready-made yogurts, well, or at the time of completion of the fermentation process, before cooling.
By the way, if you decide to sweeten the finished yogurt with sugar, then it’s better to first dissolve it in a small amount of water or make syrup, or take powdered sugar so that it doesn’t “creak” on your teeth.
Vanilla yogurt.
If you are preparing vanilla yoghurts and using not vanilla sugar, which is also possible, but a vanilla pod, then after making a longitudinal cut on the pod, lower it into milk and heat the milk together with vanilla. When you arrange the yogurts in cups, then dip a small piece of vanilla pod, which warmed up with milk, into each cup. Pieces of the pod will need to be removed from the finished yogurt before use. If you clean the pulp of the pod and add it to milk, the flavor will be more pronounced, and the pod itself, after heating in milk, can not be added to cups with yogurt, but immediately removed, but there will be small black particles of vanilla in the yogurt. According to my feelings, this does not spoil the taste in any way, and the appearance of yogurt turns out to be unusual, colorful. However, some children, and even adults, are suspicious of such yogurt.
Fat content of yogurt. Creamy yogurt.
The fat content of homemade yogurt depends on the fat content of the milk in which you prepare the yogurt, as well as whether you add cream to the milk. The less fat milk you use, the more low-fat yogurt, and therefore the less high-calorie product, you will receive.
Creamy yogurt (cream is added to milk during its preparation) is more dense and tender. Cream can be added directly to milk before fermentation, but be careful. If you heat milk with cream to high temperatures, then the cream may melt, separate from the milk, float to the surface in greasy spots similar to melted butter. And then, when you add the starter, mix everything well and pour the yogurt into fermentation jars, a hard greasy film may form on the surface of the finished yogurt. It's not scary, after the fermentation and cooling process is completed, just carefully remove this film from the yogurt. Such a film often appears when you use fresh milk "from under the cow" and not completely skimmed cream remains in the milk.
To avoid the formation of a greasy film on creamy yogurt, use industrial (that is, already thermally processed) cream and add it to milk before fermentation, when the milk has already cooled down to t 38-42 o C. I already wrote above that if you use a yogurt maker, then yoghurts will turn out, even if you don’t heat milk at all, but simply take it at room temperature, while you can replace part of the milk with cream, for example, take 200 ml of cream and 800 ml of milk and mix it all well. In this case, you will not have a fatty hard film, the only question is trust in the milk producer and the safety of the product.
Cream can also be added to ready-made yogurt, this will also make it more tender (this option is not suitable for people suffering from milk protein intolerance and lactase deficiency).
Thickness of yogurt.
If you need a dense, thick yogurt, you can use the following methods:
- add a few tablespoons of milk powder to milk before fermenting;
- add peptin or agar-agar to the finished yogurt before cooling;
- add cornstarch to the finished yogurt (1 tsp per standard serving cup 125-140 g). It will also make the yogurt more tender.
Yogurt bacteria.
The history of fermented milk products, and in particular yogurt, has more than one thousand years, but Bulgaria is considered the birthplace of modern real yogurt, where yogurt is also called “sour milk”. It was in Bulgaria that yoghurt fermented milk cultures of Lactobacillus bulgaricus, bacillus bulgaricus (named after Bulgaria), and Streptococcus thermophilus, thermophilic streptococcus, were first discovered, studied and used.
Ilya Ilyich Mechnikov, a famous biologist, Nobel Prize winner, studying the issues of aging, found that at the time of the study, out of 36 countries studied, Bulgaria had the largest number of people who had reached 100 years old. For every 1000 people, there were 4 centenarians. In his studies, he associated this fact with the regular use of Bulgarian sour milk by the inhabitants of the country, and, accordingly, yoghurt cultures of Bulgarian sticks, which have such a beneficial effect on the intestinal microflora and the body as a whole.
In this way, real yogurt should only contain milk and starter cultures including Lactobacillus bulgaricus and Streptococcus thermophilus However, the composition of yogurt is currently not regulated by law in many countries. In addition to yogurt bacteria, or instead of them, lactobacilli or bifidobacteria are used, for example, Lactobacillus acidophilus, lactobacillus bifidus, etc. Of course, these bacteria can also be very useful for the body, they also ferment lactose, contributing to a very tender yogurt-like mass, but this is no longer yogurt and a yoghurt product. In addition, some types of bacteria die after the fermentation of milk, and it is already difficult to call such yogurt “alive”. And there is a category of "yogurts" made using a culture called pima, "pima" makes the "yogurt" mass so thick that it is no longer necessary to add any thickeners to the product, say, natural peptin. This significantly reduces the cost of production, but! The mass turns out to be “slippery” and rather unpleasant in taste, so it is generously flavored with sugar and fruit puree. Can this product be called "yogurt"?
When buying yogurt, read the label.
Thus, when choosing natural yogurt in a store, carefully read the label and pay attention to the following:
- the shelf life of “live” natural yogurt should not exceed 1 month, and indeed, in this case, the shorter the shelf life, the better;
- to increase the shelf life, yogurts are often pasteurized, while the yogurt bacteria die, to be honest, such yogurts should be labeled "heat-treated";
- the composition of yogurt - the less components (especially preservatives, stabilizers, sweeteners, dyes, etc.) in the composition, the better, ideally - milk and yogurt sourdough. By the way, manufacturers rarely write down information about which yogurt cultures are used, but if there is a label indicating the presence of a “live yogurt culture”, this is better than nothing;
- the content of lactic acid bacteria in yogurt at the end of the shelf life should be at least 10 7 CFU (colony-forming units, 10 to the seventh power) per 1 g of the product;
- yogurt must be kept in the refrigerator;
And once again about the sad, giving preference to sweet and fruit yoghurts, still do not flatter yourself with the hope of the high benefits of such yoghurts, especially fruit ones, because fruits have at least undergone heat treatment, and therefore have lost the lion's share of their benefits, but in order to, lactic acid bacteria did not ferment fruit sugar, the manufacturer most likely had to add a number of chemicals to the product.
Summary. What are the benefits of homemade yogurt?
- You can make absolutely natural yogurt without artificial additives, colors, preservatives.
- You can adjust the calorie content and consistency of yogurt by choosing more or less full-fat milk (yogurt calorie table - at this link).
- You can make sugar-free yoghurts using, for example, natural sweeteners such as honey, maple syrup, Jerusalem artichoke syrup, fresh fruit or vegetable juices and purees, and add muesli, fiber, nuts, and dried fruits.
- Pouring yogurt on fresh seasonal fruits or using it as a salad dressing will only increase the usefulness of your table.
- By using special yoghurt starters (eg dry starter cultures), you can be sure which yoghurt bacteria your yogurt is enriched with.
The use of yogurt in cooking
Finally, a few words about how yogurt can be used in cooking.
In addition to traditional, natural or sweet yoghurts, as well as yoghurts with the addition of all kinds of fruits, yoghurts go well with various herbs (dill, parsley, mint, etc., etc.) and spices. Yoghurts can be salted, peppered, garlic is added to them, they make a wonderful sauce or salad dressing.
At high temperatures, yogurt curdles, so if you add it to hot dishes, then in order for it not to curdle, yogurt should be at room temperature, it is better to add (mix) it at the very end of cooking, when the temperature is no longer so high or the dish is simmering on very low heat.