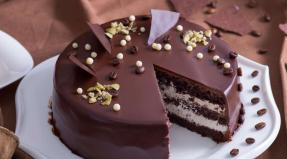
What year were potato chips invented? Making Potato Chips: The Fascinating Story of George Krum
In this article we will talk about such a popular material today as polymer clay. You can make a lot of beautiful things from it.
Polymer clay is one of the most common handicraft materials. And it is not surprising, because it is very elastic and completely non-toxic, and the crafts are simply fantastic!
Moreover, the variety of such crafts is striking - not only decorations, but also a lot of other things that will definitely decorate your life.
How to work with polymer clay?
So, first, let's figure it out what you should definitely stock up on when working with polymer clay... Half of the success in work depends on the right choice.
Of course, first of all you need to stock up on the clay itself, which is sold in special stores for needlework. There are enough brands:
- You can buy a domestic version of the type "Tsvetika"- it is inexpensive, but unsuitable for sausage blanks. The color palette is not extensive, there are no special effects like mother of pearl, no metal
IMPORTANT: The most noticeable drawback is that after baking, the products from "Tsvetika" become very fragile.
- Of foreign brands, the most common is considered "FIMO"- it offers the buyer a large selection of flowers that practically do not change after baking, suitable for a variety of techniques
- There are the following types: soft Soft, standard Classic and interesting Effect with additives, transparency, glitter and mother-of-pearl

- "Premo"- has a greater similarity to wax than the previous version. It is very easy to sculpt from it. Well suited for pre-cut sausages
- "KATO"- you will have to suffer a little with this brand, as it is baked at a sufficiently high temperature. And as for trying to knead the clay, it will be quite problematic to do this if you do not use a hammer
- You can pay attention and for Polish products- it is strong, affordable. Well suited for sculpting applications. However, if you plan to make sausage blanks, such clay is of little use.
- "Cernit"- recommended for those who want to sculpt dolls and imitate stones such as marble. For those who want to add a touch of transparent to their products, this brand is perfect. Clay is similar to wax, it is advisable to knead it thoroughly before sculpting

What else cannot the creative process do without?
- Without workplace, of course. For this business, it is best to find tiles or glass, since you will have to work with a knife. You can also have a thick sheet of white paper, but this is a last resort
- Knife you need the sharpest, and preferably special for this kind of work. But if this is not found, you can use the clerical. Pay close attention to the sharpening - the material should not be lubricated as a result. And look at the price, choosing the "golden mean", since the cheap ones are very often blunt, and the expensive ones have an overly thick blade - these include, for example, Japanese
IMPORTANT: Do not use kitchenware under any circumstances! There is a risk of harm to health.

- Rolling pin is also irreplaceable, but not plastic. The fact is that some types of plastics quickly deteriorate under the influence of polymer clay. But you can use a special roller to roll out the clay or even
- Toothpicks they will help you well in making holes in beads, forming parts, drying beads - it is very convenient to string round pieces onto such sticks. As an alternative to toothpicks, stacks serve, but not made of plastic
- Buttons, pendants and other accessories will make crafts unique
- For cutting out the details, in the absence of special molds, it is quite possible to take lids or glasses
- Emery cloths with water-resistant effect well polish and remove fingerprints from products. A dense material like felt, jeans will help to polish.
- Lucky will be required without fail. You can use building acrylic with a water base, but the Sculpey, Fimo brands are best suited

The basic rules for working with polymer clay are as follows:
- The most basic thing is observance of cleanliness. The surface should be as clean as your hands. It would be nice to stock up on gloves. And try to keep lint-free at the place of work.
IMPORTANT: Wet wipes will be very helpful when working. They will not only keep your hands and tools clean, but also allow you to smooth out irregularities in the material.
- For softening clay you can use a special tool called a plasticizer. The experienced needlewomen recommend the Moldmaker brand. A few peas of the product are enough for a pack of clay. Alternatively, creams, petroleum jelly, warming up procedure
- There are cases when the clay sticks to your hands especially fresh. Then you can mix it with harder clay or leave it on a white sheet of paper for several hours. But if paint has already got into the material, it is unlikely that something can be done.
- Parts are varnished in different ways. For flat, each side is processed in turn. Round ones are best strung first on a toothpick, which, in turn, must be stuck into plasticine. You can also dip parts in varnish or apply with a synthetic brush

- Whichever clay is chosen, it is imperative to use it properly before use. knead- due to this, the material becomes plastic, soft and suitable for comfortable modeling
IMPORTANT: Do not ignore this step, otherwise air bubbles will remain in the material, which will transform into bumps when the clay is heated.
- Stock up on a special baked gel- for example, such as FIMO liquid. Sometimes you need to glue a pin to the part - in this case, the hole for it needs to be made a little larger, given the glue
- Store clay sausages need in a foil or a well-closing sachet. Otherwise, they will not dry out, but will lose their plasticity and become brittle. This is explained by the evaporation of the plasticizer. Better yet, put the blanks in the refrigerator.

- At what stage should you do grinding? After the parts are baked, but before varnishing. It is recommended to wipe the parts with a linen towel after sanding - so they become like velvety
IMPORTANT: Do not think that the varnish will hide material defects. As a rule, he only emphasizes them. Therefore, it is worth taking the time to sand.
How to bake polymer clay crafts?
The baking process should be discussed separately, but this does not mean at all that it is somehow too tricky and requires a special oven.
This is not ceramics - here an ordinary oven is enough, after all the temperature at which many types of polymer clay solidify is only 110-130 degrees.

- What do you need to bake crafts on? Never on utensils that are used for food
- It is better to adapt a special baking sheet for a creative impulse, covered, in turn, with folded accordion paper
- Much depends on what is being baked. So, the beads will feel great, strung on a toothpick stuck in foil. It is recommended to place flat details on glass or ceramic tiles.
- You can place glass in the baking sleeve, and then get the craft out on the street - this is if you have doubts about toxicity

In general, so that toxic substances are not released, you need to adhere to the temperatures indicated on the clay packaging. Even so, it is necessary to work with the hood. The stove must be thoroughly washed after each work.
IMPORTANT: If a smell appears, and the craft itself has turned black and even charred, stop baking immediately and ventilate the room well.
If, after processing in a slab, the product becomes dense, thin parts are able to bend, and during subsequent drilling, long chips are formed - everything is in order, you are on the right track.
Polymer clay crafts for beginners step by step: master class
Beginner needlewomen must first of all master master classes on making sausages from polymer clay... Having such sausages, in the future, you can create spectacular details for various products.

So, let's try to do the simplest strawberry sausages that even a beginner can do:
- So, you need pink, red and white clay. From white blind a slightly elongated triangle, and from pink - layer about a millimeter thick
IMPORTANT: Before rolling out the layer, the clay should be thoroughly kneaded.

- More from white clay you need to make sausages. Sausages will also be needed from red... Then they need to be connected together.

- Carefully wrap connected red and white sausages with a pink layer

- The resulting red-white-pink sausage should be pulled in length as accurately as possible. Approximately until it reaches a length of 12 or 13 centimeters. When pulled, the product should in no case lose its original shape.
- And after that the sausage can be cut equal pieces

- Now from scattered sausages strawberry is formed... It is not difficult to form it: a white sausage turns into a pink layer and is covered with sausages made of red and white clay in a circle
IMPORTANT: Do not glue the entire core, leaving the bottom intact, as shown in the photo.

- Now the core turns around again, but this time with a layer of red polymer clay

- At this stage the sausage needs to be stretched to a size that is comfortable. Note that it should be thick and short for beads, and thin and long for toy pieces.


- And here is the final stage - baking! Do this for about half an hour, after which you need to cool the workpiece and cut into strawberries
- When made correctly, they should be easy to cut, resembling a fairly dense rubber in structure.

The described master class is intended for the simplified production of strawberry sausages. If you want something more naturalistic, then you can use a pasta machine.
It allows you to achieve smooth color transitions. As an analogy, take an acrylic rolling pin, only it will take longer to tinker with it.


 Polymer clay sausage fruit can be used in manicure
 Beginners can also practice buttons- it is very easy to make them, but the thing turns out to be beautiful and useful. So, for the simplest recipe for making will need:
- Actually, polymer clay
- Acrylic paint, which can be used for decoration
- Sandpaper
- Sleeve in which baked goods are made
- Any vintage type button

- So, first you just need roll balls from polymer clay... Choose colors as you like. Attach a button to the balls

- Now with a thick needle make holes... Such blanks can be immediately packed in a sleeve and baked at a temperature of 110 degrees
IMPORTANT: It is better not to use the baking sheet, as it will not always be possible to thoroughly wash it, like the oven. Even so, leave the oven door slightly open.

- Sandpaper processed baked buttons. Can be trimmed neatly
- Now you can add the final touches, having processed the product with paint or varnish

But what if you want to make such a trinket, but you don't have a vintage button at hand? No problem: you can shape the craft in a different way, and easy too!
- Roll the polymer clay into layer thinner. Attach a piece of lace to the layer, which you can surely find in any home. But before applying, be sure to lightly sprinkle the clay with water


- Now cover the workpiece with polyethylene- without it, cutting will turn out to be sloppy

- You need to press on the layer with a mold. The mold can be absolutely any shape

- The resulting contours are easy can be neatly cut future button


- Using a toothpick holes are made

- Blanks bake, cool- and now they can be covered with acrylic paint
IMPORTANT: The thing must cool in the oven.


Lightweight polymer clay crafts
An easy and useful craft will be magnet for needles. You will need:
- Rolling pin and surface for work
- Mold
- Polymer clay
- Acrylic paint, brush
- Lace
- Sandpaper
- 2 magnets
You can get to work:
- Clay is needed properly knead by hand
- Then her roll out
- Using a cookie cutter the desired contours are cut... Edges are trimmed
- Now to the workpiece pressed in lace
- You can bake the craft in the oven. However, if polymer clay is purchased with the feature of self-hardening, it is still easier - you just need to give it the opportunity to harden
- Sandpaper the product is being processed
- And now you can apply paint b the way you want. If you have a desire to somehow decorate the magnet, it's time to do it
- To the back of the craft the magnet is glued. That's it, you can use it! You need to apply a useful craft to the fabric previously fixed in the hoop

IMPORTANT: Do not forget about the second magnet, which is attached from the back of the fabric to the one attached to the craft.
The next easy-to-make and useful craft made of polymer clay is lid for can... The lid will outwardly resemble weaving from a vine, so any jar will look economic and comfortable with it. You need to stock up on such things:
- Any most ordinary can lid
- Polymer clay any shades. But to recreate the weaving effect, beige, red, yellow, green, brown and dark blue are best.
- If there's molds- a special mold for creating volumetric figures - then it will be very useful
- PVA glue or liquid plastic
- Orange and brown pastel
- Green, yellow, white, red acrylic paint
- Varnish, also acrylic
- Device for rolling polymer clay- acrylic rolling pin, glass rolling pin, in the absence of - a regular jar
- A special machine for processing polymer raw materials, called extruder
- Brush for applying paint. At the same time, choose a thinner brush.
- Sharper stick or toothpick

- To begin with, take a piece of brown clay and rolls out to the state of the reservoir... Please note that it must be at least the size of the original cap
- The original cover is lubricated liquid plastic or PVA glue
- Now the clay should be put on the lid. At the same time, it should cover the entire surface of the lid, but also should not interfere with it from closing. You will need to make cuts right there - this will release air bubbles. Alternatively, you can pierce the clay - then the air will come out during the baking process, otherwise the clay will simply rise
- It's high time twist polymer clay into a sausage, then immerse it in an extruder. This should be done with brown and beige clay. Any thickness

IMPORTANT: If there is no extruder, you just need to gently knead the sausage - so that the shades do not mix. After that, you need to gradually cut off pieces from it, rolling them into thin threads.
- Now we need to intertwine the strings... First, take a bunch of four and lay them horizontally on the lid. The ends should extend beyond the cap. Then take four more threads and put them on top of the previous ones, only perpendicular to them
- Spread the threads so that their ends diverge from each other. by the principle of rays
- Take a couple more polymer clay strands - and place them in the center of the improvised spider web. Start weaving in a checkerboard pattern- threading the leading threads over and under others. If you've ever woven wreaths or baskets, you should do it very quickly.
- You need to weave the cobweb to the edges of the lid. If the threads run out, new ones are simply glued to the old ones. After that, the weaving is carefully removed from the lid, transferred to paper
- On the cover PVA or liquid plastic is applied... In the first case, you must act quickly - before the glue dries

- The polymer clay web returns to the lid again. And now you need to complete this weaving with an edging... It is created from six stripes intertwined with a pigtail

- Now you can decorate the lid to your liking- for example, create flowers or berries from polymer clay, not forgetting to varnish them

Lovers of weaving and just useful little things will surely like it miniature ring box... We will make it in the form of a basket.
You will need:
- Clay
- Wire, the thickness of which is approximately 0.8-1 millimeter
- Stationery knife
- Capacity which resembles a basket. Cream jars are very suitable for this purpose.

So, let's get to work:
- Roll out the polymer clay to a sausage state... Its thickness should be about 1.5-2 millimeters. It is best to use an extruder, but not critical if it is not at hand
- This the sausage must be cut into pieces 3 centimeters long
IMPORTANT: Make sure the number of pieces is odd.

- The container itself should be turned over. Then you can stick polymer clay slices on it

- Carefully you need to cut off excess parts pieces so that they are the same length

- Now a circle is made of clay... It must be attached to the bottom of the container. For the best effect, it will be good to iron this circle with a toothpick.

- The jar is placed in this form in the oven.... The temperature depends on the type of clay, but 5 or 8 minutes will be enough time. After baking, the jar is immersed in cold water, cools and frees from polymer clay

- Roll the sausage as long as you can make it. However, it will be possible to connect sausages during the weaving process, which is easier to do with an extruder

IMPORTANT: After weaving, do not touch up the basket from the sides, otherwise the natural weaving effect will disappear.

- If you want to make the base of the basket complete, you can weave two-piece pigtail and stick it on top. A on the bottom from the inside, you can stick a circle of clay- so the bottom will become more accurate

- It remains to make the handle of the basket, for which the wire is useful. Measure the length you want and bend it in an arc

- The final stage is wrapping the handle frame with polymer clay sausage. Remember to leave 5 millimeters on both sides. Next, the handle is attached to the base, and this whole composition is sent to the oven for 20 minutes

DIY polymer clay doll
A doll made of polymer clay will be an excellent gift for a child, and it will also fit well into the interior of an adult. Of course, each such doll is individual, but still there are general manufacturing nuances.
The experienced needlewomen are convinced that the proportions of a living person are not suitable for a doll - the head turns out to be small, and the arms are too long. AND the surest way to calculate proportions- this is to remember that one body of a toy is measured by seven heads. The palm is equal to the width of the face, and the foot is 1.5 to the palms.

You always need to start creativity from the head, twisting a loop of wire... Foil should then be wrapped around such a base.
IMPORTANT: Be sure to wrap the foil tightly.
Now polymer clay comes into play which you need to knead well, then stick around the foil. It is important to smooth out all unnecessary irregularities.
Perhaps the most time consuming is start drawing facial features... It is necessary to highlight not only the eyes, nose, mouth, but also not to forget about the forehead and chin. You don't need to paint anything yet - just a relief designation of features. And remember that the face should turn out to be convex.

Thereafter the workpiece is placed in the oven... The baking temperature depends on the recommendations of the clay manufacturer.
Hands can be made next- cylindrical pieces are formed from clay. They need to be rolled out.

Using the stack fingers are formed... It is very important to separate them carefully without damaging them. Next, give the handles a natural look by rounding their outlines and not forgetting about the folds.

Now you can handle your hands in the oven, having previously put them on the wire.
The manufacture of legs begins, oddly enough, with the feet- they are made of parts, one side of which should be thicker than the other. Fingers, folds are indicated by a stack.
Pieces are attached to the feet, which are then transformed into a leg to the lower leg. The legs are baked in the same way as other parts of the doll's body.

IMPORTANT: Use the longest pieces of wire to fit the legs, as they will form the main frame of the doll.
And now it's time to collect the disparate parts in common frame. To do this, the wire from the head is connected to the pieces from the hands, and a long wire from the legs is screwed to all this. Where the waist is planned for the doll, the wire should be twisted.

Now you can bake the doll.

And now the most interesting thing begins - the formation of appearance. For face painting it is recommended use acrylic paints and brushes # 10. For the eyes, you need the thinnest brush.

As for the hair, then you can use a wig for a good cause, shaping the hair in parts. You can form strands from silk threads.
Or you can use wool for felting - just fantastic doll hair is obtained from it.

Outfit it is sewn whatever, depending on the idea and the materials at hand.

 Doll made of polymer clay by canadian craftsman Martha Boers
  Another polymer clay miracle from Martha Boers
 DIY clay toys
You can make a lot of polymer clay toys - it all depends solely on your imagination. Let's try to make this year's symbol in this tutorial - fire monkey.
- First of all, carefully mash the clay and create an oval from the orange piece- this is the future head of the monkey. Flatten it a bit for your face
- For body you need to make another oval just reworked as a drop

- Head and body are held together like this so that the body is attached with the smaller side of the drop
- A thin pancake is formed from beige polymer clay, on which you need to make a recess on top
IMPORTANT: A thin toothpick for shaping the polymer clay pieces will do just fine.

- Beige pancake is superimposed on the head... And closer to the bottom. And the groove should "look" up
- With the help of dots small dimples for the eyes are formed... The nostrils and mouth are designated according to the same principle.
- Roll two small circles out of black polymer clay... They are placed with light pressure in the eye sockets.
- 2 balls roll from orange and beige clay... Moreover, beige is less than orange. Pancakes are made from them. Beige superimposed on orange
 Polymer clay ears
 - The resulting ball is cut into two parts - these are the ears... They are attached to the sides of the head with pressure. The joints should be smoothed
- You can make the monkey playful with bangs. is a small orange droplet glued with its wide part up. The lower one needs to be twisted a little
- And now the handles-legs are formed from 4 sausages in the form of drops. Roll smaller drops for your hands. In all four sausages, make indentations in the wider parts.

- Form 4 drops from beige clay, and cut fingers on their wide parts - these are the palms and feet... Attach them to the indentations of the arms and legs

- From orange clay tail is formed, pointed on one side, and also twisted in the form of a question mark on the other

- Now all body parts are attached to the torso, and the toy is baked

DIY clay sculptures
Garden sculpture is both interesting and functional. It is unlikely that you want to spend money on buying a finished sculpture, but you can try to make one yourself. For example, an owl for which you will need:
- Capacity for mixing material about 5 liters
- Approximately 6 glasses of stucco
- 500 gram polymer clay which itself can harden
- Water
- Skewers made of wood or thick wire, stacks
- Plastic bag
- Paint brushes No. 1 and No. 5
- Owls are also useful for decorating gouache, glass eyes, matte varnish, yellow and black nail polishes

- So, let's start with the fact that in the bucket for mixing the material, you need to tightly lay a plastic bag. Separately knead about 4 glasses of gypsum
IMPORTANT: The consistency of the dough should resemble cottage cheese with sour cream. But there should be no lumps.
- After kneading, the dough is transferred to a bucket- it will take up a third of the capacity. The form in which the material was mixed, meanwhile, is quickly washed off. Well, skewers are inserted into the dough so that they half stick out of the plaster. Gypsum must be leveled and left to harden for 2 hours.
- After solidification plaster is taken out of the bucket

- Now you need to mix the plaster again to the same state as last time. He is laid out on skewers. You need to form the outlines of an owl. The container is immediately washed, and the workpiece hardens within 24 hours

- And then creativity begins: breaking off pieces of polymer clay, stick them little by little to the gypsum base
IMPORTANT: After breaking off a piece, immediately wrap the rest of the polymer clay in cellophane, otherwise it will harden.

- Then feathers are drawn- it is advisable to do this with a pusher. Glass eyes are inserted


- Formed from polymer clay back and wings
- Black and yellow nail polish eyes are painted... The advantage of this varnish is that it is transparent, and therefore retains the shine of the glass.

- But now you can start tail... Moreover, for reliability, it should be formed in tiers and processed by a pusher.
- Are drawn wings

- If there is excess clay left, you can mold additional decorations in the form of a ladybug, for example. The owl is dried and painted with gouache. Top covered with matte varnish

Polymer clay cup
It is extremely undesirable to completely make a cup from polymer clay, since storing and serving food in it can have unpleasant consequences for health. But decorating the cup is quite possible. For this you will need:
- Polymer clay
- Toothpicks, stacks
- A utility knife or a good blade
- Pastel of the color you need for decoration
- Room temperature water
Getting started:
- So first of all need to work on a sketch, because in the process it will be quite difficult to decorate at random
- Now, based on the sketch, you can start fixing polymer clay, recreating certain details. Help yourself with toothpicks or stacks
- Once the clay outlines are formed, you can connect pastels- it emphasizes the 3D effect of the decor
- Now bake the cup at a temperature of 120 degrees
- And after this procedure the polymer clay parts must be carefully detached from the cup. It is best to help yourself with a stationery knife
- Rinse the cup with warm water. Dry it, degrease it
- Grease each of the decor details carefully with glue, and attach them to the cup... Remove glue outside the decor with a toothpick
- The vase now needs to be placed in the oven for 20 minutes. Set the temperature to 120 degrees.
- Let the vase cool, cover it with varnish

We offer another design option for a glass vase:
- In this case, use stamps, stacks, coloring pigment in the consistency of a powder. Pour such a powder onto a layer of polymer clay, and rub it with your fingers - this will achieve smooth transitions of shades. You can pre-mark patterns with stamps
- Now cut the figurines out of the layer. You can use scissors, or you can use a clerical knife. Let the figures be different sizes - in design it looks just fine
- Figures need to be baked following the instructions from the clay packaging
- Roll out another layer of polymer clay- the figures will be attached to it
IMPORTANT: The base layer must be equal in size to the glass vase. And in thickness, it should be denser than the layer from which the decor details were cut.
- Use glue to attach the base to the vase. Press in the details into this layer, helping yourself with this work with glue
- Apply mother-of-pearl varnish to the entire surface. It is recommended to work with a large brush.
- Now put the vase in the oven for 5 minutes... Temperature - 265 degrees
- This way we only worked on one side. Repeat this algorithm for others not forgetting to let the vase cool down after each baking

DIY clay flowers
Polymer clay makes great flowers for decoration. For example, delicate sakura flowers:
- First, make a sausage out of pink and white polymer clay. The color transitions should be smooth, for which you can use a paste machine. But you need a little clay, so you can try to arrange it by hand.
- Once the sausage rolls up, cut it into slices. in a millimeter or 1.5 millimeters thick

IMPORTANT: It should be noted that a real tandoor is made exclusively of clay - only thanks to it the stove will have thermal insulation properties. The really impressive thing is that it keeps food warm for about 3 or 4 hours.
What is the structure of this oven? It is an earthen vessel, tapering upward - there the food is placed. And the traction is provided thanks to the blower at the bottom. The bottom is lined with bricks, and clay, salt or sand are placed between it and the clay to keep warm.
In addition to all of the above, you will have to stock up on sheep wool or camel wool - this will allow the oven not to crack when high temperatures are set.

- So the first thing it is necessary to mix the clay with the wool. Pre-cut the wool into 10-15 millimeter fibers
IMPORTANT: The consistency of the mixture should resemble thick sour cream, have a viscosity.
- Such a mixture must be left until it reaches a suitable state for at least a week. But during this time, stir the workpiece, otherwise it may dry unevenly. And make sure that no water accumulates on top - otherwise the tandoor will be covered with cracks
- If the workpiece looks like a dense plasticine at the end of the week - you did everything right! Blind oblong sheets from such plasticine, the thickness of which should be at least 5 centimeters. It is from them that a tandoor with a height of 1.5 meters is formed, the diameter of the wide part is a meter, and the diameter of the neck is 0.5 meters.
IMPORTANT: Be sure to leave a hole at the bottom of the side - it is necessary for blowing.

- Leave this blank for a month for complete drying
- Now you can overlay the workpiece with bricks. The same clay is used as a solution. You can replace it with a mixture of clay, plasticizer and quartz sand
- From the inside, the oven is lubricated with cottonseed oil.
- And now - kiln firing until it resembles ceramics. The temperature rises slowly, so don't worry if it takes 24 hours to burn.
Polymer clay jewelry
Polymer clay makes excellent jewelry - bracelets, necklaces, rings. But they will be discussed in another article.
As you can see, polymer clay is just a godsend for creative people. You can make a lot of excellent things from it that will bring positive, comfort and benefit to your life.
You can hardly resist purchasing such a thing, and if you start to take an interest in the process of working with polymer clay, you can hardly resist trying to make something on your own.
Video: Magic peonies from polymer clay
Video: Bunny polymer clay
Video: Unreal polymer clay sculpting
And a very promising topic Clay crafting... Which not only allows you to occupy your hands with something, but also has a positive effect on well-being, self-awareness, and inner balance of a person. It can also help you earn money.
Applied art classes in general always have a very positive effect on a person's development, reveal his creative abilities, develop fine motor skills of fingers (and hence thinking), an eye, a sense of color and shape - and these are exactly the qualities that are very needed in life. In addition, it has long been known that the best gift is DIY homemade products. Even if not quite a masterpiece, naive, sincere, and from this even more dear to family and friends.
As this kind of homemade products, you can use any small object that is in the baby's field of vision: household "trifles" - nuts, wire, carnations, eggshells and, of course, natural materials - wood, pebbles, leaves. Separately, we can note the topic of our article - clay modeling, as the most fully providing a person with room for the realization of his creative fantasies, in fact, it is an ideal opportunity for DIY homemade products.
Modeling from clay means that you can give this natural material any shape you want: from clay you can create both figurines of animals and cars, houses, up to whole toy cities. By the way, clay is the most ancient building material of mankind and, quite possibly, the building functions of clay were noticed by people just when they watched the games of children, creating various homemade products on the banks of rivers with their own hands.
Clay is a by-product of the earth's crust, a sedimentary rock formed as a result of the destruction of rocks during the process of weathering. Clay is different - red, blue, white, yellow. Its color is influenced by the addition of other minerals. Clay can be purchased ready-made or in powder form. If possible, you can find natural clay, but not all are suitable for work and require a long and careful preparation.
It is important - if you want your products to be immediately usable without firing, use clay with polymer additives
Before sculpting, the clay must be thoroughly kneaded with your hands, and then beaten off by tapping in your palms. In this way, you can get rid of most of the air in order to prevent rupture of the product during firing (if you will fire your products).
You should work with both hands. This will allow you to simultaneously design the right and left sides of the product, will help to more organically link everything into a single whole. To help your hands for sculpting, you need to use special tools - stacks.
As a rule, work begins with the largest part of the product, gradually moving to smaller ones.

Before finishing work, the product is “smoothed” with a damp sponge, cloth or brush.
What are the options for modeling clay?
You can create a shape from a single piece of clay by stretching and shaping it as needed. Using simple techniques of pressing, pinching and pulling, traditional clay figures are created, for example, folk toys-whistles.
- You can cut a clay figure using special tools (stacks). Then the piece of clay should be dense enough and slightly hardened so that it does not fall apart in your hands.
- You can create a product using a plaster mold, into which clay is poured, dissolved in water until a homogeneous mass is made.
- If you want to create a clay craft in shape (for example, make a vase from a mold of an existing vessel), use plastic wrap. You need to wrap the vessel with it before sticking a clay base around it. After the clay dries, the film peels off easily, and you have a finished form.
- There is also a relief molding, when a drawing of any complexity is glued onto the clay rolled out in a layer.
A kind of embossing is cutting a pattern on a surface.
How to sculpt from clay correctly?
Always remember that clay is not plasticine. This material is much stronger, but it also needs to be handled more carefully. Remember a few simple rules:
- First, the modeling clay should always be moist. Therefore, after completing the work, cover the mass with a damp cloth, preventing it from drying out.
- Secondly, during the sculpting process, always smooth out the cracks that appear with water or a water-clay mass.
- When creating a clay craft, start by sculpting the larger parts, and then attach the smaller ones to them.
- Remember not to roll foreign parts into dry clay, for example, pieces of wire, metal or wooden legs, etc. It is better to make indentations for them and put them on the glue after the product has dried.

With buttons, clothespins, magnets or pins, you can make a ceramic fridge magnet, brooch or creative earrings.
What to do with the figurine after sculpting - if you don't use polymer clay?
Anything clay product needs to be dried before doing any further work with him. It is better to dry the clay craft in a plastic bag. Do not rush things and let it settle for at least a couple of days. To determine if the craft is ready, carefully examine it: a dry clay product is much lighter than a raw one and a little lighter.
After the craft has dried, you can additionally dry it in the oven or microwave.
To make a clay product more durable, it is fired. It is quite problematic to do this at home, but if you have a stove in your country house or in the village, you can burn the figurine in it. To do this, put the dried (!) Craft for a while in a not too hot oven away from the burning coals.
Also, a clay product can be burned at the stake. To do this, either place it in a tin can, or set it on the surface of a brick or stone, then cover it with burning logs on all sides and gradually burn it. Remember that the firing must always be uniform and clay cracks from sudden temperature changes!

Before painting a clay product, apply a layer of regular white enamel to it. It dries quickly and creates an even surface for painting.
After finishing painting, apply regular PVA evenly to the clay figurine. When the glue dries, you will have a beautiful, shiny and durable clay product on your hands! It is done!
More: a site about clay and working with it - http://glina.teploruk.ru/
Happy creativity!
Recently, do-it-yourself crafts have become more and more popular. Modeling also refers to this. Unfortunately, not everyone has the opportunity to buy clay for modeling, there are no funds or it is not available in stores. We propose to solve this problem by making clay for modeling with our own hands. Polymer clay is also created with your own hands in order to avoid high costs when you just start to get acquainted with this material.
Types of clay crafts
So, clay is natural and sometimes artificial. Polymer clay is a very comfortable material: it becomes hard only when exposed to high temperatures, and at room temperature it is a very soft material. It is perfect for sculpting dishes and crafts: accessories, decor items, jewelry and many other products. They are made only of clay or combined with other decorative items: beads, sequins.


A simple recipe
To create clay, we need PVA glue, corn starch in a glass, a tablespoon of petroleum jelly and silicone-free hand cream, two tbsp. l. lemon juice, a bowl, plastic wrap and a spatula.
We mix starch, petroleum jelly and glue until smooth. Add lemon juice and stir. We put the resulting mixture in the microwave for thirty seconds, take it out, mix and put it in the microwave again for the same amount of time.

Spread glue over the working area. Put the resulting mass on top and begin to knead it. Then, we roll the resulting blank into a sausage, wrap it in plastic wrap and put it in the refrigerator.


Second way
This recipe is more suitable for sculptural plastics, since the products are more durable and harder.
For the manufacture of such clay, we need art. glue for wood, 100 g of corn starch, art. l. stearic acid, glycerin and petroleum jelly, 13 g citric acid and capacity. It is best to take one where the coating does not burn.

Combine all ingredients except starch. Then, put on a warm fire and stir. Slowly add table starch and mix thoroughly so that there are no lumps. After our mixture begins to peel off from the edges of the boards, lay it out on the working area and knead it like dough. Then, let it cool and put it in the refrigerator, having previously wrapped it with cling film. If you want to paint, you can do it using ordinary acrylic paints.
This way of making clay works great for crockery.
Sculpting lesson
The process of sculpting from homemade polymer clay can be seen on the example of sculpting flowers, namely roses.
For work, we need handmade clay, a stationery knife, pins, foil and toothpicks.
We paint our clay in the desired shade and knead it. Making a sausage. Cut the clay into pieces. Press down on the piece with your finger, creating a rose petal. We make the core by wrapping the first "cake" in a roll. Next, attach each petal. We roll the rose between our fingers, thereby pulling it out, as it were, a tail. Cut off the excess clay with a clerical knife.
In the middle, carefully make a hole with a toothpick, without piercing the product completely. This is necessary for sculpting jewelry, for example, earrings, in order to then insert the earring itself.

Related videos
Watch a video selection on how to properly make polymer clay with your own hands and what products can be sculpted from it.
My 3 year old daughter loves to sculpt. Together we master new techniques, materials and forms for sculpting. Today I will tell you about the features of clay modeling for beginners.
Modeling from plasticine, clay, salt dough and other plastic material soothes the nervous system of the most mobile baby, captivates the most restless fidget, soothes and pacifies. Sculpting is considered an essential component of art therapy.
Modeling allows you to develop fine motor skills, expands spatial thinking. Inventing and embodying with the baby figures made of plasticine, clay or dough, parents stimulate his cognitive activity, the child imagines, invents and plays with what he invented.
Clay is a material for joint creativity
Clay is the most flexible and profitable material for modeling. Finished products do not break, retain their shape for a long time. And most importantly, fabulous handles for a locker, a dollhouse, counting material - mushrooms, an alphabet, etc., molded from clay together with the baby. will well complement the interior of the children's room and will be dear to the child.

In clay modeling, beginners should immediately determine the type of material. Clay is different. It can vary in color, consistency, plasticity, and even the presence of water in it.
If cracks appear on the finished product during work, this indicates an incorrect technique for working with the material or a lack of moisture in the clay. There is blue clay, which is enough to get out of the package and knead it. There are types of clays that require the addition of water when working with them.
I would also like to highlight polymer clay... Very good material for modeling. Polymer clay is based on PVC and plastic bonding agents; finished products from such clay need to be baked at a temperature of 110 degrees.
Another type of polymer clay consists of a combination of natural ingredients and organic polymers. This material is self-hardening, finished products do not need heat treatment.
Since we decided to master modeling together with the children, we must also choose polymer clay that is safe for working with babies. With my children, I use Fimo Air self-hardening polymer clay, it contains more than 90% natural materials, environmentally friendly and well suited for children's modeling.

Workplace, sculpting techniques
Clay modeling for beginners requires strict adherence to all the rules for organizing the workplace. On the table before sculpting, you should:
- spread oilcloth or other covering material;
- put a bowl half full of water;
- prepare a dry towel and a damp sponge;
- put a wooden stack and a plastic brush in front of you.
Now you can start a trial clay modeling lesson for beginners. We take out the clay from the bag, box, plastic bucket. Roll out into a tourniquet, or pinch off the pieces. We knead the workpieces.

If the clay is too dry and is about to crumble between your fingers, place it on a table, dampen your brush in water, and then brush over the clay with a wet brush. Moisten the clay until it has the desired plasticity.
Attention! During the sculpting process, the clay may stick a little to the fingers, so that it does not interfere, periodically wipe your hands with a towel and a damp sponge.
If cracks appear on the clay figurine, gently rub them with your finger dipped in water. The finished products should be dried within 24 hours. Then they can be colored and decorated.
The only "but" in natural clay modeling: processing of the finished product. If you do not have a muffle furnace, the finished clay figurine must be dried within 5-6 days, for example, on a windowsill. To prevent the figurine from cracking, cover it with plastic for a day.
Sand the dried product and saturate it with PVA glue. Once the glue is dry, you can paint the figurine with gouache, tempera or acrylic paint. Instead of PVA, you can use an acrylic primer as a base for paint. The finished product can be varnished.

Clay toys workshop "Paraskeva", the village of Diveevo

Clay figurines in the interior of a children's room
Clay sculpting can be used to decorate any space. Moreover, a children's room. For example, decorate the handles of cabinets, doll furniture, a table or a chest of drawers with stucco molding. Together with the child, you can mold materials for role-playing and educational games: figurines of vegetables and fruits in the game "Shop", counting material (numbers, signs, figures), letters for the magnetic alphabet and much more.

Polymer clay cabinet handles. Master class on the link


Lamp "Tabby Cat"