Red velvet with cream. How to decorate a Red Velvet cake with New Year's motives - video
Red Velvet Cake is an amazing combination of juicy and velvety cakes with delicate and smooth butter cream. American Red Velvet Cake is a spectacular, tasty and very satisfying dessert that you can prepare at home if you wish. The cut alone makes the hearts of many sweet tooths beat faster, and the dense and at the same time soft cake dough simply melts in your mouth.
For me personally (as well as for my husband) the Red Velvet cake is a mystery. The color of the dessert initially tries to deceive the taste buds (it seems that you are just enjoying a creamy cake), but then you realize that the aftertaste is chocolate! It is difficult to describe the texture of the cakes in a nutshell ... I think it looks like a cross between a well-baked brownie and a juicy cake. There is absolutely nothing from the classic biscuit here.
I propose to prepare the cream on the basis of delicate and velvety cream cheese (in my case, Mascarpone) with the addition of heavy cream whipped with powdered sugar. Buy Cream Cheese, Philadelphia, Almette, and similar cheeses as a base if you like. Whipping cream (33-35% fat) can be easily prepared at home -. The amount of powdered sugar you can react to your liking.
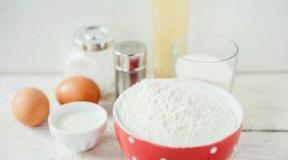
I use the highest grade wheat flour for the dough, kefir - 2.5% fat, butter - 82.5%. Replacing the last product with margarine or a spread is personally unacceptable for me! We use unsweetened cocoa powder, chicken eggs are medium-sized (50-55 grams each), and if desired, we will make the baking powder ourselves ().
A few more words about red dye, which plays a very important role in the preparation of the Red Velvet cake. I use Top Decor food gel dye (mixture for coloring food products) Top Product LLC. It was this dye that I needed 10 grams, you adapt according to your own. Dry food colors are fine, but they are best combined with flour, baking powder, and cocoa. True, in this case, you will have to calculate the exact amount of paint yourself.
Ingredients:
Dough:
(360 grams) (360 grams) (250 grams) (220 grams) (2 pieces ) (15 grams) (10 grams) (10 grams)
Cream:
Cooking a dish step by step with a photo:

We start assembling the Red Velvet cake (I do this on a special turntable, it's more convenient this way). Here I have a few tips that will surely come in handy for scrupulous aesthetic hostesses. If you want the cream to be the same thickness over the entire height of the cake, use a kitchen scale to divide the cream into equal parts. So, for a layer of 4 cakes, I used 4 parts of cream (100 grams each), part for rough coating and part for final leveling of the cake. That is, in this case, exactly 100 grams of cream is applied to the bottom cake.


- Butter 82.5% - 220 g
- Sugar - 395 g
- Eggs - 2 pieces
- Milk 3.5% - 250 g
- Flour - 365 g
- Baking powder - 10 g
- Cocoa - 10 g
- Dye AmeriColor Red Red
Before you is the most popular and beloved by the whole world American classic, the cake - "Red velvet" (or "Red velvet cake"). Today you can meet him anywhere in the world: in cafes, restaurants, pastry shops and supermarkets. Until now, many people think that red velvet is just a sponge cake, with dye and a rather loose dough. In fact, this is not at all true. The most important thing is his cunning nature. Red dough does not bode well for any surprises, because everyone who tries it for the first time is sincerely surprised that at the very end, from somewhere, unexpectedly, a chocolate taste appears! And after that, you can no longer be the same. You become a fan of this dessert, which looks delicious and has enough chocolate flavor to make you happy. And, of course, do not forget about the texture - any cake secretly dreams of such velvety.
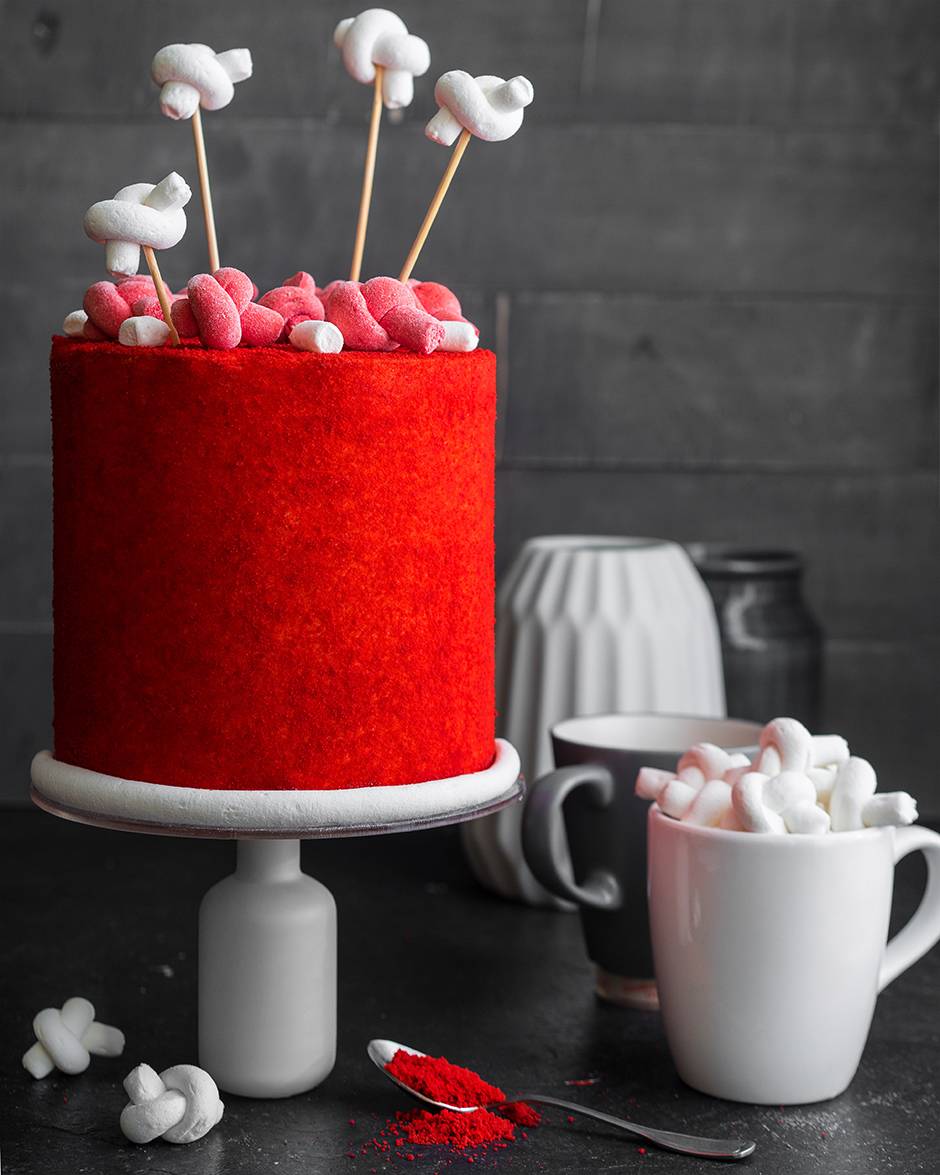
There are thousands of recipes. Through experimentation, I found mine. All its advantages can be read in my post. In short, this is real American bliss. A noble cake that makes anyone fall in love in a fantastic way. Delicate loose dough that will melt in your mouth and at the same time make perfect friends with cheese cream. It gives you the opportunity to enjoy a sweet dessert and receive a chocolate reward in the end. Perhaps this is the perfect compromise for two camps: ardent opponents of chocolate and weak-willed chocolates like me. To bring the idea to the end, I use trimmings, creating a velvet coating on the cake, as it can rightfully be called red velvet, not only for its inner peace, but also for its impeccable appearance. Catchy, bright and very appetizing, he says: "Stay away, with me you can lose your head forever." In addition, I'll show you how to make decor - another American classic - marshmallow knots.
Andrey Rudkov
If you need some kind of ingredient, confectionery inventory and equipment, go to my store - dvemorkovki.ru. I plan that it will become the most convenient store for those who love to cook. An up-to-date showcase, many payment and delivery methods (all over the world), there is a store in Moscow and goods that I select myself and the ingredients that I use on my blog. Come on in!
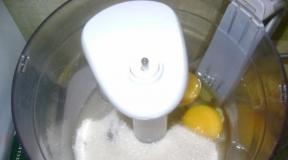
First stir 82.5% good butter (220 g) and sugar (395 g) in a mixer bowl. The oil should be soft. Moreover, it will be good if you take it out of the refrigerator and use it right away when it becomes soft.
Do not let the oil sit on the table for a long time, especially in summer. This can negatively affect the final result.

Along the way, mix the dry ingredients of the future dough in a separate bowl: flour (365 g), baking powder (10 g) and alkalized cocoa(10 g). Use a whisk or even a mixer to make the mass as homogeneous as possible.
You have to understand that Red Velvet is a special cake, here it is important to get a quite perceptible chocolate aftertaste. Therefore, the quality of the cocoa is very important. Ideal is alkalized cocoa with a significantly stronger taste, color and aroma. I wrote about this in a special post "", read!

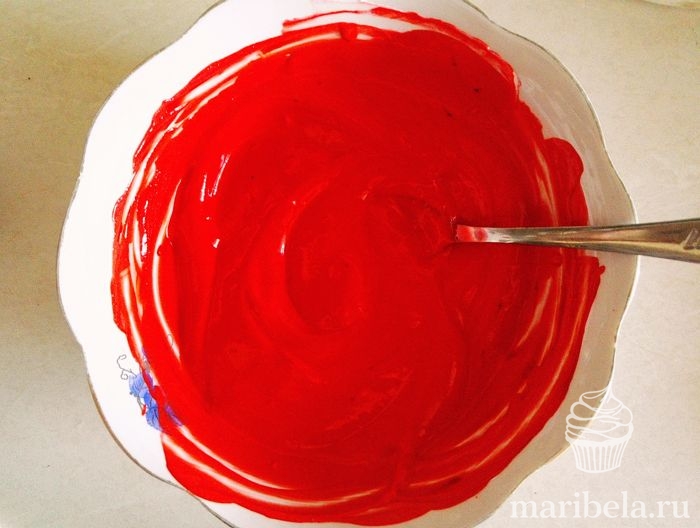
When the butter and sugar are mixed into a homogeneous mass, you can move on.
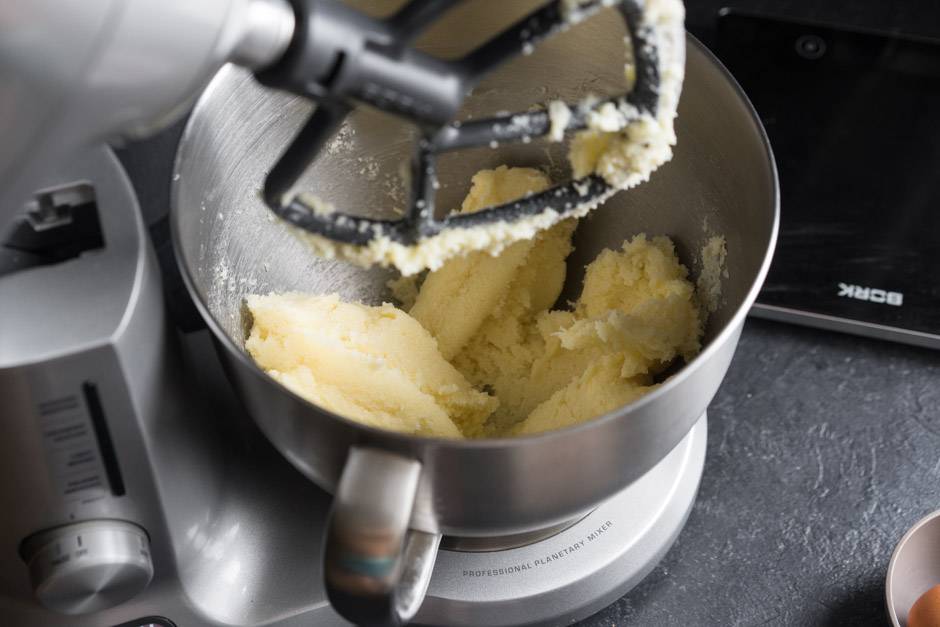

You should get a pretty lush mass.


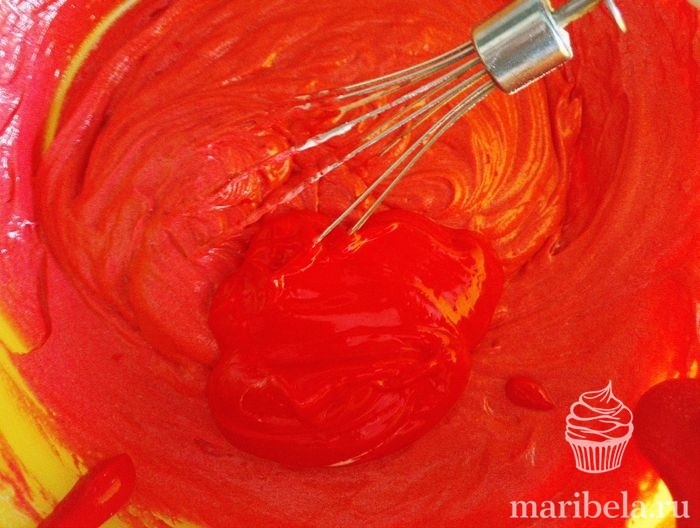
Stir and add half of the dry ingredients.

Then half the milk again ...

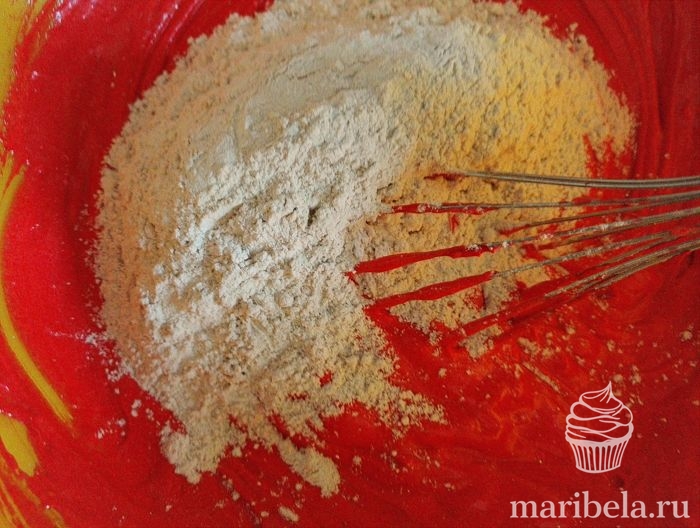
And finish with dry ingredients.

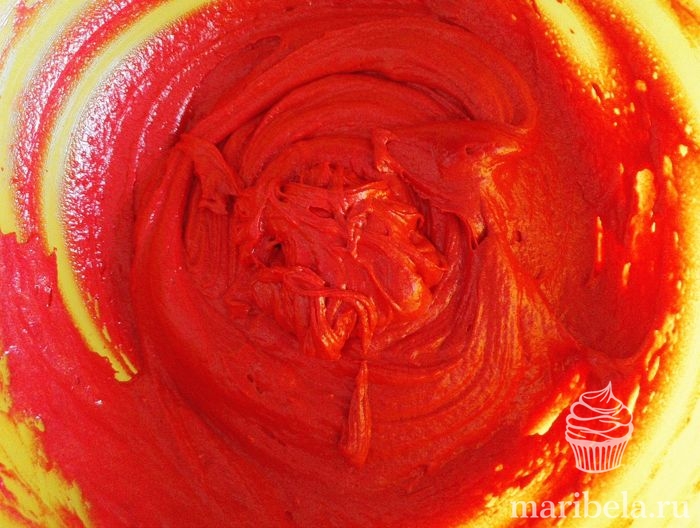
Make sure the paste is smooth, uniform, shiny and has a subtle cocoa color. The dough should be elastic and keep its shape well.

When the basic assembly is ready, apply the final layer of cream, 8-10 mm thick, as I also said.

Chop the resulting cuttings on a baking sheet and place in the oven, preheated to 100-120 degrees. We need to make sure croutons. This will take about 60-80 minutes (depending on the size of the pieces). Stir the cuttings occasionally when baking to dry evenly.
Here it is better to keep them in the oven for a longer time, the result will only be better. The main thing is not to rush.

Then crush them in a blender or food processor. It should be fine and dry, as if you had crumbled Yubileinoye cookies.

When the cake has stabilized and the cream has cooled enough to be resistant to touch (touch it with your hand, if there are traces of cream, return to the refrigerator), place it on the baking sheet. Sprinkle generously with crumbs on top.

And begin to gently distribute the crumb all over the cake, while trying not only to cover the whole cake with the crumb, but also to remove the excess. Only then will you have a beautiful cake with right angles, and not a fluffy shapeless cake, as honeymen sometimes do in pastry shops)

A soft brush will help very well. Just collect the crumb at the bottom and roll it up with a brush. It will come out neater and smoother. Cover the cake with crumbs step by step and skim off the excess. Then you will have that very velvet finish.

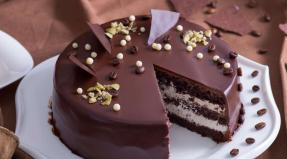
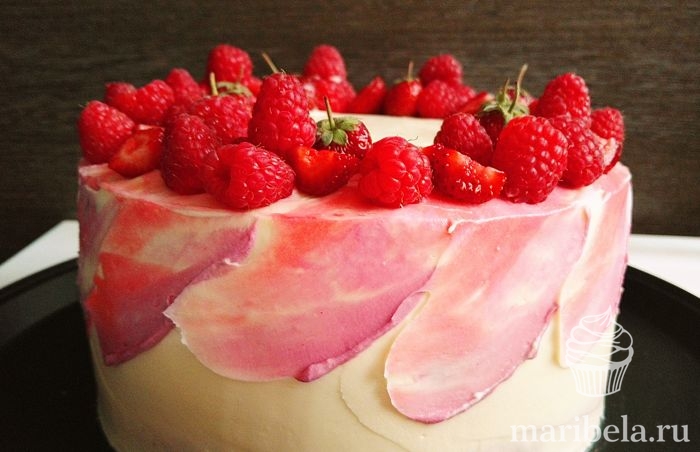
I present to you my New Red Velvet with decor.
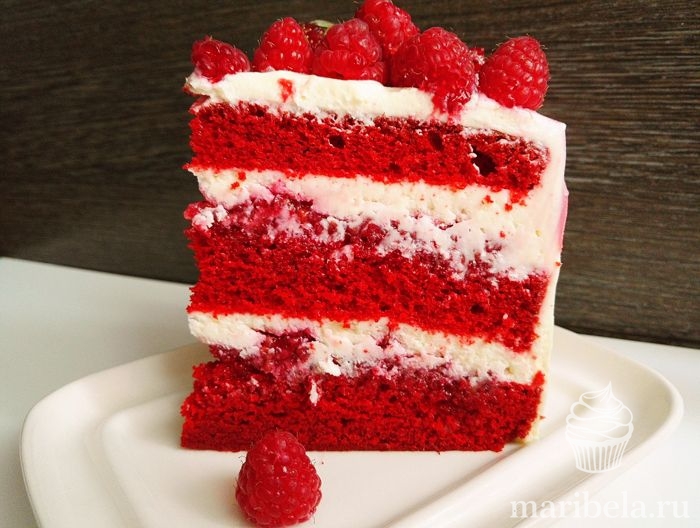
And here's our cut of six layers of stunning velvety red velvet.

Just notice how loose and tender it is.

Hello everyone. Today I will share with you the Red Velvet cake recipe. Yes, I already have one recipe for this legendary cake on the blog, but this time it will not be made with vegetable oil, but with yogurt. And this is, so to speak, its light version.
I found this recipe for a long time on the Instagram page of @shanti_aa, he bribed me with his composition. There is no "liter of butter and a kilogram of sugar" in it) Therefore, I prepared it immediately. And now, I will tell you frankly, I am making this cake exclusively according to this recipe.
The biscuit turns out to be so delicate and fluffy, it is like a weightless cloud.
I will describe first the whole cooking process, and then all the nuances of working with such cakes.
So, step by step how to make a Red Velvet cake with adding yogurt at home with photos.
Ingredients for a mold diameter of 18 cm:
- 95 grams of butter, room temperature
- 180 grams of caster sugar
- 2 small eggs (C2)
- 190 grams of flour
- 4 g strong cocoa (alkalized)
- 1 half teaspoon of baking soda
- 0.5 tsp baking powder
- 0.25 tsp salt
- 170 ml. natural yoghurt
- 0.5 tsp dry dye (or 1 tsp gel)
Preparation:
Butter at room temperature (you can take 72% for the dough) is placed in the mixer bowl and beat together with the powder at high speed until whitening. It takes 5-7 minutes in my mixer.


While the butter is whipping, it is necessary to sift all the dry ingredients: flour, cocoa, soda, baking powder, salt. And mix them thoroughly with a whisk.

Dissolve the dye in yogurt and leave it for a while.

Yoghurt should be natural, without dyes, at room temperature. I prepared this sponge cake with Greek yogurt, Sloboda, Danone and Activia yogurt. The main thing is that it should not be drinking yogurt. Usually their fat content is about 6%. You can also use homemade yogurt if you do that.
I’ll make a reservation right away that you will not be able to paint the biscuit with beet juice. If there is no food coloring in the house, then, unfortunately, Red Velvet cannot be prepared. But, you can find a replacement for it (there are many good recipes on my blog) or just cook it without dye. I have India dye, I bought it by weight in a confectionery store. It is quite possible to paint with gel dyes, I use Amerikolor and Top-product firms.

Then add half of the yogurt there, mix again.

Next, again, a third of the bulk.

Then the leftover yogurt.
Then loose. Mix everything well every time.
This is the consistency of the dough.
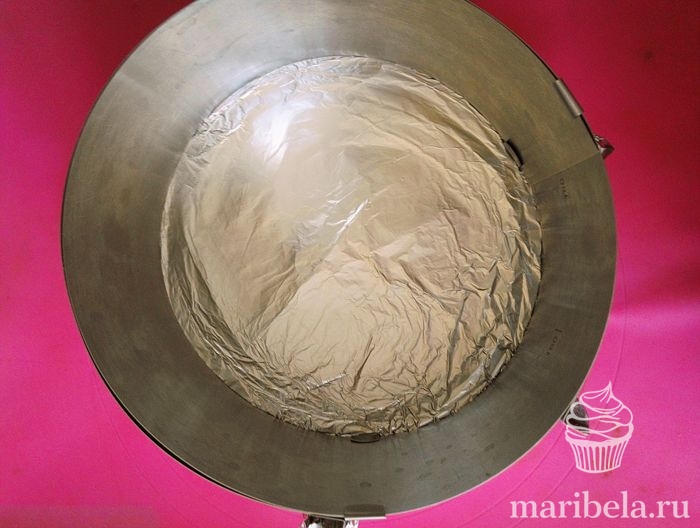
I bake in a split ring, I don't grease the sides with anything. I just wrap the bottom with foil.
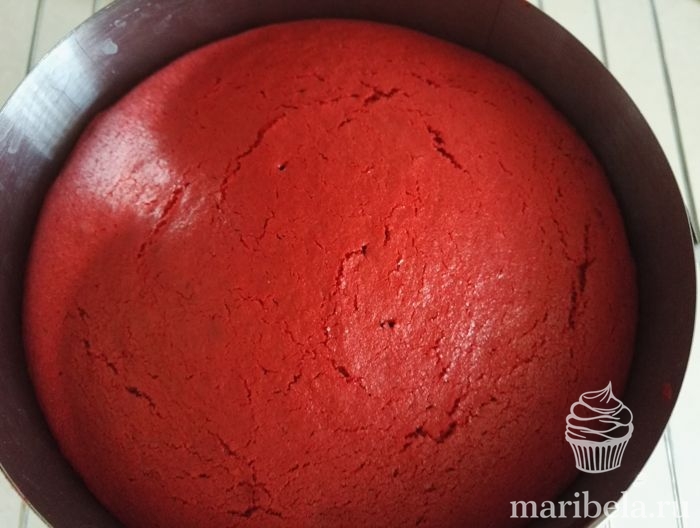
Attention, the cake rises very well. It comes out in height 6-7 centimeters, so do not fill out the form anymore. than half.

We put to bake in a preheated oven to 160º degrees and bake for about an hour. It takes me 50 minutes to bake. So look at the dry torch. I am always guided by the smell, as soon as it smells delicious - I go to check everything.
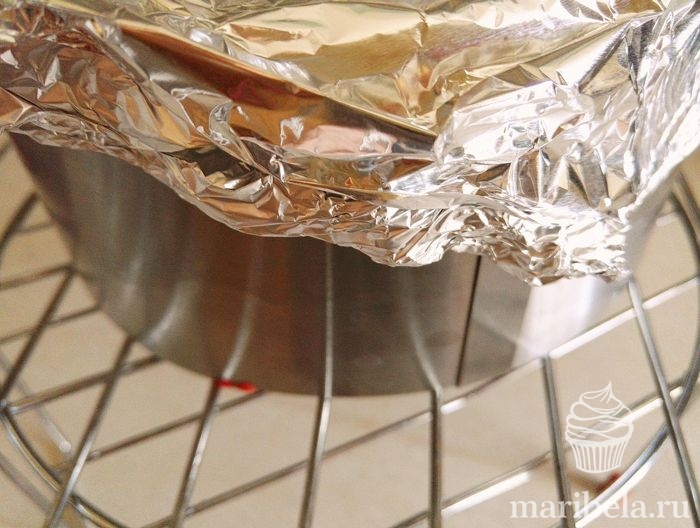
Next, you need to properly cool this biscuit. It must be turned right in the mold on a wire rack or on a support in the form of cans, so it must cool completely. The biscuit is very tender, this is done so that it does not settle when it cools.
Then, we go through the edges of the form with a knife and take out the cake. See how tall and wet he is ?!

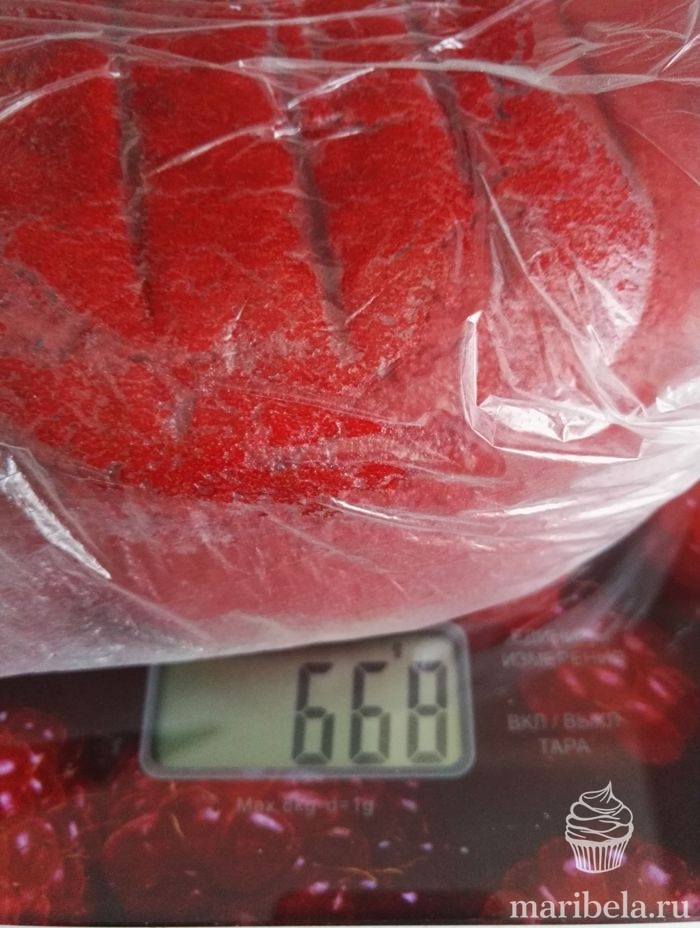
We wrap it in foil and put it in the refrigerator overnight to redistribute moisture. The result is 670 grams by weight.
In the morning we cut the biscuit into 3 cakes, be extremely careful here, because the biscuit is sooo delicate, it can break with rough work.

What other nuances are there when working with him?
Well, firstly, it does not contain vegetable oil, therefore, the biscuit requires impregnation, but not much! Here you need to know when to stop, because because of its airiness, the biscuit absorbs moisture and, having re-soaked it, your cake can "float", as it happened to me once.
Secondly, the cake is tender, I constantly break off the edge a little when cutting, so we cut it carefully.
Third, it crumbles. Therefore, be sure to make a rough layer so that later there are no crumbs outside.
Now I will show you how I collected this cake.
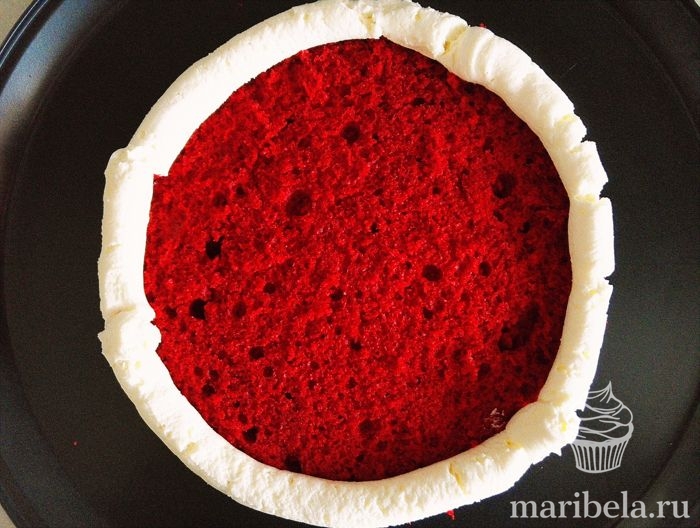
We make a side of finishing cream along the edge. The cream needs a dense one that keeps its shape well and it is convenient for you to work with it in terms of alignment.
It can be (as in my case), or (all recipes are available via the links, just click on the desired name and you will be taken to the page).
Why is it necessary to make the sides from thick cream? To prevent the filling from flowing out of the cake) Take this as a rule, otherwise the cake may "float" or slide out.
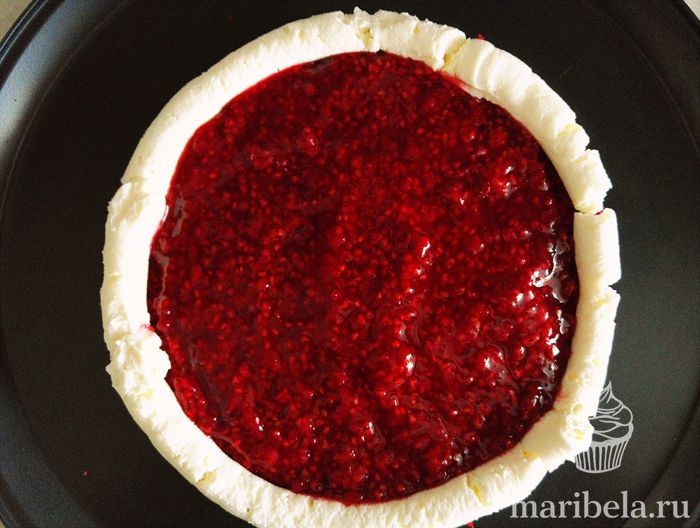
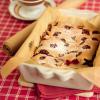
Then, I put the filling in this "well". I deliberately decided to put the filling on the biscuit so that it would give its juices there, since I hardly soaked it.
I chose raspberry jam as the filling. To do this, I took 200 grams of fresh raspberries, 10 grams of water and put them in a saucepan over medium heat, boiled for a minute or two. Then sugar was poured there 100 grams (see to your taste) and corn starch - 8 grams. I boiled it for another three minutes until it thickened. Removed from heat and cooled to room temperature. If you want seedless filling, then pass the mass through a sieve. Then the amount of raspberries should be increased.

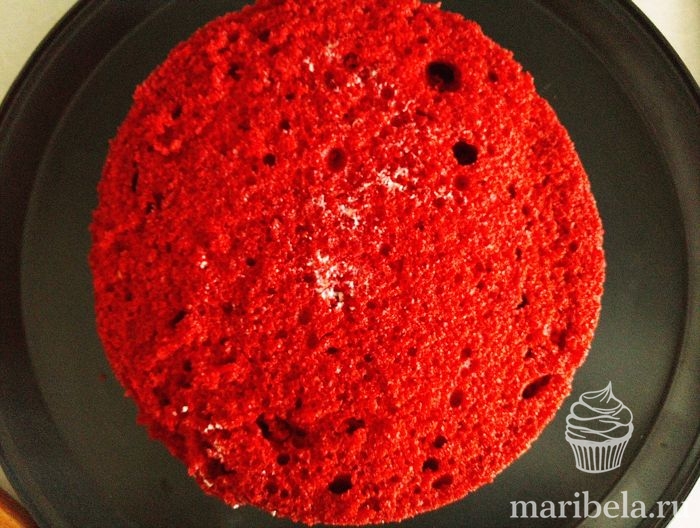
Put the cream on top. Align the surface.

And we put the next cake. So until the end.
Then, immediately apply a rough coating, wrap the cake in a foil and put on the ring or the form in which you baked the cake on top. This is necessary in order for the cake to take the correct shape. You can collect and immediately in the ring, it does not matter, then do whatever is more convenient for you.
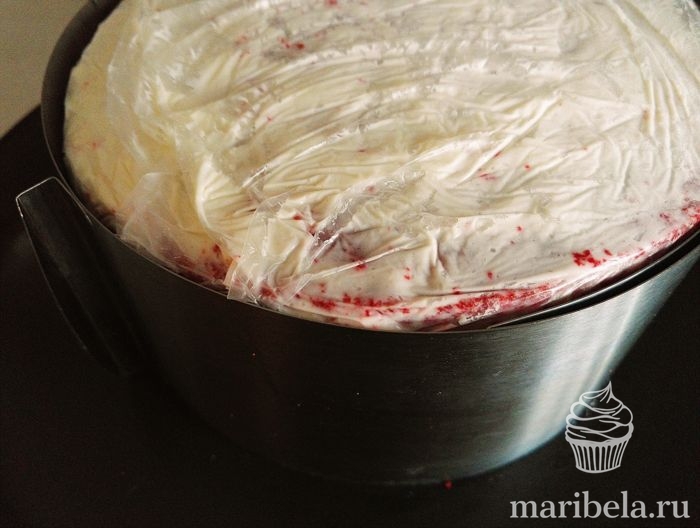
We send the cake to the refrigerator for stabilization. I usually leave it overnight. Still, I recommend to always wait a couple of hours before finishing coating, because otherwise the cake may askew or cracks appear on the cream.

In the morning, remove the ring and level the cake to finish. Here I used. For a given diameter, you need 400-500 grams of finished coating cream to cover the cake.
For the filling, I would recommend lighter cream-based creams, this or. These are ideal options. For the layer, you need 600 grams of cream. I didn't have cream on hand, so in the layer the same one with it is also tasty, but more fatty. Thus, for the whole cake, we need about 1 kg of cream.
Here's what kind of cake I got. I made the strokes on top with the same cream, staining it with gel dyes of red and turquoise colors.
And this is a cut. Wet cakes of obscene red color, snow-white cream and berry filling. This cake will not leave anyone indifferent.
If you are looking for a substitute for the fatty version of Red Velvet in vegetable oil, then this is the perfect recipe for you.
Be sure to try this cake. I'm sure you will like it.
Bon Appetit.
Devil's Food, Red Velvet, Red Cake, American Bliss are all names for the awesome Red Velvet cake that has become very popular lately. It would seem - what is it about him? Plain loose biscuits with red chemical dye and white cream. But no - it's not that simple at all!
The main secret of this divine delicacy is that after a piece of velvet red biscuit with amazingly tender cheese cream melts in your mouth, a chocolate aftertaste appears!
Surprisingly, you can expect any taste (strawberry, cherry, raspberry, etc.) from a bright red unusually porous sweet madness, but just not the taste of chocolate masked by this color!
There is nothing difficult in making this amazing cake. Some people simply put the ingredients in one bowl for the dough and in the second bowl for the cream, and without bothering for a long time, immediately whisk all the ingredients in bowls in one go.
You can do this, but when mixing and whipping of all the components occurs sequentially, the dough manages to get the required amount of air and the cakes are much more porous and tender. And the cream becomes more airy.

For the test we need:
- Flour - 320 gr.
- Sunflower oil - 200 ml.
- Sugar - 300 gr.
- Kefir 3.2% - 250 ml.
- Butter - 115 gr.
- Chicken egg - 2 pcs.
- Cocoa powder - 20 gr.
- AmeriColor Super Red Gel Red Food Color - 2 tsp.
- Vanilla extract - 2 tsp
- Wine vinegar - 1 tsp
- Baking powder - 5 gr.
- Soda, salt - 4 g each.
For the cream:
- Cream cheese - 400 gr.
- Cream 33% - 250 ml.
- Powdered sugar - 150 gr.
- Vanilla extract - 2 tsp
A prerequisite for achieving the desired result is the use of all ingredients at room temperature!
Dough preparation

1. To get the most tender cakes, when making a dough, it is very important to sift all bulk ingredients through a sieve. It is not necessary to sift each component separately. It is enough to set a fine sieve on a deep bowl and pour everything that is necessary to obtain a flour mixture in succession into it. Since we have the most flour, we should pour it out first.

2. Pour very high quality aromatic cocoa powder on top. It will depend on its rich taste whether we will be able to achieve a delicate chocolate aftertaste or not.

The ideal option would be to use alkalized cocoa powder, which gives the maximum flavor to the chocolate. Otherwise, you can increase the amount of cocoa by 5 grams. or use the chocolate flavoring.
3. To make the dough loose, add baking soda mixed with baking powder. It is not necessary to extinguish the soda in advance. Baking powder alone will not be enough, therefore it is advisable to immediately combine it with the second soda powder "lifting" the dough.

4. Thoroughly sift the resulting set of bulk products into a bowl and carefully move with a whisk to make the mass more homogeneous.

5. Put butter melted to room temperature in a second deep bowl. In order for it to be further mixed well, it is better to cut it into equal pieces in advance.

6. Add granulated sugar to the butter, trying to distribute it evenly over the oily pieces, so that later they mix better.

7. To obtain a homogeneous sugar-oil consistency, it is best to use a mixer - this will speed up the process of combining such dissimilar products and will allow you to slightly strain your hand while stirring.

8. When the butter and sugar are well combined, first introduce one egg and beat it thoroughly with them. And then pour in the second egg and also achieve uniform mixing of the entire mass.

Since the butter is quite fat, it is the successive whipping that allows all the components to mix evenly.
9. With constant whisk, pour in the wine vinegar. Subsequently, it will interact with soda in the dough and will allow you to achieve double splendor of the cakes.

10. Next, send the vanilla essence. It will add a light vanilla flavor to the dough and hide the flavors of baking soda, baking powder, vinegar and oils.

11. Pour sunflower oil into the mixture whipped with a mixer.

12. As soon as the sunflower oil is mixed with the previous ingredients until smooth, add kefir in a thin stream with constant stirring and continue to beat for about two minutes.

13. The next important step in preparing a tender dough for biscuit cakes is to gradually add flour to the liquid part of the dough. This should really be done in parts, so that flour lumps that we do not need form do not form, and the mixing proceeds evenly.

14. When we get a homogeneous thick creamy consistency with a slightly chocolate tint, you can pour in food red coloring and use a mixer to distribute it throughout the dough.

15. The result will be a very beautiful smooth bright red shiny elastic mass, which can be set aside for a couple of minutes.

16. Since the dough already contains enough oils, it will not stick or burn in the baking dish. Therefore, you can not make French shirts and even put the bottoms of the split molds, but simply put the two split ring parts of the molds directly on the silicone mats. If you are afraid of such an experiment, then still use the entire form as a whole (with a bottom). Divide the dough evenly into two 20-centimeter tins.

17. Next, it is imperative to preheat the oven to 160-170 degrees, and only then set to bake, so that all the loosening components under the influence of temperature begin to react and the cakes become air-porous in the process. Bake for about 30 minutes (depending on oven).
We check whether the cakes are ready in the most usual way - we pierce with a toothpick and, if there are no traces of dough on it, they are completely ready. If not, then they should be left in the oven for another 5 minutes and check the readiness in the same way again. Allow to cool directly in the molds on the table.
Ready-made cakes tend to spring well if you press lightly on them. To maintain this elasticity, they can be removed from the molds and wrapped in cling film, and then put away for cooling in the refrigerator on the middle shelf for four hours (but this is not necessary).
You can immediately, after cooling down, start preparing the cream and decorating the cakes.
Cream preparation
Cream plays an equally important role in the taste of the cake. Much depends on its choice and preparation: the saturation of the cakes, the flavor combination of the dough and the creamy layer, the aftertaste and tenderness of the delicacy in the mouth, etc.
For Red Velvet, a cream based on soft cheese and cream is ideal. On the basis of these ingredients, not only a delicate layer is obtained, but also an excellent final "coating".

To prevent the cream from flaking and cracking, it is best to use powdered sugar instead of regular sugar. And just like with the dough, it is better to beat all the ingredients separately, and then combine them.
1. Delicate cream cheese must be put into a deep bowl and beat well with a mixer. Mascarpone, Ricotta, Philadelphia, and even any creamy curd cheese will do.

2. Then add powdered sugar into the cheese mass and beat again with a mixer so that the powder is evenly distributed in the cheese.

3. To eliminate the cheese flavor and add vanilla tenderness to the cream, it is advisable to add vanilla essence.

If you wish, you can add food coloring to the cream at this moment, but in the classic version of “Red Velvet” it should remain white.
4. Beat the ingredients well until a paste.
5. Pour heavy cream into a separate deep bowl. The fatter they are, the thicker and richer the cream will turn out.

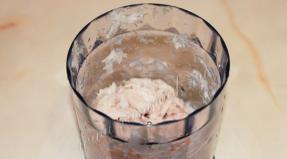
6. Whip the cream until large, non-falling peaks appear. Ideally, the whipping cream should thicken and look like it has just been squeezed out of a factory can.

7. Gently add whipped cream in small portions to the cheese mass, stirring with a silicone spatula.

8. The result should be a very thick cream, similar in consistency to a very fatty thick village sour cream, in which there is a "spoon".
We collect the cake
So, the cakes are baked, the cream is prepared. Now you need to combine them so that you get a gorgeous cake that guests will remember for a long time.

1. When baking, the top of each cake may turn out to be slightly uneven, and when assembling, instead of a beautiful cake, an incomprehensible angular pyramid or, even worse, a "rolled tower" may turn out.
That is why it is advisable to carefully cut this unevenness with a knife. You should get a voluminous, even biscuit. If the cake turns out to be quite high, you can cut it in half, then in the finished incomparable delicacy you will get twice as many layers sandwiched with cream.

2. Place the first sponge cake on a stand or a beautiful dish on which we will then serve the cake. In a thick layer, evenly apply a good thick layer of cream so that it even slightly extends beyond the edges of the cake, so that later it would be easier to smear it on the sides.

Under the edges of the crust, you can lay strips of baking parchment, which will serve as a kind of protection against soiling the dish with cream and crumbs. When the assembly of the cake is completely completed, the parchment can simply be carefully removed and it will be clean around the sweet masterpiece.
3. Put the second cake on top and lightly press it down with your hands so that a tighter fit appears, the cream was able to penetrate into the pores of the cake layers and some of it smeared the edges of the red biscuits.

4. Spread a layer of excellent thick cream evenly on top of the second biscuit base. It must be at least half a centimeter thick. Excess cream can be immediately applied with a spatula to the sides of the collected layers of the cake.

5. Gradually apply all the remaining cream on the sides and carefully align so that the cake is coated on all sides with the same thickness. Ideally, a creamy final coat should be about one centimeter thick.
6. It is necessary to send the assembled composition to the refrigerator for several hours so that the cream hardens and becomes resistant to touch. If fingerprints remain, it is better to let the cake cool down.
Video on how to make a cake at home
And here is a video in which you can clearly see everything. Here are all the stages of preparation and preparation. And if something remains incomprehensible after reading, then in the video you can fill in the missing elements. We prepared it specifically for today's article.
There is one little joint in the video. We wanted to show what the cake was like from the inside and cut it right after assembly, and the cream “floated” a little. Do not do this under any circumstances. Let the dessert sit in the refrigerator for at least 6 hours, or even more.
Firstly, it will harden well, and secondly, excess moisture will be absorbed into the cakes, due to which they will be soaked and even more tasty.
For the rest, feel free to start cooking. This recipe has been tested many, many times, and it always works. 100% guaranteed result.
How to decorate a cake
You can decorate "Red Velvet" by relying on your own imagination. You don't even need to smear the sides of the cake, just applying curly creamy "lines", sprinkling with chocolate or nut crumbs, or creating a fruit and berry "meadow".
In the classic version, the cut parts of the cakes are used for sprinkling.
To do this, the cuttings are crushed and sent to dry on a baking sheet in an oven heated to 200 degrees to make beautiful bright red crackers. So that the pieces do not burn and their color does not deteriorate, they must be periodically mixed or turned over - it all depends on the quality of grinding.
After the oven, it is necessary to let the biscuit crackers cool down to at least room temperature and grind them to the state of crumbs with a blender attachment, or roll them with a rolling pin to get something similar in consistency to crushed shortbread cookies.

As a result, it will turn out just like that, and at the same time a beautifully decorated cake:
Alternatively, you can evenly coat the entire top of the cake with the sides with red crumbs. Moreover, fluffiness, velvety and even distribution of the crumb can be achieved with a soft brush, which can be used to remove and redistribute the loose layer.
For example, the following options for decorating a cake can be cited:
Option number 1 - sprinkle with chopped nuts on top of the cream

Option number 2 - make "roses" with a cream and lay out the berries in the center, which are sprinkled with powdered sugar for heightened effect.

Option number 3 - apply curly cream on the sides, sprinkle the top with biscuit crumbs and put berries on it

Option number 4 - cut identical Victoria berries and put them on top in a circle, and for showiness pour white chocolate on each berry or apply thin stripes from the remains of the cream.

Option number 5 - do not distribute the top cream layer evenly, but give it the shape of a bouquet of roses.

Option number 6 - sprinkle the bottom of the cake with crumbs, and on top make cream "peaks" and decorate with berries.

Option number 7 - sprinkle with plenty of crumbs and decorate with hearts or any other chocolate figurines

Option number 8 - a cake covered with smooth shiny red glaze will look very original:

Option number 9 - fill the cake with glossy glaze, combining two color options

Such a beautiful bright glaze color can be achieved by adding the same gel red food coloring:

In general, cake decorating is an expression of the individuality of each person. So don't be afraid to experiment and express your ideas on the surface of the cake! We can only wish you some culinary inspiration!
Video on how to make the Red Velvet cake according to the original recipe
There are a lot of options for making "Red Velvet"! They also combine red cakes with white ones, and various creams have already been tried by many chefs.
I would like to wish you from the bottom of my heart that according to the above classic recipe you get such a delicious cake that not only guests, but also you and your household will fall in love with this red sweet delicacy with a chocolate hint and the dessert will become your signature dish for all the following holidays!
Bon appetit and success in dessert art!
Hello friends, today we will again talk about culinary masterpieces. It will be about the different ways of making a delicious cake called "Red Velvet". I think many have tried it, today we will cook dessert ourselves in our kitchen.
"Red Velvet" - a classic recipe at home
According to this recipe, the cake is tender, juicy. Ease of preparation is available even for novice housewives.
Ingredients for the dough:
- 170 g flour.
- 1-2 eggs (depending on the size of the eggs).
- 150 g Sahara.
- 125 gr. sunflower oil.
- 150 ml. drinking yogurt or kefir.
- 1 tsp soda.
- ½ tbsp. l. cocoa.
- ¼ h. L. salt.
- ½ tsp lemon juice.
- 1 tsp food gel red dye.
- ¼ h. L. vanillin.
For the cream:
- 140 gr. creamy curd cheese.
- 140 gr. butter.
- 100 g powdered sugar.
- Vanilla.
Let's start cooking.

Here we have such a delicate, velvety, soft cake melting in the mouth. The recipe, as you can see, is simple to prepare at home. Bon Appetit.
Red velvet - the original cake recipe step by step

The recipe is a bit unusual, but you will love the result. I'm sure. It is prepared according to the basic recipe with some changes and step by step photos. The taste and appearance are amazing.
Ingredients for the dough:
- Flour - 365 gr.
- Sugar - 395g.
- Milk - 250g.
- Cocoa - 10 gr.
- Butter - 220g.
- Eggs - 2 pcs.
- Baking powder - 10 gr.
- Vanillin.
- Food red dye.
Ingredients for the cream:
- Half lemon
- 3 tbsp. l. Sahara.
- Curd cheese - 340 gr.
- Cream - 200 gr.
- Powdered sugar - 100 gr.
- Cherry juice for soaking.
Let's start cooking.

Here we have such an unusual cake "Red Velvet". I hope you enjoyed it.
Cake "Red Velvet" - we cook at home according to the video recipe

The recipe is close to the traditional one, but with some differences. I describe all the steps in detail, available to everyone. For those who do not like to cook from the book, I will post a step-by-step video. You will definitely get a delicious dessert.
Ingredients for the crust for 3 pieces:
- Flour of the highest grade - 475 gr.
- Sugar - 435 gr.
- Butter - 155 gr.
- Refined vegetable oil - 75 gr.
- Buttermilk (kefir) - 365 gr.
- Egg - 3 pcs.
- Cocoa powder - 25 gr.
- Vanilla essence - 10 gr.
- Baking powder - 10 gr.
- Soda - 4 gr.
- Salt - 2 gr.
- Food coloring - 10 gr.
For the cream:
- Philadelphia cheese - 355 gr.
- Cream 33% - 410 gr.
- Powdered sugar - 145 gr.
- Vanilla sugar - 10 gr.
We have prepared all the components, let's start cooking.
- Sift flour, combine it with cocoa powder, baking powder, soda and salt, mix.
- Mix buttermilk with dye, stir.
- Combine the softened butter with half a portion of sugar, mix with a mixer for 1 minute. Put sunflower oil, vanilla, the second portion of sugar into the mixture and mix well. Break the eggs there, they should lie warm, beat until fluffy.
- Add liquid and dry components in three steps, alternating until we mix everything.
- Line the bottom of the mold with baking paper. We distribute the third part of the test according to the form. We put in an oven heated to 180 degrees for 30-35 minutes. Leave the finished cake to cool on the table for 15 minutes. Then remove and cool to the end on the wire rack. We also bake two more cakes. Cut off the tops of the cooled cakes.
- Let's prepare the cream. Mash the butter cream to a uniform consistency.
- Beat the chilled cream with a mixer until airy peaks. Add cream cheese to the cream in two steps, mixing thoroughly. Do not stir for too long, or the cream will separate into its constituents.
- All is left to assemble the cake. We coat the bottom cake with a layer of cream, put the second and third on top. Cover the cake with cream on all sides.
- We make small crumbs from the cut tops and decorate our dessert with it. We send it to the refrigerator for 3-4 hours.
Here we have such a soft, delicate dessert. Bon Appetit.

The recipe for a favorite cake in a new interpretation, I think everyone will like it. It turns out to be surprisingly light, covered with a mirror glaze.
Cranberry Confit Ingredients:
- 355 gr. cranberries.
- 15 gr. gelatin + 60 ml. water.
- 120 g Sahara.
- 12 gr. potato starch
Ingredients for Cream Cheese Mousse:
- 10 gr. gelatin + 60 gr. water.
- 255 g cream cheese.
- 110 g Sahara.
Mirror glaze composition:
- 12gr. gelatin + 70 gr. water.
- 150 g Sahara.
- 75 gr. water.
- 160 g glucose syrup.
- 160 g white chocolate.
- 90 gr. condensed milk.
- Titanium dioxide / colorant.
Ingredients for the biscuit:
- 340 g flour.
- 310 gr. Sahara.
- 160 g butter.
- 140 ml. sunflower oil.
- 275 ml buttermilk can be kefir.
- 3 eggs.
- Vanilla.
- 2 tsp red gel dye.
- 1 tbsp. l cocoa.
- 1 tsp baking powder.
- 1 tsp soda.
- 1/4 tsp salt.
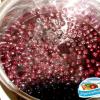
First, let's prepare cranberry confit

While the confit is solidifying, prepare a biscuit.

All the basics have been prepared, let's start making the mousse

We will collect the cake in an unusual way, upside down.

Now let's prepare the mirror glaze.

The cutaway cake looks great. I hope you will definitely try that recipe and share your impressions in the comments.

"Red Velvet" without dye

Tell me it's impossible to make this cake without red dye, you can still do it. Today I will share my secret of making a cake with beets.
- Walnuts - 20 gr.
- Curd cheese - 100 gr.
- Honey - 3 tbsp. l.
- Flour - 40 gr.
- Soda - 1/3 tsp.
- Olive oil - 20 ml.
- Cognac - 10 ml.
- Yogurt - 50 ml.
- Orange - 1 pc.
- Coffee - 20 ml.
- Egg - 1 pc.
- Ginger - 1/3 tsp
- Beets - 180 gr.
Let's start cooking:
- Wash the beets, dry them, wrap them in foil and bake them in the oven for about 50 minutes. Add a little water to a container with beets. When it's baked, peel and grind with a blender.
- Separate the white and yolk. Salt the protein and refrigerate. Put the yolk in the beets. Grate the ginger and orange peel there. Squeeze 2 tbsp. tablespoons of juice from it, pour into the beets.
- Add olive oil, flour, and dry foods other than baking soda. Mix everything well. Add honey and sugar.
- Quench the baking soda with orange juice, add to the dough. Pour in the remaining juice.
- Whisk the cooled proteins until fluffy, mix with the mass. Pour the dough into a mold.
- Bake at 190 degrees for about 50 minutes, check for readiness after 30 minutes. You can turn it off earlier. Put the finished cake on a plate to cool.
- For the cream, mix the cheese with yogurt, sugar and vanilla. Mix everything until smooth, add a little orange zest.
- For impregnation, mix coffee with cognac, soak our cake.
- Spread over the crust and cut it in half.
- Lightly fry the nuts in a pan, put some of them on one half of the crust, cover the second on top. Cut in half again. Sprinkle nuts over one part and cover with the other. Coat the top with cream and refrigerate for an hour.
You have a great cake with four layers. An unexpected twist, isn't it? If you want a full-fledged Red Velvet cake with beets, increase the ingredients.
On this I say goodbye to you. Like it, share with your friends, subscribe to the blog. Good mood everyone, bye.