How to make a two-tier cake from the finished cakes. Strengthening a multi-tiered cake
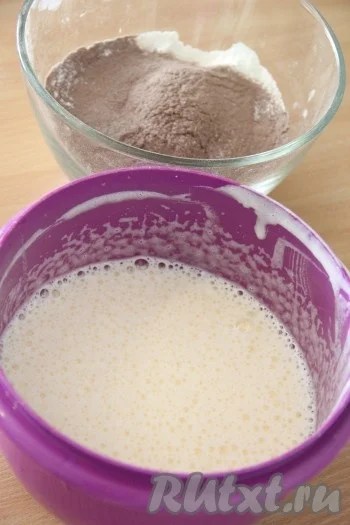
For the preparation of white biscuit for the first tier: separate the yolks from proteins.

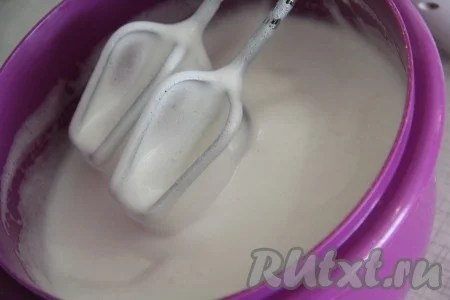
Protein shake with a mixer in a lush foam. Then gradually add sugar, without stopping to beat for 5 minutes. The mass will turn white and increase in volume.
 Then add the yolks, one at a time, continuing to beat. The mass should be homogeneous and very airy.
 Pour the liquid mass into the flour and mix gently with a silicone spatula. The dough should be homogeneous and airy.
 Lightly grease the form with vegetable oil. Put the dough into the form. Put in a preheated oven and bake at 200 degrees for about 35 minutes. Readiness to check with a dry toothpick. The first 20 minutes it is better not to open the oven door, otherwise the biscuit may fall off. Cool the prepared sponge cake in the mold and then cool it completely on the grid.

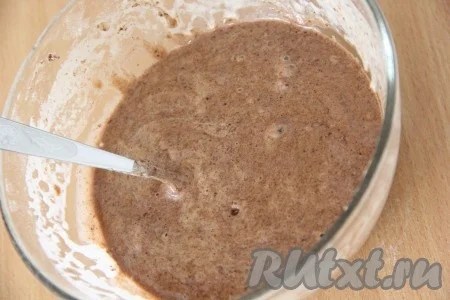
Then make a chocolate sponge cake for the second tier of the cake. Sift flour with cocoa. Separate the whites from the yolks. Beat the whites in the foam, then gradually add sugar and beat for 5 minutes. Then add the yolks one at a time and beat again until smooth.
 Pour the liquid mass into the flour and gently mix with a silicone spatula until smooth.
 Lightly grease the form with vegetable oil, put the dough into a mold and smooth it. Put the dough into the preheated oven and bake at 200 degrees for about 25-30 minutes. Readiness to check with a dry toothpick. Ready the cake to cool slightly in the form, and then completely cool on the grill.
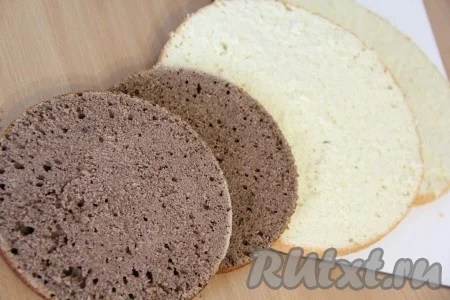
 When the cake cakes have cooled completely, cut each cake in two. Soak the cakes with any syrup (I added liqueur in 500 ml of coffee, mixed well and soaked the cakes).
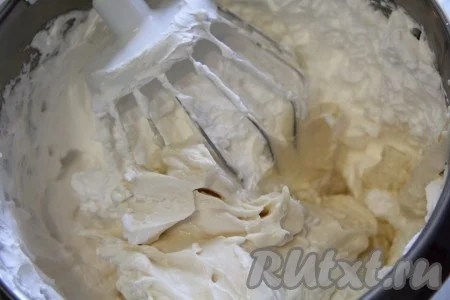
 Prepare the cream for our homemade bunk cake: combine the cream cheese with powdered sugar and mix using a mixer. It is not necessary to beat for a long time, we only need to combine cream cheese and powder into a homogeneous mass.
 Cool cream well and then beat until resistant peaks. I use cream on vegetable oils.
 Add cream cream cheese to cream and mix until smooth.
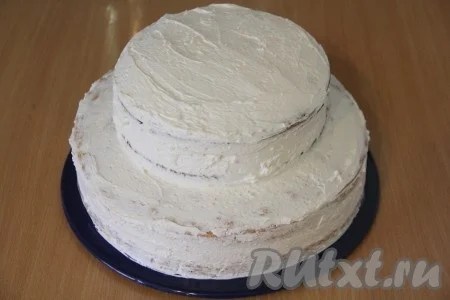
To assemble a two-tiered cake: put the cake on a flat plate or stand and smear it with cream.
 Put the second cake on top of the cream and press lightly. Smear cream sides.
 Grease the center of the white cake with cream and put the chocolate cake on top. Well grease the cake with cream.
 Put the second chocolate cake and press lightly. Coat the top and sides of the cake with cream. As such, put the cake in the fridge for the night.
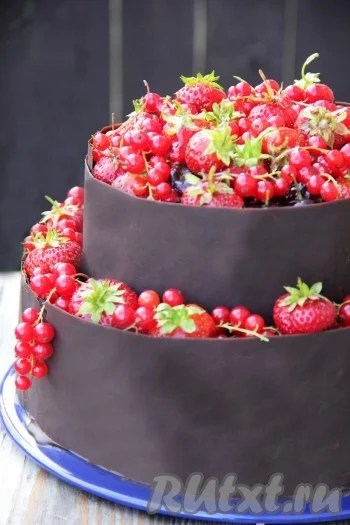
 Ready baked cake cooked at home, decorate as desired. I surrounded the sides of the cake with a chocolate side. To do this, melt the chocolate in a water bath. From parchment paper cut strips, determine the width and height of the rim on your cake. Put the chocolate on the parchment and attach to the sides of the cake. Put the cake in the fridge for 10-15 minutes, so that the chocolate froze. And then carefully remove the parchment. I made chocolate bumpers just above the cakes, and I put fresh berries in the resulting niches. Here is a cake turned out. Unfortunately, there is no slice in the cut, since on the festive table they immediately ate the whole cake, leaving not a slice in the morning.
 Have a nice tea party!
For those who are not afraid of difficulties and like to spend time in the kitchen, we offer to prepare an elegant and interesting two-tiered cake with their own hands in the form of a winter hut. The dessert consists of standard biscuits: the bottom with cream and sour cream and peanuts, the top with a delicate and pleasant cherry mousse. The finished product is covered with protein cream and is made in accordance with the Christmas theme.
For convenience, we recommend dividing the cake formation for several days, for example, pre-bake biscuits, and only then engage in the assembly of tiers and design. The cake, of course, is not the fastest in preparation, but the result is worth the effort! The guests from your culinary skills will be in complete delight, and how happy the children will be delighted with such a sweet surprise! Let's make together a winter fairy tale with your own hands!
Ingredients: 
Lower sponge cake (form 26 cm):
- eggs - 8 pcs .;
- sugar - 240 g;
- flour - 160 g;
- starch - 50 g;
- butter - 50 g;
- baking powder dough - 1.5 tsp;
- vanilla sugar - 2 tsp.
Top sponge cake (16 cm shape):
- eggs - 2 pcs .;
- sugar - 60 g;
- flour - 40 g;
- starch - 10 g;
- butter - 10 g;
- baking powder dough - ½ tsp;
- vanilla sugar - 1 tsp.
Biscuit impregnation:
- sugar - 90 g;
- water (boiling water) - 300 ml;
- cognac - 1-2 tbsp. spoons.
Biscuit Cream:
- sour cream 20% - 200 g;
- whipping cream 33-35% - 200 ml;
- sugar - 120 g;
- peanuts - 100 g
Top Biscuit Mousse:
- cream 33-35% - 150 ml;
- frozen cherries - 150 g;
- cream cheese - 130 g;
- sugar - 80 g;
- powder gelatin - 5 g;
- water (to dissolve gelatin) - 30 ml.
- egg whites - 4 pcs .;
- sugar - 200 g;
- vanillin - a pinch;
- butter - 320 g
Protein cream for decor:
- egg whites - 3 pcs .;
- water - 75 g;
- sugar - 150 g;
- salt - a pinch;
- citric acid - a pinch.
Registration:
For windows:
- dark chocolate - 40 g;
- butter - 10 g;
- marmalade;
- sweet straws
For Christmas trees:
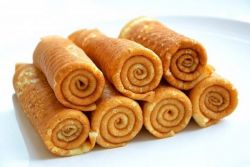
- waffle cones for ice cream - 2 pcs .;
- butter - 100 g;
- condensed milk - 4 tbsp. spoons;
- food coloring (green).
Bunk cake do it yourself recipe with photo
How to make a sponge cake for a two-tiered cake
- Cooking bottom biscuit. Squirrels are very carefully separated from the egg yolks, placed in a deep, clean and dry bowl. Beat with a mixer, gradually pouring half a serving of sugar. We work to obtain “strong peaks” (that is, to obtain a dense mass that remains stationary when tilting / turning the bowl).

- Separately, together with the second part of granulated sugar and flavored vanilla sugar, beat the yolks. We work as a mixer for at least 5 minutes. The mass should lighten, noticeably thicken and increase by 2-3 times.

- Gradually interfere with the yolks to the squirrels with gentle upward movements. Flour combined with starch and baking powder, sift into the egg mixture in parts, carefully mixing each time. Our task is not to besiege the fluffy mass, so we work very carefully! You should not mix the tender biscuit dough in a circle, only from the bottom up!

- We melt the butter, cool it and pour it along the edge of the bowl on a homogeneous dough. Mix for long.

- The bottom of the form with a diameter of 26 cm is laid with a circle of parchment, we do not grease the walls. Fill the container with biscuit dough and send it to the preheated oven. We bake at 180 degrees to the "dry match".

- We turn over the form with the freshly baked biscuit and put on two piala or on the lattice. In this form, leave baking until cool. This step will help to avoid settling the top of the biscuit.

- We prepare the upper biscuit similarly to the lower one, but this time we take the form with a diameter of 16 cm.

How to make mousse for the upper tier
- Prepare cherry mousse as a filling for the upper biscuit. To do this, pour the cherries without preliminary defrosting with sugar, put on a slow fire. Stirring, warming up for about 5 minutes (until complete dissolution of sugar and softening of the berries).

- Cool the cherry mass, and then turn into a "puree" using a blender. Thoroughly fray through a fine sieve. All the resulting juice will be used to prepare the mousse (small pieces of cherry remaining on the sieve are not used).

- Beat cold cream until compacted. Add cream cheese at room temperature and cherry juice. Stir until a homogeneous, evenly colored mass.

- The upper biscuit is removed from the mold (we first pass a knife along the sides of the container). Cut the pastries into two cakes. We wash the form, rub it dry, lay the bottom and walls with parchment. We lower the lower cake into the prepared container, pour it with impregnation (to prepare it, dissolve the sugar in boiling water, cool it, add cognac).

- Gelatin pour cold, pre-boiled water. Let the mass swell.

- Place the bowl with the swollen gelatin in a bowl of hot water. Constantly stir until the powder is dissolved.

- We enter gelatinous solution into creamy-cherry cream with continuous beating with a mixer. We spread the mass on the lower cake, leveled. We remove the container in the fridge until the mousse solidifies.

How to make a cream for the lower tier
- While the mousse is frozen, prepare the lower tier of the cake. Cream whipped with sugar until thick. Add sour cream, beat a few seconds (before combining the components into a single cream).

- Fry the peanuts in a dry frying pan, stirring. As soon as the skin begins to crack, remove from heat, cool. After removing the husk, grind the peanuts with a blender.

- Biscuit divide by 3 Korzh. We pour the lower one by impregnation and then grease with half the creamy sour cream. On top, distribute half the peanuts.

- Cover the base of the cake with the second cake, soak it, apply the rest of the cream. Sprinkle with the second half of peanuts. We pour the last cake with impregnation and spread it on top. The top and sides of the workpiece while not promazvaem.

- The second cake for the upper biscuit soaked and spread on the frozen mousse. And the upper and lower tier for the cake is removed in the refrigerator.

How to make oil-protein cream to cover the cake
- Squirrels mix with sugar, put the bowl in the "water bath". Actively and continuously stir the mixture with a whisk, warm the mass on low heat until the sugar dissolves. To check readiness, we take a small portion of proteins and grind between the thumb and forefinger. If the grains are not felt, remove the container from the plate. It is important not to overheat the squirrels, otherwise they may collapse! The bottom of the bowl of proteins should not touch the water in the lower container.

- To the squirrels that have just been removed from the heat, we add vanillin for the aroma and immediately start beating the mass. Gradually, proteins will thicken. We work as a mixer until the formation of "soft peaks". To achieve a very strong and stable mass, as in the manufacture of biscuits, is not necessary. As soon as the cream will remain clear divorces from the mixer, stop.

- The softened butter is loaded in small pieces to the protein mass, constantly working with a mixer. As a result, we get a fairly dense oil cream.

- We take out the bottom of the fridge from the refrigerator. We coat with oil and protein cream the top and sides, level.

- So that the lower tier does not collapse under the weight of the upper one, we strengthen our "construction". We take wooden skewers, cut off the height of the lower tier and stick it in the biscuit to the place where the upper tier will be (according to our idea it will stand on the edge of the lower biscuit).

- The upper tier is placed on the substrate for the cake, suitable for the diameter. Coat with butter cream, smooth. Together with the substrate placed on the prepared lower tier.

How to make a bunk cake do it yourself
- To make our cake look like a hut, we cut and remove the triangular segment from the lower tier. Apply the butter cream to the cut, and then fasten the straw to imitate wooden planks. The upper tier is also slightly trimmed, lubricated with cream and complemented with straws.

- For the manufacture of "windows" on a sugar-sprinkled kitchen board, roll out the marmalade. Cut out square billets of suitable size. Sugar is needed so that the marmalade pieces do not stick to the working surface.

- We melt chocolate with butter in a “water bath”, cool it and transfer it to the cornet. Apply a small portion of the chocolate mass on the straw and pieces of marmalade, fasten the "windows" to the "house". The contour of the "windows" is also circled with chocolate.

How to make protein cream for decorating a two-tier cake
- To make our two-tier cake look even more like a snow-covered hut, we will cut it with protein cream. Boil the syrup - pour the sugar with water, bring to a boil. Heat the syrup to 118 degrees.

- In parallel, beat the proteins with citric acid and a pinch of salt to strong peaks (when turning the bowl, the proteins should firmly "sit" in place).

- Without ceasing to work as a mixer, pour a thin stream of hot syrup to the protein mass. Whip the cream continuously until it cools to room temperature (about 10 minutes).

How to decorate a two-tier cake with your own hands
- We coat the tiers of the cake with white protein cream, around the “windows” we make whirlwinds to imitate icicles.

- At will we decorate the cake with figures. To make a snowman we make 2-3 marmalade balls of 2-3 different sizes, put them on the free edge of the lower tier. We coat the figure with protein cream. “Carrots”, “cap” and “buttons” are formed again from marmalade, “eyes” are drawn with chocolate, “hands” are made from pieces of straw. "Fir-trees" we prepare from horns and butter cream with dye (the detailed technology is described in the recipe
Table decoration is definitely a cake. Three-tiered at the same time looks like the real king of the feast, whether it be a celebration of a wedding, birthday, anniversary or any other date.
Even the most eminent confectioners of the worlds consider such baking to be the pinnacle of culinary art. What can we say, a three-tiered cake is not an easy job. But believe me, he is capable of "mere mortals." The main thing is to be patient, set yourself to do everything neatly and learn a couple of tricks. That's about them, and will be discussed.
Other people's mistakes are the best educational material.
If it seems to you that to prepare a three-tiered cake, it is enough to stack three cakes of different diameters in descending order, then rather quit this venture! Otherwise, just spend time and translate products. Acting at random is not worth it.
What happens if you do not comply with the technology? The most common side effect is the deformation of the bottom cake that did not withstand the pressure of the top cake. It can simply fall apart or swim in one direction. Due to the deformation, the upper cakes will skew, and perhaps even collapse. Effective, isn't it? To avoid such embarrassment in the middle of the banquet, it is worth paying attention to the theory.
The method of forming a three-tiered cake with your own hands
How to avoid the collapse of plans, cakes and hopes? We use the trick that will strengthen the design. And for her, we will need bamboo skewers and cocktail tubules.

Find the center of each cake, note. At the second end, we measure the radius and set aside the same distance from the center of the bottom cake. Make the markup and carefully place the second tier at the first. The markup will help avoid skewing. Following the same principle, we put the top cake on our cake.
Working with squares is even easier. And cakes of an unusual shape (hearts, for example) are also unlikely to cause difficulties for those who understand the principle of how to make a three-tiered cake.
And now the fun part. In the center of the cake we make a puncture with the help of a skewer, we pierce all three cake layers. Slightly stir the hole to crawl through it. We insert the straw, pour the melted chocolate inside (it is convenient to do this from a syringe), immerse the skewer in it. In the same way we make several more bearing axes around the middle one. They will not let the cake fall to the side.
It is logical to assume that the easier the middle and upper tiers will be, the less problems will be with sustainability. Choose for the lower cake dough "heavier." For example, you can take a brownie as a basis - a very tasty and beautiful recipe. Not bad for the basics and recipe for honey cakes.

For the second and third tiers, light biscuit or puff pastry is ideal, as in Napoleon. Light Raffaello coconut cakes will also not weigh down the structure and give an unforgettable flavor to the taste.
Cooking Souffle and Jelly
The top of the cake can generally be made not from dough, but from a souffle. Any recipe for desserts will do. Shake up 10 cooled proteins, adding sugar in stages (1 tbsp.). At the very end, add 0.5 tsp. citric acid. Next, dissolve 10 g of gelatin in 100 ml of water. When the gelatin swells, pour the mass in a thin stream into the whites, stir with a spoon and place in the form. Souffle will harden for at least 12 hours.
An excellent option would be the jelly tier. To prepare it, add 1/3 less soluble water than the manufacturer recommends.
Cream cake
Before you begin, think about how your three-tier cake will look like. Perhaps it is worth tightening the cake in the paste before the pyramid starts to gather? Or maybe no mastic is planned at all and you will want to grease the already prepared cake with cream?

Try to make a layer of cream between tiers. Yes, and the cakes themselves can be divided in advance along and soak them well.
Avoid too liquid creams. If you are at a loss with a choice, prepare a win-win option: heat 200 grams of oil to room temperature, beat at low rpm to fluffiness, add 250 g of boiled condensed milk, continuing to beat. Before starting work, keep the cream in the refrigerator for at least 20 minutes.
This cream not only does not flow, but also keeps its shape. And thanks to the viscous consistency of condensed milk it sticks together the cakes among themselves, providing additional strength.
Auxiliary substances, fillers, decor
Are you afraid that your three-tier cake is not strong enough? Use another trick. Dissolve steep berry jelly by adding no more than one third of the recommended amount of water to the pack. Spread the cakes like glue and mix them together.
Unleash the imagination, if you are preparing children's three-tiered cakes. The photos demonstrate that they can be decorated in the form of a fairytale castle or decorated with the characters of your favorite children's fairy tales.


Alternative ways: unusual dishes
If you really want to cook a stunning dessert, but you are afraid that the task will be overwhelming, use the easier way. Who said that a three-tiered cake must necessarily be monolithic? Fold the cakes on the tiers of a special serving dish, as shown in the photo.

Such a dessert will look no less impressive, especially if you arrange baked goods in the same style.
Cooking a delicious cake is a responsible task for every hostess. And if the cake is baked for the holiday, it still needs to be given a beautiful design. Prepare for the celebration of a beautiful two-tier cake, decorated with mastic and roses from it. This will surely conquer all the gathered guests.

Ingredients:
For the upper tier (honey cake with prunes and sour cream):
- flour - 3 glasses;
- egg - 2 pcs .;
- sugar - 1 cup;
- honey - 2 tbsp. spoons;
- butter (can be replaced with margarine) - 100 gr .;
- soda - 2 tsp;
- Vinegar - for slaking soda.
For cream:
- sour cream (fat content of 15-20%) - 400 gr .;
- sugar - ½ cup.
For filling:
- prunes - 250 gr.

For the lower tier (chocolate sponge cake with cherries and butter cream):
Ingredients are indicated for one biscuit (it is necessary to prepare two biscuits for the cake in order to give the cake the necessary height).
- flour - 80 gr .;
- egg - 4 pcs .;
- sugar - 150 g .;
- baking powder - 1 tsp;
- cocoa - 2 tbsp. spoons.
For cream:
- whipping cream - 1 cup;
- icing sugar - 1/2 cup.
For filling:
- Cherry (fresh or frozen) - 500 gr .;
- sugar - 3 tbsp. spoons.
Common ingredients for two cakes:
To level the cakes:
- butter - 400 gr .;
- condensed milk - ½ cans.
For mastic:
To cover the cake:
- marshmallow (white) - 300 g;
- icing sugar - ~ 1.5 cups;
- Butter - 1 tbsp. spoon.
- marshmallow - 400 gr .;
- icing sugar - ~ 2 glasses;
- Butter - 1 1/4 tbsp. spoons;
- food pink dye - at the tip of a knife.
For leaves:
- marshmallow –100 gr .;
- icing sugar - ~ 0.5 cup;
- Butter - 1 teaspoon;
- food green dye - at the tip of a knife.
The diameter of the upper tier of the cake - 15 cm, lower - 22 cm.
How to cook with photos step by step
We will start to prepare our two-tier cake with mastic from the preparation of roses, as they should dry up a little before setting on the cake. 
So, take the marshmallow, separate them by color. White marshmallows leave to cover the cake, and pink will be used to make roses. Put the pink marshmallows in a container, add oil to them. 
Place the container with the listed ingredients in the microwave and heat them up at a power of 600 W for 1 minute until the marshmallows increase in volume. Stir everything with a spoon. 
Add food dye pink (you can and any other of your choice). The dye is used to give a bright color to roses. Mix everything again until the color is uniform. 
Add powdered sugar in small portions and knead until a homogeneous plastic mass is obtained - mastic. 
Roll it on a powdered sugar iced table with a rolling pin into the bed.
In our bunk cake we will use two kinds of roses. One kind of roses will be done by cutting.
So, with the help of special “Rose” cuttings, cut blanks of different sizes. 
Thin a little with the help of a special tool edges of flowers. 
From a small piece of mastic make a cone and chop it on a toothpick. This will be the base of the rose. 
Thread the toothpick with the smallest billet and attach it to the cone using a drop of water. 
Now also, using a drop of water, glue one petal to the cone (wrap around it). 
Next - paste the opposite petal to the already glued petal. 
Then, in the same way, glue all the other petals. 
Similarly, thread the following workpiece in size and glue with a drop of water. Also, glue all the petals to the previous billet. 
Next - paste the next blank. 
And - the last. Leave the rose to dry out. 
So make the necessary number of roses.
To make a second type of rose for a cake with mastic, cut two circles of smaller diameter (I have 4 cm) and five circles of larger diameter (I have 5.5 cm). It will be rose petals.
Thin the edges of the petals. 
Make a cone for a rose and chop it on a toothpick. 
Glue one petal to the cone with a drop of water and wrap it around it, leaving a little free edge. 
Then place another petal on the free edge of the petal and also wrap around the previous petal. Each petal stick to the previous drop of water. 
Next is the next petal. Glue, thus, all the petals. Dry the roses. 
Cook mastic green. Roll out and cut the leaves with a special cut. 
You can also make flagella from green mastic. It is necessary to roll out the mastic in thin strips and wrap them around the pencil. 
Cooking honey cake.
Combine eggs with sugar. Beat them with a mixer or rub with a whisk.
Add softened butter and honey.
Sour soda with vinegar and add to the ingredients.
Shuffle everything. Now you need to make a "water bath". Boil water in a saucepan. Place a container with mixed ingredients on top of the pan (the water in the pan should not reach the bottom of the upper container). Keep the container in the bath for 15 minutes. During this time, the mass in it should increase. Remove the container from the bath and add flour.

Separate small pieces from dough. 
Roll them with a rolling pin. Cover with a plate (lid or form) of the required diameter and cut off the excess dough. 
Put the dough on a baking sheet sprinkled with flour. 
Bake in the oven heated to 180 ° C until golden brown for about 10-15 minutes.
Cool the finished cakes.
To make a cream for honey cake, combine sour cream with sugar.
Whisk with a whisk until sugar is completely dissolved.
Drain the prunes with hot water and leave for half an hour to swell. After that, dry it and cut into small pieces.
Collect the bunk cake. Place the cake on a flat dish. Grease it with cream, not reaching the edges of about 1 cm (this is necessary in order to exclude further contact of the cream with mastic).
Sprinkle with prunes on top. 
Cover the second cake and do the same procedure. So collect the whole cake. Leave it on for at least a few hours so that it becomes saturated.
By the way, instead of sour cream you can use condensed milk, as in ours.

Cooking chocolate sponge cake.
In this cake used two biscuits.
Divide eggs into whites and yolks.
To the yolks, add half the rate of sugar. Beat the yolks with the sugar mixer until the mass is clarified.
Separately, beat whites until soft peaks. After that, while continuing to whip, gradually add the remaining sugar. Beat whites with sugar until hard peaks (when turning the bowl upside down, they should not pour out of it).
Add a third of the whipped whites to the yolks. Stir the mass. Sift to her flour, mixed previously with baking powder and cocoa. Stir with a spatula, lifting the mass from the bottom up.
Add the remaining proteins. Mix everything gently again. 
Spray the baking dish with butter and cover with parchment. Transfer the dough into it and smooth the surface. 
Bake the biscuit for about 30-35 minutes at 180 ° C in a preheated oven. Do not open the oven for the first 20 minutes, otherwise the sponge cake will fall. After the cake is baked, leave it in the oven for about 1 hour. After that, remove and cool on a wire rack.
Biscuit should rest for at least 5-6 hours. After that, cut it lengthwise into 3 cakes. Since we have 2 biscuits, we get only 6 cakes (I did not use one cake because the cake was too high). You can use all the cakes. 
To prepare the impregnation of chocolate sponge cake, combine cherries with sugar.
Put on the fire and boil them for 5 minutes. Cool it down. Strain them through a colander.
Soak up sprinkled juice biscuit cakes. On a soaked cake layer lay out a piece of cherries. 
To make cream for the cake, whip the cream with powdered sugar.
Then grease the cream cake.
Cover the second cake, put the cherries and grease them with cream.
Collect the whole cake. Leave it for a few hours to soak it. 
Mix the softened butter with a mixer.
Then add condensed milk and continue to beat until you get a lush cream. 
Spread both cakes on top and sides of the cream, smoothing out all the irregularities on the cake. The surface under the mastic should be as even as possible, because the mastic does not hide, but on the contrary, shows all the irregularities. 
Cakes put in the fridge for a few hours to cream well. Above, you can re-apply a layer of oil cream, if necessary. Frozen oil cream can be further leveled with a knife. To do this, warm the knife in hot water and wipe it dry. 
Prepare the mastic white, roll it and using a rolling pin, transfer to one tier. Smooth well, cut off excess. 
Also act with the second tier.
Now collect the cake. Since the upper tier of the cake is heavier than the lower, the cake can be further strengthened with wooden skewers. To do this, cut the required length of the cuts, equal to the height of the lower tier, and stick them into the lower tier. (If you have the upper tier of the cake is light, such as a sponge cake, then you do not need to stick skewers). 
From above on the lower tier install the top. The gap between the tiers, close the harness. 
Decorate the two-tier cake with mastic roses, leaves and flagella. 
And also we offer lovers of mastic decorations
Surely many housewives admire the beautiful multi-tiered cakes, and think about how to cook a two-tier cake at home? For some it seems like magic and a work of art, and they are even afraid to try. But, it is not so difficult as it seems, if you know how to cook regular cake layers for cakes, and cream.
Of course, there are some secrets in the preparation of bunk cakes, but they relate not so much to culinary skills, as to the secrets of cake assembly. Often, due to improper assembly, cakes can twist, fall, or even fall to the side. All this can be avoided if you use some simple techniques that experienced confectioners use.
Most often, pastry chefs use two types of cake layers to make bunk cakes. The bottom cake is baked from shortcrust dough, and the top cake is made from biscuit dough. If the bottom cake is biscuit, then the top cake should be lightened, and make it from a light soufflé. However, it happens that you need a cake with both biscuit tiers, and in this case, the cake needs to be strengthened. How to cook a two-tier cake at home from biscuit dough, we consider a little more detail.
Bunk cake do it yourself, recipe with photos
You can cook a two-tier cake with your own hands from ready-made sponge cakes, or bake them with your own hands. Of course, this requires forms of different diameters, and a lot of time. Biscuit dough is better to cook separately for the lower tier and separately for the top, so as not to confuse. After all, when baking biscuit rises strongly, and you need not to pour the dough into one form.
Biscuit dough for the bottom cake:
Lower sponge cake (form 26 cm)
Top sponge cake (form 16 cm)
Cooking a two-tier cake with your own hands
The recipe for making biscuit dough is the same for the top and bottom crust.
Very carefully separate the whites from the yolks in different containers.
Beat begin with proteins, with the smallest revolutions. Gradually add sugar (half of the total), and gradually increase the speed. Squirrels should whip into a strong foam and not pour out when turning the bowl.
Now you can beat the yolks with the remaining sugar and vanilla. When the yolk mass increases substantially in volume and turns white, very carefully pour the yolks to the whites, and mix with a mixer whisk, but do not turn on the mixer itself.
Mix the flour with baking powder and gradually introduce it into the egg mixture, trying not to precipitate the froth.
When the flour is completely mixed with the egg mass and the dough becomes homogeneous, melt the butter, and add it to the dough.
Biscuit dough is ready, and you can start baking cake layers.
Baking cake cakes
Lay on the bottom of the form a circle of parchment paper, the diameter of the bottom. Pour the dough into the mold and place it in a preheated 180 degree oven.
Look at the biscuit. When the smell of freshly baked biscuit goes through the kitchen and the top turns golden, remove the biscuit, turn the mold over and leave it until the biscuit cools down.
In the same way we bake a biscuit for the upper tier.
When the biscuits cool, they need to be cut into 2-3 layers. It is more convenient to do this with a sturdy thread, or fishing line. Make a cut with a sharp knife along the side of the cake, or install “beacons” of toothpicks, clasp the sponge cake with thread, make a string overlap as if you are tying a knot around the cake, and slowly pull the ends of the thread. Thus, the biscuit can be easily divided into even layers.

If you make a two-tier birthday cake with your own hands, choose a denser cream for coating the lower tier cakes. Consider the weight of the cake, and if it is a soft, tender mousse, it will just come out on the sides. For the same reason, do not use impregnation, at least for the lower tier. Too soft biscuit can "float."
Oil cream for biscuit two-tier cake
This cream is very simple, but universal. It is suitable for coating cakes, and for decorating an already made cake.
For the preparation of butter cream need softened butter. Take care of this in advance, and remove the oil from the refrigerator for a couple of hours before making the cream.
Place the oil in a deep bowl and whisk it with a mixer until fluffy, soft and some increase in volume. Do not stop beating, pour condensed milk into the oil, gradually increasing the speed. Beat the cream for at least 5 minutes, until the cream is smooth.
Cake assembly
Now you can begin to assemble the cake. We start the assembly from the lower tier. Spread each layer of biscuit cream, and fold all the cakes, as they should be. Likewise, separately collect the cakes of the upper tier. You get two separate cakes, one big and one small.


Many questions arise, how to decorate a double deck cake with your own hands? After all, not everyone knows how to use a pastry syringe and squeeze roses with leaves. Working with mastic is also not so easy. It is quite capricious, and you can spoil more than a dozen cakes, until you start to get something similar to beautiful photos from culinary sites. If you are not special in this matter, take a couple of cans of chocolate paste. This is always a winning option, as everyone loves chocolate. Spread both cakes with chocolate paste and smooth the sides with a warm knife.

Assembling the tiers of the cake is a crucial moment. We first talked about strengthening the cake, and now this moment has come. Sticks are commonly used to strengthen the cake. They can be made of wood or plastic. If you do not professionally bake bunk masterpieces, do not buy these sticks separately, but use ordinary boiler straws. Only straws should be thick, which is used for milkshakes.
Insert a straw in the center of the cake, and cut it to the level of the cake. Also, stick 4-5 straws in a circle, for lateral support of the upper tier of the cake, and also cut them to the desired height.


With a wide spatula, transfer and place the upper tier of the cake on the lower one. Everything, on it assembly of cake is finished.

How to decorate a two-tiered cake with your own hands?
It is very easy to spoil a masterpiece with inept decor. Take a few steps away from the cake and look at it from the side. On a chocolate background, berries, fruits, colorful sprinkles, and ready-made mastic ornaments look great. They are used by experienced cooks, so there is no reason to refuse such help to you.


This is one of the many recipes for making a two-tier cake with your own hands. Despite the apparent complexity, it is a feasible task even for an inexperienced hostess. The skill comes only with experience, and this cake is worth your effort.