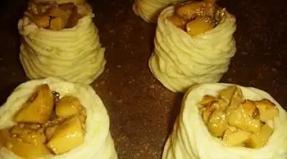
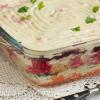
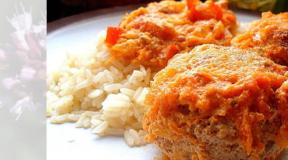
Chocolate caramel recipe with chocolate. caramelized chocolate
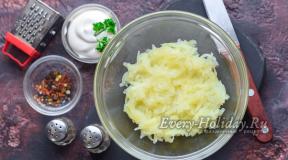
Garlic feathers and arrows are great for winter preparations. Fragrant, with a tart taste, they are enriched with many vitamins and trace elements. In winter, garlic-based seasonings will raise immunity, make up for the lack of nutrients.
It is important that healthy greens do not lose their properties during the preparation and storage of blanks. I propose to analyze the most proven recipes that are recommended by many gardeners on thematic forums.
Drying
The method is simple and accessible to everyone. Arrows and feathers must be cut before they are fully ripe. In the first, the tips with seeds are removed. The remaining parts are finely chopped and dried either by spreading out on paper or in an oven at a temperature of 40 C with the door ajar.
The resulting dry herbs can be further crushed to obtain a moderately spicy aromatic seasoning. Some housewives mix it with hot crushed pepper.
Freeze
Freezing garlic is one of the best ways to preserve its beneficial properties for a long time. The washed greens are allowed to dry, after which it is finely chopped, laid out in bags and put in the freezer. Instead of bags, you can use cling film. With the help of it, “tubes” are made from chopped garlic. In the future, you can quickly cut off the right amount of greenery with a sharp knife.
You can freeze garlic in small molds made of silicone or plastic. Even the standard form that comes with the refrigerator will do. Finely chopped greens are tightly placed in the compartments of the form, after which they are poured with cold boiled water. The blank is removed for 3-4 hours in the freezer. After this time, they take it out, and quickly transfer the resulting ice cubes into plastic bags, which are put into the freezer for permanent storage.
Such cubes are convenient to use when preparing first and second courses in the winter.
It is worth noting that frozen greens are actually a coarse condiment similar to fresh greens. When used in dishes, it also needs to be boiled, stewed, etc. But there are several proven ways that will significantly speed up the process:
- Blanching. Feathers and arrows are washed, cut into pieces about 4-5 cm long and put in boiling water for 2-3 minutes (cook over low heat). After that, the greens are immediately transferred to cold pre-boiled water, where the blanks are allowed to cool completely. After cooling, blanched garlic is dried, laid out in bags and put away for storage in the freezer.
- For the second method, we need a meat grinder or a good blender. We turn the washed feathers and arrows of garlic to obtain a homogeneous gruel. Add a small amount of salt and sunflower oil to it. We mix everything well, put it in plastic containers, close it with airtight lids and store it in the freezer. At the right time, you can easily take the required amount of the resulting garlic paste for use in the preparation of first and second courses.
Salt garlic arrows for the winter
If you have garlic shooters in your dacha for at least 1 half-liter jar, you can pickle them for the winter. There are several popular recipes (simpler and more difficult):
- The arrows are washed, dried, cut into 4 cm pieces and placed in a bowl. Next, salt is added to the composition at the rate of 1 part of salt per 5 parts of the arrows. Everything is mixed and left to infuse for about 30 minutes. Arrows will give juice. Clean glass jars are tightly filled with arrows so that the juice completely covers them from above. The resulting blanks are hermetically rolled up or closed with lids and removed for long-term storage in the cellar.
- As in the previous recipe, the arrows must be cut into 4-5 cm pieces. Then they are blanched in boiling water for several minutes, after which they are abruptly transferred to ice water. At the same time prepare the brine. To do this, 50 g of salt and 25 ml of 9% acetic acid are added to 1 liter of water. The composition is brought to a boil and removed from heat. The arrows are tightly laid out in jars, poured with the prepared solution and hermetically sealed with lids. After complete cooling, the jars are stored in the basement or refrigerator.
Such arrows are very fragrant and fragrant. Any of your dishes will now be even more savory and tasty.
Do the same with regular garlic chives. But the arrows look more impressive!
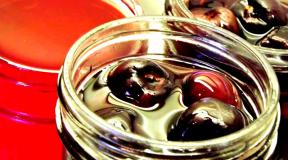
pickled garlic cloves recipe
Another way to harvest garlic arrows and feathers is to marinate them. Such an appetizer will decorate Birthday, New Year and other family holidays.
As with salting, here are some popular recipes:
- Arrows and feathers are cut into 5 cm pieces. After 2 minutes of blanching, they are sharply cooled in cold water. At the same time prepare the marinade. In 1 liter of water add 100 ml of 9% vinegar and 50 g of salt. The composition is brought to a boil. Garlic arrows, a few peas of black pepper are placed in prepared jars and everything is poured with boiling marinade. Banks roll up and put away for storage.
- Blanched for 2 minutes, garlic arrows and feathers are cut into 4 cm pieces and laid out in 1 liter glass jars. Next, prepare the marinade: 12 peas of black pepper are added to 3 liters of water, 4 tbsp. l. salt, 1 bay leaf (whole). Pour into jars 3 tbsp. l. 9% vinegar and boiling marinade to the top. Next, the blanks are sterilized for 15 minutes, after which they are rolled up with lids.
Pickled arrows are simply amazing, for example, with hot mashed potatoes, a fried egg, and just with brown bread in a bite. In winter, such a preparation will always come in handy.
Be sure to harvest garlic arrows for the winter. If there are few arrows, use feathers. Everything is done simply and quickly. In winter, you will be supplied with delicious and fragrant seasoning!
Active time:
Passive time:
Rating
Recipe Rating:5 out of 5
Do you love caramelized chocolate? He is very popular all over the world. From it you can make delicious sweets, mousses, creams, ganaches, cake toppings and much more. Even if you have never tried it, this is not a reason to be sad. This chocolate is very easy to make at home.
The technology for making such chocolate was successfully used in L "Ecole Du Grand Chocolat Valrhona (Valrhona Chocolate School). David Lebovitz shared the white chocolate caramelization technique in his blog https://www.davidlebovitz.com/caramelized-white-chocolate/. I am somewhat years ago I found a recipe in LiveJournal from a wonderful pastry chef Natalya. Everything is simple here, like everything ingenious. It will take white chocolate, a pinch of salt and a little of your time and attention. Chocolate turns out very tasty. Immediately there are many ideas for its use.
Cook with pleasure! Please your family and friends!

When I saw this recipe in 2014, I was making caramelized chocolate for the first time from ordinary store-bought aerated white chocolate. Despite the fact that the cocoa butter content in store-bought chocolate is low and the chocolate clumped heavily, the result was good. I, not a fan of white chocolate, really liked it. I do not urge you to cook like this, but in fairness I can say that everything works out. Of course, if you use good quality confectionery chocolate, then the taste will be excellent. Cook with pleasure!
The taste of chocolate caramel can be characterized by such words - sophistication, nobility and charm. This dessert will not leave anyone indifferent. Cooked once - it will become a favorite treat for your whole family for a long time.
A bit of history
Caramel is a taste familiar from childhood, remember at least “cockerels” on a stick, how delicious they are! It's probably not a secret for anyone that caramel is obtained by boiling sugar syrup. Today it is one of the most popular delicacies. Who invented caramel? The only author of caramel, unfortunately, has been lost for centuries. However, it is known that for the first time Indian dolids roasted sugar cane on fire, and it was two and a half thousand years ago. Since then, this delicious delicacy has undergone many changes. Today, there are about two thousand types of caramel all over the world.
Favorite delicacy and sweet tooth, and gourmet
Chocolate caramel is one of the most popular types of caramel. Its rich and refined taste will not leave anyone indifferent. Even the most fastidious connoisseurs of sweets, having tasted chocolate caramel, will be satisfied. And for children and adults with a sweet tooth, this delicacy will be the height of pleasure.
chocolate caramel dessert recipe
For cooking you will need:
Sugar - 100 grams;
. butter - 75 grams;
. milk - ½ cup;
. honey - 50 grams;
. dark chocolate (cocoa not less than 52%) - 100 grams.
Cooking method:
1. Take a small saucepan and pour milk into it. Add butter, sugar and honey there. Then put the pan on the fire and stir from time to time with a wooden spatula.
2. Melt the chocolate in a water bath. When the mass that is being cooked in the pan turns brown, add melted chocolate to it. Continue cooking, stirring constantly with a spatula.
3. At times, pour 2-3 drops from the mass that you are brewing into a glass of cold water. If it curls up into a ball, then the caramel is ready.
4. Then grease the baking sheet with oil and sprinkle with granulated sugar. Pour caramel into it, lightly mark rectangular pieces. When the caramel has cooled, cut it into the intended pieces and put it in the refrigerator.
Delicious chocolate caramel is ready! Bon Appetit!
Finally, I would like to say that chocolate caramel is not only tasty, but also healthy (if used in moderation!), as it contains glucose, which is very useful for the brain, and chocolate generally produces the hormone of happiness in the body.
Chemisova Albina, especially for Madame Annine.
2013, Madame Annin. All rights reserved. Without the written consent of the author or an active, direct and open to indexing link to the source, the republishing of materials is completely or partially prohibited!
It would seem, why do we need recipes for chocolates, if these sweets are presented in abundance on the shelves? Of course, in stores now there is a real paradise for the sweet tooth - the assortment list of confectionery products will take more than a dozen pages. But do homemade chocolates compare to store-bought ones? Firstly, you cook them only from proven ingredients, and secondly, you make dishes with love, which undoubtedly affects the taste.
Recipes for homemade cocoa chocolates
Sweets "Chocolate balls"
Ingredients:
- Vanilla crackers - 300 g
- Milk - 250 g
- Butter - 200 g
- Walnuts - 100 g
- – 100 g
- Powdered sugar - 50 g
- Sugar - 250 g
Cooking:
Mix cocoa powder with sugar, pour over hot milk and cook until the sugar dissolves. Pass vanilla crackers through a meat grinder, fill them with hot milk mixture, mix thoroughly and refrigerate. Add softened butter, mix well until smooth. Make balls and roll them in a mixture of chopped walnuts, powdered sugar and cocoa. Place chocolates with cocoa prepared according to this recipe for hardening for 1 hour in the refrigerator or freezer.
Homemade chocolate sweets "Sweet tooth"

Ingredients:
- Dried apricots -100 g
- Raisins - 100 g
- Dried figs - 100 g
- Walnuts - 100 g
- Sweet almonds - 100 g
- Lemon - 2 pcs.
- Honey - 200 g
- Cocoa powder - 100 g
Cooking:
Mince dried apricots, raisins, figs, walnuts or sweet almonds and lemons. To the resulting mass, add such an amount of candied honey to get the consistency of a stiff dough. Form balls, roll them in cocoa powder or powdered sugar. Let the homemade cocoa chocolates prepared according to this recipe dry at room temperature for 3-4 hours and refrigerate.
Chocolates with almonds

Ingredients:
- Butter - 100 g
- Powdered sugar - ½ cup
- Cocoa powder - 100 g
- Almonds - 50 g
Cooking:
Before preparing such chocolates, melt the butter in a saucepan, add powdered sugar, cocoa powder, mix thoroughly, let cool. Shape into balls, put crushed sweet almonds (or raisins) inside each ball, roll in powdered sugar, let dry at room temperature. Place in the refrigerator for final hardening.
Sweets "Almonds in chocolate"

Ingredients:
200 g almonds
100 g chocolate (bitter, milk - whichever you prefer)
4 tbsp. cocoa spoons
1 st. a spoonful of powdered sugar
Cooking:
Preheat the oven to 100°C.
1. For this recipe for homemade chocolates, you need to pour the almonds on a baking sheet and dry in a preheated oven for
30–40 minutes.
2. Melt the chocolate in a water bath, do not stir!
3. Sift cocoa on baking paper with a thick layer.
4. Dip almonds in chocolate, roll in cocoa.
5. Put the almonds in a sieve and shake gently to get rid of excess cocoa.
Serve sprinkled with powdered sugar.
How to make handmade chocolates: recipes with photos
Chocolates "Antoshka"

Ingredients:
- 1 can of condensed milk with cocoa or 1 can of regular condensed milk and 3 tablespoons of cocoa
- 1 cup chopped walnuts,
- 2 tablespoons flour or breadcrumbs
- a sheet of foil or thick parchment,
- some thick berry jam.
Cooking:
Place a closed can of condensed milk in a saucepan, cover with water and cook over medium heat for 2 hours. If the water boils away, top up so that the jar is in the input. Then turn off the gas, wait until the jar cools down a bit, and open the jar. Pour the contents into a bowl. Add a glass of chopped nuts and stir. If it was condensed milk without cocoa, add 3 tablespoons of cocoa. Place a sheet of foil or parchment on a baking sheet, sprinkle it with breadcrumbs or flour. Gain candy mass with one teaspoon, remove it on a baking sheet with the other. Spread at a distance of 2 cm from one another. Place a jam berry on each cake. Dry the handmade chocolates prepared according to this recipe in the oven over medium heat for 15 minutes. Let them cool directly on the baking sheet, then carefully remove with a knife and arrange on a saucer.
Recipe for candies in nuts in tartlets with chocolate and coconut crumbs
Ingredients:
30 pieces of tartlets, a handful of hazelnuts and peanuts, 3 tbsp. l. sour cream, 2 tbsp. l. cocoa, 2 tbsp. l. sugar, 40 g butter
Cooking:
Products, the amount of which is indicated in tablespoons, take without a slide. From nuts, you can take walnuts, and cashews, and pistachios. However, hazelnuts and peanuts are the most common confectionery nuts.
Lightly roast the nuts over moderate heat to peel off the brown shell. Without it, the dessert will turn out tastier and more aesthetic.
How to make chocolate icing for sweets

According to this recipe for making chocolates in cezve, you need to measure the products for chocolate icing. You can use a different recipe if you have your own favorite in this matter. There are options with the use of milk, condensed milk, ready-made chocolate.
We set the cezve on a minimum fire. Stir the contents periodically. When the mass becomes homogeneous and gives out a couple of "gurgles", remove the chocolate icing from the heat, let it cool slightly. Arrange the tarts on a flat dish.
Hazelnuts are large, so one nut per tartlet will be enough. But the peanuts are too small, so we put 3 pieces each.
Pour the nuts in tartlets with the cooled (but not frozen) glaze. So the waffle will not soften, it will retain its shape. The icing does not flow, but literally slides out of the spout of the cezve in small portions. With the edge of a teaspoon, we collect coconut crumbs, which we crush on top of the chocolate mass. Chocolate icing will harden in tartlets in just 20 minutes, but remain soft.
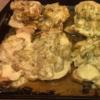
Look at the photo of handmade chocolates according to these recipes - the result obtained is not inferior in appearance and taste to purchased products:


Easy recipes for making chocolates at home
Candies "Prunes in chocolate"

Ingredients:
- Prunes (pitted) - 200 g
- Chocolate - 100 g
Cooking:
To prepare chocolates according to this simple recipe, wash prunes, pour boiling water for 20 minutes, drain in a colander, let the water drain. Melt chocolate in a water bath, pour into a cup. Pierce prunes on a fork and dip in melted chocolate, then place on parchment paper to set. Repeat the process several times if the chocolate layer is uneven.
Candies with walnuts in chocolate

Ingredients:
- Walnuts - 300 g
- Cookies - 100 g
- Honey -100 g
- Orange - 1 pc.
- White wine (grape) - 20 g
- Chocolate - 50 g
Cooking:
To make these chocolates at home, mix honey with ground walnuts, add grated orange zest, pour in orange juice and wine. Add crushed biscuits and mix thoroughly. Form small balls, roll them in grated chocolate, dry for 2-3 hours.
Candies "Rillage in chocolate"

Ingredients:
- Walnuts - 1 kg
- Melted butter - 50 g
- Sawn sugar - 1 kg
Chocolate glaze
Cooking:
To make your own chocolates, dissolve the sugar in a thick-walled saucepan, add finely chopped walnuts and ghee, mix thoroughly. Put the mass on a greased baking sheet, roll out 7-10 mm thick, cut into pieces. Cover the chilled semi-finished products with chocolate icing.
Recipe for making chocolates on a stick
Chocolates on a stick

Ingredients:
For the recipe for chocolates on a stick, you will need 2 chocolate bars (you can use 1 milk and 1 white), lollipop sticks, foil, ribbons (optional).
Cooking:
Melt the chocolate in a steam bath. When melted - cool. Then pour into molds and refrigerate. After an hour, remove from the refrigerator and insert the sticks - one into each candy.
As you can see in the photo, chocolates according to these recipes are not at all difficult to prepare, but they look very appetizing:

Recipes for making homemade chocolates "Truffle"
Handmade truffles with dried cherries

Servings: 8
Cooking time: preparation of ingredients (8–12 hours); actually cooking - 2 hours +
You will need:
- 250 g chocolate of excellent quality (with a cocoa content of at least 75%)
- 250 ml cream with a fat content of at least 35%
- 50 g butter
- 35 dried cherries
- 75 ml French cognac
- almonds, pistachios and cherries for garnish
- 4 tbsp. l. cocoa
Glaze:
- 150 g chocolate
Cooking method:
Preliminary:
1. To make chocolates according to this recipe, pour cognac over part of the cherry (23 berries), cover with cling film and leave for at least 12 hours to soak.
2. Chop the chocolate very finely and place in a bowl. Pour the cream into a saucepan and bring to a boil. Pour the boiling cream over the chocolate and stir well until the chocolate has completely melted. Add butter and chill. Cover the mass with cling film and refrigerate for 8 hours.
On the day of submission:
3. Remove the blanks from the refrigerator. It is better to get it in parts so that the mass does not have time to melt.
4. If there is liquid left in the cherry, discard the berries in a colander, and then dry with paper towels.
5. From the frozen chocolate mass, roll up balls the size of a walnut. Place a cherry in the center of each ball. To keep the candies the same size, use the same spoon when pinching off the mass.
6. Put the finished truffles on parchment-lined plates or on a silicone mat and refrigerate for at least 15 minutes.
7. Decorations: Finely chop a few dried cherries, almonds, and pistachios. Be sure to remove the dark skin from the nuts first.
8. Glaze: melt the chocolate in a double boiler and let it cool - it should not be hot, otherwise the truffles will start to melt. Prick the truffles on skewers and dip into the glaze. Transfer to a wire rack (excess icing will drip off) and garnish with cherries and nuts.
9. Leave until the chocolate sets. This amount of icing should be enough for 20 candies. Roll the remaining chocolate mass in cocoa. Candies with different textures look amazing in one box!
10. Place candies in parchment-lined containers and refrigerate for at least 1 hour.
11. Truffle chocolates prepared according to this recipe in 30 minutes. remove from refrigerator before serving.
Sweets "Sharman" - chocolate truffles with cedar condensed milk

Ingredients:
- 200 g walnut;
- 200 g dates;
- 100 g of figs;
- 50 g cocoa beans;
- 2 tablespoons ;
- 4-5 tablespoons of honey;
- 100 g poppy seeds for sprinkling;
- 2-3 tablespoons of dried apricot syrup;
- 100 g of cedar cake;
- lemon peel.
Cooking:
To prepare chocolates at home according to this recipe, grind the walnut in a mortar, food processor or meat grinder to a state of large crumbs. Break some of the nuts into small pieces with your hands. Add chopped dates and figs. If sweetness is not enough, add honey to taste, as well as cocoa butter and lemon zest. Grind the cocoa beans in a coffee grinder or high speed blender to a flour and place in the candy dough. Knead thoroughly, shape into balls and roll them in poppy seeds. Use your finger to make indentations on the top of the candy.
Prepare cream. Whisk cedar cake with sugar dried apricot syrup in a blender or with a wooden spoon. Add honey to taste Mix until thick condensed milk. Put the finished cream into the recesses of the sweets.
Sweets "Chocolate truffles"

Ingredients:
- A glass (with a top) of granulated sugar,
- 5 tablespoons cream (you can milk or water),
- 4 tablespoons of butter,
- 1 egg white
- half cup cocoa
- half a glass of dry milk;
For sprinkling:
- 1 tablespoon of powdered sugar.
- 1 tablespoon crushed toasted walnuts.
Cooking:
Pour cream into a saucepan, add sugar. Place the saucepan over low heat, stirring, heat to a boil, boil for 3 minutes. Remove the pot from the heat, turn off the gas. Add butter, cocoa (leave two tablespoons), milk powder to the hot mass. Mix everything well. Whip the protein into a strong foam, add it to the mass. Rub the mass for 10 minutes until smooth. To thicken the mass, put it in heat for half an hour. Prepare the sprinkle by mixing the powdered sugar, walnuts and cocoa residue. Cool the thickened mass in a cool place. Gain mass with a teaspoon and, helping with a knife, sculpt sweets (you can put pieces of nuts, cherries from jam inside), rolling them in sprinkles. When all the sweets are ready, put them in the cold (but not in the cold and not in the refrigerator). Tomorrow the candies are ready!
Here you can see photos for the recipes for homemade chocolates suggested above:

Recipes for making sesame chocolates
Finally, learn how to make homemade chocolates with sesame seeds.
Chocolates with sesame seeds

Ingredients:
- 300 g sugar
- 50 ml water
- 50 g cocoa powder
- 75 g butter
- 2 tbsp. spoons of infant formula ("Baby" or "Baby")
- 2 tbsp. spoons of sesame
Chocolate candies with sesame seeds recipe are prepared as follows:
1) Pour water into a stainless steel pan, add sugar. We put on medium fire. Stirring, bring to a boil, then cook for 5 minutes;
2) Put the oil into the boiling syrup. Let the mass boil for 1 minute;
3) Add cocoa powder to the hot mixture, mix thoroughly;
4) Add dry milk mixture;
5) Fry sesame seeds in a dry frying pan until golden, add to the candy mass;
6) We cover the saucepan with a lid or put it in a bag. When the mass has cooled, we collect the mixture with a teaspoon and form sweets.
Look at a selection of photos for DIY chocolate candy recipes presented on this page: