How to make figurines from mastic yourself. Figurines from mastic: a master class for beginners with photos, videos and detailed explanations
Even the most uncomplicated cake will be transformed into an elegant and festive one if you decorate it with confectionery mastic. Find out right now how to quickly and properly cook it at home. We offer a selection of proven sugar mastic recipes for beautifully covering cakes, sculpting themed figures, spectacular flower arrangements, volumetric numbers and congratulatory inscriptions. This food mastic recipe is used by professional confectioners. It is ideal for covering birthday cakes and making medium-sized decorations and figurines. You can sculpt figurines, numbers, flower arrangements and other decor immediately after preparing the mastic. For complete drying of jewelry, 2-4 hours are enough at room temperature. Marshmallow mastic is not suitable for covering the surface of cakes - when thinly rolled, the layer may break. Unlike marshmallow-based mastic, marshmallow is suitable for both modeling confectionery decor and covering homemade cakes. For sculpting, the mastic mass should be quite dense, elastic consistency, for covering - soft and plastic. Before use, it is advisable to wrap it with a film and put it in the refrigerator for half an hour or an hour. In order for the milk mastic to not dry out and retain plasticity for a long time, immediately after the end of the kneading, it is wrapped with cling film and placed in a tight bag. Confectionery mastic prepared according to this recipe is suitable for wrapping cakes, and for figurines, numbers and inscriptions. A beautiful cover of confectionery mastic can be made on any cake that has a fairly dense surface: on honey, sand, biscuit, etc. Delicate yogurt and jelly cakes, as well as soufflé cakes, are not suitable for decorative wrapping. In addition, you need to make sure that the cream with which the layers of the cake layers do not dissolve the sugar mastic. Custard and oil creams, dense creams from condensed milk are perfectly combined with mastic. Creams based on yogurt, sour cream or cream are not a suitable base for mastic covering of cakes. Mastic prepared according to this recipe will have a warm creamy hue. If you need confectionery mastic of different colors for decorating the cake, separate the mixture and add suitable food coloring while kneading. Cake "Ideal" How to cook:
Cupcakes "Creamy" How to prepare:
To conclude, here are eight helpful tips: We wish you success in confectionery creativity!Figurines from mastic for cake, photo


Sugar mastic recipe, step by step instructions

Homemade marshmallow mastic recipe, step by step instructions

A simple mastic recipe at home, step by step

Marshmallow mastic recipe, step by step with photo


Recipe for modeling mastic, master class
Chocolate mastic recipe, step by step instructions

Recipe for delicious mastic, step by step

Milk mastic recipe

Recipe for mastic for flowers
Recipe for mastic for covering a cake

Condensed milk mastic recipe

Video: mastic for cake step by step recipe
gelatin mastic recipe

Powdered milk mastic recipe

Butter mastic recipe

Cake recipe for mastic at home

Cupcake recipe with fondant with photo

The recipe for my mastic for sculpting simple figures and details. This fondant is similar to marshmallow molding paste and also replaces pastilage. The mastic is rubbery, which makes it convenient to sculpt simple figures and is also ideal for sculpting interior details and simple hollow forms (for example, towers for a castle). Details from this mastic harden into stone, so it is very convenient to cut out even parts from it and then glue them together. It is ideally dyed in bright colors, as it contains CMC, which retains moisture from the dye. Mastic for modeling 1 kg of powdered sugar 17 g of gelatin 60-70 g of cold water for gelatin (try first 60 g, if it is dry, you can add water later during the modeling process) 135 g of glucose syrup 8-10 g of CMC 1 protein 3 g food glycerin 1 tablespoon of fat or butter, in no case SUNFLOWER, as it polymerizes (thickens) and the mastic will only get worse! Soak gelatin for 20 minutes in water. Mix powder with CMC. Measure the glucose syrup and heat it for 40 seconds in a micro. Dissolve in micro gelatin and mix with syrup, the mixture should be hot. Add fat and glycerin there, and you can also add a couple of drops of lemon juice (it whitens the mastic). Make a well in the powder and pour this mixture into it. Cover the well and pour in the protein next to it (not hot in this mixture, otherwise the protein will boil). And start kneading with your hands or a powerful planetary mixer. The mixture will be liquid and thick, similar to cement or chewing gum - continue kneading for 10 minutes by hand. Then scrape off with a plastic confectionery scraper, grease your hands so that the mastic does not stick, and put it in cling film and in the refrigerator for a day. Before use, expose and allow to warm up to room temperature, knead well with your hands, just grind to a ruminant state, lubricating your hands with fat. Mastic is stored in the refrigerator for half a year, in the freezer up to 1 year. Before packing, roll into a ball, grease the surface with fat or oil (but not sunflower oil, as it polymerizes, that is, it thickens and turns into a nasty sticky mass) and wrap it tightly with cling film, then put it in a bag and sign the date of manufacture and the name of the mastic (to not to be confused with another). If the piece is dry, but not to a strong crust on top, you can reanimate: pour boiling water over the piece, let it saturate with moisture for several seconds or even minutes, if the piece is large, you can heat it up in a micro for 10-20 seconds. Then sweep with your hands, lubricating them with fat. At first, it will seem that you have completely ruined the mastic. It is necessary to continue kneading with clean, greased hands. Moisture will be absorbed, and the mastic will return to normal. And here are some of my old and newer works, where the details and characters are made from this mastic. Chip and Dale, a dog, a hollow house, trees and a hare with a mouse, sweet toys Donkey, a bee and a snail (copies of the birthday boy's favorite toys), a hollow train from Romashkovo, Winnie the Pooh, Christmas trees, a balloon, all cake decor based on illustrations for the book " I am a bunny", minions are all from this mastic. There will be questions - write in the comments)
Fondant figurines are a unique way to make a cake of any theme. And the frozen cake is no exception. It is enough to prepare a regular cake (single-tiered or multi-tiered) and simply decorate it with edible figurines. In particular, today we will consider master classes on how to make Anna from mastic.
How to make a figurine of Anna from a cold heart with your own hands
When creating any image, the most difficult thing is to carefully sculpt the head and draw a beautiful face. Therefore, we start with a step-by-step photo of a master class on sculpting Anna's head from a cold heart.
For a natural image, we insert white mastic into the “eye sockets”, and black mastic into the mouth. On top of the white, carefully draw the eyes with food paint.

Having finished drawing the eyes and eyebrows, we glue a piece of white on top of the black and form teeth from it. We paint lips. And proceed to the creation of hair and weaving braids.

The result is a very beautiful and gentle image of Anna.

Of course, you will not be able to 100% repeat Anna from the cartoon Frozen. But, in my opinion, this is not a reason to be upset. You can make just a beautiful figurine in her style, slightly different from the original, but no less attractive "Anna" from this. Or you can even make it like a cartoon, as shown in the photo instructions below.


In addition, you can mold Anna in the form of a baby.


Eyes are made on the same principle. Please note that here the eyelid is made of dark brown mastic. Drawn eyes, eyebrows, blush and charming freckles.

Then they blinded the ears.

And we started to create hairstyles. The bangs were rounded using a brush handle (you can take a round pencil). The tails were blinded from several pieces of mastic. Forming each tail from 3 pieces, at the end they stuck black stripes around them, imitating a ribbon.


The finished head looks nice.


Let me especially note that in order to make a proportional figure of Anna from mastic, it is better to draw a drawing in advance. So it will be much easier for you.
Based on the drawing, we sculpt the legs and arms.

The body follows them. Fasten the legs to the body with wooden skewers. And let's start creating the dress.


The result is a beautiful figurine of Anna from a cold heart.

If you do not have time to create a complex image, pay attention to the photo master class below.


The result is a cute figurine, and most importantly, you can make such an Anna figurine with your own hands quickly and easily.

You can compensate for the simplicity of the figurine with the originality of the decor of the cake itself.

How to mold Anna from mastic video tutorials
Video lessons are more informative than photo instructions. Therefore, I bring to your attention a few video tutorials.
Here is the most simplified version. If you watch this video first, you will see the assembly of a two-tiered cake.
In addition, pay attention to the video lessons on modeling from plasticine and plastics.
And finally, MK on sculpting a charming figurine in chibi or chibi styles.
Good luck with your experiments!1. WHAT IS MASTIC. MAKING CRAFTS AND DECORATION OF CAKES WITH EDIBLE FLOWERS
What is culinary mastic? This is a material convenient for making edible crafts and decorative ornaments, from which you can easily sculpt various shapes (flowers, figurines, children's crafts), quickly hardening and hardening after final processing by hand or special tools. You do not need to have culinary skills to learn on your own (using video lessons and photo master classes) from homemade mastic for decorating cakes and other confectionery. Little girls especially like to help their mothers make interesting flowers out of mastic, which can be used to decorate a cake for a family holiday. Therefore, be sure to involve your children in this creative work.
√ How to make mastic at home for the base of cakes and for modeling flowers:
Tools for making homemade mastic.
Dry and clean surface for rolling out the mixture (an excellent option is a wooden board);
Rolling pin (wooden or plastic);
Metal ruler;
Knife with a round cutting surface, rotating on the handle;
Food film;
Ribbon.
Recipes for making homemade mastic for decorating cakes:
There are a lot of different types of mastic and most of the options are quite possible to cook at home with your own hands. But we will focus on several options for mastic - flower and gelatin.
An ideal material for sculpting edible flowers at home. It is easy to cut flower details from the rolled out mass with a knife and molds. From these preparations it is possible giving them any shape.
Recipe.
Powdered sugar - 250 gr.
Cold water - 40 ml
Gelatin - 2 teaspoons
Glucose liquid - 1 teaspoon
Cooking method.
. Pour gelatin into a glass and pour water. Stir and wait ten minutes
Dissolve gelatin with a water bath and add glucose to the solution, stir
Add the powdered sugar one tablespoon at a time and stir the mixture each time. Should have a thick consistency.
Sprinkle a thin layer of icing sugar on a clean surface and spread the prepared mass. Stir the mass, like dough and gradually add the powder. The flower mastic will be fully cooked when it becomes slightly sticky;
Now it remains to pack the homemade mastic in a sealed plastic container and put it in a closet for 4-5 hours.
+ gelatin mastic (pastilage).
The main ingredient of this cake decorating material is gelatin. Ideal for modeling petals of complex shape, small details of a flower - pistils, stamens, inflorescences. This is a very plastic, easy-to-sculpt mass that quickly hardens after the part of the craft takes its final shape.
Recipes for making gelatin, sugar and milk mastic at home:
√ How to make a flower from fondant cake (step by step):
To make delicious crafts, we take marshmallow or gelatin mastic;
Sprinkle the surface with powdered sugar, spread the mass and roll it out with a rolling pin until the thin mastic shines through;
We cut out the desired part of the flower according to the template with a round knife and give it the appropriate shape (petal, leaf, sepal);
We add a bud or an opened flower from the petals, attach the remaining elements;
Put each collected cake flower in a plastic bag and start working on the next one;
When all the flowers and figures for the cake are done, carefully lay them out on a curved surface, and then put them in a dry and cold place for several days;
After 2-3 days, you can decorate the cake with hardened flowers and mastic figures.
Children's and wedding mastic cakes (photo), decorated with flowers and figurines:
√ How to make a fondant cake at home:
Leveling the surface of the cake.
We heat a wide knife or spatula over the burner;
We begin to carefully level the creamy surface of the cake;
The surface should become even - without pits and tubercles. The oil will heat up from the heated spatula and gradually spread over the surface in an even layer.
Formation of a layer of mastic on the leveled surface of the cake.
We roll out the mastic for the base with a rolling pin on a clean, flat surface. Walk the rolling pin 3-4 times over the rolled out mass so that the consistency becomes homogeneous, not too grainy;
The rolled mastic should be twice the diameter of the cake in order to completely cover the surface of the product from above and from the sides;
Holding the rolled mastic on the rolling pin with your hand, transfer it to the cake, gently smoothing it with a spatula. But it is best to smooth a thin layer of mastic with the help of special pastry irons so that it lays down evenly, without the formation of air bubbles;
With a round knife, cut off excess pieces of mastic around the cake.
Cake decoration with flowers from homemade mastic.
The last, most exciting stage. We take out already hardened flowers from gelatin mastic or from pastillage (marshmallow) from a dry place, we begin to lay out and strengthen these beautiful handmade crafts on the surface of the cake.
2. HOW TO MAKE SIMPLE PASTIC FLOWERS FOR CAKE DECORATION
Materials and tools for modeling:
- Stacks with rounded, sharp, spatula and other tip options;
Cut-out molds with thin edges;
Dry food colorings;
Flower (sugar, gelatin, chocolate, milk) mastic.
Large single cake flowers are often sculpted using a wire frame. For sculpting a complex composition of flowers and figures, a wire frame is not used. You can fix homemade flowers on a festive cake using a base laid out from a pastry cream or using a chocolate mixture.
Not so long ago, mastic figurines began to be used to decorate cakes. But ordering a cake from a professional confectioner is not always affordable, and there is no way to control the quality of the ingredients used in the process of baking and assembling the dessert. In this case, the output will be a hand-made decor.
A detailed description of all stages of work, from choosing the necessary tool and making mastic at home to the algorithm for sculpting individual characters, will help master the sweet sculpture even for those who last sculpted at school in fine arts.
Every mother wants to please her child with a beautiful and tasty cake. One way to decorate it is with mastic figures.
The manufacturing process includes the following steps:
- Preparation of sugar mass for modeling.
- Direct modeling of figurines.
- Drying the finished decor and installing it on the cake.
What tools and materials will be required to create sweet sculptures will be discussed in more detail below.
If there are doubts about whether it will be possible to make a mastic decor on your own, you can always practice on plasticine beforehand, and when the desired result is achieved, start sculpting from mastic.
What tools are needed for sculpting
In confectionery stores, your eyes simply run up from a wide range of various devices for working with mastic, therefore, in order not to buy too much, it is better to familiarize yourself in advance with what certain tools are needed.
Mastic confectioners use for such purposes:
- covering the finished cake to give the surface smoothness or a certain texture (wood, leather, etc.);
- to create flower arrangements (sugar floristry);
- creation of miniature sculptures (people, animals, fairy-tale and cartoon characters).
Each type of mastic decor uses its own tools.
So, in order to cover the finished cake with sugar mass, you need to have:
- rolling pin for mastic (regular or textured);
- silicone rolling mat;
- and iron to smooth out the coating to avoid creases.
In sugar floristry are used:
- cuttings or plungers of flowers or their petals;
- silicone veiners to give the blanks a more natural look;
- soft mat for thinning the edges of leaves and petals;
- fixtures (tables) for drying blanks,
- food wire and artificial stamens;
- brushes with artificial bristles.
To sculpt figures from mastic, you need to purchase a set of special stack tools:
- Dresden wand for depicting facial expressions;
- stack-cone (rounded, even), which will allow you to make non-through cone-shaped recesses;
- shell tool for sculpting animal paws, shells, human hands and feet;
- stack-bone will help create frills on clothes or wavy edges
- a tool with balls at the ends is used to form eye sockets or other round indentations;
- stack-arc to create smiles on the faces of figures of mastic people.
In addition to these tools, you will need food coloring for coloring the mastic, brushes (required with artificial bristles) and food glue for gluing the details of the figure.
We prepare mastic for modeling with our own hands
Before you make figures for the cake, you need to prepare the sugar mass for modeling.

Putty for creating flowers and figures should be pliable so that it is easy to work with, and dry quickly so as not to spend a lot of time drying the figures.
These properties are possessed by mastic prepared from:
- 1 ½ teaspoons instant gelatin;
- 40 ml of water;
- 3 teaspoons of liquid honey or syrup (invert, glucose or any other);
- 2 teaspoons butter or any other solid fat (margarine, coconut oil);
- 1 teaspoon of liquor (can be replaced with other alcohol);
- 500 g of powdered sugar;
- 25 g corn or potato starch.
Cooking technology:
- Soak gelatin for the time indicated in the instructions for its use.
- Combine syrup, oil and liqueur in a saucepan and heat until smooth. Then add the swollen gelatin and heat until it is completely dissolved.
- Sift the powder with starch in a slide, in the center of which make a funnel. Pour the liquid component into the recess and knead the mass, like a regular yeast dough.
- Put the finished mass into a tight bag, lubricated from the inside with butter, expel all the air as much as possible and leave the mastic to lie down for a day at room temperature. After that, you can start sculpting.
The simplest mastic figures for beginners
Simple figurines of animals that do not pretend to be sculptural similarities are molded using one technology:
- Roll up a ball for the body and shape it into a teardrop shape.
- The head is just a slightly smaller ball that is connected to the body with a toothpick.
- The front and hind legs are molded from mastic flagella, which are glued with food glue or raw protein.
- Next, ears are molded: for a bunny - from two wide flagella-stripes, for a cat or a tiger (lion) - pointed triangles, for a bear, a monkey - two circles with a recess in the center.
- Also from the flagellum, but thinner, form a tail. If necessary, they sculpt a hairstyle, for example, a mischievous forelock for a monkey or a mane for a lion.
- They finish sculpting the animal figurine with the design of the muzzle - nose, mouth, eyes.
It is easy to make various cars out of mastic that will be appropriate on a boy's cake.
The easiest option is from a single piece of mastic:
- Shape the body of the car into a single rectangular piece of mastic of the corresponding color.
- From four balls, blind wheel-washers and glue them into place.
- From thinly rolled white or pale blue mastic, cut out glass (front, rear and side) and also attach them where necessary.
- From small balls of yellow mastic, make headlights.
- Make the necessary additions, for example, inscriptions or eyes, and the machine is ready.
Master class on how to sculpt children's mastic figures
Children's figurines made of mastic are usually the heroes of their favorite cartoons. Among the huge number of fairies, little animals, robots and cars, the heroes of the cartoon "Smeshariki" will be ideal for a novice sculptor. Their modeling is carried out according to a principle similar to that already described.

First, the mastic is dyed in the desired color (or colors), then a ball-body is rolled out of it, and then they act as follows:
- Bunny Krosh. For the arms and legs, roll up two bundles, cut each of them in half and use a stack or a regular toothpick to separate the fingers. Form ears from two wide strips. Then it remains only to shape the face by gluing eyes from white mastic, and eyebrows from blue mastic, draw pupils and a smile.
- Barash. Roll up thin flagella, form curls from them and glue them with food glue or egg white. Shape the arms and legs in the same way as Krosh's paws, but make hooves at the ends. From flagella of darker mastic, fashion horns. Shape the face.
- Hedgehog. Roll up small balls of blue mastic, give them the shape of needle cones and glue them onto a spherical body. Sculpt arms and legs, as for a bunny. Add glasses, eyebrows, nose, ears, smile and the Hedgehog is ready.
- Nyusha. First you need to draw heart-cheeks and mold paws with hooves, as for Barash. From a small ball, form a nose-piglet by making two indentations in it with a toothpick. Weave and glue a pigtail hairstyle, shape the face.
How to dry figures from mastic
Sculpting mastic figures is only half the battle. They also need to dry properly. When the figures dry unevenly, they can crack, and if the drying temperature is too high, they melt, and nothing can save the result of long work. All the subtleties of this process and ways to speed it up will be discussed below.
The simplest and most correct, but also the longest drying method is self-drying at room temperature. Depending on their size, the figurines can take up to several days to dry.
Large figures, consisting of several parts, are usually dried unassembled, and then all the elements are glued together using confectionery glue, raw egg white or vodka. During drying, the figurines or their parts must be covered with napkins so that they do not fall with dust. Also, the wipes will absorb some of the moisture.
If time permits, then the figures should be dried only at room temperature.
And if you urgently need to make a decoration from mastic, then you can speed up the drying in one of the following ways:
- Fen. Dry the mastic decor much faster by blowing it at a considerable distance with a hair dryer operating in the “Cold air” mode. In this way, you can dry the figures in just a few hours.
- Oven. Using the oven, you can quickly dry flat mastic decorations (for example, letters), but the drying temperature should not exceed 80 - 85 degrees, and its duration should not exceed 5 minutes.
- Microwave. The principle of drying is the same as in the oven. Figures heated in a microwave oven harden after cooling. But due to the different power of the devices, the drying time will have to be selected empirically on a small piece of mastic mass.
How much and how such jewelry is stored
Cake fondant figurines can be made ahead of time before baking and assembling the dessert, but to keep them soft enough inside and edible, they need to be stored properly. Storage conditions for this decor: sealed container, placed in a cool place away from direct sunlight. The shelf life of the decor, subject to these rules, will be within 1 - 2 months.

After eating dessert, sweet sugar sculptures can be left as a memory of the solemn event. In this case, the storage conditions are not so harsh: the figurines can simply be placed on a shelf that is not exposed to direct sunlight so that their colors stay bright longer. But eating them after that is not recommended.
Read also...
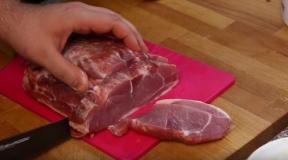
- Thai meat with vegetables - a classic recipe with step by step photos of how to cook beef with bell pepper and soy sauce at home
- Soft brushwood with cottage cheese: recipe with photo step by step
- Soft brushwood with cottage cheese: recipe with photo step by step
- Marinade for chicken How to marinate chicken meat for frying