Homemade beer: recipe, ingredients, cooking technology. How to brew beer at home according to a traditional recipe
Live home-made beer, aromatic and tasty, is much better than store beer, because you know exactly what products were used in the preparation process. This beer is pleasant to treat friends and relatives, because home brewing of beer is a very rare phenomenon in our life.
How to brew beer quickly and easily at home?
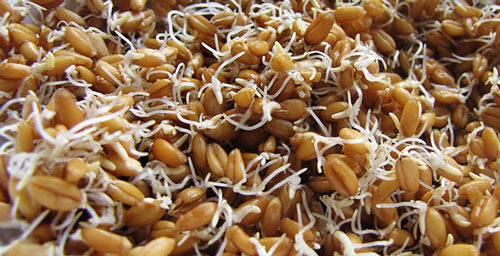
There is an opinion that home cooking technology requires special equipment. In fact, it is not at all necessary to buy a home brewery, you can completely dispense with ordinary dishes, unless, of course, you are not going to open a brewery. There is no need to cook malt from barley or wheat and dry hop cones, it is much easier to buy ready-made ingredients in the store. There are different recipes for homemade beer, and to make a classic drink you will need malt or malt extract, hops, yeast and water. In some recipes you can see molasses, honey, salt, jam, cornmeal, black pepper, bread and other products, since beer is a multifaceted drink that makes it possible to experiment with tastes.
Homemade malt beer according to an old recipe

It is malt that gives beer fullness of taste, saturation, pleasant color and persistent foam. To prepare beer, the malt is mixed with water and heated to 75 ° C in a large pan. Then, the resulting malt porridge is filtered through a sieve to separate insoluble particles of grain. So it turns out beer wort - a plant material, ready for fermentation, in which crushed hop cones are added. The wort is boiled for another 2-3 hours with constant stirring, and then again cleaned through a sieve - now to remove the rest of the hops. To save time and effort, you can lower the hops into the must in a gauze bag, then you do not have to filter. The resulting drink is infused for several hours, and then filtered again.
When the time comes for adding yeast, you need to decide which beer you want to brew - top or bottom fermentation. If yeast is introduced into the wort at a temperature of 20–22 ° С, then top fermentation begins, due to which beer is prepared faster. Bottom fermentation lengthens the cooking process (and, accordingly, shelf life) and gives the beer a more hoppy taste.
The ideal temperature for active yeast activity is 18 ° C, so cover the pan with a lid and leave the beer for a week. If foam appears on the surface in two days, it means you did everything right, and if it is not there, put the pan in a warmer place, remembering to periodically remove the foam. After about five days, the beer will acquire a familiar beer taste, and then you will have to pour it into bottles without shaking, and leave it for two weeks in a cool place. There are various variations of malt beer: sugar, salt, raisins are often added to the wort, and hops are sometimes added to the bottles after the fermentation is over, the order of bookmarking of products and methods of fermentation can also change.
Unusual homemade beer

There are many technologies for making beer without malt, and such recipes are most suitable for home conditions. In many recipes, honey is dissolved in water, mixed with hops and boiled for an hour, and then fermented and aged in heat. Beetroot beer is very original - in this case, finely chopped beets are boiled in water with salt, then hop cones and juniper berries are added to the pan, then everything is boiled again and fermented for two weeks. The rich taste is different for molasses beer, which is prepared using the same technology as classical beer, only molasses in this recipe replaces malt.
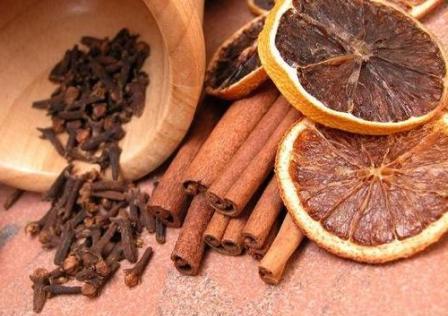
Beer without yeast has a dark brown color and a spicy taste, as it is made from crushed cereals of wheat, barley and rye, fried in a pan. Next, the grain mixture is boiled in water with chicory, and then lemon zest, hops and sugar are added to it. After six hours of brewing, the beer is bottled and stored in a cool place. Sometimes hops are ground with flour and sugar, mixed with water and boiled, and yeast and molasses are added later.
You can make beer from the pods of peas, hops and sage, and ginger beer or beer from wine, orange juice and zest will be suitable for the festive table. Beer can be oat, buckwheat, pumpkin, corn, carrot, smoked, chocolate, fruit and even milk. Making beer is a creative process in which any experiment is appropriate!
Brewing Secrets

Water for beer should be fresh, clean and soft, so the best option is filtered or boiled water, and if possible, from natural sources. In bad water, beer is tasteless. The same applies to yeast, so for brewing beer you should not buy food, but special brewer's yeast, fresh or dry.
For cooking, both malt obtained by germinating barley, rye or wheat grains, and malt extract, which is an evaporated or concentrated malt emulsion, are used for cooking. The choice of malt undoubtedly affects the taste and aroma of beer. In addition to the traditional varieties - wheat, barley and rye - there are other varieties of malt. Caramel malt gives the beer sweet tones, honey stains can be detected in stewed malt, smoked concentrate allows you to get a drink with the aroma of bonfire, burnt malt has a coffee and chocolate flavor, and melanoidin malt has a bright and characteristic taste only.
Beer wort is a favorable environment for the propagation of microorganisms, so all the dishes that are used for brewing beer must be pre-sterilized. Strict hygiene rules should also be followed during preparation.

During brewing, the beer needs to be saturated with oxygen, which is facilitated by intensive stirring and pouring the wort into the pot from a high height. However, during and after fermentation, aeration will only hurt, so while the beer is fermenting, it should not be disturbed - transfer, mix and open the lid without need. The only thing that can be done is to remove the foam, which can later be used as yeast.
In many recipes there are completely unthinkable amounts of ingredients for beer, for example 30 liters of water and 3 kg of malt. You can reduce the proportions depending on how much beer needs to be brewed.
Properly prepared beer, bottled in plastic bottles, is stored for 2 to 6 months, depending on its strength. In glass bottles with corks, beer remains fresh for up to a year, and the best ways to store home-made beer are in the cellar and refrigerator. However, if you learned how to brew home-made beer, you won’t have to store it for long, because this tasty and aromatic drink always ends very quickly!
Recipes
Homemade beer without malt
Ingredients: 10 l of water, 1/3 cup of hops, 1 cup of liquid brewer's yeast, 0.5 l of molasses.
Cooking method:
1. Pour water into the pan, add molasses, mix well, bring to a boil and cook until molasses smell disappears.
2. Dip hops wrapped in gauze into a liquid, boil for 10 minutes.
3. When the contents have cooled, add liquid yeast to the pan and mix very carefully.
4. Pour the beer into bottles and leave without closing the lids until foam appears on the surface.
5. Remove foam, cork bottles and leave them in a cool place for 4 days.
Hopped Beer
Ingredients: 900 g of sugar, 90 g of hops, 1 kg of malt extract (or 8 kg of malt), 9 l of boiling water, 50 g of brewer's yeast.
Cooking method:
1. Sugar, hops and malt pour boiling water and cook for one hour.
2. Add water to the original volume (9 L) and introduce yeast.
3. Leave the liquid for 3 days in a sealed container at a temperature of 18-20 degrees.
4. Strain, bottle, cork, secure the cork with wire and store for a week in a cool place.
Some shopkeepers don't like it. They like to brew beer at home. Brewing is done by companies and enterprises. On the shelves of stores there is a wide range of brands and varieties. People love this drink.
Beer is a low-alcohol drink with a bitter taste and hop aroma. This is the first drink created by alcoholic fermentation. The ancient Sumerians, who lived 9,000 years ago, brewed a drink from barley malt. According to assumptions, the predecessor appeared in the Stone Age. In those days, people made it by fermenting cereals.
Today, home brewing is popular, because a homemade drink is tastier than the purchased one.
I’ll tell you about the intricacies of cooking at home. Guided by tips, you will prepare refreshments in the kitchen. The main thing is to take the necessary ingredients: brewer's yeast, malt, hops and water.
Some buy special hops, I use homemade. I have a “female” hops growing in my country house, which I collect and harvest. Hops ripen in August. The collected raw materials are dried and crushed.
Malt is a germinated grain of wheat, barley or rye. I use barley. I brew beer from grain or malt extract. It is not easy to grow malt, I buy it in a store.
Video tips
Classic recipe
To make beer, you will need a capacious vessel for wort, a fermentation tank, a thermometer, a water dispenser, a wooden spoon, a siphon tube and, of course, bottles with corks.Cooking:
- I pour three liters of water into the pan, add a kilogram of sugar, mix and bring to a boil. I put the container with malt extract in heated water for 15 minutes.
- At the end of the procedure, I pour the malt extract and sugar syrup into the dishes for fermentation. I am mixing.
- I pour 20 liters of pre-filtered water into the same vessel. The main thing is that the temperature of the solution is suitable for fermentation. This is 20 degrees.
- Add yeast. The procedure is very responsible, the quality of the homemade drink depends on the quality of the fermentation of the wort. Brewer's yeast is sold along with malt extract.
- I pour the yeast into the container with the wort evenly and as quickly as possible. Future drink is not recommended for a long time in contact with air.
- Tightly close the lid of the fermentation utensil so that air does not enter. After installing the hydrodoser - a rubber stopper that closes the hole in the lid. Pour chilled boiled water into the device.
- I move the closed vessel into a dark room with a temperature of 20 degrees. I stand the wort for a week. I don’t open the lid during fermentation.
- After the specified time, I bottled and added hops - a natural flavor. I put several hop cones in each bottle, and only after that I fill the bottles.
- In each bottle I add sugar at the rate of two teaspoons per liter. After the bottle, cork, shake and leave in a cool place for 14 days to ripen.
- After this period, the homemade foamy drink is suitable for consumption.
If you’re tired of store beer or don’t trust modern producers, use my recipe. By the way, you can present a glass of homemade beer to guests as a New Year's gift.
Hop beer recipe
The taste of home-made beer will surprise, because it differs from the purchased one, the home-made has a different quality level.
Ingredients:
- yeast - 50 gr.
- boiling water - 10 liters
- dry hops - 100 gr.
- sugar - 600 gr.
- molasses - 200 gr.
- some flour
Cooking:
- Grind hops with flour and sugar.
- Pour the resulting mixture into a vessel with 10 liters of boiling water, mix and insist for three hours.
- I filter the liquid and pour it into the barrel. I add yeast with molasses to this and mix.
- I leave to wander. Not more than three days.
- After pouring into clean bottles and corking.
- It remains to send the beer to a cold place for one week for ripening.
How to make beer from bread
European monks began brewing beer in the 12th century. Later, their Russian colleagues borrowed cooking technology. For a long time, home brewing was prohibited in our country, but with the advent of democracy everybody got this opportunity.
I will consider two time-tested ways of making homemade beer, and you, choosing a convenient option, prepare wonderful nectar.
Cooking is divided into 3 stages: cooking, fermentation and ripening.
You can buy a mini-brewery and a special beer wort to simplify the brewing process.
Ingredients:
- sugar - 200 gr.
- malt - 400 gr.
- crackers - 800 gr.
- hops - 200 gr.
- yeast - 35 gr.
- water - 13 liters
- peppercorns
Cooking:
- In a large bowl I mix 100 grams of sugar, 400 grams of malt and twice as many rusks.
- I pour two hundred grams of dry hops with boiling water and add a few peas of pepper.
- In 6 liters of heated water I breed 35 grams of yeast and add a mixture of pepper and hops. I am mixing.
- I leave the container with the resulting gruel in a warm room for a day. I don’t cover it. Then I add 100 grams of sugar and pour 4 liters of heated water.
- I put the dishes on a small fire and cook for 4 hours. Should not boil.
- The next day I repeat the cooking. After draining the liquid, add 3 liters of boiled water to the slurry.
- After 60 minutes, the liquid is drained again and added to the first broth. Then boil the wort, remove the foam and filter.
- I bottled and cork tightly. Two weeks of aging in a cool place and homemade beer is ready.
Video brewing real grain beer
Home-made instant beer
Ingredients:
- malt - 200 gr.
- hops - 200 gr.
- yeast - 35 gr.
- water - 10 liters
Cooking:
- I mix two hundred grams of grated hops with a similar amount of ground malt. I pour the resulting mixture into a bag of flax.
- Through a bag in a large container, pour boiling water in a thin stream. I mix in the bag, filter and cool 10 liters of solution.
- In a container with a solution I add 35 grams of yeast diluted in warm water. I leave wandering for two days.
- After the yeast sink to the bottom. Bottled homemade beer and cork.
- I send the bottles in the refrigerator for 4 days.
Own home brewery
Now you can make a drink at home. You are convinced that this does not require special equipment. With what to drink it, decide for yourself. In my opinion, homemade beer goes well with
To become a home brewer, you need only one thing - the desire to brew beer. The rest will be helped by the exorbitantly developed brewing industry, as well as this article. The collected material is a complete guide for brewing beer at home from malt and hops. More is not required.
Beer, conditionally, can be prepared in two ways: from malt extract and directly grain. The first way is the easiest: you need to buy a malt extract, mix it with water, boil, add sugar and yeast, ferment the resulting wort and bottle it (we wrote a separate one). It doesn’t sound interesting, but it was malt concentrates that became a good help for popularizing home brewing. Perhaps you should start with them. I’ll explain now.
Malt Concentrate is a concentrated beer wort. The beer production technology itself according to the traditional recipe is very laborious, to a greater extent due to the stage at which the wort is prepared. At home, it takes 5-7 hours of nerves, dancing with a thermometer and the maximum concentration of attention. During these 5-7 hours, the malt is rubbed with water, heated to a certain temperature with certain pauses, then filtered and only then cooked with hops and other ingredients.
The malt concentrate is prepared in a similar way, after which the hopped wort is concentrated - the liquid is simply evaporated to form the very powder (or viscous mass) that we are sold in beautiful jars with the label “malt concentrate”. In other words, home brewers have a unique opportunity to bypass the complex and time-consuming process of making beer wort.
But there comes a time when the brewer, having tried various concentrates and additives to them, begins to think about traditional brewing, which, oddly enough, the beer giants practice.
If you still think that large factories brew beer from "powder", then you are deeply mistaken. It . Malt concentrate is several times more expensive than ordinary beer malt, not to mention the organization of its production, so it’s not profitable for beer giants to use them.
Well, let’s and we will brew our first beer from malt, hops, water and yeast!
In 1516, Germany passed the Law on Beer Cleanliness, the so-called Reinheitsgebot, according to which beer should be brewed exclusively from barley malt, hops and water. We do not suffer from purism, but it is from malt and hops that we will continue to dance, as well as from yeast, which we discovered much later. But we assume that any interesting ingredients can be added to the wort: unmalted grain, honey, herbs, fruits and their juices, vegetables, even mushrooms and tree bark. Brewing is a creative process.
MALT
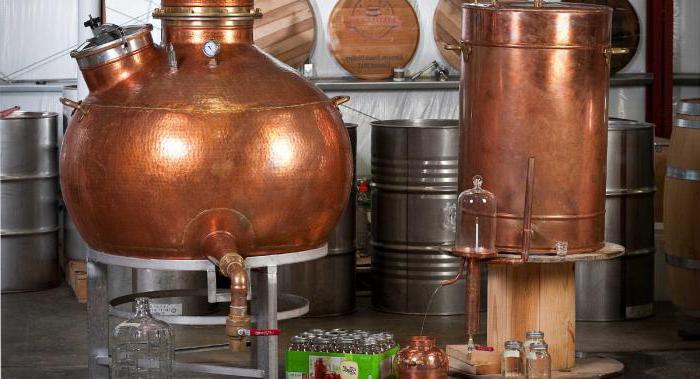
First of all, this is a convenient cook boiler, it is also a mash tun, enameled or stainless steel, most often with a thermo-cover. As a fermentation tank, a fermenter, which is mainly called a “beer factory”, plastic tanks can be used, with a slot in the lid for a water lock, or barrels made of plastic or stainless steel, equipped with faucets, thermometers, manometers and other convenient pribludy.
Now it’s hard to do without what:
- Scales or measuring cup for malt and hops.
- Capacity for soaking and filtering (bucket-basin for 5-10 l).
- Crusher for malt (mill, meat grinder, coffee grinder).
- A boiler for 25-30 liters.
- Spoon with a long handle - paddle (plastic).
- Accurate thermometer with a scale of up to 100 ° C.
- Iodine - for malt testing and disinfection (or special disinfector).
- Fermentation tank with water trap.
- Hydrometer for measuring the density of the wort.
- Silicone tube for beer overflow.
- Glass or plastic bottles with tight caps.
Of all the above, it is most difficult to do without a thermometer. During the preparation of the wort, in particular its malting, it is very important to precisely observe the temperature breaks, otherwise the beer simply will not work. The bottles are comfortable with a yoke cap, you can also use standard beer bottles, but then you will have to buy a cork closer and crown caps themselves (ordinary beer caps).
What will come in handy yet:
- Self-adhesive thermometer for fermentation tank.
- Filter materials, add. containers for filtration.
- Canvas or gauze bag for mashing wort.
- Chiller for quick cooling of the wort (or ice bath).
We recommend that you take a closer look at some of the brewing products on the world famous Chinese trading platform AliExpress. Recently, we have been conducting a column in which we publish collections of such products. For example, you will find links to cheap penny measuring instruments necessary for comfortable brewing and much more (scales, thermometers, hydrometers, volumetric flasks, a bag for mashing, etc.)
Training
Cleanliness is the key to success! In this case, this is not an empty phrase. Beer wort is an ideal breeding medium for any microorganisms that develop colonies in it in a matter of hours and beer will not work out of this. Always use sterile containers and accessories, minimize contact of the wort with air. During cooking, wash your hands thoroughly with soap, and it is better to wipe them with alcohol, like any tools that will come into contact with the must.
Disinfection is the key to successful brewing.
Tanks can be washed with iodine solution or special disinfectants that fill beer shops. You can also use a weak solution of bleach: 1 tbsp. l on 5 l of water. But still more reliable than special equipment. After their use, be sure to rinse thoroughly with disinfected containers, preferably with hot water (be careful with plastic). After iodine, it is not necessary to rinse. Do not use several solutions at once - their reaction between themselves can lead to the formation of toxic substances.
As a sterilizer, you can use the head from under any moonshine.
Brewing wort
So, you bought or sprouted quality beer malt, found aromatic hops, prepared water and sterilized all the equipment. Now, in fact, it's time to learn how to brew beer at home.
First you need to make a recipe, namely to decide how dense and bitter your beer will be. Programs for brewers for PC, such as BeerSmith, will help us with this. For educational purposes, you can use it for 21 days, then you have to buy a license, but it costs that money ($ 28). BeerSmith allows you to automatically calculate all the parameters of future beer based on the given ingredients. Also, it already has 100 styles of beer from the BJCP guide. By the way, it will not be superfluous to acquire the BJCP management itself, where beer classification is available.
Malt preparation
First you need to measure the malt. For a classic beer recipe, 4 kg of malt per 25 l of beer is taken from malt and hops. You can vary the amount of malt and water, thereby affecting the density of the drink and its taste. Malt should be checked, rinsed from dust and dirt.
Refined beer malt needs to be crushed into small grits. To do this, you can use a malt grinder, but if it was not at hand, a conventional meat grinder or other kitchen equipment will come down: a blender, a food processor, a coffee grinder. However, practice has shown that having a malt mill on hand is much more convenient and practical.
Before mashing the wort, some brewers do the so-called "mashing" - soaking the malt with water for 12 hours. This procedure is needed to give the malt husk elasticity - during crushing it will not be damaged, which means it will be more convenient to filter the wort. Also, “mashing” activates enzymes. Grinding wet malt leads to corrosion of the metal parts of the crushers, therefore, not all resort to this method. But soaking can be done after grinding, right? Be that as it may, our main task is to prepare and grind our malt to the desired condition (the optimal grinding size is like in barley grits).
Infusion mashing
Wort mashing is the most important process in making beer. At this stage, crushed malt is mixed with water (rubbed), as a result of which the malt enzymes go into solution and break down the starch into sugar, which will then be processed by the yeast. Enzymes require a certain temperature to work. There are two fundamentally different mashing methods: infusion and decoction. We will use infusion - this is a classic mashing pattern for home use, during which the wort is heated sequentially, while the required temperature pauses for the action of the enzymes are maintained. The boiling method is used in factories, as it is cheaper - part of the wort is boiled and added to the rest, raising its temperature to the desired one.
For the classic beer recipe, a 1/3 hydraulic module is used (1 part malt / 3 parts water). Therefore, to make 25 liters of beer we need to take 4 kg of malt and 12 liters of water. Boil the water and cool to 60 ° C. Pour malt in a thin stream, thoroughly mixing the wort so that no lumps form. If you don’t have a convenient brewing boiler with a filter system, you can make your first attempts to brew beer using the “in a bag” method - pour malt into a fabric bag and “rub” it directly in it.
At this stage, it is desirable to check the acidity of the wort using a pH test. For brewing, the optimal pH \u003d 5.2..5.5. How to acidity should be increased. For this, any food-grade acids are used.
After mixing hot water with malt, it's time to arm yourself with a thermometer and monitor the temperature pauses. All three of them, two of which are required:
- Protein break. The congestion is maintained for 15-20 minutes at a temperature of 25-55 ° C. This pause is optional. It is used if a slightly modernized malt or “unmalted” is used. During the pause, the brewing boiler (pan) must be insulated, periodically mix the wort. A protein break promotes a better breakdown of proteins, reduces the turbidity of the wort, and facilitates further filtering. The density of taste slightly decreases, the amount of foam decreases.
- Maltose pause. The mash is aged from 20 minutes to 1.5 hours at a temperature of 62-68 ° C. During this time, enzymes process starch into maltose, monosugar. At a low temperature and a long pause, more fermentable sugars are obtained, which means that beer becomes stronger, and the taste density is significantly lost. At a higher temperature and shorter pause, more non-fermentable dextrins are formed, which give the beer a dense taste. The fortress, accordingly, falls.
- Saccharification pause. The congestion is maintained for 15 minutes at a temperature of 70-75 ° C. At this stage, the final saccharification of the wort takes place. Starch completely breaks down into dextrins, the decomposition of enzymes begins. With the increase of this pause, which makes sense only by reducing the previous ones, the beer strength decreases and its taste density increases.
After the third pause, an iodine test should be done to check the completeness of saccharification. To do this, take a couple of drops of mash and place them on a white plate. Wait a few minutes and add a drop of iodine, then mix the drops. If the color change has not occurred, then the wort is completely saccharified and can be put on fermentation. If iodine turns blue, it means starch is still present in the wort - the wort still needs to be boiled for 15 minutes at a temperature of 70-75 ° С. After that, you can still boil it for 5 minutes at a temperature of 75-77 ° C and proceed with filtration.
Mash filtering
If you initially rubbed the wort in the bag, then filtering the wort is practically not necessary. Nevertheless, the pellet (the undissolved part of the wort) still contains a lot of sugar, so it is advisable to rinse it. The optimum temperature for flushing water is 75-77 ° C. But more on that later. First you need to filter the wort and measure its density. Modern cookers are equipped with a false filter system and a crane. All that is needed is to place a large collecting tank under the tap and start draining the wort. The first wort will be cloudy, so it is better to pour it into a separate container until a clear liquid begins to flow from the tap. It is necessary to change the capacity to the main one, and return the first muddy wort to the filter tank.
Malt pellet works here, which is collected in a dense layer on the mesh bottom (if we are talking about a purchased brewing boiler) and begins to play the role of a good filter. You can assemble your filter system from a large tank and sieve, but I will leave these engineering wisdom to your conscience. After filtering, it is necessary to measure the density of the wort using a hydrometer. Typically, the density varies between 14-22%. It's time to bring the density of the wort to the parameters in our recipe with a rinse. The amount of water depends on the desired density.
For beer with a density of 12%, the following amount of water should be taken with a temperature of 75-77 ° C (not higher):
During the filtration process, try to control the density of the wort using a hydrometer, so as not to overdo it with the amount of flushing water - at the end of the flush, more “useless” substances pass into the wort, which only increase turbidity.
Wort and beer hopping
The resulting wort must again be poured into a wort kettle and boiled for 1-2 hours with the addition of hop cones. Beer brewing is needed to enrich the wort with hop bitterness and aroma. During boiling, all unnecessary microorganisms are killed, malt enzymes are finally destroyed. It is recommended to boil the wort for at least 1 hour. Boiling should be active, 10-15 minutes before the end of cooking, it is better to reduce the fire and cover the wort with a lid.
Put the must on the fire, add hops for bitterness - about 80% of the norm of hops. The bitterness that will turn into beer from hops depends on the amount of alpha acids contained in cones (or granules). For example, to get a drink with a light hop bitterness per 25 l of wort, it’s enough to take 25-50 g of granulated hop with an alpha acid content of 6.4%, for bitter beer - 60-100 g. The granules are simply put in the wort, it’s better to put the cones into the fabric bag. For 10-15 minutes before the end of cooking, you need to add hops for taste, and 5 minutes for aroma. Irish moss is also added with flavor and aromatic hops to better clarify the beer.
Beer Wort Cooling
The boiled wort needs to be quickly cooled to a fermentation temperature of 16-18 ° C. It is important to cool it quickly, in 20-30 minutes - this reduces the risk of contamination of the wort with extraneous microorganisms, which can seriously compete with yeast. At home, this can be done with a cold water bath (possibly with plenty of ice).
If you intend to brew regularly, I advise you to purchase a chiller - a coil, through which cold running water is supplied.
Chiller is the best way to quickly cool beer after brewing.
Add yeast with preparation
During cooling, it is advisable to ferment the yeast so that you do not have to wait:
- Pour a small amount of wort into a sterile container with a temperature not exceeding 30 ° C and pour / pour yeast into it.
- Cover with a sterile lid and let stand for 30-40 minutes. When signs of fermentation appear, yeast can be introduced into chilled wort.
But before introducing the yeast, the cold wort must be freed from suspensions, because of which the cold wort becomes cloudy. This process will positively affect the final taste of the drink. To do this, stir the wort with rotational movements using your stirring spoon. As a result of rotation, the suspension will settle to the bottom in the center of the container, and the wort can be drained without problems into a brewery for fermentation.
Also, before introducing yeast cultures, it is important to saturate the wort with oxygen, which is all gone during boiling. To do this, the wort needs to be mixed intensively, and it is better to pour it from a high height. Experienced brewers use aquarium compressors for aeration. Do not forget that everything should be as sterile as possible.
The main fermentation of beer
Before setting the wort to fermentation, take a small amount of it to check the density. This data will come in handy later. The optimal density for light light beer is 10-12%, for a dense beer - 12-16%. After making yeast, mix the wort well. Close the fermentation tank with a lid with a water lock and place it in the place where the beer will ferment. It should be a dry room with a stable temperature of 18-24 ° C.
Beer fermentation lasts 5-8 days. The end of fermentation is characterized by the absence of emitted carbon dioxide through a water trap. Open the container, take a small amount of young beer to measure the density. For fermented beer, the density should drop to 2-2.2%. In fermented beer, the density is constant, since sugars are no longer processed by yeast. Knowing the initial and final density, you can calculate the final strength of the drink. If everything went well, beer can be poured into bottles and sent for ripening.
Overflow, ripening, ripening
So we came to the most pleasant stage of home brewing. At this stage, beer does not have a full taste. In order for this taste to form, beer must go through a process of maturation in tightly corked bottles. Before overflow, you need to get rid of the yeast sediment - gently drain the beer through the silicone hose without stirring the precipitate. You can use an intermediate overflow: first pour the beer into a container, which should be left for a day at a low temperature (5-7 ° C), and then pour the fully clarified drink into bottles.
To make the beer ferment and be saturated with carbon dioxide, sugar or other substances that contain it, for example, honey or un hopped malt extract, are added to it. For 1 liter of beer, it is enough to take 8-9 g of sugar or honey, malt extract - 11 g or 1.25 times more sugar. Of course, malt extract is preferred. Their sugar is better to boil syrup or use fructose-dextrose (6-7 g / 1 l). You can add sugar to each bottle, after which they must be shaken well for complete dissolution, but it is better to mix the required amount of sugar / malt with beer in a separate container and from there pour the drink into bottles.
Beer is bottled in clean, sterile bottles. It is necessary to leave 3-4 cm from the neck for normal maturation and concentration of carbon dioxide. Glass bottles without a tight cork stopper need to be corked with new crown caps. Beer needs to be fermented in a dark room at room temperature. Ripening should take place in a cool dark place for at least 1-2 weeks. In order not to get confused, it is better to label the bottles - indicate the type of beer on them, and the date when it was bottled. It can be stored for 6-8 months, while the drink will remain “alive” all this time.
It's time to reap the benefits of their activities.
I will continue to cover the beer theme and I hope for any feasible help on your part. Becoming a home brewer is not difficult. This requires only one thing - the desire to cook. In conclusion, I want to say that home brewers are enthusiastic people who are not afraid to go for an experiment. Do not limit yourself to anything other than using the results of your new hobby. For moderation is the best feast!
"data-modal-addimage \u003d" "data-modal-quote \u003d" "data-modal-preview \u003d" "data-modal-sub \u003d" "data-post_id \u003d" 4608 "data-user_id \u003d" 0 "data-is_need_logged \u003d "0" data-lang \u003d "en" data-decom_comment_single_translate \u003d "comment" data-decom_comment_twice_translate \u003d "comment" data-decom_comment_plural_translate \u003d "comment" data-multiple_vote \u003d "1" data-text_lang_comment_deleted \u003d "text deleted \u003d "Edited in" data-text_lang_delete \u003d "Delete" data-text_lang_not_zero \u003d "Field is not NULL" data-text_lang_required \u003d "This is a required field." Data-text_lang_checked \u003d "Check one of the items" data-text_lang_completed \u003d "Operation completed" data -text_lang_items_deleted \u003d "Objects have been deleted" data-text_lang_close \u003d "Close" data-text_lang_loading \u003d "Loading ..."\u003e
Submit Cancel

Home-made beer compares favorably with cheap store counterparts with a richer flavor, thick foam and lack of preservatives. It turns out a drink that does not contain anything superfluous. I will tell you how to brew beer according to the classic recipe using only traditional ingredients: hops, malt, water and yeast. To preserve the original taste, we will not resort to filtration and pasteurization.
It is believed that to make real beer you need to buy a mini brewery or other expensive equipment. This myth is imposed by manufacturers of similar products. Together with the brewery, such offices will gladly sell the finished concentrate, which you only need to dilute in water and ferment. As a result, the novice brewer exorbitantly overpays for beer, the quality of which at best is slightly higher than the store cheap brands.
In fact, you can make home-made beer without special equipment using improvised means: a large pot for brewing, a fermentation tank made of plastic or glass, any bottles and other available devices, the full list of which is published below.
You only have to buy hops, malt and brewer's yeast. I do not insist on choosing a particular company or brand. The assortment is wide enough; purchase any product you like.
Theoretically, malt and hops can be grown at home. But these processes are beyond the scope of the article. Further, we assume that all the necessary ingredients are available: homemade or purchased. The only thing I don’t advise experimenting with brewer's yeast, but to immediately choose the best strains in the store, because beer differs from grain mash in particular yeast.
Ingredients:
- water - 27 liters;
- hops (alpha acidity 4.5%) - 45 grams;
- barley malt - 4 kg;
- brewer's yeast - 25 grams;
- sugar - 8 grams per liter of beer (needed for the natural saturation of carbon dioxide).
Necessary equipment:
- 30 liter enameled pan - for making wort;
- fermentation tank - for fermentation;
- thermometer (required) - if moonshine made from sugar or wine can be made only by approximately controlling the temperature, then with beer this is initially a failure;
- bottles for bottling finished beer (plastic or glass);
- small diameter silicone hose - to remove beer from the sediment;
- ice water bath or beer wort cooler;
- gauze (3-5 meters) or a bag of fabric;
- iodine and a white plate (optional);
- hydrometer (optional) - a device for determining the sugar content of the wort.
Home brewing
1. Preparation. The first stage, during which the brewer checks the availability of the necessary ingredients and the readiness of the equipment for work. I also advise you to pay attention to the following points.
Sterilization. Wash all used containers and devices well with hot water and dry. Before working with the ingredients, the brewer thoroughly washes with soap and wipes his hands dry. It is very important not to infect the beer wort with wild yeast and pathogenic microorganisms, otherwise instead of beer you get mash. Neglect of sterilization eliminates all further efforts.
Water. It is better to use spring or bottled water. In extreme cases, the usual tap is suitable. Before brewing beer, water is defended for 24 hours in open containers. This time is enough for the chlorine to erode, and heavy metals and salts settle at the bottom. Subsequently, the settled water is carefully drained from the sediment into another container through a thin tube.
Yeast. For normal fermentation, brewer's yeast is activated 15-30 minutes before entering the wort with a small amount of warm water (temperature not higher than 28 degrees). There is no universal method for properly brewing any brewer's yeast. Therefore, you must adhere to the instructions on the packaging.
2. Mashing the wort. This term refers to the mixing of crushed malt with hot water to break down starch in grains into sugar (maltose) and soluble substances (dextrins). Sometimes malt is sold in brewed form, crushed, which makes the task a little easier. If not, the dried sprouted grain needs to be chopped on its own, using a grain grinder or a mechanical meat grinder.
Attention! Grinding does not mean grinding into flour, you just need to refine the grains into small pieces, necessarily preserving the particles of the grain peel, which will then be needed to filter the wort. The correct grinding option is shown in the photo.
 Right grinding
 25 liters of water are poured into an enameled pan and heated to 80 ° C on a stove. Then ground malt is poured into a fabric or homemade bag measuring 1 by 1 meter, made of 3-4 layers of gauze. A bag of malt is immersed in water, cover the pan with a lid and cook for 90 minutes, maintaining a stable temperature of 61-72 ° C.
Grouting malt at a temperature of 61-63 degrees contributes to a better sugar yield, increasing the strength of home-brewed beer. At 68-72 ° C, the density of the wort increases, although the alcohol content in the drink will be slightly lower, but the taste will be more saturated. I recommend keeping to the temperature range of 65-72 ° C, which results in a tasty, dense beer with a strength of 4%.
 Cooking malt in a bag
 After 90 minutes of cooking, an iodine test is made to make sure that there is no starch left in the wort. To do this, 5-10 milligrams of wort is poured onto a clean white plate and mixed with a few drops of iodine. If the solution turns dark blue, cook the contents of the pan for another 15 minutes. If iodine has not changed the color of the wort - you're done. Iodine test can not be done, but simply increase the time of mashing (cooking) by 15 minutes, the quality of the drink will not be affected.
Then the temperature is sharply raised to 78-80 ° C and the wort is boiled for 5 minutes to completely stop the enzymes. Next, the bag with the remaining malt is removed from the tank and washed with 2 liters of boiled water at a temperature of 78 degrees. So the remnants of extractives are washed. Wash water is added to the wort.
This method of mashing is called "in the bag" and allows you to do without filtering - separation of grains (not dissolved particles of malt) from the main wort. In turn, filtration requires specific equipment (purification systems) and multiple transfusion of wort from one container to another. Mashing in a bag does not affect the quality of the brewed beer in any way, but takes several times less time.
3. Boiling the wort. The contents of the pan are brought to a boil and the first portion of hops is added, in our case it is 15 grams. After 30 minutes of intense boiling, the next 15 grams are poured, and after 40 minutes the remaining 15 grams of hops are boiled for another 20 minutes.
Depending on the beer recipe chosen, time intervals and hop quantities may vary. But, adhering to the indicated sequence and proportions, it is guaranteed to get a normal result.
Boiling takes an hour and a half, throughout this time it is important to maintain intense heating so that the wort gurgles.
 Adding hops
 4. Cooling. Beer must must be cooled quickly (in 15-30 minutes) to 24-26 ° C. The faster this is done, the lower the risk of infecting the drink with bacteria and wild yeast that are harmful to fermentation.
You can cool the wort with a special immersion cooler (one of the possible designs in the photo) or carefully transfer the container to a bath of ice water. Most novice brewers use the second method. The main thing is not to accidentally turn the hot pot over, scalding yourself with boiling water.
 Cooler design
 Chilled wort is poured through cheesecloth into a fermentation tank.
5. Fermentation. Diluted brewer's yeast is added to the must and mixed well. In this case, it is very important to observe the temperature and proportions indicated in the instructions on the bag label.
Yeast is top fermentation, which contribute at a temperature of 18-22 ° C, and bottom fermentation, working at 5-16 ° C. Different types of beer are obtained from these two types.
The filled fermentation tank is transferred to a dark place with the temperature recommended by the yeast producer. In our case, it is 24-25 ° C. Then install a water seal and leave alone for 7-10 days.
 Fermentation tank example
 After 6-12 hours, active fermentation will begin, which usually lasts 2-3 days. At this time, the water trap intensively blows bubbles, then the frequency of carbon dioxide release slowly decreases. At the end of the fermentation, the young home-made beer turns light. Readiness is determined by two methods: a sugar meter (hydrometer) and a water seal.
In the first case, the readings of two samples of the hydrometer over the past 12 hours are compared. If the values \u200b\u200bdiverge slightly (in hundredths), then you can proceed to the next step. Not everyone has a sugar meter, so at home they often just look at the water seal. The absence of bubbles within 18-24 hours indicates the end of fermentation.
6. Corking and carbonization. Beer carbonization is the saturation of a drink with carbon dioxide, which helps to improve the taste and the appearance of a thick foam. Despite the complex name, the process itself is very simple.
In bottles for storing beer (preferably dark) add sugar at the rate of 8 grams per 1 liter. Sugar will cause a slight secondary fermentation, which will saturate the beer with carbon dioxide. Then the beer is drained from the precipitate through a silicone tube, filling the prepared bottles.
 Spill completed
 One end of the tube is lowered to the middle of the beer container, the other to the very bottom of the bottle, this minimizes the contact of the drink with air. It is important not to touch the yeast, which, depending on the type, can settle on the bottom or accumulate on the surface, otherwise the beer will turn out cloudy. Bottles are not refilled 2 cm to the neck and sealed tightly.
The easiest way to use a plastic container, since the lids to it can be twisted by hand. Glass bottles need cork stoppers or a special device to seal ordinary beer corks (pictured).
 Cork Bottle
  Conventional plug closure
 Bottles filled with beer are transferred to a dark place with a temperature of 20-24 ° C and left for 15-20 days. Once every 7 days, the containers should be shaken well. After that, the drink is placed in the refrigerator.
7. Ripening. Homemade beer is ready. But if you let the drink stand for another 30 days, the taste will improve significantly.
Beer can be stored in the refrigerator for 6-8 months, an open bottle - 2-3 days.

Another method of brewing beer without special equipment is shown in the video.
Brewers intend to celebrate their professional holiday on June 8. Beer festivals are held around the world these days - in the Czech Republic and Hungary. In Russia, the brewer's day falls on the second Saturday of June, that is, on the 13th. There is an idea to celebrate this holiday by joining a glorious brewer tribe.

At first glance, especially unenlightened, it’s easy to brew beer. We find a large pot, and even better - a very large, enameled one, and stock up on hops and malt. Hops, in principle, can be replaced with yeast.
Malt
Malt cannot be replaced with anything, just beer in its absence will not be beer. It will be either mead, or mash, or kvass or wine. But not beer.
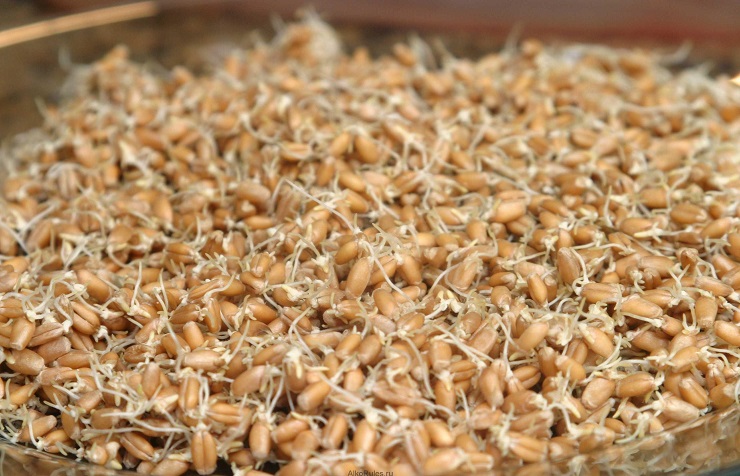
Malt can be wheat, rye, barley - from any grain. Such grain must be sprouted to obtain malt, then it is dried and then crushed.
If you do this at home, then spread the grain on a baking sheet, fill it with water and leave it warm and quiet. Only 2-3 days will pass and sprouts will appear. Germinated grain is extracted from water, dried and coarse flour is obtained. This is malt.
It can be purchased ready-made. For the needs of modern home brewers, all amenities are provided, you can even buy a whole set - with a certain kind of malt, yeast and hops. This set contains recipes for making beer.

Hop
For the manufacture of beer, only hop cones are used, that is, its fruits. The bitter taste inherent in beer comes from hops. And beer foam, lush and strong - from hops, and hops also take part in clarifying beer.
Dry hops can be bought at the market, in the store, and even in the pharmacy. It is included in beer kits.
When choosing a hop, you need to look at its color: if it is reddish, then the hop is overripe; a grayish color indicates that the hops did not have time to ripen; but the yellow-green color indicates that you have found exactly the hops you need.
Dishes
The enameled pan that you prepared for cooking hops must not have chips. You can brew beer in stainless steel containers, but glassware is best suited. Plastic, no, categorically does not fit.
At first it was said that the dishes should be very large. This is in order to give the beer a place to wander around.
The finished beer is bottled with darkened walls. Old champagne bottles that have their own plastic corks are especially convenient. Such plugs let air through - a little bit, but this is enough to stop the fermentation.

Fermentation
Beer - it is alive, and its life proceeds in continuous fermentation. The taste and aroma of beer originates in the process of fermentation, and the degrees are also added at this time. Fermentation will stop - beer will die.
And up to this point, the fermentation process must be maintained in a certain framework, the most favorable. The main condition is the temperature in the range of 18-20 C. When it rises to 25, the fermentation process becomes too intense, and at 36 the yeast simply dies - along with beer.
Homemade Beer Recipes
Dark beer
Ingredients
Mixture of grain, ½ kg (rye, oats, barley, wheat)
Dried hops, 50 g
Sugar, 4 tbsp
Chicory, 30-40 g
Zest from 1st lemon
Water, 10 L
1. Fry the grain in a dry frying pan until brown. Grind it on a coffee grinder.
2. Put the grain with chicory in 1/3 of the water, boil.
3. Add, without turning off the burner, all the water put, put the zest, sugar and hops. Turn off the heat.
4. A few hours do not touch. We filter the infusion with gauze, pour into bottles. We put in a cool place.
Peppermint beer
Ingredients
Black bread, 1 crust
Mint, 1 bunch
Sugar, 3 tbsp
Yeast, 1 stick
Vanilla Sugar, 1 sachet
Water, 3 L
1. Boil water, pour mint and leave in a pan for 1 hour, closing it with a lid.
2. Pour yeast with sugar. We are waiting for them to come.
3. We filter the mint infusion, put yeast with sugar and a bread crust in it.
4. We put our mixture to wander. When the foam appears on the surface, pour vanilla sugar, stir and bottle. Keep it.
Honey beer
To prepare such a beer, a samovar in working condition, which is capable of continuously supplying hot water, is best suited. And not just hot, but boiling.
Ingredients
Honey, 2 tbsp
Rye malt, 3 tbsp
Yeast, 1½ sticks
Sugar, 1 tbsp
Hops, 100 g
Boiling water, 10 l
1. Grind the malt, grind it with hops. Put the mixture in a bag of linen. We pour a spoonful of sugar into the yeast so that they come.
2. Take a large pot and put honey in it. We are building a complex device: we place a samovar on the table, and hot water from it should pour into the pan, passing along the bag with hops and malt. Moreover, the malt must be mixed all the time, while water flows through it.
3. Having run the required amount of water into the pan, mix its contents, let cool. Then put the yeast in it.
4. When all the yeast sinks to the bottom of the pan, pour the beer into bottles and let stand 3-4 days.
Beer
Ingredients
Rye bread, 1.6 kg
Rye malt, 300 g
Hops, 600 g
Sugar, 2 tbsp
Salt, ¼ h l
Yeast, 1 stick
1. We cut the bread into thin layers and dry it. We grow yeast in a glass with warm water.
2. Mix rye crackers with malt, put in a large pan and put salt, sugar (1 cup), pepper, pour in the diluted yeast.
3. Scald the hops with boiling water, send to the pan.
4. Pour water into the pan without stopping stirring until a sour cream consistency is obtained. We cover the dishes with a towel, leave for fermentation at night.
5. Dilute the remaining unused 1 cup of sugar in 9 liters of water. Pour into the pan and mix. We no longer cover with a towel, but with a lid. We put in a warm place for 2 days.
6. Drain the liquid until sediment. Pour 1½ liters of boiling water into the thick remaining at the bottom, mix and let cool. Again, drain the liquid, attach to the first batch. Mix together, set to boil.
7. Bringing to a boil, remove the foam. We wait until it cools down and filter. We pour beer into bottles and cork. We place in a cold place and wait 2 weeks.
No wonder they are considered the best chefs - men! No one can even argue with this. Cook borsch, bake pies, stuff fish, etc. - all this is nothing for a real man. How do you look at brewing your own beer? Can you? And you will be right! Technology has gone far ahead. You can buy all the ingredients and equipment, and organize your home brewing at home (sorry for taftology). What could be cooler to offer friends watching a football match or broadcast a boxing match a beer of their own spill?