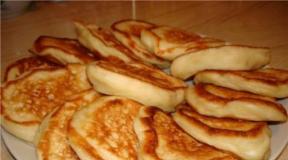
How are chocolates made? Homemade chocolates.
All lovers of chocolates will find simple recipes for making chocolates at home useful, making chocolates is not as difficult as it might seem at first glance, the indisputable advantage of homemade chocolates is not only the taste you want the candies to contain, but also naturalness, because in there are no extraneous additives in homemade sweets.
We offer you two recipes for making chocolates "Izuminka" and "Moscow Holidays".
Recipe number 1. Chocolates "Izuminka"
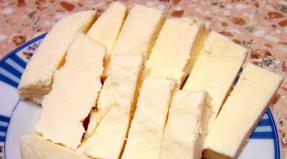
We invite you to make homemade sweets "Izuminka", which have a pronounced taste of chocolate and caramel flavor. There is a filling inside the sweets. The structure of the sweets is dense and tight. To prevent the candies from sticking together, it is advisable to use paper capsules when serving them.
The ingredients listed below are for 12 chocolates. Preparation takes 15-20 minutes. In addition, at the last stage of cooking sweets, you will need silicone molds with a smooth surface.
Taste Info New Year's recipes / Sweets
Ingredients for Izuminka chocolates:
- 5 tablespoons of milk;
- 50 g butter;
- 7 tablespoons of granulated sugar;
- 5 tablespoons of cocoa powder;
- 1 teaspoon flour;
- raisins (depending on the amount of sweets).
How to make Izuminka chocolates
1. Take a small saucepan, in which the preparation of the chocolate mass will begin. Pour sugar and cocoa into the dishes. 
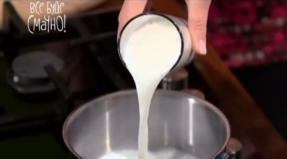
2. Then add milk to the data in a thin stream. 
3. Mix the ingredients and put on the stove (small fire). We do not stop the mixing process. 
4. We are waiting for the mass to boil. As soon as this process begins, add butter to the saucepan. 
5. The turn has come to flour. We introduce it after the butter is completely melted. Bring to a boil. 
6. Pour the ready-made chocolate mass for Iziuminka sweets into silicone molds, but not completely. 
7. Place the filling (washed and dried seedless raisins) in the center of each mold. 
8. Fill the molds with the rest of the chocolate mass. 
9. When the candies have cooled down, put the molds in the freezer (ideally if at night). 
10. Izuminka chocolates are ready to eat.
Teaser network
Chocolates "Moscow Holidays"
Oh, how pleasant and romantic it is to have an evening tea party with your loved one! And if you supplement your meal with memories of a joint vacation and delicious chocolates, then you are guaranteed a great mood. Homemade chocolates "Moscow Holidays" can be an excellent attribute to your favorite drink.
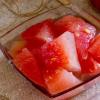
The composition of sweets includes dried apricots, which can be purchased on our markets without any problems. As you know, dried apricots are dried apricots. For our body, this dried fruit is just a godsend. Mineral substances (potassium, iron, phosphorus, magnesium), organic substances and pectins make it so valuable. By the way, dried fruits are much more useful than fresh fruits. 
So, let's not torment ourselves with anticipation of meeting amazing sweets, but let's prepare them, taking the following products:
- 150 g dried apricots (dried apricots);
- 50 g peeled peanuts;
- a tablespoon of natural honey;
- a bar of dark chocolate (no additives);
- a piece of butter;
- confectionery color decoration.
Stages of making sweets "Moscow Holidays":
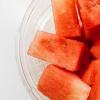
1. Processing dried apricots is the first step in making sweets "Moscow Holidays". Pour boiling water over the dried fruits, keep them in water for a quarter of an hour. 
2. Dry the dried apricots with a towel. 
3. Using an excellent assistant in the kitchen - a blender, grind dried apricots. 
4. Do a similar procedure with peanuts. 
5. Combine the processed ingredients in a bowl.

6. Stir the contents until smooth.

7. To make the taste of sweets richer, season the filling with a spoonful of natural honey. Stir the mixture again.

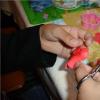
8. We make future sweets from the filling. They should resemble pyramids in shape.

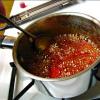
9. At the same time, etch the bitter chocolate together with a piece of butter. 
10. Dip the finished pyramids in melted chocolate. Place the candies on a flat surface. 
11. While the chocolate is not frozen, sprinkle the sides of the pyramids with confectionery decoration. 
12. The freezer is the last "haven" for our Moscow Holidays chocolates. 
13. When the chocolate hardens, you can feast on sweets. 
How candy is made miha_top wrote in May 4th, 2017
One of the main brands of the Saratov region is the confectionery factory "Saratovskaya", its abbreviated name is JSC "KONSAR". It is better known as Confashion. Let's talk a little about the factory today, and at the same time see how sweets are made. 
The factory has existed for many years - it dates back to 1930, when in the form of an artel named after. Rosa Luxemburg was located in the city center (at the corner of Radishchev and Kutyakov Streets). Now the factory has a different address, and its assortment is wider.
Why is the factory one of the main brands in the region? So after all, its products are sold in most regions of Russia (more than 60 constituent entities of the country), as well as abroad (export is made to 12 countries of the former USSR, except for the Baltic countries, as well as to China and the USA). And in 2015, the factory became the best exporter of the region. But despite this, the factory is more of a regional manufacturer.
Photo taken from Denis djhooligantk
Let's take a look at the production of the factory's main commodity, candy. Confectioners call this type of production sugar. So, all the important sugary confectionery products are produced at Konsar: chocolates, caramel, toffee and chewing candies. They also sort gift sets. The products are constantly being updated.
Information stand for workers 
The factory produces 18.5 thousand tons of sugar products per year on 14 production lines. By the way, the equipment at the factory is both domestic and foreign (Italian, German and Swiss). Equipment of different years, there is already old one. But it does its job well and there is no need to change it. In addition, all equipment undergoes periodic maintenance.
Although it should be said that the factory is constantly working to improve the quality of the assortment and the variety of the assortment. Therefore, new equipment is also bought - to open new lines. So, recently a line of sweets "One Shot" was opened with the most modern equipment of Italian origin. The peculiarity of this line is that the filling and the body are formed simultaneously. 
And now let's get acquainted with the process of candy production itself. We will start the excursion from workshop No. 6 (there are 7 workshops in total in the factory, in which there are 40 lines for the production and packaging of confectionery products). This is a workshop for the production of the most expensive products - assorted chocolates, which are also used for gift sets (see the title photo). By the way, the factory produces about 1.5 million of these sets per year. For such sweets, by the way, real cocoa butter is used.
Start of the line - a machine with empty molds for sweets embedded in it 
The workshop has 2 production lines (both German) - Knobel
and Yubitek
.
Yubitek
is a line for the production of sweets with assorted fillings. It produces chocolates with a variety of fillings. Moreover, the forms of sweets are very diverse. Examples of sweets of this line are sweets and sets of sweets "Confessional de Luxe", "Overture", "Miracle nut", "Cherry in chocolate".
And on the line Knobel
make jigging sweets - sweets based on marzipan, truffle and praline.
As mentioned above, sweets have different shapes: a basket, a bottle, a hemisphere, etc. It depends on the terms of reference received on the line. Each form has its own dose of chocolate glaze. Glaze, by the way, is also different. The factory uses bitter, milk and white chocolate for the glaze.
This is what a press looks like for giving the future candy different shapes. Now the simplest forms are being made - hemispherical. 
The process of creating a candy is as follows: first, the machine forms the body of the candy (just the photo above), then the body comes in a cooling tunnel (10-14 degrees Celsius), then the filling is poured into the body. The filling and glaze are prepared ahead of time - in another workshop.
Top photo - a machine for shaping (on the right you can see finished products - then a conveyor line). Bottom right photo - the body of the candy after cooling. 
There are 2 filling machines installed on the line (photo below) - in order to quickly switch from one to another when the raw material runs out. It also allows you to make sweets with two fillings at the same time. 
And now the body of the candy is filled with filling. 
And this is what marriage looks like. Such candies do not go on sale - they are processed for subsequent production (for example, they are used to fill waffles). 
After filling with the filling, the bottom of the candy is made. To do this, the sweets are slightly warmed up (to melt the top a little), and then poured with chocolate and flattened. 
End view 
And at the very end of the line, the candies are “shaken out” of the mold and put on pallets for further sorting.
Some of the products go to the packaging line, and some to the warehouses.
Let's take a look at the packaging line first. Here, first, the sweets enter the wrapping machine. There are several such machines, each with its own wrapping.
General view of the machine 
Sweets wrapping process 
Finished sweets at the exit from the machine 
Then, the wrapped sweets go to the packaging and packing. 
Here we see the weight packaging of truffles. 
Video of this line and the packaging of sweets
The kingdom of various sweets 
Sweets are numbered here: each type is in a special tray under its own number. 

And already according to these numbers, the process of assembling the kit is going on. 
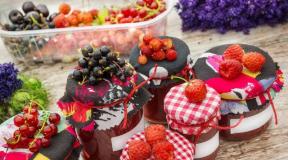
This is where various gift sets are formed: seasonal, festive and thematic. These are - in the form of assorted 
Or such 
The residents of the region can buy the products of the factory both in federal chain stores and in their own branded outlets (for example, in the well-known Chudesnitsa stores). Also, the factory has created an online store, which distinguishes the factory from others. This store is little known to the people of Saratov, and in vain - all ordered products will be delivered to your home free of charge. True, there are limitations there (for example, the minimum order value is 700 rubles), but a bonus system is provided.
By the way, the work clothes of the employees are strictly monitored here: white robes are strictly over all clothes and mandatory hats. 
But candy is not the only thing that is made at the factory. The flour production of confectionery products is also presented here, which we will talk about next time.
Some psychologists associate love for sweets with disorder, stress and lack of love. We, sweet tooth, will not enter into discussions with angry people, but simply smile and unfold a delicious chocolate candy. Let the non-romantic lovers of pickled cucumbers know that we are ready to give our loved one the last piece of chocolate. Sometimes we are so overwhelmed with warm feelings for loved ones and ourselves that we can make chocolates with our own hands at home. 
Chocolate psychotherapy
New Zealand psychotherapist Murray Langham has been studying the chocolate question for many years and has even written several books about it. According to the author, it is possible to determine a person's character by his favorite type of chocolate.
Chocolate therapist Murray Langham is a registered physician, but has served as a chef for many years and his findings are practical. Landham now has his own confectionery company. Here are some secrets from a hypnologist-chocolate therapist.
Candy shape:
- If you like round candy, you are an outgoing extrovert.
- Balanced, honest and reliable people choose squares.
- Those who prefer oval sweets easily converge with people, feel great in a new society and often become the soul of the company.
- Lovers of rectangles know how to listen to the interlocutor and always remain calm.
- Can't take your eyes off the strange spirals of candy? This gives you a very energetic but disorganized personality.
- Rhombuses attract those who dream of wealth.
- People of triangles have little interest in the feelings of others, but they are easy-going.
Chocolate type:
- Milk chocolate is made for sentimental romantics.
- Dark chocolate lovers strive for innovation in all areas of life.
- Those who prefer chocolate white, endowed with a heightened sense of justice, but they lack courage.
- Gourmets and connoisseurs of comfort cannot resist dark chocolate.
- If you don't worry too much about the type of chocolate, then you are flexible and always willing to compromise.
Candy filling:
- Nuts in the filling are popular with tactful people with a developed sense of style.
- Passionate and dreamy natures will not give up on coconut flakes.
- Lovers of mint flavor are distinguished by a vivid imagination.
- Coffee filling for the impatient.
- Reliable and faithful love candy with orange jam.
- Spirituality is manifested in the love for Turkish delight or jelly filling.
- Sensitive people will be delighted with chocolate fondant.
Homemade chocolates are great because you can choose the color, shape and filling yourself. Sweetness cooked with your own hands will allow you to express yourself and show your culinary skills.

Secrets of making homemade chocolates
Making chocolates is not a difficult task, you just need to know a few rules:
Chocolate does not like heat and temperature extremes
The temperature in the room should not exceed 20 o C. It is also necessary to observe the temperature regime when melting the chocolate, otherwise the sweets will be dull and "gray". The ideal temperature for dark chocolate is 32 ° C, for milk chocolate - 30 ° C, for white chocolate - 28 ° C. When the candies are ready, leave them to solidify at a temperature not exceeding 20 ° C. If the room is warmer, put in the refrigerator for 10 minutes, but not in the freezer.
Not a drop of water
The molds must be completely dry. The water in the melted mass will provoke crystallization, and the candy will be spoiled.
Correct melting
Homemade chocolates can be made with cocoa, drops, or plain chocolate bars. It is easier to melt the drops, the tiles should be chopped by hand or grated on a coarse grater. You can melt chocolate in the microwave or in a water bath, but in the first case, it is difficult to control the temperature. It is not recommended to heat the mass in a saucepan over a fire, as the chocolate will burn and everything will be spoiled. Heat the chocolate in a bath to about 45 ° C and bring down the temperature by adding cold drops or crumbs.
Use molds
Dry silicate or polycarbonate molds are ideal. The candies will be attractive and glossy. You can pour chocolate into the packaging left over from ready-made chocolates, but you won't get a spectacular gloss. It is possible to give shape without molds, and to provide shine with glaze.
Choice of filling
Chocolate goes well with prunes, dried apricots, nuts, nougat, ganache, marzipans. Ganache is made from chocolate, cream, rum or brandy. Before filling, nougat needs to be heated to 25 ° C. Too hot filling will ruin the chocolate.
You can also put fresh berries inside, but it is better to use jam anyway. In combination with ganache, the filling will be very tasty. Ganache does not freeze like chocolate, it always retains its plastic consistency.
Storage conditions
The shelf life of homemade chocolates depends on the filling. If you've used dried fruit, the finished candy can be stored in the refrigerator for up to a month. Ganache filling can go bad faster. If the candies contain nuts, the shelf life is increased, and the fresh fruit filling cannot be stored even for a couple of days.

Homemade Chocolate Candy Recipes
Making candies with your own hands is not difficult, it all depends on the recipe you choose and your pastry experience. Start with the simplest recipes, and pretty soon you will be able to make chocolate masterpieces.
Cocoa sweets "Balls"
Composition:
- 100 g cocoa powder
- 300 g dry biscuits
- 250 ml milk
- 200 g butter
- 100 g walnuts
- 250 g sugar
- 50 g icing sugar
Preparation:
- Mix cocoa with sugar.
- Pour in warm milk, stir and cook until the sugar is completely dissolved.
- Grind the cookies in a meat grinder, coffee grinder or by hand.
- Pour hot cocoa over the cookie crumbs. Stir well to avoid lumps. Leave to cool.
- Add soft butter and knead to a homogeneous mass.
- Shape into balls and roll in crushed walnuts. Sprinkle with powdered sugar.
- Chill in the refrigerator for an hour.
These simple sweets are similar to the Potato brownie. Even a child is able to cook them, and adults and children love this delicacy.

Cocoa sweets with almonds
Composition:
- 100 cocoa powder
- 100 g butter
- Half a glass of powdered sugar
- 50 g peeled and toasted almonds
Preparation:
- Melt the butter.
- Add powdered sugar. Pour in cocoa gently, stirring constantly.
- Let cool and shape into candies.
- Place a nut in the middle of each.
- Sprinkle with powdered sugar
- When the candy has cooled down, put it in the refrigerator for a couple of hours.

Sweets with condensed milk and milk powder
Composition:
- Powdered milk - 150 g
- Boiled condensed milk - 200 ml
- What-powder - 100 g
- Powdered sugar - 50 g
- Butter - 50 g
- Walnuts - 150 g
- Banana - 1 pc.
Make candies from powdered milk at home to delight yourself and your kids. From this amount of products, about 30 sweets are obtained.
Preparation:
- Heat the oil in a water bath and dissolve the icing sugar in it.
- Mix with boiled condensed milk.
- Add milk powder and cocoa. Mix the mixture in a high-rimmed container with a mixer. Refrigerate.
- Fry the nuts in a dry frying pan. Walnuts can be substituted for any others. Choose some of the nuts for the filling, from the rest, make crumbs to roll the candies.
- Cut the banana into slices about 2 cm thick and divide each into three slices.
- Lubricate your palms with butter so that the chocolate mass does not stick to your hands.
- Spoon the mixture with a teaspoon and roll into balls with your palms. Flatten the ball with a tortilla, insert a slice of banana and a nut. Pin and roll the ball.
- Dip the candies in crushed nuts and send them to a cool place for several hours.
Sweets made from powdered milk with a banana at home will be delicious, but you do not need to store and cook them for a long time. Candy with fresh fruit can be stored in the refrigerator for no more than 2 days.

Chocolate-covered prunes
Everyone's favorite homemade prunes in chocolate will be even tastier. Prepare prunes in advance: rinse, pour boiling water for 20 minutes, remove the seeds, spread on a board to dry the fruits.
Composition:
- 200 g pitted prunes
- 100 gram dark chocolate bar
- Roasted almonds, peanuts, walnuts or any other nuts - about 150 g
Preparation:
- Fry the nuts in a dry skillet.
- Place a nut in each swollen and dried prune.
- Melt the chopped chocolate in a water bath.
- Place the prunes on a fork and dip in the chocolate.
- Place the candies on top of the parchment.
- When the first layer of chocolate has hardened, repeat the procedure.

Truffle sweets with "drunken" cherries at home
Composition:
- Dark chocolate (not less than 75% cocoa) - 250 g + 150 g for icing
- Heavy cream - 250 ml
- Butter - 50 g
- Dried cherries - 35-40 pieces
- Cognac - 75 ml
- Almonds or walnuts for garnish
- Cocoa - 4 spoons
Preparation:
- Pour brandy over the cherries 12 hours before making the sweets, cover with a lid or plastic wrap.
- Chop the chocolate.
- Boil the cream, add the chocolate and stir until it dissolves.
- Add butter, cool and refrigerate for several hours.
- Remove the cherries from the cognac and pat dry with paper towels.
- Roll the cold chocolate into walnut-sized balls. Place cherries in the middle.
- Place the finished candies on a plate and refrigerate for 10-15 minutes.
- Chop the peeled and toasted nuts. Chop the remaining cherries finely.
- Melt the chocolate for the icing in a water bath, let it cool.
- Chop the truffle on a fork or skewer, dip in cold icing, place on the wire rack and garnish with nuts and cherries.
- There is not enough frosting for all the candies, roll the rest in cocoa. Candy with different surfaces will look interesting on one dish or in a box.
- Finished truffles should cool in the refrigerator for at least an hour.

Cocoa and milk powder truffles
Composition:
- A glass of sugar
- 100 ml cream
- 100 g butter
- Egg white - 1 pc.
- Cocoa - 100 g + 25 g for sprinkling
- Powdered milk - 100 g
- A tablespoon of powdered sugar and crushed nuts for sprinkling
Preparation:
- Add sugar to the cream, heat over low heat and cook for three minutes.
- Remove from heat, add butter, milk powder and cocoa. Stir until smooth.
- Whisk the cooled egg whites into a thick foam.
- Mix with chocolate and leave warm for 30 minutes. During this time, the mass should thicken. Then send it to the refrigerator.
- Mix together a powder of crushed nuts, powdered sugar and cocoa.
- Shape the candies with traditional truffle slides or balls. To prevent the chocolate from sticking to your palms, brush them with butter. If desired, you can put a filling in the middle of each candy.
- The truffles should sit in a cool place for several hours.
Sweets "Bird's milk" at home
Everyone knows delicious sweets since childhood. Do-it-yourself bird's milk will be even better, although you have to tinker.
Composition:
- 180 g sugar
- 150 g of condensed milk
- 100 g butter
- 3 egg whites
- 15 g gelatin
- 100 ml of water
- 300 g dark chocolate
Preparation:
- Pour sugar and gelatin with water and put on a small fire. Stir until everything is dissolved. Do not bring to a boil.
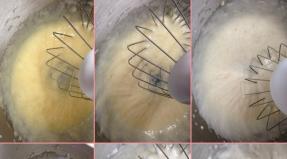
- Beat the warm butter with a mixer, gradually pouring in the condensed milk.
- Whisk the whites into a thick foam.
- Pour gelatin into the whites in a thin stream, continue whisking.
- Add condensed milk with butter. Whisk until smooth.
- Pour the mixture into molds and refrigerate for 3 hours.
- Melt the chopped chocolate in a water bath and cool to room temperature.
- Stick the frozen soufflé on a fork and dip in the chocolate. Place candy on a platter.
- Bird's milk is done when the chocolate is solid and hard.

The idea of making truffle or “Bird's milk” sweets at home may seem strange - the choice of chocolate in stores is huge. Each chocolate maker has its own arguments - some like to come up with their own recipes and find new tastes, others want to be sure of the composition of the products, and still others are not satisfied with the traditional design of sweets. Experiment and please yourself and your loved ones!
It has already become a tradition to go to factories and plants to see and study exactly how all those products that we see every day on store shelves are produced. I didn’t wait until fate would reward me with such a moment, so I took everything into my own hands and went to the factory of my favorite sweets, as I probably dreamed of seeing this mysterious process from my childhood. And of course, this is directly related to my profession - I am a business woman and I want to be the queen of sweets in the near future.
How chocolates are made - Video:
|
Only first I need to figure out the production process and maybe I will be able to translate my childhood into a real big business.
So, chocolates produce using special equipment. But first you need to take care of the raw materials, the basis of which is, of course, cocoa beans. It is common for them to grow in warm distant lands, such as North and South America, some islands of Asia and Australia, of course.
But in order to get this delicious product called chocolate, cocoa beans undergo complex technological processing: peeling, sorting, roasting, grinding into cocoa groats and then grinding it. But this is not chocolate yet - it is only cocoa powder.
There are many different varieties of cocoa and you need to understand them in order to select only the best for your production. Well, when the raw materials are purchased, and all the equipment is set up, we proceed to the very process of making sweets.
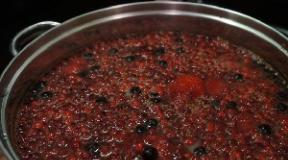
At a high temperature, the chocolate mixture is fed into the hopper of the machine, where it is melted under thermal action. At the same time, the filling is made in another workshop. Then the melted chocolate and filling go into special molds for casting sweets, which can be of different shapes and with different funny or exquisite patterns on the surface.
After that, the candies in molds are sent for cooling for some time so that the candies remain beautiful and do not succumb to external influences before they enter the mouth of their customers. Chilled sweets are knocked out on sheets and then move along the conveyor to the packaging machine. Then, after packing, the sweets are also transported along a conveyor directly to the packing boxes, where they are sealed with a special tape, and they are eaten in large cars to their sweet-tooth customers.
|
The production process can be beat and manual, this is of course a more complex form of making sweets, but it also has the right to life. Since we all want to have something that others do not have. Strange as it may seem, this phenomenon extends to the usual, but at the same time, unusual purchase of sweets. Some sweets can indeed be called designer items. A lot of human imagination present at the pastry chefs can only pleasantly surprise.
As for the manufacturing process itself, it is similar to the one presented above until the moment the chocolate mixture is poured into the molds. The molds are specially designed by pastry chefs. But these candies differ not only in shape, but also in their painting with many types of fondant and glaze.
You can see famous people made of chocolate, including actors and politicians, fairytale heroes and cute animals. And all this can not only be admired, but also given to loved ones or entertained by children, and then of course you can eat and fully enjoy the delicacy of the taste of delicate praline or tart dark chocolate.
In conclusion, I would like to say that confectioners have always been and will always be, therefore, investing in sweets will always be profitable, since humanity, having once tasted this wonderful product (chocolate), can no longer refuse it.
Video, howdochocolate:
Hello everyone! Vika Leping is with you, and today I will tell you how to make delicious chocolates at home, because February 14 is coming soon, and gifts for Valentine's Day, as we all know, are, first of all, chocolates. So your chosen one or your chosen one will definitely appreciate the handmade sweets and excessive efforts.
What to give a loved one on February 14 (or a loved one, of course) is one of the most frequently asked questions on the eve of a holiday called Valentine's Day. Valentine's Day gifts are actually classics - handmade chocolates, a valentine card and flowers. There is nothing to be smart about, to wait for expensive gifts too, because in Catholic countries, where this holiday came to us from, this is a sign of bad taste.
On this day, you can simply cook dinner for your loved one or beloved, open a bottle of your favorite wine, sit in a romantic atmosphere, devouring an original gift for February 14 for dessert - the most delicious sweets in the world, made with love and from natural ingredients. Look at the composition of shop chocolates, I'm sure you will count more than 20 incomprehensible names. I will only use 3+ filler as desired. Only 3 ingredients! Can you imagine?
When I wondered how to make chocolate at home, I realized that almost all chocolate recipes are a mixture of cocoa powder with butter, and this is completely wrong, because real chocolate is not made from cake powder, but from real cocoa beans and butter. cocoa, and these are its irreplaceable ingredients. Therefore, I turned to my vegan friend for advice, who helped me with the proportions 🙂 So, if you still don’t know what to give a girl or boyfriend on February 14, we start making gifts from sweets.
So, a step-by-step photo recipe for chocolates, or how to make chocolates at home.
Ingredients
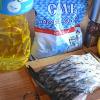
- - grated beans (raw cocoa) - 50-100 gr
- - 50 gr
- - maple syrup or other sweeteners - to taste
- - or milk (can be dry) coconut or regular - to taste and at will
- - dried fruits, seeds, berries - optional
Cooking method
How to make chocolate at home? It's very simple! All you need is quality ingredients and silicone candy molds. The given amount of ingredients is enough for about 20 pieces. Let's start cooking, although, it's more like a meditation 🙂 By the way, you probably already realized that it is not necessary to use a mold for sweets, you can also make a bar of chocolate 😉
We start preparing chocolate by preparing all the ingredients. In each candy I will put cashews or hazelnuts and some raisins. Only I love him in our family, so there will be few of them 🙂 We chop raw cocoa and cocoa butter into pieces, so they will melt faster.
Preparing a water bath. If you do not know how to make a water bath, then look at the photo below. We take a saucepan, pour a liter of water into it, bring it to a boil, reduce the heat to a minimum, and put a large bowl or frying pan or saucepan on top, the main thing is that it is heat-resistant, otherwise it will burst like mine.

Now put the grated cocoa beans and cocoa butter in a bowl in a water bath, stir with a silicone spatula until completely dissolved and turn off the heat. Handmade chocolate is almost ready 🙂

Add any sweetener. 1 teaspoon each, stir until dissolved, then taste. If necessary, add more. You can also add regular or coconut cream / milk at this point if desired, then you will make regular milk or vegan milk chocolate.
By the way, if you are making ordinary milk chocolate, then to enhance the creamy taste, you can also add butter or ghee, which also hardens well. [ ] And another important point! The more milk, the more cocoa butter should be in relation to the beans, or the homemade chocolates may not solidify. Therefore, the amount of beans I have varies from 50 to 100 grams.

Here's the hot chocolate recipe! However, the recipe for chocolate candies has not yet come to an end. We take a silicone mold or pour hot chocolate into the recesses. I did it with a teaspoon, it's more convenient that way.
It is important to take into account that if you want to add filling to delicious chocolates, then you do not need to top up to the very edges, otherwise then the cocoa chocolate will flow over the sides.

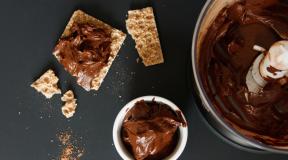
We lay out the fillers. You can drown nuts or dried fruits in chocolate, but I like it better when the filling is visible. Small but delicious gifts for lovers are almost ready!

And if you don't have enough tins, you can pour the leftover real chocolate into muffin tins, for example. We put delicious chocolates in the refrigerator for about 1 hour.

We take it out of the refrigerator and carefully remove the natural chocolate from the molds. Now you know how to make chocolates at home! 🙂 Dots are visible on mine - this is honey. Such delicious gifts for Valentine's Day can be folded into a beautiful box with a bow, or you can serve it on a silver platter 😉

Here comes the super-fast results!
A short recipe: homemade chocolates, or how to make chocolate at home
- In a water bath, melt the cocoa butter and grated cocoa beans, mix and turn off the heat.
- Add 1 teaspoon of honey or other sweetener, stir until completely dissolved, taste, add more, if necessary.
- Add some regular milk or coconut milk / cream (to taste) if desired, while reducing the amount of cocoa beans added (think ahead!). [ Addition: I didn't have any problems when adding ghee and liquid coconut cream, but one of my friends has exfoliated for unknown reasons, so perhaps, in order to completely eliminate the possibility of delamination, it is worth using powdered milk!]
- Pour into molds, put in the refrigerator for 1 hour, then carefully take out the finished natural chocolates.
- Now you know how chocolate candies are made!
Small delicious gifts for Valentine's Day are ready. As you can see, the recipes for chocolate and bitter and milk turned out to be very simple. By the way, we, with my boyfriend Serezha, will go to a French restaurant on February 14 to try different sweets. Honestly, I have never been to such a restaurant, so I'm waiting for something especially tasty and interesting. Then I will share my impressions of what I have eaten. And what will you do with yourself on this wonderful Valentine's Day?
And I will try very hard to have time to lay out one more recipe. sweets, but already berry, from agar-agar ... More precisely, I will try to have time to cook, take pictures and tell you everything 🙂 And so as not to miss anything, , it's free! In addition, when you subscribe, you will receive as a gift a whole collection of full-fledged recipes from 20 dishes prepared very quickly, from 5 to 30 minutes, which will save a lot of your time! Eating fast and tasty - it's real!
And Vika Leping was with you! Try to bring chocolate recipes to life, like, leave comments, appreciate, tell what you did and remember that everyone can cook deliciously, that you are more talented than you can imagine, and, of course, enjoy your food! I love you, be happy!