Do-it-yourself salt dough horses. How to make a horse out of salted dough
Master class for parents and children on making crafts from salt dough
Theme: A dough horse for a little Cossack.
Target: Get the skill in making a toy out of dough with your own hands.
Tasks:
Help your child not only gain self-confidence, but also develop creativity.
Develop a cognitive interest in exploring the world around you.
Master class progress:
1. In my master class, you will get acquainted with the various options and secrets of recipes for salted dough and its drying. Master the principle of sculpting a horse from dough. Learn about the benefits of sculpting, affecting the all-round development of the child. And of course you will get a lot of positive impressions and emotions.
2. All parents are well aware of the benefits that modeling brings to the development of a child of preschool and primary school age. Thanks to this type of creative activity, the child develops figurative thinking, develops memory, visual perception of objects, trains fine motor skills, which is especially important for preparing the hand for writing. Also, the role of sculpting in the development of a child's sense of beauty, his aesthetic upbringing is undeniable. Working on volumetric images, children study the characteristic features of objects, clarify certain details, and comprehend the basic qualities of objects. Modeling is a simple and effective way to reveal and develop hidden abilities and skills, to realize your uniqueness, your creativity. For many children, modeling becomes a kind of bridge between the world of reality and fantasy. I bring to your attention one of the classic recipes for salt dough.
Classic recipe:
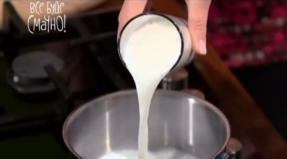
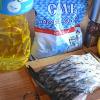
Pour 1 cup fine salt and 1 cup flour into a bowl and stir. Then pour in 1 tablespoon of vegetable oil and half a glass of water, stir with a spoon and knead with your hands until smooth, just like a regular dough. Water can be replaced with starch jelly, then the mass will be much more plastic. Kissel is made like this: dissolve 1 tablespoon of starch in 1/2 cup of cold water. Also, heat 1 glass of water in a small saucepan to a boil. Pour the starch solution into boiling water, stirring occasionally. When the contents of the saucepan are thick and clear, turn off the heat. Let the jelly cool and pour it into the flour and salt mixture instead of water.
2) To make a horse, we need:
dough, a stack, a plate for rolling out the dough, then we sculpt according to the scheme:
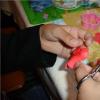
3. Work of the participants.
4. At the end of the master class, I offer you a booklet and a memo for further fun modeling lessons with the children at home. You can sculpt toys, gifts, crafts. Remember, the best gift is a gift made with soul and with your own hands!
I wish you success!!! Sculpt, create, rejoice !!!
________________________________________________________________
Annex 1
Material for the master class:
salty dough
dough rolling board
stack
container with water (for wetting hands)
foil (for the finished product)
paints, brushes (for coloring pre-dried products)
Appendix 2
memo to parents
memo to parents

The benefits of modeling for a child are simply amazing! Modeling helps the child not only gain self-confidence, but also develop creativity. Children are very fond of smearing everything and messing around with everything. Advanced mothers all understand that this is useful for general development in general, and also for intellectual development. Small children pull everything into their mouths, but trying to wean a baby from this is harmful to his development. Since, starting from three months and up to two years, during this period, the mouth is the main instrument of cognition and research of the world around for the child. When you decide to give your child a try to start sculpting, then be prepared that all this may end up in his mouth. But this should not be considered an obstacle to starting sculpting. If you are strict about the appearance of the slightest stains on clothes, then the crumbs may develop a fear of any stains of dirt in the future. Such a kid will not feel the desire and joy to draw. The child's purity, which is not harmful, but beneficial, must be taught between two and three years. If you want your child to fall in love with sculpting and drawing, then try to captivate yourself with this too! For modeling, you need to select those places where it will be easiest for mom to wash and cleanse the consequences of these creative abilities of the baby. The most suitable place can be found in the kitchen. All things that you and your child need for sculpting should be nearby, especially wet wipes and various rags.
It is very important to find the time for this activity.... The baby should be full and not overworked, and the mother should not rush anywhere. This will be half the success. Never get angry or scold your child if something goes wrong. The child remembers more not the classes themselves, but the mood of the mother during them, therefore, if you are not happy, then the child will never fall in love with modeling either. Mom needs to remember that a child up to the age of three can be focused for a short time, but children from a year to one and a half can be completely attentive only for a couple of three minutes.
It is forbidden hold and force the child to sculpt with plasticine when he does not want to and is capricious.
Not necessary overexert and overload the child with activities, it must be remembered that kids get tired quickly. Lesson time will increase when the child's nervous system becomes more developed. The benefit for the child from modeling is the general development of the child's creative skills and motor skills in general.
Every mom needs to remember and know which children under three years of age cannot. So what is it? Children at this age cannot fix their attention on anything for a long time. Can't do several things at the same time. They also cannot understand what is not related to their personal experience. They should have everything by illustrative example. Even small children cannot sit in one position for a long time. Create according to the plan, and also act purposefully, achieving any result.
What is the best material for modeling? To date, there is simply plenty of such material on store shelves. Any material has its own specifics. Salted dough is considered to be the best material for starting modeling. It is completely environmentally friendly, you can easily take it in your mouth, its recipe can be found either on the Internet or in any book on children's creativity. In addition, the dough has increased plasticity and softness.
The first thing you should teach baby - crumple and try to tear off large pieces. Then knock and slap the torn piece with the handle. Poke holes with your fingers in this piece. Try to insert dry pasta or large cereals into the resulting holes, or something else. But during these activities, the mother must carefully monitor the baby so that he does not shove all this for himself somewhere not intended. Each action of the child, when he sculpts, must be given a name. Keep the word short. For example, when a child claps a piece of dough, you need to say "clap", and so on. Treat the child's creativity with enthusiasm and attention, try to organize his "exhibitions". With the characters that your baby has blinded, you can arrange theatrical home performances. Most importantly, the baby can get tremendous satisfaction from the very process of creativity. Children love to break what they have blinded, but the skills that they acquired in the process of sculpting with dough or plasticine will be very useful to the child in the future! The benefits for the child from modeling lessons - development, communication and play! If you wish to familiarize yourself with this topic in more detail, you can refer to the source.
Master class on needlework "Testoplasty". Chess piece "Horse" from salted dough
Master class on needlework "testoplasty"
Master class on making a volumetric figure from salted dough.
This master class is intended for teachers of additional education, children of primary and secondary school age.
Purpose: Chess figure.
Usage: For Game. While playing chess, the child learns to think logically, independently make decisions, draw conclusions.
Target: Development of the creative abilities of teachers of additional education and children, to consolidate the ability to sculpt a volumetric figure from the dough.
Tasks:
- Increase sensory sensitivity (the ability to subtle perception of shape, texture, color, weight, plasticity, proportion);
- To develop general skill, fine motor skills, as well as spatial thinking and imagination;
- To form the ability to plan work on the implementation of the concept, to anticipate the result and achieve it, if necessary, making adjustments to the original concept.
For work you will need:
- salted dough (salt, flour, water, starch, PVA glue)
- frame for the base *
- foil
- toothpicks
- stacks
- brushes
- gouache
- yacht varnish

________________________________
* For the frame, I used a mold from an old chandelier, but you can make it yourself from foil by stuffing it tightly into a glass or into a beaker.

Step-by-step process of making crafts:
Salted dough: 1 tbsp. salt (crushed on a coffee grinder), not a full glass of cold water (about 7/8), 2 tbsp. flour, 2 tablespoons starch, 2 tbsp. PVA glue. Knead a thick dough, wrap in a plastic bag and put in the refrigerator for 20 minutes. Then you can start sculpting.

Cover the frame of the base of the figure with a small layer of dough. Insert a toothpick into the middle from above. Let the dough dry. We form the shape of the future figure from the foil and put it on a toothpick.

Cover the form with dough. The horse's legs will be at the same point, so at this stage we are making them together as one cylinder.

We cut the cylinder from four sides

and smoothing the edges with a stack and a wet brush, we form the round legs of our horse.

We leave our feet to dry and proceed to the pedestal.

Put small balls "stones" in a circle

three rows.

Lay out the top layer with small "stones", two rings.

While the pedestal dries, we'll take care of the head. We build up the horse's face.

Cut out the mouth. And with a wet brush we smooth out the edges of the dough cut.

We make the nostrils with a toothpick.

We mold triangular ears and glue them (with water) to the head.

Next, we make the hooves. Cut out a thin strip 1 cm wide.

and wrap the horse's legs at the bottom.

We mark the hooves

for each leg.

On the front legs, we make forked hooves.

For greater strength of the tail, we make a flat dough frame for it. Let the craft dry.

Now we build up the tail.

We roll thin long "flagella"

and lay them out from the bottom of the base of the tail to the top.

Making eyes and cheeks

smoothing the dough with wet fingers.

We stick the tongue in the mouth. For wet dough to stick to dry dough, moisten dry with a wet brush.

We make the mane. Spread thin small sausages around the neck

in different directions

in two rows.

Put the bangs between the ears.

Also in two rows, like the mane.

Our horse is almost ready, it remains to dress it up. Cut out a strip of 0.5-0.7 cm and glue it to the neck.

Squeeze out two parallel strips along the edges with a stack, and between them with a blunt tip of a brush we make small pits,

into which we insert small balls - "precious stones". We wrap the center ball with a thin ring.

We put a blanket on the horse's back. Cut out a rectangle about 3 cm wide, cut the corners a little and glue (with water) to the back.

As well as on the collar we make two parallel stripes,

decorate the middle with a pattern and make recesses

insert small balls into them.

We make grass on the pedestal on three sides.

Our horse is ready. We dry it well in the open air - in the room on the table. It can be near the battery, but not on it. It is better not to dry such a craft in the oven, it may swell.

This craft is a chess piece, and for our fabulous "Goldfish" chess we need two identical horses. The height of the finished figure is 10-12 cm.

After drying, you can start painting.

I use gouache because it is not only paint, but also a kind of primer that the varnish oils do not pass through.

If you like to make a variety of crafts from salt dough, then with the help of this master class your collection can be replenished with a new specimen - a fun horse.
Moreover, the HORSE is a symbol of the coming New Year.
Thanks for the masterclass masterclassy.ru.
Necessary materials:
- salty dough
- horse drawing
- food oilcloth
- rolling pin
- brush
- paints
- acrylic lacquer
- Super glue
- coffee beans
In order to get started, you need to draw a horse, or, to make it faster, you can print a ready-made drawing.

Cooking salted dough: take water, salt, flour in a 1: 1: 2 ratio, knead the dough. Then we wrap the dough with food oilcloth and hide it in the refrigerator for 60 minutes. The finished dough should be similar in consistency to plasticine.

We take the drawing and cut out the horse.

We take a part of the dough and roll out a circle, after which we take a drawing of a horse and put it on top of the dough.

We circle the outline of the horse with a knife.

Carefully remove the excess dough.


We make a blank for the eyes from the dough - two balls.

We moisten the dough with water and attach the eyes.

We take a brush from the back side and make holes, these will be the pupils. We dry the horse for at least 5 days.

After the horse has dried, we take acrylic paints or gouache, paint the face and eyes.

Give the paint time to dry.

Then we paint the horse itself in beige.

Paint the horse's mane with yellow. Let the paint dry.

Then we turn the horse over and paint the back side in beige.

We paint the ears of the horse pink, the eyelashes and pupils - black. With a light brown paint with a brush, we make the effect of specks on the horse.

To add flavor to our creation, we take coffee beans and glue them to the horse.

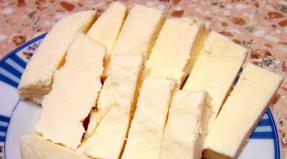
A cheerful horse made of salt dough is ready.

The horse can be like that, it all depends on your imagination. There are tons of pictures on the Internet, rate the one you like better!

This one was spied on in the "Land of Masters"

Horse magnet)


Good luck to everyone in your work.
We sculpt from the dough. The horse made of salted dough, the master class of which was provided by a master of modern hande-made works, was made in the style of a Dymkovo toy. Maybe that's why this craft is so beautiful and eye-catching.
It turns out that feeling like a real sculptor is not so difficult at all! And you don't need marble, granite, bronze, or even clay. After all, you can sculpt a sculpture ... from dough! Of course, this should not be ordinary dough, but special - salty. Then it will not crack when dried and will acquire sufficient strength comparable to clay. Pancake flour is not suitable for creating a plastic mass, as it will necessarily rise, forming cracks and deforming the figure.
How to make a horse out of salted dough

To make a plastic salty dough, you need to take flour, salt and water, in weight proportions of 200: 200: 125. But it should be borne in mind that salt is twice as dense as flour, so if you measure it by volume, then the proportion will be 200: 100: 125. 
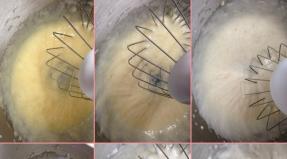
Water should be taken cold and poured in portions into a mixture of flour and salt. It is best to use a mixer when mixing. 
Then the dough is kneaded by hand in the same way as for baking.

If it is decided to sculpt a horse figurine, then this can be done in three steps, starting with sculpting the body. The rest of the mass is best placed in a plastic bag for a while so that it does not become covered with a hard crust.

Having fashioned the head and neck, this detail is fastened to the body. For stickiness, you can slightly moisten the bonding site, and gently smooth the "seam" itself, hiding it.

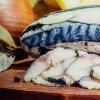
At the very end, we form the tail of the mare. You can make it to the very ground - this will increase the support of the figure by one more point.

The finished product must be dried well. You can use the oven and "bake" the sculpture at 80 degrees. Or you can use the "microwave" - it's safer and faster. Only in a microwave oven is it better to first use the defrosting mode and keep the figurine for a minute.
Then you need to check whether cracks have appeared, whether the product has lost its shape. In the event of surface violations, you can "make a small repair" with the test, first immersing it in water. In this way, it is easy to hide any irregularities and cracks that may appear.
Then you can already switch to the warming up mode. The figurine should be removed periodically and checked for strength. When it becomes hard and dry, you can proceed to the last step of making the toy figurine.

This will be coloring. You can use any paints: from acrylic and oil paints to food and watercolors. Some may even leave the figurine pure white, some will limit themselves only to coloring the mane and tail. Or you can joke a little and remember the famous colorful Dymkovo toys.
Can you say now that the horse is made of salt dough? Rather, she rode from a fairy tale or a cartoon ...

It is so easy to become a real sculptor, sculptor, artist - in a word, a creator.
Therefore, rather take flour and salt and - get down to business, gentlemen! Create your masterpieces!