Tempering chocolate at home recipe. Tempering chocolate at home
Crystallization of cocoa butter.
In molten chocolate, cocoa butter fatty acid molecules are randomly arranged and in constant motion. When chocolate is cooled without observing special rules, the molecules form a loose structure of unstable crystals, such chocolate is soft and sticky. If the chocolate is cooled correctly, the molecules form the correct structure from stable crystals, such chocolate is hard and crunchy.
The cocoa butter contained in the chocolate mass is polymorphic, that is, it is capable of forming six different types of crystals with different melting points:
I (17.3 °),
II (23.3 °),
III (25.5 °),
IV (27.5 °),
V (33.8 °),
VI (36.3 °).
Some of them are unstable and, after formation, rather quickly transform into crystals of other types (according to the scheme I – II – IV – V – VI). If the chocolate mass is simply left to cool, the hardening process will take several hours. In this case, the chocolate will have a coarse-grained structure and a gray bloom ("fat bloom") due to the gradual transition from one crystalline form to another.
Tempering the chocolate.
To obtain stable crystals of cocoa butter, chocolate must be heated above the melting point of all crystals - up to 45-50 ° C, and then cooled in one of two ways. The first is to chill all the chocolate to 32 ° C and add the pre-tempered (hard) chocolate to seed the crystallization. The second way is to chill part of the chocolate to a temperature at which all types of crystals are formed, and then mix again with the hot mass and bring to 31–32 ° C in order to melt unstable types, leaving only the desired shape.
So, to obtain high-quality chocolate, it is necessary to carry out controlled cooling and growth of crystals of only the required type - namely V. Why this particular form?
First, it is quite stable (it turns into type VI, but slowly, over many months or even years).
Secondly, its melting point is optimal - chocolate remains solid at room temperature, and melts easily in the mouth (unlike form VI).
For tempering, the chocolate mass is first heated to 45-50 ° C in order to melt all crystalline forms. Then part (about 2/3) of the mass is quickly cooled to 25-29 ° C (depending on the type of chocolate - milk or bitter) on a table cooled with water or ice. With such blast cooling, all crystal forms
... This mass, full of seeds, is again mixed with hot chocolate, while the temperature is equalized to 30-32 ° С, which ensures the melting of unstable forms (stable ones remain)
... After that, you can pour the mass into molds and put in the refrigerator (to speed up the solidification) - and after five minutes the chocolate of the required crystalline form (V) will be ready.
It is not enough to simply temper the chocolate.
You need to know exactly how it is tempered.
The figure shows three examples of cooling and crystallization charts for chocolate.
1. Properly tempered chocolate.
2. Overtempered chocolate.
3. Undertempered chocolate.
Anyone who has ever thought about making beautiful chocolate decorations or homemade homemade chocolates usually breaks off during the tempering phase of the chocolate. First, a marble table was required. Where will I get a marble table? In the funeral service, they told me sarcastically. Well, thanks ... And then. It is necessary to heat the chocolate to 45C, cool to 26C and reheat to 31C. In general, a nightmare.
And if the chocolate is not tempered, then it is dull, instantly melts, not hard, grainy, streaked, tasteless. You can't get it out of the molds in which it was poured.

So just now I was surfing the Internet, studying chocolate tempering. My vigilant concern for the students, who needed to somehow make life easier in terms of tempering, haunted me. At least you can do without a marble table!
And I came across a video about tempering from the Callebaut company. Which, as everyone knows, is one of the world leaders in the production of chocolate. What I saw shocked me. It turns out that to get tempered chocolate, you don't need to temper it at all! No marble tables, no heat up and no quick cools! Honestly, I watched the video twice to make sure I got it right. And then she ran to try, because I could not believe it. It turned out EXCELLENT!

So, I have one good news and one bad news about this method of making tempered chocolate.
The good news is, yes, tempered chocolate is made in one step without cooling or reheating. And that's all.
The bad news is that you still need a thermometer. And better not a needle thermometer, which you use to check the readiness of steaks or measure the temperature of sugar syrup. Better to take a pyrometer - a non-contact thermometer. It produces results much faster. With my needle, the correct result is obtained in a minute, and with a pyrometer in two seconds. I bought a pyrometer in Leroy Merlin, it cost 1,880 rubles.

The way in a nutshell. We take tempered chocolate and melt it so that its temperature does not exceed 30C for white, 32 for black and 34 for dark chocolate. Everything.
So. We take professional chocolate. Precisely professional, chocolate bars in supermarkets are meant for eating and are not tempered. Convenient is chocolate in culets (medals). If you have chocolate in a large bar, then it must be chopped into small, small pieces.
We take chocolate, pour it into a bowl, and microwave at maximum power for 30 seconds. After that, most of the chocolate is still hard. We repeat the procedure, mix. Here the chocolate will already be heated. You can measure its temperature, you get 26 degrees. Then we go in portions for 10 seconds. Got it - mixed it up. You need to stop at the moment when ALMOST all the chocolate has melted, and its temperature reaches the limit for this type of chocolate. For example, we are drowning milk chocolate. Here he became 32 degrees. But there are still many unmelted pieces! Mix, rubbing the unmelted pieces against the walls. After that, you can literally heat it for another 5 seconds in the microwave. Can be punched with a blender.

To check if everything worked out for us, dab our melted chocolate on the table or on any other cool surface. If the chocolate froze in less than 1 minute, then everything worked out !!
Now we need to keep the chocolate at this temperature while we are working with it. Well-tempered chocolate freezes instantly! While you are passionate about writing out chocolate patterns. everything has already set in the bowl 🙂 there are two ways to maintain the temperature of the chocolate. The first method is a hot hair dryer. We just blow on the surface of the chocolate and it melts. Method two. A bowl of hot tap water. Placed for 10 seconds a bowl of chocolate in a bowl of hot water, mixed the chocolate, took out the bowl of chocolate. Remember, we must never exceed the temperature limit! And the water should not get into the chocolate, everything will go bad!
If the chocolate is slightly overheated. Well, it happens to everyone. Add a handful of unmelted culets and beat with a blender to lower the temperature of the chocolate. But this only works if it is literally a couple of degrees overheated. If it’s too much, it’s gone, you will have to temper it in a complicated way: heat it up, cool it down quickly, heat it up again.
Why does this method work without tempering? The funny thing is that professional chocolate is sold already tempered. That is, it has the correct crystal structure. And if we melt it so as not to exceed the temperature at which the chocolate loses this structure, then the chocolate will remain tempered! That is, all we need is not to disturb the crystal structure of tempered chocolate by overheating! Moreover, with this method, at some point most of the chocolate melted, but there are still lumps left, remember? These lumps are nothing more than chocolate crystals. They have the correct texture and the melted chocolate begins to crystallize around them.
Anticipating your question. Can this be done in a water bath without a microwave? I'm not sure, but give it a try.
I forgot to say. The temperature in the kitchen when working with chocolate should be 18-20C. it should be cool. Otherwise, nothing will really solidify. And further. Do not refrigerate the chocolate as it will lose its shine.
In general, hurray! I put on some decor, I'm happy as an elephant. I'll be back tomorrow. Liked.

If this is possible, and the dish does not require tempering, then it does not have to be done. But if you want chocolate to create the perfect surface and give all its taste, then this is what you need.
We all love practice, sometimes in the heat of the moment you can not finish reading the recipe to the end. But in the case of tempering, theory is important: it will make it easier to understand the whole process and not make a mistake.
In scientific terms, tempering Is the process of melting and recrystallizing cocoa butter in chocolate. You have a solid chocolate mass from which you need to create something different. But it is important to "replicate" the structure of the finished chocolate. By tempering it, you will achieve the same homogeneous cocoa butter texture and excellent quality chocolate.
Tempering chocolate at home
What you need to know first:- Tempering is controlling the temperature of the chocolate. Without it, the chocolate will not seize, "turn gray", will quickly melt or break. Therefore, you will need a cooking thermometer.
- You need to take three steps: melt, cool and heat the chocolate.
- This is a quick process and shouldn't take more than 10 minutes. Everything happens quickly, continuously: you reach the first temperature, immediately cool it down, and then heat it up again to the operating temperature!
- Each stage requires careful preparation and repeated practice. If it doesn't work on the first try, don't despair!
- The ideal room temperature for chocolate is 20 ° C.
Each type of chocolate needs its own temperature regimes:
- bitter chocolate: heat up to 49-55 ° C, let cool to 28 ° C, heat up to 31-32 ° C.
- milk chocolate: heat to 46-50 ° C, let cool to 27 ° C, heat to 29-30 ° C.
- whiteth chocolate: heat to 43-45 ° C, let cool to 26 ° C, heat to 28-29 ° C.
For work you will need:
- Cooking thermometer.
- Silicone stirring paddle.
- Marble surface, as well as spatula and scraper - for the first method.
- A saucepan with water.
- Metal bowl for chocolate.
- A container with cold water or ice - the liquid from it should not get into the chocolate.
Tempering chocolate on a table or marble board
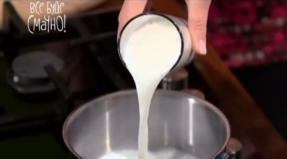
- We melt it. Chop the chocolate with a knife and place in a water bath. While stirring continuously, bring to the desired temperature.
- We cool it down. Remove the melted chocolate from the water bath while stirring. Two thirds of the mass pour onto a cold marble surface.
As soon as the chocolate on the board begins to thicken, place the mass in 1/3 of the chocolate, stir, check the temperature. If it is close to what you want, then continue stirring until perfect. If the temperature is much higher, repeat the process on the marble board and mix the chocolate again. You should have a smooth, homogeneous chocolate - then it's ready for the next step.
- We heat up. Before heating to operating temperature, check the quality of the tempered chocolate: dip a small piece of baking paper into it. At 18 ° –20 ° C it will stabilize in 3-5 minutes. If the chocolate does not pass the test, then you need to repeat steps 1-2.
Stir the chocolate constantly. And check its fluidity: too thick chocolate should be diluted with cocoa butter.

Tempering chocolate in callets (drops, drops, chips)
Callets are plastic, they are easier to grind - this is their advantage. You can also buy colorful and even flavored callets! They are much easier to temper because they are already tempered and the cocoa butter has the desired crystalline form.- We melt it. Repeat all the steps as in the first method, taking 2/3 of the chocolate mass.
- We cool it down. While stirring constantly, cool to desired temperature by adding 1/3 of the callets. To do this, remove the melted chocolate from the stove and transfer to a bowl of cold water or ice.
- We heat up. If the chocolate is well tempered, bring it to working temperature. Transfer to a bowl of hot water, stir the chocolate for at least 2 minutes. Then we move on to creating the product.

Tempering chocolate in pieces ("blocks")
Confectioners use this method if they need a small batch of chocolate - up to a kilogram. Use lumpy chocolate using the Callet Tempering Method. Remove the unmelted part of the piece in the first step and proceed to steps 2-3.Tempering in the microwave
This is an accelerated method, an alternative to a water bath. If you need to temper a small amount of chocolate, for example 100-200 grams, you can also do this in the microwave. This method is convenient, but care must be taken not to overheat the chocolate. It is very convenient to use plastic dishes to temper chocolate. It is good because it does not keep warm for a long time and thus does not overheat the chocolate.Place the container with chocolate in the microwave and heat in an impulse mode for 15 seconds, stirring each time. Check the temperature. If it is below the melting point, then heat the chocolate for another 15 seconds, stir until smooth. Once the chocolate has reached the desired temperature, chill it in an ice bath, stirring thoroughly. Then heat to operating temperature.

Create masterpieces: cake decorations, figurines and chocolates
Method for flat figures and patterns:- Prepare cling film or parchment paper - this is your work surface.
- Pour out the tempered chocolate, spread it with a spatula, layer thickness not less than 3 mm. Add decor as desired, cut out the desired shapes with metal cuttings.
- For the pattern, pour the chocolate into a piping bag and use the nozzle to apply the chocolate to your work surface.
- Leave to set in a cool, dry place.
- Two types of molds are suitable for working with chocolate: polycarbonate and silicone. Be sure to wipe the first with a cotton swab, and the second must be dry and clean.
- Apply the tempered chocolate with a brush to the entire surface of the mold. Remove excess and irregularities with a spatula.
- Refrigerate until solid. Then apply a second coat, place the molds on a flat surface and leave to set.
Anyone who has ever thought about making beautiful chocolate decorations or homemade homemade chocolates usually breaks off during the tempering phase of the chocolate. First, a marble table was required. Where will I get a marble table? In the funeral service, they told me sarcastically. Well, thanks ... And then. It is necessary to heat the chocolate to 45C, cool to 26C and reheat to 31C. In general, a nightmare.
And if the chocolate is not tempered, then it is dull, instantly melts, not hard, grainy, streaked, tasteless. You can't get it out of the molds in which it was poured.
So just now I was surfing the Internet, studying chocolate tempering. My vigilant concern for the students, who needed to somehow make life easier in terms of tempering, haunted me. At least you can do without a marble table!
And I came across a video about tempering from the Callebaut company. Which, as everyone knows, is one of the world leaders in the production of chocolate. What I saw shocked me. It turns out that to get tempered chocolate, you don't need to temper it at all! No marble tables, no heat up and no quick cools! Honestly, I watched the video twice to make sure I got it right. And then she ran to try, because I could not believe it. It turned out EXCELLENT!

So, I have one good news and one bad news about this method of making tempered chocolate.
The good news is, yes, tempered chocolate is made in one step without cooling or reheating. And that's all.
The bad news is that you still need a thermometer. And better not a needle thermometer, which you use to check the readiness of steaks or measure the temperature of sugar syrup. Better to take a pyrometer - a non-contact thermometer. It produces results much faster. With my needle, the correct result is obtained in a minute, and with a pyrometer in two seconds. I bought a pyrometer in Leroy Merlin, it cost 1,880 rubles.
The way in a nutshell. We take tempered chocolate and melt it so that its temperature does not exceed 30C for white, 32 for black and 34 for dark chocolate. Everything.
So. We take professional chocolate. Precisely professional, chocolate bars in supermarkets are meant for eating and are not tempered. Convenient is chocolate in culets (medals). If you have chocolate in a large bar, then it must be chopped into small, small pieces.
We take chocolate, pour it into a bowl, and microwave at maximum power for 30 seconds. After that, most of the chocolate is still hard. We repeat the procedure, mix. Here the chocolate will already be heated. You can measure its temperature, you get 26 degrees. Then we go in portions for 10 seconds. Got it - mixed it up. You need to stop at the moment when ALMOST all the chocolate has melted, and its temperature reaches the limit for this type of chocolate. For example, we are drowning milk chocolate. Here he became 32 degrees. But there are still many unmelted pieces! Mix, rubbing the unmelted pieces against the walls. After that, you can literally heat it for another 5 seconds in the microwave. Can be punched with a blender.
To check if everything worked out for us, dab our melted chocolate on the table or on any other cool surface. If the chocolate froze in less than 1 minute, then everything worked out !!
Now we need to keep the chocolate at this temperature while we are working with it. Well-tempered chocolate freezes instantly! While you are passionate about writing out chocolate patterns. everything has already set in the bowl 🙂 there are two ways to maintain the temperature of the chocolate. The first method is a hot hair dryer. We just blow on the surface of the chocolate and it melts. Method two. A bowl of hot tap water. Placed for 10 seconds a bowl of chocolate in a bowl of hot water, mixed the chocolate, took out the bowl of chocolate. Remember, we must never exceed the temperature limit! And the water should not get into the chocolate, everything will go bad!
If the chocolate is slightly overheated. Well, it happens to everyone. Add a handful of unmelted culets and beat with a blender to lower the temperature of the chocolate. But this only works if it is literally a couple of degrees overheated. If it’s too much, it’s gone, you will have to temper it in a complicated way: heat it up, cool it down quickly, heat it up again.
Why does this method work without tempering? The funny thing is that professional chocolate is sold already tempered. That is, it has the correct crystal structure. And if we melt it so as not to exceed the temperature at which the chocolate loses this structure, then the chocolate will remain tempered! That is, all we need is not to disturb the crystal structure of tempered chocolate by overheating! Moreover, with this method, at some point most of the chocolate melted, but there are still lumps left, remember? These lumps are nothing more than chocolate crystals. They have the correct texture and the melted chocolate begins to crystallize around them.
Anticipating your question. Can this be done in a water bath without a microwave? I'm not sure, but give it a try.
I forgot to say. The temperature in the kitchen when working with chocolate should be 18-20C. it should be cool. Otherwise, nothing will really solidify. And further. Do not refrigerate the chocolate as it will lose its shine.
In general, hurray! I put on some decor, I'm happy as an elephant. I'll be back tomorrow. Liked.