Butterfly cake made of cream. Fruit Butterfly Cake
Prepare buttered biscuit. Mix milk with vegetable oil, boil, remove from heat and let cool. Beat eggs in a bowl with vanilla sugar. While continuing to beat, add the powdered sugar in small portions until the mixture turns a light yellow color.
Sift flour with salt. Add half the flour and half the milk and butter to the egg mixture, stir gently. Add baking powder, remaining flour and milk. Mix thoroughly so that there are no lumps, until a soft, foamy mass is obtained.
Preheat the oven to 180 ° C. Cover the baking sheet with a sheet of parchment moistened with water, pour the biscuit dough on it, bake for 30 minutes. Remove from oven, let cool. Transfer the biscuit to a cutting board.
Cut off a piece of such width from the short side of the biscuit so that the remaining piece will turn into a square - this narrow piece will be the "body" of the butterfly. Cut the square piece diagonally into 2 identical triangles. Cut off a triangle with a side of 4 cm from the right angle of each of them. At this point, the "wings" of the butterfly will be connected to the "body". Cut small triangular pieces from the opposite side of the "wings". Shape the cake into a butterfly.
Beat the whites with sugar in a cool foam. Soak gelatin in a little water. When it swells, warm it up, without bringing it to a boil, until it is completely dissolved. Set aside 2 tbsp. l. gelatin, and gently pour the remaining into the whites, stirring constantly. Grease the cake on all sides with the resulting cream and put in the refrigerator for 1 hour.
Peel the fruit, cut into thin slices. Lay out on the cake, imitating the drawing of butterfly wings. Make eyes from 2 grapes, and antennae from thin strips of zest. Brush the top of the cake with the set aside gelatin. Put the cake in the refrigerator for another 15 minutes.
Today I'm making a Butterfly cake. The idea of the cake is old, but very successful. The cake turns out to be delicious, spectacular, it will never go unnoticed on your table. And I really like that it is very variable. You can cook with another biscuit, and with other berries-fruits - all at will, mood, availability and season. Let's cook!
For the recipe you will need:
For a biscuit on a 26 cm cake mold:
140 g flour
140 g sugar
4 large eggs
30 ml vegetable oil
30 ml hot water (60-70 ° C)
4 g baking powder
8 g vanilla sugar
a pinch of salt
food coloring (optional)
Cakes impregnation syrup:
3 tbsp. spoons of water
2 tbsp. tablespoons of sugar
For the cream:
350 g soft cottage cheese
300 ml cream 33-35%
100 g caster sugar (or to taste)
8 g vanilla sugar
15 g gelatin
100 ml syrup, milk or water
Berries and fruits for decoration
COOKING:
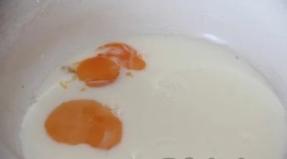
Mix the flour and baking powder, then sift. We divide chicken eggs into whites and yolks.
Pour a pinch of salt into the whites and beat until sugar-free until soft peaks. Then gradually, in several steps, add about 2/3 of all the sugar required for the recipe.

and beat until firm peaks. This is what a steady peak looks like.

Beat the yolks with the vanilla sugar and the remaining sugar until lightened. The yolks should be noticeably lighter. Continuing to beat, gradually add hot water (60-70 ° C). Pour in vegetable oil

and work well with a mixer. The yolks should turn light and flow off the shoulder with a ribbon.

Put in about 1/3 of all beaten egg whites and stir gently with a spatula.

We dilute the yolks with this portion of proteins. Stir in the flour mixture until a homogeneous dough is obtained. If you will not color the biscuit, then gently stir in the remaining whipped egg whites into this dough and bake the biscuit.
Well, I want to paint the biscuit to match the mood of the cake. Divide the dough into 3 equal parts. It is highly desirable to divide the dough not by eye, but to divide it on the scales. We paint each portion of the dough with a gel dye. Add a drop of orange gel dye to one portion, add a drop of yellow dye to the second portion, and add green dye to the third portion. But we add literally at the tip of a toothpick, since the green color is very active.

Divide the remaining whipped egg whites into three bowls and gently join with a spatula.

I baked a sponge cake in a split form for cakes with a diameter of 26 cm, covered the bottom of the form with baking paper, did not grease the sides with anything.
Spoon the colored biscuit dough into the mold.

The form can be scrolled several times so that the dough lies flat.

We bake the biscuit in an oven preheated to 180 ° C, put the baking sheet just below the middle, heat up and down. The biscuit is baked for about 30-35 minutes. Readiness is determined by lightly pressing your finger in the middle - the biscuit should be springy, the finger should not fall through.

Put the freshly baked sponge cake right in the mold on the wire rack and leave for 15-20 minutes.

You can cool the biscuit upside down. When the biscuit has cooled to warm, it can be cut out of the mold. To do this, we go with a thin knife along the walls of the form and carefully remove the form. We return the biscuit to the wire rack and in this form let the biscuit cool completely.

You can cut the biscuit no earlier than a few hours after baking. You can bake a biscuit the night before. When it is completely cool, wrap it in plastic wrap and put it in the refrigerator.
Cut the biscuit into 2 cakes. Here he is so handsome in the cut.


We put the butterfly aside and prepare the cream.
Pour the gelatin into the syrup (I have canned peach syrup) and leave it to swell for a while.

Pour vanilla sugar and about 2/3 of all powdered sugar into cottage cheese. Stir and leave for now to disperse the sugar.

We take the cream out of the refrigerator and beat it with the remaining powdered sugar until stable.

Gently heat the swollen gelatin so that it completely dissolves. Pour the gelatinous solution into the cottage cheese, stir and let cool to room temperature or slightly warm.
Gently mix the whipped cream into the curd and our cream is ready.

Now the cream is watery and it will not work to plant it on the cakes, it will simply spread. Therefore, we put a bowl of cream in the refrigerator for a while. During the cooling process, periodically approach, mix the cream and control its density.
Put the cooled cream into a pastry bag. I installed a round nozzle on the bag, the diameter of the nozzle is 12 mm. Be sure to do a test deposit to make sure that the cream holds its shape well, does not spread.

Soak the bottom cake.

I soaked in canned peach syrup. Alternatively, you can make sugar syrup.
Place half of the curd cream on top.

We put the second cake. I did not soak the second cake, but you can soak it if you want. We set aside the second half of the curd cream.

Decorate the cake with berries and fruits.

For the antennae, I chopped up the remaining scraps of the cake and mixed with a little curd cream.

From this mass I fashioned tendrils and laid slices of plum on top of them.
We put the cake in the refrigerator for several hours so that the cream stabilizes, and our cake is ready.

Enjoy your tea!
When I see the photo and the name of the recipe, the first thing that comes to my mind is HOW? And if I'm interested, and I don't have an answer to this question, then I look at the recipe. And this is not a recipe, but a guide to action, after reading which every housewife will understand that she can do it. Moreover, you can become the creators of the taste and decoration of your own cake!
Well, how is that? - you say. - And what kind of biscuit to take?
And I will answer you: "Round! The one that tastes best for you!"
And which one is the most delicious? - you ask. And I will tell you that all the biscuits on this site are delicious, and if you bake a new one every day, then even a few years will not be enough for you to try everything!
And the cream? - you say.
And what about the cream? Any cream for decoration, oil or protein, or with cream will do. I use jelly cream that holds its shape perfectly! Or you can just take the cream and whip it with powdered sugar or condensed milk, and it will be great to draw too!
The most important thing is that you can make a magical beauty out of a simple round biscuit without any losses.
So, let's get down to making the Butterfly cake!
The biscuit is round.
Beat eggs for about 5 minutes, then add sugar and vanilla and beat for another 7 minutes. My machine does it in 5 minutes.

Sift flour with baking powder.

Pour flour and baking powder into eggs in portions and stir with a spatula from bottom to top. I do this at "super low" speed, if your machine is not that advanced, do it with a spatula. Add oil and boiling water and stir. The dough is ready.

Pour the dough into the prepared dish.

Bake in a preheated oven at 180 degrees for 35-40 minutes. Cool upside down.

For a more proportional look, it is better to make the biscuit not very high, but more than 20 cm in diameter. I have 25 cm. Let it be low, but the butterfly's wings will be larger and more effective.

Cut the biscuit into two cakes.

Next, cut the biscuit in half. We measure out about one third of the diameter, cut out a rhombus. This will be both the body of the butterfly and the relief of the wings. If you don't trust your eye, use a measuring tool.

We spread the biscuit like this! The butterfly is almost ready. Peel off the top layer of the biscuit, saturate the cakes and fill the cake with cream of your choice, or maybe fruit and berries. As you wish.

After collecting the cake, cover it with cream for decoration. I have it whipped with condensed milk.

With your eyes closed, imagine your butterfly. I want a bright one, like from a magic forest! So, the colors will be like that.

And we start to create! No matter how you fantasize, a little markup will not hurt. Let's outline the contours of the pattern with a toothpick.

A few more strokes ...

And you're done!

A small addition, and my butterfly flew to her birthday girl.

I used two biscuits in the Butterfly cake in the photo. The height of the cake is 9 cm. Remember: the taller the cake, the more impressive it looks. Flatbread cakes are not in trend now!
Hurry to please your loved ones.
Description
Butterfly cake- a kind of biscuit dessert. “Nothing new,” you say. But no. The most interesting thing about this cake will be its shape. And here you really have to sweat. True, you can find stencils of butterflies in the vastness of the network, print and cut out ready-made sketches. You can easily cook the Butterfly cake with your own hands, give it the necessary look and decorate it so that it will simply not be distinguished from a branded store product.
We have prepared a real master class with a photo for you. Therefore, you can easily embody a butterfly cake in your kitchen. Using our recipe, you will learn how to make a butterfly cake, what ingredients to use for a biscuit, how to decorate the surface of the dessert beautifully and brightly.
For a children's party, it is important that the dessert looks bright and appetizing, and our cake fully meets these requirements. Only then will the children appreciate your efforts and will gratefully devour the sweetness on both cheeks.
Ingredients
-
(8 pcs.) -
(2 tbsp.) -
(2 tbsp.) -
(2 tsp) -
(250 g) -
(10 tbsp. L.) -
(1 PC.) -
(5-7 tbsp. L.) -
(3 colors) -
(for decoration)
Cooking steps
Let's make a biscuit for the cake. Break the eggs and separate the egg white from the yolk into two different bowls. Add one glass of sugar to the yolks, the second to the whites. Beat the ingredients separately until smooth, then mix the whites, yolks and baking powder in a saucepan. Sift flour into a saucepan. Mix everything thoroughly and put the dough on a baking sheet, pre-oiled. We heat the oven to 180 degrees and bake the dough for half an hour. You should get two biscuits of the same size and thickness. While preparing the foundation, let's move on to the creative part of the process. On a blank sheet of paper, draw a symmetrical butterfly, as shown in the photo. We cut it out boldly.

The stencil is ready, and you need to start creating the cream. Melt the butter in a deep, suitable bowl. Do not heat too much: the oil should just become liquid. Stir gradually and add condensed milk to the melted butter. Cut the lemon in half and squeeze the juice into the butter and milk mixture. Also add the zest there. Whisk all this well. During this time, biscuits will arrive. Cool them down and use a stencil to make 2 identical butterflies.

Cover the surface of the first cake with any jam you like. Determine the thickness of the layer by eye relative to the thickness of the cake itself.

Place a second butterfly on top and cover the entire surface of the cake with butter cream.

The outline of the butterfly itself can be laid out with licorice candies or drawn using melted chocolate and a pastry bag.

Divide the remaining cream into 3 parts, and unequal parts. We paint parts of the cream in the selected colors using confectionery paint. From the photo, we determine which cream is needed more and which one is less. We use a pastry syringe and decorate the dessert. The Butterfly cake is ready!

Bon Appetit!
For the base of the cake, combine milk and vegetable oil in a saucepan and bring to a boil. Remove from heat and let cool. Whisk eggs with vanilla sugar. While whisking, add the icing sugar in small portions until the mixture turns light yellow.
Step 2
Sift flour and salt. Add half the flour and half the butter and milk to the egg mixture and stir gently. Then gently add the baking powder, the remaining flour, and the remaining milk. Stir well to avoid lumps. You should get a soft, foamy mass.
Step 3
Cover a deep baking sheet with a sheet of parchment moistened with water. Pour in the biscuit dough and place in an oven preheated to 180 ° C for 30 minutes. Cool and transfer to a cutting board.
Step 4
Cut a piece from the short side of the biscuit so wide that the remaining biscuit forms a square. The narrow slice will be the "body" of the butterfly. Cut the square piece diagonally into two identical triangles. Cut off a triangle with a side of 4 cm from the right corner of each of them. At this point, the "wings" of the butterfly will be connected to the "body". Cut out small triangles on the opposite side of the “wings”. Fold the cake in a butterfly shape.
Step 5
To decorate the top, beat the whites until stiff. While whisking, add sugar in portions. Soak gelatin in 1/2 glass of water for 20 minutes. When it swells, heat it, stirring constantly and not boiling. Set aside 2 tbsp. l. gelatin. Gently pour the remaining gelatin into the whites, mix. Coat the cake with the resulting cream and refrigerate for 1 hour.
Step 6
Peel the fruit, cut into thin slices, sprinkle the pears with lemon juice. Arrange the fruit plates on the cake, imitating the butterfly wings pattern. Make eyes from 2 grapes, and antennae from thin strips of zest. Brush the top of the cake with the remaining gelatin and refrigerate until serving, at least 1 hour.
