Dog magnet made from salt dough. Original ideas of crafts and figures from salt dough with a photo
Modeling from the dough is a fascinating way to spend time with children. After all, they not only sculpt, but also cook: they can experiment with the flour mixture in the process of measuring and mixing the ingredients, and then observe the metamorphoses that occur with the finished product when the temperature changes during the drying process.
In addition, crafts sculpted from salt dough are harmless to children, they do not contain allergens and you can safely taste them.

Figures made from home-made flour mixture are harder and are better preserved than clay.
The basic recipe for modeling dough
Before you make the dough for modeling, you need to imagine what kind of products will be made, whether it is necessary to paint the dough, how long the modeling will take, what drying mode will be selected.

The basic recipe for craft dough consists of one part of salt and two parts of wheat flour to which citric acid is added - 2 tsp. 1 glass of salt and 1 tbsp. l vegetable oil. The amount of water added during kneading should be equal to the amount of salt.

Method for making dough
The dough is made in the following order:
- Mix flour with salt and citric acid and pour this mixture into a pan;
- Put the pan on moderate heat and constantly stirring to gradually add water until the dough starts to lag behind the pan and you can roll it into a lump
- Remove from heat and knead the dough with your hands.

Food coloring or gouache should be diluted in water, which is added before kneading the dough.

In the process, depending on the desired consistency, the salt-flour mixture can be further diluted with water or oil, or flour can be added for hardness.

It is better to prepare the dough in small portions, if possible, right before the start of modeling, and store it only in a tightly closed container or cling film.

Salt Dough Drying
In order for crafts made from salt dough, made by oneself to maintain their shape, not break, and not crack, you need to choose the right drying mode. You can simply leave the figures for their natural drying in the air, you can put them in the oven.
There are two different methods for drying in the oven. The first is to preheat the oven, then turn it off and place the figures in a heated space. You can also bake products at 100 degrees, making sure that there is no burning.

The master class on making dough crafts involves first of all experimenting with the material: the composition of the dough and the drying mode, so failures in this process are inevitable.
Useful advice: When you start modeling with children, you need to set them up so that the first success, after many not quite aesthetic attempts, becomes a real miracle for them.

It is better to start with simple and uniform figures, such as, for example, round beads of various colors and sizes. From them you can make garlands to decorate the room.

Then you can master more complex silhouettes - stars, hearts, and voluminous figures - Christmas snowflakes, Christmas trees, Easter eggs with patterns, egg coasters, chickens.

You can coincide with the production of figures for the holidays, or choose more neutral motifs for all occasions, making souvenirs and gifts in the form of stylized horseshoes, suns, stars, airplanes and funny faces.

During sculpting, you can use special molds for sculpting and baking, and other things, at the tip of your imagination: garlic crush - to get thin dough ropes, bottle caps - to cut circles, plastic parts of toys - to get prints, almost everything that at hand from a toothpick to wheels from toy cars can be a tool for sculpting from dough.
Note!


In salt dough, it is easy to make holes, both decorative and for hanging on threads. Holes on flat shapes retain their shape when dried.

But in the manufacture of more bulky parts, such as spherical balls, in order to get a hole for the thread, you need to pierce the figure with a toothpick or other sharp tool made of wood or plastic and do not remove it until the product dries.

Useful advice: To glue elements from the dough, you just need to wet individual sections and attach them to each other.

From voluminous and flat figures you can make garlands, key chains, medals and pendants. You can fashion chests and cups for storing jewelry, small treasures and pencils.

Volumetric figures of animals
Volumetric figures of animals are especially popular among children, they can be made in accordance with the popular step-by-step instructions that are intended for clay and clay crafts.
Note!


You can sculpt from dough without dyes, then paint the finished figure and after drying, cover it with varnish.

You can also cut out various figures: having made their breadboard model from cardboard, lay it on a flat dough rolled out by a rolling pin and carefully cut along the edges. Then you can colorize the figure, add the necessary texture - roughness, strokes, make eyes, nose or jewelry from beads.

A wonderful gift made by yourself can be a photo frame or a unique candle holder.

Production of panels in which elements of mosaic, applications and sculpting are combined can captivate both children and adults. The simplest drawings are suitable for the smallest: you must first draw a silhouette on the parchment, then carefully fill it with dough along the lines.

You can also conceive and implement more complex ideas, using beads, mosaic of cereals, dried flowers, etc.
Note!


Photo of crafts from the test


- This is a popular area of \u200b\u200bhome creativity, because before the onset of the holidays I so want to cook at least small memorable presentations for all my friends, colleagues and relatives. Buying so many ready-made gifts is unlikely to succeed - not every budget can withstand such expenses. But home creativity allows you to make a lot of pleasant surprises with minimal financial investments.
Today, shops for creativity offer the widest selection of materials - you can buy sets of polymer clay, blanks for scrapbooking, Christmas toys and cards, patterns for embroidery or drawing. However, you can make unusual toys for the New Year from improvised materials - for this it is enough to master the technique of testoplastics or bioceramics. This direction of creativity is truly fascinating and, which is nice, practically does not require additional financial costs.
Salt dough figures look great and are stored indefinitely
You only need to make a special salt dough, from which you can fashion everything that your heart desires! The working material has another important quality - it is completely harmless, so feel free to involve children in your work and make unusual gifts for grandparents, prepare for New Year's exhibitions in kindergarten, engage in joint manufacture and. And we will tell you how to make a dog from salt dough for the New Year 2018.
How to prepare material for crafts?
Making dough for sculpting figures is not at all difficult. We offer you a proven recipe for which you will need:
- fine salt - 2 glasses;
- flour - 2 glasses;
- oil (vegetable) - 1 tablespoon;
- water (cold) - 1 cup.
Cooking method:
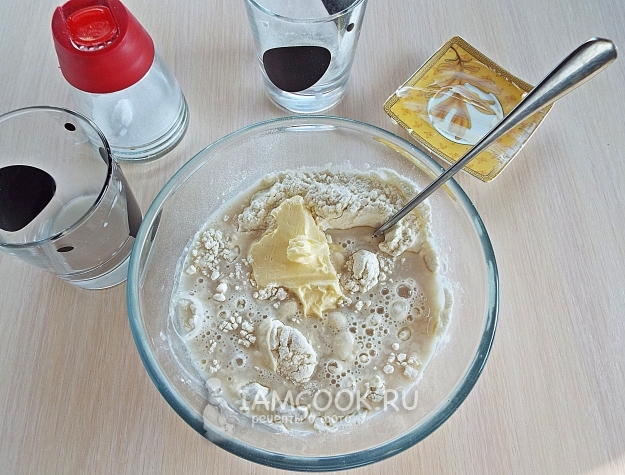
- Take a bowl, pour two cups of flour into it, add salt.
- Add vegetable oil and mix the ingredients.
- Pour in a little cold water and knead the dough.
- Roll the finished dough in a lump, cover with foil and place in the refrigerator for half an hour. After that, you can start sculpting - the mass will be uniform and elastic.
Tip: if you want to get colored dough, then you can add food coloring or freshly squeezed juice (for example, from beets) when kneading. If you need to get a mass that is suitable for sculpting delicate delicate patterns and figures, add a tablespoon of starch or PVA glue when mixing.
 For the manufacture of crafts, you can use purchased cuttings for dough.
 Tools and items for creativity
In the process of creating figures from salt dough you will come in handy:
- a rolling pin or a bottle of water (needed for rolling out the test mass);
- board for sculpting figures;
- toothpicks (needed to make patterns and holes);
- brushes;
- black marker for guidance lines;
- gouache or acrylic paints;
- universal varnish;
- paper and pencil (to make patterns of figures);
- scissors;
- foam sponge (for coloring a large surface);
- glue;
- ropes (for hanging figures);
- buttons and beads (for the manufacture of textured prints);
- cereals and pasta for the manufacture of rustic panels.
Figurine drying
Giving the product durability provides competent drying. You can apply one of the following methods:
- drying in a warm oven - the figures are placed on a baking sheet covered with parchment, and then in the oven with a temperature of 60-80 degrees. Keep the craft 1-2 hours (it all depends on its size and thickness);
- natural drying - the figures are placed on a wooden or plastic board and kept in a warm place (without direct sunlight and not on the battery!). The process is long (4-5 days), but provides uniform drying, making the figure strong;
- heated and cooled dryer in the oven - figures must be placed in the oven on a baking sheet lined with parchment, put the cabinet on warming up (up to 150 degrees). When the set temperature is reached, the cabinet must be turned off and the figures left in it until completely cooled.
Secrets of making crafts
 Paint the finished dog figure with gouache or acrylic paints
 Decorative crafts from unpainted dough look very nice, reminiscent of classical rustic art. However, sometimes the figures want to add colors - in this case, you can use one of these coloring methods:
- watercolor paints - draw a little water on the brush, dip the brush into the paint of the desired color and apply to the figure element;
- gouache - first you need to prepare a gouache mixture with a small amount of PVA glue, and then mix the components and color the figure;
- food coloring - This option is useful if you want to immediately work with the color test. Divide the mass into pieces, form balls, make holes with your finger and drop the dye of the desired color there. After that, knead the test balls until the paint is dispersed in mass evenly.
Remember that at the end, the craft must be varnished. Otherwise, the paint may fade or crumble. Varnishing is possible both with the help of liquid varnish (it should be applied in at least two layers) and thick (it will better protect crafts that will be exposed to moisture).
Possible problems in making dough
If the first time you didn’t get the perfect dough or figure, you will need to solve one of the possible problems:
- bubbles or cracks that occurred after drying the figure indicate that you dried it too quickly by setting the oven to the wrong temperature. Dry the figures naturally or in a preheated oven, but with the doors ajar. It is possible that your cabinet heats too intensely or unevenly;
- the paint cracked on the figure - most likely, you began to put colors on the figure, which did not have time to dry to the end. Do not throw away the craft - let it rest in the air, and then remove the paint with fine sandpaper and paint again;
- it is impossible to make a massive figure without cracks (for example, a panel) - the thickness of the test prevents it from drying out. Do not forget to turn the product while it dries in the oven or in the air;
- a piece has broken off at the figurine - do not rush to send the craft to the bin. Glue the element using PVA, let it dry, walk along the junction with sandpaper and varnish.
Master class on making dachshund dogs
 Step-by-step instructions for making a dog from the test for the New Year 2018
 Now that you are aware of all the secrets of working with salt dough, let's start the step-by-step production of a cute dog-dachshund, which will be a great present for the New Year. Making a figure includes the following steps:
- Step 1. Take a piece of cardboard and draw a stencil for a doggie. Cut out the template by marking the location of the eye, nose and mouth so that you can then compare it with the drawing while working with the dough.
- Step 2. Place the test mass on parchment and roll it with a rolling pin into a plate with a thickness of 2 to 3 millimeters.
- Step 3. Place the dachshund pattern on the plate and cut the workpiece with a sharp knife. Cut carefully, trying not to tear the paper - then a piece of parchment with a blank will need to be transferred to a baking sheet. If you cut the mass on the board, it will be difficult for you to shift the dachshund onto a baking sheet without having to crush the product. In extreme cases, use a wide spatula with thin edges and pry the dog when moving. Dump the rest of the dough into a ball - then it will come in handy to give volume to the dog.
- Step 4. Nip off a couple of pieces from the rest of the dough. Form oval eyes, roll them well in your fingers, and referring to the pattern, glue it on the blank so that the dachshund has eyes. Before attaching your eyes to the face, moisten this area a little with water.
- Step 5. Dip your fingers in cool water and walk well around the slices, smoothing their edges.
- Step 6. Nip off the small pieces from the lump of dough and form a dachshund eyelids.
- Step 7. Using a toothpick, draw a dog’s eye, paws, and mouth.
- Step 8. Tear a small lump from the dough and form a voluminous ear. Do not forget to moisten the place of gluing with water. Stick a lump of dough on the middle of the future ear and smooth it with wet fingers, stretching to the edges.
- Step 9. Glue a piece of dough at the tail of the dog and stretch the mass to the sides, giving the back of the figure volume. Add volume to the tail of the dog.
- Step 10. Use a toothpick to make strokes imitating wool, drawing lines from the edges to the center of the product. If the test mass has dried by this time, slightly moisten the figure with water.
- Step 11. Dry the dog for several days in the air or in the oven using the methods described above.
- Step 12. Using black gouache, draw strokes that mimic the dog’s coat and draw the main lines. Black paint must emphasize all the relief places on the figure. Let the paint dry.
- Step 13. Take a dark yellow or ocher paint. Apply it to a foam sponge. Blot all exposed parts of the figure with a painted sponge. Let the paint dry.
- Step 15. Color the eyes with white and put the black dots of the pupils. Write a wish on the figure.
- Step 16. Cut a small piece of twine or twine. Glue sealant to the back of the dachshund.
- Step 17. Coat the product with a layer of thick or liquid glossy varnish. Leave to dry. Craft is ready!
The yellow dog will be a symbol of the New Year of 2018 and we want to show you how to make a dog from salt dough with our own hands. Follow us and you will make a merry and bright New Year's souvenir.
How to make a dog out of salt dough? Salty dough is a very kind material. Crafts made from salt dough keep the warmth of the hands of their creator.
How to make a dog out of salt dough? To start, knead the salt dough. We spread the foil for baking. First, we draw an oval directly on the foil - the body of the dog.

Glue a round head.

We fix the muzzle and the round nose.

We fix the ears.

Glue the paw to the dog and wrap it with a scarf.

Glue two balls - eyes. We make two holes in the center in them.

We make holes in the nose.

We make holes on the legs and scarf.

We bake a dog in the oven.

Color the body of the dog with white paint.

We color the head with white paint. 2018 is the year of the Yellow Dog, so for the ears, muzzle and paws, we choose yellow or golden paint. We make the scarf rich red.

Salt Dough Dog - Ready!


The symbol of the year 2018, a dog from salt dough can be glued to the fabric and put in a frame. We will get a magnificent panel with the symbol of 2018!

Panel with a dog - a symbol of 2018
Even more wonderful ideas in our section "Crafts for the New Year"
New Year's gifts and handmade toys are a popular area of \u200b\u200bhome creativity, because before the holidays, I so want to cook at least small memorable presentations for all my friends, colleagues and relatives. Buying so many ready-made gifts is unlikely to succeed - not every budget can withstand such expenses. But home creativity allows you to make a lot of pleasant surprises with minimal financial investments.
Today, shops for creativity offer the widest selection of materials - you can buy sets of polymer clay, blanks for scrapbooking, Christmas toys and cards, patterns for embroidery or drawing. However, you can make unusual toys for the New Year from improvised materials - for this it is enough to master the technique of testoplastics or bioceramics. This direction of creativity is truly fascinating and, which is nice, practically does not require additional financial costs.
Salty dough is just a godsend for creative people! This material is suitable for a wide range of work, from application to volumetric modeling.
These master classes are devoted to how to mold a dog from salt dough. The article will consider various options for crafts, so anyone can choose what they like best - and do it yourself.

The basis of a strong and durable job - this is the right cooked test.
Ingredients:
2 glasses of salt “Ekstra”;
2 a glass of wheat flour;
10 art. spoon of oily oil;
0.5 glass of water.
This is a classic recipe, but it can be modified. Maclo will replace pyc cream or pharmacy glycerin. In the mixture for viscosity, you can add 2-4 tablespoons. spoons of wallpaper adhesive.

After mixing, the dough must be wrapped in polyethylene (bag, cling film) and put in the refrigerator for an hour or two.
Please note: the dough prepared in this way is not intended for consumption! It is completely inedible and can harm the human body. If you are mastering with a child, he should explain this rule before starting work.
The resulting dough should:
- Do not stick to hands and work surface.
- Have a uniform consistency.
- Be tight.
- Strictly keep the form devoted to him.
In order for the dough to get the right color, instead of ordinary water, you can use vegetable juice (carrots - orange, beets - pink). Instant coffee gives the material a soft brown tint.
Please note: with this staining, the colors will not be bright, and after drying, they will turn pale at all.
Any violation of the recipe or storage conditions of the finished material can lead to such unpleasant consequences:
- During the work, the dough will stick to your hands, table, tools. It’s simply not possible to sculpt a neat figure out of it.
- After drying, the craft made from the dough will begin to crumble and crumble.
- The product will not bake or will not be able to solidify properly. It often happens that the top layer of salt dough forms a hard crust, not letting air into the middle. Because of this, the craft will become vulnerable and will crash on its first fall.
Possible problems in making dough
If the first time you didn’t get the perfect dough or figure, you will need to solve one of the possible problems:
- bubbles or cracks that occurred after drying the figure indicate that you dried it too quickly by setting the oven to the wrong temperature. Dry the figures naturally or in a preheated oven, but with the doors ajar. It is possible that your cabinet heats too intensely or unevenly;
- the paint cracked on the figure - most likely, you began to put colors on the figure, which did not have time to dry to the end. Do not throw away the craft - let it rest in the air, and then remove the paint with fine sandpaper and paint again;
- it is impossible to make a massive figure without cracks (for example, a panel) - the thickness of the test prevents it from drying out. Do not forget to turn the product while it dries in the oven or in the air;
- a piece has broken off at the figurine - do not rush to send the craft to the bin. Glue the element using PVA, let it dry, walk along the junction with sandpaper and varnish.
Tools and items for creativity
In the process of creating figures from salt dough you will come in handy:
- a rolling pin or a bottle of water (needed for rolling out the test mass);
- board for sculpting figures;
- toothpicks (needed to make patterns and holes);
- brushes;
- black marker for guidance lines;
- gouache or acrylic paints;
- universal varnish;
- paper and pencil (to make patterns of figures);
- scissors;
- foam sponge (for coloring a large surface);
- glue;
- ropes (for hanging figures);
- buttons and beads (for the manufacture of textured prints);
- cereals and pasta for the manufacture of rustic panels.
Figurine drying
Giving the product durability provides competent drying. You can apply one of the following methods:
- drying in a warm oven - the figures are placed on a baking sheet covered with parchment, and then in the oven with a temperature of 60-80 degrees. Keep the craft 1-2 hours (it all depends on its size and thickness);
- natural drying - the figures are placed on a wooden or plastic board and kept in a warm place (without direct sunlight and not on the battery!). The process is long (4-5 days), but provides uniform drying, making the figure strong;
- heated and cooled dryer in the oven - figures must be placed in the oven on a baking sheet lined with parchment, put the cabinet on warming up (up to 150 degrees). When the set temperature is reached, the cabinet must be turned off and the figures left in it until completely cooled.
Flat dog
A flat dog made from salt dough can serve as a keychain, decoration, pendant in a nursery, wall decor, etc.

This master class will explain how to make a flat dog step by step:
- You can act the same way as when creating the panel - use the sketch and the film. But it’s more interesting to sculpt “on my own”.
- We break the image into component parts.
- We tear off from the test such pieces that are enough to create one part.
- Sculpt the foundation - the body. Based on its size, we build a general view of the product. The shape of the body immediately needs to be corrected with a knife or hands: tear off the excess, add the necessary, smooth the edges, add thickness, etc.
- We supplement the body with other details.
- If in the future you plan to hang this craft, then the holes for the thread must be made in advance.
- Dry using a combined method (in air, then in the oven).
- Paint, if necessary.
Dachshund dog

- Step 1. Take a piece of cardboard and draw a stencil for a doggie. Cut out the template by marking the location of the eye, nose and mouth so that you can then compare it with the drawing while working with the dough.
- Step 2. Place the test mass on parchment and roll it with a rolling pin into a plate with a thickness of 2 to 3 millimeters.
- Step 3. Place the dachshund pattern on the plate and cut the workpiece with a sharp knife. Cut carefully, trying not to tear the paper - then a piece of parchment with a blank will need to be transferred to a baking sheet. If you cut the mass on the board, it will be difficult for you to shift the dachshund onto a baking sheet without having to crush the product. In extreme cases, use a wide spatula with thin edges and pry the dog when moving. Dump the rest of the dough into a ball - then it will come in handy to give volume to the dog.
- Step 4. Nip off a couple of pieces from the rest of the dough. Form oval eyes, roll them well in your fingers, and referring to the pattern, glue it on the blank so that the dachshund has eyes. Before attaching your eyes to the face, moisten this area a little with water.
- Step 5. Dip your fingers in cool water and walk well around the slices, smoothing their edges.
- Step 6. Nip off the small pieces from the lump of dough and form a dachshund eyelids.
- Step 7. Using a toothpick, draw a dog’s eye, paws, and mouth.
- Step 8. Tear a small lump from the dough and form a voluminous ear. Do not forget to moisten the place of gluing with water. Stick a lump of dough on the middle of the future ear and smooth it with wet fingers, stretching to the edges.
- Step 9. Glue a piece of dough at the tail of the dog and stretch the mass to the sides, giving the back of the figure volume. Add volume to the tail of the dog.
- Step 10. Use a toothpick to make strokes imitating wool, drawing lines from the edges to the center of the product. If the test mass has dried by this time, slightly moisten the figure with water.
- Step 11. Dry the dog for several days in the air or in the oven using the methods described above.
- Step 12. Using black gouache, draw strokes that mimic the dog’s coat and draw the main lines. Black paint must emphasize all the relief places on the figure. Let the paint dry.
- Step 13. Take a dark yellow or ocher paint. Apply it to a foam sponge. Blot all exposed parts of the figure with a painted sponge. Let the paint dry.
- Step 15. Color the eyes with white and put the black dots of the pupils. Write a wish on the figure.
- Step 16. Cut a small piece of twine or twine. Glue sealant to the back of the dachshund.
- Step 17. Coat the product with a layer of thick or liquid glossy varnish. Leave to dry. Craft is ready!
Volume dog
- We tear off one piece from the dough and mold one by one the body, head, paws, tail. Moving from large parts to smaller ones.
- Lightly grease the seams between the parts of the craft with water so that the dog does not fall apart later.
- Now you need to let the salty dough dry thoroughly so that the figure is not afraid of drops and temperature drops.
- We paint.

Among lovers of needlework, salt dough has been used for a long time and successfully as a material for creating flat and volume sculptures. In general, modeling is traditionally loved, probably by all children from a very young age, and many creatively oriented adults are not averse to working with plasticine. However, plasticine for a number of reasons is not always suitable for children, and for babies who can swallow it is generally undesirable, except under the supervision of adults, which does not always work out. But salt dough is a wonderful, affordable and almost harmless material. In addition, it has a number of features, it is interesting to work with it, so modeling from salt dough in a number of popular hobbies occupies a separate place.


Let's make salt dough
A tempting and indisputable advantage of this material is its availability: the dough is prepared on its own, in the right amount, and all the few ingredients are available in almost any kitchen - in extreme cases, you can run to the nearest grocery store, and you will not have to spend any money on it.
DIY Salted Dough Recipe
Mix 200 grams of table salt with 2 cups of wheat flour and 2 tablespoons of starch, add about ¾ cup of water and a tablespoon of sunflower oil. Knead all this well. The correct dough for modeling does not crumble and does not stick to your hands; it accepts and holds the shape attached to it well. During the preparation of the dough, its structure can be adjusted by adding (in small portions) water or flour, depending on whether the dough is too thick or too liquid.

Starch, by the way, is not an obligatory component - it is more needed to create voluminous relief figures, although many add it constantly, regardless of what they are going to sculpt.
After the dough is cooked and it is well molded, put it in a plastic bag and put it in the refrigerator for a couple of hours.
