Decoration of Easter eggs with thermal labels. We decorate eggs for Easter with stickers
Decorating eggs for Easter is one of the most beloved activities in our family. Previously, the process was reduced to the following procedure: for several months we collected onion husks, for Easter we threw it in water, laid eggs and cooked. It turned out colored eggs of such a golden brown color.
They did not buy special paint, as our family considered it harmful.
But I always wanted to not just make the eggs monophonic, but somehow decorate them so that there were patterns.
And how wonderful that thermal labels for decoration were invented.
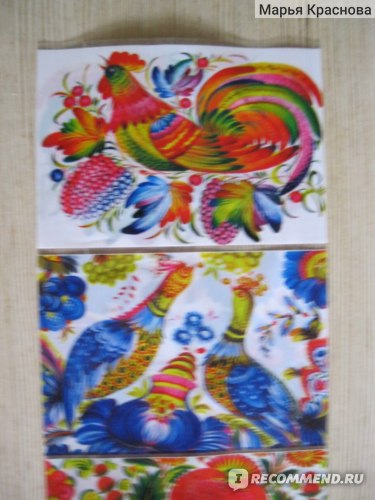
There are many drawings on such labels: churches, faces of saints, children's motifs. I really like labels for various painting: gzhel, Khokhloma and other folk motifs.


The set is designed for seven eggs.
Before gluing the label must be cut.

The decoration process is as follows:

Bring the water to a boil in a bowl,
Put the label on the egg

Put the egg on a spoon or ladle (who adapted how)
Dip the egg in boiling water,
The label shrinks under the influence of hot water and wraps tightly around the egg

There is a little secret here. In order for the label to lie evenly, you need to put it on the egg not exactly, but a little obliquely, so that the top is pulled slightly higher and the bottom slightly lower. Having caught it this way, you can achieve a more or less even sticker.
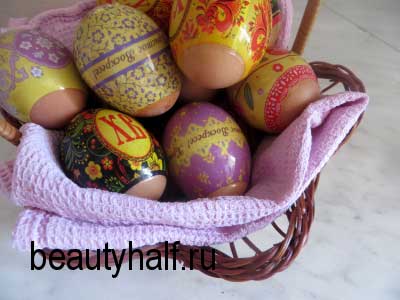
It turns out beauty. The complete impression is that the eggs are painted.

But there is a significant drawback in these stickers. When you clean the eggs, it is very difficult to get rid of it. It is torn with difficulty, sometimes you even have to use a knife.
I can’t say how much such labels will cost now, but in the past they cost very cheaply: from 1 to 2 hryvnias for one set of seven stickers.
In general, despite the shortcomings, this is a very convenient way to quickly and easily decorate eggs for Easter.
There are one more stickers with which you can decorate the eggs very nicely, in this case these are stickers from the manufacturer Alt, which is mentioned in this review.
If you don’t like to paint, you forgot what it means to hold a brush in your hands, and you don’t want to deal with wax, which is necessary for complex egg painting techniques, don’t despair. After all, there are many other easier, but no less beautiful ways.
1. Painting with stickers
To create such a fun painting - stick stickers of various shapes on unpainted eggs and dip them into the paint (read how to make natural paint). After the eggs are painted, let them dry and carefully remove the stickers.
2
 1
1
2. Wide elastic bands
Want to give your decor a modern look? Wrap eggs with thick elastic bands and dip them in bright colors. After you remove the elastic bands, graphic stripes will remain on the eggs (the color of the stripes depends on the natural color of the egg). 
 1
1
3. Flower applique
Paint the eggs in bright colors and stick solid small flowers on them. 
4. Spot decoration
Take some pencils with erasers on the end. Soak a pencil in the paint and apply points to it. The gum can be washed with water before changing the paint, or each pencil can be used in a separate color. 
5. Toothpick instead of brush
Choose 2 colors to decorate each egg. In one color, draw the center of the flower, and in the other, petals. Wear the paint with a toothpick (tilting it slightly towards the egg to make strokes) 
6. Confetti
If you still have confetti from the New Year, use them to decorate the eggs! Flowers, stripes, circles - all these patterns can be reproduced with the help of small circles. 
7. Thin rubber bands
Wrap the eggs with thin elastic bands (so that the circles go parallel to each other). First, put the eggs in one of the flowers (for example yellow). Then use 4 elastic bands - and place in a new color (purple), after that add 4 more elastic bands once again dip the eggs in the main color (blue). Thus, the egg will have thin rings of different colors (in our case, it is a blue egg with yellow and purple stripes).  1
1
8. Sequins
If you have sparkles and you like everything brilliant - this simple way is created for you. Dissolve the glue with water, completely dip the egg in this mixture, and then roll it in sparkles. You can use both monochromatic sequins for one egg, and multi-colored. We do not recommend such eggs (sparkles will fall on the squirrel), but you can safely decorate the interior with them.  2
2
It is also possible to cover with glue only that part of the egg on which the spangles should stick. Apply the patterns with a glue brush, and then run them in sparkles. 
9. Thermal stickers
This method for several years ranks first among housewives. Thermal stickers are beautiful and it’s very easy to decorate eggs with them. True, removing the shell from such an egg is very problematic, so it is better to use it as a decor. Buy special stickers (they are sold at any supermarket before Easter), place the egg inside the sticker, dip the egg in boiling water for a few seconds - and the sticker will glue the egg tightly. 

A beautiful tradition to give different colors to Easter eggs has come to us since the reign of the Roman Empire. And now this is the biggest holiday among all believers in the Orthodox and Catholic churches.
This tradition has undergone a lot of changes, and today we already know it in a modern design, using food colors and various decorations. But this does not change our attitude to these rites.
In this article, we tried to bring together from simple ways to decorate eggs, to complex master classes that will require preliminary preparation and training, but seeing the result of your work, you will definitely be satisfied with yourself.
And today we will be painting eggs with you. Our task is to learn how to do this in a variety of ways. And there are a lot of such methods accumulated among the people. Each housewife probably has a beloved one, whom she uses from year to year. But each of us has such a moment that I want to try something new.
Where did Easter go to paint eggs?
Colored eggs are a constant attribute of Easter. People give them each other, conveying the good news. But where did this tradition come from, we will now consider. Since there are several versions, we will consider each, and it is up to you to decide which one to believe.
Such a tradition has long been known that the first one about the resurrection of the son of the Lord was recognized by Mary Magdalena. She preached the rest of the believers about this and went to the Roman ruler, in order to be the first to tell this message.
But then without an offering to the king it was not accepted. And Mary Magdalena had only great faith. And she decided to present the emperor with a white chicken egg.
Having come to the king, she extended her hand with an egg and said, "Christ is Risen." But he did not believe her, laughed in response and said: “The dead do not come to life, nor can an egg turn from white to red” And at that moment the egg in the hands of Mary Magdalene turned red. So the tradition began for believers to paint eggs in red color, an indicator of faith. And a symbol of the beautiful resurrection of Jesus Christ. And consecrated eggs were considered healing, helping from any disease.
And others believe that it was forbidden to eat eggs during fasting. And believers, so that they do not disappear, boil them and repaint them in different colors, so as not to be confused with fresh eggs. And after, starting from Easter, the first day after Lent, they began to use them.
Marble Egg Pattern
This method of coloring appeared relatively recently, but it gained immense popularity among people who do not want to use chemical dyes, and just onion peel is already fed up. 
Ingredients Ingredients:
- Onion peel - 1 bunch;
- A sheet of paper is white - 1 pc;
- Eggs - 5pcs;
- Gauze - 1 meter;
- Scissors - 1pc;
- Gum - 5pcs.
Let's start:
Grind the husks with scissors, the size of a nail. Cut the paper the same way and mix everything together.  Gauze cut into squares - 16 * 16 centimeters.
  Rinse the egg with a sponge and hot water, and without wiping roll in a husk with paper. Pour a pinch of husk onto a square of gauze and lay the egg on top.
  Raise the edges of the gauze and tie with an elastic band, as tight as possible. Previously, distribute the husk in it as evenly as possible.
  Lay eggs in a pot of water and put on fire. Cook for about thirty minutes.
  Then free the eggs from the tissue and grease with vegetable oil.
Marble pattern with greenery
Here is another way to get a marble pattern, but brighter and more saturated, thanks to the use of a green diamond. The principle of operation is practically no different from the previous one, but here there are some nuances in cooking. 
Ingredients:
- Eggs - 5pcs;
- Gauze - 5pcs;
- Scissors - 1pc;
- Onion peel - 1 sachet;
- Elastics - 5pcs;
- Green diamond - 1 bottle.
Cooking method:
Grind the husk into a variety of geometric shapes, but not more than one centimeter.  Cut the cheesecloth into 5 squares measuring 16 * 16 centimeters. Wash the eggs thoroughly and roll them in husk.
  Next, pour a little husk on the gauze and wrap it very tightly. We put the billets in a saucepan with water and put on medium heat. As soon as the water boils, pour the green stuff into it and cook for 20 minutes. Expand the prepared eggs and grease with butter.
How to make decoupage eggs for Easter napkins?
Chicken eggs decorated using decoupage technique look very tender and elegant. And since there is nothing complicated in its implementation, it can be performed by the whole family, including with children.
Instruments:
- Napkins - 1 pack;
- Egg protein - 1 pc;
- Chicken eggs (boiled) - 10pcs;
- Brush - 1 pc.
The principle of action:
First you need to wash and boil the chicken eggs.
White eggs are best suited for this technique, otherwise it will show through the napkins. Beat the protein well. Remove two white layers from the napkin.
And gently tear off fragments with the necessary pattern. Then, using chicken protein and a brush, glue small flower fragments to the surface of the shell.
We lay the egg on the wire rack to dry and glue the remaining workpieces in the same way. Then you need to thoroughly smear the eggs with protein and dry for the second time. That's all.
Painting Easter Eggs with Silk Flaps
If you want to decorate eggs with interesting patterns, but do not possess the artist’s skills. Then this method is invented specifically for you. Since silk dyes very well, then transferring its pattern to eggs will not be difficult. And we will tell you how to do it the easiest way without boiling.
Instruments:
- Boiled eggs - 10pcs;
- Silk flaps - 10pcs;
- Flaps of white fabric - 10pcs;
- Vinegar 9% - 2.5 tbsp;
- Elastics - 20pcs.
Let's start:
Take the egg and wrap it in a silk flap measuring 18 * 18cm. Secure it with an elastic band. Repeat the same operation with each egg, then wrap them in a white cloth in the same way. Take a medium-sized saucepan, place all the eggs in it, fill them with water and add 2.5 tablespoons of 9% vinegar. Then carefully unfold each item. Here we got such intricate patterns.
Painting eggs with nail polish
A very bright and creative way to make Easter eggs beautiful and festive outside. This option of decorating eggs for Easter will appeal to the fair sex. To implement this method will require a minimum of tools, and the result exceeds all expectations.
Instruments:
- Nail polish - 5pcs;
- Wooden stick - 1pc;
- Bath with water - 1 pc;
- Latex gloves-1 pair;
- Eggs - pcs.
Let's start:
In the bath with water, we add in turn varnishes, a few drops each. When you see that this is enough, take a wooden stick and mix them several times with smooth movements. Thanks to mixing, you get these patterns. Take an egg and dip it in a bath with varnishes and water. It’s better to use gloves at this moment, otherwise your hands will be difficult then wash, tested in my experience. Depending on the selected shades, the staining result will be the most diverse in the end.
How to stick stickers on easter eggs?
Not so long ago there was a new trend in decorating eggs with various thematic wrappers. Using them, you can also depict Jesus Christ, the Son of the Lord, the Mother of God, Mary Magdalene and various Saints on an egg. Honoring them with this. Any image you can choose to your taste.
Composition of products:
- Eggs - 5pcs;
- Stickers - 5pcs;
- Spoon - 1pc;
- Saucepan with hot water - 1 pc.
The principle of action:
Cut stickers from each other. Cook eggs for at least 10 minutes.
Before cooking, eggs must be removed from the refrigerator and warmed to room temperature. This will protect them from cracks.
Wrap each egg in a separate sticker. Using a ladle, dip the eggs in boiling water for a few seconds. That's all, Easter eggs are decorated!
Beautiful stickers for eggs
Modern technology, allowed to transfer to stickers, a huge number of traditional and simply beautiful drawings. Thus, expanding the palette of decorations for Easter eggs. They are oil-based, voluminous, covering the egg completely and small, but no less beautiful, in size.
Consider only a few of them:
Multi-colored 3D volumetric stickers of flowers and butterflies. Stickers depicting Disney characters. With thematic images of saints. Paper rings with volumetric flowers. Decorations from multi-colored braid from fabric. Stickers with old Russian drawings. Wraps with Russian cartoon characters. Drawings with volumetric gel. Patterns in style gzhel. Gilded stickers. Comic jewelry with modern faces.
How to decorate eggs with foil
A very beautiful way to decorate eggs with foil gold. He does not require special skills, and the result is simply amazing. The egg truly becomes golden and shines in the sun like a precious metal. You can easily find materials for such decor in shops for creativity or needlework.
Instruments:
- Eggs - 3pcs;
- Foil gold - 1 unitary enterprise;
- Capacity with water - 1 pc;
- Brushes - 2pcs;
- Medical scalpel - 1 pc.
The principle of action:
We divide the foil into small squares with a medical scalpel. Wet the egg with water using a flat brush. Gently brush the foil into the eggshell. Gradually adding a piece of glue the whole egg. Then, once again, pass the wet brush over the entire surface of the egg. This way you can decorate the eggs gold and silver foil. What a beauty!
Making fluffy eggs for Easter
Ingredients:
- Eggs - 10pcs;
- Manka - 100g;
- Food colors - 1 package;
- Brush - 1pc;
- Protein - 1pc.
The principle of action:
Wash the eggs and cook for ten minutes. Cool them under ice water. Then color the eggs with food colors according to the instructions on the packaging. Remove the eggs on a plate with a napkin to dry. Separate the protein from the yolk and beat it with a whisk. But not to the state of foam. Then, using a silicone brush, coat the egg with protein and sprinkle it with painted semolina.
You can choose semolina in the color of the egg, or you can use a different shade, it will also look interesting.
It is very simple to paint semolina: drip liquid food coloring in dry cereal, take 15 drops of colorant per 100 grams of semolina and carefully rub it with a dry spoon until a uniform color is obtained. Let the eggs dry and they are ready!
DIY Easter Egg Decoration
Do not dwell on the traditional methods of decorating eggs. If you look a little at the search for non-traditional jewelry, you can see such beautiful things that you will certainly want to repeat. All of them are made far from professionals, so go ahead and surprise your loved ones with beautiful products.
Scrapbooking style decoration. Often you can take any decor that you have at home, just use your imagination. Quilling - never ceases to amaze with its perfect beauty. Paper baskets and dried grass, and eggs look like a finished composition. Decorations with any cereal that is available you. Fluffy balls from the store for creativity and not much of your imagination. Marble eggs in flower pots are simply incomparable gifts. Decorations in the decoupage style. A simple and interesting decoration. Decoration with braid and fabric. Dried flowers can also be very interesting to decorate eggs. A ribbon decoration will require perseverance and patience. New-fashioned 3D stickers add a spring mood. Ribbons and buttons will make even plain eggs interesting.
How to serve eggs to the table in an original way
Very unusual and no less tasty snack. You will definitely surprise guests. It is easy to prepare, it just takes time to color the protein, and then you just have to stuff them.
Ingredients:
- Boiled beets - 1 pc;
- Herring - 1pc;
- Boiled eggs - 5pcs;
- Sour cream - 2.5 tablespoons;
- Lemon juice - 1 tablespoon;
- Red caviar - 1, 5 tablespoons;
- Greens - at the discretion.
Cooking:
Boil eggs and cool under ice-cold water. Cut into two parts, carefully remove the yolk and set it aside. Cut the boiled beets into pieces, add boiling water and squirrels for 1.5 hours. In the mixer, grind the herring, yolks and sour cream. Cut the greens and put it in the minced meat. Then set it aside in the refrigerator. Get the squirrels, dry and stuff the fish. After serving on the table, garnish with a slice of fish and caviar. In the same way, only blue color can be painted with red cabbage.
Decoration onion husks and herbs
And now we can talk about a fairly traditional way of decorating eggs with onion husks and green leaves. Our grandmothers painted eggs in this way, but it remains relevant to this day.
Composition:
- Eggs - 5pcs;
- Kapron stocking - 1 pc;
- Threads - 1 skein;
- Onion peel - 1 packet;
- Greens - 1 bunch.
Step-by-step instruction:
Remove the eggs from the refrigerator and warm to room temperature. Then wash thoroughly with a dishwashing sponge. Then rinse the greens. Decorate each egg with a leaf of greens and tightly wrap a nylon stocking. Fold them in a saucepan with husks and pour warm water. Put on the stove and cook for at least 25 minutes. The color of the eggs will be more saturated if you use the husks of various types of onions. Expand the eggs and cool. For a glossy finish, grease them with refined oil.
Lace pattern onion peel
Even in onion peel, you can weld a lace pattern. Just wrap them in various lace and get a beautiful and interesting pattern.
Instruments:
- Eggs - 5pcs;
- Lace - 0.5 meters;
- Onion peel - 1 packet;
- Threads - 1 skein.
Let's start:
Pre-take the eggs from the refrigerator and warm to room temperature. Sheat them tightly with lace, using threads and a needle. It is better to take lace of medium density to get a high-quality pattern. Put them in a pan with husk and boil for thirty minutes. When the eggs are painted, remove the husks from them and cool under ice water. For a beautiful shine, smear them with sunflower oil.
Onion husk rice pattern
And finally, the easiest way to make a pattern when cooking in onion peel. This method involves the use of rice, but you can use any cereal that is available, the main thing is that it does not boil for a long time, I think it will come out no worse.
Composition of products:
- Eggs - 5pcs;
- Rice - 1 st;
- Kapron stocking - 1 pc;
- Gum - 5pcs.
Let's start:
Rinse the eggs, which should be at room temperature. Roll them in rice groats and put in a bag of nylon, adding another tablespoon of rice there. Tie the bag tightly, evening the rice in it. And put to boil with onion husks for twenty-five minutes. Get eggs, remove stockings and cool. Lubricate with refined oil.
Egg shell decoration
A rather original way to decorate the shell with a shell, but it looks very effective. And this process is really addictive.
Required tools:
- Colored eggs - 5pcs;
- Boiled white eggs - 5pcs;
- Glue gun.
Let's start:
In advance painted eggs, knock on the table and scroll several times between the palms to get small fragments of the shell.
Then, using the glue of the gun, we glue the colored pieces on a white egg one by one. This beauty comes out in the end.
Marble pattern without green
The effect of marble can be obtained without the use of a diamond of green and onion peels.
Ingredients Ingredients:
- Eggs - 5pcs;
- Sunflower oil - 30g;
- Vinegar - 30g;
- Food colors - 1 pack.
Let's start:
In a deep cup, mix the oil and vinegar, and add a glass of hot water and the required amount of food coloring to the plate. To obtain a better pattern, the depth of the liquid should be no more than twenty millimeters.
Dip the egg in this liquid and twist in all directions.
Gently blot the egg and leave to dry. The egg can be taken already painted in any light shade. That's all, a beautiful marble pattern is ready.
Secrets of coloring with natural dyes
Best of all, natural dye gives off its color in slightly acidified water, so add 2 tablespoons of vinegar and a natural coloring product to cold water, then let it boil and remove from heat and let it brew for at least 40 minutes.
Cool eggs in ice water.
And to get a very saturated color, leave the eggs in the broth for the whole night.
Since natural coloring pigments are less aggressive, more time is required for their coloring. All that remains is to dry the eggs and rub them with oil.
The basic principles of painting eggs at home
To date, store shelves are literally littered with food colors of various brands, colors and stripes. Using them is not difficult, and detailed instructions are always on the packaging. Here are the basic rules for using food coloring.
Food colors should be diluted before starting work, and do not leave them diluted after use. In direct sunlight, they very quickly lose all their properties. Diluted paint is strictly forbidden to be stored. Only use gloves with paint to protect hands. Saturation directly depends on the exposure time.
This amazing art appeared relatively recently, but every year it is gaining more and more popularity.  See how amazing patterns of unprecedented beauty come out from under the easy movement of the hand.
Eggshell carving workshop
This amazing art appeared relatively recently, but every year it is gaining more and more popularity. See how amazing patterns of unprecedented beauty come out from under the easy movement of the hand.
If you have absolutely no time for creativity - there is no time to invent drawings and patterns, you can just buy special stickers. All of them are bright and beautiful, there are with the faces of saints, with animals and birds - an option for children. There are pictures that will give Easter eggs the look of painted ones - the choice depends on your preference. How to stick stickers on easter eggs? Find out today. 
Will need
- medium sized eggs
- stickers on the number of eggs.
How to cook with photos step by step
Keep in mind that the size of the stickers is standard, but the eggs are very large. Small eggs fit, then the stickers can crumple into an accordion, which will not look very nice. 
Before sticking Easter stickers, you need to boil hard-boiled eggs. Cut the strip of stickers along the dividing lines. Put each piece on the egg, make sure that it turns out smoothly. Otherwise, when the picture is stuck, it will turn out crookedly, but to redo it, you will have to remove it and repeat the whole procedure again. 
Pour water in a bowl, about a liter, and bring to a boil. Take a tablespoon or even larger, lay the egg with the sticker and gently dip in boiling water. Due to the effects of high temperature, cellophane will shrink in the shape of an egg. 
By wiping with a towel, you can immediately serve Easter eggs to the table. To make them look even brighter and more beautiful, you can pre-color them in any color using dyes or improvised means (such as beets, blue cabbage, etc.).
This activity can be trusted even to children, but preferably already of school age, since there is a close contact with boiling water. The only inconvenience is that during the cleaning of the eggs you have to hook the cellophane sticker with a knife, then it will easily break. That is, the time of the festive meal, it is desirable to have on hand something spicy.
Happy Easter! 
Adults and children each year are eagerly awaiting the onset of the Easter holiday, on the eve of which a special ritual is always performed - the decoration of Easter eggs. This is done in a different way. Someone, adhering to the ancient traditions, makes unique pysankas, someone paints eggs with dyes, and some keep up with new trends and paste over eggs with colorful thermal glues. On how to properly stick a sticker on the egg, we will continue.
How to stick stickers on eggs: the choice of desired products
Before you start decorating eggs, you need to prepare the following ingredients:
- Eggs On average, you will need 8-12 eggs. The quantity must match your preferences and the size of your family. One is enough for 5 eggs, and some need more than 10 pieces. Also important is the caliber of eggs. They must be of medium size: too small eggs will slip out of the label, and very large eggs will not fit into it. In addition, eggs are better to buy only white, to highlight the beauty of stickers.
- Water. In order for the eggs to completely "drown", you need 1.5-2 liters of water and a shallow stew pan. Water should only be filtered, otherwise when boiling it will leave an unsightly coating on top of the labels.
- Salt. It will take half a teaspoon.
- Set of 10 easter thermo stickers. The variety of drawings on the labels is very large: cartoon characters, traditional patterned and floral motifs, church symbols, faces of saints, as well as the image of temples.
There are many contradictions regarding the use of church symbols. The shell with such stickers requires a special relationship - it can not be thrown away. After the holiday, as a rule, the shell is burned or carried to the temple, where it is disposed of according to church canons.
The process of decorating eggs with stickers
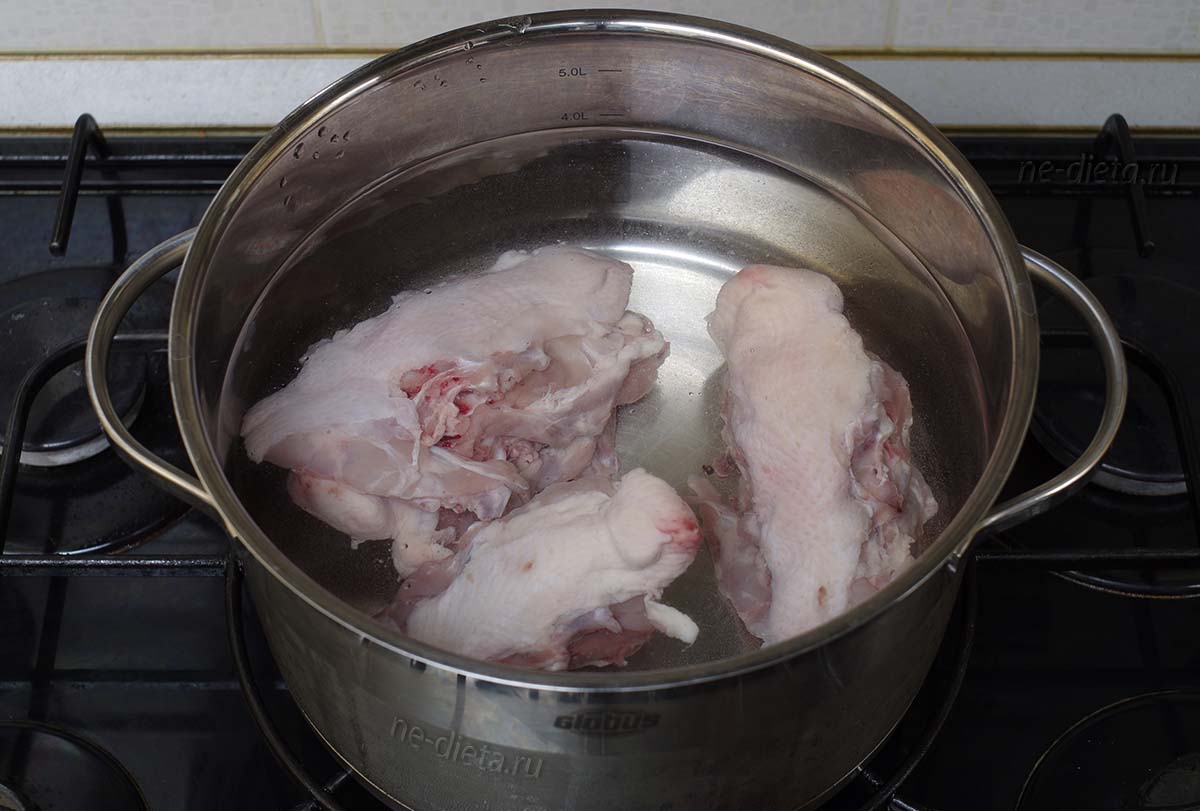
- Boil the eggs. To do this, boil water, add salt, and then immerse the eggs in boiling water. After a minute, turn down the gas and continue cooking for 3-4 minutes. After that, remove the eggs and cool in cold water. Then dry the shells thoroughly. Do not pour out the water, as you still need it.
- Prepare stickers. Using scissors, cut the ribbon into individual stickers.
- Put the stickers on the eggs. Carefully push the egg into the sticker, trying to place it strictly in the middle. This will allow the sticker to stick tightly on the surface of the egg, free of defects in the form of a curved pattern with creases.
- Secure the sticker with boiling water. Heat the water in which the eggs were boiled, carefully lower the eggs with stickers into it for 7-9 seconds, and then pull them out. Stickers immediately take the form of an egg and stick tightly to the shell.
- Put the eggs on a kitchen towel or paper napkin until dry.