Everything will be delicious cooking Kiev cake. Kiev cake from Alla Kovalchuk (Everything will be delicious)
Sweet meringue cakes with cashew nuts melt in your mouth.
Saturated cream Charlotte with a cognac note perfectly emphasizes the airy structure of the base for the cake.
Cooking time -140 minutes. It belongs to the type of meringue desserts.
Ingredients
For shortcakes you will need:
- 12 proteins.
- Cashew - 450 grams.
- Flour of the second grade - 100 grams.
- Vanilla - 1 packet.
- Sugar is a pound.
Cream:
- Sugar - 300 grams.
- Milk - 350 milliliters.
- Yolks - 12 pieces.
- 400 grams of butter.
- Cocoa Powder - 1 tablespoon.
- Vanilla - 1 packet.
- Cognac - 20 milliliters.
Oil cream for decoration:
- Butter - 1 pack.
- Powdered sugar - 4.5 tablespoons.
Cooking process
Prepare the proteins and nuts, beat the dough:
- Separate the proteins from the yolks, cover them with cling film and leave to ferment for 12 hours at room temperature. To make the proteins “age” faster, wipe them through a fine sieve twice.
- Dry the nuts in the oven, preheated to 150 degrees for 7 minutes. Put the nuts in one layer and after 3-5 minutes shake the pan several times.
- Grind completely cooled nuts with a rolling pin into a large crumb. Put them in a bag and roll them several times.
- Pour 2.5 cups of sugar, mix.
- Add low-gluten flour (2 grades).
- Beat the squirrels in a lush, dense foam, start at a low speed, gradually increasing it.
- Add vanilla sugar.
- For a tablespoon, add the “dry” portion of the cakes and mix by hand.
- Cover two forms with a diameter of 26 centimeters with parchment.
- Grind the dough into two identical parts and form two cakes. Smooth the surface with a spatula.
- Preheat the oven to 150 degrees, bake for about 20 minutes. Bake another 1.5 hours at 120 degrees.
Cook Charlotte:
- Yolks with sugar - 25 grams of sugar per yolk.
- Whisk with a whisk.
- Pour in cold milk and mix thoroughly.
- Put the mass on a small fire. Stir constantly, warm for 6 minutes.
- Cool the hot cream with an ice bath: pour ice water into a deep bowl, place a smaller saucepan with Charlotte cream on top.
- Hold two packs of butter at room temperature (20-22 degrees) until soft.
- Whip it. It should increase at least twice and slightly whiten.
- Pour the milk mixture into the whipped butter.
- Add vanilla and 20 milliliters of cognac. Cognac will give the cream shine and aroma.
- Separate 1/3 of the cream. Pour 1 tablespoon of cocoa powder into most.
Putting the cake together:
- Keep the cakes in the oven for at least 30 minutes, cool and remove the parchment. Ideally, the cake should be about 20 hours at room temperature, cool and get stronger.
- Grease the cooled cake with a light cream at least 2 centimeters thick.
- Cover the top of the cake and the sides with a cream of cocoa. Flatten with a knife to make the surface shiny and smooth. Use a flat, wide knife for this. It can be slightly moistened with water.
- Cover the cake and put it in the cold for 15-20 minutes so that the cream “seizes” and does not drain.
While the cake is cooling, prepare an oil cream for decoration:
- Cut the oil at room temperature (20-22 degrees) into pieces.
- Transfer it to a deep bowl and beat at high speed mixer.
- Pour the powder.
- Transfer the mass to a pastry bag with a nozzle, the diameter of which is not more than 1 centimeter. You can form roses, a fringing and any figures.
The finished cake must be cut very carefully so that the cakes do not crumble and do not deform.
Crunchy “Kiev cake” is a dessert dessert. Since Soviet times, it has become the hallmark of Kiev, delivering gastronomic pleasure not only to the indigenous people of Kiev, but also to numerous guests of the capital. Sweet meringue cakes with cashew nuts melt in your mouth. Saturated cream Charlotte with a cognac note perfectly emphasizes the airy structure of the base for the cake.
Cooking time -140 minutes. It belongs to the type of meringue desserts.
For shortcakes you will need:
- 12 proteins.
- Cashew - 450 grams.
- Flour of the second grade - 100 grams.
- Vanilla - 1 packet.
- Sugar is a pound.
Cream:
- Sugar - 300 grams.
- Milk - 350 milliliters.
- Yolks - 12 pieces.
- 400 grams of butter.
- Cocoa Powder - 1 tablespoon.
- Vanilla - 1 packet.
- Cognac - 20 milliliters.
Oil cream for decoration:
- Butter - 1 pack.
- Powdered sugar - 4.5 tablespoons.
Cooking process
Prepare the proteins and nuts, beat the dough:
- Separate the proteins from the yolks, cover them with cling film and leave to ferment for 12 hours at room temperature. To make the proteins “age” faster, wipe them through a fine sieve twice.
- Dry the nuts in the oven, preheated to 150 degrees for 7 minutes. Put the nuts in one layer and after 3-5 minutes, shake the pan several times.
- Grind completely cooled nuts with a rolling pin into a large crumb. Put them in a bag and roll them several times.
- Pour 2.5 cups of sugar, mix.
- Add low-gluten flour (2 grades).
- Beat the squirrels in a lush, dense foam, start at a low speed, gradually increasing it.
- Add vanilla sugar.
- For a tablespoon, add the “dry” portion of the cakes and mix by hand.
- Cover two forms with a diameter of 26 centimeters with parchment.
- Grind the dough into two identical parts and form two cakes. Smooth the surface with a spatula.
- Preheat the oven to 150 degrees, bake for about 20 minutes. Bake another 1.5 hours at 120 degrees.
Cook Charlotte:
- Yolks with sugar - 25 grams of sugar per yolk.
- Whisk with a whisk.
- Pour in cold milk and mix thoroughly.
- Put the mass on a small fire. Stir constantly, warm for 6 minutes.
- Cool the hot cream with an ice bath: pour ice water into a deep bowl, place a smaller saucepan with Charlotte cream on top.
- Hold two packs of butter at room temperature (20–22 degrees) until soft.
- Whip it. It should increase at least twice and slightly whiten.
- Pour the milk mixture into the whipped butter.
- Add vanilla and 20 milliliters of cognac. Cognac will give the cream shine and aroma.
- Separate 1/3 of the cream. Pour 1 tablespoon of cocoa powder into most.
Putting the cake together:
- Keep the cakes in the oven for at least 30 minutes, cool and remove the parchment. Ideally, the cake should be about 20 hours at room temperature, cool and get stronger.
- Grease the cooled cake with a light cream at least 2 centimeters thick.
- Cover the top of the cake and the sides with a cream of cocoa. Flatten with a knife to make the surface shiny and smooth. Use a flat, wide knife for this. It can be slightly moistened with water.
- Cover the cake and put in the cold for 15–20 minutes so that the cream “seizes” and does not drain.
Ingredients
- Eggs - 12 pcs for cream, 6 pcs for cakes.
- Sugar - 800 g
- Second grade wheat flour - 100 g
- Cashew - 450 g
- Vanilla Sugar - 30 g
- Butter 82.5% - 400 g
- Milk 2.6% - 350 ml
- Cocoa - 20 g
- Cognac - 20 ml
Kiev cake - a step by step recipe for cooking
Cooking cake layers
You will need: eggs, sugar, flour, vanilla sugar and cashew nuts.
- Fry nuts in the oven at a temperature of 150 ° C for 5-7 minutes until golden brown. Shake nuts every two minutes.
- Squirrels are separated from the yolks. For cakes we use only proteins - they will make the cake light and airy. Put the yolks in the refrigerator, covered with cling film
For the preparation of cakes, only aged proteins are used. To do this, they must be left at room temperature overnight or twice passed through a sieve
- Grind the toasted nuts with a rolling pin into a large crumb. Add to them 500 g of sugar and 3.5 tbsp. flour, mix thoroughly
- Using a mixer, beat the proteins - first at a low speed, and when foam is already formed at a higher speed. In the process of whipping, add 20 g of vanilla sugar. Whip the squirrels until a thick and strong foam
- After we mix them with dry ingredients - so that the proteins do not fall off, pour the mixture gently and gradually. Stir with a spatula from the bottom up.
Bake a cake
We use two identical forms. For baking we take 2 identical forms, preferably detachable round ones. Cover the bottom with parchment.
- Pour half of the mass into each mold - the mass should tightly cover the entire bottom. During baking, the cake will double in size, so the layer thickness should be 1-1.5 cm.
- We put the forms in an oven preheated to 150 ° C. After 15-20 minutes, reduce the temperature to 120 ° C. Bake cakes for an hour. Then we open the oven door, but leave the forms in the oven for another half hour - so that the cakes do not fall off due to a sharp temperature difference.
Cooking Charlotte Cream
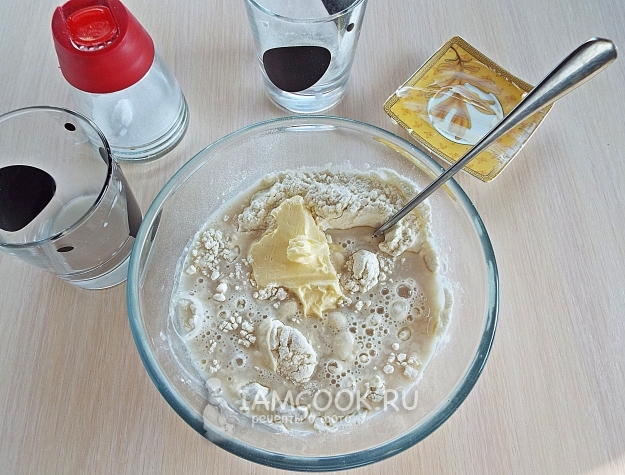
- Mix 12 yolks and 300 g of sugar, and then add 350 ml of milk
- Stir everything with a whisk so that the yolks are combined with milk
- We heat the milk mixture until thickened so that the yolks are brewed. To do this, pour the mixture into a saucepan and keep on low heat, constantly stirring for 5-10 minutes until a uniform transparent yellow color
- Remove the cream from the heat and pour into a separate bowl so that it does not continue to boil and does not exfoliate. You can put the bowl on ice to cool the cream to room temperature faster.
- Beat with a mixer the butter in a lush foam. In the process we interfere with the cooled cream base. Add to the cream 10 g of vanilla sugar and 1 tbsp. cognac.
Cooking Oil Cream
Beat 200 g of butter and 100 g of icing sugar with a mixer until lush and thick cream
Stack the cake
We divide the Charlotte cream into 2 parts - bigger and smaller. 2/3 of the cream (approximately 500-600 ml) will cover the cake on top and sides. Add 1 tablespoon of cocoa powder to it and mix. The second part of the cream (200-300 ml) remains for the layer.
We get cakes from the oven. They should rise twice - become about 2 cm, find a light beige color and become porous. Allow them to cool well at room temperature for at least 6 hours, and preferably 10-12 hours.
Making a cake
We take a wide flat plate, and preferably a cake bowl. In the center we put a spoonful of cream, then the cake with the smooth side down. Spread the Charlotte cream on top. The thickness of the layer should be the same as the cakes. From the top we lay out the second cake with the bottom up. Press the cake lightly on top.
Gently spread a long knife or metal spatula on the cake on top and sides with the chocolate part of the cream. We decorate the cake with oil cream drawings on top. We use wide serrated nozzles for cream roses.
Let the cream harden so that the cake holds its shape better - put it in the refrigerator for 30 minutes.
Before serving, sprinkle a cake with a thin layer of nuts.
Well-known psychologist and expert of the “Save our family” program Natalya Khlodenko will learn how to cook “Kiev Cake”. And Alla Kovalchuk, participant of the second season of MasterShef, will become her culinary mentor.
The famous “Kiev Cake” won many hearts. He became the hallmark of not only Kiev, but also the whole of Ukraine. Every day, tens of thousands of guests of the Ukrainian capital, leaving Kiev, take with them a sweet memory of the capital - “Kiev Cake”
Kiev cake
Ingredients:
eggs - 12-13 pcs.
sugar - 800 g
second grade wheat flour - 100 g
cashew nuts - 450 g
vanilla sugar - 30 g
butter (82.5%) - 400 g
milk (2.6%) - 350 ml
cocoa - 20 g
cognac - 20 ml
Method of preparation:
We begin to prepare cake cakes. You will need: eggs, sugar, flour, vanilla sugar and cashew nuts. Dry nuts - fry in the oven at a temperature of 150 C for 5-7 minutes until golden brown.
While nuts are roasted, separate the whites from the yolks. For cakes, only proteins are used. They will create the airy and light cake structure. Combine all the squirrels and all the yolks in two different bowls. Proteins are needed for shortcakes, and Charlotte cream is prepared from yolks. But for now, put the yolks in the refrigerator, covering with cling film.
To make the cakes airy and crispy, you need to pass the proteins through a sieve twice. So that the protein does not get stuck, do not pour it all at once - it is better in 3-4 servings. To make it faster, just pour the squirrel from a bowl into a sieve. When there is almost no protein left at the bottom of the sieve, top up the next portion and rub on top with a tablespoon.
Remove the nuts from the oven and let them cool. Toasted nuts need to be chopped with a rolling pin into a large crumb.
Pour the chopped nuts into a bowl and add 500 g of sugar. Add 3.5 tbsp. flour to nuts with sugar and mix thoroughly with a tablespoon.
We start whipping the proteins with a mixer at a low speed of 1-2, when the foam forms - increase the speed to 4. During the whipping process, add 20 g of vanilla sugar. Beat the whites to a thick and strong foam.
Mix protein with dry ingredients. But so that the squirrels do not fall, pour the mixture gently and gradually with tablespoons. Stir best with a silicone spatula from the bottom up.
Prepare two identical baking dishes. It is most convenient to use detachable round shapes. Cover the bottom with parchment. Pour half the mass into each mold.
Put whipped squirrels in a baking dish.
The mass is dense and should densely cover the entire bottom. During baking, the cake will double in size, so the layer thickness should be 1-1.5 cm.
Cake is kept in the oven for 1-1.5 hours at a low temperature - just 120C. But for cakes to rise, they need hot air. Therefore, first put the cakes in a well preheated - up to 150C - oven for 15-20 minutes, and then reduce the temperature. After the cakes are baked for an hour in the oven, you need to turn off the fire and open the oven door. But you can’t immediately get cakes - they will fall off due to a sharp temperature difference. Leave the cakes to stand for another half an hour.
While the cakes are in the oven, prepare the Charlotte cream. Stir 12 yolks and 300 g of sugar well first, and then pour 350 ml of milk. Stir everything with a whisk so that the yolks are combined with milk. This milk mixture must be heated to thicken - so that the yolks are brewed. Pour it into a stewpan and keep on low heat and mix constantly for 5-10 minutes until a uniform transparent yellow color.
Remove from heat and pour into a separate bowl so that the cream does not exfoliate. Put a bowl on ice to cool the cream faster. Cool the cream to room temperature.
Beat the butter with a mixer into the lush foam. Continue to whisk the butter and mix in the cooled cream base.
Add 10 g of vanilla sugar and 1 tbsp. cognac in cream.
It is necessary to divide the Charlotte cream into 2 parts. The main mass - 2/3 (approximately 500-600 ml) - will go to cover the cake on top and on the sides. And the remaining 200-300 ml - for decoration. In delayed cream, add 1 tablespoon of cocoa powder and mix again. This cream will go to the sides and top of the cake.
Remove the cakes from the oven. In order for the cake to harden well, become truly airy and crispy, it must cool and compact at room temperature for at least ... 6 hours. And if time allows - all 10-12 hours.
The cakes rose twice - they became about 2 cm. They are light beige, pleasant color, not dense - porous.
Cake assembly. Take a wide flat plate, and preferably a cake bowl. In its center, put a spoonful of cream. Put the cake inside with the smooth side down. Spread Charlotte cream set aside for the layer above. The thickness of the layer is the same as the cakes - 2 cm. From the top - lay the second cakes - upside down. Press the cake lightly on top. Now take the chocolate portion of the cream. And gently spread a long knife or metal spatula over the cake on top and sides.
In order to decorate the cake on top with different patterns, you need to make a dense butter cream. For butter cream for decoration, take 200 g of butter and 100 g of powdered sugar. Mix the butter with a mixer until a smooth consistency and gradually add the powdered sugar.
For cream roses you need to wear wide toothed nozzles on the bags. We will lay literally 1-1.5 tablespoons in bags. cream. Like toothpaste, push it to the bottom with your fingers. Cream is applied at two angles: 90 ° and 45 °. Keep a bag or a cornet perpendicular to the surface of the cake if you draw flowers, stars or other voluminous patterns - this will make them as tall and convex as possible. Having placed the bag perpendicularly, squeeze out the cream and with a sharp movement lift the bag up so that no tails remain. The rosette is ready!
Decorate the cake with roses.
You can write something or make a border around the edge, simply changing the different nozzles of the pastry bag.
Kiev cake is almost ready. But the cream needs to be frozen so that the cake holds its shape better. To do this, leave it at least 30 minutes in the refrigerator. Remove the Kiev Cake from the refrigerator and sprinkle with a thin layer of nuts. Now your “Kiev cake” is ready!
Butter cream for Kiev cake
Ingredients:
butter (82.5%) - 200 g
icing sugar - 100 g
Method of preparation:
Take 200 g of butter and 100 g of powdered sugar. Mix the butter with a mixer until smooth, gradually adding the powdered sugar.
Now you can decorate your “Kiev cake” by adding an original inscription. To do this, use different nozzles for the pastry bag.
Legendary "Kiev cake" - This is a real business card of Ukraine and Kiev. And today in "" you will learn all the secrets of making this dessert at home. Original kiev cake recipe will reveal the cook Alla Kovalchuk. Guest guest - psychologist Natalia Kholodenko.
In today's issue of "Everything will be delicious!" famous psychologist Natalya Kholodenko will learn to cook “Kiev Cake”. And her culinary mentor will be the participant of the second season of “Master Chef” Alla Kovalchuk.
The famous “Kiev cake” won many hearts. He became the hallmark of not only Kiev, but also the whole of Ukraine. Every day, tens of thousands of guests of the Ukrainian capital, leaving Kiev, take with them the sweet memory of the capital - “Kiev Cake”.
But everyone knows that a cooked dish is much tastier than what was bought in a store. In fact, the recipe for "Kiev Cake" is much simpler than it seems at first glance. Therefore, today the psychologist Natalya Kholodenko and Alla Kovalchuk will share with you a recipe for this famous cake so that you can please yourself and your loved ones with this dessert, prepared independently at home.
Having tested a new recipe, Natalya admitted: “I made“ Kiev Cake ”today - the most delicious I've ever tasted. I advise you to make this cake according to our recipe, and the result will exceed all your expectations. ”
Want to learn how to cook a real “Kiev cake”? Then study with us.
Everything will be delicious. The air of 11/29/14 Kiev cake. Watch online
ALTERNATIVE
Butter cream for Kiev Cake
Ingredients:
butter (82.5%) - 200 g
icing sugar - 100 g
In order to decorate the “Kiev cake” with different patterns from above, you need to prepare a thick butter cream.
Method of preparation: Take 200 g of butter and 100 g of powdered sugar. Beat the butter with a mixer until smooth, gradually adding icing sugar.
Now you can decorate your “Kiev cake” by adding an original inscription. To do this, use different nozzles for the pastry bag.
"Kiev cake"
Ingredients:
eggs - 12-13 pcs.
sugar - 800 g
second grade wheat flour - 100 g
cashew nuts - 450 g
vanilla sugar - 30 g
butter (82.5%) - 400 g
milk (2.6%) - 350 ml
cocoa - 20 g
cognac - 20 ml
for decoration:
butter (82.5%) - 200g
icing sugar-100g
Cooking method:
We begin to prepare cake cakes. You will need: eggs, sugar, flour, vanilla sugar and cashew nuts. Dry the nuts - fry in the oven at a temperature of 150 C for 5-7 minutes until golden brown.
While nuts are roasted, separate the whites from the yolks. For cakes, only proteins are used. They will create the airy and light cake structure. Combine all the squirrels and all the yolks in two different bowls. Proteins are needed for shortcakes, and Charlotte cream is prepared from yolks. But for now, put the yolks in the refrigerator, covering with cling film.
To make the cakes airy and crispy, you need to pass the proteins through a sieve twice. So that the protein does not get stuck, do not pour it all at once - it is better in 3-4 servings. To make it faster, just pour the squirrel from a bowl into a sieve. When there is almost no protein left at the bottom of the sieve, top up the next portion and rub on top with a tablespoon.
Remove the nuts from the oven and let them cool. Toasted nuts need to be chopped with a rolling pin into a large crumb.
Pour 350 g of chopped nuts into a bowl and add 500 g of sugar. Add 3.5 tbsp. flour to nuts with sugar and mix thoroughly with a tablespoon.
We begin to whip the proteins with a mixer at a low speed of 1-2, when the foam forms - increase the speed to 4. During the whipping process, add 20 g of vanilla sugar. Beat the whites to a thick and strong foam.
Mix protein with dry ingredients. But so that the squirrels do not fall, pour the mixture carefully and gradually - with tablespoons. Stir best with a silicone spatula from the bottom up.
Prepare two identical baking dishes. It is most convenient to use detachable round shapes. Cover the bottom with parchment. Pour half the mass into each pan.
The mass is thick and should densely cover the entire bottom. During baking, the cake will double in size, so the layer thickness should be 1-1.5 cm.
Cakes are kept in the oven for 1-1.5 hours at a low temperature - only 120C. But for cakes to rise, they need hot air. Therefore, first put the cakes in a well-preheated - up to 150С - oven for 15-20 minutes, and then reduce the temperature. After the cakes are baked for an hour in the oven, you need to turn off the fire and open the oven door. But you can’t immediately get cakes - they will fall off due to a sharp temperature difference. Leave the cakes to stand for another half an hour.
While the cakes are in the oven, prepare the Charlotte cream. Stir 12 yolks and 300 g sugar well, then pour 350 ml of milk. Stir everything with a whisk so that the yolks are combined with milk. This milk mixture must be heated to thicken - so that the yolks are brewed. Pour it into a stewpan and keep on low heat and mix constantly for 5-10 minutes until a uniform transparent yellow color.
Remove from heat and pour into a separate bowl so that the cream does not exfoliate. Place a bowl on ice to cool the cream faster. Cool the cream to room temperature.
Beat the butter with a mixer into the lush foam. Continue to whisk the butter and mix in the cooled cream base.
Add 10 g of vanilla sugar and 1 tbsp. cognac in cream.
It is necessary to divide the cream "Charlotte" into 2 parts. The bulk - 2/3 (approximately 500-600 ml) - will go to cover the cake on top and on the sides. And the remaining 200-300 ml - for the layer between the cakes. In most of the deferred cream, add 1 tablespoon of cocoa powder and mix again. This cream will go to the sides and top of the cake.
Remove the cakes from the oven. In order for the cake to harden well, become truly airy and crispy, it must cool and compact at room temperature for at least ... 6 hours. And if time permits - all 10-12 hours.
Cakes rose twice - they became about 2 cm. They are light beige, pleasant color, not dense - porous.
Assembly of the cake. Take a wide flat plate, and preferably a cake bowl. Put a spoonful of cream in its center. Put the cake inside with the smooth side down. Spread Charlotte cream set aside for the layer above. The thickness of the layer is the same as the cakes - 2 cm. From the top - lay the second cakes - upside down. Press the cake lightly on top. Now take the chocolate portion of the cream. And gently spread a long knife or metal spatula over the cake on top and sides.
In order to decorate the cake on top with different patterns, you need to make a dense butter cream. For butter cream for decoration, take 200 g of butter and 100 g of powdered sugar. Beat the butter with a mixer until a smooth consistency and gradually add the powdered sugar.
For cream roses you need to wear wide toothed nozzles on the bags. We put literally 1-1.5 tablespoons in bags. cream. Like a toothpaste, push it to the bottom with your fingers. The cream is applied at two angles: 90 ° and 45 °. Keep a bag or a cornet perpendicular to the surface of the cake if you draw flowers, stars or other voluminous patterns - this will make them as tall and convex as possible. Having placed the bag perpendicularly, squeeze out the cream and with a sharp movement lift the bag up so that no tails remain. The rosette is ready!
Decorate the cake with roses. You can write something or make a border around the edge, simply changing the different nozzles of the pastry bag.
Kiev cake is almost ready. But the cream needs to be frozen so that the cake holds its shape better. To do this, leave it at least 30 minutes in the refrigerator. Remove the “Kiev cake” from the refrigerator and sprinkle a thin layer of nuts on the sides. Now your “Kiev cake” is ready!