Types of puff pastry buns. Puff pastry: shaping ideas worthy of culinary masterpieces
In the previous two parts, I told and showed what forms of buns there are and what can be beautifully molded from yeast dough. And in the third part of this exciting story, we will talk about puff pastry. After all, puffs are also different, different!
What to mold from puff pastry
From ready-made puff pastry, you can come up with, cut or mold so many beautiful, diverse products, which is simply amazing. I made a selection of puff pastry recipes that I have already prepared. All these puffs are on the site in the form of detailed photo recipes, so if you especially like something and want to take a closer look and cook, use the links to the recipes!
Puff corners, triangles

The easiest way to seal a puff is to place the filling in the center of a square of dough, fold it in half diagonally, and pinch the edges. It turns out a corner. They can be made sweet and savory, with cheese, with cottage cheese, with eggs and herbs, with berries and fruits.
How to make a puff envelope

You can also do this with a square of dough: wrap all 4 corners towards the center and pinch so that they do not open. You will get a nice “envelope”, which works well with a filling of apples, cottage cheese with raisins.
How to make croissants

Croissant in shape is the same bagel. So we take a triangular strip of dough, put the filling on the wide part and fold it. Please note: the shape of croissants depends on the width and length of the strip, they turn out to be different!
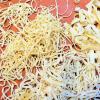
How to make puff tubes

If the previous puffs can be molded with a knife and hands, then for the tubes you need special molds in the form of metal cones. Narrow strips of puff pastry are wound slightly overlapping on them. Molds need to be lubricated with sunflower oil so that the tubes can be easily removed.
How to make flounces - puff pastry nests

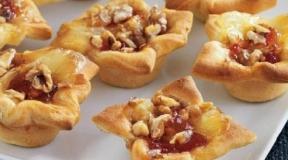
Now let's move on to more complex shapes. Baking in the form of puff nests looks very original, in which you can put various fillings - from red caviar and fried champignons to strawberries with cream.
To make nests, we cut out a pair of circles from the dough - with a glass, for example. And then in half of them we cut out the middle with a smaller glass.
We put the baked rings on top of the circles, gluing them with cream, butter or mayonnaise, and fill the “nests” with the filling. Depending on the filling, you get an unusual snack or pastry for tea.
How to make the original form of puff pastries

And also try to make "wools" - they look very unusual. In the dough rectangles, make small cuts in a checkerboard pattern vertically - to the middle of the piece, leave the other half of the rectangle intact. Put the filling on it, then cover the top with an openwork half, slightly stretching, and pinch the edges. "Vuliki" are named for their resemblance to honeycombs, and work especially well with a bright fruit filling of cherries, apricots, pumpkins with sugar and cinnamon.
How to make a puff scallop
It is very easy to form such a nice scallop puff with a filling, for example, from chocolate.

Many people love puff pastry for its tenderness and versatility. After all, you can make puffs with various fillings, ranging from jam to meat. Store-bought puffs are expensive and not always tasty, so many housewives prefer to buy puff pastry (or make it yourself) and bake at home. We will tell you how to wrap puffs in a variety of ways so that homemade cakes please not only the stomach, but also the eyes.
Triangle
This is one of the easiest and most popular ways to wrap puff pastry. So you can make puffs with cottage cheese, jam, jam, mushrooms, chicken, cheese and any other filling, because it will be inside the triangle. Folding the puff into a triangle is as easy as shelling pears:
- cut the dough into squares. The size can be any, the main thing is to keep the shape of a square. Usually they make 10 by 10 cm;
- put the filling in the middle. There should not be much of it (1 tbsp of filling per 10 by 10 square);
- We close the edges of the puff tightly with our fingers so that the filling does not flow out.
Ready. When baking, the puff will swell and turn out lush. And even if you bite off the pie and do not immediately get to the filling, it will still be delicious, because the puff pastry itself is tender and light.
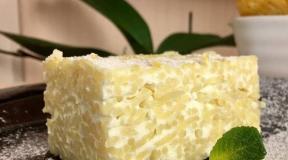
Cheesecake
You can wrap puffs in such an interesting way. Puff cheesecake differs from the classic one in its shape: it is not round, but square or diamond-shaped. For such a product, only thick (viscous) fillings are suitable, because liquid ones can flow onto a baking sheet. Learn how to make puff pastry:
- fold the dough square into a triangle (without pressing);
- make an incision, as in photo 3 (not completely);
- open the triangle back into a square and coat the edges with an egg (for better gluing);
- we cross the corners (as in photo 5);
- put the filling in the center.

Puff pastry is ready!
Butterfly
A very unusual way of wrapping puffs, suitable for sweet products. The filling should again be viscous. Watch and remember:
- it all starts, as in a cheesecake: a triangle, an incision, a sweep;
- we grease the middle of the square with an egg;
- as in photos 4 and 5, glue the corners to the middle;
- put the filling in the resulting cells.

The result is very beautiful lush butterflies, which, after baking, can be additionally decorated with powdered sugar and red currant berries, for example.
Bow
Many people remember puff bows from childhood. They did not have any fillings, but because of this, the products did not become less tasty, because the bows were sprinkled with sugar. It turns out that wrapping puffs in this way is not difficult at all:
turn a square into a triangle;
make 2 cuts as in photo 3;
the resulting tail is wrapped around the two side "ears", forming a bow.

Sprinkle the finished baked bow with powder or grease with liquid jam. Great light dessert for tea.
Kare
The ideal form of puffs for meat and mushroom fillings. The wrapping method is a bit like the cheesecake technique (at least it all starts exactly like that).
Many people want to diversify their menu, including treats for dessert. Of course, you can not think about what to do for tea, but go to the store and buy various sweets and confectionery there, but still, baking made by yourself will be much tastier.
Buns are a good addition for dessert. Cooking baking is not so difficult, but the main thing in this matter is a beautiful design.
After all, not everyone can make beautiful twisted buns with various braided patterns. But how to perform them, you can find out below from the recipes with photos.
From yeast dough
- a glass of milk;
- sugar - 100 grams;
- 2 yolks;
- ½ teaspoon of salt;
- 100 grams of butter;
- a sachet of vanillin;
- dry yeast - 25 grams or a bag of "fast";
- a kilogram of flour;
- yolk and 30 ml of milk - to lubricate the top of the baking.
Let's start cooking:
- The first step is to prepare the dough for the test. To do this, all milk must be warmed up;
- Pour yeast into warm milk and dissolve in it;
- We fall asleep 2 large spoons of granulated sugar and stir;
- As soon as the whole mixture becomes homogeneous, sift 1 large spoonful of flour into it and stir;
- We close the dough on top with a towel and put it in a warm place for 10-15 minutes;
- In the meantime, the butter must be placed in a saucepan, put it on the fire and heat until it is completely melted;
- We introduce two yolks into the approached dough and pour warm melted butter;
- Then pour the rest of the granulated sugar and stir with a whisk;
- At the end, vanilla powder, salt are added to the base and flour is sifted;
- It is better to fill the flour in parts so that the dough is lush;
- After that, everything is thoroughly kneaded, first with a spoon, and then by hand;
- Cover the cup with the dough with a towel and leave to infuse at room temperature. The dough should stand for about 40-60 minutes;
- As soon as the dough rises, you can start forming the buns. Buns can be made in different shapes. Consider the most popular.
Network
Execution scheme:
- Determine the size of the braids by eye, they can be made large, then the total amount of dough should be divided into two or three parts;

- We knead each part well;
- Divide into three flagella and roll out;

- Next, the flagella must be braided in the form of a braid;
- By the same principle, we make the rest of the braids;
- Next, in a cup, mix the yolk and milk, but you do not need to beat, just mix until smooth;

- Approached braids should be greased with an egg-milk mixture from above and from the sides;

- If desired, braids can be sprinkled with poppy seeds;

heart
Execution scheme:
- The dough needs to be divided into several small parts, roll out one part in the form of a cake, it must be greased with oil and sprinkled with sugar;

- We twist the cake in the form of a roll;

- We turn the roll in half and connect the edges;

- Then you need to cut, as shown in the photo below;

- We straighten the finished heart;

- In the same way, we make other buns.
butterflies
Butterflies are performed according to the following scheme:

Buns should be baked at a temperature of 200 degrees for 10 minutes, then the temperature is reduced to 180 degrees and the buns should be baked for 15-20 minutes.
How to make beautifully shaped burgers
Buns in the form of roses
How to make poppy roses:

Braids or curls
Curls are made according to the following scheme:

hearts
The formation of hearts with poppy seeds is performed as follows:
- Roll out a few small cakes and grease with oil;

- Sprinkle with sugar;

- Next, sprinkle with poppy seeds, you can additionally sleep with cinnamon;

- Next, twist in the form of a tube, fold and cut;

- Unfold in the shape of a heart.

with apples
Mini braids
How apple braids are made:

Spirals
How to make apple spirals:

Roses
How to make roses:
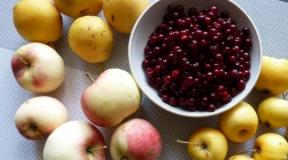
- First you need to cut the apples into slices;

- Next, you need to boil the apples in water with citric acid for about 5 minutes;

- Roll out the dough in the form of a rectangular layer and cut into strips;

- The strips should be smeared with applesauce or jam;
- Next, sprinkle the strips with sugar and cinnamon;

- After that, put apple slices in the center of each strip and fold the strip in half as in the photo below;

- We turn the strip with an apple in the form of a rose.

With cottage cheese
Envelopes
How to make envelopes:

Roses
How to make roses with cottage cheese:

Buns
How to make beautiful buns with cottage cheese:

From sweet dough
What components are required for the test:
- 4 cups flour;
- 1 large spoon of dry yeast;
- a glass of milk;
- one egg;
- two large spoons of granulated sugar;
- a pinch of salt;
- half a pack of butter;
- some vanilla powder.
Let's start cooking:
- Pour flour into a cup, add dry yeast, salt and granulated sugar;
- You can add vanilla powder and mix everything;
- Milk should be slightly warmed up and poured into dry ingredients;
- We break the egg and put it in a container with the ingredients;
- Butter must first be removed from the refrigerator so that it stands at room temperature for a while and softens;
- We spread the oil to the rest of the components;
- Mix everything well, first with a spoon, and then with your hands;
- We form a ball from the dough and cover with a towel;
- We remove the bowl in a warm place, leave to stand for about an hour, so that the dough comes up.
braids
Braids are made according to the following scheme:

Christmas trees
How to make Christmas trees from dough:

How to make beautifully shaped sweet buns with jam
Daisies

From puff pastry
Pigtail with cottage cheese
How to make a pigtail stuffed with cottage cheese:
- First, roll out a rectangular layer of dough and cut into strips from one edge;
- We spread the cottage cheese filling with a small slide in the center and cut the other edge into strips;
- Then, in turn, we braid each segment in the form of a braid from right to left;
- We spread the finished braid on a baking sheet.
rolls
How to make rolls:

rings
How to make puff pastry rings:
- We roll out a rectangular layer from the dough;

- We cut the layer into 6 parts, cut each part from the edges into segments to the middle;

- On the edge that is not cut, you can put a filling, such as jam with cinnamon;

- After that, we fold everything in the form of a tube, we begin to fold from the uncut edge;

- Next, we twist the tubes in the form of rings and connect the edges.

Beautiful buns made from yeast, rich and puff pastry in the form of hearts, roses, braids, butterflies will be a wonderful table decoration. They can be done at least every day, especially since you can see the detailed design from the photo. Therefore, the entire cooking process will not cause any particular difficulties.
How sometimes you want to improve your culinary skills and make a unique dish that will captivate the whole family. Of course, hostesses place a special emphasis on desserts, due to the fact that both children and adults love sweets.
It is much easier to go to the nearest pastry shop and buy a treat for tea, but it is more interesting and better to bake delicious pastries at home on your own.
Buns are a great addition to tea. Cooking is not at all difficult, the main thing is to decorate the dish beautifully. Not everyone can bake twisted buns with braided patterns.
But in this article, you can learn how to make beautiful buns very simply. These will be braids with patterns that everyone will be delighted with.
Each recipe is supplemented with steps, this will help you more easily figure out what are the ways of forming buns and how to implement them in practice.
Do not be afraid that you will not be able to mold the buns. My recipes are not complicated, and the effect will amaze everyone. I propose to learn the recipes for formation as soon as possible.
yeast buns

Components: 100 gr. Sahara; 250 ml of milk; 2 pcs. chickens. yolks; ½ tsp salt; pack. vanillin; 100 gr. sl. oils; 25 gr. yeast; 1 kg of flour; 30 ml of milk; 1 PC. chickens. yolk.
The last 2 ingredients on the list are needed to grease the buns.
Cooking algorithm:
- I begin to prepare beautiful rolls from yeast dough by making dough for kneading dough. Warm the milk to room temperature, only then add yeast to it and completely dissolve their composition in it. You also need to enter 2 tbsp. sugar sand, mix. The mixture should become homogeneous. It is worth introducing 1 tbsp into it. flour and mix. Cover the dough with a towel, move it to a warm place, let it stand there for about 15 minutes.
- You won’t be bored, because it’s also worth warming up the sl. oil, let it cool and add 2 pcs. chickens. eggs.
- I add sugar. sand and mix. It's best to do this with a whisk. I'm bringing in a van. powder, salt, sow flour. It is worth adding the last ingredient in parts to make the test batch from the yeast composition lush. Using a spoon, mix the mass, it remains to knead with your hands.
- I cover the dough of the yeast composition with a towel, let it stand for 40 minutes in warmth, you can wrap it in a film. During this time, it will become 2 times larger. Next comes the molding of the buns.
There will be one recipe for making dough for buns, but I will offer methods for shaping them for consideration a little lower. Of course, each recipe for shaping buns has its own characteristics, how to sculpt them, and therefore, for convenience, I attached a photo to them.
Network

Scheme of shaping rolls:
- The braid can be both large and not. If you make large rolls, then it is worth dividing the dough mass into 2.3 parts. Knead each part of the dough well. After dividing into 3 bundles of their dough and roll out.
- Weave bundles of dough in the form of a pigtail. The rest of the braids need to be done the same way. As you can see, even such forms of buns as wicker rolls are elementary to roll up.
- It is worth mixing milk with chickens in a cup. yolk. Beating the mass in this case is not worth it. Just make sure it's uniform.
- Lubricate the surface of the dough with the mixture and cover with sesame seeds, poppy seeds, sugar. In general, the sprinkling of dough is at your personal discretion.
A heart

This time you need to divide the finished dough into parts. Roll out one part of the dough in the form of a cake, smearing the next. oil. Sprinkle the surface of the dough with sugar on top.
Scheme:
- Roll the cake into pieces.
- I connect the edges of the dough. I cut the roll lengthwise and it turns out the heart, it remains only to straighten it.
- This scheme will be the same for other types of buns that you want to sculpt.
Butterfly

Scheme:
- I divide the mass of dough into parts, now it is worth rolling it out and sprinkle with sugar.
- It remains to roll the roll, I turn it into a bracket so that the ends are connected in the center.
- I cut the roll by 1 cm in the center and unfold the butterfly. Wings should be turned to the sides. That's all, the butterfly bun with sugar is ready. Your family will be delighted with the rolls.
Baking beautiful rolls
When the process of forming the buns is completed, you need to put them on a baking sheet to bake. The oven must be preheated to 200 gr. Baking should last approximately 10 minutes at this temperature setting.
Then rearrange the temperature to 180 gr., But you don’t need to get the buns, because they still need to be baked for about 20 minutes.
On this recipes and methods of formation have not come to an end, I still have something to surprise my faithful readers.
Homemade buns with filling
Poppy rolls can be made in the form of beautiful roses. Most likely you have seen a similar design in stores. Look at the photo and you will understand what roses I am talking about.
Interested? Then it's time to learn how to make rose buns with poppy seeds at home.
Cooking algorithm:
- The finished dough mix needs to be rolled out, only then divided into equal halves.
- One of them should be rolled out into a rectangle, the cake should not be thin, I grease the rast. oil and sprinkle on top with the right amount of poppy seeds.
- Roll out the dough into a roll again. I cut it into pieces, their width will be approximately 10 cm. It remains only to form roses.
As you can see, all methods are extremely simple!
Curls and braids

Scheme:
- I put the finished dough kneading on the surface of the table, sprinkle with flour. I roll out the dough in the form of a layer, it will be rectangular. I sprinkle poppy seeds on it. I overlap the layer. I cut into strips across. You will get 12 strips approximately.
- I twist all the strips in spirals 3-4 times. I roll into rings. Baking with sugar will be cooked after 20 minutes of baking at 200 gr. in the oven. But this is not all the ways and forms for delicious rolls.
Stuffed hearts

Scheme:
- I make small cakes, cover the rast. butter, sugar. I pour poppy. By the way, you can safely cover the dough with cinnamon, it turns out really very tasty, and even the buns have a cool flavor.
- I twist the mass of dough into a tube, roll it up and cut it. I form a heart. It remains only to send the baked buns. The finished result will delight you with its beauty and originality.
Look at the photo, what kind of buns with sugar were formed by me.
Sweet buns
Components: 4 tbsp. flour; 1 tbsp dry yeast; 250 ml of milk; 1 PC. chickens. egg; salt; 2 tbsp sugar sand; van. powder; 0.5 pack. sl. oils.
Cooking algorithm:
- Flour with dry yeast, sugar. mix sand and salt. I'm adding a van. powder, I knead.
- I warm a little milk and mix with dry ingredients. I kill chickens. the egg there.
- Softened sl. I put oil in the mixture. I mix it with a spoon, then I knead the dough by hand.
- I roll the dough into a ball, cover with a towel. I leave the bowl in a warm place for 1 hour.
We are engaged in the formation of rolls, their methods are presented below.
Recipes for molding buns with apples
Apple jam buns are not only very tasty, but they can also be spectacular and beautiful.
Below I have presented a recipe with jam, but instead of jam, you can put apples, after stewing them for a couple of minutes in a pan.
But just do not forget to remove the core from the apples and cut into cups or slices.
Small braids with jam

Scheme:
- The dough should be rolled out into a cake, cut into medium-sized squares. I fill the center with jam.
- I cut the squares into small pieces on the sides. You don't have to go to the middle. In the center, you still need to leave a place of 5 cm.
- I braid the edges in a braid with jam. Forming a braid with jam, as in the photo, is not difficult.
Network
Scheme:
- I form 2 sausages from the layer.
- I twist them around. Ready. Video to help you at the end of the article.
Herringbone

Scheme:
- The dough should be rolled out in the form of a cake. I cut into triangles.
- I cut each edge from 2 sides into segments, I form Christmas trees.
- I smear the top of the baking with a mixture of milk and yolk. I form buns. Their shape will be really beautiful. To make them golden, I bake them well in the oven.
Spirals with jam

Scheme:
- I roll out a layer of dough of large size. I put stuffing on it. Complete the apple filling with delicious raisins.
- I overlap the edges. I cut the roll crosswise into strips. They should be 3 cm wide. About 12 strips will be enough.
- I roll the strips in the form of spirals. I put the spirals with jam to bake on a baking sheet covered with pre-rast. oil. If you have any questions, you can watch the video to better understand how baking is done at home. It will turn out very nice.
Roses

Even from apple buns you can make beautiful shapes.
Cooking algorithm:
- I cut apples into slices. I boil for 5 minutes in water, add citric acid to them. I roll out the dough into a layer and cut into strips.
- I grease all the strips with apple jam, sprinkle cinnamon and sugar on top.
- I put the strips in the center, put the apple slices on the strip in half, so that it turns out as it was done in the photo.
- I fold the strip in the form of a rose with an apple.
Curd buns
Few people refuse cottage cheese rolls when they are served with tea. The thing is that the filling with cottage cheese is almost the most popular among bun lovers.
You can bake not only sweet rolls, even salted cottage cheese will come in handy. But the most interesting thing is that the shapes of cottage cheese buns cannot surprise you, look at the photo in person.
If you are interested in this topic, then below I have presented a number of interesting recipes.
Envelopes with cottage cheese

Scheme:
- I divide the dough into squares. I put the cottage cheese filling in the center.
- I turn the corners to the center. I bake until done.
This method is the easiest, as you can see. See other ways in the video.
Roses with cottage cheese

Scheme:
- I roll out the dough cakes and cut them into 3 parts, but not completely.
- I put the filling in the center.
- I wrap the edge around the filling. I fold the edges and form roses.
Curd buns
Very beautiful curd buns are obtained.
Scheme:
- I roll out the dough into a rectangle. I cut into squares. I put the filling in the center and make cuts in the corners.
- I fold the dough with the filling and put the edges into the holes.
- I wrap the second edge. Done, you can send to bake. Each bun will delight you with a beautiful view.
As you can see, even the simplest bun, if you know the secrets of its design, can become a masterpiece. The options for their design are very different, and therefore each housewife will be able to find one that suits her, both in terms of the method of preparation and the effect.
Videos bun molding
Read other baking recipes on my website to find out how different and spectacular it can be in design.
Every woman strives to pamper her relatives with various pies and buns. It is by baking that you can determine the level of skill of the hostess. After all, you need to show imagination when choosing not only the filling, but also the shape of future products. Not everyone knows how to mold a pie beautifully.
What are the pies
Baking is an art. Recipes for various pies have been passed down from generation to generation for many centuries. At the moment, there are many ways to prepare them. What are the pies? Baking can be:
- Main dish. Most often these are pies with meat or fish filling.
- Snack. For the preparation of such pies, a filling of mushrooms or vegetables is used.
- Dessert. These are, as a rule, sweet pastries with various fruit or milk fillings.
It is worth noting that the menu of many foreign restaurants includes pies and pies. The uniqueness of baking lies not only in the filling, but also in the choice of dough. It can be:
- Yeast - rich, used for pies and buns.
- Yeast-free - custard and puff.
However, not every housewife can make beautiful pies, the photo of which is presented below. can be absolutely any:
- Round.
- Oval.
- triangular.
- square and so on.
It is best to cook pies and buns from yeast dough, as in the process of cooking it becomes more fluffy and airy.

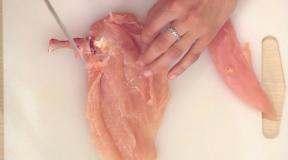
We make oval pies
How beautiful to mold oval-shaped pies? It is worth noting that this option allows you to use almost any filling. That is why the oval shape is considered the most popular. To make original pies, you need:
- Divide the dough into small pieces and roll into balls.
- Such blanks should be rolled into flagella, and then cut into cubes (about 4 centimeters each).
- Each piece must be rolled into an oval-shaped cake. The thickness of the dough should be no more than 5 millimeters.
- In the middle of the workpiece, you need to put a little filling. After that, one edge of the cake must be thrown over the second and pinched. The result should be a crescent.
That's all. The oval-shaped pie is ready. When baking or frying, the blanks should be laid out with the seam down.

Original round pies
How to sculpt beautiful round pies? Actually, it's easy. It is worth noting that this form is ideal for baking with fruit filling. To make the products exactly round, you need:
- Divide the yeast dough into pieces, and then roll it out so that neat cakes with a thickness of no more than 5 millimeters are formed as a result.
- Put the filling in the center of the round blank.
- Carefully gather the edges of the cake in the center and carefully pinch. The result should be a bag.
When baking, these pies should be laid out with a clamp. Otherwise, the cake will spread.
cute little squares
How to mold a pie beautifully from yeast dough? If the filling consists of dry products, such as potatoes or minced meat, then it is best to make square-shaped pastries. It takes a little time. It is worth noting that the fruit or vegetable filling from such pies may leak out. To prepare square-shaped products, you need:
- Roll out cakes from the dough, preferably medium-sized.
- Put the required amount of filling in the middle of each blank.
- Gently lift the corners of the dough and pinch together.
Spread these pies on a baking sheet or in a pan with the seam up. This way the cake won't spread.

triangular baking
How to mold beautiful yeast dough pies for the festive table? In this case, a triangular shape is ideal. The pies are baked very quickly and easily. This form is suitable for baking with an open filling. To make triangular pies, you need:
- Roll out the dough so that you get a neat triangle.
- Put the filling in the center of the resulting workpiece.
- Fold the two edges so that an arrow forms.
- Fold the rest of the edges up.

The secrets of making pies from yeast dough
- So that during the modeling process the dough does not stick to your fingers, you need to grease your hands with sunflower oil.
- To make the edges of the cakes stick together well, craftsmen advise lubricating them with water.
- Before baking, the workpiece should be covered with cling film, previously lubricated with vegetable oil. In this case, it is better to use corn. The pies should stand under the film for about 15 minutes. As a result, the pastries will turn out to be more magnificent.
- The tops of the pies should be greased with a beaten egg or milk. Thanks to this, during the baking process, the products will acquire an appetizing crust.
If the dough is yeast-free
If there is no desire to mess with yeast, you can use regular dough, puff or custard. In this case, you can make pies:
- From circles.
- From harnesses.
- With original embossed outlines.
In this case, you can use it as for yeast dough.
Pies-mugs
How to mold a pie beautifully from yeast-free dough? The manufacturing technology is quite simple:
- First you need to roll out the dough into a fairly thin layer. The thickness must exceed 5 millimeters.
- From the dough, cut out round-shaped blanks, preferably of the same diameter.
- In the center of the cake you need to put the filling, and then close the second cake. The edges of the blanks must be carefully pinched.
Put the finished pies on a baking sheet or in a pan.

Flagella pies
This is another original way of sculpting pies from yeast-free dough. Preparing such a cake is very simple. For this you need:
- Roll out the dough and cut out small rectangles. From the side of each corner it is worth making cuts.
- Put the filling in the center of the workpiece.
- After that, each edge must be lifted and folded crosswise. The edges must be sealed.
Pies prepared in this way must be laid out on a baking sheet.
Embossed pies
Want to make a beautiful pie? Photos of ready-made pastries, lovingly prepared by the hands of skilled culinary experts, are simply mesmerizing, causing appetite and a burning desire to try at least a piece of such a delicacy! However, getting embossed pies is not so difficult. The main thing is to follow the sequence. For the manufacture of original baking, not so much is required:
- The dough should be rolled out so that oval-shaped layers are obtained.
- Put the stuffing in the form of a sausage in the middle of each blank.
- Tuck the bottom and top of the cake about a quarter.
- Fold the corners along the wide edge twice crosswise.
It remains only to bake pies in the oven.
Rules for sculpting from yeast-free dough
Yeast-free dough is much denser than muffin. From it you can cook lean pies with a variety of fillings. To make the finished baking look appetizing, you should follow certain rules:
- If you want to get pies with an appetizing and golden brown crust, then grease it with egg white before baking.
- If you bake everything in the oven, then you should only heat it up to 100 degrees. The temperature must be increased gradually during cooking to the desired level.
- To make pies out of the oven airy and soft, you need to sprinkle them with water immediately after baking.

In conclusion
Now you know how beautifully to blind yeast or custard. The technology is quite simple. If necessary, you can master several ways of sculpting. This will make pastries not only tasty, but also original. Do not forget that a certain filling requires its own form of baking. For example, square or triangular pies are not suitable for a liquid filling. In this case, it is better to make products round or oval. The main thing is to follow the rules and recommendations of professionals.