How to make a decorative diaper cake. How to make a cake for a newborn from diapers
The birth of a baby in a family is a great happiness not only for parents, but also for relatives and friends. It is very difficult to choose a gift for a newborn with such a huge selection of baby supplies.
I would like to present useful and original surprise baby and his parents. A diaper cake with a surprise inside, made by yourself, will be a great gift.
DIY diaper cake: materials and tools
To make a diaper cake with your own hands, you need the following materials and tools:
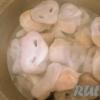
Diapers, ask your mother about the size of diapers, which manufacturer is preferred;
Round flat tray or circle cut out of hardboard;
Wet wipes - 1 pack;
Cotton buds - 1 pack;
Stationery rubber bands - 1 pack;
Satin ribbon of different widths (color, depending on the sex of the newborn: girl - red, yellow, white, pink; boy - green and blue), you will need up to 15 meters;
Double-sided adhesive tape;
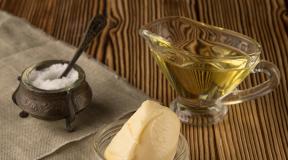
For a surprise - baby powder, creams, soaps, toys, socks, books and whatever you like;
Medical gloves - one pair.
Do-it-yourself three-tier diaper cake

The creation of such a cake does not take much time and financial costs. It is based on diapers, and the size of the cake can be adjusted by yourself. Wash your hands well before starting work. Pampers are a personal hygiene item and should be clean when they get to the baby.
Stage 1
Let's get started with the first layer. On a flat surface (a tray or a cut out round stand made of thick cardboard), we lay vertically, 37 diapers twisted into rolls. We fix each diaper with a clerical rubber band. We insert a baby bottle or shampoo with wet wipes in the middle. We fasten with an elastic band from the outside.
Stage 2
Preparing the middle tier. For the second layer, we need 27 diapers. We prepare the rolls according to the model of the first tier, fasten them with an elastic band, remove one diaper from the middle and insert a bottle of powder or baby cream.
Stage 3
Getting the top layer ready. For the top layer, take 16 diapers, fastened with elastic bands, put them on the middle tier, tighten everything with an elastic band. Be sure to fasten the tiers together. Otherwise, the structure will be unstable and may fall apart.

Stage 4
Let's start decorating our cake. For decoration, any size and color of satin ribbon is suitable. We tie each tier in the outer circle and tie it with a beautiful bow. Under the ribbon, you can insert a card with congratulations or things you need for the baby. We decorate the top of the cake with toys, put rattles and children's accessories on the sides. Such a cake will turn out beautiful, elegant, and most importantly useful for parents.
Do-it-yourself single-tier diaper cake
To create such crafts, diapers are used. The size original gift depends on your preference. The more diapers in the package, the more you can get final result.
For a small craft, 30 diapers are enough. Of these, you can make a neat cake one tier high. Such a cake can be beautifully decorated, showing your imagination and design idea.
Stage 1
For work, we need the following materials: eleven diapers, one bright diaper, a wide satin ribbon, a narrow ribbon (like florists), jewelry and scissors.
Stage 2
We twist the first diaper into a roll, tie it with a ribbon and put it in the middle of the tray. It will be the main one, from which we will build on and arrange rolls of diapers. It must be well fixed, because it will be the basis of the cake.
Stage 3
Around the first roll, we install diapers in such a way that we get a “sun”. They should stand on edge, and their lower part is directed to the first roll, which was installed in the center of the cake.

Stage 4
Then we carefully tighten all the diapers with a tape to make a cake, directing the tips in one direction. This is easy to do if you attach the first diaper to the roll with its lower part and put the rest behind it. Thus, when tightened with a ribbon, the cake does not fall apart and is easily fixed.

Stage 5
Wrap with a diaper and tape and fasten with hot glue. You can decorate the cake with any fabric. Commonly used natural fabrics cotton, linen, etc. They are safe and do not cause allergies in children.

Do-it-yourself diaper cake with "icing"
To make a diaper cake with your own hands, you need to take 90 diapers of the first or second size, bright beautiful ribbons of any width, thin elastic bands for fastening diapers, double-sided tape, tailor's needles, diapers, a baby blanket or towel, baby soap accessories, various decorations, toys.
Stage 1
Pampers must be divided into tiers. The first tier will require 40 diapers, the second 30 diapers, and the third 20. Thus, the cake will be pyramidal in shape. This design has strong and stable properties.
Stage 2
The first cake: we put 40 pieces of diapers in a circle, in a spiral, fixing the first and last with tailor's needles. Put the baby shampoo in the middle. From above, in a circle, we fix the spiral with an elastic band, for the strength of the structure.

Stage 3
Preparing the frosting for the cake. We fold the diaper along the width of the diapers, wrap it around the cake and fix it with needles. This will give the cake strength and aesthetic appearance.
Stage 4
We prepare the second cake from 30 diapers folded in a circle, fixed with tailor's needles and an elastic band. We wrap the edges of the cake with a colored diaper. We install on the first layer, put baby powder in the middle.
Stage 5
The third top cake - from 20 pieces. The process of creating the third cake is not much different from others. The only difference here is the number of diapers.
Stage 6
We decorate the cake. To do this, we take various children's toys, place them on the "steps" of the cake, between diapers. Do not forget about such important things as a pacifier, cotton swabs, a drinking bottle, creams, powder. And on top of the cake are booties or soft toy. A gift for a newborn is ready!

When preparing a cake from diapers with your own hands for a newborn, you must follow following rules hygiene:
1. When creating a cake, hands must be clean or gloved, and the place must be sterile. Do not turn diapers inside out to preserve the protective layer.
2. Animals are excluded indoors, so that the wool does not get on the diapers. Even a small amount of wool can harm the baby, causing allergic reaction.
3. All cake materials must be processed. Glass and plastic items are washed with soap and treated with antiseptic solutions. Fabric materials are ironed.
4. Rubber bands and tailor's needles that we use to hold the cake together, steam or sterilize.
MK: diaper cakeTaken here http://podarki.ru/chto-podarit/tort-iz-pampersov-svoimi-rukami
Every newborn baby needs a gift. You can present it simply in a bag, or you can present it in such a beautiful and very original way.
To make a cake, in addition to the gifts themselves, we need very little. We will assemble it carefully, without unnecessary clips, ropes and fasteners, which can be very embarrassing for a young mother. After all, hygiene in our business will be in the first place. So, we go to the store and choose as a gift for the baby everything that he likes, but with taste. Still, our composition should be in harmony with colors.
And I got this cute set :

1.2 cups for pencils as a base.
2.1 cut towel roll.
3. Linen elastic 1.5 m.
4. Medical gloves.
5.Pack of diapers for newborns 72pcs.
6.Baby shampoo Bubchen, 200 ml
7.Bubchen bathing medium, 200 ml
8. Wet wipes Pampers 64 pcs.
9.2 flannel diapers 0.75x1.20cm
11.1 pillow 20x32cm. in tone plaid
12. A pair of socks
13.Cooling teether
15. Dummy
17. A set of children's pins (3 pcs.)
In order to make it easier for you to understand the whole process of work. Let's conditionally divide it into 4 stages:

1. We make the base.
Here you need to strictly follow the recommendations so as not to “injure” our delicate material for the base once again. Diapers lose their marketable appearance very easily, and it is not recommended to twist, unfold and fold them several times. Of course, if the purpose of our surprise is the maximum use for its intended purpose, absolutely all the details. Let's clarify right away. This twisting technique takes a lot of diapers. But we save on the services of a master, so we can afford a little more cost and less visibility of a gift? After all, it is given for sure for the most respected and dear to us people. So, it's not worth saving here))
2. Filling.
If you are still a little tight on funds, then you can fill the cake with nothing. To fasten it, it will be enough to insert inside, through all three cakes, a tube - the base that remains from a roll of ordinary kitchen disposable towels. Or there is the same one in rolls of foil, thin packaging film, etc. But my personal opinion is this - if you still decide to make a gift, then why spoil it with such content? It is much more interesting and useful to hide a useful surprise inside. And here's how to do it, I'll show you below.
3. Registration.
It won't take long. You just need to properly fold the diapers and keep fasteners at hand.
4. Decoration. The most pleasant part of our composition. There is no need to make any recommendations here. In order not to spoil your taste)) But here are a couple of secrets, I can still tell you.
Stage 1. Base making:

Our task is to make three cakes - the basics. Where in the upper cake there is one part, in the middle - two, and in the bottom three parts. All together 6 parts. There are 72 diapers in the Pack. 72/6 = 12. 12 diapers is 1 piece. Accordingly, the Upper cake - 12, Middle - 24, Lower 36 diapers.
The proposed twisting technique will allow you to practically not touch the diapers, not wrinkle and not violate the integrity of the entire styling and each one individually. It is important to follow the recommendations exactly, since the cake can lead to the side and it is very difficult to straighten it later.
1. Open the package and right in it, without separating or pushing them apart, count 36 diapers. We take a row of diapers the right amount from the package, without violating the order, we put it on the table.
2. We tie it with a linen elastic, tightening it not too tight so that it does not break the row, but not too weak so that it does not let it fall apart. In the photo, the elastic is wrapped in two turns, but if you want, you can wrap it with one turn for now. On the top side of the diapers, put a cup under the elastic band.
3. Packed diapers always have a slight slant to one side. This is where we start turning them. In order for the circle to immediately form correctly, lightly wrap the diapers around the cup.
4. With one hand, grab the cup and the diapers, as if fixing the beginning of the circle, and with the other, 1 little thing at a time, begin to increase the distance between the pressed diapers along the outer perimeter. With your left hand, pressing the base of your right hand, slide in the direction of the circle and slightly pull each subsequent diaper an even distance.

5. Our circle is already beginning to form.
6. The further you advance, the harder the circle will form. In order not to spoil the work already done, with the left hand we lightly hold the already aligned diapers so that they do not deform, and with the right we continue to increase the distance along the outer perimeter.
7. At the end of the circle, again with your left hand, hold the base together with the cup. Do not let the diapers move or change position so that the middle of the circle does not deteriorate. With the right we take the rest of the unformed diapers and wrap them in the right direction.
8. In the center of the cake, around the cup, constantly adjust the diapers so that they do not lie in packs, but twist evenly in the right direction. So they fit nicely and neatly in the center, and in the future will allow us to freely choose the diameter of the circle.

9. At the “freshly baked” cake, we align and hold the middle. We adjust the beginning to the tail.
10. The gum should always be strictly in the middle of the cake. If you do not follow it, the cake will “lead” to one side, and then it will be difficult to straighten it out.
11-12. When the circle is ready it is very weak. Carefully untie the bow with an elastic band, (the whole circle may fall apart, do not let the elastic out of your hands), tighten the knot tighter and make a second turn around the cake, tie it into a knot and a bow. Double elastic will allow us to adjust the diameter of the circle and the density.

13. We put the cake on the edge and begin the last stage of equalizing the distance between the diapers. Here you can already tighten them up a little. The elastic should not be too tight so that the diaper can easily be adjusted to the desired distance.
15. When you complete the circle. The cake is tightened with an elastic band even tighter and you can leave it at that density, but this form implies filling in the middle (our version). But if you decide to make a cake without filling, then now is the time to remove the cup from the center and tighten the cake to maximum density. The first and largest circle is ready. Now, therefore, according to the principle, we prepare cakes 2 (medium) of 24 diapers and 3 (small) of 12 diapers.
That's how we got three gorgeous cake base layers. Neatly, hygienically and very nicely packed pack of diapers. Your baby's parents will thank you.
Stage 2. Filling:
We hide the "stuffing" in the cake. The diameter of the glass in the center does not limit our capabilities so much that we can put anything there. Children's cosmetics, clothes, toys, and much more interesting and necessary for a young mother. We spread the glass, and instead we insert an impressive pack of wet wipes and shampoo. At the second cake, we also carefully lay out the glass and put it on the first cake. We also deprive the third cake of the middle and put it on the second. We put a bathing agent in an empty place. This will be the base that holds the cake together.

Our cake is again in its original form, but this time with a filling. Now on each cake we untie the bow and tighten the circles more tightly. This is done to compact and level all tiers. Now our cake will not collapse, and notice that there is not a single fastener in it yet. Let me remind you though! If you want to leave it empty, then it's time to take out the cups, pull the circles tighter and stick an ordinary wooden skewer (one or two) from the top cake to the bottom. Or a foil tube.
Stage 3. Composition layout:

To decorate the base, we take diapers. We fold them so that we get a strip equal to one turn of the cake in length and width. This is done very simply. Fold an approximate strip and in the center attach the cake to it with an edge. The width is immediately visible, and the length is determined by the connection of the two ends of the diaper around the cake. If the diaper is too long, you can tuck one of the sides (in the photo, the first diaper is tucked up on the left). If short, use it either on a small cake, or fold it diagonally. We use baby safety pins to fasten diapers. They will then be useful to the gifted mother. After the cake is fastened, carefully pry off the elastic and pull it out. Now the diaper will hold the entire cake. The living construction of the cake itself regulates the filling. As soon as you remove the elastic, it unwinds to the desired size and fills the entire space inside the diaper. So your cake will always be perfect in terms of density, accuracy and consistency. appearance. No additional rubber bands, ribbons, etc.
Stage 4. Composition decoration:
There are no recommendations. Just take your bunnies, bears or baby dolls and put them on top, put them on the side or give them your cake in their paws (hands). Sew on bows or ribbons, insert nipples, teethers, rattles and other bright and useful items for the care and entertainment of newborns between diapers. All of the above is attached in three ways. On hot glue. Needle with thread. Or gift ribbon. According to your taste and possibilities.
So, your friends have a baby and you want to give them something unusual, but at the same time, useful? Or maybe you are going to celebrate the birth of your own baby, and are wondering how to surprise your guests? You may be able to solve both of these problems. original cakes from diapers and baby accessories.
The simplest "one-story" cake
Let's start with the simplest option.
You will need:
- 11 diapers
- Wide ribbons and bright fabric
- floral ribbon
- hot glue
- Scissors
- Decorations
Operating procedure:
- Roll one diaper into a roll and tie it with floral tape.
- Put the roller on the table and place the rest of the diapers around it, as shown in the photo.
- Wrap a piece of floral tape around all of the diapers and pull them off, wrapping the edges in the same direction along the way.

- Tie the ends of the ribbon to secure the design.
- Wrap the cake with a bright cloth and wide ribbon, and secure the edges with hot glue.
- Decorate the top of the cake with toys, flowers or ribbons.

Tiered cake
This option will take more time to manufacture, but it will look spectacular:

You will need:
- Diapers
- cardboard pallet
- A long thin cardboard tube (you can take a tube from under paper towels) and several wider short tubes (for example, from toilet paper)
- hot glue
- Rubber bands
- Wrapping
- decorative elements
Operating procedure:
- Glue the tube to the center of the pallet.

- Evenly wrap each of the short tubes with diapers and secure each circle with elastic bands. First, find out how many diapers you need for a cake. On the bottom cake in our case, it took about 30-35, on the middle - 20-25, and on the top - 10-15 "diapers". Accordingly, the higher the cake is located, the smaller its diameter.

- The number of diapers can vary depending on the desired cake size.
- Push all the cakes, starting with the largest, onto the center tube. Between the tiers, you can put some decorative elements, for example, tinsel from wrapping paper.

- Wrap each cake with brightly colored ribbon, pull off and secure the ends with hot glue.

- Decorate the cake.
Tiered cake with filling
Anything can serve as a filling, for example, a bottle of baby shampoo or baby powder. The main thing is that this item has an elongated shape and is higher than the bottom layer of your cake (you can stack two bottles on top of each other if one is too small).
You will need:

- Diapers (their number depends on the number of tiers)
- Filling (high bottle like or bottle, or two low ones)
- Thin elastic bands
- Round cake box with raised sides, baking dish, tray or saucepan
- Double-sided tape
- Wide ribbons or bright fabric
- Toys or decorative items of your choice
Operating procedure:
- Place the bottle or vial in the center of a rimmed tray (moulds, pots, etc.).
- Take diapers one at a time and roll them into rolls, pulling each with an elastic band.

- Arrange rollers around the powder. Pull off the first circle with an elastic band.

- Gradually fill the entire space of the tray. Try to do it evenly, without moving the bottle to the edges.

- Tighten the entire structure with an elastic band.
- Take the second bottle and stick it with double-sided tape on the cap of the first. It is important that the first bottle sticks out, then the design will be more durable. Start making the second tier of the cake.

- Secure the first circle of diapers with an elastic band.
- Roll up more rolls from the diaper and make a second diaper ring on the second layer. Secure it with a rubber band.

- Make the third tier out of one diaper ring. Pampers will be higher than a small bottle, or its end will rise above the cake, it's okay. Secure the ring with a rubber band.

- The cake is almost ready. It remains to wrap each cake with strips of fabric to hide the folds, and decorate with decorative elements. Hooray! You did it! The whole cake making process should take about an hour. Decoration will depend on your skill and imagination.

- We would like to offer you some decoration ideas.

- Cute buds are obtained from socks:

- And from gauze or muslin, you can roll a larger rose:

Watch the video for a one-hour webinar on this topic. It's very simple!
The birth of a baby in a family is a great happiness not only for parents, but also for relatives and friends. It is very difficult to choose a gift for a newborn with such a huge selection of baby supplies.
I would like to present a useful and original surprise to the baby and his parents. A diaper cake with a surprise inside, made by yourself, will be a great gift.
DIY diaper cake: materials and tools
To make a diaper cake with your own hands, you need the following materials and tools:
Diapers, ask your mother about the size of diapers, which manufacturer is preferred;
Round flat tray or circle cut out of hardboard;
Wet wipes - 1 pack;
Cotton buds - 1 pack;
Stationery rubber bands - 1 pack;
Satin ribbon of different widths (color, depending on the sex of the newborn: girl - red, yellow, white, pink; boy - green and blue), you will need up to 15 meters;
Double-sided adhesive tape;
For a surprise - baby powders, creams, soaps, toys, socks, books and whatever you like;
Medical gloves - one pair.
Do-it-yourself three-tier diaper cake

The creation of such a cake does not take much time and financial costs. It is based on diapers, and the size of the cake can be adjusted by yourself. Wash your hands well before starting work. Pampers are a personal hygiene item and should be clean when they get to the baby.
Stage 1
Let's get started with the first layer. On a flat surface (a tray or a cut out round stand made of thick cardboard), we lay vertically, 37 diapers twisted into rolls. We fix each diaper with a clerical rubber band. We insert a baby bottle or shampoo with wet wipes in the middle. We fasten with an elastic band from the outside.
Stage 2
Preparing the middle tier. For the second layer, we need 27 diapers. We prepare the rolls according to the model of the first tier, fasten them with an elastic band, remove one diaper from the middle and insert a bottle of powder or baby cream.
Stage 3
Getting the top layer ready. For the top layer, take 16 diapers, fastened with elastic bands, put them on the middle tier, tighten everything with an elastic band. Be sure to fasten the tiers together. Otherwise, the structure will be unstable and may fall apart.

Stage 4
Let's start decorating our cake. For decoration, any size and color of satin ribbon is suitable. We tie each tier in the outer circle and tie it with a beautiful bow. Under the ribbon, you can insert a card with congratulations or things you need for the baby. We decorate the top of the cake with toys, put rattles and children's accessories on the sides. Such a cake will turn out beautiful, elegant, and most importantly useful for parents.
Do-it-yourself single-tier diaper cake
To create such crafts, diapers are used. The size of the original gift depends on your preferences. The more diapers in the package, the larger the end result can be.
For a small craft, 30 diapers are enough. Of these, you can make a neat cake one tier high. Such a cake can be beautifully decorated, showing your imagination and design idea.
Stage 1
For work, we need the following materials: eleven diapers, one bright diaper, a wide satin ribbon, a narrow ribbon (like florists), jewelry and scissors.
Stage 2
We twist the first diaper into a roll, tie it with a ribbon and put it in the middle of the tray. It will be the main one, from which we will build on and arrange rolls of diapers. It must be well fixed, because it will be the basis of the cake.
Stage 3
Around the first roll, we install diapers in such a way that we get a “sun”. They should stand on edge, and their lower part is directed to the first roll, which was installed in the center of the cake.

Stage 4
Then we carefully tighten all the diapers with a tape to make a cake, directing the tips in one direction. This is easy to do if you attach the first diaper to the roll with its lower part and put the rest behind it. Thus, when tightened with a ribbon, the cake does not fall apart and is easily fixed.

Stage 5
Wrap with a diaper and tape and fasten with hot glue. You can decorate the cake with any fabric. Commonly used natural fabrics are cotton, linen, etc. They are safe and do not cause allergies in children.

Do-it-yourself diaper cake with "icing"
To make a diaper cake with your own hands, you need to take 90 diapers of the first or second size, bright beautiful ribbons of any width, thin elastic bands for fastening diapers, double-sided tape, tailor's needles, diapers, a baby blanket or towel, baby soap accessories, various decorations, toys.
Stage 1
Pampers must be divided into tiers. The first tier will require 40 diapers, the second 30 diapers, and the third 20. Thus, the cake will be pyramidal in shape. This design has strong and stable properties.
Stage 2
The first cake: we put 40 pieces of diapers in a circle, in a spiral, fixing the first and last with tailor's needles. Put the baby shampoo in the middle. From above, in a circle, we fix the spiral with an elastic band, for the strength of the structure.

Stage 3
Preparing the frosting for the cake. We fold the diaper along the width of the diapers, wrap it around the cake and fix it with needles. This will give the cake strength and aesthetic appearance.
Stage 4
We prepare the second cake from 30 diapers folded in a circle, fixed with tailor's needles and an elastic band. We wrap the edges of the cake with a colored diaper. We install on the first layer, put baby powder in the middle.
Stage 5
The third top cake - from 20 pieces. The process of creating the third cake is not much different from others. The only difference here is the number of diapers.
Stage 6
We decorate the cake. To do this, we take various children's toys, place them on the "steps" of the cake, between diapers. Do not forget about such important things as a pacifier, cotton swabs, a drinking bottle, creams, powder. And on top of the cake are booties or a soft toy. A gift for a newborn is ready!

When preparing a cake from diapers with your own hands for a newborn, the following hygiene rules must be observed:
1. When creating a cake, hands must be clean or gloved, and the place must be sterile. Do not turn diapers inside out to preserve the protective layer.
2. Animals are excluded indoors, so that the wool does not get on the diapers. Even a small amount of wool can harm the baby by causing an allergic reaction.
3. All cake materials must be processed. Glass and plastic items are washed with soap and treated with antiseptic solutions. Fabric materials - ironed.
4. Rubber bands and tailor's needles that we use to hold the cake together, steam or sterilize.
13 March 2015
The birthday of a baby or christening is the brightest and sweetest holiday. But it’s not so easy to please with gifts at such a tender age - clothes may not be the right size, “sweets” are completely contraindicated for many children. Perfect solution- give unusual cake, not from cakes and cream, but from diapers which will always come in handy. diaper cake It is designed in an unusual way using bright ribbons and toys, so it will clearly attract the attention of the baby.
To make a small cake you will need:

At the first stage, each diaper is tightly twisted. You need to start twisting the product from the belt line.

To prevent the diaper from falling apart, you need to fasten it (with an elastic band, clothespin) or ask an assistant to hold the cake blanks. Another option is to tightly put bundles in a small box, then the diapers will not unwind.

For the first layer of the cake, use 14 diapers. One bundle should be in the center, the rest of the diapers are folded around it.
An elastic band will help to fix the products in this position, which must be pulled along the outer edge of the circle. For strength, use 2-3 rubber bands. Straighten the diapers for a more rounded shape.

The top "cake" consists of 5 diapers, which are twisted in the same way as in the bottom row, then fixed with an elastic band.

The central bundle from the lower tier must be removed halfway.

Attached to it upper layer a kind of cake so that it is located strictly in the center.

The side parts of the layers, where the elastic bands pass, are decorated with a wide satin ribbon. We wrap the bottom layer with a blue ribbon with a 1.5 cm overlap, cut it off.

To keep the braid tightly, fasten its ends to each other with tape.

We decorate the top layer according to the scheme of the first.

Toys are attached to the cake with skewers. One end of the stick is inserted into the hole of the rubber toy.

Then the skewer is placed deep between the diapers.

One toy is placed on top of the cake, while the other decorates its side. You can use cars, animals, baby dolls, etc.
The places where the edges of the ribbon converge are decorated with bows to match the composition. You can use the blanks of bows different shapes or create them from tapes. Using the origami technique, beautiful bows are obtained for decorating gifts.

Fabulous baby diaper cake ready!

On the last step the cake is wrapped in a large foil. To do this, place the "sweet composition" in the center gift box, lift its edges and fasten with a ribbon with a bow.
If some parts of the foil “fall out”, then secure them with tape.

A diaper cake for a boy is the best gift!
An unforgettable gift for the little ones is ready. It will not only surprise the child and parents, but is also used with benefit for its intended purpose.