Pies in the oven: how to sculpt pies from yeast dough in the form of hedgehogs, hares and pigs. How to sculpt pies from dough? Simply and easily
Have you ever noticed that those culinary experts who test for "you" claim that there is nothing easier than making pies? Their opponents, like fire, afraid of a sticky mass of flour, can knead the hated dough for hours, fill it even longer, and as a result get an incomprehensible substance, which simply cannot be called pies. How do you learn to handle the dough? What is the secret of ruddy fragrant pies, before which it is simply impossible to resist not to taste even a tiny piece?
Good dough, tasty filling and patience - these are the essential ingredients of beautiful pies, which are not a shame to treat even gourmet guests. Now put on an apron, turn on your favorite music - and run to the kitchen, learn to sculpt pies! It is possible that the first two or three "masterpieces" will be a little like a ruddy pie, but, believe me, the fourth attempt will certainly be successful. And then it’s a matter of technology. Let's get started.
Taming the obstinate yeast dough
Not every experienced chef knows how to sculpt pies from yeast dough. And novice housewives are completely afraid to take in their hands an elastic mixture of flour, yeast and liquid. But in vain! The soft and pliable yeast dough is the ideal “wrapping material” for a wide variety of fillings. The main thing is to knead well and let it come up at least twice, now the dough is ready for use. Lubricate your hands with vegetable oil and lightly crush the dough. Form a tourniquet with a diameter of about 5 cm. Now we need to divide this tourniquet into portioned balls, from which we will form pies. It is easiest to cut the dough "sausage" into pieces with a knife, but it will be better if you do without using this kitchen accessory. While holding the tourniquet with one hand, use your thumb and forefinger to separate the small balls. You see, there is nothing complicated!
Now you need to decide on the shape of the pie. From yeast dough, you can easily mold a round, oval, square or triangular pie.
- The easiest way is to sculpt oval and round pies. Take a ball of dough and crush it with your fingers into a cake. Don't overdo it, the dough shouldn't get thinner than 5 mm. The easiest way to do this simple procedure is on a kitchen table that has been pre-oiled with vegetable oil. Place the filling in the center and pinch the edges of the patty with a crescent moon. The pie will look like a large dumpling. Place the patty, seam side down, in a skillet or baking sheet. Making a round pie is even easier! Put the filling in the center of the cake, and collect the edges of the cake on top so that you get a bag. Carefully flatten the seam. But for square pies, you will have to work a little, rolling out and cutting the dough into equal squares. We put the filling in the center, and fold the corners of the square in the form of an envelope. We pinch the edges carefully.
- Many housewives are interested in the question: "How to sculpt pies with a triangle?" Simply and easily! Mash the dough ball into a cake, put the filling on the center, which must be smoothed out, in no case going to the edges of the pie. Brush the edges of the patty with cold water. Now fold the two edges at a 45 degree angle to form an arrow. Fold in the remaining edge of the patty. Ready!
Do not rush to put yeast dough pies in the oven. Sprinkle some vegetable oil on the cling film and cover the baking sheet with it. After 15 minutes, you will not recognize your pies, they will double in size. Brush the surface of the patties with an egg or milk to create a golden brown crust during baking.
Puff pastry pies
Roll the finished puff pastry into a thin layer. Cut the dough into squares or squeeze circles out with a glass. Put the filling in the center, and fold the edges of the dough in the form of an envelope or collect in the form of a bag. Wasting no time, place a baking sheet of pies in a hot oven. In 15-20 minutes you will be able to treat your loved ones with fragrant puff pies. You see, now you also know how to sculpt puff pastry pies.
Such different fillings
The shape of the pie is influenced not only by the dough, but also by the filling. Unfortunately, from the soft berry filling, you get shapeless pies rather than an ideal oval shape. Therefore, for a dense filling, you can choose any pie shape you like, but for spreading fillings, it is better to opt for a square shape.
A little secret of delicious fruit filling! To prevent syrup from leaking out when baking pies with fruit filling, dust the berries or fruits with potato (corn) starch.
The patties can be baked very quickly. The secret of how to sculpt pies is very simple - ready-made dough, ready-made filling, 5-8 minutes and you are the chef accepting congratulations. Jam, jam, boiled condensed milk, chopped ham, cheese, feta cheese, boiled potatoes, sausages or sausages - any products that have already undergone heat treatment are suitable as a ready-made filling. Patties with fresh berries and fruits, vegetables or minced meat usually take longer to cook. With one single exception - deep-fried pasties made from thin puff pastry. Raw minced meat is put in pasties and they are cooked in hot oil in a matter of minutes. But that is the topic of a completely different article.
We will look at several methods that are equally simple to implement, but with different time costs. Not always a big time investment gives the most beautiful result. Spectacular puff pastry triangles are prepared for 10 minutes, of which 3 are spent on cutting the dough, the rest of the time you watch the pies through the oven window.
Simple pies on kefir
The easiest option for hearty kefir pies with meat, potato or onion filling. If you do not even have a semi-finished dough product, but have a glass of kefir, flour, an egg, vegetable oil and a little soda, you can already make the simplest kefir pies without yeast. Boiled potatoes, fried onions, chopped greens, an egg, or a mixture of all of these ingredients are suitable as a filling.
Tip: Any meat filling recipe benefits from adding ham and cheese.
The cooking time for kefir pies is about 20-40 minutes, depending on the method of roasting and the number of pies.
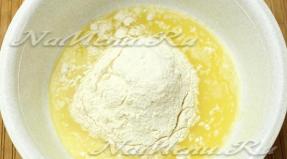
How to make the simplest dough
Mix kefir, egg, a couple of three tablespoons of vegetable oil and add flour until you get a viscous light dough. Finally, add about a quarter teaspoon of baking soda and stir again. There is no need to make special delicacies and weaving from viscous kefir dough - everything will blur. For simple pies, the simplest elongated shape is optimal. Kefir in this case is a conventional name for a liquid lactic acid product. You can also cook with ayran, yogurt, fermented baked milk, yogurt. The presence of live lactic acid bacteria is important, which ensures the rise and fluffiness of the dough.
How to sculpt kefir pies
- Collect the finished dough into a ball directly in the container, into which you mixed, transfer to a board sprinkled with flour and mold a sausage uniform along the entire length.
- Cut equal pieces from the sausage and roll or knead with your hands into a round cake.
- Place the filling exactly in the middle. You can put the fillings without regret. The rate of filling for a hearty pie is a heaped tablespoon.
- Bring the opposite ends of the cake together and pinch. This will make the pie smooth. Finish the seam, you don't have to worry too much about neatness. It is important that the filling is inside and does not fall out.
- Flip the patty upside down and let sit while you cook the rest of the patties.
- In the meantime, preheat the oven to 150 degrees. Grease a baking sheet with butter, place the pies on a baking sheet and bake at 180 degrees for 15 minutes.
Kefir pies do not even need to be cooked in the oven. They can be fried on both sides in a skillet in oil. Fried pies are especially delicious right after cooking.
Yeast or non-yeast dough for pies
There is a difference in temperature and baking time for yeast and non-yeast dough. The yeast-free dough can be safely placed in the preheated oven as much as possible without the slightest damage to the quality of the final product.
Yeast dough constantly takes time to "rest". The dough is rolled out - let it rest for half an hour. The pies are sculpted - let them rest. Transferred to a baking sheet - rest again. If the dough is not allowed to rest, it will be “capricious” and the pies will turn out to be completely “different”. Yeast dough is placed in an oven heated to a maximum of 120-150 degrees. Otherwise, it will not have time to rise. As you understand, yeast pies require a lot of attention.
Is the shape of the dough important?
The shape of the dough and the way the patties are sculpted are actually very important to the taste. The dough is baked in different ways, the filling is kept inside or creeps out onto a golden brown crust. Everyone in childhood wondered why a puff is tastier than a regular bun and why sausage in the dough tastes better if the dough is wound in a strip? Indeed, when winding the dough strip, the contact between the meat filling and the bun increases, the strip is better impregnated with aroma.
Sausages in dough
If you are cooking sausages or sausages in dough, wrap the dough with a spiral strip, twisting it slightly. This applies to both puff pastry and yeast dough. Twisting will prevent the dough from rising too high. A huge bun with a sausage lost in the depths is not very attractive.
Cooking sausages in dough from ready-made puff pastry takes about 15-25 minutes.
Puff pastry triangles
The most economical way to sculpt pies from ready-made puff pastry is triangles. Pros - the complete absence of scraps, maximum cooking speed, some elegance in appearance. Elegance and beauty can be easily enhanced with cuts and notches that allow the puff pastry to open up magnificently in the incised areas.
Tip: make cuts in a simple shape - you won't go wrong.
The procedure for making puff pastry pies:
- Defrost the puff pastry and roll out with a rolling pin. It is more convenient to immediately roll out a layer of dough than each square in turn. If you don't have a rolling pin, any smooth glass bottle will do.
- Cut the dough into squares or rectangles. Perfect accuracy is not required; you do not need to measure the sides of the square with a ruler.
- Place the filling in the middle of each square - cheese, ham, cottage cheese, or just a spoonful of jam.
- Fold the triangle in half and pinch the edges slightly. You do not need to pinch the edges of the puff pastry hard.
- Scribble the triangles to add originality to the baked goods. Place on a baking sheet and place in the oven. Cooking time in a preheated oven is about 7-10 minutes.
How to sculpt square pies
Square pies can be made from yeast and yeast-free puff pastry, plain or shortcrust pastry. Any thick dough makes perfect square envelopes. The main requirement for the filling of square pies is that it should be dense enough, not spread or crumble.
- Roll out and cut the dough into squares as in the previous recipe.
- Place the filling in the middle, preferably rolled into a ball.
- Lift the edges of the square and staple at the top.
Brush the pies with butter or a beaten egg before baking for a delicious crust.
The pinching often diverges, and the pie opens up. It is important that the pie looks appetizing even when opened. The requirements for the filling are due precisely to this property.
The same method works well on large meat pies. Pinching upwards allows you to put a lot of toppings in the cake. This is the best way to make a chicken or fish pie.
Large cakes take a long time to bake, at least 20-30 minutes.

How to make croissant-style pies
A regular croissant is easy to mold. The puff pastry triangle is rolled around the hypotenuse, the longest side. Consider other, more intricate options that do not require much effort.
Notched bagel
A rectangular or round piece of puff pastry is cut in half with the noodles. This can be done with scissors, a knife, or a pizza roller.
Wrap the filling in the uncut half and tighten it to the end. The resulting roll with a notch can be bent in an arc or in a circle.
Sun-Shaped Puff Croissant Option
Artek pies with butter can be dazzled with a minimal investment of time. Place a piece of butter on top of a round puff pastry. You can sprinkle with sugar, cinnamon, grated poppy seeds or put curd filling.
Fold the circle in half, preferably slightly unevenly so that one half protrudes more. Make several rays - cuts and slightly unfold the resulting patty. Such pies are baked almost instantly - in 7-10 minutes.
How to make a rose-shaped pie
For the base, you need a dense and elastic dough. You can puff. You can take a circle or a square as an initial shape. Make a notch, not reaching the middle, place the filling in the center and wrap it with dough petals, stretching and bending the shape. Form a rose, brush with oil and bake at 180 degrees until tender. You can check the readiness with a toothpick - if the toothpick with which you pierced the pie is dry, without traces of dough - everything is ready.
For a beautiful result, experience and skill are required. If you went to art school, you will definitely succeed.

Envelope
Not everyone can mold a rose. Now we will show you how to sculpt pies that will be perceived by the household “with a bang” and surpass any options in ease of manufacture.
Slice the puff pastry into a triangle. Place some jam, jam, or other filling in the center of each triangle. A slice of cheese or a spoonful of cottage cheese is a great option. Fold the sharp corners of the triangle over. Ready! No need to pinch, sculpt. This is the easiest way to sculpt pies with no effort at all.
The result is quite presentable and original. If you put cheese, ham, a slice of tomato inside, and sprinkle with coarsely ground pepper on top, you get an amazing mini pizza.
Many people think that the secret knowledge of how to sculpt pies is transmitted exclusively from a caring mother or grandmother. The making of the pies was a sacred rite and took the whole evening. Pies, loaves, buns, puffs were baked for holidays and celebrations. Meanwhile, pies are great food on the road. Good patties usually stay fresh for 3 days. The filling inside the dough shell does not dry out or crumble. With the help of a stock of pies, you can provide tasty and nutritious food, for example, in the country or on a hike. If the pies are the same size, there is no problem with the distribution of portions.
A man who knows how to cook pies is appreciated by the ladies worth their weight in gold. A basket of croissants, the preparation of which will take half an hour on the strength, is capable of breaking any unapproachable beauty.
Making pies is easy, especially if you use store-bought dough pieces. The original pies are especially appetizing. Curiosity is one of the strengths of a person, and a pie is always a mystery.
What kind of pies our modern housewives did not bake. Their fantasy becomes more and more diverse and attractive. Pies made from yeast dough in the oven are the most delicious pastries. The pies are baked, which means they are warm and cozy.
Baking in the oven from ready-made yeast dough in the form of hedgehogs, hares and pigs is the topic of this article. Children are very fond of such unusual pastries with different fillings, they just laugh with delight. Children like to make the dough themselves, and then sculpt pies.

And they want to learn culinary creativity.

The presence of parents is required. Such beautiful pies are sculpted with an explanation of the conceived figure and a discussion of all the elements of sculpting.
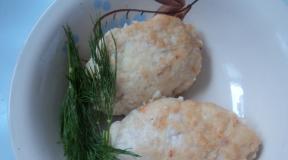
How to sculpt pies: hares with cottage cheese - master class
Products for 10 pieces:
- ready-made yeast dough
- 300 grams of cottage cheese
- 2 - 3 tablespoons sour cream
- sugar
- 1 teaspoon vanillin
- Carnation
The method of sculpting pies in the form of hares step by step:
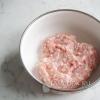
1. Mix cottage cheese with sour cream, vanilla and sugar. The filling should not be too dry and at the same time not runny.

2. Roll out the dough (not thinly) into squares or small cakes, put the filling in the center and seal the edges, forming a ball.
Then give the balls the shape of a petal: one part is round and the other a little narrower. Place on a baking sheet.

3. Do the ears like this: carefully cut the dough with scissors, but try not to reach the filling, otherwise it will come out of the dough later in the baking process. Pull the ears slightly with your hands.

4. Insert the eyes (studs) into the narrow part of the patties. And leave the pies to dissolve.

Beat the egg with a whisk and cover the top and sides of all the rabbits,

and then bake at 180 degrees C until golden brown.

Delicious bunny-shaped pastries with cottage cheese are ready to decorate the table.
Easter baking "Easter Bunny" - video tutorial
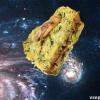
How to sculpt pies: hedgehogs with poppy seeds - master class
Products for 10 pieces:
- ready-made yeast dough
- 200 grams of poppy
- 1 glass of milk
- 1/2 cup sugar
- 1.5 tablespoon semolina
- 1 teaspoon vanillin
- raisins (for nose and eyes)
Modeling hedgehog dough with poppy seeds step by step:
1. For the filling, combine milk, sugar and vanillin, mix well, bring to a boil. Add poppy seeds and semolina, cook for 2 - 3 minutes, stirring constantly.

2. Shape the dough into flat cakes with a diameter of 10 - 11 cm. Place the filling in the center and mold an oval pie. On one side of the patty, pull the dough out a little, forming the hedgehog's nose.

Make round legs from pieces of dough, stick on four sides. Make three cuts on each foot to form the toes.

Insert raisins into the nose and eyes.
3. Needles are obtained as follows: carefully make cuts with scissors, but do not perforate the dough.

4. Leave the patties to stand and then bake at 180 degrees C until golden brown.

Modeling of pies from yeast dough ended with the creation of creative figures in the form of hedgehogs with poppy seeds.
How to make a hedgehog out of dough - video tutorial
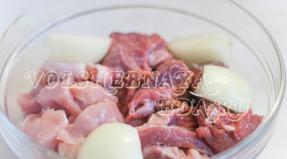
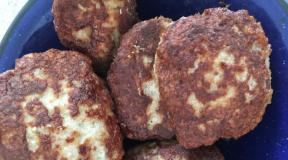
How to sculpt pies: piglets with meat - master class
Products for 10 pieces:
- ready-made yeast dough
- 300 grams of minced meat
- 4 boiled eggs
- 1 onion
- Carnation
Modeling piglet-shaped pies with meat step by step:
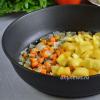
1. Twist the onion, cut the peeled eggs into cubes. Mix everything with minced meat, salt.

2. Roll out the dough, but not thinly (otherwise the minced meat will not bake, and the dough will be ready). Cut into squares. lay in the filling and seal the edges. folding a square into a triangle. This will make an elongated pie.

3. Pull out one end of the patty slightly and form a patch.

Insert two studs into the patch - these are the nostrils.

4. Cut two small triangles out of the dough and stick in place of the ears.

Then make the eyes from the raisins, and the tail from the dough. Leave the piglets to stand. Cover them with a beaten raw egg. Then bake at 170 degrees C until golden brown.

The modeling turned out to be successful and after baking delicious piglets with meat were formed.
How to sculpt a pig from dough with minced meat - video lesson
Their yeast dough baked goods are always delicious. And the structural composition of the yeast dough allows you to show your creative imagination. Baking figurines are touching.
It's boring when there are no pies on the festive table! This is an appetizer, a main course, and a dessert! However, why only on a festive occasion. In many cuisines around the world, cakes are part of the daily meal. Delicious and hearty dough products are also evaluated as the culinary professionalism of hostesses and cooks. Since the existence of pies, their range has been replenished with new recipes. And to this day, appetizing, ruddy, juicy and aromatic, they have not lost their relevance and are in demand, and often the top priority dish.
Secrets of delicious pies
Pies are sweet and savory, yeast, biscuit and flaky, baked or fried. Mothers and grandmothers teach their daughters and granddaughters the art of baking pies. But no matter how many secrets there are, two components of a delicious dough and filling are unchanged - this is the desired state of mind and a positive attitude towards the hard work ahead. They say that the dough seems to "feel" the mood of the cook, and if he is depressed or makes pies "without desire", then they will turn out to be "C".
Flawless dough is that which is too thick and does not stick to your hands. Experts recommend that you follow the order in which you place your products. So, first you need to use "liquid" ingredients, and then dry. It is advisable to sift the flour before pouring it into the future dough. Then you will get rid of lumps, specks, and the flour itself will be enriched with oxygen. By the way, you need to mix it into the liquid slowly: not immediately overturning the required amount, but gradually pouring it in. Continue kneading until you get rid of the stickiness of the dough. There is a time limit for shortcrust pastry: no more than 3 minutes, so that it does not turn out rough.
 If you plan to bake yeast cakes, test the yeast first for freshness. They should be soft cream in color and smell good. For reliability, they can be lowered into a container of warm water. If they DO NOT pop up, then they are NOT suitable for use.
The atmosphere in the room where the pies are prepared is also important. The dough easily absorbs odors, so the kitchen needs to be cleaned and ventilated, and ideally clean dishes must be prepared for the ingredients. Naturally, all products must be fresh. If "watery" berries are used as a filling, they can be slightly rolled in flour to "bind" the liquid. By the way, mushrooms also give excess moisture. If you are making a pie with mushroom filling, fry them first.
"Bows and roses"
Now we come to another important point - the shape of the pies. The classic shape is oval. Although it can be triangular, and square, and round. These are the simplest ones. And there are curly ones, and such that their modeling is a real work of culinary art:
- Harnesses,
- Bows,
- Roses,
- Chrysanthemums,
- Bunnies,
- Hedgehogs,
- Fish,
- Boats.
It's not that hard to master them! However, all of them are "derived" from the basic shapes: round and quadrangular. For example, croissants, well-known to all, are made very simply. Roll out the dough, make an almost round "cake" out of it, cut into 8 parts, make cuts on each segment closer to the center with a knife, put the filling on most of the croissant and wrap it towards the "sharp corner".
 Pies "Roses with filling" are also made - from a round "pancake". Four cuts are made at the same distance from each other. Put the filling in the center, "close" the middle with petals one by one so that the filling is visible, and put them not evenly, but slightly diagonally. When the flower is folded, the upper edges of the "petals" need to be turned out a little so that they look rounded, and the flower - voluminous.
Funny "bunnies" from the dough will delight children! And they are made so simply that children can take part in the preparation of a delicious treat. Roll out the dough into a rectangle, cut into equal portions. Put the filling in each "pancake" and make the pies round (not flat) and slightly elongated (like a chicken egg). The seam should be at the bottom. Make two cuts with scissors so that the "ears" of the bunny are sharp and slightly protruding. It remains to make the "eyes" - two small indentations. Be sure to grease the dough with an egg or milk so that the "ears" are golden brown.
Which shape to choose
 Everyone's favorite and profitable pastries, like sausages in dough, are also easy to prepare. And most importantly, the process will be surprisingly exciting, since the sausage, like a "doll", will have to be wrapped in dough. They do it in several ways! A round cake is cut from the sides several times, and a sausage (a piece of sausage or ham) is placed in the center. Each cut strip is placed on top of the filling, one after the other, in the manner of weaving a braid. You can also make cuts on the cake from the side, then the "pattern" of the product will be slightly different.
The very pies that Little Red Riding Hood carried in a basket to a sick grandmother were probably of a classic oval shape. A seam made with a "pigtail" is considered ideal - beautiful and durable. To do it, you need to practice. However, if you watch the master class, then everything will become clear and understandable. Put the filling in a round pancake and wrap the edges towards the center. It is necessary to make a seam, alternately sticking with your fingers the slightly pinched edge of one side of the "pancake" to the other: left to right, right to left, and so on along the entire length of the pie. Bake the seams up.
To make triangular products, you need to prepare a quadrangular cake or a square one. The first option is more complicated only because the filling needs to be “wrapped” several times. But you can take a square one as a basis - put meat, vegetable or some other filling in one of the corners of the dough piece and "cover" it with the opposite corner. The seam is lateral.
A triangular pie can also be made from a round flatbread: the filling is in the center, and the three sides of the dough are folded to the middle, fastening them into a seam. In such products, the scar can be decorated in different ways: with a pigtail, with a comb. Alternatively, leave the filling “visible” or make a seam at the bottom so that the patties are smooth on top.
Square products are made as "envelopes". On a piece of dough in the shape of a square, put the filling exactly in the middle and wrap each corner up so, fix the corners and then fasten it with a scar. And the easiest way is to put the filling on one “half” of it on a square cake, and cover it with the other. The seam then turns out to be lateral. To prevent it from coming apart, it is pinned with fingers, a fork, or cut with a roller knife with wavy teeth.
 Round patties are made from one or two of the same size. In the first case, the seam will be top or side, in the second case, only the side. For round pies, an open (but not too) shape is also possible so that the filling is visible (for example, for whitewash). In this case, the edges are "pinched" with your fingers.
As you may have noticed, there are many forms for pies. And in the end, we offer some useful tips on how to sculpt them correctly.
- To prevent the yeast dough from sticking to your hands, grease your fingers with sunflower oil.
- Before being sent to the oven, the blinded pies should be checked again for the "strength" of the seams, and if any "parted" - fasten them.
- Before sending the pies to the oven, they are greased with broken and mixed with water (1: 1) egg, milk or custard tea: for additional fastening of the seams and for a beautiful browning when baking.
- If you fry pies, then you need to start from the side where the seam is.
- It is better to make puff pastry pies in a simple form: if you sculpt them for a long time, they will be rough.
- Round dough blanks are made very simply: squeeze circles out with a mug or glass, and then they will be the same size and even.
- The embossed forms are only suitable for pies with a thick filling.
- The oven must be preheated before placing the baking sheet of pies in it, and the pan hot so that the pies are fried immediately.
- After the oven, the cakes can be sprinkled with water, then they will be softer and fluffier.
Well, that's all about pies and secrets of how to sculpt and bake them correctly. It's up to you, and bon appetit!
This dough is suitable for a wide variety of cakes and rolls. The situation is similar with the filling: sweet, savory, vegetable, meat, fruit, etc. The type of filling depends on how best to wrap the pie so that it not only holds firmly, but is also beautiful.
Standard way:
- Pinch off a lump of dough from the dough that has come up. For one pie, a piece the size of 2 walnuts will be enough. But this value can be changed depending on your wishes.
- Let the lumps lie down and come up for another 15 minutes.
- Now we put it on the palm of your hand (it should be sprinkled with flour) and turn it into a cake with your fingers.
- Put the filling in the center of the resulting cake (it should not be wet).
- Align the edges of the cake and press them together with your finger.
- We put the pie on the table, powdered with flour, and pull our seam up, additionally squeezing the edges. The main thing here is not to overdo it, so as not to break them.
- If you plan to fry them in a pan, then it is better to pull the edges to the middle and slightly crush the pie in the center. This way, the inside of the dough will not be soggy during the frying process. And you need to fry immediately, seam down.
- If it is a brass pie, then the location of the seam is not important. So, if the seam is ordinary, you can hide it at the bottom and get a beautiful and fluffy pie at the same time. And if the seam is twisted (fingers wrap the seam when sculpting, applying a new fold over the previous one), then you can leave it on top. But at the same time, brush with egg yolk, whipped with water, so that the seam does not part when baking.
5 delicious rice casseroles with fish
How to beautifully mold puff pastry pies
A wide variety of pastries are also made from this dough. From croissants and rolls to a variety of spring rolls.
Standard way:
- This dough is rarely made on its own due to the complexity of the process. The store version is sold in the form of a square or rectangle. The latter is more common. And in order not to damage the layers of the dough, it is slightly rolled out without changing the original shape. The table should be well floured.
- Cut it with a sharp knife in the center of the long side, and also divide the resulting 2 halves into medium-sized squares. Usually, 8 pies are obtained from a medium sheet of dough.
- A lump of filling is placed in the middle of each piece.
- Then you need to fold the ends of one side to the other and close them up. You can do this with a fork and get not only strong but also beautiful edges.
Triangular method 1:
- The first three points are similar to the previous one.
- Now you need to blind the edges of one side of the square with its side part, and attach the remaining sides to them, so that you have a pyramid or triangle.
- Grease the top with a yolk mixture.

Triangular method 2:
- To do this, the dough layer must be cut in the center of the long side.
- Cut the resulting strips into isosceles triangles.
- Place the filling in the center of the mold.
- Connect the edges and get a flat triangle.
You can press the edges down with a fork and make them wavy.
Puff yeast dough
There are also many options for baking, both in terms of filling and shape. Most often, such pies are made square or rectangular (as described above). You can make them a little non-standard, but at the same time incredibly beautiful and tasty.
Puff pastry patties and buns: 6 best recipes
Snail:
- If you have a store-bought dough, then its shape is usually similar to puff pastry. Therefore, we also roll it into a layer that needs to be cut in the middle.
- Cut the long pieces so that you get 6 squares or rectangles.
- Each piece needs to be rolled out by slightly lengthening it.
- The filling should be soft, with a plasticine texture. We smear it all over the piece without reaching the edge a few millimeters.
- Roll the long side of the pie into a roll and lightly blind the edges.
- Wrap the resulting roll in a snail, twisting one end into a spiral to the other. Protect the interface.
- We put on a proofer and after that you can send the pies to the oven.

Open snail:
- To do this, the dough is rolled into a layer, but not cut, but immediately greased everything with a filling.
- After that, fold it into a roll and pinch the long edge.
- Cut the pieces with a sharp knife and put them on a baking sheet with the open side.
- The sweet filling can be sprinkled with sugar on top and set to bake after proving.

Do not be afraid to get creative and deviate a little from the step-by-step instructions.
Shortcrust pastry
This dough is most often used to make cookies, pastries and cakes. Pies are made from them only with a sweet filling. And in fact, it looks more like a closed cake than a pie.

There are 4 options:
- The standard way of sculpting a pie like yeast dough. It does not need time for proofing; you need to bake such pies right away.
- Any of the methods for sculpting puff and puff yeast dough is perfect. Also without proofing.
- Roll the ball, crush it slightly in the center. Put, for example, half a peach in the groove. Sprinkle it with sugar and put it in the oven. The filling, maybe any.
- Carry out manipulations in the same way as in the previous option, only pull the edges up on four sides and fasten them over the filling. Brush with yolk mixture before baking.