Available methods of making baked milk at home. How to make baked milk at home
Today everything about the beneficial properties of baked milk and recipes for cooking in the oven, multicooker. Among the huge amount of food products, there is a product to which I especially have a heart. Many of the regular readers probably realized this - too many recipes are associated with stewed milk. Its taste brings me back to my childhood, and the memories are the most pleasant!
No country has such a product, it exists only here, in Russia, and we share with you our homemade recipes for its preparation. Just like our grandmothers used to make stewed milk in Russian ovens. We, who have joined civilization, now cook it in ovens, multicooker, pressure cooker, thermoses.
In other foreign languages, even the words meaning ghee are not. There is “baked” in England, but this is a completely different dish.
In the old days, milk was simmered in clay pots, they stood for a whole day in a Russian oven, as a result, a dish of amazing taste was obtained! As a result of extremely long and slow languishing, a crust was formed, the color of the milk became soft creamy, caramel.
The benefits of a wonderful product do not depend on the preparation method at all. Nowadays, there are many recipes that satisfy the conditions for home cooking.
How to make baked milk at home
Want some advice? If you don't want to part with your beloved, drink a melted drink with it, prepare it yourself, add a drop of fresh honey and ripe pomegranate grains - this is an ancient belief, and it works, I guarantee!
Recipe in a saucepan on a gas stove
Preparation:
Pour fresh milk into a saucepan and place on the stove. When the milk begins to rise, reduce the heat to low and simmer for several hours, covered with a lid.
Skim the foam periodically. The drink is considered ready when it acquires a creamy shade.
How to heat milk in the oven
Closest to cooking in the old days, albeit more laborious. You can do it in a clay pot - the most ideal option. If it is not there, do not be discouraged - any dishes with thick walls are perfect: portioned pots, a cast iron pot, a cauldron, a goose maker.
- Pour milk into an earthenware pot and place in an oven preheated to 180 degrees. When the milk boils, lower the temperature to 80 degrees (look at the situation, you can raise it to 100 degrees, the main thing is not to boil away).
- After about an hour, a golden crust will appear on the surface, make the temperature lower - 70-80 degrees. Leave the milk to simmer for 7 hours.
- Be sure to observe the behavior of the milk. If the crust begins to swell and tends to pop out over the edges of the pan, lower the temperature slightly. At the right temperature, milk breathes, the crust rises and falls evenly.
- The crust will be crispy if you don't put a lid on the pot while simmering. If you want a soft crust on top, then cover.

Thermos milk recipe
Boil the milk and pour it into a thermos (first warm it up with hot water). Screw the lid back on and let the milk sit for at least 6-7 hours - the longer the better.
Milk in a pressure cooker
A suitable recipe, especially for lovers of frothy milk. Boil the milk in a pressure cooker for 20 minutes and leave to cool, but do not open the lid.
Baked milk in a multicooker
Absolutely not a troublesome recipe for homemade milk.
- Pour milk into a multicooker, first set the "Stew" or "Milk porridge" mode, depending on the model, for 15 minutes. When the milk boils, the multicooker will switch to the "Warm up" mode. Simmer milk for 10-12 hours, no less.
- To prevent the milk from boiling away, do not fill the multicooker container to the top, leave some space. There is a trick: take a piece of butter and draw a line with it above the milk line, then it will not boil away, with a guarantee - checked.
Useful properties of baked milk
Homemade ghee is useful in that all the usefulness of ordinary milk is concentrated in greater quantities. A lot of fats, proteins, vitamins, amino acids, carbohydrates, in terms of calcium content, the product is generally a champion.
For people who cannot tolerate fresh milk, overheated milk is a way out, it is assimilated without causing trouble.
What they sell in the store is far from perfect. The composition contains preservatives, and the taste pumped up, it only vaguely resembles a real, homemade one. I hope I've convinced you to try making a healthy product yourself. It remains to teach how to do it.
So ... grandmother's recipes in modern kitchen ... but I want to warn you right away, we will use natural milk, from under a cow, store milk - pasteurized is not suitable.
You can get acquainted with a wonderful recipe for baked milk made at home by cooking in a multicooker - watch the video, the recipe is easy! I wish you health, come visit more often. With love ... Galina Nekrasova.
Baked milk has a rich creamy taste, an unforgettable aroma and a beautiful dark color. Such milk makes very tasty porridges, thick custards, and you can also make homemade fermented baked milk from it. or simply serve with cornflakes or biscuits. We usually buy baked milk at the store, but it's very easy to make it yourself. It will turn out no worse, and even better than the store one.
How to make baked milk - what raw materials are needed for it
Baked milk is made from regular milk, but not pasteurized milk. Homemade or farmed, which can be bought at any collective farm market, is best suited. If you have a choice, then buy morning milk - it is much fatter than evening milk. Also, be sure to taste and smell the raw materials. Good milk smells good and has no off-taste.
How to make baked milk - a variety of ways
Baked milk is called baked milk because for its preparation it is necessary to keep ordinary milk hot for a very long time, i.e. drown. The grandmothers in the villages cook it in Russian stoves. In urban conditions, baked milk can be prepared:
- in the oven;
- in a multicooker;
- in a thermos.
Baked milk from the oven will turn out to be the most delicious and aromatic. Less tasty - in a slow cooker. And in the last place in this row is milk from a thermos.

How to make baked milk in the oven
Prepare the dishes in which you will heat the milk. For this, only a ceramic or glass fireproof saucepan is suitable. Never use a metal bowl - the milk will burn in it.
- Pour the milk into a saucepan and place it in a cold oven.
- Turn the oven on to the very minimum and wait for the milk to boil.
- Open the oven door slightly and watch the milk. When brown foam crusts begin to form on it, remove them and put them in a plate. Do not put the plate in the oven. Later, you can use these foams to make fermented baked milk or simply serve them with pancakes.
- Heat milk in a warm oven for 5-6 hours. Make sure the milk does not boil.
If you follow this technology, your milk will turn out to be light brown and will decrease in volume by a third. Pour hot baked milk into jars and let it cool. After cooling down, transfer the milk to the refrigerator.


How to make baked milk in a multicooker
In a multicooker, baked milk can be cooked in two programs: stewing and simmering.
- Grease the edges of the multicooker bowl with butter - this way the milk “won't run away” when it boils.
- Pour enough milk into the bowl so that it turns out to be one third less than the total volume. If you pour more, even an oil stopper won't help the milk.
- Set the “Braising” or “Simmering” program and the time “6 hours”.
- Lift the lid periodically and skim the brown froth from the milk.
Cool the prepared milk and transfer to a cold place.


How to make baked milk in a thermos
For baked milk, use a large thermos with a wide neck. Pour boiling milk into it and close the thermos tightly with a lid. After 16 hours, open the thermos and enjoy the taste of baked milk. In a thermos, it will turn out without foam and not very dark in color. For taste, you can put a handful of fried and ground walnuts in a thermos with hot milk. Shake the milk thermos from time to time to keep the milk full of nutty flavor.


How to make varenets fermented baked milk from baked milk
You can make homemade fermented baked milk from baked milk. Pour hot baked milk into half liter jars. Use a kitchen thermometer to measure the temperature of the milk - it needs to be between 40 and 42 degrees. If there is no special thermometer in the house, then simply dip a cleanly washed finger into the milk. If the finger tolerates heat, but it is a little hot, then the milk is suitable for fermentation. In each jar of hot baked milk, put a tablespoon of rustic sour cream and stir it in the milk. Spread the skimmed brown milk froths on top. Cover the jars with foil or lids. Cover all the jars on top with an old terry towel and a warm downy shawl. Keep jars of future fermented baked milk in a warm kitchen. After 8-10 hours, free the jars from the handkerchief and towels and taste the delicious homemade fermented baked milk made from baked milk.


You will learn how to cook baked milk in a real Russian oven from this video. Suddenly you have a grandmother in your village, and she has a stove - then this experience will be useful to you.
Hello dear readers! It is not difficult to prepare such a dietary product as baked milk at home, and it turns out to be no less useful than at a dairy. A special attitude towards such a delicacy was formed due to the fact that this product is more easily absorbed by the body.
Under the conditions of modern civilization, it turned out to be very simple to prepare a fragrant ghee product, despite the fact that our ancestors had to heat the stove and use special pots for this.
A simple recipe in a saucepan
Spending my childhood in the village, I got used to the taste of homemade baked milk, so when I returned to the city in the fall, I was capricious and refused to drink store counterparts of this useful product. Parents argued that only I feel the difference, and the products are the same and identical. But over time, I figured out how to get a real and special dairy product: milk should be fresh, not reconstituted from dry concentrate.
If homemade baked milk is to be made, I choose the starting product with particular care. Pasteurized or UHT milk will not work; it is better to take a regular perishable product, but fresh enough.
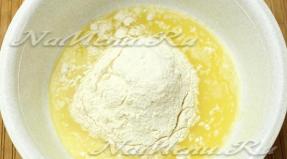
In order to make a real ghee in a simple way, you only need clean aluminum or enamel dishes and a wooden spoon, as well as fresh milk.
This product should be cooked, paying attention to it from time to time, as milk is known for its "run away" property.
Cooking method:
- I wash the cooking utensils with cold water. I put some ice water into it and let it stand: my grandmother said that this would help prevent the protein from sticking to the walls of the dishes.
- I pour the milk into a chilled bowl and immediately put it on the fire, bring it to a boil.
- At the moment when it begins to rise with a "cap", I stir with a wooden spoon and reduce the heat to a minimum.
- Cover with a lid, leave to simmer slowly for 5 hours, periodically removing the foam with a wooden spoon.
- The milk is ready when it takes on a delicate creamy color.
Using such a "stewed" product, I cook porridge, add it to tea and coffee. It is stored in a refrigerator in a glass container for several days.
Tip: Immediately after cooking, the finished product should be poured into a glass container, since in most cases the milk will still burn a little to the walls. In this way, you can avoid the appearance of a "burnt" aftertaste in baked milk.
Important: when preparing baked milk, the dishes in which it boils may not be covered with a lid. The cooking time in this case is reduced to 3-4 hours, since the excess liquid evaporates faster.
The old-fashioned recipe in the oven

Our grandmothers cooked a wonderful baked dairy product in a Russian oven, today you can cook similar milk in the oven. But there is a small condition: earthenware should be used for the oven. I use small clay pots for baking, in which the milk takes on a special aroma and taste.
This "caramel" dairy product should be prepared following a step-by-step recipe:
- I pour fresh milk into clean prepared pots and put it in an oven preheated to 180 degrees.
- After boiling milk in pots, I reduce the temperature to 80 degrees and leave it for an hour, constantly observing that it does not "run away".
- After an hour, I lower the temperature to 70 degrees and leave the product to simmer for 7 hours.
- I constantly observe the behavior of milk: it should seem to "breathe", rising and falling on its own.
- I don’t cover the pots with lids, as I love the golden and crispy frothy crust.
After I turn off the oven, I keep the milk in it for about a quarter of an hour, after which I pour it into storage containers. It is not worth "simmering" longer than 8 hours, as the product will lose some of its beneficial properties due to prolonged heat treatment.
Tip: if there are no pots, you can use any utensils with thick walls: a goose-pot, a brazier, a cauldron. It is important that the dishes are fireproof, since they have to spend at least 8 hours in the oven.
Cooking in a multicooker
When you feel like pampering yourself with a glass of warm, freshly prepared baked milk for breakfast, you can use the modern kitchen appliances. Delicious and real baked milk is obtained in a multicooker. I put it on for preparation at night, and in the morning I serve a fragrant delicacy with morning tea or coffee.
- I pour fresh milk into the multicooker bowl, close the lid and set the “stewing” mode for a quarter of an hour.
- After the milk boils, the unit automatically switches to the "heating" mode.
- In this mode, it languishes for 12 hours, so I fill it in the evening and calmly go to bed. In the morning I open the lid and pour the "yummy" into a glass dish.
Milk in a multicooker does not boil away if the bowl is not filled to the very top. I also take a lump of butter and draw a line with it just above the milk line. Tested: it never rises above this oil line.
Advice: for those housewives who do not have a multicooker at hand, you can cook the baked version of milk in a thermos. Pour boiling water over the flask and pour boiling milk into it, close it tightly with a stopper and screw on the thermos lid. After it has been closed overnight, the next morning it will be warm and pale pink baked milk.
I hope my advice will help you, dear housewives, in the preparation of aromatic homemade baked milk. Maybe some of you know other recipes for this tasty and healthy product? Share your knowledge with us, maybe you have special recipes for dishes cooked in baked milk?
Do not forget to subscribe to our new products and options for new recipes for old dishes. Share our experiments with your friends on social networks. Until next time on our blog!
Mini tips for losing weight
Reducing your portions by a third is what will help you slimmer! Briefly and to the point :)
Should I put on supplements or stop? When this question arises, it's definitely time to stop eating. This organism gives you a signal of imminent saturation, otherwise you would have no doubts.
If you tend to overeat in the evenings, take a warm shower before dinner. 5-7 minutes, and you already have a completely different mood and attitude towards food. Try it - it works.
No matter how delicious the food is, you will eat it many more times. This is not the last meal of your life! Remind yourself of this when you feel like you can't stop and swallow tightly piece by piece.
It is best to make baked milk from homemade milk. But a high-quality store is also suitable with a fat content of at least 3.2%.
The finished product must be cooled at room temperature, and then put into the refrigerator.
Bring milk to a boil on the stove top. Then pour it into an earthenware or cast iron bowl. It is very convenient to prepare milk in clay pots.
Without covering, place the cookware in preheated to 80–90 ° C. The temperature should be low so that the milk does not boil.
Leave the milk in the oven for 3-5 hours. The longer it languishes, the more aromatic and tasty it will turn out. Color saturation also depends on time.
Please note that during heating some of the milk will evaporate and a dark crust will appear on the surface. Some throw it away, but for some it is a delicacy.

In a thermos, milk will turn out lighter and without a crust. But it will taste no worse than the classic one.
It is best to use a ½ or 1 liter thermos. And that is how much milk will have to be poured. If the liquid is much less, then the temperature in the thermos may drop ahead of schedule.
First, rinse the inside of the thermos with hot water. Boil the milk on the stove and immediately pour it into a thermos. Close tightly and leave for 8-12 hours.

You can leave the milk for a whole day, but only if the thermos keeps warm well. Then the taste of the finished product will be more intense.
Pour milk into a bowl. To prevent it from escaping, you can place a container for steam cooking on top.

Close the lid and set the "Simmering" or "Quenching" mode for 6 hours. If the milk does escape, try cooking it in the Multi Cook setting at 95 ° C.
Some slow cookers can crust the milk like an oven. A crust may also form at the bottom, which easily comes off the bowl.

It was prepared back in the days of Ancient Rus. Although many believe that this product is not entirely useful. This is explained by the fact that in the process of languishing vitamins are destroyed, calcium dissolves worse and protein is denatured. According to other experts, baked milk is better absorbed by the human body. Therefore, it is recommended to include it in the diet in case of disruption of the digestive system. Which opinion to share is a personal matter for everyone. We will tell you how to cook baked milk yourself.
The first way is traditional. Take a large saucepan and pour the required amount of fresh milk into it. Bring it to a boil on the stove. As soon as our future baked milk begins to rise, stir with a spoon (preferably made of wood) and reduce the heat. We leave it to languish with the lid open. At the same time, it is very important to periodically remove the formed film. After about three or four hours, all excess moisture will evaporate, and the baked milk will acquire the desired condition - it will become a dark, beautiful shade. The second option is with a regular thermos. We pour boiled milk into it. The main thing is not to forget to pre-rinse the thermos with boiling water! Then carefully cork it with a lid and leave it for a day. After about eight hours, the baked milk will be ready for use. In color, it should turn out to be pinkish, and in consistency, it should not be as thick as cooked over a fire. But this does not affect its taste in any way.

You can also cook baked milk in a multicooker. Pour several liters of milk into the container, select the "quenching" mode. We cook for about six hours, and then switch to heating mode and leave to languish for two to four hours. The technique will do the rest for you. There is also a way to make baked milk in the oven. According to him, we perform all the same manipulations as during cooking on the stove. The main thing is to monitor the heating temperature. A very important point is the percentage of fat content of milk. Factory has usually from four to six percent. For home cooking, you can take more, especially if you use a rustic one. However, it is worth remembering: the fattier the milk, the more time it will take to prepare the "melon". As you can see, there are many methods for preparing this product, and everyone can choose the one that suits them best.

Many housewives recommend adding baked milk to yeast dough. Such pastries are much tastier. The dough from it becomes more tender and soft. You can also make homemade fermented baked milk or varenets from baked milk. It's a great immunity booster, not to mention how delicious it is! If you like milk porridge, then try to cook them with baked milk for a change. The dish will turn out the same, but the taste will be unusual. The same can be said for or various fruit cocktails.