Small bunk cake. Fondant bunk cake
Table decoration is definitely a cake. At the same time, a three-tiered one looks like a real king of a feast, whether it is a celebration of a wedding, birthday, anniversary or any other date.
Even the most eminent confectioners in the world consider such baking to be the pinnacle of culinary art. What can I say, a three-tiered cake is not an easy job. But believe me, he is within the power of "mere mortals". The main thing is to be patient, set a goal to do everything neatly and learn a couple of tricks. Here we will talk about them.
Someone else's mistakes are the best teaching material
If it seems to you that to make a three-tiered cake, it is enough to stack three layers of different diameters on top of each other in descending order, then quit this venture sooner! Otherwise, just waste time and transfer products. You shouldn't act at random.
What happens if you don't follow the technology? The most common side effect is the deformation of the bottom cake, which cannot withstand the pressure of the upper ones. It can simply fall apart or swim to one side. Due to deformation, the upper cakes will warp, and possibly even collapse. Effective, isn't it? To avoid such embarrassment in the middle of a banquet, it is worth paying attention to theory.
A method of forming a three-tiered cake with your own hands
How to avoid frustration of plans, cakes and hopes? We will use a trick that will strengthen the structure. And for her we need bamboo skewers and cocktail tubes.

Find the center of each cake, mark it. At the second end, measure the radius and set aside the same distance from the center of the bottom cake. We do the markup and carefully place the second tier on the first. The markings will help to avoid skewing. By the same principle, we put the top cake on our cake.
Working with squares is even easier. And cakes of an unusual shape (hearts, for example) are also unlikely to cause difficulties for those who understand the very principle of how to make a three-tiered cake.
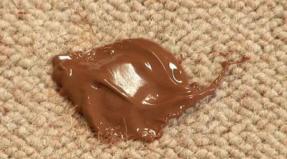
Now comes the fun part. In the center of the cake we make a puncture with a skewer, we pierce all three cakes. Slightly stir the hole so that a tube can fit into it. We insert the tube, pour melted chocolate inside (it is convenient to do this from a syringe), immerse a skewer into it. In the same way, we make several more bearing axes around the middle one. They will prevent the cake from collapsing to one side.
It is logical to assume that the lighter the middle and upper tiers are, the less stability problems there will be. Choose a "heavier" dough for the bottom crust. For example, you can take brownie as a basis - a very tasty and beautiful recipe. Not bad for a base and a recipe for honey cakes.

For the second and third tiers, a light biscuit or puff pastry is ideal, as in Napoleon. Light coconut cakes "Rafaello" also do not weigh down the structure and will add unforgettable notes to the taste.
Making soufflé and jelly
The top of the cake can generally be made not from dough, but from a soufflé. Any dessert recipe will work Whisk 10 chilled whites, adding sugar in stages (1 tbsp). At the very end, add 0.5 tsp. citric acid. Next, dissolve 10 g of gelatin in 100 ml of water. When the gelatin swells, pour the mass in a thin stream into the whites, stir with a spoon and put in a mold. The soufflé will freeze for at least 12 hours.
A jelly tier would also be an excellent option. To prepare it, add 1/3 less to soluble water than the manufacturer recommends.
Cake cream
Before you start, consider what your three-tiered cake will look like. Perhaps it is worth tightening the cakes in the mastic before the pyramid begins to gather? Or maybe no mastic is planned at all and you will want to grease a ready-made cake with cream?

Try to make layers of cream between the tiers. And the cakes themselves can be divided in advance along and well soaked with them.
Avoid overly liquid creams. If you find it difficult to choose, prepare a win-win: Heat 200 grams of butter to room temperature, beat at low speed until fluffy, add 250 g of boiled condensed milk, whisking. Before starting work, keep the cream in the refrigerator for at least 20 minutes.
Such a cream not only does not flow, but also keeps its shape perfectly. And also, thanks to the viscous consistency of condensed milk, it glues the cakes together, providing additional strength.
Excipients, fillers, decor
Afraid that your three-tiered cake isn't strong enough? Use another trick. Dilute the tough berry jelly by adding no more than a third of the recommended volume of water to the pack. Spread the cakes as if with glue and join together.
Unleash your imagination if you are preparing three-tiered children's cakes. Photos show that they can be designed in the form of a fairytale castle or decorated with characters from your favorite children's fairy tales.


Alternative ways: unusual dishes
If you really want to cook a stunning dessert, but you are afraid that the task will be overwhelming, use the simpler method. Who said that a three-tiered cake must be monolithic? Place the cakes on the tiers of a special serving dish as shown in the photo.

Such a dessert will look no less impressive, especially if you arrange baked goods in the same style.
If the cake is a pyramid, then there is a possibility that the upper tiers will "crush" the lower ones with their weight. If the cake has three tiers and there is a delicate filling below, then the failure is definitely guaranteed.
Even if you use dense fillings in the lower tiers, they still deform as soon as the cake warms up to room temperature. How to prevent this from happening? This is quite simple, you just need to get rid of pressure from above, the question is how to achieve this?
Columns must be installed in all tiers except the upper one.
The installation procedure is as follows:
- the cake blank (filling) is placed on a tray made of food-grade moisture-resistant plywood, of the same diameter as the cake blank itself, and coated with a leveling cream, it turns out like this:
By the way, who cares - I buy them in Korobkin. the thickness of the tray is 8mm, usually cutting boards are made from such plywood to the kitchen for cutting meat and vegetables. They are inexpensive, and therefore presenting them with a cake is much more pleasant than driving for a "returnable" stand.
After covering with marzipan and mastic, the tier is pierced by a future column:

Three pieces are needed for each tier. By the way, the columns are made of round timber, you can order it there. Round timber is cut with a knife:

Please note that the columns must be of the same length, so that later the cake does not turn out oblique.
well it turns out something like this:

In a schematic section, it looks like this:

If you don’t know how to make an "oil" cream for a tight-fitting leveling coating, it is not difficult, this is condensed milk and butter in a 1: 1 ratio
You need to beat for about five minutes, the main thing is that the products should be warmed up to room temperature.
As a result, after all the manipulations, you can collect this without fear of being crushed at all.
For those who are not afraid of difficulties and like to spend time in the kitchen, we suggest preparing an elegant and interesting two-tier cake with their own hands in the form of a winter hut. The dessert consists of standard biscuits: bottom with creamy sour cream and peanuts, top with delicate and pleasant cherry mousse. The finished product is covered with a protein cream and decorated in accordance with the New Year theme.
For convenience, we recommend to divide the formation of the cake into several days, for example, bake biscuits in advance, and only then engage in the "assembly" of tiers and decoration. The cake, of course, is not the fastest to prepare, but the result is worth the effort! Guests will be delighted with your culinary skills, and children will be delighted with such a sweet surprise! Let's create a winter fairy tale together with our own hands!
Ingredients: 
Bottom biscuit (shape 26 cm):
- eggs - 8 pcs.;
- sugar - 240 g;
- flour - 160 g;
- starch - 50 g;
- butter - 50 g;
- baking powder - 1.5 tsp;
- vanilla sugar - 2 tsp.
Upper biscuit (form 16 cm):
- eggs - 2 pcs.;
- sugar - 60 g;
- flour - 40 g;
- starch - 10 g;
- butter - 10 g;
- baking powder - ½ teaspoon;
- vanilla sugar - 1 tsp.
Impregnation for biscuits:
- sugar - 90 g;
- water (boiling water) - 300 ml;
- cognac - 1-2 tbsp. spoons.
Lower biscuit cream:
- sour cream 20% - 200 g;
- whipping cream 33-35% - 200 ml;
- sugar - 120 g;
- peanuts - 100 g.
Top biscuit mousse:
- cream 33-35% - 150 ml;
- frozen cherries - 150 g;
- cream cheese - 130 g;
- sugar - 80 g;
- powder gelatin - 5 g;
- water (to dissolve gelatin) - 30 ml.
- egg whites - 4 pcs.;
- sugar - 200 g;
- vanillin - a pinch;
- butter - 320 g.
Protein cream for decoration:
- egg whites - 3 pcs.;
- water - 75 g;
- sugar - 150 g;
- salt - a pinch;
- citric acid - a pinch.
Registration:
For windows:
- dark chocolate - 40 g;
- butter - 10 g;
- marmalade;
- sweet straws.
For Christmas trees:
- waffle cones for ice cream - 2 pcs.;
- butter - 100 g;
- condensed milk - 4 tbsp. spoons;
- food coloring (green).
DIY bunk cake recipe with photo
How to make a biscuit for a bunk cake
- Cooking the bottom biscuit. We carefully separate the whites from the egg yolks, place them in a deep, clean and dry bowl. Beat with a mixer, gradually adding half of the sugar. We work until "strong peaks" are obtained (that is, until a dense mass is obtained, which remains motionless when the bowl is tilted / overturned).

- Separately, together with the second part of granulated sugar and aromatic vanilla sugar, beat the yolks. We work with a mixer for at least 5 minutes. The mass should lighten, thicken noticeably and increase by 2-3 times.

- Gradually mix the yolks into the whites with gentle movements from bottom to top. Sift the flour, combined with starch and baking powder, in portions onto the egg mixture, stirring carefully each time. Our task is not to upset the lush mass, so we work very carefully! You cannot stir the tender biscuit dough in a circle, only from the bottom up!

- Melt the butter, cool and pour over a homogeneous dough along the edge of the bowl. Stir for a short time.

- The bottom of the mold with a diameter of 26 cm is laid with a circle of parchment, the walls are not greased. We fill the container with biscuit dough and send it to the preheated oven. We bake at 180 degrees until "dry match".

- Turn the mold with a freshly baked biscuit and put it on two bowls or on a wire rack. Leave the baked goods in this form until they cool completely. This step will help prevent the top of the biscuit from settling.

- We prepare the upper biscuit in the same way as the lower one, only this time we take a form with a diameter of 16 cm.

How to make mousse for the top tier
- Prepare cherry mousse as a filling for the top biscuit. To do this, pour the cherries with sugar without preliminary defrosting, put on low heat. While stirring, we warm up for about 5 minutes (until the sugar is completely dissolved and the berries soften).

- Cool the cherry mass, and then turn it into a “puree” using a blender. Rub thoroughly through a fine sieve. We will use all the resulting juice to make mousse (we do not use small pieces of cherries that remain on the sieve).

- Whip cold cream until firm. Add room temperature cream cheese and cherry juice. Stir until a homogeneous, evenly colored mass is obtained.

- We remove the upper biscuit from the mold (we first pass it along the sides of the container with a knife). Cut the pastry into two cakes. We wash the form, wipe it dry, lay the bottom and walls with parchment. We lower the bottom cake into the prepared container, pour it with impregnation (for its preparation, dissolve the sugar in boiling water, cool it, add brandy).

- Pour gelatin with cold, pre-boiled water. Let the mass swell.

- We place a bowl with swollen gelatin in a bowl of hot water. Stir constantly until the powder dissolves.

- We introduce the gelatinous solution into the creamy cherry cream with continuous whipping with a mixer. We spread the mass on the bottom cake, level it. We remove the container in the refrigerator until the mousse hardens.

How to make a cream for the lower tier
- While the mousse is solidifying, prepare the bottom tier of the cake. Beat the cream with sugar until thick. Add sour cream, beat for a few seconds (until the components are combined into a single cream).

- Fry peanuts in a dry frying pan, stirring occasionally. As soon as the skin begins to crack, remove from heat, cool. After removing the husk, grind the peanuts with a blender.

- Divide the biscuit into 3 cakes. Pour the bottom with impregnation, and then grease with half of the butter-sour cream. Distribute half of the peanuts on top.

- Cover the base of the cake with the second crust, soak it, apply the rest of the cream. Sprinkle with the other half of the peanuts. Pour the last cake with impregnation and spread it on top. We do not coat the top and sides of the workpiece with anything yet.

- Soak the second cake for the upper biscuit and put it on the frozen mousse. We put both the upper and lower tier for the cake in the refrigerator.

How to Make Butter Protein Cream For Cake Topping
- Mix the proteins with sugar, place the bowl in a "water bath". Actively and continuously stir the mixture with a whisk, heat the mass over low heat until the sugar dissolves. To test the doneness, take a small portion of the protein and rub it between your thumb and forefinger. If grains are not felt, remove the container from the stove. It is important not to overheat the proteins, otherwise they may curl up! The bottom of the protein bowl should not touch the water in the lower bowl.

- Add vanillin to the proteins just removed from the heat for flavor and immediately begin to beat the mass. Gradually, the proteins will thicken. We work with a mixer until “soft peaks” are formed. It is not necessary to achieve a very strong and stable mass, as in the manufacture of a biscuit. As soon as clear streaks from the mixer remain on the cream, we stop.

- We load the softened butter in small pieces to the protein mass, constantly working with a mixer. As a result, we get a fairly dense oil cream.

- We take out the bottom blank from the refrigerator. We coat the top and sides with butter and protein cream, align.

- To prevent the lower tier from sinking under the weight of the upper tier, we strengthen our "structure". We take wooden skewers, cut them to the height of the lower tier and stick them into the biscuit in the place where the upper tier will be located (according to our idea, it will stand on the edge of the lower biscuit).

- Place the upper tier on a cake base that matches the diameter. We coat with butter cream, level. Together with the substrate, we place it on the prepared lower tier.

How to make a bunk cake with your own hands
- To make our cake look like a hut, cut out and remove the triangular segment from the lower tier. Apply butter cream to the cut, and then attach a straw to simulate wooden planks. The upper tier is also slightly trimmed, greased with cream and supplemented with straws.

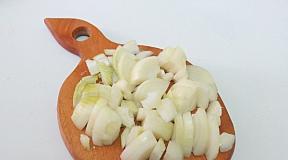
- To make "windows" on a kitchen board sprinkled with sugar, roll out the marmalade. We cut out square blanks of suitable size. Sugar is needed to prevent the pieces of marmalade from sticking to the work surface.

- Melt the chocolate with butter in a "water bath", cool it and put it in a cornet. We put a small portion of the chocolate mass on straws and pieces of marmalade, attach the "windows" to the "house". We also outline the contour of the "windows" with chocolate.

How to make a protein cream for a bunk cake
- To make our two-tiered cake look even more like a snow-covered hut, we will cover it with protein cream. Boil the syrup - pour the sugar with water, bring to a boil. We heat the syrup to 118 degrees.

- At the same time, beat the whites with citric acid and a pinch of salt until strong peaks (when turning the bowl, the whites must firmly "sit" in place).

- Without stopping to work with a mixer, pour hot syrup into the protein mass in a thin stream. Whisk the cream continuously until it cools down to room temperature (about 10 minutes).

How to decorate a bunk cake with your own hands
- We coat the tiers of the cake with snow-white protein cream, make vortices around the "windows" to imitate icicles.

- Decorate the cake with figurines if you wish. To make a snowman, we sculpt 2-3 balls of different sizes from marmalade, place them on the free edge of the lower tier. We coat the figure with protein cream. We form the "carrot", "hat" and "buttons" again from marmalade, draw "eyes" with chocolate, make "hands" from pieces of straw. We prepare "Christmas trees" from horns and butter cream with dye (detailed technology is described in the recipe
I made this cake for my niece's first birthday. This is my first two-tiered cake, of course there are many mistakes and shortcomings, but in general I think I managed to bring the idea to life.
The cake will be biscuit with sour cream and fruit, decorated with sugar mastic.
I will not describe how to cook biscuits in this recipe, I have already told about them in previous recipes: Chocolate sponge cake on boiling water and Vanilla chiffon biscuit.
My cake is in two tiers, the lower tier with a diameter of 26 cm (vanilla chiffon biscuit), the upper one - 16 cm (chocolate biscuit on boiling water).
As a fruit I decided to use frozen pitted cherries (400 g) for a chocolate biscuit and canned peaches (400 g) for a chiffon biscuit.


Sour cream, it is ideal for both biscuits and goes well with the selected fruit.
Cut the finished biscuits into cakes, chiffon cakes into 3 cakes, and chocolate cakes into 6 cakes, so it is 2 times higher than the first.
For sour cream, beat the sour cream (1 liter) with sugar (280 g) for about 7 minutes, leave the cream for 10-15 minutes until the sugar is completely dissolved. At this time, squeeze the juice out of the lemon (1 pc.). Add lemon juice to sour cream and beat again, lemon thickens sour cream perfectly.

Cut the peaches into small cubes, defrost the cherries and drain off the excess liquid.

When all the components for the cake are prepared, we start assembling it.
Put the first cake on a plate or plate, pre-grease the center of the plate with cream so that the cake does not slide out.


Soak the crust with peach syrup, then grease it abundantly with sour cream, spread a layer of chopped peaches on top and grease it again with sour cream. We spread the next cake and follow the procedure as with the first cake. Do not grease the last cake with anything.

The bottom cake is almost ready. We put a clean, dry plate on the cake, and put something heavy on it and leave it for a couple of hours so that the cake stands and evens out.
Let's start assembling the top chocolate cake. Chocolate cakes do not need to be impregnated, due to the permeability of the crust, the sour cream penetrates well and soaks it. Lubricate the cake profusely with cream and spread a layer of cherries, grease with cream again and spread the next cake.


We spread the cherry not on each cake, but after one, since it is sour.
When the cake is assembled, we act with it in the same way as with the previous one, put it under the press for a while.
While the cakes are resting, prepare a cream for leveling under the mastic. We mix butter at room temperature (200 g) with condensed milk (140 g).
We grease the cake with this cream, level the sides and top. We send the cake to the refrigerator until the cream is completely solidified.


While the cake is resting in the refrigerator, we begin to prepare the mastic. I described how to make mastic in the recipe Bear from mastic.
You need to fit each tier separately. We start from the bottom tier, I covered the bottom cake with white mastic. Roll out the mastic thinly, but so that it does not break during the transfer to the cake, the diameter should be 1.5 times the cake itself, so that there are no folds at the bottom.

Before spreading the mastic on the cake, you finally need to level it for this to smooth out the cream with dry, clean hands, it melts from the warmth of the hands and takes on the desired shape.

We carefully transfer the mastic to the cake and smooth it, cut off the excess mastic.


Cut not too high, as the mastic on the cake can rise.

We do the same with the upper tier. On the upper tier, I did not get a little mastic, but there was no time to redo it, I left it as it is.


Since the upper tier is quite heavy and so that it does not fail the lower one, you need to make a backing and install shryrs. For the substrate, we cut out a circle from thick white cardboard with a diameter slightly smaller than the upper tier.

For the pins, we will use wooden skewers (4 pcs.). We insert the pins into the lower tier in a circle under the substrate.

We put a substrate on them, and already lay the upper tier on it. So that the upper tier does not fall off, it needs to be connected to the lower one with a wooden stick, I used a sushi stick. In the center we pierce both cakes through and through, while taking into account that between the cakes there is a cardboard substrate, which must first be pierced in the center.

Next, decorate as desired. I placed mastic balls around the top and bottom tiers. I planted a mastic bear on the top, which I talked about in previous recipes. I also made a pyramid, cubes, a button, a gift out of mastic. Decorated the upper tier with flowers, also attached the number 1.

The cake turned out to be very tasty, juicy and satisfying. Unfortunately, it was not possible to photograph it in section.
Everyone liked it, and this is the main thing.
Bon Appetit!!!
Cooking time: PT04H00M 4 h.
For a significant celebration, a tiered cake is a highlight that everyone expects to see and taste, crowning the holiday.
A dessert of several tiers (two or three, and even more, which is inherent in wedding ceremonies), must be carefully assembled so that the lower tier does not sink under the pressure of the upper ones.


We do the same in several places.

Now it is permissible to install the second tier of the dessert in place, and not be afraid that the top will push and siege the lower base.

Strengthening a tiered cake
It is easy to strengthen the cake in two tiers, but what to do if the culinary idea is more ambitious. And we solve this issue, but how, we look further MK.
Prepare in advance, for example, three tiers of cake of different sizes. The tiers are covered with mastic and stand for about one hour or more in the refrigerator.
It is worth noting: Each of the tiers should be placed on separate paper ones, in the center of each of them we will make holes of a small diameter in advance.

To strengthen each tier, we will also use cocktail tubes, but only one wooden skewer, which is recommended, in addition, to wrap with cling film.


So, we start assembling a three-tiered cake.
Make a hole in the center of the product using our wooden stick wrapped in cling film. The length of the stick should be approximately the same as the total height of all the tiers. But do not pierce the cake through.

Around the hole made in the center, at a distance of up to 3 centimeters from each other, make smaller holes with tubes. We adjust the length of the tubes to the level of the first tier.

Melt the white chocolate in a water bath, and pour it, using a bag, into the holes made in the cake.

Now we return the stick and cocktail tubes to the previously made places, filled with chocolate.

You can give the white chocolate some time to harden.
We begin to put the second tier on a long skewer through the hole in the base.


Now it's time to plant the third tier of the birthday cake on the base of the mount (a wooden skewer).