Secrets of working with sugar mastic. Working with sugar mastic: nuances, subtleties and mistakes
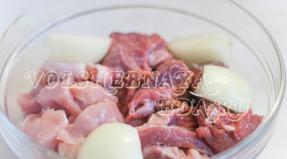
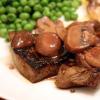
I baked the cake at night, layered it with cream, wrapped it in cling film so that it did not absorb foreign odors, and put it in the refrigerator under a press. I have a cake here made of thin layers with the addition of honey, creamy sour cream and homemade caramel. Very tasty! In principle, he does not need the press too much, because the cream is almost completely absorbed into the cakes, but I decided to play it safe. As a press, I used a weighty cutting board, on which I put a small saucepan :) Why do you need a press at all? So that later, when we wrap the cake with mastic and decorate it, the excess cream does not crawl out on the sides, turning our cake into a pot-bellied barrel or otherwise deforming it. Here's our cake!
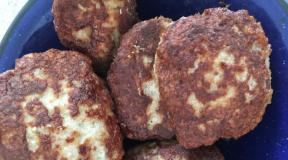
When baking, I still have scraps. Now they will be very useful to me. If you are making a sponge cake, and the cakes are so smooth that there are no scraps left, you can use regular cookies like "Jubilee". It is possible that your cake is so smooth that you can do without any scraps at all. Read on and look at the situation.

Put the trimmings (or cookies) in a blender.

And grind it into crumbs.

Mix the resulting crumb with a cream suitable for use as a "buffer" between the cake and mastic. Here it is necessary to clarify. Mastic is afraid of moisture, it melts from it, so in no case should it be put on wet creams! It is very important! No creamy, sour cream, cheese, custard will do! The base of the cream for mastic should be either butter or chocolate. In other words, you need any buttercream or chocolate ganache. The second one is even preferable, because it behaves better at room temperature: the butter cake begins to melt rather quickly, and with a long decoration and if it is still hot in the room, the cake begins to "float". But chocolate ganache is far from always combined with the taste of the cake itself, for example, in my case, the cake is very delicate, and the chocolate would have drawn attention to itself, but I didn't want that, so I used my favorite butter cream Charlotte. Here we have prepared a cream (recipe) and mixed about half with crumbs. With this mass we will level the sides to "rough". It is not advised to align with cream under the mastic right away: to cover it with mastic, the cake should be perfectly even, because it does not hide, as many mistakenly think, but on the contrary - only emphasizes all the shortcomings! Each master has his own methods here, and with experience you will develop your own tactics, you will find a way that suits you more than others, but I am telling you one of the possible options. Immediately transfer the cake to a plate (plate, cake plate). In order not to stain it too much with cream, put strips of parchment under the cake around the circumference.

We collect on a large spatula (buy yourself such or a similar thing, they are sold in confectionery stores or you can replace with a construction scraper, a new one!) A little mass of "crumb" and apply to the sides. We twist the cake counterclockwise, and move the spatula towards ourselves, clockwise. If you have a spinning stand for leveling and decorating your cakes, you're in luck! It will greatly facilitate your pastry life for you. I still can't order it, I adapted without it, but I understand that such a thing is very necessary, and I have it on my wish-list :)

We apply the crumb first to the sides, and then to the top of the cake. We put in the freezer for 15-20 minutes so that the crumb grabs. We take it out and continue to level it, only now - just with a cream. Also, put it on a clean spatula, put it perpendicular to the table and lead it towards you, and twist the cake counterclockwise. The turntable will be cleaner. But you can cope without it. Not perfect, yes, but not bad.

Tip: when leveling the sides with cream, try to make a "crown". Then freeze the cake, and take out - cut off the ledge with a knife. This will make the edges smoother.

Let's take care of the mastic!
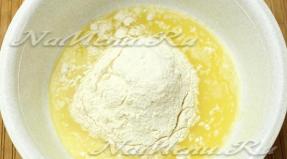
When we decided that the cake is already quite even, we put it in the freezer for at least half an hour! More is possible (it depends on the filling)! At this time, we ourselves can do some mastic. But not in the sense of cooking. Homemade mastic must be done in advance and let it rest for at least a night. In the sense - knead, add dyes, if necessary, and roll out. This time I made the mastic for the covering myself (and I had a purchased one for the figures) according to the recipe of Inna Sapegina, a very talented artist, pastry chef-decorator. True, I changed the proportions a little, perhaps because of my powdered sugar or the matter in measuring spoons. It's easy to prepare: 5 tsp. pour gelatin powder 3 tbsp. l. cold water, add 125 ml of glucose to the same saucepan (I had caramel syrup, and Inna herself most often uses liquid honey), put it in a water bath, bring it to homogeneity. Next, sift the icing sugar into a large bowl (I have “Slavic meal”), the author advises taking 1 kg, but I put less - 600 grams, otherwise my mastic turns out to be too hard. So, I pour out the powder, make a dent in the middle, pour the liquid obtained in a water bath and knead first with a spoon, and then with my hands, like dough. You do not need to pour out all the powder at once, but add in parts, it is important to catch the consistency: the mastic should be viscous and quite sticky. It may seem to you that there is not enough powder, but this is a deceptive feeling. Wrap it in plastic and leave it at room temperature overnight. The mastic will harden and be ready for use. If you put in more powder than you need, it will be very difficult for you to roll it out, and if it is tight, it will tear. So, here's our mastic. I added just a tiny bit of yellow Americolor gel dye, taking into account the future decor.

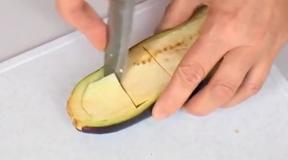
Sprinkle the table with starch, not sparing it, and roll the mastic with a rolling pin into a large layer about 3 mm thick.

The mastic plastic should be much larger than the cake! I repeat, because this is a very important point! We wind it on a rolling pin.

We take out our cake. We remove the parchment. Now he will no longer help us, but interfere.

Using a rolling pin, carefully transfer the mastic to the cake. As it were, we unwind a layer of mastic over the cake and lower it onto it.

Sugar mastic is a unique confectionery material that is widely used to create decorations: color, figures, ruffles, reliefs, inscriptions. Mastic is similar in structure to plasticine, so invite your little assistants to mold the decorations themselves. Modeling will allow you to develop fine motor skills of the hands, and unlike plasticine, mastic does not contain harmful substances, so it's not scary if the baby eats a piece.
Special equipment, silicone molds, plastic molds expand the boundaries of the use of mastic. You can familiarize yourself with and purchase all the most necessary tools on our website in the "tools for working with mastic" section.
Despite the fact that it is not difficult to work with sugar tests, there are a number of subtleties and nuances, knowledge of which will be useful to both novice confectioners and professionals.
The first difficulty encountered when working with mastic is it is excessive stickiness. It appears from the elevated temperature of the room, from the warmth of the hands and even from excessive moisture (for example, if the palms are sweating) and, if the mastic was prepared on its own, due to the incorrect proportions of the ingredients.
This is where powdered sugar and regular cornstarch (or rice) come to the rescue.
If your self-made mastic is very sticky, then just continue to knead it with the powdered sugar. In fact, mastic is a sugar dough, where powder acts as flour.
If the purchased mastic sticks, then it is enough to dust the work surface and hands with cornstarch and continue working.
The mastic should be rolled out on a flat surface sprinkled with starch and powdered sugar or on specialized embossed rugs that will give the mastic an original pattern.
You rolled out the mastic and were about to transfer it to the cake, but it broke? Definitely, you overdid it: you need to roll out the sugar dough with a thickness of 2 to 4 mm. Too thinly rolled dough not only tears, but also shines through all the irregularities of your cake.
Now, perhaps, about the most important question: how to properly wrap the cake with mastic. The first step is to prepare its surface.
Confectioners use a thin layer of marzipan, ganache or butter cream for leveling under the mastic. No other creams, including butter cheese, will work because the sugar dough can drip.
It is most convenient to level the surface of the cake in three stages:
· Smear the surface of the cake, from which all the bumps and irregularities have previously been removed, with a thin layer of butter cream to remove all excess crumbs. Refrigerate for 15 minutes.
· Take the cake out of the refrigerator and coat the cake with a thick layer of cream. Refrigerate for 10 minutes.
· Take out the cake again and remove the excess cream with a hot knife or spatula and level it to a perfectly flat surface. Refrigerate for 15-20 minutes.
The cake can be wrapped with mastic as soon as the cream has hardened.
Apply a layer of sugar dough to the side of the cake, then roll the mastic from the rolling pin onto the surface of the cake with rotating movements away from you.
Press the mastic with your palms, being careful not to touch and press with your fingers to avoid dents on the surface.

There will be no folds on the sides of the cake if you roll out the mastic "with a margin". First of all, it is necessary to smooth out the "stock" so that it lies without wrinkles and folds.
If everything is even, you can trim the excess. It is convenient to do this with a special mastic knife, which can be purchased in our store.
Flowers or mastic figures should be sculpted in advance and allowed to dry for at least a day.
It happens that when tightening, bubbles appear on the mastic: you just need to pierce them with a needle and smooth out this place. You should also do if the mastic is torn. The most convenient way is to flatten the mastic on the cake using a special iron, which you can also find in our store.
The cake covered with mastic should be stored in the refrigerator, covered with a box, so that moisture does not accidentally get on it.
It happens that the cake, which was taken out of the refrigerator, becomes covered with water droplets. This phenomenon is called condensation. It appears on the cake due to a sharp temperature drop.
It is very important to let the cake dry naturally, that is, you do not need to rub the mastic with dry napkins, which can lead to damage to the appearance. If the cake was painted with paints, then do not worry: they will not flow from condensation.
How to decorate mastic?
To add shine to the surface of the sugar dough, mix honey and vodka in proportions 1: 1. Apply the mixture to the cake with a soft brush and let it dry. The vodka will wear off and a shine will appear.
A cake decorated with kandurin looks very impressive.
There are two ways to decorate:
· Dry method. With a brush, take a little paint from the can and shake it off on the cake. The dry method is more convenient to use on large surfaces.
· Solution. Vodka is added dropwise to 1-2 grams of kandurin. The consistency should not be thick, but not liquid either. This method is convenient for drawing details and patterns, for decorating flowers from mastic.
The mastic should be painted with gel dyes. You can, of course, use powder, but the consumption of such dyes is much higher, so getting a rich color can be difficult and costly.
Gel dyes are odorless and tasteless and, what is important, do not change the structure of either purchased mastic or prepared by yourself.
You can use a neutral confectionery gel, plain water, and even fresh egg white to glue the parts together and fix the figurines on the cake. The principle is simple: lubricate the base of the part with the necessary amount of gel, water or protein and fix it on the cake.
How to store the mastic? Be sure to wrap tightly in plastic wrap to avoid moisture ingress and prevent the sugar dough from drying out.
Store in a cool dry place.
If the mastic is still dry, it can be reanimated with confectionery glycerin.
Mastic is a universal assistant for a pastry chef. With its help, it is easy to turn fantasy into reality. If you don't have enough time to make and dry figurines or flowers, we are glad to offer you ready-made decorations. Take a look at the section "Decorations from mastic": we are sure that you will find a bouquet or funny sugar and marzipan figurines to your liking.
Inspiration to you, friends!
Almost ten years have passed since the cake has ceased to be just a delicious dessert, which is served as a sweet and is the logical conclusion of the holiday. Now, different decor options using mastic allow you to create a culinary masterpiece. There is an opinion that such a design can only be done by masters who have comprehended the secrets of the culinary art. Each housewife can create such a culinary work independently; this will require minimal baking skills, knowledge of the basics of working with mastic. See the recipes for delicious cakes, creams for mastic below.
What cake is suitable for mastic
In order to get a beautiful mouth-watering cake decorated with mastic, you must follow several rules when choosing a baking recipe, cream and decoration option. The appearance of the product and the taste of the dessert depend on all these factors. Experienced chefs, behind whom there are more than a dozen of prepared original cakes decorated with mastic, advise you to adhere to the following rules when creating a masterpiece:
- Any cakes can be used for the cake, for example, biscuit, honey cake, shortbread or even soufflé.
- The cream between the cakes can be completely different from sour cream, yogurt, cottage cheese or condensed milk. But such options cannot be used for mastic, since it can melt, lose its appearance.
- The following cream can be used as a base for mastic: oil, ganache, with marzipan or condensed milk. However, before proceeding with the decor, the cake should be cooled until the top layer is completely hardened.
- Before decorating, it is necessary to carefully align the top layer so that the product looks as neat and beautiful as possible.
- The theme of the finished product design depends on who it is intended for: for a child - characters from fairy tales or cartoons; for a boy - cars, superheroes; a cake with a Barbie doll is suitable for girls; women will be delighted with a dessert with flowers - roses, daisies; and for men, decor in the form of a barrel of honey, on the theme of fishing, cars, will suit.
Step-by-step master classes on making a cake with mastic
There are many recipes for cakes that can be decorated with mastic and can please not only with their taste, but also give a true aesthetic pleasure. Different options for cakes, cream, decoration provide an opportunity for every housewife to create a culinary masterpiece to her taste. Below is a selection of delicious and simple baking recipes for mastic, which even novice cooks can easily handle.
Sponge cake
The classic basis of any cake is biscuit cakes, for the preparation of which the most affordable and simple products are used. The recipe is based on a large number of eggs, which makes it possible to get fluffy, beautiful cakes without using baking powder, soda. Any mass can be used as a cream. Depending on individual preferences.
Ingredients for the biscuit:
- Eight eggs.
- 220 gr. granulated sugar.
- Wheat flour - 250 grams.
- 80 gr. butter.

Instructions for making biscuit:
- Break eggs into a deep bowl, add granulated sugar and beat with a mixer, until the mass is significantly increased.
- Sift wheat flour, add to egg mixture, mix well.
- Melt the butter, add to the dough - mix well.
- Bake the dough, divided into two parts, in the oven.
- Collect the cake, smear it with the selected cream, and cover with mastic on top and decorate with figures from it.
Chocolate cake recipe
The taste of the chocolate cake will be remembered by everyone for a long time, and the pleasant aftertaste of chocolate will still remind you of the most delicious dessert that you have ever tasted. Such pastries can be supplemented with icing and cream with chocolate or any other filling option can be used for these purposes, and mastic and various figures, edible decorative elements from it can be used as decoration.
Products for cooking:
- Cocoa - 30 grams.
- One and a half glasses of flour.
- Baking powder - 1 teaspoon.
- Eggs - four pieces.
- One and a half glasses of sugar.
- Butter - 225 grams.

Cooking chocolate biscuit:
- Combine flour, baking powder and cocoa in one container, mix well.
- Add butter, eggs to the dry ingredients and mix everything thoroughly.
- Pour in two tablespoons of hot water, stir until all ingredients are fully combined.
- Divide the dough into several parts, bake the cakes in the oven.
- Smear the chocolate biscuits with cream to your liking, allow to harden, after which you can start decorating the culinary masterpiece with mastic.
Cake with soufflé under mastic
For decorating with mastic, cakes without baking are suitable, where one or several layers are occupied by a soufflé. The preparation of such a dessert has several rules that should be adhered to: there should be a biscuit above and below the jelly layer so that the culinary masterpiece keeps its shape; do not allow the soufflé and mastic to come into contact, otherwise the latter will flow. There are many recipes for a delicious layer of soufflé, with fruit, cottage cheese, or the classic version - "Bird's milk". Let's consider one of the cooking options.
Ingredients for the biscuit:
- Two hundred grams of wheat flour.
- Granulated sugar - 160 grams.
- Chicken eggs - 5 pieces.
- Vanillin.
For soufflé:
- Gelatin - 20 grams.
- Fruit yoghurt - 400 ml.
- Cream - 20 ml.
- Fruit (peach, pineapple, fresh or canned).

How to make a cake with soufflé under mastic step by step:
- To prepare a biscuit, you need to beat the eggs with the addition of vanillin and granulated sugar until white peaks form.
- Add wheat flour, stir gently with a spoon from bottom to top to retain air bubbles - this will give the biscuit fluffiness.
- Place parchment paper on the bottom of the mold, grease the container with oil and lay out the dough. Bake a biscuit at a temperature of 175-180 degrees for half an hour. Allow the workpiece to cool, then cut it in half.
- To make a soufflé you need to: soak the gelatin for swelling. Add sugar to yogurt, add gelatin and stir well.
- Chop the berries, beat the cream into a foam.
- Add cream to the cooled yogurt, mix well, add chopped fruits.
- Put a biscuit on the bottom of the form, then pour and put another cake on top. Allow the cake to harden completely.
- Smooth out the cake with butter cream, cover with mastic.
Honey cake recipe
The recipe for the honey cake is known to many and is passed down in the family from one generation to the next. In the standard version, the culinary product is decorated with crumbs from the cakes, but modern craftswomen began to decorate the dessert with mastic, which makes it possible to decorate your favorite cake with amazing taste in an original way, guided by your imagination or the wishes of the client.
To prepare the cakes, you will need the following ingredients:
- Fresh, liquid honey - 2 tablespoons.
- Two eggs.
- Sugar - 1 teaspoon.
- Two teaspoons of salt.
- Margarine - one hundred grams.
- Flour - 3 cups.
Components of sour cream for Medovik:
- Fat sour cream - 800 grams.
- One glass of sugar sand.
- Oil - 250-350 grams (the amount depends on the fat content of the sour cream).
Step-by-step preparation of the cream:
- Mash the butter with a fork, add ¼ of sugar and mix thoroughly. Pour in the remaining granulated sugar gradually, kneading it well until the two components are completely combined.
- When the butter and sugar are completely combined, it is necessary to gradually introduce sour cream in 1-2 tablespoons, mixing all the components well.
- Sour cream for smearing the cakes is ready.

Step-by-step preparation of cakes:
- Put honey in a small container and melt over low heat. After boiling, add baking soda, mix thoroughly. Cook until caramel color appears.
- With a mixer, beat two eggs with a glass of sugar and pour into a container with caramelized honey. Add margarine to the resulting mixture, beat well with a mixer.
- Put the pan on the fire again, add 1/3 of the flour, beat with a mixer. When the dough begins to thicken, heat up, remove the container from the heat and continue the gradual introduction of flour, without stopping stirring.
- Chill the dough in the refrigerator or in a cool place, for example, on the balcony. Divide everything into several parts, roll out and bake the cakes in the oven for five minutes at a temperature of 200 degrees.
- When all the cakes are baked, it is necessary to allow them to cool slightly and smear with sour cream (if an oil layer is used, the cakes must be soaked in sugar syrup).
- The cake for decorating with mastic is ready, the culinary specialist chooses the design option himself and it all depends on personal wishes.
A simple recipe for the cake "Sour cream"
The Smetannik recipe is known to many housewives, and everyone remembers its taste from childhood, when a shortage of products encouraged women to invent delicious desserts based on what was available. Such a cake is well suited for mastic, the main thing is not to forget about the intermediate layer - a special cream, thanks to which the mastic will evenly and beautifully cover the culinary masterpiece.
Products for cooking:
- Eggs - 3 pieces.
- Kefir, sour cream - 1.5 cups.
- One and a half glasses of sugar.
- Flour - 1.5 tbsp.
- Soda, vinegar for extinguishing.
- Vanillin.
- For the cream you need sour cream and sugar.

Step-by-step cake preparation:
- Combine all the ingredients for making the dough in a deep container and mix well.
- Divide the resulting batter into 3 parts, pour cocoa into one of them to add chocolate color and taste (2 tbsp. L.).
- Bake the cakes at an oven temperature of 200 degrees.
- For the cream, beat the cream or heavy sour cream with granulated sugar well.
- After cooling, cut the cakes in half, grease with cream, let it brew.
Milk Girl Cake Recipe
The light, airy cake got its beautiful name thanks to the condensed milk from Germany "Milchmädchen". Ease of preparation, exquisite taste and the ability to use various creams for cakes - all this became the main reasons that many housewives fell in love with the dessert. In modern culinary art, the Milk Girl cake recipe is used to make a dessert decorated with mastic.
Cake recipe and required ingredients:
- Bank of condensed milk.
- Two chicken eggs.
- A glass of flour.
- Baking powder spoon.
For the cream:
- Powdered sugar - 0.5 cups.
- Cream - 400 ml.

Cake preparation:
- Put the condensed milk into a deep container and break the eggs. Beat the ingredients until smooth.
- Gradually introduce baking powder, wheat flour - mix everything well.
- Draw the shape of the desired crust on the parchment and pour out some dough. Bake in an oven preheated to 180 degrees - 5 minutes. Bake all the cakes, let them cool slightly.
- Whip the cream and sugar for the cream and coat the cakes with it.
- The top of the culinary masterpiece should be covered with butter cream so that the mastic is evenly coated and adhered well.
Pancho cake
Many sweet tooths are familiar with the amazing taste of the original Pancho cake, and almost every housewife's cookbook contains a recipe for this dessert. Delicate taste, unusual design and the ability to make some adjustments to create new variations of the product. "Pancho" is perfect for decorating a cake for mastic, for example, creating a dress for a Barbie doll.
Ingredients for the cake layers:
- Chicken eggs - five pieces.
- Sugar - one and a half glasses.
- Cocoa - 4 tablespoons.
- Baking powder - 1 hour l.
- Flour - 1.5 cups.
- Lemon juice - 1 tsp
For the cream:
- Sour cream or cream - 3 cups.
- Sugar - one glass.

Step by step cooking:
- Beat the whites until a firm white foam.
- Combine and grind the yolks with sugar and beat, add proteins, mix well, add flour and lemon juice.
- Add the remaining proteins, stir everything thoroughly until combined.
- Divide the finished dough into several parts, add cocoa to one of them. Arrange in two containers and bake the cakes in the oven.
- To prepare the cream, beat the sour cream with sugar until thickened.
- Put one cake on the bottom of the plate, cut the rest into small cubes, which are laid out in layers, carefully pouring cream until a small slide is formed.
- To harden the cream, put the dessert in the refrigerator, and then decorate with mastic.
The best recipes for cream-based cake base for mastic
When creating a delicious cake, the right choice of cream plays an important role. Firstly, it should be ideally combined with the cakes, complement them and create a harmonious flavor tandem; secondly, it is necessary that it fits under the mastic, does not spread and keeps its shape well. To prepare a delicious dessert, a cream for a cake with mastic based on butter, condensed milk or marzipan is suitable. See below for recipes.
Boiled condensed milk cream
A simple but insanely delicious cream can be made from butter and boiled condensed milk. Despite the minimum amount of ingredients and ease of preparation, the mass has an amazing taste and is ideal for a cake that will be further decorated with mastic. To make a cream, you need condensed milk (1 can) and 30 grams of butter with a high percentage of fat.

Step-by-step cooking:
- Beat the softened butter until fluffy.
- Add boiled condensed milk to the container and beat at low speed with a mixer. Do not overdo it, it is necessary that the components are well connected.
- Place the mixture in the refrigerator to cool and thicken.
- Cover the cake with cream, decorate with mastic - an amazing dessert is ready.
Butter cream on proteins
According to many culinary experts, the ideal option is the use of butter cream for a cake under mastic. This is due to some factors: it keeps its shape well, fits any cakes for a layer or can participate in decorating the product, does not allow the mastic to spread, prevents mixing of colors. It is possible to prepare a protein-based butter cream at home on your own.

Cooking components:
- Protein - 4 pieces.
- Oil - 300 grams.
- Salt.
- Powdered sugar (sand) - 200 grams.
Step by step preparation of the cream:
- Separate the whites from the yolks and place them in a deep container.
- Add sugar to the proteins, heat until dissolved in a water bath, then remove from heat, allow to cool.
- Beat butter until fluffy.
- Beat the whites with clean dry whisks, after adding a pinch of salt. Beat until a shiny, persistent foam is formed, then gradually add oil, without stopping the mixer.
- The cream is ready, it can be used to smear the cakes or used as a base for mastic.
Ganache cream
Chocolate lovers will definitely like ganache cream. This amazing cream-based dish can be used to prepare a variety of desserts, grease cakes when baking a cake or decorate ready-made culinary products. In addition, ganache is perfect for mastic, helping to create a culinary masterpiece with an amazing taste.
The recipe for ganache cream includes the following ingredients:
- Black chocolate with a high percentage of cocoa - 200 grams.
- Fat cream - 125-200 ml (the exact amount is influenced by the consistency you want to get).
- Powdered sugar - 2 tbsp. l.
- Butter - 50 grams.

Step by step preparation of "ganache":
- Chop the chocolate into small pieces.
- Pour the cream into a deep container and put on a small fire. Stirring constantly, it is necessary to bring it almost to a boil.
- Put the broken chocolate in hot cream and let it melt for five minutes.
- Add powder or sugar if you want a sweet cream.
- Mix all products thoroughly until the components are fully combined.
- Let the mixture cool slightly and gradually add oil, stirring constantly.
- Stir the cream until smooth, after cooling, use to form a cake.
Fruit yoghurt cream
A cake with yoghurt and fruit cream is ideal for creating a light dessert. Cooking requires a minimum of ingredients, time and effort, and the finished result will win the heart of every sweet lover. The advantage of such a cream is the possibility of using it in cakes under mastic, the main thing is to constantly store it in a cool place.
According to the recipe for the preparation of the cream, you will need the following ingredients:

Step by step cooking:
- Soak gelatin in water until it swells completely.
- Add sugar to the cream and beat.
- Beat the yogurt on low speed with a mixer or whisk.
- Combine the cream with yogurt, mix the ingredients thoroughly until they are completely combined. Add chopped fruits (peaches, bananas, strawberries - optional) and gelatin, mix thoroughly.
- Cover the cake with cream, and after the filling has completely solidified, you should start assembling the dessert.
How to align a cake with mastic
In order for the cake decorated with mastic to look neat, appetizing and beautiful, it is necessary to level the cream before applying the final layer. Simple steps will help you create a delicious work of art from classic baked goods. It will win the heart not only of the hero of the occasion for whom the product was prepared, but also everyone who happens to contemplate and taste the dessert. For the alignment procedure, you will need: a knife with a wide blade or a special culinary spatula, a small towel or paper napkins, hot water.
Aligning the cake to match the mastic:
- Put the finished cake, covered with cream under the mastic, in the refrigerator until it solidifies.
- Take out the cooled dessert, moisten a knife or spatula in hot water, then wipe it dry so that not a single drop of water remains, but at the same time the temperature of the tool remains.
- Run a knife over the cream. Under the influence of a warm tool, the cream will begin to melt and take the shape that the chef needs.
- After several manipulations, put the product back in a cool place and let the cream cool down. Repeat the procedure until the surface is perfectly flat without bumps, dimples and uneven corners or transitions. Having received the desired result, start decorating the cake with mastic.
Video: how to bake a cake with mastic at home
On a birthday, I would like to especially please the birthday person, loved ones, surprise guests not only with a delicious dessert, but also with its original design. To prepare a culinary masterpiece, you will need several components: a chocolate sponge cake, a cream based on whipped cream with the addition of curd dessert, berries for a layer, mastic and figurines from it for decoration. The decoration, the design of the dessert depends on the individual preferences of the birthday person, the inspiration and capabilities of the master. An example of the step-by-step preparation of a cake and decorating it with mastic, look at the video:
I store the mastic in the refrigerator, but no more than 2-3 weeks ... Even well-packed, over time, it loses its elasticity and crumbles during molding and rolling. 10-12 hours before working with the mastic, I take it out of the refrigerator and keep it on the table at room temperature. Before work, I stir it well so that it becomes soft.
Factory mastic can be stored much longer, since it contains conservatives - this is its plus and minus.
As for the figures: it depends on which figures. If this is a type of dragon (baby elephant, shoes and everything like that), then yes, I sculpt it in advance, dry it, and then it only serves as a decoration, it is simply impossible to eat them. But such figurines have one advantage - they can be left as a souvenir.
But I sculpt the flowers and immediately put them on the cake - it makes it easier to lay the "bouquet", this is, firstly, and secondly, they can be eaten with the cake ...
And in general, I decorate all cakes, especially for children, as they say at the last minute, so that the decoration from mastic does not have time to turn into stone (unless this is specially conceived), so that everything is really edible
What to put the mastic on !?
.
Only for butter cream or ganache. I coat the cake on all sides with cream and let it cool in the fridge. I make impregnation with either jam or confiture ... who loves what. The jam sticks the mastic onto the frozen cream and prevents it from slipping during the transportation of the cake and when slicing.
in any case, do not warm up the marshmallows in the bag
Tips on how to cover a biscuit with sugar mastic(I found it on some forum, you need to know this!)
First, the biscuit must be coated with cream, boiled condensed milk or jam in order to even out all the irregularities of the biscuit. On the surface of the biscuit prepared and primed with cream, boiled condensed milk or jam, sugar mastic will lie evenly and smoothly, there will be no protrusions and irregularities.
After the surface of the biscuits is prepared, you need to measure the diameter of the piece to cover the cake.
The diameter should be no less than the diameter of the biscuit, plus double the height and another 5 centimeters for folds and irregularities.
For example, if you have a cake with a diameter of 20 cm and a height of 5 cm, then, to cover the biscuit, roll the mastic to a diameter of at least 35 cm = 20 + 2x5 + 5.
It is convenient to roll out confectionery sugar mastic on a table greased with butter and sprinkled with powdered sugar, or even better between two sheets of plastic wrap, the mastic rolled out on a plastic wrap is very easy to transfer onto a biscuit, this can be done directly with the film, which then just needs to be separated from the mastic and continue leveling the mastic on the surface of the biscuit.
The thickness of the rolled sugar mastic to cover the biscuit should be about 5 mm, after you put it on the cake and level it, it will stretch to the required 2-3 mm.
If you roll out sugar mastic immediately to a thickness of 2-3 mm, it can easily break when manipulated.
How to knead the mastic correctly?
Mastics are different, and they are all mixed in different ways. We will dwell in more detail on marshmallow mastic as the simplest one (if you don’t know, marshmallows are such sweets as Bon Pari). To prepare this mastic, you will need, in fact, the sweets themselves and finely ground powdered sugar, which will interfere with the melted candy mass.
The finished marshmallow mastic should be homogeneous, dense and plastic. To achieve this result, it is important not to overheat the marshmallows (it is enough to heat the candies until they begin to swell and melt). If, when kneading, the sugar mass remains sticky for a long time, do not stop there: continue to stir in the powder until you get the mass of the desired consistency. If our mastic, on the contrary, turns out to be too tough, heat it slightly in the microwave, knead it with your hands and continue kneading. If the sugar-candy paste begins to crumble, add a drop of water or lemon juice to it, and then continue kneading again.
How to roll the mastic?
’Secrets There are two ways of rolling sugar mastic: on a table sprinkled with starch or powder, and between sheets of polyethylene greased with vegetable oil. The only disadvantage of the first method is that the rolled-out layer of mastic will have to be “detached” from the table surface and kept in weight. If you choose the second option, you will need to remove the top layer of polyethylene from the rolled mastic, turn the layer over, evenly cover the cake with it, and only then separate the second layer of polyethylene. However, thin polyethylene (for example, cling film) is poorly suited for our purposes: here you need to use something thicker and more substantial, like a film for greenhouses.
What if the mastic breaks all the time?
You are probably used to rolling out pizza dough and use the thinner the better principle. Alas, this number will not work with sugar mastic. The thickness of the rolled layer should be approximately 2–3 mm (thicker is not necessary either). Thinly rolled mastic has two whole drawbacks: firstly, it can break during the coating of the cake, and secondly, all the "flaws" and irregularities of the culinary masterpiece will be visible under it.
It is also possible that when mixing the mastic you used “coarse” powdered sugar, which contains whole sugar crystals. There is nothing you can do about it: such mastic will tear even when rolling.
If the layer that covered the cake nevertheless broke at the most crucial moment, do not despair. Seams, patches and other shortcomings can be easily "plastered" with a wide brush dipped in water. With this brush, the cake is ironed until its surface is perfectly flat. And if air bubbles suddenly appear under the layer of mastic, try to pierce it with a needle in these places, and then carefully smooth out the "holes". You've probably done something similar if you've ever had to glue wallpaper.
How to cover the cake with mastic evenly?
It is very simple to avoid ugly folds on the "sides" of the cake: you just need to roll out the sugar mastic with a large margin (at least 10-15 cm) and so that this stock is kept around the entire circumference. Then the mastic will stretch under its own weight and lie flat on the cake. After that, take a round pizza knife and carefully cut off "all unnecessary", leaving about half a centimeter in reserve. If the "sides" of the cake are wavy, flatten them with a spatula.
And if from under the layer of mastic the base began to shine through?
Most likely, the matter is in moisture: sugar mastic is very sensitive to it. Either you used the "wrong" cakes, or overdosed on the cake impregnation, or did not comply with the storage conditions. It is necessary to store the finished cake in a tightly closed sealed box or in a plastic bag (and preferably no more than 2 days).
What should be the cake (base) itself?
It is recommended to use dry biscuits, butter cakes or purchased cakes as a base for the cake. As for the cream under the cover, the easiest way, perhaps, is to work with the marzipan mass. If you don't like marzipan, use the classic buttercream, boiled condensed milk, or ganache (chocolate buttercream). In this case, you will have to put the cake in the cold for a couple of hours and only then apply a layer of mastic. If the cream does not have time to completely harden, ugly dents may form on the surface of the cake after coating with mastic.
Under no circumstances use sour cream and all kinds of impregnations (sugar syrup, liqueur, pastry rum, etc.) for the base. Remember that any mastic dissolves very quickly on contact with moisture.
How to paint the mastic?
It is best, of course, to use special food colors, but they are not always and not always found. You can replace the dyes with ordinary paints for Easter eggs, but this must be done carefully, since the composition of paints for eggs usually contains salt, and our mastic should not turn out to be salty. Therefore, it is better to take not powder paints, but paints in tablets that do not contain salt. If you are categorically against "any chemistry" in food, try natural dyes: for green - spinach juice, for red - beet juice, for orange - carrot juice. It will turn out, of course, not so beautiful, but 100% harmless.
The hardest thing is to paint the mastic black. To do this, you need to mix as many as three dyes: blue (2 parts), yellow (1 part) and red (1 part). It is very important to strictly observe the proportions, but at the same time there is no guarantee that we will get the shade we need - neutral black. Depending on the colorants used, it can be slightly greenish, slightly reddish or with a hint of purple.
Another option for making black mastic is to first cook brown mastic (for example, with chocolate or burnt sugar), and then add a drop of blue dye to it.
Can I store ready-made mastic?
Yes you can! There is nothing in the composition of the mastic that could deteriorate in a few days. For storage, it is recommended to pack the mastic well in polyethylene or put it in a plastic container with a lid. It is not necessary to put this container in the refrigerator: the mastic just needs to be protected from moisture and air so that it does not dry out ahead of time and does not get wet. By the way, underused marshmallow mastic can be stored in the freezer for up to 2 months.
’Secrets How to "make" the mastic shine?
To make the sugar mastic covering your cake shine, apply a layer of honey and vodka solution (honey and vodka in a 1: 1 ratio) on it with a soft brush. Don't worry: the vodka will evaporate quickly and won't affect the taste or smell of the cake.
Aerobatics - figures from mastic
In fact, figurines from well-prepared plastic mastic are no more difficult to sculpt than from plasticine: special talent is not required here. In order to connect different parts of the figures or glue the decorations on the mastic coating, you just need to slightly moisten the gluing place with water. To make colored figurines, it is not necessary to use mastics of different colors: you can sculpt figurines from simple white mastic, dry them, and then paint on top with food dyes. To remove the remnants of powder or starch from the finished figures, "walk" over them with a damp brush.
I will first show you how I assemble the cake before torte, this will make it easier for us to torte later.
To begin with, we need to make a butter cream from butter and boiled condensed milk. You can also make from simple condensed milk, but boiled condensed milk is thicker and tastes better.
Butter must be taken without any admixtures of other oils. I mean butter that you take out of the refrigerator and it is already soft, in order to quickly spread it on bread, is not very suitable. We must take a solid consistency. Here in Germany I buy the cheapest Deutsche Markenbutter oil, you can buy it at any store. I have butter with Aldi this time

The oil must be taken out of the refrigerator in advance so that it is at room temperature, it is better to take it out of the refrigerator even at night, then you will definitely not forget.
I made two honey cake cakes with a diameter of 25 cm and a height of 8 cm and a chiffon biscuit with a diameter of 24 cm and a height of 6 cm.
For two cakes, I needed 2 packs of butter (room temperature) + one and a half cans of boiled condensed milk

The butter must first be ground to a smooth consistency by adding boiled condensed milk to it. Then mix everything at a low speed of the mixer until a homogeneous smooth mass

Now let's move on to the cake. When I work with a cake, I put cardboard stands under the cake. You can buy them from us, one side of which is covered with impermeable paper. This will make it cleaner and then it will be more convenient to transfer the cake to the finished dish, afterwards you will see it from the photos for yourself.
So we take our cardboard stand and lightly grease with butter cream so that the cake does not slide off it later, as in the photo

I started with a chiffon biscuit, put the first cake on our blot

I first soaked it lightly with peach juice

Now you need to prepare two pastry bags for butter and cream.

with which you will smear your cake. I have a cream on top. For a bag of cream, you need those who are afraid that they will put more cream than necessary. The star or hole nozzle does not matter. You can just take the bags for freezing food and cut off a small corner at the tip. You will see below why I am doing this. To make the bag easier to fill, place it on a glass or large mug

Now, on the singing cake, squeeze out a line of butter cream along the edges of the biscuit, as in the photo

And now fill the middle with cream, any to your taste. This can be done from a bag, it will be smoother. I filled, just with a spoon, as in the photo

Since the mastic melts on creamy and similar wet creams, the butter string will make it easier for us later on the task of cake. Because of it, the butter cream will not run out to the edges. and so to do with subsequent cakes. But do not grease the topmost cake with cream, you also don’t need to make a side, but so that the cake is not dry soak it with any syrup

This is what our biscuit looks like after assembly

Now you will need to put it in the refrigerator for 2 hours to freeze it. I also did the same with honey cakes, unfortunately there is no photo, the camera sat down at the wrong time.
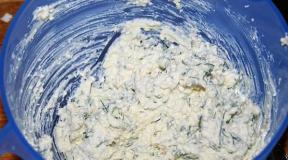
Now we will need to add the crumb to our remaining butter cream. I had cakes from the honey cake, which I milled in a blender

It is possible from a biscuit, if such a house does not exist, then you can make a crumb out of cookies. Add enough crumbs so that it is not completely liquid, but also not thick, but so that you can spread it on the cake. I did it by eye, so I can't say how much I added, this is how the finished mass looks like

Pull our frozen biscuit out of the refrigerator and start to cake it, starting from the sides

I did this with a small spatula, which can be replaced with a wide knife or a plastic scraper. and so applying the mass to the sides, drive the spatula from left to right so that the mass is evenly distributed

We also do with the top of the biscuit

If your top is not even, then with the help of this mass you can align. That is, where there are depressions, put more there, also on the sides of the biscuit where there are dimples or depressions, everything can be covered with this potato mass. This is how our biscuit looks like, completely covered with a mass of crumbs and cream

Now we need to prepare hot water, boiling water in which we will wet our spatula or a wide knife and smooth the biscuit

Now we dip our spatula or knife in boiling water, shake off excess water, but do not wipe it off and begin to smooth the sides with it. It is necessary to do this in small steps, re-wet the spatula in boiling water so that the cream does not reach for it. And so smooth the whole side

If you take too long and the water has cooled down, then you need to pour, new boiling water. We also smooth out the top of the cake. On the edges you have formed irregularities, they must be ´smooth out as in the photo. Moisten in boiling water, starting from the bottom, rounding with a spatula on top of the cake, endlessly wetting the spatula and shaking from excess water


This is what the place where you smoothed will look like.

And this is what our top looks like after smoothing

It looks like a side

Well, the whole biscuit is ready after tortizing.

The honey cake was made according to the same principle. This is how he looked smeared with potato mass

And after smoothing with a spatula


Now, after smoothing, you need to put it in the refrigerator for another half hour.
Now, to cover the mastic, we need to prepare a rolling pin, a sharp knife or a pizza knife, if there is a special one for smoothing, I forgot what the names are, you will see in the photo. Well, a bag of starch for dusting the table and mastic

The dusting bag, I made myself from a new cloth for dishes, can´t be made from gauze. Pour starch on it and tie it in a bag as in the photo, then I store it in a small dose


To cover the honey cake, I took mastic with a margin, about 850 grams

I made the rollfondat myself; I gave the recipe here. It is better to take the mastic out of the refrigerator overnight so that it is at your room temperature. In a micro-well, I would not advise to warm it up after it, it becomes dry and crumbles. So the mastic must still be kneaded so that it is plastic and homogeneous. To do this, wipe the work table dry and grease it cleanly with light coconut or white vegetable fat, also grease your hands with vegetable fat and begin to knead it with your hands, as in the photo. From the warmth of the hands, it heats up and becomes more plastic and uniform


Cover the finished mastic with a glass cup so that it does not wind up and dry out while we do something else

Now I pulled the honey cake out of the refrigerator and held it with my left hand. The cake is on the edge of the table, if you have the strength, you can hold it completely on your hand and cut off the excess cardboard stand around the edges with scissors, as in the photo


Now dust the table and the mastic itself with starch from our bag, but not much

And start rolling out our rollfondat, lifting it carefully from time to time, not pulling our layer in different directions, so that it does not stick to the table. If necessary, dust a little more

Carefully roll our layer onto a rolling pin without pressing it down, so it will be more convenient to put the layer on the cake


And cover it on the cake by rolling it off the rolling pin, here I unfortunately accidentally erased the photo
First, smooth the top with your hands and then the sides of the cake. The edges of the hanging mastic on the sides should be carefully laid out on the sides, but do not pull carefully. And start quietly from top to bottom to smooth the sides of the cake so that there are no folds, slowly spreading the mastic to the sides


Cut off the excess so that they do not interfere

Then with a sharp knife or for cutting the pizza with a wheel, cut off in a circle, along the bottom of the honey cake, after you smooth the sides and top well with your hands or with a special smoother for the cake