2 tier cake. How to assemble a tiered cake
Very often in our life there are events that require special solemnity, for example, a wedding or anniversary. Or, on the contrary, small holidays that you want to decorate with something special. In either case, the cake will be a wonderful elegant detail. Of course, the easiest way is to order it from a professional pastry chef, but sometimes you want to try to surprise your guests and cook everything yourself. If that's the case, our article on how to make a bunk for you will be a great guide.
DIY bunk cake
In order to correctly assemble a two-tier cake with your own hands, a dense biscuit for the lower tier and lighter cakes for the upper tier are the best fit. Moreover, the first should be approximately twice the size of the second. They are great as a cream, but if you have planned a two-tiered cake with mastic decorations, it is better to take a thicker butter cream, which is perfect as a substrate.
How to assemble a bunk cake?
We will tell you in detail about the assembly using the example of a two-tier cake with fruit without mastic.
Ingredients:
- cream;
- biscuits;
- berries and fruits;
- aromatic herbs such as rosemary or thyme;
- jam or liquid jam;
- any chocolate cream or nutella;
- melted chocolate icing.
Preparation
- We also need cocktail tubes and substrates, which can be made of thick cardboard and wrapped with cling film.
- So, we cut the first biscuit horizontally into three layers, grease the substrate with a small amount of cream so that the cake does not slip and with the help of a pastry bag or bag we make a side. This is so that the jam layer does not spread and spoil the appearance of the cake.
- Put the jam into the resulting pool.
- Now you can immerse nuts, berries, chocolate chips, etc. in the middle.
- It is better to close the top with cream so that the next cake lies flat.
- We repeat the same procedure with the next layer, you can take other berries or fruits.
- Cover with the third cake layer and cover the whole cake with cream. We work especially carefully on the sides to fill in all the voids, hide irregularities and in no case allow the filling to break through. If your recipe for a two-tiered cake involves coating with mastic or another decorative layer of cream, then you may not bring the surface to perfect smoothness. Considering that in our case the lower tier will remain "bare", we align the sides more carefully.
- We do the same with the upper tier, but it is better not to burden it with various fillings, in our case, instead of jam, we use nutella. We send the blanks to the refrigerator, they should solidify well, and the cakes should be soaked. This will take at least a couple of hours, and preferably a whole night.
- Now let's move on to the assembly. Using, for example, a saucer, we outline the diameter of the upper tier in order to know where to install the props, which are cocktail tubes. There are two options for installing them. You can immediately insert them and cut off the excess with scissors. And you can first measure the height with a skewer, cut off the required length and only then insert. In any case, the height of the tubes should be 3-4 mm less than the height of the tier, because after a few hours, the whole structure will sag a little and then it may turn out that the upper tier is not on the cream, but on the supports and can easily move out. For the upper tier weighing no more than 1 kg, three pieces will be enough.
- Insert the tubes and cover the intended center with cream.
- We install the upper tier together with the cardboard backing, level its surface with cream and let the whole structure grab a little in the refrigerator.
- Further, imagination enters into work, with the help of which we decorate the cake with fruits and berries. They adhere well to cream and chocolate glaze.


There can be many design options, the main thing is to follow the basic assembly rules and then you will not have to worry about your work.
For a meaningful celebration, a tiered cake is a highlight that everyone expects to see and taste to crown the holiday.
A dessert of several tiers (two or three, and even more, which is inherent in wedding ceremonies), must be carefully assembled so that the lower tier does not sink under the pressure of the upper ones.


We do the same in several places.

Now it is permissible to install the second tier of the dessert in place, and not be afraid that the top will push and siege the lower base.

Strengthening the tiered cake
It is easy to strengthen the cake in two tiers, but what to do if the culinary idea is more ambitious. And we solve this issue, but how, we look further MK.
Prepare in advance, for example, three tiers of cake of different sizes. The tiers are covered with mastic and stand for about one hour or more in the refrigerator.
It is worth noting: Each of the tiers should be placed on separate paper ones, in the center of each of them we will make holes of a small diameter in advance.

To strengthen each tier, we will also use cocktail tubes, but only one wooden skewer, which is recommended, in addition, to wrap with cling film.


So, we start assembling a three-tiered cake.
Make a hole in the center of the product using our wooden stick wrapped in cling film. The length of the stick should be approximately the same as the total height of all the tiers. But do not pierce the cake through.

Around the hole made in the center, at a distance of up to 3 centimeters from each other, make smaller holes with tubes. We adjust the length of the tubes to the level of the first tier.

Melt the white chocolate in a water bath, and pour it, using a bag, into the holes made in the cake.

Now we return the stick and cocktail tubes to the previously done places, filled with chocolate.

You can give the white chocolate some time to harden.
We begin to put the second tier on a long skewer through the hole in the base.


Now it's time to plant the third tier of the birthday cake on the base of the mount (a wooden skewer).

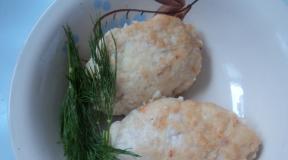
Once again I was going to make a two-tier cake at home and it turned out to be big, very tasty and beautiful. In the preparation of the cake I decided to use one cake made of white biscuit and the other made of chocolate. The impregnation for the cake was made on the basis of coffee and liqueur, but you can soak it with any syrup). I decided to make the cream from whipped cream with the addition of cream cheese. Decorated the cake with chocolate decor and, of course, fresh berries. It turned out very bright and beautiful. I share a step-by-step recipe, maybe someone will find my recipe useful.
To make a bunk cake at home, you will need:
For a white biscuit, diameter 25 cm - 1 tier):
egg - 5 pcs.;
sugar - 250 g;
wheat flour - 250 g;
vegetable oil for lubricating the mold.
For chocolate biscuit, diameter 18 cm - 2 tier):
egg - 3 pcs.;
sugar - 150 g;
wheat flour - 150 g;
cocoa - 2 tbsp. l.
For the cream:
cream cheese I have homemade cream cheese) - 500 g;
icing sugar - 3-4 tbsp. l .;
whipping cream - 500 ml.
For impregnation:
coffee dissolved in water - 500 ml;
I have baileys liqueur) - 50-100 ml instead of coffee and liqueur, you can use any syrup to taste).
For decor:
chocolate - 600 g;
fresh berries.
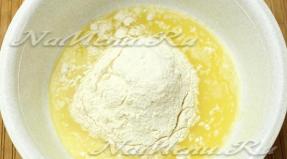
To prepare the white biscuit for the first tier: separate the yolks from the whites.

Beat the whites with a mixer until fluffy. Then add sugar gradually, without stopping whisking for 5 minutes. The mass will turn white and increase in volume.
 Then add the yolks, one at a time, while whisking. The mass should become homogeneous and very airy.
 Pour the liquid mass into the flour and mix gently with a silicone spatula. The dough should be smooth and fluffy.
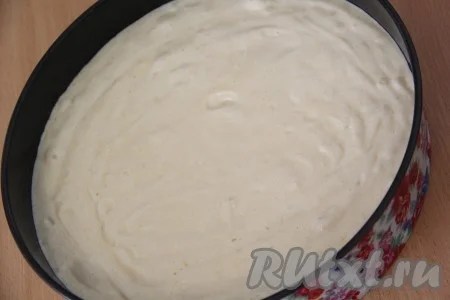
 Lightly grease the form with vegetable oil. Put the dough into a mold. Place in a preheated oven and bake at 200 degrees for about 35 minutes. Willingness to check with a dry toothpick. It is better not to open the oven door for the first 20 minutes, otherwise the biscuit may fall off. Cool the finished biscuit slightly in the form, and then cool completely on the wire rack.

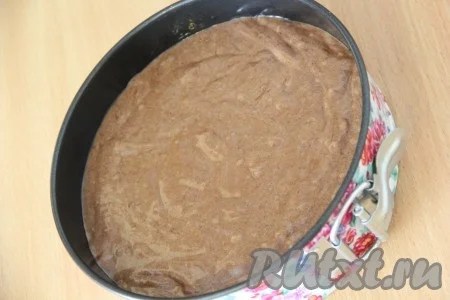
Then prepare a chocolate sponge cake for the second tier of the cake. Sift flour with cocoa. Separate the whites from the yolks. Beat the whites into a foam, then gradually add sugar and beat for 5 minutes. Then add the yolks one at a time and beat again until smooth.
 Pour the liquid mass into the flour and mix gently with a silicone spatula until smooth.
 Lightly grease the form with vegetable oil, put the dough in the form and smooth. Place the dough pan in a preheated oven and bake at 200 degrees for about 25-30 minutes. Willingness to check with a dry toothpick. Cool the finished cake slightly in the mold, and then cool completely on the wire rack.
 When the cake layers are completely cool, cut each cake layer in half. Soak the cakes with any syrup, I added liqueur to 500 ml of coffee, mixed well and soaked the cakes).
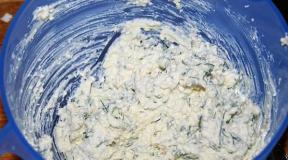
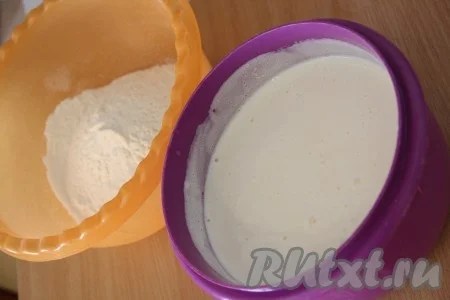
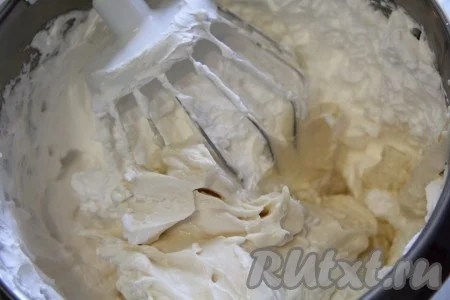
 To prepare the cream for our homemade bunk cake: combine cream cheese with powdered sugar and stir with a mixer. You don't need to beat for a long time, we just need to combine cream cheese and powder into a homogeneous mass.
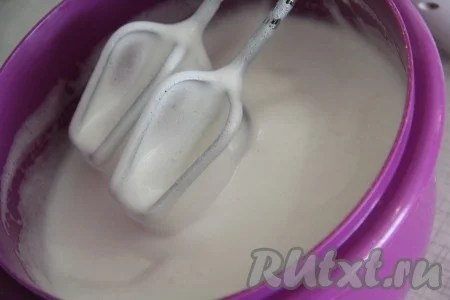
 Cool the cream well, then beat until firm peaks. I use vegetable oil cream.
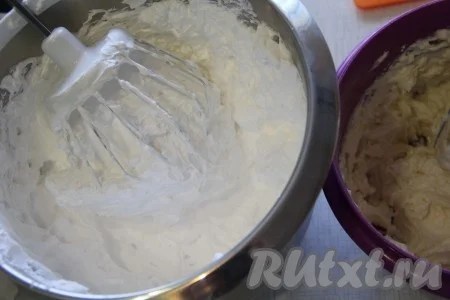 Add cream cheese to the cream and stir on low speed until smooth.

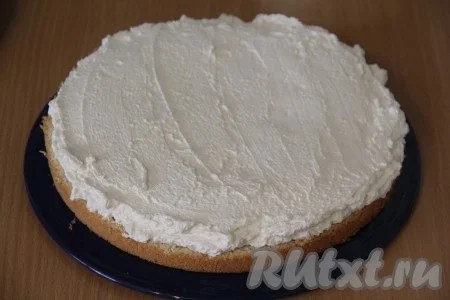
To assemble a two-tiered cake: put the cake on a flat plate or stand and brush it with cream.
 Put the second cake on top of the cream and press down slightly. Grease the sides of the cakes with cream.
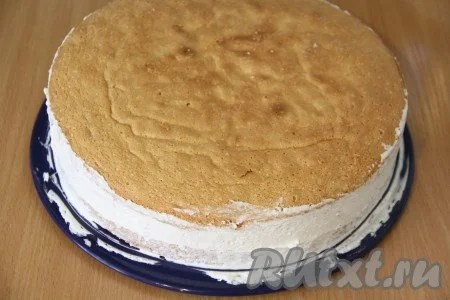 Grease the middle of the white crust with cream and put the chocolate crust on top. Grease the cake well with cream.
 Place the second chocolate crust and press down lightly. Coat the top and sides of the cake with cream. In this form, put the cake in the refrigerator overnight.
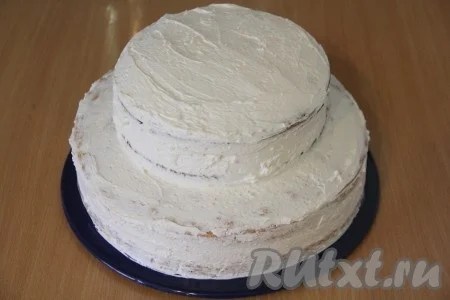 Decorate the homemade bunk cake as desired. I surrounded the sides of the cake with a chocolate rim. To do this, melt the chocolate in a water bath. Cut strips out of parchment paper, determine the width and height of the side by your cake. Place the chocolate on the parchment and place it on the sides of the cake. Put the cake in the refrigerator for 10-15 minutes to freeze the chocolate. And then carefully remove the parchment. I made the sides of chocolate just above the cakes, and put fresh berries in the resulting niches. Here's a cake turned out. Unfortunately, there is no slice in the cut, since the whole cake was eaten on the festive table at once, without leaving a single slice for the morning.
 Enjoy your tea!
To prepare the white biscuit for the first tier: separate the yolks from the whites.
Beat the whites with a mixer until fluffy. Then add sugar gradually, without stopping whisking for 5 minutes. The mass will turn white and increase in volume.
 Then add the yolks, one at a time, while whisking. The mass should become homogeneous and very airy.
 Pour the liquid mass into the flour and mix gently with a silicone spatula. The dough should be smooth and fluffy.
Lightly grease the form with vegetable oil. Put the dough into a mold. Place in a preheated oven and bake at 200 degrees for about 35 minutes. Willingness to check with a dry toothpick. It is better not to open the oven door for the first 20 minutes, otherwise the biscuit may fall off. Cool the finished biscuit slightly in the form, and then cool completely on the wire rack.
Then prepare a chocolate sponge cake for the second tier of the cake. Sift flour with cocoa. Separate the whites from the yolks. Beat the whites into a foam, then gradually add sugar and beat for 5 minutes. Then add the yolks one at a time and beat again until smooth.
Pour the liquid mass into the flour and mix gently with a silicone spatula until smooth.
Lightly grease the form with vegetable oil, put the dough in the form and smooth. Place the dough pan in a preheated oven and bake at 200 degrees for about 25-30 minutes. Willingness to check with a dry toothpick. Cool the finished cake slightly in the mold, and then cool completely on the wire rack.
 When the cake layers are completely cool, cut each cake layer in half. Soak the cakes with any syrup (I added liqueur to 500 ml of coffee, mixed well and soaked the cakes).
 To prepare the cream for our homemade bunk cake: combine cream cheese with powdered sugar and stir with a mixer. You don't need to beat for a long time, we just need to combine cream cheese and powder into a homogeneous mass.
 Cool the cream well, then beat until firm peaks. I use vegetable oil cream.
Add cream cheese to the cream and stir on low speed until smooth.
To assemble a two-tiered cake: put the cake on a flat plate or stand and brush it with cream.
 Put the second cake on top of the cream and press down slightly. Grease the sides of the cakes with cream.
 Grease the middle of the white crust with cream and put the chocolate crust on top. Grease the cake well with cream.
 Place the second chocolate crust and press down lightly. Coat the top and sides of the cake with cream. In this form, put the cake in the refrigerator overnight.
 Decorate the homemade bunk cake as desired. I surrounded the sides of the cake with a chocolate rim. To do this, melt the chocolate in a water bath. Cut strips out of parchment paper, determine the width and height of the side by your cake. Place the chocolate on the parchment and place it on the sides of the cake. Put the cake in the refrigerator for 10-15 minutes to freeze the chocolate. And then carefully remove the parchment. I made the sides of chocolate just above the cakes, and put fresh berries in the resulting niches. Here's a cake turned out. Unfortunately, there is no slice in the cut, since the whole cake was eaten on the festive table at once, without leaving a single slice for the morning.
 Enjoy your tea!
For those who are not afraid of difficulties and like to spend time in the kitchen, we suggest preparing an elegant and interesting two-tier cake with their own hands in the form of a winter hut. The dessert consists of standard biscuits: bottom with creamy sour cream and peanuts, top with delicate and pleasant cherry mousse. The finished product is covered with a protein cream and decorated in accordance with the New Year theme.
For convenience, we recommend to divide the formation of the cake into several days, for example, bake biscuits in advance, and only then engage in the "assembly" of tiers and decoration. The cake, of course, is not the fastest to prepare, but the result is worth the effort! Guests will be delighted with your culinary skills, and children will be delighted with such a sweet surprise! Let's make a winter fairy tale together with our own hands!
Ingredients: 
Bottom biscuit (shape 26 cm):
- eggs - 8 pcs.;
- sugar - 240 g;
- flour - 160 g;
- starch - 50 g;
- butter - 50 g;
- baking powder - 1.5 tsp;
- vanilla sugar - 2 tsp.
Upper biscuit (form 16 cm):
- eggs - 2 pcs.;
- sugar - 60 g;
- flour - 40 g;
- starch - 10 g;
- butter - 10 g;
- baking powder - ½ tsp;
- vanilla sugar - 1 tsp.
Impregnation for biscuits:
- sugar - 90 g;
- water (boiling water) - 300 ml;
- cognac - 1-2 tbsp. spoons.
Lower biscuit cream:
- sour cream 20% - 200 g;
- whipping cream 33-35% - 200 ml;
- sugar - 120 g;
- peanuts - 100 g.
Top biscuit mousse:
- cream 33-35% - 150 ml;
- frozen cherries - 150 g;
- cream cheese - 130 g;
- sugar - 80 g;
- powder gelatin - 5 g;
- water (to dissolve gelatin) - 30 ml.
- egg whites - 4 pcs.;
- sugar - 200 g;
- vanillin - a pinch;
- butter - 320 g.
Protein cream for decoration:
- egg whites - 3 pcs.;
- water - 75 g;
- sugar - 150 g;
- salt - a pinch;
- citric acid - a pinch.
Registration:
For windows:
- dark chocolate - 40 g;
- butter - 10 g;
- marmalade;
- sweet straws.
For Christmas trees:
- waffle cones for ice cream - 2 pcs.;
- butter - 100 g;
- condensed milk - 4 tbsp. spoons;
- food coloring (green).
DIY bunk cake recipe with photo
How to make a biscuit for a bunk cake
- Cooking the bottom biscuit. Very carefully separate the whites from the egg yolks, place them in a deep, clean and dry bowl. Beat with a mixer, gradually adding half of the sugar. We work until "strong peaks" are obtained (that is, until a dense mass is obtained, which remains motionless when the bowl is tilted / overturned).

- Separately, together with the second part of granulated sugar and aromatic vanilla sugar, beat the yolks. We work with a mixer for at least 5 minutes. The mass should lighten, thicken noticeably and increase by 2-3 times.

- Gradually mix the yolks into the whites with gentle movements from bottom to top. Sift the flour, combined with starch and baking powder, in portions onto the egg mixture, stirring carefully each time. Our task is not to upset the lush mass, so we work very carefully! You cannot stir the tender biscuit dough in a circle, only from the bottom up!

- Melt the butter, cool and pour over a homogeneous dough along the edge of the bowl. Stir for a short time.

- The bottom of the mold with a diameter of 26 cm is laid with a circle of parchment, the walls are not greased. We fill the container with biscuit dough and send it to the preheated oven. We bake at 180 degrees until "dry match".

- Turn the mold with freshly baked biscuit and put it on two bowls or on a wire rack. Leave the baked goods in this form until they cool completely. This step will help prevent the top of the biscuit from settling.

- We prepare the upper biscuit in the same way as the lower one, only this time we take a form with a diameter of 16 cm.

How to make mousse for the top tier
- Prepare cherry mousse as a filling for the top biscuit. To do this, pour the cherries with sugar without preliminary defrosting, put on low heat. While stirring, heat for about 5 minutes (until the sugar is completely dissolved and the berries soften).

- Cool the cherry mass, and then turn it into a “puree” using a blender. Rub thoroughly through a fine sieve. We will use all the resulting juice to make mousse (we do not use small pieces of cherries that remain on the sieve).

- Whip cold cream until firm. Add room temperature cream cheese and cherry juice. Stir until a homogeneous, evenly colored mass is obtained.

- Remove the upper biscuit from the mold (we first pass it along the sides of the container with a knife). Cut the pastry into two cakes. We wash the form, wipe it dry, lay the bottom and walls with parchment. We put the bottom cake in the prepared container, pour it with impregnation (for its preparation, dissolve the sugar in boiling water, cool it, add brandy).

- Pour gelatin with cold, pre-boiled water. Let the mass swell.

- We place a bowl with swollen gelatin in a bowl of hot water. Stir constantly until the powder dissolves.

- We introduce the gelatinous solution into the creamy cherry cream with continuous whipping with a mixer. We spread the mass on the bottom cake, level it. We remove the container in the refrigerator until the mousse hardens.

How to make cream for the lower tier
- While the mousse is solidifying, prepare the bottom tier of the cake. Beat the cream with sugar until thick. Add sour cream, beat for a few seconds (until the components are combined into a single cream).

- Fry peanuts in a dry frying pan, stirring occasionally. As soon as the skin begins to crack, remove from heat and cool. After removing the husk, grind the peanuts with a blender.

- Divide the biscuit into 3 cakes. Pour the bottom with impregnation, and then grease with half of the butter-sour cream. Distribute half of the peanuts on top.

- Cover the base of the cake with the second crust, soak it, apply the rest of the cream. Sprinkle with the other half of the peanuts. Pour the last cake with impregnation and spread it on top. We do not coat the top and sides of the workpiece with anything yet.

- Soak the second cake for the upper biscuit and put it on the frozen mousse. We put both the upper and lower tier for the cake in the refrigerator.

How to Make Butter Protein Cream For Cake Topping
- Mix the proteins with sugar, place the bowl in a "water bath". Actively and continuously stir the mixture with a whisk, heat the mass over low heat until the sugar dissolves. To test the doneness, take a small portion of the protein and rub it between your thumb and forefinger. If grains are not felt, remove the container from the stove. It is important not to overheat the proteins, otherwise they may curl up! The bottom of the protein bowl should not touch the water in the lower bowl.

- Add vanillin to the proteins just removed from the heat for flavor and immediately begin to beat the mass. Gradually, the proteins will thicken. We work with a mixer until the formation of "soft peaks". It is not necessary to achieve a very strong and stable mass, as in the manufacture of a biscuit. As soon as clear streaks from the mixer remain on the cream, we stop.

- We load the softened butter in small pieces to the protein mass, constantly working with a mixer. As a result, we get a fairly dense oil cream.

- We take out the bottom blank from the refrigerator. We coat the top and sides with butter and protein cream, align.

- To prevent the lower tier from sinking under the weight of the upper one, we strengthen our "structure". We take wooden skewers, cut them to the height of the lower tier and stick them into the biscuit in the place where the upper tier will be located (according to our idea, it will stand on the edge of the lower biscuit).

- Place the top tier on a cake base that matches the diameter. We coat with butter cream, level. Together with the substrate, we place it on the prepared lower tier.

How to make a bunk cake with your own hands
- To make our cake look like a hut, cut out and remove the triangular segment from the lower tier. Apply butter cream to the cut, and then attach a straw to simulate wooden planks. The upper tier is also slightly trimmed, greased with cream and supplemented with straws.

- To make "windows" on a kitchen board sprinkled with sugar, roll out the marmalade. We cut out square blanks of suitable size. Sugar is needed to keep the pieces of marmalade from sticking to the work surface.

- Melt the chocolate with butter in a "water bath", cool it and put it in a cornet. We put a small portion of the chocolate mass on the straws and pieces of marmalade, attach the "windows" to the "house". We also outline the contour of the "windows" with chocolate.

How to make a protein cream for a bunk cake
- To make our two-tiered cake look even more like a snow-covered hut, cover it with protein cream. Boil the syrup - pour the sugar with water, bring to a boil. We heat the syrup to 118 degrees.

- At the same time, beat the whites with citric acid and a pinch of salt until strong peaks (when turning the bowl, the whites must firmly "sit" in place).

- Without stopping to work with a mixer, pour hot syrup into the protein mass in a thin stream. Whisk the cream continuously until it cools down to room temperature (about 10 minutes).

How to decorate a bunk cake with your own hands
- We coat the tiers of the cake with snow-white protein cream, make vortices around the "windows" to imitate icicles.

- Decorate the cake with figurines if you wish. To make a snowman, we sculpt 2-3 balls of different sizes from marmalade, place them on the free edge of the lower tier. We coat the figure with protein cream. We form the "carrot", "hat" and "buttons" again from marmalade, draw "eyes" with chocolate, "hands" we make from pieces of straw. We prepare "Christmas trees" from horns and butter cream with dye (detailed technology is described in the recipe